【挑戦】Laravel 11 がリリースされたのでメモアプリを作ってみる
はじめに
今回の作ってみるシリーズは、Laravel 11がリリースされたので、基本機能などを触れつつメモアプリの作成に再挑戦していきたいと思います。
アーカイブ
開発環境
- Docker 4.27.1
- VS Code
利用言語
- PHP PHP 8.3.3
- Laravel 11.0.0
公開コード[GitHub]
注意事項
ここで説明しているコマンドプロンプトで扱うコマンドですが、エイリアスを設定しておりXAMPPの時と同じようなコマンドで実行できるようにしています。
エラーが吐かれる場合には、phpをvendor/laravel/sail/bin/sailに置き換えて実行してみてください。
例:php artisan route:list → vendor/laravel/sail/bin/sail artisan route:list
Laravel 11のインストール
~\Project\memo-appにLaravel 11をインストールしたいと思います。
Projectがカレントディレクトリの状態でcurl -s https://laravel.build/memo-app | bashを実行します。
~ここで数十分は経過~
初起動
いったん、localhostへアクセスしてみるもエラーが発生してダメなようす。

環境設定
ひとまず.envファイルの中身を確認してみるとDB_DATABASEがコメントアウトしている

調査開始
調査するにも何から調べたら良いのか・・・🤔
- コメントアウトを解除して起動 🤔変わらず
-
mysqlでデータベースにアクセスができるか確認 😀アクセスできた -
show databases;を実行してデータベースmemo_appがあるか確認 🤔出来ていない
アプローチを変更して、.envのとおりにデータベースが作成されない方法を調査したところ、下記のサイトを発見してコメントアウトを解除した後にビルドを開始。
sail down -vでいったんコンテナを削除
sail up -d --buildでビルドし直し
起動してみた結果、ここまで表示された😀

php artisan migrateを実行してデータベースを構築

再度、localhostへアクセスして起動したところ、やっとできた!!

データベースを使わない人はどうするのだろう・・・🤔
機能説明
- ユーザー毎にメモが残せる
- メモを一覧で表示することができる(ダッシュボード)
- メモを登録することができる
- メモを更新することができる
- メモを削除することができる
- メモを検索することができる
- メモをPDFにして保存することができる
作っていく手順
- ログイン認証機能の追加(Jetstream:ダッシュボードも付属)
- ダッシュボードにメニューを追加
- メモの登録画面の作成
- メモの一覧表示機能の追加
- メモの編集機能の追加
- メモの削除機能の追加
- ダッシュボードにページネーションを追加
- メモの検索機能の追加
- メモのPDF保存機能の追加 👈いまここ
ログイン認証機能の追加
ログイン認証にはJetstreamを使っていきたいと思います。
上記ページのInstallationページを参考にして進めます。
コマンドプロンプトにてプロジェクトフォルダ~\Project\memo-appをカレントディレクトリにして、下記のコマンドを順に実行します。
Jetstreamインストール手順
composer require laravel/jetstreamphp artisan jetstream:install livewirenpm installnpm run build
2を実行した時に選択肢が表示されたらYesを選択することで、認証関係のデータベースがマイグレーションされます。
ユーザー登録を試行
トップページの右上にLog inとRegisterが表示される

Registerに遷移すると下記の画面が表示されるので、必要事項を入力

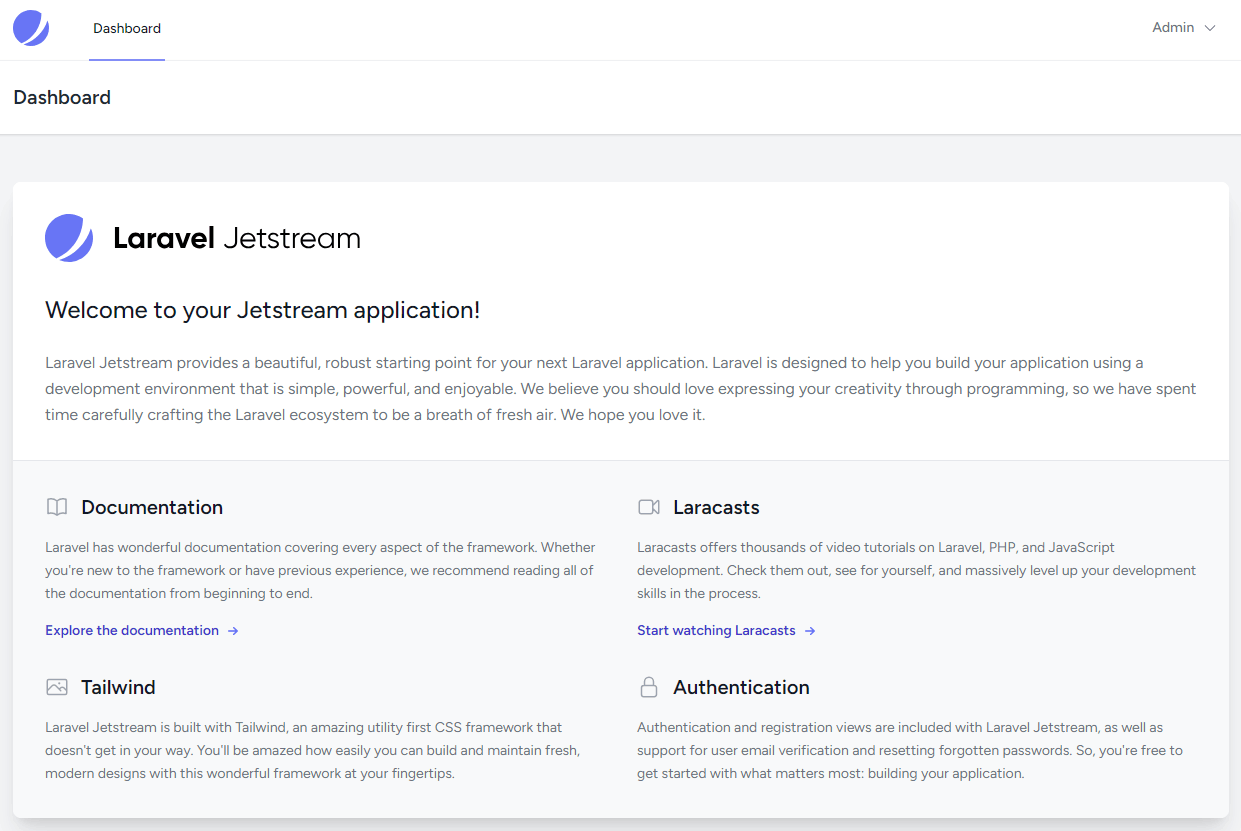
ダッシュボードはこんな感じ

ダッシュボードにメニューを追加
JetstreamにTailwind CSSが使われているため、Prelineというプラグインを使っていきます。
Laravelへのインストール手順
import defaultTheme from 'tailwindcss/defaultTheme';
import forms from '@tailwindcss/forms';
import typography from '@tailwindcss/typography';

/** @type {import('tailwindcss').Config} */
export default {
    content: [
        './vendor/laravel/framework/src/Illuminate/Pagination/resources/views/*.blade.php',
        './vendor/laravel/jetstream/**/*.blade.php',
        './storage/framework/views/*.php',
        './resources/views/**/*.blade.php',
+       'node_modules/preline/dist/*.js',
    ],

    theme: {
        extend: {
            fontFamily: {
                sans: ['Figtree', ...defaultTheme.fontFamily.sans],
            },
        },
    },

    plugins: [
        forms,
        typography,
+       require('preline/plugin'),
    ],
};
  import './bootstrap';
+ import 'preline';
ダッシュボードに新規作成ボタンを追加
<x-app-layout>
    <x-slot name="header">
        <h2 class="font-semibold text-xl text-gray-800 leading-tight">
            {{ __('Dashboard') }}
        </h2>
    </x-slot>

-   <div class="py-12">
-       <div class="max-w-7xl mx-auto sm:px-6 lg:px-8">
+       <div class="mt-2 max-w-7xl mx-auto sm:px-6 lg:px-8">
-           <div class="bg-white overflow-hidden shadow-xl sm:rounded-lg">
-               <x-welcome />
-           </div>
+           <button type="button" class="py-3 px-4 inline-flex items-center gap-x-2 text-sm font-semibold rounded-lg border border-transparent bg-blue-100 text-blue-800 hover:bg-blue-200 disabled:opacity-50 disabled:pointer-events-none dark:hover:bg-blue-900 dark:text-blue-400 dark:focus:outline-none dark:focus:ring-1 dark:focus:ring-gray-600">
+               新規作成
+           </button>
-       </div>
    </div>
</x-app-layout>
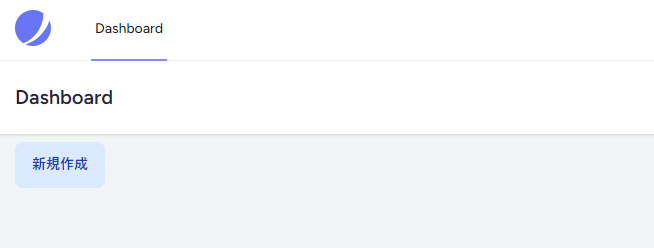
画面キャプチャ
こんな感じになります。

メモの登録画面の作成
画面を作っていくにあたり、メモのデータベースを考える必要があるので、ここで書き出しておきます。
大したものは用意していません😄
+------------+-----------------+------+-----+---------+----------------+
| Field      | Type            | Null | Key | Default | Extra          |
+------------+-----------------+------+-----+---------+----------------+
| id         | bigint unsigned | NO   | PRI | NULL    | auto_increment |
| user_id    | int             | NO   |     | NULL    |                |
| subject    | varchar(100)    | NO   |     | NULL    |                |
| content    | text            | YES  |     | NULL    |                |
| created_at | timestamp       | YES  |     | NULL    |                |
| updated_at | timestamp       | YES  |     | NULL    |                |
| deleted_at | timestamp       | YES  |     | NULL    |                |
+------------+-----------------+------+-----+---------+----------------+
モデルファイルを生成
モデルファイルと合わせて、コントローラー、マイグレーションのファイルも作成しています。
また、モデルにはソフトデリートの機能を設定していきます。
コマンドプロンプトにてphp artisan make:model Memo -crmを実行します。
後ろの方に記載されている-crmにコントローラーやマイグレーションのファイルも作成することを指定しています。ご参考はLaravel公式をご覧ください。
モデルファイルにソフトデリートを記述
<?php

namespace App\Models;

use Illuminate\Database\Eloquent\Model;
+use Illuminate\Database\Eloquent\SoftDeletes;

class Memo extends Model
{
+   use SoftDeletes;
}
マイグレーションを記述
<?php

use Illuminate\Database\Migrations\Migration;
use Illuminate\Database\Schema\Blueprint;
use Illuminate\Support\Facades\Schema;

return new class extends Migration
{
    /**
     * Run the migrations.
     */
    public function up(): void
    {
        Schema::create('memos', function (Blueprint $table) {
            $table->id();
+           $table->integer('user_id');
+           $table->string('subject', 100);
+           $table->text('content')->nullable();
            $table->timestamps();
+           $table->softDeletes();
        });
    }

    /**
     * Reverse the migrations.
     */
    public function down(): void
    {
        Schema::dropIfExists('memos');
    }
};
マイグレーションを記述したらデータベースに反映させるために、コマンドプロンプトでphp artisan migrateを実行します。
登録画面への遷移
まずは、ダッシュボードにある新規作成ボタンから画面遷移ができるようにします。
MemoControllerはリソースで出力しているため、基本的なCRUDが含まれているので、ここでは、memo.createに遷移するようにします。
    <div class="mt-2 max-w-7xl mx-auto sm:px-6 lg:px-8">
-       <button type="button" class="py-3 px-4 inline-flex items-center gap-x-2 text-sm font-semibold rounded-lg border border-transparent bg-blue-100 text-blue-800 hover:bg-blue-200 disabled:opacity-50 disabled:pointer-events-none dark:hover:bg-blue-900 dark:text-blue-400 dark:focus:outline-none dark:focus:ring-1 dark:focus:ring-gray-600">新規作成</button>
+       <button type="button" onclick="location.href='{{route('memo.create')}}'" class="py-3 px-4 inline-flex items-center gap-x-2 text-sm font-semibold rounded-lg border border-transparent bg-blue-100 text-blue-800 hover:bg-blue-200 disabled:opacity-50 disabled:pointer-events-none dark:hover:bg-blue-900 dark:text-blue-400 dark:focus:outline-none dark:focus:ring-1 dark:focus:ring-gray-600">新規作成</button>
    </div>
次にルーティングの設定を行います。
ここでもリソースでルーティングの設定を行います。
<?php

use Illuminate\Support\Facades\Route;
+use App\Http\Controllers\MemoController;

Route::get('/', function () {
    return view('welcome');
});

+Route::resource('memo', MemoController::class);

Route::middleware([
    'auth:sanctum',
    config('jetstream.auth_session'),
    'verified',
])->group(function () {
    Route::get('/dashboard', function () {
        return view('dashboard');
    })->name('dashboard');
});
エラーが起きないようにコマンドプロンプトにてphp artisan route:cacheを行っておきましょう。
コントローラーの修正
新規作成ボタンが押されたらcreateが実行されるようになっているので、ユーザーデータを取得して画面を表示するようにします。
-    //
+    public function create()
+    {
+        $user = auth()->user();
+        return view('memo.index', compact('user'));
+    }
登録画面の作成
views\memo\index.blade.phpファイルを作成します。

そして、下記のとおり記述します。
<x-app-layout>
    <x-slot name="header">
        <h2 class="font-semibold text-xl text-gray-800 leading-tight">
            {{ __('Dashboard') }}
        </h2>
    </x-slot>

    <form action="{{route('memo.store')}}" method="post" class="mt-5 max-w-7xl mx-auto sm:px-6 lg:px-8">
        @csrf
        <input type="hidden" name="user_id" value="{{$user->id}}">
        <input type="text" name="subject" class="py-3 px-4 mb-3 block w-full border-gray-200 rounded-lg text-sm focus:border-blue-500 focus:ring-blue-500 disabled:opacity-50 disabled:pointer-events-none dark:bg-slate-900 dark:border-gray-700 dark:text-gray-400 dark:focus:ring-gray-600" placeholder="タイトル" autofocus required>
        <div class="relative">
            <textarea name="content" class="py-3 px-4 block w-full h-48 border-gray-200 rounded-lg text-sm focus:border-blue-500 focus:ring-blue-500 disabled:opacity-50 disabled:pointer-events-none dark:bg-slate-900 dark:border-gray-700 dark:text-gray-400 dark:focus:ring-gray-600" rows="3" placeholder="本文"></textarea>
        </div>
        <div class="text-right">
            <button type="button" onclick="location.href='{{route('dashboard')}}'" class="py-3 px-4 mr-3 inline-flex items-center gap-x-2 text-sm font-semibold rounded-lg border border-transparent bg-yellow-100 text-yellow-800 hover:bg-yellow-200 disabled:opacity-50 disabled:pointer-events-none dark:hover:bg-yellow-900 dark:text-yellow-500 dark:hover:text-yellow-400">戻る</button>
            <button type="submit" class="py-3 px-4 mt-3 inline-flex items-center gap-x-2 text-sm font-semibold rounded-lg border border-transparent bg-teal-100 text-teal-800 hover:bg-teal-200 disabled:opacity-50 disabled:pointer-events-none dark:hover:bg-teal-900 dark:text-teal-500 dark:hover:text-teal-400">送信</button>
        </div>
    </form>
</x-app-layout>
戻るが押されるとダッシュボードに戻るようにしています。
送信が押されるとデータベースへ登録するようにします。
データベースへの登録
送信が押されるとstoreが実行されるようになっているので、フォームに入力されたものをデータベースへ登録していきます。
    public function store(Request $request)
    {
-        //
+        $memo = new Memo;
+        $memo->fill($request->all())->save();
+        return redirect(route('dashboard'))->with('message', 'メモが登録されました。');
    }
最後に登録したことをメッセージとしてダッシュボードに表示するようにします。
    <div class="mt-2 max-w-7xl mx-auto sm:px-6 lg:px-8">
+       @if (session('message'))
+           <div class="mt-2 mb-2 bg-teal-100 border border-teal-200 text-sm text-teal-800 rounded-lg p-4 dark:bg-teal-800/10 dark:border-teal-900 dark:text-teal-500" role="alert">
+               <span class="font-bold">Info</span> {{ session('message') }}
+           </div>
+       @endif
        <button type="button" onclick="location.href='{{route('memo.create')}}'" class="py-3 px-4 inline-flex items-center gap-x-2 text-sm font-semibold rounded-lg border border-transparent bg-blue-100 text-blue-800 hover:bg-blue-200 disabled:opacity-50 disabled:pointer-events-none dark:hover:bg-blue-900 dark:text-blue-400 dark:focus:outline-none dark:focus:ring-1 dark:focus:ring-gray-600">新規作成</button>
    </div>
登録後の画面
登録後はこんな感じでメッセージが表示されます。

メモの一覧表示機能の追加
ここでは、ダッシュボード画面が表示された時に、メモの一覧が表示されるようにしていきたいと思います。
ルーティングの編集
今のままだとダッシュボードを表示するだけの状態のため、/dashboardにリンクするとmemo.indexにリダイレクトするようにします。
Route::middleware([
    'auth:sanctum',
    config('jetstream.auth_session'),
    'verified',
])->group(function () {
    Route::get('/dashboard', function () {
-       return view('dashboard');
+       return redirect(route('memo.index'));
    })->name('dashboard');
});
コントローラーの編集
コントローラーを通してメモ一覧をデータベースから取得した後、ビューを表示させるようにします。
    public function index()
    {
-       //
+       $memos = Memo::all();
+       return view('dashboard', compact('memos'));
    }
モデルの編集
モデルを通してメモ一覧を取得する時に認証しているユーザーのデータのみを取得してくるようにします。この処理をしないと、他のユーザーの情報が取得できるようになってしまいます。
ここでは、memoモデルにグローバルスコープを設定して制御しています。
<?php

namespace App\Models;

use Illuminate\Database\Eloquent\Model;
use Illuminate\Database\Eloquent\SoftDeletes;
+use Illuminate\Database\Eloquent\Builder;

class Memo extends Model
{
    use SoftDeletes;

    protected $fillable = ['user_id', 'subject', 'content'];

+   protected static function booted(): void
+   {
+       static::addGlobalScope('auth', function (Builder $builder) {
+           $builder->where('user_id', auth()->id());
+       });
+   }
}
リストデザイン
リストのデザインはこのサンプル(Preline)を利用します。
右上のCopyからHTMLをコピーすることができます。

ダッシュボードにリストを表示
新規作成ボタンの下あたりに貼り付けます。
このままだとデータベースから取得してきたデータを表示できないので、下記の通り変更します。
コード真ん中付近にある@foreachと@endforeachで囲まれているところが編集しているところで、データの数だけループしている部分です。
<x-app-layout>
    <x-slot name="header">
        <h2 class="font-semibold text-xl text-gray-800 leading-tight">
            {{ __('Dashboard') }}
        </h2>
    </x-slot>

    <div class="mt-2 max-w-7xl mx-auto sm:px-6 lg:px-8">
        @if (session('message'))
            <div class="mt-2 mb-2 bg-teal-100 border border-teal-200 text-sm text-teal-800 rounded-lg p-4 dark:bg-teal-800/10 dark:border-teal-900 dark:text-teal-500" role="alert">
                <span class="font-bold">Info</span> {{ session('message') }}
            </div>
        @endif
        <button type="button" onclick="location.href='{{route('memo.create')}}'" class="py-3 px-4 inline-flex items-center gap-x-2 text-sm font-semibold rounded-lg border border-transparent bg-blue-100 text-blue-800 hover:bg-blue-200 disabled:opacity-50 disabled:pointer-events-none dark:hover:bg-blue-900 dark:text-blue-400 dark:focus:outline-none dark:focus:ring-1 dark:focus:ring-gray-600">新規作成</button>

+       <div class="flex flex-col mt-2">
+           <div class="-m-1.5 overflow-x-auto">
+               <div class="p-1.5 min-w-full inline-block align-middle">
+                   <div class="border rounded-lg divide-y divide-gray-200 dark:border-neutral-700 dark:divide-neutral-700">
+                       <div class="py-3 px-4">
+                           <div class="relative max-w-xs">
+                               <label class="sr-only">Search</label>
+                               <input type="text" name="hs-table-with-pagination-search" id="hs-table-with-pagination-search" class="py-2 px-3 ps-9 block w-full border-gray-200 shadow-sm rounded-lg text-sm focus:z-10 focus:border-blue-500 focus:ring-blue-500 disabled:opacity-50 disabled:pointer-events-none dark:bg-neutral-900 dark:border-neutral-700 dark:text-neutral-400 dark:placeholder-neutral-500 dark:focus:ring-neutral-600" placeholder="アイテムを検索する">
+                               <div class="absolute inset-y-0 start-0 flex items-center pointer-events-none ps-3">
+                                   <svg class="size-4 text-gray-400 dark:text-neutral-500" xmlns="http://www.w3.org/2000/svg" width="24" height="24" viewBox="0 0 24 24" fill="none" stroke="currentColor" stroke-width="2" stroke-linecap="round" stroke-linejoin="round">
+                                       <circle cx="11" cy="11" r="8"></circle>
+                                       <path d="m21 21-4.3-4.3"></path>
+                                   </svg>
+                               </div>
+                           </div>
+                       </div>
+                       <div class="overflow-hidden">
+                           <table class="min-w-full divide-y divide-gray-200 dark:divide-neutral-700">
+                               <thead class="bg-gray-50 dark:bg-neutral-700">
+                                   <tr>
+                                       <th scope="col" class="px-6 py-3 text-start text-xs font-medium text-gray-500 uppercase dark:text-neutral-500">件名</th>
+                                       <th scope="col" class="px-6 py-3 text-start text-xs font-medium text-gray-500 uppercase dark:text-neutral-500">更新日時</th>
+                                       <th scope="col" class="px-6 py-3 text-end text-xs font-medium text-gray-500 uppercase dark:text-neutral-500">アクション</th>
+                                   </tr>
+                               </thead>
+                               <tbody class="divide-y divide-gray-200 dark:divide-neutral-700">
+                                   @foreach($memos as $memo)
+                                       <tr>
+                                           <td class="px-6 py-4 whitespace-nowrap text-sm font-medium text-gray-800 dark:text-neutral-200">{{$memo->subject}}</td>
+                                           <td class="px-6 py-4 whitespace-nowrap text-sm text-gray-800 dark:text-neutral-200">{{$memo->updated_at}}</td>
+                                           <td class="px-6 py-4 whitespace-nowrap text-end text-sm font-medium"><button type="button" class="inline-flex items-center gap-x-2 text-sm font-semibold rounded-lg border border-transparent text-blue-600 hover:text-blue-800 disabled:opacity-50 disabled:pointer-events-none dark:text-blue-500 dark:hover:text-blue-400">消去</button></td>
+                                       </tr>
+                                   @endforeach
+                               </tbody>
+                           </table>
+                       </div>
+                       <div class="py-1 px-4">
+                           <nav class="flex items-center space-x-1">
+                               <button type="button" class="p-2.5 min-w-[40px] inline-flex justify-center items-center gap-x-2 text-sm rounded-full text-gray-800 hover:bg-gray-100 disabled:opacity-50 disabled:pointer-events-none dark:text-white dark:hover:bg-white/10">
+                                   <span aria-hidden="true">«</span>
+                                   <span class="sr-only">Previous</span>
+                               </button>
+                               <button type="button" class="min-w-[40px] flex justify-center items-center text-gray-800 hover:bg-gray-100 py-2.5 text-sm rounded-full disabled:opacity-50 disabled:pointer-events-none dark:text-white dark:hover:bg-white/10" aria-current="page">1</button>
+                               <button type="button" class="min-w-[40px] flex justify-center items-center text-gray-800 hover:bg-gray-100 py-2.5 text-sm rounded-full disabled:opacity-50 disabled:pointer-events-none dark:text-white dark:hover:bg-white/10">2</button>
+                               <button type="button" class="min-w-[40px] flex justify-center items-center text-gray-800 hover:bg-gray-100 py-2.5 text-sm rounded-full disabled:opacity-50 disabled:pointer-events-none dark:text-white dark:hover:bg-white/10">3</button>
+                               <button type="button" class="p-2.5 min-w-[40px] inline-flex justify-center items-center gap-x-2 text-sm rounded-full text-gray-800 hover:bg-gray-100 disabled:opacity-50 disabled:pointer-events-none dark:text-white dark:hover:bg-white/10">
+                                   <span class="sr-only">Next</span>
+                                   <span aria-hidden="true">»</span>
+                               </button>
+                           </nav>
+                       </div>
+                   </div>
+               </div>
+           </div>
+       </div>

    </div>
</x-app-layout>
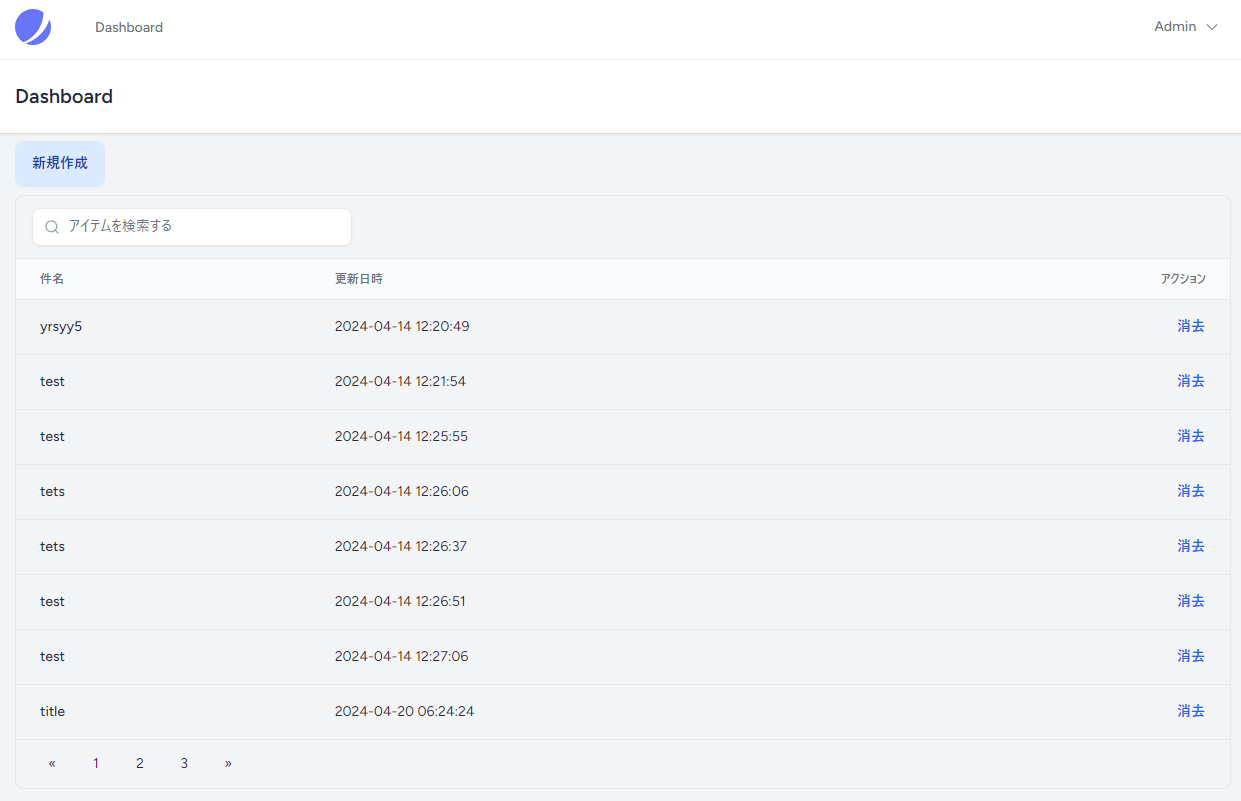
画面キャプチャ
こんな感じになります。
検索窓や消去ボタンはまだ機能していませんので、クリックしても何も起きません。

メモの編集機能の追加
ここでは、一覧に表示されたメモの件名をクリックすると編集画面に遷移して、そのまま編集することができる機能を追加していきたいと思います。
編集画面への遷移
件名をテキストではなく、ボタンにして編集画面へのリンクを設定します。
リンク先:{{route('memo.edit', ['memo' => $memo->id])}}
<table class="min-w-full divide-y divide-gray-200 dark:divide-neutral-700">
                                <thead class="bg-gray-50 dark:bg-neutral-700">
                                    <tr>
                                        <th scope="col" class="px-6 py-3 text-start text-xs font-medium text-gray-500 uppercase dark:text-neutral-500">件名</th>
                                        <th scope="col" class="px-6 py-3 text-start text-xs font-medium text-gray-500 uppercase dark:text-neutral-500">更新日時</th>
                                        <th scope="col" class="px-6 py-3 text-end text-xs font-medium text-gray-500 uppercase dark:text-neutral-500">アクション</th>
                                    </tr>
                                </thead>
                                <tbody class="divide-y divide-gray-200 dark:divide-neutral-700">
                                    @foreach($memos as $memo)
                                        <tr>
-                                           <td class="px-6 py-4 whitespace-nowrap text-sm font-medium text-gray-800 dark:text-neutral-200">{{$memo->subject}}</td>
+                                           <td class="px-6 py-4 whitespace-nowrap text-sm font-medium text-gray-800 dark:text-neutral-200"><button type="button" onclick="location.href='{{route('memo.edit', ['memo' => $memo->id])}}'" class="inline-flex items-center gap-x-2 text-sm font-semibold rounded-lg border border-transparent text-blue-600 hover:text-blue-800 disabled:opacity-50 disabled:pointer-events-none dark:text-blue-500 dark:hover:text-blue-400">{{$memo->subject}}</button></td>
                                            <td class="px-6 py-4 whitespace-nowrap text-sm text-gray-800 dark:text-neutral-200">{{$memo->updated_at}}</td>
                                            <td class="px-6 py-4 whitespace-nowrap text-end text-sm font-medium"><button type="button" class="inline-flex items-center gap-x-2 text-sm font-semibold rounded-lg border border-transparent text-blue-600 hover:text-blue-800 disabled:opacity-50 disabled:pointer-events-none dark:text-blue-500 dark:hover:text-blue-400">消去</button></td>
                                        </tr>
                                    @endforeach
                                </tbody>
                            </table>
編集画面の作成
編集画面は新規登録画面から複製します。
複製した後、下記の通りに修正します。
フォームのアクション先:{{route('memo.update', ['memo' => $memo->id])}}
また、メソッドをPUTかPATCHに変更しなければならないため、@csrfの下あたりに下記を追加します。
@method('PUT')
<x-app-layout>
    <x-slot name="header">
        <h2 class="font-semibold text-xl text-gray-800 leading-tight">
            {{ __('Dashboard') }}
        </h2>
    </x-slot>

    <form action="{{route('memo.update', ['memo' => $memo->id])}}" method="post" class="mt-5 max-w-7xl mx-auto sm:px-6 lg:px-8">
        @csrf
        @method('PUT')
        <input type="hidden" name="user_id" value="{{$user->id}}">
        <input type="text" name="subject" class="py-3 px-4 mb-3 block w-full border-gray-200 rounded-lg text-sm focus:border-blue-500 focus:ring-blue-500 disabled:opacity-50 disabled:pointer-events-none dark:bg-slate-900 dark:border-gray-700 dark:text-gray-400 dark:focus:ring-gray-600" placeholder="タイトル" value="{{$memo->subject}}" autofocus required>
        <div class="relative">
            <textarea name="content" class="py-3 px-4 block w-full h-48 border-gray-200 rounded-lg text-sm focus:border-blue-500 focus:ring-blue-500 disabled:opacity-50 disabled:pointer-events-none dark:bg-slate-900 dark:border-gray-700 dark:text-gray-400 dark:focus:ring-gray-600" rows="3" placeholder="本文">{{$memo->content}}</textarea>
        </div>
        <div class="text-right">
            <button type="button" onclick="location.href='{{route('dashboard')}}'" class="py-3 px-4 mr-3 inline-flex items-center gap-x-2 text-sm font-semibold rounded-lg border border-transparent bg-yellow-100 text-yellow-800 hover:bg-yellow-200 disabled:opacity-50 disabled:pointer-events-none dark:hover:bg-yellow-900 dark:text-yellow-500 dark:hover:text-yellow-400">戻る</button>
            <button type="submit" class="py-3 px-4 mt-3 inline-flex items-center gap-x-2 text-sm font-semibold rounded-lg border border-transparent bg-teal-100 text-teal-800 hover:bg-teal-200 disabled:opacity-50 disabled:pointer-events-none dark:hover:bg-teal-900 dark:text-teal-500 dark:hover:text-teal-400">送信</button>
        </div>
    </form>
</x-app-layout>
メソッドにPUTを指定している理由としては、php artisan route:listを実行してみると分かるかと思います。
  GET|HEAD        memo .......................................................................... memo.index › MemoController@index
  POST            memo .......................................................................... memo.store › MemoController@store
  GET|HEAD        memo/create ................................................................. memo.create › MemoController@create
  GET|HEAD        memo/{memo} ..................................................................... memo.show › MemoController@show
  PUT|PATCH       memo/{memo} ................................................................. memo.update › MemoController@update
  DELETE          memo/{memo} ............................................................... memo.destroy › MemoController@destroy
  GET|HEAD        memo/{memo}/edit ................................................................ memo.edit › MemoController@edit
コントローラーの編集
コントローラーに編集画面に遷移した時の処理を入力します。
ユーザー変数にユーザー情報を代入して、ビューの表示の際にデータを渡しています。
    public function edit(Memo $memo)
    {
-       //
+       $user = auth()->user();
+       return view('memo.create', compact('user', 'memo'));
    }
次に、編集画面での編集後の処理を入力します。
フォームに入力された値をデータベースへ代入してダッシュボードへリダイレクトしています。
    public function update(Request $request, Memo $memo)
    {
-       //
+       $memo->fill($request->all())->save();
+       return redirect(route('dashboard'))->with('message', 'メモが更新されました。');
    }
メモの削除機能の追加
ここでは、ダッシュボードで消去をクリックすると、メモを削除する処理を追加していきます。
まずはダッシュボードの消去アクションのところを書き換えます。
削除は、ボタンから実行することはできないので、フォームにしています。
                                    @foreach($memos as $memo)
                                        <tr>
                                            <td class="px-6 py-4 whitespace-nowrap text-sm font-medium text-gray-800 dark:text-neutral-200"><button type="button" onclick="location.href='{{route('memo.edit', ['memo' => $memo->id])}}'" class="inline-flex items-center gap-x-2 text-sm font-semibold rounded-lg border border-transparent text-blue-600 hover:text-blue-800 disabled:opacity-50 disabled:pointer-events-none dark:text-blue-500 dark:hover:text-blue-400">{{$memo->subject}}</button></td>
                                            <td class="px-6 py-4 whitespace-nowrap text-sm text-gray-800 dark:text-neutral-200">{{$memo->updated_at}}</td>
-                                           <td class="px-6 py-4 whitespace-nowrap text-end text-sm font-medium"><button type="button" class="inline-flex items-center gap-x-2 text-sm font-semibold rounded-lg border border-transparent text-blue-600 hover:text-blue-800 disabled:opacity-50 disabled:pointer-events-none dark:text-blue-500 dark:hover:text-blue-400">消去</button></td>
+                                           <td class="px-6 py-4 whitespace-nowrap text-end text-sm font-medium">
+                                               <form action="{{route('memo.destroy', ['memo' => $memo->id])}}" method="post">
+                                                   @csrf
+                                                   @method('DELETE')
+                                                   <button type="submit" onclick="return confirm('本当に削除しますか?')" class="inline-flex items-center gap-x-2 text-sm font-semibold rounded-lg border border-transparent text-blue-600 hover:text-blue-800 disabled:opacity-50 disabled:pointer-events-none dark:text-blue-500 dark:hover:text-blue-400">消去</button>
+                                               </form>
+                                           </td>
                                        </tr>
                                    @endforeach
次に、コントローラーを書き換えています。
既に対象となるメモの情報が$memoに代入されているため、削除処理をしてダッシュボードへリダイレクトしています。
    public function destroy(Memo $memo)
    {
-       //
+       $memo->delete();
+       return redirect(route('dashboard'))->with('message', 'メモが削除されました。');
    }
ダッシュボードにページネーションを追加
ここでは、ダッシュボードにあるメモ一覧にページネーションを追加します。
メモコントローラーにページネーションを追加
$page_countにページ毎に表示する件数を設定。
ひとまず10件毎にページネーションするようにしています。
    public function index()
    {
+       $page_count = 10;
-       $memos = Memo::all();
+       $memos = Memo::paginate($page_count);
        return view('dashboard', compact('memos'));
    }
サービスプロバイダーにページネーションのビューを追加
ページネーションのカスタマイズビューの項目を参考に下記のコマンドを実行
コマンド:php artisan vendor:publish --tag=laravel-pagination
\resources\views\vendor\paginationの配下に複数のブレードが作成されます。
不要なものは削除して良いのでdefault.blade.phpだけ残して削除します。
そして、default.blade.phpに下記を貼り付けます。
※実はtailwind.blade.phpを参考にしています。
@if ($paginator->hasPages())
    <nav role="navigation" aria-label="{{ __('Pagination Navigation') }}" class="flex items-center justify-between">
        <div class="flex justify-between flex-1 sm:hidden">
            @if ($paginator->onFirstPage())
                <span class="relative inline-flex items-center px-4 py-2 text-sm font-medium text-gray-500 bg-white border border-gray-300 cursor-default leading-5 rounded-md dark:text-gray-600 dark:bg-gray-800 dark:border-gray-600">
                    {!! __('pagination.previous') !!}
                </span>
            @else
                <a href="{{ $paginator->previousPageUrl() }}" class="relative inline-flex items-center px-4 py-2 text-sm font-medium text-gray-700 bg-white border border-gray-300 leading-5 rounded-md hover:text-gray-500 focus:outline-none focus:ring ring-gray-300 focus:border-blue-300 active:bg-gray-100 active:text-gray-700 transition ease-in-out duration-150 dark:bg-gray-800 dark:border-gray-600 dark:text-gray-300 dark:focus:border-blue-700 dark:active:bg-gray-700 dark:active:text-gray-300">
                    {!! __('pagination.previous') !!}
                </a>
            @endif

            @if ($paginator->hasMorePages())
                <a href="{{ $paginator->nextPageUrl() }}" class="relative inline-flex items-center px-4 py-2 ml-3 text-sm font-medium text-gray-700 bg-white border border-gray-300 leading-5 rounded-md hover:text-gray-500 focus:outline-none focus:ring ring-gray-300 focus:border-blue-300 active:bg-gray-100 active:text-gray-700 transition ease-in-out duration-150 dark:bg-gray-800 dark:border-gray-600 dark:text-gray-300 dark:focus:border-blue-700 dark:active:bg-gray-700 dark:active:text-gray-300">
                    {!! __('pagination.next') !!}
                </a>
            @else
                <span class="relative inline-flex items-center px-4 py-2 ml-3 text-sm font-medium text-gray-500 bg-white border border-gray-300 cursor-default leading-5 rounded-md dark:text-gray-600 dark:bg-gray-800 dark:border-gray-600">
                    {!! __('pagination.next') !!}
                </span>
            @endif
        </div>

        <div class="hidden sm:flex-1 sm:flex sm:items-center sm:justify-between">
            <div>
                <span class="relative z-0 inline-flex rtl:flex-row-reverse shadow-sm rounded-md">
                    {{-- Previous Page Link --}}
                    @if ($paginator->onFirstPage())
                        <span aria-disabled="true" aria-label="{{ __('pagination.previous') }}">
                            <span class="relative inline-flex items-center px-2 py-2 text-sm font-medium text-gray-500 bg-white border border-gray-300 cursor-default rounded-l-md leading-5 dark:bg-gray-800 dark:border-gray-600" aria-hidden="true">
                                <svg class="w-5 h-5" fill="currentColor" viewBox="0 0 20 20">
                                    <path fill-rule="evenodd" d="M12.707 5.293a1 1 0 010 1.414L9.414 10l3.293 3.293a1 1 0 01-1.414 1.414l-4-4a1 1 0 010-1.414l4-4a1 1 0 011.414 0z" clip-rule="evenodd" />
                                </svg>
                            </span>
                        </span>
                    @else
                        <a href="{{ $paginator->previousPageUrl() }}" rel="prev" class="relative inline-flex items-center px-2 py-2 text-sm font-medium text-gray-500 bg-white border border-gray-300 rounded-l-md leading-5 hover:text-gray-400 focus:z-10 focus:outline-none focus:ring ring-gray-300 focus:border-blue-300 active:bg-gray-100 active:text-gray-500 transition ease-in-out duration-150 dark:bg-gray-800 dark:border-gray-600 dark:active:bg-gray-700 dark:focus:border-blue-800" aria-label="{{ __('pagination.previous') }}">
                            <svg class="w-5 h-5" fill="currentColor" viewBox="0 0 20 20">
                                <path fill-rule="evenodd" d="M12.707 5.293a1 1 0 010 1.414L9.414 10l3.293 3.293a1 1 0 01-1.414 1.414l-4-4a1 1 0 010-1.414l4-4a1 1 0 011.414 0z" clip-rule="evenodd" />
                            </svg>
                        </a>
                    @endif

                    {{-- Pagination Elements --}}
                    @foreach ($elements as $element)
                        {{-- "Three Dots" Separator --}}
                        @if (is_string($element))
                            <span aria-disabled="true">
                                <span class="relative inline-flex items-center px-4 py-2 -ml-px text-sm font-medium text-gray-700 bg-white border border-gray-300 cursor-default leading-5 dark:bg-gray-800 dark:border-gray-600">{{ $element }}</span>
                            </span>
                        @endif

                        {{-- Array Of Links --}}
                        @if (is_array($element))
                            @foreach ($element as $page => $url)
                                @if ($page == $paginator->currentPage())
                                    <span aria-current="page">
                                        <span class="relative inline-flex items-center px-4 py-2 -ml-px text-sm font-medium text-gray-500 bg-white border border-gray-300 cursor-default leading-5 dark:bg-gray-800 dark:border-gray-600">{{ $page }}</span>
                                    </span>
                                @else
                                    <a href="{{ $url }}" class="relative inline-flex items-center px-4 py-2 -ml-px text-sm font-medium text-gray-700 bg-white border border-gray-300 leading-5 hover:text-gray-500 focus:z-10 focus:outline-none focus:ring ring-gray-300 focus:border-blue-300 active:bg-gray-100 active:text-gray-700 transition ease-in-out duration-150 dark:bg-gray-800 dark:border-gray-600 dark:text-gray-400 dark:hover:text-gray-300 dark:active:bg-gray-700 dark:focus:border-blue-800" aria-label="{{ __('Go to page :page', ['page' => $page]) }}">
                                        {{ $page }}
                                    </a>
                                @endif
                            @endforeach
                        @endif
                    @endforeach

                    {{-- Next Page Link --}}
                    @if ($paginator->hasMorePages())
                        <a href="{{ $paginator->nextPageUrl() }}" rel="next" class="relative inline-flex items-center px-2 py-2 -ml-px text-sm font-medium text-gray-500 bg-white border border-gray-300 rounded-r-md leading-5 hover:text-gray-400 focus:z-10 focus:outline-none focus:ring ring-gray-300 focus:border-blue-300 active:bg-gray-100 active:text-gray-500 transition ease-in-out duration-150 dark:bg-gray-800 dark:border-gray-600 dark:active:bg-gray-700 dark:focus:border-blue-800" aria-label="{{ __('pagination.next') }}">
                            <svg class="w-5 h-5" fill="currentColor" viewBox="0 0 20 20">
                                <path fill-rule="evenodd" d="M7.293 14.707a1 1 0 010-1.414L10.586 10 7.293 6.707a1 1 0 011.414-1.414l4 4a1 1 0 010 1.414l-4 4a1 1 0 01-1.414 0z" clip-rule="evenodd" />
                            </svg>
                        </a>
                    @else
                        <span aria-disabled="true" aria-label="{{ __('pagination.next') }}">
                            <span class="relative inline-flex items-center px-2 py-2 -ml-px text-sm font-medium text-gray-500 bg-white border border-gray-300 cursor-default rounded-r-md leading-5 dark:bg-gray-800 dark:border-gray-600" aria-hidden="true">
                                <svg class="w-5 h-5" fill="currentColor" viewBox="0 0 20 20">
                                    <path fill-rule="evenodd" d="M7.293 14.707a1 1 0 010-1.414L10.586 10 7.293 6.707a1 1 0 011.414-1.414l4 4a1 1 0 010 1.414l-4 4a1 1 0 01-1.414 0z" clip-rule="evenodd" />
                                </svg>
                            </span>
                        </span>
                    @endif
                </span>
            </div>
        </div>
    </nav>
@endif
次にサービスプロバイダーに下記を追記してdefault.blade.phpが表示されるようにします。
<?php

namespace App\Providers;

+use Illuminate\Pagination\Paginator;
use Illuminate\Support\ServiceProvider;

class AppServiceProvider extends ServiceProvider
{
    /**
     * Register any application services.
     */
    public function register(): void
    {
        //
    }

    /**
     * Bootstrap any application services.
     */
    public function boot(): void
    {
-       //
+       Paginator::defaultView('vendor.pagination.default');
    }
}
最後にダッシュボードのページネーションの項目を書き換えます。
                            <div class="py-1 px-4">
-                               <nav class="flex items-center space-x-1">
-                               <button type="button" class="p-2.5 min-w-[40px] inline-flex justify-center items-center gap-x-2 text-sm rounded-full text-gray-800 hover:bg-gray-100 disabled:opacity-50 disabled:pointer-events-none dark:text-white dark:hover:bg-white/10">
-                                   <span aria-hidden="true">«</span>
-                                   <span class="sr-only">Previous</span>
-                               </button>
-                               <button type="button" class="min-w-[40px] flex justify-center items-center text-gray-800 hover:bg-gray-100 py-2.5 text-sm rounded-full disabled:opacity-50 disabled:pointer-events-none dark:text-white dark:hover:bg-white/10" aria-current="page">1</button>
-                               <button type="button" class="min-w-[40px] flex justify-center items-center text-gray-800 hover:bg-gray-100 py-2.5 text-sm rounded-full disabled:opacity-50 disabled:pointer-events-none dark:text-white dark:hover:bg-white/10">2</button>
-                               <button type="button" class="min-w-[40px] flex justify-center items-center text-gray-800 hover:bg-gray-100 py-2.5 text-sm rounded-full disabled:opacity-50 disabled:pointer-events-none dark:text-white dark:hover:bg-white/10">3</button>
-                               <button type="button" class="p-2.5 min-w-[40px] inline-flex justify-center items-center gap-x-2 text-sm rounded-full text-gray-800 hover:bg-gray-100 disabled:opacity-50 disabled:pointer-events-none dark:text-white dark:hover:bg-white/10">
-                                   <span class="sr-only">Next</span>
-                                   <span aria-hidden="true">»</span>
-                               </button>
-                               </nav>
+                               {{ $memos->links() }}
                            </div>
画面イメージ

ブレイクタイム
ここまできたところで、メモを登録した時や、削除した時に表示させていたメッセージが、表示されないバグが発生しています。
原因追及
バグフィックスを行うのですが、まずは原因を突き止めようと思います。
メモを作成した時の情報を一つずつ辿ってみます。
下記の記述の通り、メモが登録されたら、ダッシュボードという名前のルーティングが確認できます。
    public function store(Request $request)
    {
        $memo = new Memo;
        $memo->fill($request->all())->save();
        return redirect(route('dashboard'))->with('message', 'メモが登録されました。');
    }
次に、ルーティングの中にdd(session('message'));を用いて確認してみます。
Route::middleware([
    'auth:sanctum',
    config('jetstream.auth_session'),
    'verified',
])->group(function () {
    Route::get('/dashboard', function () {
+       dd(session('message'));
        return redirect(route('memo.index'));
    })->name('dashboard');
});
web.phpを書き換えたときはキャッシュをクリアします。
コマンドプロンプト:php artisan route:cache
その後、メモを新規登録します。
ここで気を付けて欲しいのは、このまま画面更新を行うとdd()の結果が表示されてしまい、調査を続けることができません。
因みに、👇こんな感じで表示されたので、ルーティングのところまではデータが到着している様子。

次はmemo.indexにルーティングしているので、コントローラーを確認します。
先程web.phpに追加した記述は削除して、キャッシュもクリアしておきましょう。
そしてMemoController.phpの中に、次のように追記します。
    public function index()
    {
+       dd(session('message'));
        $page_count = 10;
        $memos = Memo::paginate($page_count);
        return view('dashboard', compact('memos'));
    }
動作確認をしてみます。
👇このようにコントローラーまで届いていないようです。

原因は、web.phpからMemoController.phpに移動する際にセッションが渡されていないことでした。
そこで、web.phpを次のように書き換えます。
正直、この書き方が最適か自信がなく、もっと良い書き方があるのではないかと思っています。
一応、セッション情報がなければ、セッション情報は渡さずコントローラーへ、セッション情報があればセッション情報も含めてコントローラーへ移動するようにしています。
    Route::get('/dashboard', function () {
+       if(empty(session('message')) == true) {
            return redirect(route('memo.index'));
+       } else {
+           return redirect(route('memo.index'))->with('message', session('message'));
+       }
    })->name('dashboard');
動作確認結果
無事にメッセージが表示されました。

メモの検索機能の追加
ここではメモを検索ができるようにしていきます。
メモのsubject、contentのどちらにもヒットするようにします。
ダッシュボードに検索ボタンを追加
+                                   <form action="{{route('memo.index')}}" method="POST" class="flex">
+                                   @csrf
+                                   @method('GET')
-                                   <input type="text" name="hs-table-with-pagination-search" id="hs-table-with-pagination-search" class="py-2 px-3 ps-9 block w-full border-gray-200 shadow-sm rounded-lg text-sm focus:z-10 focus:border-blue-500 focus:ring-blue-500 disabled:opacity-50 disabled:pointer-events-none dark:bg-neutral-900 dark:border-neutral-700 dark:text-neutral-400 dark:placeholder-neutral-500 dark:focus:ring-neutral-600" placeholder="アイテムを検索する">
+                                   <input type="text" name="keyword" class="py-2 px-3 ps-9 block flex-1 border-gray-200 shadow-sm rounded-lg text-sm focus:z-10 focus:border-blue-500 focus:ring-blue-500 disabled:opacity-50 disabled:pointer-events-none dark:bg-neutral-900 dark:border-neutral-700 dark:text-neutral-400 dark:placeholder-neutral-500 dark:focus:ring-neutral-600" placeholder="アイテムを検索する" value="{{request()->input('keyword')}}">
+                                   <button type="submit" class="ml-5 px-4 inline-flex items-center gap-x-2 text-sm font-medium rounded-lg border border-transparent bg-teal-100 text-teal-800 hover:bg-teal-200 focus:outline-none focus:bg-teal-200 disabled:opacity-50 disabled:pointer-events-none dark:text-teal-500 dark:bg-teal-800/30 dark:hover:bg-teal-800/20 dark:focus:bg-teal-800/20">
+                                       検索
+                                   </button>
+                               </form>
- 検索ボックスを
<form> ~ </form>で囲みます。 - URLにパラメータが付与されないように、ここではメソッドを
POSTにしています。 - Laravelのフォーム送信で必要な
@CSRF(トークン)を追加しています。 -
POSTメソッドではルーティングでエラーが発生してしまうため、ここでGETメソッドを指定しています。 - 最後に
検索ボタンを追加しています。
コントローラーに検索をしたときの処理を追加
-   public function index()
+   public function index(Request $request)
    {
        $page_count = 10;
+       $keyword = $request->keyword;

+       if ($keyword) {
+           $memos = Memo::where('subject', 'like', "%$keyword%")->orWhere('content', 'like', "%$keyword%")->paginate($page_count);
+       } else {
            $memos = Memo::paginate($page_count);
+       }

-       return view('dashboard', compact('memos'));
+       return view('dashboard', compact('memos', 'keyword'));
    }
- 送信されたキーワードが取得できるようにリクエストを
$request変数に代入しています。 -
keywordの入力ボックスに入力された文字を$keyword変数に代入しています。 - キーワードが存在するのであれば、キーワード検索を行い、
$memos変数にデータベースから取得してきたデータを代入しています。 - キーワードがなければ、これまで通りにすべてのメモを読み込んでいます。
- ビューを表示する際に、キーワードも返してダッシュボードで表示されるようにしています。
動作確認の結果
検索していない状態

eと検索した1ページ目

eと検索した2ページ目
