【挑戦】Laravel 10 でチームで使えるタスク管理システムを作ってみた
はじめに
今回の作ってみたシリーズは、Laravelの認証機能の一つであるチーム機能に焦点をあてた勉強を兼ねてアウトプットしていきたいと思います。今回も凝ったものではなく、初心者でも簡単に参考にできるようなものを目指したいと思います。
アーカイブ
開発環境
- XAMPP v3.3.0
- composer 2.5.5
- VS Code
利用言語
- PHP 8.2.0
- Laravel 10.7.1
企画
今回は、チームでタスクを管理していくシステムを作っていこうと思います。
具体的には、ユーザーは、多数のチームに参加することができ、チーム内のアクションとしてタスクを作成・閲覧・削除・完了することができます。
例えばAさんが作成したタスクを、同チームに属するBさんも閲覧・削除・完了することができます。
しかし、同チームに属していないCさんは閲覧することもできません。
作成の流れ
- チーム機能を有した認証機能の追加
- ダッシュボード画面の構成を検討 ※チーム内のタスク一覧を表示
- タスク テーブルの作成
- ダッシュボード画面にデータベースから取得したタスク一覧を表示
- タスクの作成画面の作成
- タスクの削除処理の作成
- タスクの編集画面の作成 ※編集・完了 機能を有する
プロジェクトの作成
早速、プロジェクトを作成していきます。
laravel new task-app --git --branch="main"
cd task-app
次に、GitHub上に作成しておいたリポジトリと連携させていきます。
git remote add origin https://github.com/DaiNaka1207/task-app.git
最後に、GitHub上に初期状態をプッシュしていきます。
git push -u origin main
Github
環境設定
- APP_NAME=laravel
+ APP_NAME="task-app"
- APP_DEBUG=true
+ APP_DEBUG=false
- 'timezone' => 'UTC',
+ 'timezone' => 'Asia/Tokyo',

- 'locale' => 'en',
+ 'locale' => 'ja',

- 'faker_locale' => 'en_US',
+ 'faker_locale' => 'ja_JP',
データベースの作成
Laravelで生成されたデータベース名を確認して、実際にデータベースを作成していきます。
Laravel側のデータベース設定の確認
データベースを作成する前に.envファイルのDB_DATABASEに入っている値(task_app)を確認します。
DB_CONNECTION=mysql
DB_HOST=127.0.0.1
DB_PORT=3306
DB_DATABASE=task_app
DB_USERNAME=root
DB_PASSWORD=
mysqlへデータベースの作成
コマンドプロンプトにて下記のコマンドを実行して、mysqlへアクセスします。
C:\XAMPP\mysql\bin\mysql -u root
次のコマンドを実行して、確認した値の名前(task_app)でデータベースを作成します。
create database task_app;
次のコマンドを実行して、作成できているか確認する事ができます。
show databases;
Laravel起動
コマンドプロンプトにて下記コマンドを実行して、Laravelのサーバーを起動します。
php artisan serve
そして、ブラウザにて下記へアクセスして、起動している事を確認します。
http://localhost:8000/
無事にWelcome画面が表示された事を確認

チーム機能を有した認証機能の追加
チーム機能を有した認証機能を追加するには、Laravel公式に記載されているJetstreamを使っていきます。
composerを利用してLaravelプロジェクトへJetsteamをインストール
基本的にはJetstream公式の公式サイトを見ながらインストールしていきます。
コマンドプロンプトにてプロジェクトフォルダ内に移動して下記のコマンドを実行していきます。
composer require laravel/jetstream
php artisan jetstream:install livewire --teams
npm install
npm run build
php artisan migrate
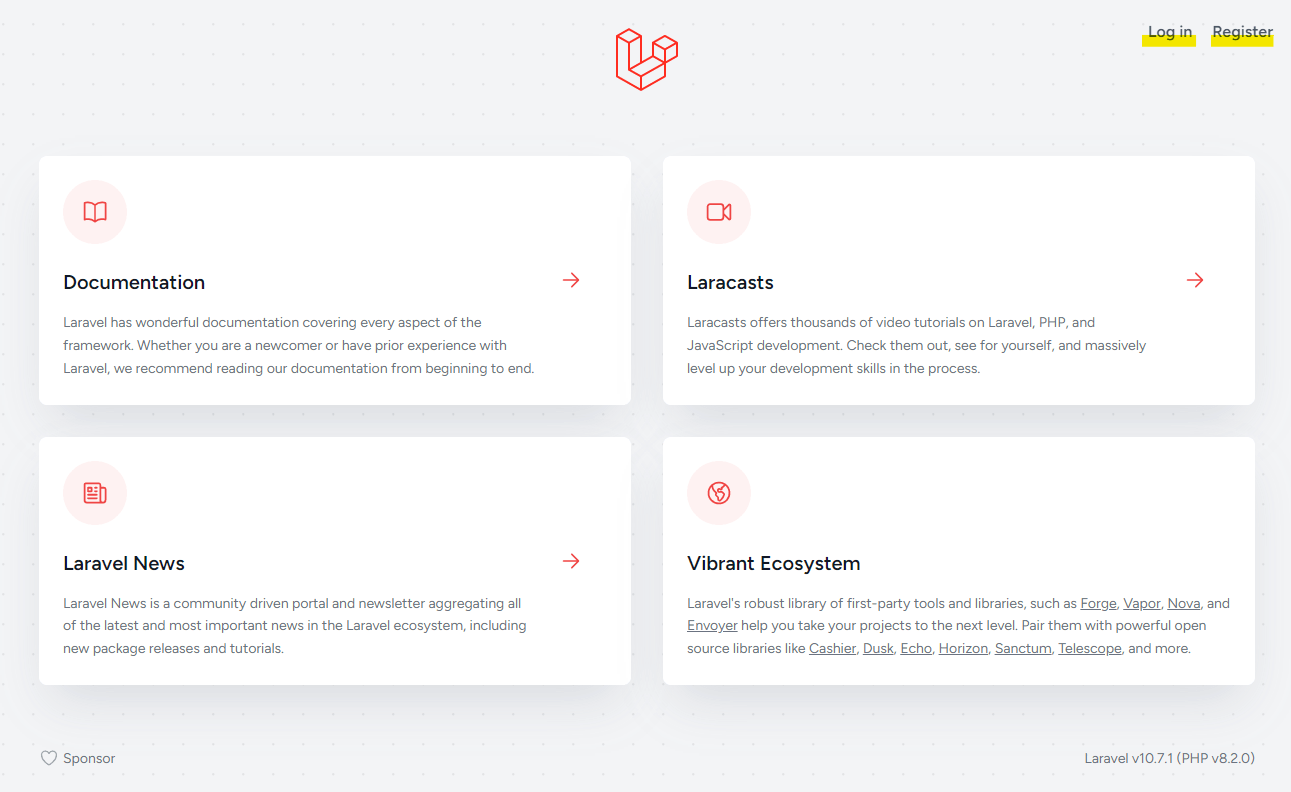
認証機能を追加した後の画面
右上にログイン画面とユーザー登録画面へのボタンが付いています。
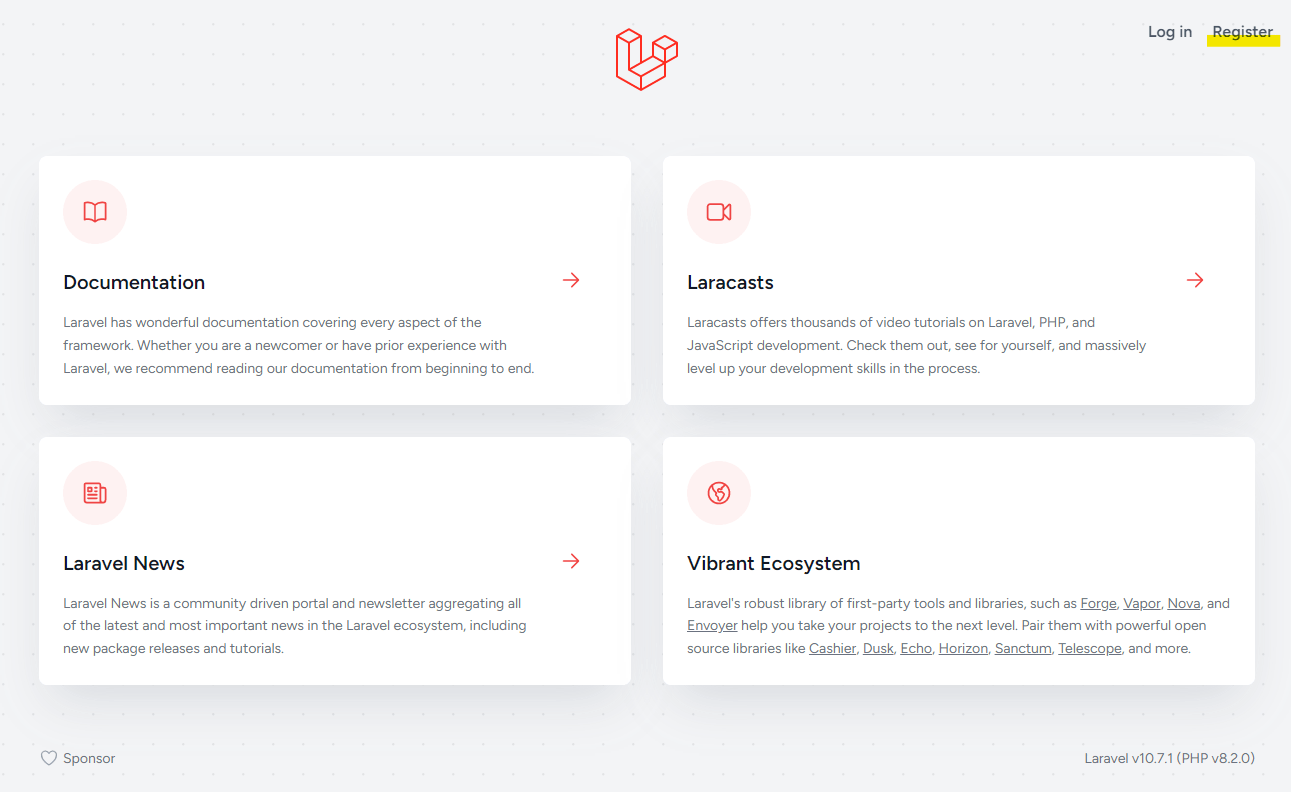
ユーザーを登録してダッシュボードへ
右上のRegisterボタンからユーザー登録画面へ遷移することができます。
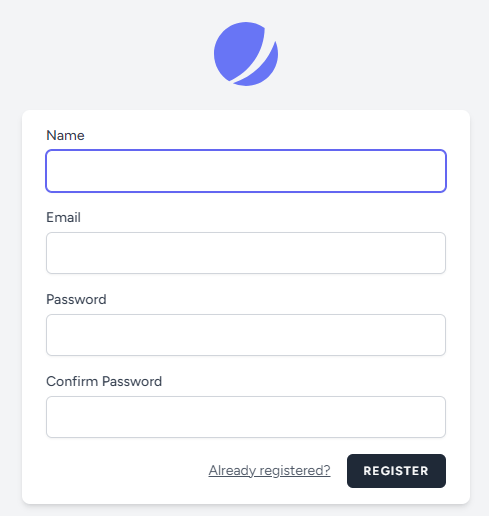
ユーザー登録画面
必要事項を入力してREGISTERボタンからユーザー登録ができます。
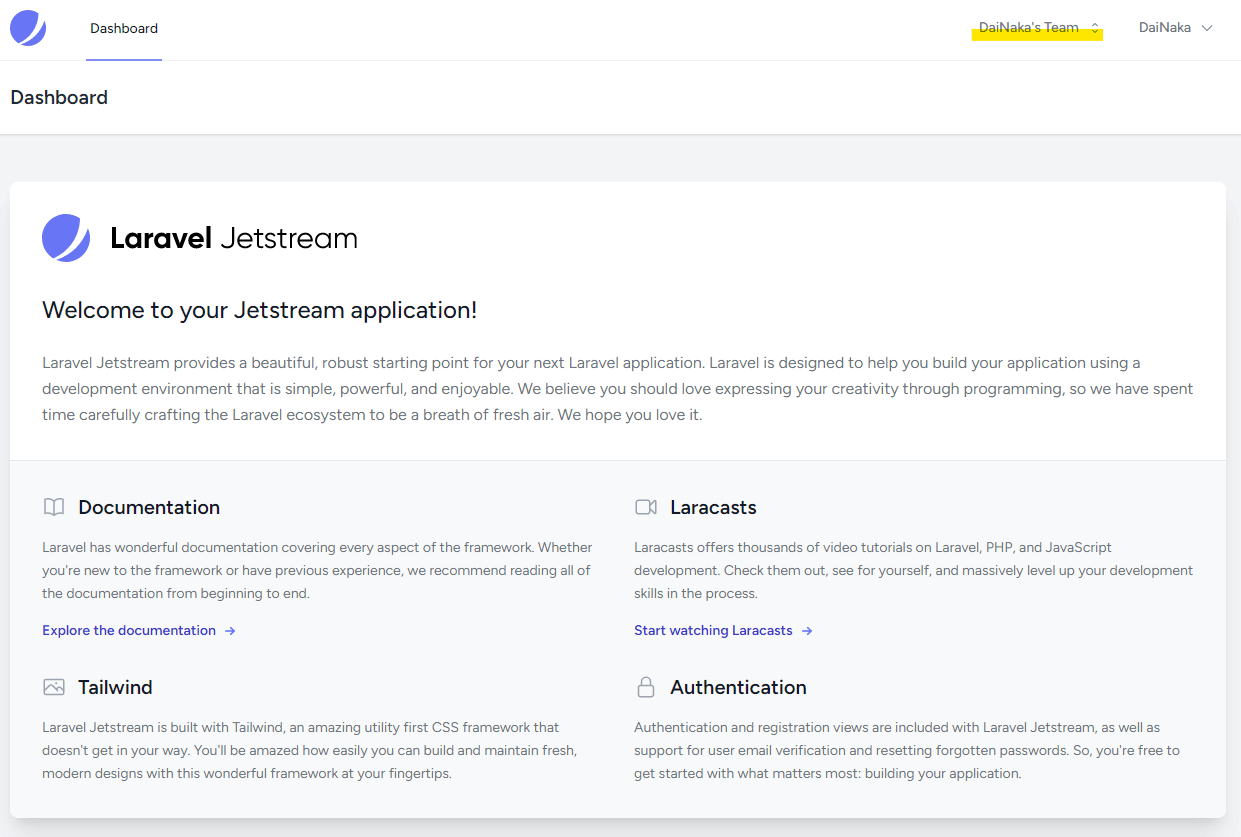
ダッシュボード画面
右上の方にユーザー名だけでなく、チーム名も表示されています。
ダッシュボード画面の構成を検討
Welcome画面が表示されているダッシュボードにタスク一覧を表示させていきます。
ダッシュボードのコードを確認
ダッシュボードのコードを見てみると、現在は<x-welcome />になっています。
Path:\resources\views\dashboard.blade.php
<x-app-layout>
    <x-slot name="header">
        <h2 class="font-semibold text-xl text-gray-800 leading-tight">
            {{ __('Dashboard') }}
        </h2>
    </x-slot>

    <div class="py-12">
        <div class="max-w-7xl mx-auto sm:px-6 lg:px-8">
            <div class="bg-white overflow-hidden shadow-xl sm:rounded-lg">
                <x-welcome /> // 👈ここ
            </div>
        </div>
    </div>
</x-app-layout>
タスクリストのコンポーネントを作成
welcome.blade.phpをコピーした後、task-list.blade.phpにリネームして、下記の場所へ移動します。
Path:\resources\views\components\task-list.blade.php

コードはprelineのコンポーネントを参考にしています。
<div class="flex flex-col">
    <div class="-m-1.5 overflow-x-auto">
        <div class="p-1.5 min-w-full inline-block align-middle">
            <div class="border rounded-lg shadow overflow-hidden dark:border-gray-700 dark:shadow-gray-900">
                <table class="min-w-full divide-y divide-gray-200 dark:divide-gray-700">
                    <thead class="bg-gray-50 dark:bg-gray-700">
                        <tr>
                            <th scope="col" class="px-6 py-3 text-left text-xs font-medium text-gray-500 uppercase dark:text-gray-400">No</th>
                            <th scope="col" class="px-6 py-3 text-left text-xs font-medium text-gray-500 uppercase dark:text-gray-400">Name</th>
                            <th scope="col" class="px-6 py-3 text-left text-xs font-medium text-gray-500 uppercase dark:text-gray-400">Done</th>
                        </tr>
                    </thead>
                    <tbody class="divide-y divide-gray-200 dark:divide-gray-700">
                        <tr>
                            <td class="px-6 py-4 whitespace-nowrap text-sm font-medium">
                                <a class="text-blue-500 hover:text-blue-700" href="#">1</a>
                            </td>
                            <td class="px-6 py-4 whitespace-nowrap text-sm font-medium text-gray-800 dark:text-gray-200">Test Task 1</td>
                            <td class="px-6 py-4 whitespace-nowrap text-sm font-medium">o</td>
                        </tr>

                        <tr>
                            <td class="px-6 py-4 whitespace-nowrap text-sm font-medium">
                                <a class="text-blue-500 hover:text-blue-700" href="#">2</a>
                            </td>
                            <td class="px-6 py-4 whitespace-nowrap text-sm font-medium text-gray-800 dark:text-gray-200">Test Task 2</td>
                            <td class="px-6 py-4 whitespace-nowrap text-sm font-medium">o</td>
                        </tr>

                        <tr>
                            <td class="px-6 py-4 whitespace-nowrap text-sm font-medium">
                                <a class="text-blue-500 hover:text-blue-700" href="#">3</a>
                            </td>
                            <td class="px-6 py-4 whitespace-nowrap text-sm font-medium text-gray-800 dark:text-gray-200">Test Task 3</td>
                            <td class="px-6 py-4 whitespace-nowrap text-sm font-medium">o</td>
                        </tr>
                    </tbody>
                </table>
            </div>
        </div>
    </div>
</div>
ダッシュボードのコンポーネントを書き換え
Path:\resources\views\dashboard.blade.php
<x-app-layout>
    <x-slot name="header">
        <h2 class="font-semibold text-xl text-gray-800 leading-tight">
            {{ __('Dashboard') }}
        </h2>
    </x-slot>

    <div class="py-12">
        <div class="max-w-7xl mx-auto sm:px-6 lg:px-8">
            <div class="bg-white overflow-hidden shadow-xl sm:rounded-lg">
-               <x-welcome />
+               <x-task-list />
            </div>
        </div>
    </div>
</x-app-layout>
変更後のダッシュボード画面
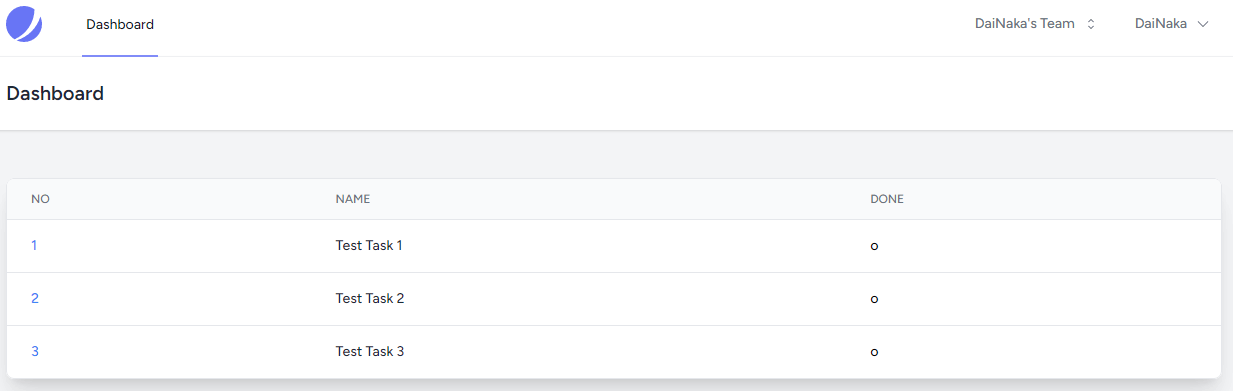
タスク テーブルの作成
Jetstreamで認証機能を追加した際に、自動で作成されたTeamsテーブルの構成を確認して、チームのタスク一覧が取得できるようにタスクテーブルも作成していきます。
チームのデータベースの構成を確認
コマンドプロンプトにて下記のコマンドを実行して、mysqlへアクセスします。
C:\XAMPP\mysql\bin\mysql -u root
事前に作成したデータベースを選択します。
use task_app;
次のコマンドを実行して、データベースでどのようにチームが管理されているかを確認します。
desc teams;
+---------------+---------------------+------+-----+---------+----------------+
| Field         | Type                | Null | Key | Default | Extra          |
+---------------+---------------------+------+-----+---------+----------------+
| id            | bigint(20) unsigned | NO   | PRI | NULL    | auto_increment |
| user_id       | bigint(20) unsigned | NO   | MUL | NULL    |                |
| name          | varchar(255)        | NO   |     | NULL    |                |
| personal_team | tinyint(1)          | NO   |     | NULL    |                |
| created_at    | timestamp           | YES  |     | NULL    |                |
| updated_at    | timestamp           | YES  |     | NULL    |                |
+---------------+---------------------+------+-----+---------+----------------+
チームにはIDが振られていてユニークになっている様子が分かります。
そのため、タスクにチームのIDがあれば紐づけ(リレーション)が出来そうです。
タスク テーブルの構成
+------------+---------------------+------+-----+---------+----------------+
| Field      | Type                | Null | Key | Default | Extra          |
+------------+---------------------+------+-----+---------+----------------+
| id         | bigint(20) unsigned | NO   | PRI | NULL    | auto_increment |
| team_id    | bigint(20) unsigned | NO   |     | NULL    |                |
| name       | varchar(255)        | NO   |     | NULL    |                |
| done       | tinyint(1)          | YES  |     | 0       |                |
| created_at | timestamp           | YES  |     | NULL    |                |
| updated_at | timestamp           | YES  |     | NULL    |                |
+------------+---------------------+------+-----+---------+----------------+
タスク モデルの作成
Laravel公式を参考にモデルを含め関連ファイルを生成します。
コマンドプロンプトにて下記のコマンドを実行します。
php artisan make:model Task -mcr
-mcrを付与することで、マイグレーションファイル、コントローラーファイル(リソース)も一緒に作成することができます。
PS C:\xampp\htdocs\Project\task-app> php artisan make:model Task -mcr

   INFO  Model [C:\xampp\htdocs\Project\task-app\app/Models/Task.php] created successfully.

   INFO  Migration [C:\xampp\htdocs\Project\task-app\database\migrations/2023_04_19_005336_create_tasks_table.php] created successfully.

   INFO  Controller [C:\xampp\htdocs\Project\task-app\app/Http/Controllers/TaskController.php] created successfully.
マイグレーションファイルの編集
Path:\database\migrations\YYYY_MM_DD_hhmmss_create_tasks_table.php
    public function up(): void
    {
        Schema::create('tasks', function (Blueprint $table) {
            $table->id();
+           $table->foreignId('team_id');
+           $table->string('name');
+           $table->boolean('done')->nullable()->default(false);
            $table->timestamps();
        });
    }
コマンドプロンプトにて下記のコマンドを実行
php artisan migrate
ダミーデータの登録
Tinkerを使ってダミーデータを登録しておきます。
コマンドプロンプトにて下記のコマンドを実行します。
php artisan tinker
$task = new App\Models\Task;
$task->name = "test1";
$task->team_id = 1;
$task->save();
上記を何度か繰り返してダミーデータを複数作成しておきます。
また、データは同じ値のものではなく、異なったデータを作成しておくと良いと思います。
mysqlでデータを確認します。
コマンドプロンプトにて下記のコマンドを実行して、mysqlへアクセスします。
C:\XAMPP\mysql\bin\mysql -u root
データベースを選択します。
use task_app;
次のコマンドを実行して、登録されたデータを確認します。
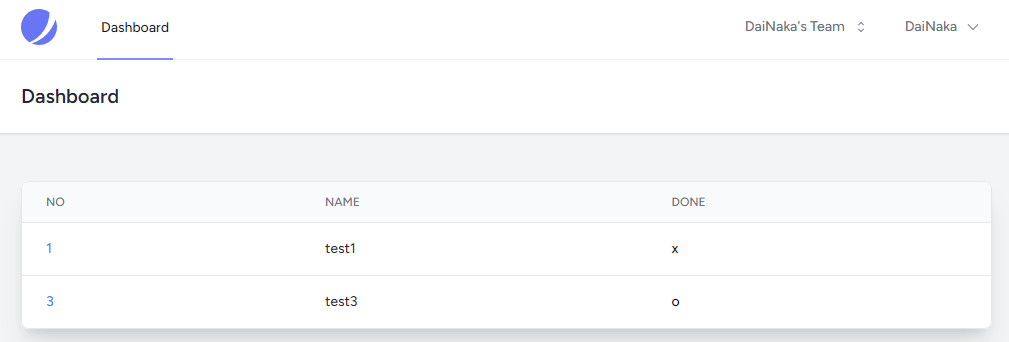
select * from tasks;
+----+---------+-------+------+---------------------+---------------------+
| id | team_id | name  | done | created_at          | updated_at          |
+----+---------+-------+------+---------------------+---------------------+
|  1 |       1 | test1 |    0 | 2023-04-19 01:43:04 | 2023-04-19 01:46:23 |
|  2 |       2 | test2 |    0 | 2023-04-19 01:46:52 | 2023-04-19 01:46:52 |
|  3 |       1 | test3 |    1 | 2023-04-19 01:47:06 | 2023-04-19 01:47:06 |
+----+---------+-------+------+---------------------+---------------------+
ダッシュボード画面にデータベースから取得したタスク一覧を表示
データベースにダミーデータを登録してあるので、ダッシュボードに表示させていきたいと思います。
タスクコントローラーを編集
Path:\App\Http\Controllers\TaskController.php
+ // Auth::user()が使えるようにします
+ use Illuminate\Support\Facades\Auth;

    public function index()
    {
+       // 変数($tasks)にカレントチームのIDに紐づくタスクを代入
+       $tasks = Task::where('team_id', Auth::user()->currentTeam->id)->get();
+
+       // 変数($tasks)を渡しつつ「dashboard」ビューを表示
+       return view('dashboard', compact('tasks'));
    }
ダッシュボードビューを編集
「dashboard」ビューには変数($tasks)が渡されますが、「task-list」コンポーネントビューには変数が渡されないため、未定義の変数となりエラーが表示されます。
下記のようにビューを書き換えることでコンポーネントビューにも変数を渡すようにします。
この処理が出来ていなくて、一日費やしました・・・😢
Path:\resources\views\dashboard.blade.php
            <div class="bg-white overflow-hidden shadow-xl sm:rounded-lg">
-               <x-task-list />
+               <x-task-list :tasks="$tasks"/>
            </div>
この処理をしていないと👇こんな画面が表示されます。

エラー画面
タスクリストコンポーネントビューを編集
ハリボテのテキストを消してデータベースから取得してきたデータを表示させます。
Path:\resources\views\components\task-list.blade.php
                    <tbody class="divide-y divide-gray-200 dark:divide-gray-700">
-                       <tr>
-                           <td class="px-6 py-4 whitespace-nowrap text-sm font-medium">
-                               <a class="text-blue-500 hover:text-blue-700" href="#">1</a>
-                           </td>
-                           <td class="px-6 py-4 whitespace-nowrap text-sm font-medium text-gray-800 dark:text-gray-200">Test Task 1</td>
-                           <td class="px-6 py-4 whitespace-nowrap text-sm font-medium">o</td>
-                       </tr>
-
-                       <tr>
-                          <td class="px-6 py-4 whitespace-nowrap text-sm font-medium">
-                               <a class="text-blue-500 hover:text-blue-700" href="#">2</a>
-                           </td>
-                           <td class="px-6 py-4 whitespace-nowrap text-sm font-medium text-gray-800 dark:text-gray-200">Test Task 2</td>
-                           <td class="px-6 py-4 whitespace-nowrap text-sm font-medium">o</td>
-                       </tr>
-
-                       <tr>
-                           <td class="px-6 py-4 whitespace-nowrap text-sm font-medium">
-                               <a class="text-blue-500 hover:text-blue-700" href="#">3</a>
-                          </td>
-                           <td class="px-6 py-4 whitespace-nowrap text-sm font-medium text-gray-800 dark:text-gray-200">Test Task 3</td>
-                           <td class="px-6 py-4 whitespace-nowrap text-sm font-medium">o</td>
-                       </tr>
+                       @foreach ($tasks as $task)
+                           <tr>
+                               <td class="px-6 py-4 whitespace-nowrap text-sm font-medium">
+                                   <a class="text-blue-500 hover:text-blue-700" href="#">{{$task->id}}</a>
+                               </td>
+                               <td class="px-6 py-4 whitespace-nowrap text-sm font-medium text-gray-800 dark:text-gray-200">{{$task->name}}</td>
+                               <td class="px-6 py-4 whitespace-nowrap text-sm font-medium">@if ($task->done == 1) o @else x @endif</td>
+                           </tr>
+                       @endforeach
                    </tbody>
ルートを変更
今までは直にダッシュボードを開いていましたが、「TaskController」コントローラーの「index」メソッドを経由させるため、下記のとおりに書き換えます。
コントローラーを経由させるのは、データベースから取得したデータを変数に代入してビューに渡しているためです。
ルートでも同じことができますが、LaravelのMVCモデルの考え方に沿うとそうなります。
Path:\routes\web.php
+ use App\Http\Controllers\TaskController;

Route::middleware([
    'auth:sanctum',
    config('jetstream.auth_session'),
    'verified'
])->group(function () {
-   Route::get('/dashboard', function () {
-       return view('dashboard');
-   })->name('dashboard');
+     Route::get('/dashboard', [TaskController::class, 'index'])->name('dashboard');
});
データベースから取得した状態での画面表示
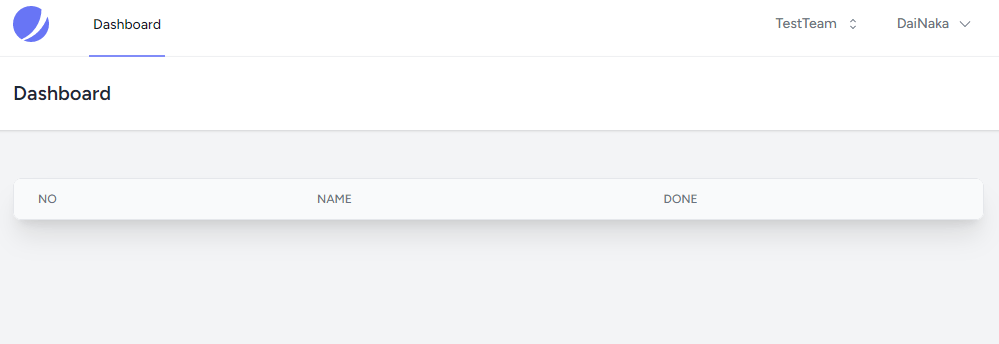
別のチームを作成して表示
試しに別のチームを作成して、チームを切り替えてみた画面です。
右上のチーム名のところでチームを作成したり、切り替えたりすることができます。
タスクの作成画面の作成
ダッシュボード画面にタスクの新規作成ボタンを取り付け、タスクの新規作成ができるようにします。
タスクの新規作成ボタンの追加
新規作成ボタンのコンポーネントを作成します。
下記のPathに新規ファイルcreate-button.blade.phpを作成します。
Path:\resources\views\components\create-button.blade.php
コードはprelineのコンポーネントを参考にしています。
<button type="button" onclick="location.href='{{route('task.create')}}'" class="w-full py-3 px-4 inline-flex justify-center items-center gap-2 rounded-md border border-transparent font-semibold bg-blue-500 text-white hover:bg-blue-600 focus:outline-none focus:ring-2 focus:ring-blue-500 focus:ring-offset-2 transition-all text-sm dark:focus:ring-offset-gray-800">
    New Task
</button>
作成したボタンをダッシュボードに表示
作成したタスク作成ボタン(コンポーネント)をダッシュボードに表示させます。
Path:\resources\views\dashboard.blade.php
<x-app-layout>
    <x-slot name="header">
        <h2 class="font-semibold text-xl text-gray-800 leading-tight">
            {{ __('Dashboard') }}
        </h2>
    </x-slot>

    <div class="py-12">
        <div class="max-w-7xl mx-auto sm:px-6 lg:px-8">
+           {{-- タスク一覧のコンポーネントを表示 --}}
            <div class="bg-white overflow-hidden shadow-xl sm:rounded-lg">
                <x-task-list :tasks="$tasks"/>
            </div>
+           {{-- タスク新規作成ボタンのコンポーネントを表示 --}}
+           <div class="bg-white overflow-hidden shadow-xl sm:rounded-lg mt-5">
+               <x-create-button/>
+           </div>
        </div>
    </div>
</x-app-layout>
タスクの新規作成画面の構成を検討
新規作成ボタン押下後のタスクの新規作成画面を作っていきます。
下記のPathにtaskフォルダを作成して、その中にcreate.blade.phpを作成します。
Path:\resources\views\

create.blade.phpを作っていきます。
Path:\resources\views\task\create.blade.php
<x-app-layout>
    <x-slot name="header">
        <h2 class="font-semibold text-xl text-gray-800 leading-tight">
            {{ __('Dashboard') }}
        </h2>
    </x-slot>

    <div class="py-12">
        <div class="max-w-7xl mx-auto sm:px-6 lg:px-8">
            <div class="bg-white overflow-hidden shadow-xl sm:rounded-lg">
                <div class="p-5">
                    <label for="hs-input-with-add-on-url" class="block text-sm text-gray-700 font-medium dark:text-white">Task Name</label>
                    <form action="{{route('task.store')}}" method="post" class="flex rounded-md shadow-sm">
                        @csrf
                        {{-- 新規タスクにカレントチームのIDを渡すため --}}
                        <input type="hidden" name="team_id" value="{{$user->currentTeam->id}}">
                        {{-- 新規タスクの名前の入力欄 --}}
                        <input type="text" id="name" name="name" class="py-3 px-4 block w-full border-gray-200 shadow-sm rounded-l-md text-sm focus:z-10 focus:border-blue-500 focus:ring-blue-500 dark:bg-slate-900 dark:border-gray-700 dark:text-gray-400" placeholder="Enter new task name here." required autofocus>
                        {{-- 追加ボタン --}}
                        <button type="submit" class="py-3 px-4 inline-flex flex-shrink-0 justify-center items-center gap-2 rounded-r-md border border-transparent font-semibold bg-blue-500 text-white hover:bg-blue-600 focus:z-10 focus:outline-none focus:ring-2 focus:ring-blue-500 transition-all text-sm">
                            Add
                        </button>
                        {{-- キャンセルボタン --}}
                        <button type="button" onclick="location.href='{{route('dashboard')}}'" class="ml-3 py-3 px-4 inline-flex justify-center items-center gap-2 rounded-md border border-transparent font-semibold bg-red-500 text-white hover:bg-red-600 focus:outline-none focus:ring-2 focus:ring-red-500 focus:ring-offset-2 transition-all text-sm dark:focus:ring-offset-gray-800">
                            Cansel
                        </button>
                    </form>
                </div>
            </div>
        </div>
    </div>
</x-app-layout>
タスクコントローラーの処理を作成
画面構成が出来たので、コントローラーに処理を書いていきます。
Path:\App\Http\Controllers\TaskController.php
まずは、public function create()を書いていきます。
    public function create()
    {
-       //
+       // 変数($user)にユーザー情報を代入
+       $user = Auth::user();
+
+       // 変数($user)を渡しつつ「task.create」ビューを表示
+       return view('task.create', compact('user'));
    }
次に、public function store()を書いていきます。
    public function store(Request $request)
    {
-       //
+       // 変数($task)に新しいタスクインスタンスを生成
+       $task = new Task;
+
+       // 変数($task)にフォームで入力された値を代入してデータベースへ反映
+       $task->fill($request->all())->save();
+
+       // 「dashboard」ビューを表示
+       return redirect(route('dashboard'));
    }
モデルの修正
フォームで入力された値をfill()で代入する場合には、意図しないカラムの更新を防ぐため、モデルにあらかじめprotected $fill = [];を指定しておく必要があります。
詳しくは【Laravel】fillableはなぜ必要かを具体的に。の記事をご参考ください。
Path:\App\Models\Task.php
class Task extends Model
{
    use HasFactory;
+   protected $fillable = ['team_id', 'name'];
}
最後にルーティングを設定
View、Controller、Modelの作成が終えたら、ルーティングを設定して動作確認をしていきます。
Path:\routes\web.php
Route::middleware([
    'auth:sanctum',
    config('jetstream.auth_session'),
    'verified'
])->group(function () {
    Route::get('/dashboard', [TaskController::class, 'index'])->name('dashboard');
+   Route::resource('task', TaskController::class)->only('create', 'store');
});
ルーティング情報を書き換えたら、キャッシュをクリアしましょう。
コマンドプロンプトにて下記のコマンドを実行します。
php artisan route:cache
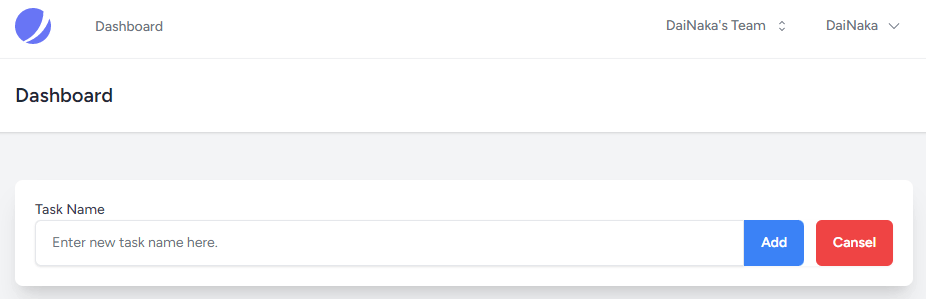
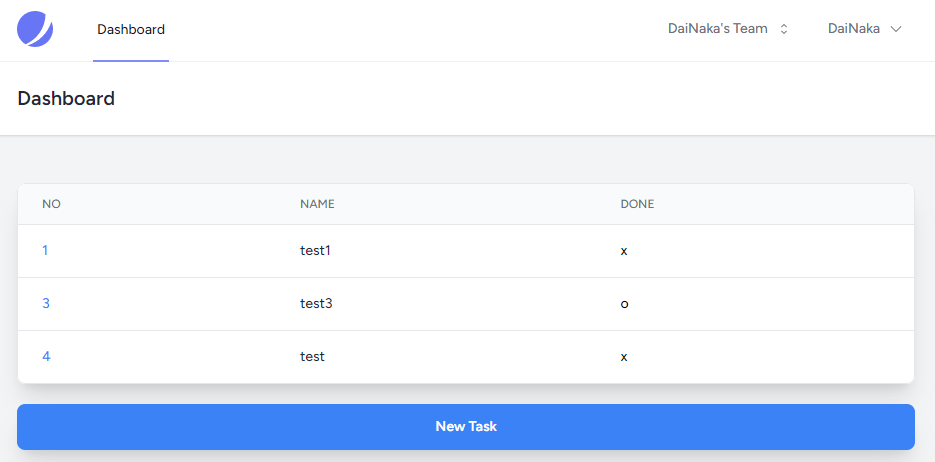
画面構成
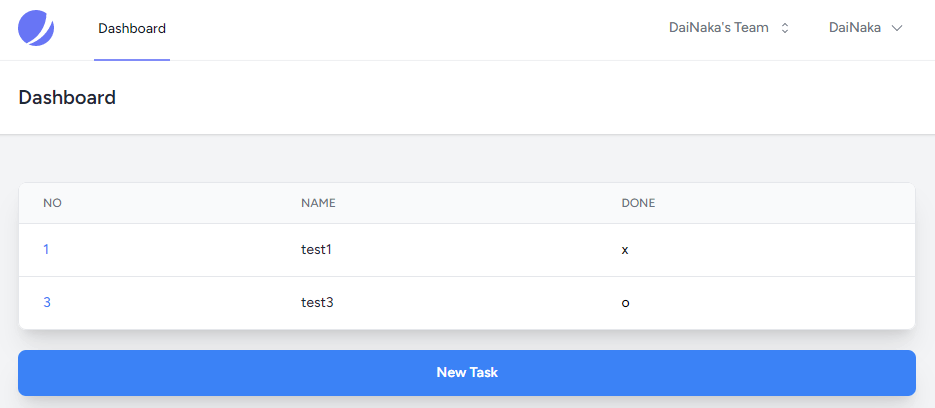
新規作成ボタンが付いたダッシュボード画面
タスクの新規作成画面
タスクの新規作成後のダッシュボード画面
タスクの削除処理の作成
タスクを削除する処理を作成していきます。
まずは画面ですが、今回はダッシュボード画面の各タスクに削除ボタンをつけていきます。
Path:\resources\views\components\task-list.blade.php
                <table class="min-w-full divide-y divide-gray-200 dark:divide-gray-700">
                    <thead class="bg-gray-50 dark:bg-gray-700">
                        <tr>
                            <th scope="col" class="px-6 py-3 text-left text-xs font-medium text-gray-500 uppercase dark:text-gray-400">No</th>
                            <th scope="col" class="px-6 py-3 text-left text-xs font-medium text-gray-500 uppercase dark:text-gray-400">Name</th>
                            <th scope="col" class="px-6 py-3 text-left text-xs font-medium text-gray-500 uppercase dark:text-gray-400">Done</th>
+                           <th scope="col" class="px-6 py-3 text-left text-xs font-medium text-gray-500 uppercase dark:text-gray-400">Delete</th>
                        </tr>
                    </thead>
                    <tbody class="divide-y divide-gray-200 dark:divide-gray-700">
                        @foreach ($tasks as $task)
                            <tr>
                                <td class="px-6 py-4 whitespace-nowrap text-sm font-medium">
                                    <a class="text-blue-500 hover:text-blue-700" href="#">{{$task->id}}</a>
                                </td>
                                <td class="px-6 py-4 whitespace-nowrap text-sm font-medium text-gray-800 dark:text-gray-200">{{$task->name}}</td>
                                <td class="px-6 py-4 whitespace-nowrap text-sm font-medium">@if ($task->done == 1) o @else x @endif</td>
+                               <td class="px-6 py-4 whitespace-nowrap text-sm font-medium">
+                                   <form action="{{route('task.destroy', ['task' => $task->id])}}" method="POST" onSubmit="return submitCheck()">
+                                       @csrf @method('DELETE')
+                                       <button type="submit" class="inline-flex flex-shrink-0 justify-center items-center gap-2 h-[1.25rem] w-[1.25rem] rounded-full border border-transparent font-semibold bg-red-500 text-white hover:bg-red-600 focus:outline-none focus:ring-2 focus:ring-red-500 focus:ring-offset-2 transition-all text-sm  dark:focus:ring-offset-gray-800">x</button>
+                                   </form>
+                               </td>
                            </tr>
                        @endforeach
                    </tbody>
                </table>
削除ボタンを押下時に確認画面が出るようにしたいと思うので、task-list.blade.phpの一番下にでも記述しておきます。
<script>
    // 削除ボタンが押下されたら確認メッセージを表示
    function submitCheck(){
        if(!window.confirm('本当に削除しますか?')) {
            return false;
        }
    }
</script>
タスクコントローラーの処理を作成
画面構成が出来たので、コントローラーに処理を書いていきます。
Path:\App\Http\Controllers\TaskController.php
public function destroy()を書いていきます。
    public function destroy(Task $task)
    {
-       //
+       // 対象となるレコードをデータベースから削除
+       $task->delete();
+
+       // 「dashboard」ビューを表示
+       return redirect(route('dashboard'));
    }
最後にルーティングを設定
ルーティングを設定して動作確認をしていきます。
Path:\routes\web.php
Route::middleware([
    'auth:sanctum',
    config('jetstream.auth_session'),
    'verified'
])->group(function () {
    Route::get('/dashboard', [TaskController::class, 'index'])->name('dashboard');
-   Route::resource('task', TaskController::class)->only('create', 'store');
+   Route::resource('task', TaskController::class)->only('create', 'store', 'destroy');
});
ルーティング情報を書き換えたら、キャッシュをクリアしましょう。
コマンドプロンプトにて下記のコマンドを実行します。
php artisan route:cache
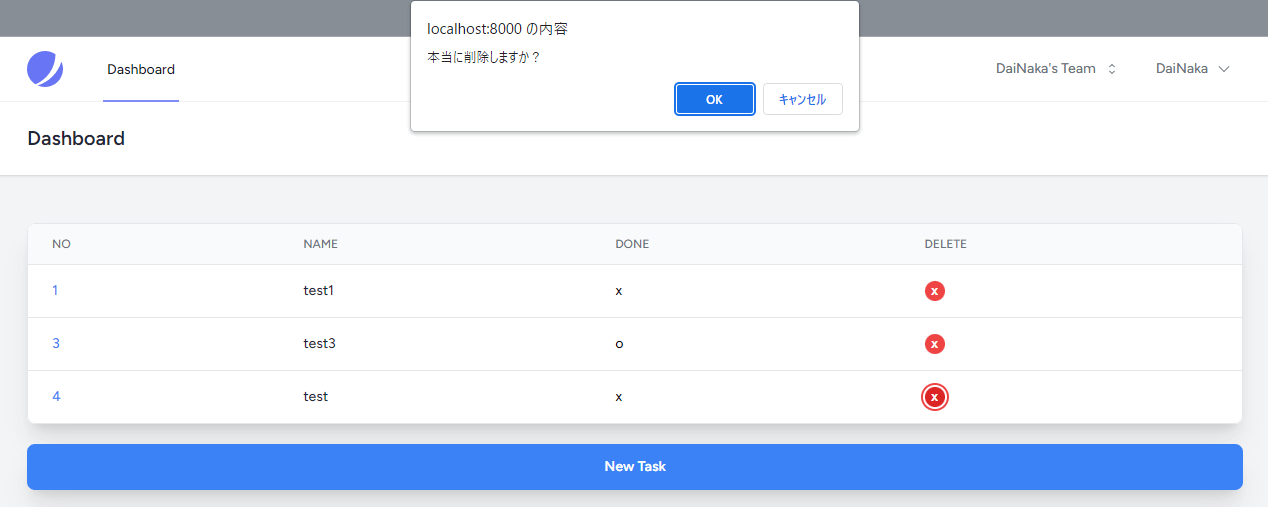
削除ボタンが追加されたダッシュボード画面

削除ボタンが押下された直後の確認画面
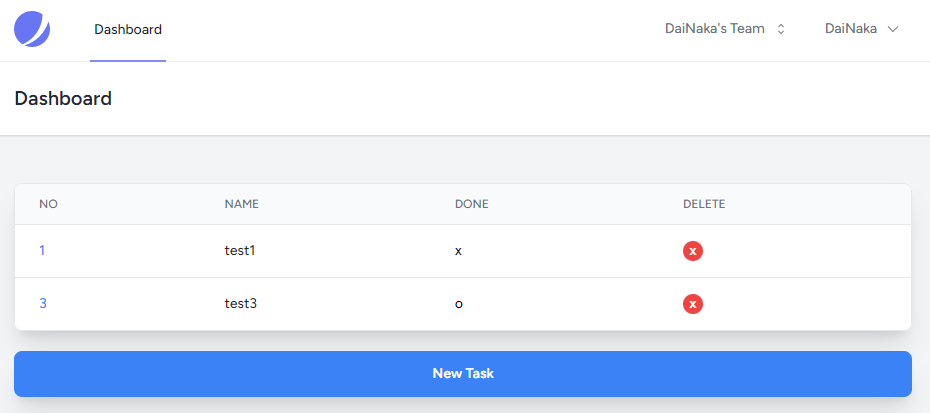
削除された直後のダッシュボード画面
タスクの編集画面の作成
最後にタスクの編集画面を作成していきます。
編集画面の作成
いつも通り、画面から作成していきたいと思います。
下記の場所へedit.blade.phpを作成します。
Path:\resource\views\task\edit.blade.php
<x-app-layout>
    <x-slot name="header">
        <h2 class="font-semibold text-xl text-gray-800 leading-tight">
            {{ __('Dashboard') }}
        </h2>
    </x-slot>

    <div class="py-12">
        <div class="max-w-7xl mx-auto sm:px-6 lg:px-8">
            <div class="bg-white overflow-hidden shadow-xl sm:rounded-lg">
                <div class="p-5">
                    <form action="{{route('task.update', ['task' => $task->id])}}" method="post">
                        @csrf @method('PATCH')
                        {{-- タスクの名前の入力欄 --}}
                        <label for="hs-input-with-add-on-url" class="block text-sm text-gray-700 font-medium dark:text-white">Task Name</label>
                        <input type="text" id="name" name="name" class="py-3 px-4 block w-full border-gray-200 shadow-sm rounded-md text-sm focus:z-10 focus:border-blue-500 focus:ring-blue-500 dark:bg-slate-900 dark:border-gray-700 dark:text-gray-400" placeholder="Enter new task name here." value="{{$task->name}}" required autofocus>
                        {{-- タスク完了チェックボックス --}}
                        <label for="hs-checkbox-in-form" class="flex mt-3 p-3 w-full bg-white border border-gray-200 rounded-md text-sm focus:border-blue-500 focus:ring-blue-500 dark:bg-slate-900 dark:border-gray-700 dark:text-gray-400">
                            <input type="checkbox" id="done" name="done" class="shrink-0 mt-0.5 border-gray-200 rounded text-blue-600 focus:ring-blue-500 dark:bg-gray-800 dark:border-gray-700 dark:checked:bg-blue-500 dark:checked:border-blue-500 dark:focus:ring-offset-gray-800" @if($task->done == 1) checked @endif>
                            <span class="text-sm text-gray-500 ml-3 dark:text-gray-400">Done</span>
                        </label>
                        {{-- 編集ボタン --}}
                        <button type="submit" class="mt-3 py-3 px-4 inline-flex justify-center items-center gap-2 rounded-md border border-transparent font-semibold bg-blue-500 text-white hover:bg-blue-600 focus:outline-none focus:ring-2 focus:ring-blue-500 focus:ring-offset-2 transition-all text-sm dark:focus:ring-offset-gray-800">
                            Update
                        </button>
                        {{-- キャンセルボタン --}}
                        <button type="button" onclick="location.href='{{route('dashboard')}}'" class="mt-3 ml-3 py-3 px-4 inline-flex justify-center items-center gap-2 rounded-md border border-transparent font-semibold bg-red-500 text-white hover:bg-red-600 focus:outline-none focus:ring-2 focus:ring-red-500 focus:ring-offset-2 transition-all text-sm dark:focus:ring-offset-gray-800">
                            Cansel
                        </button>
                    </form>
                </div>
            </div>
        </div>
    </div>
</x-app-layout>
ダッシュボード画面の編集
ダッシュボード画面より編集画面に遷移するためのリンクを修正します。
Path:\resource\views\components\task-list.blade.php
                        @foreach ($tasks as $task)
                            <tr>
                                <td class="px-6 py-4 whitespace-nowrap text-sm font-medium">
-                                   <a class="text-blue-500 hover:text-blue-700" href="#">{{$task->id}}</a>
+                                   <a class="text-blue-500 hover:text-blue-700" href="{{route('task.edit', ['task' => $task->id])}}">{{$task->id}}</a>
                                </td>
                                <td class="px-6 py-4 whitespace-nowrap text-sm font-medium text-gray-800 dark:text-gray-200">{{$task->name}}</td>
                                <td class="px-6 py-4 whitespace-nowrap text-sm font-medium">@if ($task->done == 1) o @else x @endif</td>
                                <td class="px-6 py-4 whitespace-nowrap text-sm font-medium">
                                    <form action="{{route('task.destroy', ['task' => $task->id])}}" method="POST" onSubmit="return submitCheck()">
                                        @csrf @method('DELETE')
                                        <button type="submit" class="inline-flex flex-shrink-0 justify-center items-center gap-2 h-[1.25rem] w-[1.25rem] rounded-full border border-transparent font-semibold bg-red-500 text-white hover:bg-red-600 focus:outline-none focus:ring-2 focus:ring-red-500 focus:ring-offset-2 transition-all text-sm  dark:focus:ring-offset-gray-800">x</button>
                                    </form>
                                </td>
                            </tr>
                        @endforeach
タスクコントローラーの処理を作成
画面構成が出来たので、コントローラーに処理を書いていきます。
Path:\App\Http\Controllers\TaskController.php
まずは、public function edit()を書いていきます。
    public function edit()
    {
-       //
+       // 変数($user)を渡しつつ「task.edit」ビューを表示
+       return view('task.edit', compact('task'));
    }
次に、public function update()を書いていきます。
    public function store(Request $request)
    {
-       //
+       // タスク名にフォームから取得したタスク名を代入
+       $task->name = $request->name;
+
+       // タスク完了チェックボックスが"on"か、そうでないかチェック
+       // "on": 1を代入 / "off": 0を代入
+       if ($request->done == "on") {
+           $task->done = 1;
+       } else {
+           $task->done = 0;
+       };
+
+       // データベースへ反映
+       $task->save();
+
+       // 「dashboard」ビューを表示
+       return redirect(route('dashboard'));
    }
最後にルーティングを設定
View、Controllerの作成が終えたら、ルーティングを設定して動作確認をしていきます。
Path:\routes\web.php
Route::middleware([
    'auth:sanctum',
    config('jetstream.auth_session'),
    'verified'
])->group(function () {
    Route::get('/dashboard', [TaskController::class, 'index'])->name('dashboard');
-   Route::resource('task', TaskController::class)->only('create', 'store', 'destroy');
+   Route::resource('task', TaskController::class)->only('create', 'store', 'edit' ,'update', 'destroy');
});
ルーティング情報を書き換えたら、キャッシュをクリアしましょう。
コマンドプロンプトにて下記のコマンドを実行します。
php artisan route:cache
画面構成
編集前のダッシュボード画面

編集中画面
No.1のタスクの名前を変更した後、完了(Done)していきます。

変更後のダッシュボード画面
No.1のタスクのタスク名とDoneが変わっていることが分かります。

デモサイト
作成したデモサイトは下記にデプロイしてあります。
ご自由にテストしてください。