大学生、NeovimにおけるLazyvimの環境を構築した
文量が多くなったので『大学生、Windowsにおける快適な操作環境を思案』に書いていた内容を移しました。
読者対象
- Neovimの環境構築を考えたい人
- Lazyvimの環境構築を考えたい人
導入
Vivaldiで動画を流しながら検索をし、Visual Studio Codeを二つ立ち上げ、Godotを立ち上げる。そんな使い方を一週間再起動もせず使えば、ノートパソコンの上部キーボード部分は灼熱です。
そんななのでNeovimを使います。Neovimで負荷を軽くしようという算段です。
Neovimの、特にLazyvimの環境構築を説明します。なお、この記事は深いところまで説明していない点に注意してください。
また、Neovimを始めて三ヶ月です。Vimもだいたいそのくらいです。
環境
Windows 11 Pro
Neovim : 0.11
インストール
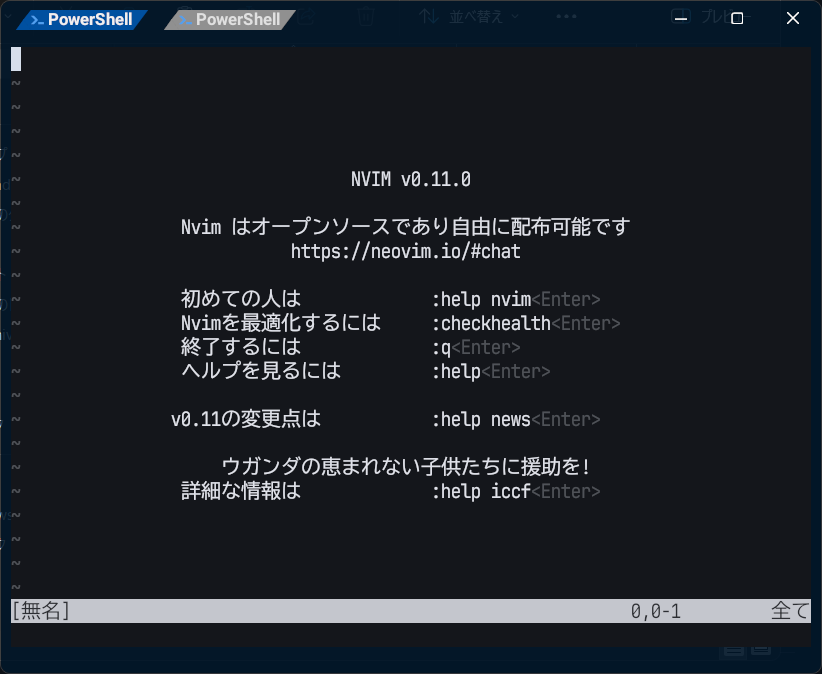
Neovim
こちらからインストールしてください。私は.msiのインストーラーを使いました。
インストールが完了したらnvimと打って起動するか確認してください。
Lazyvim
インストールできたら次はLazyvimを入れます。 こちらの記事を読みながらダウンロードしてください。
また、Lazyvimの機能を最大限に活かしたい場合、Lazygitやfzfなどを入れる必要性も出てきます。ターミナルの右上に赤い枠が出たら、checkhealthでエラーを見ながら一つずつダウンロードしていきましょう。下の記事が参考になります。
Lazyvimではここら辺が必要ですね。
- Using Neovim >= 0.9.0
-
gitis install -
rgis install -
fdis install -
lazygitis install -
fzfis install -
curlis install
この環境ではもともとlazygitとfdが入っていない状態でしたので入れました。
設定
もちろんこのままでも使えますが、使いやすいように調整していきましょう。
Windowsの場合、ディレクトリはユーザ名\AppData\Local\nvimにあります。
設定が終わったらどこかにdotfileを作ってバックアップを取れるようにしておくのが吉です。
最終的な見た目はこのようになります。
lazy = trueとは
プラグインなどの導入を行う前に行っておきたいことがあります。
lua\config\lazy.luaを開いて、以下のコードを変更してくだい。
  defaults = {
    -- By default, only LazyVim plugins will be lazy-loaded. Your custom plugins will load during startup.
    -- If you know what you're doing, you can set this to `true` to have all your custom plugins lazy-loaded by default.
-     lazy = false,
+     lazy = true,
    -- It's recommended to leave version=false for now, since a lot the plugin that support versioning,
    -- have outdated releases, which may break your Neovim install.
    version = false, -- always use the latest git commit
    -- version = "*", -- try installing the latest stable version for plugins that support semver
  },
初心者がこれを変えると碌な目に合わないことが多々ありますが・・・動作が分かっていてかつどのように影響を及ぼすかを把握しているなら問題ないと思われます。
このコードの意味は、プラグインすべてを遅延読み込みに変更するです。プラグインは基本的に起動時読み込みですが、これを入れることでプラグインを読み込むタイミングを変更することができます。
遅延読み込みに変更することで、Neovimの起動を早くしたり限定的なプラグインを常に起動しないようにしたりすることができます。
これを変える影響として、遅延読み込みによってエラーが発生する場合がある点に気をつけてください。これからの動作でうまく動かない内容があれば、この設定をfalseに変えて動作を見るのがおすすめです。
lua\config
option.lua
コメントが入っているので、それを読めばだいたい分かります。
おすすめの設定とかを下に書いておきます。
-- Options are automatically loaded before lazy.nvim startup
-- Default options that are always set: https://github.com/LazyVim/LazyVim/blob/main/lua/lazyvim/config/options.lua
-- Add any additional options here

--[[ Neovim設定 ]]--
vim.opt.mouse = "a"  -- マウス操作を有効化
vim.opt.clipboard = 'unnamedplus' -- クリップボードの変更

--[[ エンコーディング設定 ]]--
vim.scriptencoding = "utf-8"
vim.opt.encoding = "utf-8" -- Neovimのデフォルト文字コード
vim.opt.fileencoding = "utf-8" -- ファイルの保存時
vim.opt.fileencodings = "utf-8,utf-16,sjis," -- ファイル読み込み時推定
vim.opt.list = true -- インデントの表示
vim.opt.listchars = { -- インデントの文字
  space = "-",
  tab = "> ",
}

--[[ 表示設定 ]]--
vim.opt.cursorline = true -- カーソル行のハイライトを有効にする
vim.opt.number = true -- 行番号を表示
vim.opt.relativenumber = false -- 絶対行の表示

--[[ エディタ設定 ]]--
vim.opt.fixeol = false -- 最後の行に空行を入れない
-- 新しい行を改行で追加した時に、ひとつ上の行のインデントを引き継がせます。
vim.opt.autoindent = true
vim.opt.smartindent = true

--[[ 検索設定 ]]--
vim.opt.hlsearch = true  -- 検索結果をハイライト

--[[ ヘルプ設定 ]]--
vim.opt.helplang = "ja"  -- ヘルプの言語を日本語に設定

-- Python
vim.g.python3_host_prog = "C:\\Users\\ユーザ名\\Documents\\.venv\\3.12.5\\Scripts\\python.exe"
lazyvimだとすでに設定されている内容もありますが、このように設定方法を調べることでどのような動作をするかを覚えられます。
vim.opt.clipboard = 'unnamedplus'を入れておくと、コピーペーストをOSのクリップボードで使えます。便利なので使うといいでしょう。
vim.scriptencoding、vim.opt.encoding、vim.opt.fileencodingはファイルのエンコード、文字コードです。何も考えずutf-8にしてください。場合によってはutf-16でもいいかもしれません。
fileencodingsは左から順番に文字コードを推定するようにします。
vim.g.python3_host_progでPythonのパスを指定するようにします。.venvを使っているのであれば、こちらの記事が使えるかと思います。
keymap.lua
標準のエディタに寄せている感じになっています。
-- Keymaps are automatically loaded on the VeryLazy event
-- Default keymaps that are always set: https://github.com/LazyVim/LazyVim/blob/main/lua/lazyvim/config/keymaps.lua
-- Add any additional keymaps here

-- [[ Neovimの挙動 ]] --

-- インサートを抜ける
vim.api.nvim_set_keymap('i', 'jkl', '<Esc>', { noremap = true, silent = true })

-- ペースト挙動変更
vim.keymap.set('n', 'p', 'p`]', { desc = 'Paste and move to the end' })
vim.keymap.set('n', 'P', 'P`]', { desc = 'Paste and move to the end' })

--[[ コントロールキー・シフトキー ]] --

-- ノーマルモードで Ctrl + 矢印キーで単語間を移動
vim.keymap.set("n", "<C-Left>", "b", { desc = "Move to previous word" })
vim.keymap.set("n", "<C-Right>", "w", { desc = "Move to next word" })
-- 挿入モードで Ctrl + 矢印キーで単語間を移動
vim.keymap.set("i", "<C-Left>", "<C-o>b", { desc = "Move to previous word in insert mode" })
vim.keymap.set("i", "<C-Right>", "<C-o>w", { desc = "Move to next word in insert mode" })
-- ビジュアルモードで Ctrl + 矢印キーで単語間を移動
vim.keymap.set("v", "<C-Left>", "b", { desc = "Move to previous word in visual mode" })
vim.keymap.set("v", "<C-Right>", "w", { desc = "Move to next word in visual mode" })


-- 挿入モードで Shift + 矢印キーでコピーモード
vim.keymap.set("n", "<S-Left>", "v", { desc = "Copy Mode to previous char" })
vim.keymap.set("n", "<S-Right>", "v", { desc = "Copy Mode to next char" })


-- Ctrl + zで取り消し
vim.keymap.set("n", "<C-z>", "u", { noremap = true, silent = true })
vim.keymap.set("i", "<C-z>", "<C-o>u", { noremap = true, silent = true }) -- 挿入モード対応

-- Ctrl + cでコピー
vim.keymap.set("v", "<C-c>", "y`]", { noremap = true, silent = true })

-- Ctrl + vで貼り付け
vim.keymap.set("n", "<C-v>", "p`]", { noremap = true, silent = true })
vim.keymap.set("i", "<C-V>", "<C-o>p`]", { noremap = true, silent = true }) -- 挿入モード対応
この設定で注意したい点として、pとPの動作が、カーソルがコピーした場所に留まらず、コピーした文字の先端に移動するようになっています。通常のVimとは異なる動きに注意してください。
インサートを抜ける動作は「jkl」としています。「jk」や「jj」といろいろありますが・・・ここまでしたらどの単語にも引っかからないはずです。
また、コントロールキー、シフトキーでの動作は、通常のエディタと同様の動きを模倣するために追加しています。ウェブなどのコピーを扱う際、yやpを左手で打つのが億劫だったりしたので追加しました。
lazy.lua
Lazyvimを使う場合、init.luaを変更していなければlazy.luaが最初に読み込まれる設定ファイルとなります。
この設定ファイルはlazyvimのバージョンを確認して更新したり、設定したプラグインの読み込みを行うコードが最初から組み込まれています。
最初にlazy = trueに書き換える行動を行いましたが、この他にも起動を早くする設定があるようです。私は詳しく見ていないのであまり分かりませんが・・・。
  spec = {
    -- add LazyVim and import its plugins
    { "LazyVim/LazyVim", import = "lazyvim.plugins" },
    -- import/override with your plugins
    { import = "plugins" },
  },
「add LazyVim and import its plugins」と書いてある通り、読み込みたいプラグインが入っているディレクトリがあれば、import = ""にディレクトリ名を書くことで読み込むようにしてくれます
私はno-pluginsを作って、エラーや競合が起きて使わないけど興味のあるプラグインを入れています。
Neovimでは最初に読み込まれる標準のプラグインがありますが、こちらを読み込まないようにすることで少々起動が早くなります。
私は圧縮ファイル関連のプラグインを中心に読み込み停止しています。
  performance = {
    rtp = {
      -- disable some rtp plugins
      disabled_plugins = {
        "tutor",
        "tohtml",
        -- "filetypes",
        -- "ftplugin",
        -- "matchit",
        -- "matchparen",
        -- "netrw",
        -- "netrwPlugin",
        "gzip",
        "tar",
        "tarPlugin",
        "zip",
        "zipPlugin",
        "vimball",
        "vimballPlugin",
        "install_default_menus",
        "install_syntax_menu",
        "loading_mswin",
      },
    },
  }
after
afterディレクトリはよく分かっていません。中に関連するファイルを入れたら機能するとだけ知っています。
ftplugin
ftpluginは中にプログラミング言語のファイルを入れると、関連する言語に合わせて動作してくれるようです。
下のコードをプログラミング言語のファイル名に置き換えると、ファイルタイプに合致した設定に自働で切り替えてくれます。
-- オートフォーマット
vim.g.autoformat = false

-- タブをスペースに変換
vim.opt.expandtab = true
-- タブを4スペースとして扱う
vim.opt.tabstop = 4
-- スペース4つ分のタブ入力をサポート
vim.opt.softtabstop = 4
-- インデント時のスペース幅
vim.opt.shiftwidth = 4
例として、LuaとRustはこんな感じにしています。
vim.g.autoformat = false

vim.bo.expandtab = true
vim.bo.tabstop = 2
vim.bo.shiftwidth = 2
vim.bo.softtabstop = 2
vim.g.autoformat = false

vim.bo.expandtab = true
vim.bo.tabstop = 4
vim.bo.shiftwidth = 4
vim.bo.softtabstop = 4
lsp
うまく扱えていません。具体的にはRustのrust-analyzerにあるclippyが機能していません。
Neovim 0.11からMasonだけでいいという情報に乗られてnvim-lspconfigを使うのを止めてしまいました。
素直にnvim-lspconfigを素直に使えばよかったかな。使う言語が増えたらMasonでLSPを追加していきます。
return{
  -- cmd = { 'clangd' },
  -- filetypes = { 'c','cpp' },
  settings = { }
}
return{
  -- cmd = { 'rust-analyzer' },
  -- filetypes = { 'rust' },
  settings = {
    ["rust-analyzer"] = {
      check = {
        command = "clippy",
      },
      extraArgs = {
        "clippy::needless_return"
      },
    }
  }
}
return {
  -- cmd = { 'lua-language-server' },
  -- filetypes = { 'lua' },
  settings = { }
}
時間があればこちらの記事を参考にして再構築していきます。
lua\plugins
現在18個のファイルがあります―――が、Lazyvim側で設定されているプラグインもあるので実体は15個くらいかと思われます。半分はLazyvimに標準で入っているはずです。
順番は適当に並べています。
event = '~~~'とは?
Neovimに標準的にある遅延読み込みです。
起動するときに、最初から起動するものと後から起動するものを設定できます。
この記事の表が分かりやすかったのでおすすめです。
colorscheme.lua
return {
  lazy = false,
  event = 'VimEnter',
  priority = 1000,
  --[[ - Like Color Scheme -
  "oxfist/night-owl.nvim"
  'cocopon/iceberg.vim'
  --]]
  {
    "oxfist/night-owl.nvim",
    config = function()
      require("night-owl").setup({
        italics = false,
        bold = true,
        underline = true,
        undercurl = true,
        transparent_background = true,
      })
    end,
  },
  {
    "LazyVim/LazyVim",
    opts = {
      colorscheme = "night-owl",
    },
  },
}
Neovimのカラースキームを設定するファイルです。
WeztermでNight-Owlを使用しているのでNeovimも同じにしています。
ここらへんに関しては軽く調べると管理やしやすい方法があったりします。興味があれば調べてみましょう。
priority = 1000はプラグインを読み込む優先度です。高ければ高いほど先に読み込みます。
snacks.lua
return {
  "folke/snacks.nvim",
  priority = 1000,
  lazy = false,
  ---@type snacks.Config
  opts = {
    dashboard = { enabled = true,
      preset = {
      -- Font Name: Slant
        header = [[
    _   ____________ _    ________  ___
   / | / / ____/ __ \ |  / /  _/  |/  /
  /  |/ / __/ / / / / | / // // /|_/ /
 / /|  / /___/ /_/ /| |/ // // /  / /
/_/ |_/_____/\____/ |___/___/_/  /_/
        ]],
      }
    },
    indent = { enabled = false },
  },
}
Neovimにダウンロードできる便利な外部プラグインの詰め合わせです。
Neovimの最初の起動画面を変更するプラグインや、Zenモードに入るプラグンなど便利なものが入っています。
dashboardのアスキーアートの文字は下記サイトのSlantを使用しています。
また、アスキーアートを自動生成するサイトなどもあるようです。
vimdoc-ja.lua
return {
  'vim-jp/vimdoc-ja',
  lazy = true,
  keys = {
    { "h", mode = "c", },
  },
}
Vimのヘルプ表示を日本語化するプラグインです。 こちらの記事を参考にしました。
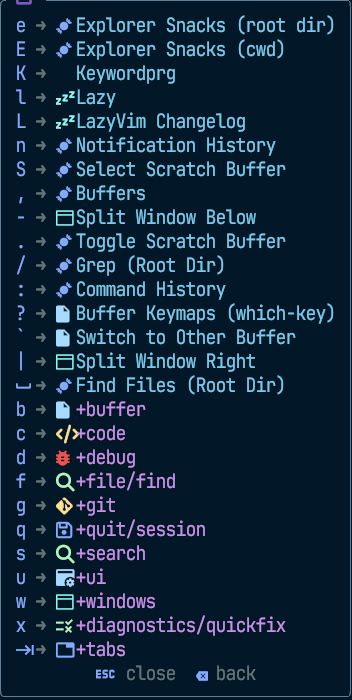
wihch-key.lua
return {
  'folke/which-key.nvim',
  lazy = true,
  event = "VeryLazy",
}
example.luaに入っていました。こんなのを表示してくれます。
trouble.lua
return{
  "folke/trouble.nvim",
  lazy = true,
  cmd = { "Trouble", "TroubleToggle" },
  opts = {},
}
よく知らないプラグイン。Lazyvimのexample.luaに入っていたはず。
nvim-scrollbar.lua
return {
  "petertriho/nvim-scrollbar",
  event = {"BufRead","BufNewFile"},
  config = function()
    require("scrollbar").setup({
    })
  end
}
petertriho/nvim-scrollbar
Neovimにスクロールバーを表示するプラグインです。
エラーの場所がなんとなく分かるのでお勧めです。
rainbow-delimiters.lua
return{
  "HiPhish/rainbow-delimiters.nvim",
  event = {"BufReadPost","BufNewFile"},
  lazy = true,
  config = function()
    require('rainbow-delimiters.setup').setup {
      strategy = {
        -- ...
      },
      query = {
        -- ...
      },
      highlight = {
        'RainbowDelimiterYellow',
        'RainbowDelimiterViolet',
        'RainbowDelimiterBlue',
        'RainbowDelimiterGreen',
      },
    }
  end,
}
Visual Studio CodeのBracket機能をNeovimに追加する機能です。Visual Studio Codeと似たような色合いにしています。
indent-blankline.lua
return {
  "lukas-reineke/indent-blankline.nvim",
  lazy = true,
  event = {"BufReadPost","BufNewFile"},

  main = "ibl",
  ---@module "ibl"
  ---@type ibl.config
  config = function()
    local highlight = {
      "Red",
      "Orange",
      "Yellow",
      "Green",
      "Blue",
      "Purple",
    }
    local hooks = require "ibl.hooks"
    -- create the highlight groups in the highlight setup hook, so they are reset
    -- every time the colorscheme changes
    hooks.register(hooks.type.HIGHLIGHT_SETUP, function()
      vim.api.nvim_set_hl(0, "Write", { fg = "#FFFFFF" })
      vim.api.nvim_set_hl(0, "Red", { fg = "#FF0000" })
      vim.api.nvim_set_hl(0, "Orange", { fg = "#FFA500" })
      vim.api.nvim_set_hl(0, "Yellow", { fg = "#FFFF00" })
      vim.api.nvim_set_hl(0, "Green", { fg = "#008000" })
      vim.api.nvim_set_hl(0, "Blue", { fg = "#0000FF" })
      vim.api.nvim_set_hl(0, "Purple", { fg = "#800080" })
    end)

    require("ibl").setup {
      indent = { char = "▏", highlight = highlight },
      scope = { highlight = "Write" },
    }
  end,
}
こちらはVisual Studio Codeのインデント(colorCustomizations)と同じように表示してくれるプラグインです。こちらもVisual Studio Codeと同じ色になるよう調整しました。
scope = { highlight = "Write" },で現在いるインデントを白くすることができます。これはおすすめです。
ところで、BufReadとBufReadPostの違いって?
こちらの記事によるとこのようになっているようです。
BufNewFile:存在しないファイルの編集を始めたとき
BufReadPre:新しいバッファの編集を始めたとき。ファイルを読み込む前
BufRead:新しいバッファの編集を始めたとき。
BufReadPost:新しいバッファの編集を始めたとき。
BufReadCmd:新しいバッファの編集を始める前。
同じ説明じゃ分からんね。全く分からないからChatGPTに投げてみたよ。ちょいと出力を修正してペタリ。
BufRead と BufReadPost の違い
-
BufRead
→ ファイルをバッファに読み込んだ直後に発火(ただし、この時点ではNeovim内部のバッファ設定などは未調整)。 -
BufReadPost
→ ファイルがバッファに読み込まれたさらに後、
バッファの設定(例えばfiletype detectionとか)も終わった後に発火。
わかりやすいイメージ
BufReadPre → BufRead → BufReadPost
ちょうわかりやすいイメージ
-
BufReadPre: 「ファイルをこれから読むよ!」 - ファイル読み込み開始
-
BufRead: 「ファイル読み終えたよ!(ただし、まだ細かい設定はこれから)」 - Neovimが filetype を決めたり、syntax highlight を設定したりする
-
BufReadPost: 「ファイルも読み終わったし、filetypeも設定完了したよ!」
ts-comments.lua
return {
  "folke/ts-comments.nvim",
  lazy = true,
  event = {"BufRead","BufNewFile"},
}
gccでコメントを追加したりできるプラグイン。
lualine.lua
return {
  "nvim-lualine/lualine.nvim",
  lazy = true,
  event = {"BufReadPost","BufNewFile"},
  -- 設定
  init = function()
  end,
  opts = function()
  end,
}
下部にステータスラインを表示するプラグイン。
ちゃんと調べて設定したいです。
bufferline.lua
return {
  "akinsho/bufferline.nvim",
  lazy = true,
  event = {"BufReadPost","BufNewFile"},
}
Visual Studio Codeにように上にタブバーを追加するプラグイン。実際のところはバッファを表示しているもよう。
mason.lua
return {
  "williamboman/mason.nvim",
  "williamboman/mason-lspconfig.nvim",
  lazy = true,
  cmd = {
    "Mason",
    "MasonUpdate",
    "MasonInstall",
    "MasonUninstall",
    "MasonUninstallAll",
    "MasonLog",
  },
  config = function()
    local ensure_installed = {
      "clangd",-- C
      "rust_analyzer",-- Rust
    }
    require("mason-lspconfig").setup({
      automatic_installation = false,
      ensure_installed = ensure_installed,
    })
  end,
}
言語サーバのLSPやデバッガのDAPなどをインストールできるプラグイン。こちらはインストーラーみたいなものと考えて問題ない。
mason-lspconfigと合わせて使う。場合によってはnvim-lspconfigと使うが、Neovim0.11からは必要ないという話がある。
nvim-dap.lua
return {
  "mfussenegger/nvim-dap",
  lazy = true,
  event = {"BufRead","BufNewFile"},
}
こちらもexample.luaに入っていたはず。デバッグ用のプラグインなのだが、デバッガが必要になるほどNeovimを使い込んでいないので分からない。
仕組み的にはLSPのデバッガ版と考えてよい。ちなみにDAPと呼ぶようだ。
詳しくはこちらを読もう。
blink.lua
return {
  "saghen/blink.cmp",
  version = not vim.g.lazyvim_blink_main and "*",
  build = vim.g.lazyvim_blink_main and "cargo build --release",
  lazy = true,
  event = {"InsertEnter","CmdLineEnter"},

  opts_extend = {
    "sources.default",
  },
  ---@module 'blink.cmp'
  ---@type blink.cmp.Config
  opts = {
    keymap = { preset = "super-tab" },
    appearance = {
      -- 'mono' (default) for 'Nerd Font Mono' or 'normal' for 'Nerd Font'
      -- Adjusts spacing to ensure icons are aligned
      nerd_font_variant = "mono"
    },
    -- Default list of enabled providers defined so that you can extend it
    -- elsewhere in your config, without redefining it, due to `opts_extend`
    sources = {
      default = { 'snippets','lsp','path','buffer' },
    },

    completion = {
      documentation = { auto_show = true },
      -- menu = { border = "rounded" },
      -- documentation = { window = { border = 'single' } },
    },
  }
}
Neovimを始めたばかりならβ版でも大きな問題はないだろうと考え、nvim-cmpからblinkへ変更しました。
設定が行いやすくて使いやすい。これからNeovimを使うならblinkを勧めたほうがいいかもしれない?
この二つを読んどけば大丈夫なはずです。
neocodeium.lua
return {
  "monkoose/neocodeium",
  lazy = true,
  event = "InsertEnter",

  config = function()
    local neocodeium = require("neocodeium")
    neocodeium.setup()
    -- https://zenn.dev/renlqqz/articles/8f98789ea8b280 --
    vim.keymap.set("i", "<A-f>", neocodeium.accept)
    -- 複数候補ある場合に次の候補を表示
    vim.keymap.set("i", "<C-j>", function()
      neocodeium.cycle(1)
    end)
    -- 前の候補を表示
    vim.keymap.set("i", "<C-k>", function()
      neocodeium.cycle(-1)
    end)
  end
}
私がメインで使っているAI補完です。無料で補完できるAIですごく優秀です。登録はこちらからできます。
このプラグインの使い方はこちらの記事を読んでください。
最初の大まかなことはChaGPTやCludeに任せているので、入力時のチャットによる補完は殆ど使いません。なので、Codeiumを使ったAI補完のみ動かすようにしています。
補完のメニューに出すのではなく、Visual Studio Codeのように入力時に薄く表示してくれる形式が好きです。
また、前まで公式はVimSprictしか対応していませんでしたが、ようやっと公式でLuaを使用したNeovim用のプラグインが配布されています。
どっちがいいかはドキュメントを読んで判断して、お好みで選びましょう。
crates.lua
return {
  'saecki/crates.nvim',
  event = { "BufRead Cargo.toml" },

  config = function()
    require('crates').setup{
      neoconf = {
        enabled = true,
      },
      lsp = {
        enabled = true,
        on_attach = function(client, bufnr)
          -- the same on_attach function as for your other lsp's
        end,
        actions = true,
        completion = true,
        hover = true,
      },
    }
  end
}
RustのCargoに使うcrateを使うのに使えるプラグイン。
かなり使いやすい。
nvim-treesitter.lua
return {
  "nvim-treesitter/nvim-treesitter",
  build = ':TSUpdate',
  install = function()
    require("nvim-treesitter.install").setup({
      prefer_git = false,
      compilers = { "cl" }
    })
  end,
  lazy = true,
  event = { "BufReadPost", "BufNewFile" },
  cmd = { "TSUpdateSync", "TSUpdate", "TSInstall" },
  keys = {
    { "<c-space>", desc = "Increment Selection" },
    { "<bs>", desc = "Decrement Selection", mode = "x" },
  },

  opts_extend = { "ensure_installed" },
  config = function()
    require("nvim-treesitter.configs").setup({
      enable = true,
      auto_install = false,
      modules = {},
      ensure_installed = {
        "html",
        "json",
        "yaml",
        "markdown",
        "markdown_inline",
        "javascript",
        "typescript",
        "bash",
        "lua",
        "python",
        "c",
        "cpp",
        "rust",
      },
      ignore_install = {},
      highlight = { enable = true },
      indent = { enable = true },
      sync_install = false,
    })
  end
}
使えているのか全く分からないプラグイン。
Lazyvimに標準で入っているから使えていると信じて今日もNeovimを立ち上げる。
もし、Windowsを使っていてcl.exeでのコンパイルを行う派であるなら、下のコードを入れないとうまく起動しない可能性があります。
  install = function()
    require("nvim-treesitter.install").setup({
      prefer_git = false,
      compilers = { "cl" }
    })
  end,
nvim-treesitter-context.lua
return {
  "nvim-treesitter/nvim-treesitter-context",
  dependencies = { "nvim-treesitter/nvim-treesitter" },
  lazy = true,
  event = { "BufReadPost", "BufNewFile" },

  opts = function()
    local tsc = require("treesitter-context")
    Snacks.toggle({
      name = "Treesitter Context",
      get = tsc.enabled,
      set = function(state)
        if state then
          tsc.enable()
        else
          tsc.disable()
        end
      end,
    }):map("<leader>ut")
    return { mode = "cursor", max_lines = 3 }
  end,
}
example.luaに入っていたプラグイン。何をやっているかよく分からない。
nvim-treesitter-textobjects.lua
return{
  "nvim-treesitter/nvim-treesitter-textobjects",
  dependencies = { "nvim-treesitter/nvim-treesitter" },
  lazy = true,
  event = { "BufReadPost", "BufNewFile" },
}
こちらもnvim-treesitter-context.lua同様なにをしているのか分からない。
その他
他のプラグインはLazyvim標準のを使用しています。
終わり
これでVivaldiを動画を流すウィンドウと検索をするウィンドウを二つ立ち上げてGodotを立ち上げても、Visual Studio Codeを二つ立ち上げるよりNeovimを二つ立ち上げる方が軽くなりました!
パソコンが壊れた時用のdotfileを作るのも目的だったので完成してよかったです。
軽い作業はNeovimやmicroを使うようにしたら、明らか動作が軽くなったので今後も多分使い続けます。いずれは重い作業もできるようにしたいです。
Discussion