🦁
備忘録03 Flutter ログイン・ログアウト機能の実装
概要
備忘録02同様、ログイン・ログアウト機能が搭載されているため、
そのまま使いまわせるように記録に残す。
やる作業
- ログインのプロバイダ設定
- パッケージのインストール
- ログイン・ログアウト機能実装
前提
firebaseでプロジェクトを作成ずみで、firebaseと紐付けが済んでいる。
過去に紐付けた時のやり方を記事に残した。
1. ログインのプロバイダ設定
備忘録02 Flutter アカウント作成機能の実装の記事の作業手順1に載っているため、
そちらを参照
2.パッケージのインストール
これも備忘録02 Flutter アカウント作成機能の実装の記事の作業手順2に載っているため、
そちらを参照
3. ログイン・ログアウト機能実装
以下コードで実装した。
メールアドレスとパスワードを入力して、
ログインボタンをタップするとログインする。
ログアウトボタンをタップするとログアウトする。
今回はprintを使ってログイン/ログアウトできているか確認する。
main.dart
import 'package:firebase_auth/firebase_auth.dart';
import 'package:firebase_core/firebase_core.dart';
import 'package:flutter/material.dart';
import 'package:testapp/firebase_options.dart';

void main() async {
  WidgetsFlutterBinding.ensureInitialized();
  await Firebase.initializeApp(
    options: DefaultFirebaseOptions.currentPlatform,
  );
  runApp(const MyApp());
}

class MyApp extends StatelessWidget {
  const MyApp({super.key});

  // This widget is the root of your application.
  @override
  Widget build(BuildContext context) {
    return MaterialApp(
      title: 'Flutter Demo',
      theme: ThemeData(
        colorScheme: ColorScheme.fromSeed(seedColor: Colors.deepPurple),
        useMaterial3: true,
      ),
      home: const MyHomePage(title: 'ユーザー登録画面'),
    );
  }
}

FirebaseAuth auth = FirebaseAuth.instance;

// ログイン機能
Future loginEmailAndPass(String email, String passWord) async {
  await auth.signInWithEmailAndPassword(
    email: email,
    password: passWord,
  );

  final loginEmail = getLoginEmail();

  print('ログインしました:$loginEmail');
}

// ログアウト機能
void logout() async {
  await auth.signOut();
  final loginEmail = getLoginEmail();
  if (loginEmail == null) {
    print('ログアウト完了しました');
  }
}

// ログイン情報取得
String? getLoginEmail() {
  // ログインユーザーのemail取得
  String? email = auth.currentUser?.email;

  return email;
}

class MyHomePage extends StatefulWidget {
  const MyHomePage({super.key, required this.title});

  final String title;

  @override
  State<MyHomePage> createState() => _MyHomePageState();
}

class _MyHomePageState extends State<MyHomePage> {
  @override
  Widget build(BuildContext context) {
    // 格納用変数
    String textMail = '';
    String textPassWord = '';

    // コントローラー用変数
    final TextEditingController mailTextController = TextEditingController();
    final TextEditingController passWordTextController =
        TextEditingController();

    return Scaffold(
      appBar: AppBar(
        backgroundColor: Theme.of(context).colorScheme.inversePrimary,
        title: Text(widget.title),
      ),
      body: Center(
        child: Column(
          mainAxisAlignment: MainAxisAlignment.center,
          children: <Widget>[
            const SizedBox(
              height: 5,
            ),
            Container(
              margin: const EdgeInsets.only(bottom: 10),
              width: 300,
              child: TextField(
                keyboardType: TextInputType.text,
                controller: mailTextController,
                decoration: InputDecoration(
                  border: OutlineInputBorder(
                    borderRadius: BorderRadius.circular(10),
                  ),
                  labelText: 'Email',
                  fillColor: Colors.white,
                  filled: true,
                ),
                onChanged: (value) {
                  textMail = value;
                },
              ),
            ),
            Container(
              margin: const EdgeInsets.only(bottom: 10),
              width: 300,
              child: TextField(
                obscureText: true,
                keyboardType: TextInputType.text,
                controller: passWordTextController,
                decoration: InputDecoration(
                  border: OutlineInputBorder(
                    borderRadius: BorderRadius.circular(10),
                  ),
                  labelText: 'PassWord',
                  fillColor: Colors.white,
                  filled: true,
                ),
                onChanged: (value) {
                  textPassWord = value;
                },
              ),
            ),
            // ログイン処理
            ElevatedButton(
              onPressed: () async {
                await loginEmailAndPass(textMail, textPassWord);
              },
              child: const Text('ログイン'),
            ),
       // ログアウト処理
            ElevatedButton(
              onPressed: () {
                setState(() {
                  logout();
                });
              },
              child: const Text('ログアウト'),
            ),
          ],
        ),
      ),
    );
  }
}
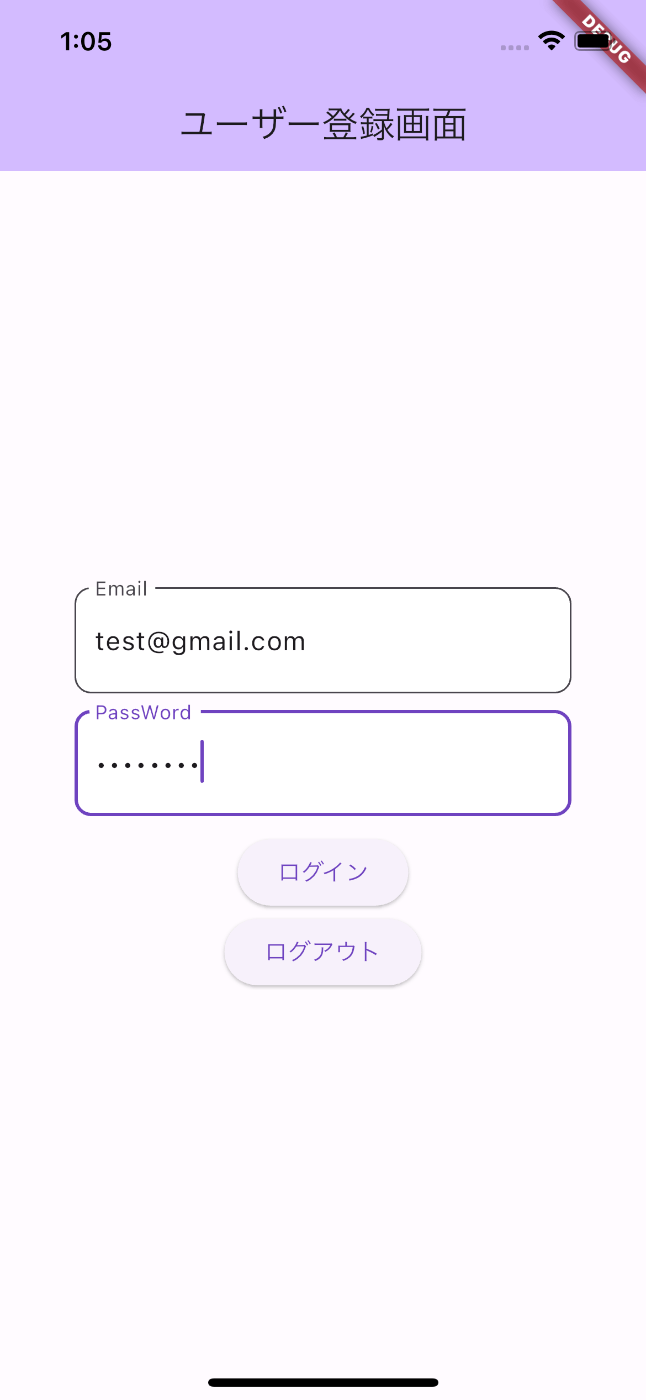
UIはこんな感じ

問題なくログイン・ログアウト機能が実行されたことを確認できた。

最後に
メール以外のログイン方法にもチャレンジしていきたいと思う。
Discussion