😸
備忘録02 Flutter アカウント作成機能の実装
概要
いくつかアプリを開発してきたが、
個人情報を取り扱うアプリには必ずアカウント作成機能が搭載されるため、
そのまま使いまわせるように記録に残す。
やる作業
- ログインのプロバイダ設定
- パッケージのインストール
- アカウント作成機能実装
前提
firebaseでプロジェクトを作成ずみで、firebaseと紐付けが済んでいる。
過去に紐付けた時のやり方を記事に残した。
1. ログインのプロバイダ設定
firebaseの対象プロジェクトのAuthenticationのログイン方法からプロバイダを設定する。
今回はメールアドレスとパスワードでログインする方法を設定する。
こうすることで、メールアドレスとパスワードでアカウントを作成することができる。


プロバイダの設定が完了すると、有効になる。

2. パッケージのインストール
以下コマンドを叩き、「firebase_auth」パッケージをインストールする
flutter pub add firebase_auth
pubspec.yamlファイルに「firebase_core」と「firebase_auth」がインストールされているか確認
pubspec.yaml
dependencies:
  flutter:
    sdk: flutter


  # The following adds the Cupertino Icons font to your application.
  # Use with the CupertinoIcons class for iOS style icons.
  cupertino_icons: ^1.0.2
  firebase_core: ^2.24.2
  firebase_auth: ^4.16.0
3. アカウント作成機能実装
以下コードで実装した。
メールアドレスとパスワードを入力して、
登録ボタンをタップするとアカウントが作成される。
本来はエラーハンドリングが必要だが、今回はなしで作成。
main.dart
import 'package:firebase_auth/firebase_auth.dart';
import 'package:firebase_core/firebase_core.dart';
import 'package:flutter/material.dart';
import 'package:testapp/firebase_options.dart';

void main() async {
  WidgetsFlutterBinding.ensureInitialized();
  await Firebase.initializeApp(
    options: DefaultFirebaseOptions.currentPlatform,
  );
  runApp(const MyApp());
}

class MyApp extends StatelessWidget {
  const MyApp({super.key});

  // This widget is the root of your application.
  @override
  Widget build(BuildContext context) {
    return MaterialApp(
      title: 'Flutter Demo',
      theme: ThemeData(
        colorScheme: ColorScheme.fromSeed(seedColor: Colors.deepPurple),
        useMaterial3: true,
      ),
      home: const MyHomePage(title: 'ユーザー登録画面'),
    );
  }
}

// アカウント登録処理(メールアドレス&パスワード)
Future createAccount(String email, String passWord) async {
  FirebaseAuth auth = FirebaseAuth.instance;
  // アカウント登録
  await auth.createUserWithEmailAndPassword(
    email: email,
    password: passWord,
  );
}

class MyHomePage extends StatefulWidget {
  const MyHomePage({super.key, required this.title});

  final String title;

  @override
  State<MyHomePage> createState() => _MyHomePageState();
}

class _MyHomePageState extends State<MyHomePage> {
  @override
  Widget build(BuildContext context) {
    // 格納用変数
    String textMail = '';
    String textPassWord = '';

    // コントローラー用変数
    final TextEditingController mailTextController = TextEditingController();
    final TextEditingController passWordTextController =
        TextEditingController();
    return Scaffold(
      appBar: AppBar(
        backgroundColor: Theme.of(context).colorScheme.inversePrimary,
        title: Text(widget.title),
      ),
      body: Center(
        child: Column(
          mainAxisAlignment: MainAxisAlignment.center,
          children: <Widget>[
            Container(
              margin: const EdgeInsets.only(bottom: 10),
              width: 300,
              child: TextField(
                keyboardType: TextInputType.text,
                controller: mailTextController,
                decoration: InputDecoration(
                  border: OutlineInputBorder(
                    borderRadius: BorderRadius.circular(10),
                  ),
                  labelText: 'Email',
                  fillColor: Colors.white,
                  filled: true,
                ),
                onChanged: (value) {
                  textMail = value;
                },
              ),
            ),
            Container(
              margin: const EdgeInsets.only(bottom: 10),
              width: 300,
              child: TextField(
                obscureText: true,
                keyboardType: TextInputType.text,
                controller: passWordTextController,
                decoration: InputDecoration(
                  border: OutlineInputBorder(
                    borderRadius: BorderRadius.circular(10),
                  ),
                  labelText: 'PassWord',
                  fillColor: Colors.white,
                  filled: true,
                ),
                onChanged: (value) {
                  textPassWord = value;
                },
              ),
            ),
            // アカウント登録処理
            ElevatedButton(
                onPressed: () {
                  setState(() {
                    createAccount(textMail, textPassWord);
                  });
                },
                child: const Text('登録'))
          ],
        ),
      ),
    );
  }
}
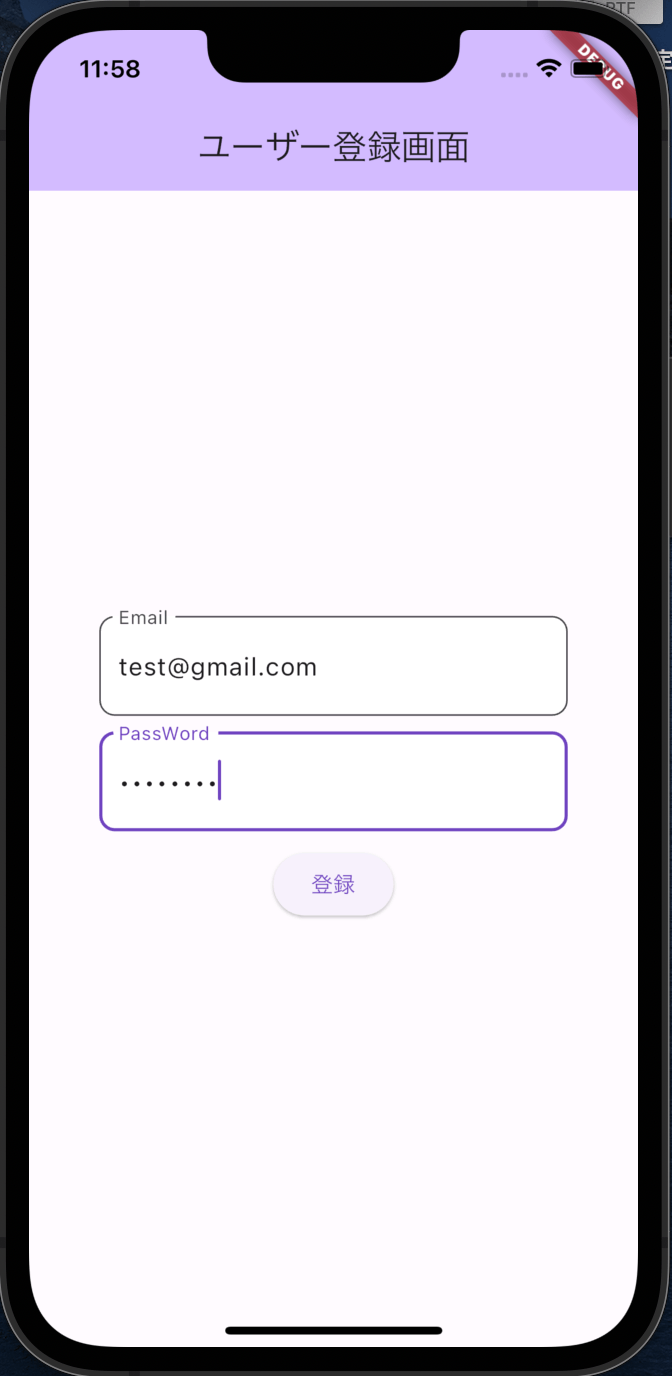
UIはこんな感じ

登録ボタンをタップしたら無事登録された。

最後に
メール以外の登録方法にもチャレンジしていきたいと思う。
Discussion