Raspberry PiでRust+OpenCVで人物認識
突然、Webカメラを使って何かをしたくなりました。
Raspberry Piにカメラをつけて設置すれば何か面白い事が出来ないか、と思い作業したメモを残します。
コンピューターリソースが限られた環境ではRustを使うのに適しているのではないかと思い、画像認識で有名らしいOpenCVを使って何かをしようとしています。
各スクラップへのリンクです。
思いのほか環境構築ばかりやっていました。
Rustのopencv-rustというクレートを使って、人物認識→Slackへ通知、というアプリを作りました。
Raspberry Pi上でのRustのbuildは時間がかかるので、自分のメインPCで開発してRaspberry Piへ反映、という手順で進めました。
Raspberry Pi初期設定
Python + OpenCVの環境構築(Raspberry Pi)
WindowsでRust開発環境構築
Rust + OpenCV環境構築(Windows)
Rust + OpenCVで人物認識(ソースコード)
Rust + OpenCV環境構築(Raspberry Pi)
Raspberry Pi初期設定
初めてRaspberry Piを触った。
メインマシン(Windows)からVSCodeのRemoteSSHを使って開発するまで。
使用したモデル
Raspberry Pi 3 Model B
メルカリで購入した。
スペックは以下のものだと思われる。
https://www.switch-science.com/catalog/3050/
OS install
公式が用意したRaspberry Pi Imagerを使う。
32GBのmicroSDにRaspberry Pi OS(32-bit)を入れた。
この時点でSSHやWiFiの設定を入れることも可能。
周辺機器のセット
- 電源(micro USB type B)
- webカメラ
- キーボード
- マウス
- ディスプレイ(HDMI)
SSH設定後は電源とwebカメラのみの接続でOKになる。
電源を入れたあとにHDMIを接続するとディスプレイに表示されなかったので、あらかじめ必要な機器は接続した後に電源を接続したらうまくいった。
初期セットアップ(WiFi、SSH)
ユーザー名、パスワード、言語設定、WiFi設定等をする(略)。
次に、ホスト名とIPを確認してSSH設定を行う。
- ローカルIP
WiFi設定後、端末もしくはルーター管理画面からローカルIPを確認する。
端末でのIP確認ではwlan0のinetが該当する。
以下はRaspberry Piの端末にて。
$ ifconfig
eth0: flags=4099<UP,BROADCAST,MULTICAST>  mtu 1500
        ether b8:XX:XX:XX:XX:XX  txqueuelen 1000  (イーサネット)
        RX packets 0  bytes 0 (0.0 B)
        RX errors 0  dropped 0  overruns 0  frame 0
        TX packets 0  bytes 0 (0.0 B)
        TX errors 0  dropped 0 overruns 0  carrier 0  collisions 0

lo: flags=73<UP,LOOPBACK,RUNNING>  mtu 65536
        inet 127.0.0.1  netmask 255.0.0.0
        inet6 ::1  prefixlen 128  scopeid 0x10<host>
        loop  txqueuelen 1000  (ローカルループバック)
        RX packets 2558  bytes 1139913 (1.0 MiB)
        RX errors 0  dropped 0  overruns 0  frame 0
        TX packets 2558  bytes 1139913 (1.0 MiB)
        TX errors 0  dropped 0 overruns 0  carrier 0  collisions 0

wlan0: flags=4163<UP,BROADCAST,RUNNING,MULTICAST>  mtu 1500
        inet 192.168.11.18  netmask 255.255.255.0  broadcast 192.168.11.255
        inet6 XXXX::XXXX:XXXX:XXXX:XXXX prefixlen 64  scopeid 0x20<link>
        inet6 XXXX:XX:XXXX:XXXX:XXXX:XXXX:XXXX:XXXX prefixlen 64  scopeid 0x0<global>
        ether XX:XX:XX:XX:XX:XX txqueuelen 1000  (イーサネット)
        RX packets 33754  bytes 47060701 (44.8 MiB)
        RX errors 0  dropped 0  overruns 0  frame 0
        TX packets 12051  bytes 1773111 (1.6 MiB)
        TX errors 0  dropped 0 overruns 0  carrier 0  collisions 0ホスト名
- ホスト名
デフォルトのホスト名はおそらくraspberrypi
$ hostname
raspberrypi
変更したい場合はディスプレイを接続していればGUIから変更可能。
コマンドでも変更できるはず。
- SSH設定
ディスプレイ接続したラズパイの「設定」からSSHをenabled、パスワードでssh可能にする。
また、authorized_keysファイルを.ssh以下に作成する。
$ mkdir ~/.ssh
$ touch ~/.ssh/authorized_keys
メインマシンのWindows側でssh鍵を生成する。
今回はid_rsa_raspberrypiという名前で作る。
参考
コマンドプロンプト or Powershellからsshが通るかを確認。
# command prompt or powershell
# ssh pi@192.168.0.0など
$ ssh ${username}@${localIP}
生成したssh鍵のパブリックキーをコピーするなどしてauthorized_keysに書き込む。
$ echo 'publickeyファイルの中身' >> .ssh/authorized_keys
Ctrl + DでSSH接続を切ってメインマシンのssh configに設定を書く。
C:\Users${username}.ssh\config
Host raspberrypi
	HostName raspberrypi
	User pi
	Port 22
	IdentityFile "C:\Users\${username}\.ssh\id_rsa_raspberrypi"
再度コマンドプロンプトorPowershellからsshが通ることを確認する。
$ ssh raspberrypi
SSHが通ることを確認できたので、以降はラズパイにつけたディスプレイ、マウス、キーボードは不要になる。
VSCodeでRemoteSSH
VSCodeにRemoteSSHの拡張を入れる。
画面左下の><アイコンからConnect to Hostを選択。
.ssh/configに設定したホスト名が表示されるので、ラズパイのホスト名を選択すると接続できる。
リモートデスクトップ
GUIが欲しいとき用。
https://scratchpad.jp/raspberry-pi-3-model-b-plus-4/#toc1
を参考に、Windowsのリモートデスクトップでラズパイに接続出来るようにする。
ラズパイにsshして以下のコマンドを実行する。
$ sudo apt-get install xrdp
$ sudo service xrdp restart
VNCもメジャーかもしれないが試していない。
https://www.realvnc.com/en/connect/download/viewer/
カメラの動作確認
## package update
$ sudo apt update
## package install
$ sudo apt install fswebcam
## image.jpgという名前で画像を撮る
fswebcam image.jpg
## 画像がとれていればOK
Swapメモリ設定
参考記事から、
sudo vi /etc/dphys-swapfile
# 以下を追記
CONF_SWAPSIZE=1024
ローカルIP固定
https://mugeek.hatenablog.com/entry/2019/05/27/230256
再起動の度にルーターからIPを振りなおされるため、固定する。
WindowsのPower ShellでルーターのIPを確認する。
PS C:\Users\name> ipconfig

Windows IP 構成

イーサネット アダプター イーサネット:

   接続固有の DNS サフィックス . . . . .: flets-east.jp. iptvf.jp
   IPv6 アドレス . . . . . . . . . . . .: XXXX:XX:XXXX:XX:XXXX:XXXX:XXXX:XXXX
   一時 IPv6 アドレス. . . . . . . . . .: XXXX:XX:XXXX:XXX:XXXX:XXXX:XXXX:XXX
   一時 IPv6 アドレス. . . . . . . . . .: XXXX:XX:XXXX:XXX:XXXX:XXXX:XXXX:XXX
   一時 IPv6 アドレス. . . . . . . . . .: XXXX:XX:XXXX:XXX:XXXX:XXXX:XXXX:XXX
   リンクローカル IPv6 アドレス. . . . .: XXXX:XX:XXXX:XXX:XXXX:XXXX:XXXX:XXX
   IPv4 アドレス . . . . . . . . . . . .: 192.168.11.100
   サブネット マスク . . . . . . . . . .: 255.255.255.0
   デフォルト ゲートウェイ . . . . . . .: XXXX::XXXX:XXXX:XXXX:XXXX%12
                                          192.168.11.1

イーサネット アダプター イーサネット 3:

   メディアの状態. . . . . . . . . . . .: メディアは接続されていません
   接続固有の DNS サフィックス . . . . .:

イーサネット アダプター vEthernet (WSL):

   接続固有の DNS サフィックス . . . . .:
   リンクローカル IPv6 アドレス. . . . .: XXXX::XXXX:XXXX:XXXX:XXXX%37
   IPv4 アドレス . . . . . . . . . . . .: 172.28.0.1
   サブネット マスク . . . . . . . . . .: 255.255.240.0
   デフォルト ゲートウェイ . . . . . . .:
デフォルトゲートウェイ:192.168.11.1を確認。
ラズパイにsshして設定ファイルを編集して再起動する。
sudo vi /etc/dhcpcd.conf
static ip_address=192.168.11.111/24
static routers=192.168.11.1
static domain_name_servers=192.168.11.1

sudo reboot
static ip_addressに固定したいIPアドレスを書く。
これでIPが固定される。
ルーター管理画面などでも確認可能。
Python + OpenCVの環境構築(Raspberry Pi)
PythonでOpenCVを動かすサンプルがよく見つかるので、まずはPythonで動かしてみるところまで。
Python
2022-01-28リリースのラズパイ公式OSではデフォルトでPythonの3系が入っていた。
また、pipが3系しか入っていないであろう事を確認した。
$ python --version
Python 3.9.2

$ which pip
/usr/local/bin/pip
$ ls -la /usr/local/bin/
合計 20
drwxr-xr-x  2 root root 4096  2月 12 18:27 .
drwxr-xr-x 10 root root 4096  1月 28 10:02 ..
-rwxr-xr-x  1 root root  221  2月 12 18:27 pip
-rwxr-xr-x  1 root root  221  2月 12 18:27 pip3
-rwxr-xr-x  1 root root  221  2月 12 18:27 pip3.9
OpenCV
-
失敗した例
参考記事の通りにOpenCVのインストール、サンプルを動かす。
# pipのバージョンを更新する
$ sudo pip install --upgrade pip

$ sudo pip install opencv-python
## error
note: This error originates from a subprocess, and is likely not a problem with pip.
  ERROR: Failed building wheel for opencv-python
Failed to build opencv-python
ERROR: Could not build wheels for opencv-python, which is required to install pyproject.toml-based projects

$ pip install --upgrade pip setuptools wheel

Defaulting to user installation because normal site-packages is not writeable
Looking in indexes: https://pypi.org/simple, https://www.piwheels.org/simple
Requirement already satisfied: pip in /usr/lib/python3/dist-packages (20.3.4)
Collecting pip
  Downloading https://www.piwheels.org/simple/pip/pip-22.0.3-py3-none-any.whl (2.1 MB)
     ━━━━━━━━━━━━━━━━━━━ 2.1/2.1 MB 742.7 kB/s eta 0:00:00
Requirement already satisfied: setuptools in /usr/lib/python3/dist-packages (52.0.0)
Collecting setuptools
  Downloading https://www.piwheels.org/simple/setuptools/setuptools-60.8.2-py3-none-any.whl (1.1 MB)
     ━━━━━━━━━━━━━━━━━━━ 1.1/1.1 MB 611.2 kB/s eta 0:00:00
Requirement already satisfied: wheel in /usr/lib/python3/dist-packages (0.34.2)
Collecting wheel
  Downloading https://www.piwheels.org/simple/wheel/wheel-0.37.1-py2.py3-none-any.whl (35 kB)
Installing collected packages: wheel, setuptools, pip
  WARNING: The script wheel is installed in '/home/pi/.local/bin' which is not on PATH.
  Consider adding this directory to PATH or, if you prefer to suppress this warning, use --no-warn-script-location.
  WARNING: The scripts pip, pip3 and pip3.9 are installed in '/home/pi/.local/bin' which is not on PATH.
  Consider adding this directory to PATH or, if you prefer to suppress this warning, use --no-warn-script-location.
Successfully installed pip-22.0.3 setuptools-60.8.2 wheel-0.37.1

$ sudo pip install opencv-python
## error
note: This error originates from a subprocess, and is likely not a problem with pip.
  ERROR: Failed building wheel for opencv-python
Failed to build opencv-python
ERROR: Could not build wheels for opencv-python, which is required to install pyproject.toml-based projects
ラズパイ3でOpenCVをコンパイルすると数時間かかるうえ、エラーが出た。
https://karaage.hatenadiary.jp/entry/rpi4-dl-setup
で公開されているスクリプトsetup-opencv-raspbian-buster.sh
https://github.com/karaage0703/raspberry-pi-setup
を試したが、やはりコンパイルに時間がかかったうえ、エラーになった(?)。
(正確には、一晩まったらSSH接続が切れており何が起きたか不明だが、少なくともpythonでimport cv2は出来なかった)
非公式だがビルド済のパッケージをインストール方が早いという話があったのでそれを試してみた。
バージョンは以下から選べ、2022/02/20現在一番新しいものを選んだ。
https://www.piwheels.org/simple/opencv-contrib-python/
pip3 install opencv-contrib-python==4.5.3.56
import cv2したときのランタイムエラー
pi@rasp3:~ $ python
Python 3.9.2 (default, Mar 12 2021, 04:06:34)
[GCC 10.2.1 20210110] on linux
Type "help", "copyright", "credits" or "license" for more information.
>>> import cv2
RuntimeError: module compiled against API version 0xe but this version of numpy is 0xd
Traceback (most recent call last):
  File "<stdin>", line 1, in <module>
  File "/home/pi/.local/lib/python3.9/site-packages/cv2/__init__.py", line 5, in <module>
    from .cv2 import *
ImportError: numpy.core.multiarray failed to import
https://www.souichi.club/python/cv2-runtime-error/
の通りnumpyを最新にして(1.19.5→1.22.2)解消した。
sudo pip3 install numpy --upgrade
openCVチュートリアルのコード実行
http://independence-sys.net/main/?p=6858
の記事を参考に画像ファイルオープンを試した。
import cv2

img = cv2.imread('./image.jpg')
cv2.imshow('image',img)
cv2.waitKey(0)
以下のエラーが出た。
pi@rasp3:~ $ python open-cv-tutrial.py
Unable to init server: 接続できませんでした: 接続を拒否されました
Traceback (most recent call last):
  File "/home/pi/open-cv-tutrial.py", line 4, in <module>
    cv2.imshow('ginza',img)
cv2.error: OpenCV(4.5.3) /tmp/pip-wheel-ulre47vq/opencv-contrib-python_edf6b92c2aed48ceb1cae55c8d5542a6/opencv/modules/highgui/src/window_gtk.cpp:635: error: (-2:Unspecified error) Can't initialize GTK backend in function 'cvInitSystem'
どうも、Xサーバーが無いことによるエラーだった(SSH接続だとGUIが無いので、表示するウィンドウを立ち上げられないということだろう)。
ssh -Xでsshするとよいらしい。
SSHではなく、Raspberry Piにリモートデスクトップしてから実行すれば無事動いたのでよしとする。
カメラのストリーミングについては以下のサンプルを実行した。
import numpy as np
import cv2

cap = cv2.VideoCapture(0)

while(True):
    # Capture frame-by-frame
    ret, frame = cap.read()

    # Display the resulting frame
    cv2.imshow('frame',frame)

    if cv2.waitKey(1) & 0xFF == ord('q'):
        break

# When everything done, release the capture
cap.release()
cv2.destroyAllWindows()
WindowsでRust開発環境構築
経緯
Raspberry Piで動かす前に、まずは自分のメインマシンで色々試したい。
普段開発で使っているWindows WSL2環境ではUSB接続したwebカメラをそのまま使う事が出来ない。
いくらかの手順を踏めば使えるように出来るらしい。
https://touch-sp.hatenablog.com/entry/2021/12/03/205300
https://contentsviewer.work/Master/WSL/Tips/WSL2-USB/WSL2-USB
https://qiita.com/ryoma-jp/items/799f3811fc02150094a4
が、Windows上でRustを動かすのをまずはやってみる。
(軽い気持ちで始めたが、Windowsのパッケージ管理でこんなに詰まるとは…)
基本的にMicrosoftのドキュメントに従ってやっていく。
https://docs.microsoft.com/ja-jp/windows/dev-environment/rust/setup
パッケージ管理ツールのインストール
MicrosoftがサポートするWindows公式のパッケージ管理ツールwingetが2021年5月にリリースされた。
パッケージ管理ツールとして他にchocolateyとscoopを導入してRustの開発環境構築をする記事もあった。
chocolateyとScoopがメジャーだったようだが、公式がサポートするwingetを使うことにする。
Microsoftのドキュメント:https://docs.microsoft.com/ja-jp/windows/package-manager/winget/
Microsoft Storeでwingetを検索するとアプリインストーラーが出てくる。
これをインストールする。
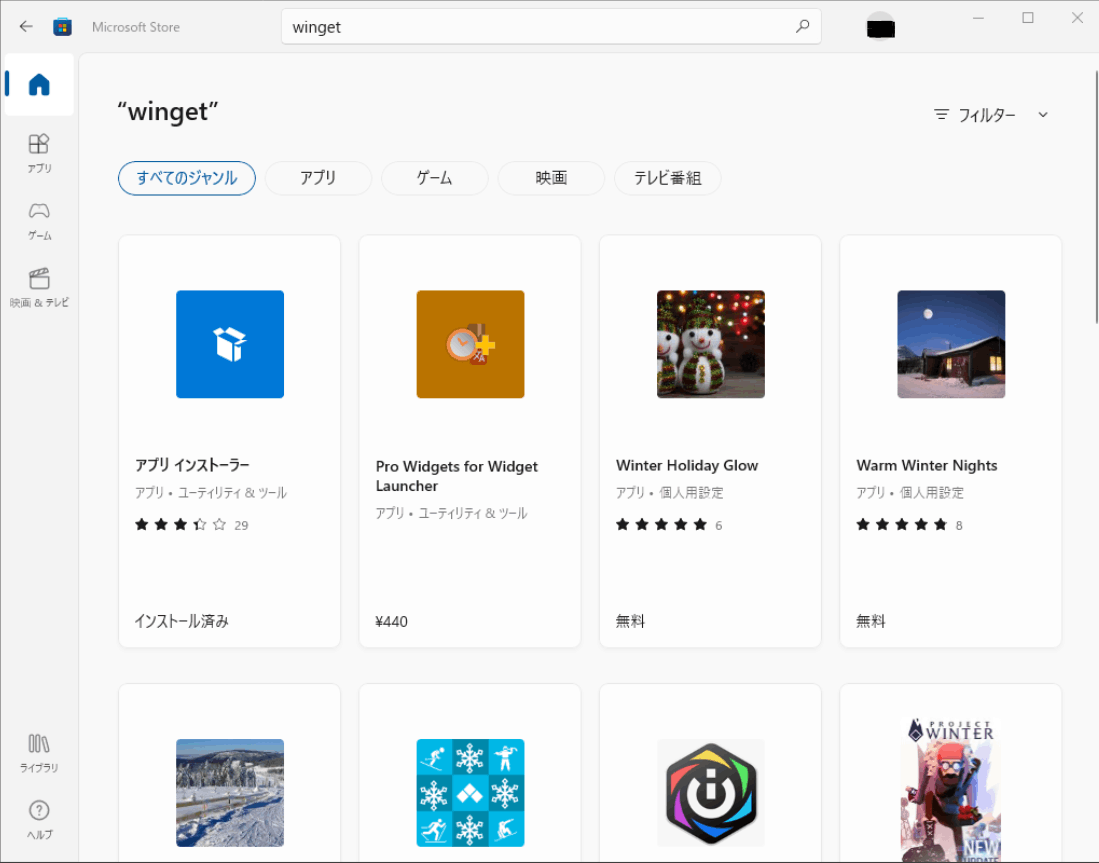
windowsアップデートで入っていたのか、既にインストール済だった。
poweshellでwingetコマンドを使えるか確認した。
PS C:\Users\name> winget
Windows Package Manager v1.1.13405
Copyright (c) Microsoft Corporation. All rights reserved.

WinGet コマンド ライン ユーティリティを使用すると、コマンド ラインからアプリケーションやその他のパッケージをインストールできます。

使用状況: winget [<コマンド>] [<オプション>]

使用できるコマンドは次のとおりです:
  install    指定されたパッケージをインストール
  show       パッケージに関する情報を表示します
  source     パッケージのソースの管理
  search     アプリの基本情報を見つけて表示
  list       インストール済みパッケージを表示する
  upgrade    指定されたパッケージをアップグレードします
  uninstall  指定されたパッケージをアンインストール
  hash       インストーラー ファイルをハッシュするヘルパー
  validate   マニフェスト ファイルを検証
  settings   設定を開くか、管理者設定を設定する
  features   試験的な機能の状態を表示
  export     インストールされているパッケージのリストをエクスポート
  import     ファイル中のすべてのパッケージをインストール

特定のコマンドの詳細については、そのコマンドにヘルプ引数を渡します。 [-?]

次のオプションを使用できます。
  -v,--version  ツールのバージョンを表示
  --info        ツールの一般情報を表示

詳細については、次を参照してください。 https://aka.ms/winget-command-help
Gitのインストール
winget search gitすると色々出てきた。
winget install getで適切なものが入るだろうと思ったが、パッケージが複数あるとの事。
PS C:\Users\name> winget install git
複数のパッケージが入力条件に一致しました。入力内容を修正してください。
名前   ID           ソース
---------------------------
My Git 9NLVK2SL2SSP msstore
Git    Git.Git      winget
後者のGit.Gitを入れることにする。IDを指定してインストールができる。
PS C:\Users\name> winget install --id Git.Git
見つかりました Git [Git.Git] バージョン 2.35.1.2
このアプリケーションは所有者からライセンス供与されます。
Microsoft はサードパーティのパッケージに対して責任を負わず、ライセンスも付与しません。
Downloading https://github.com/git-for-windows/git/releases/download/v2.35.1.windows.2/Git-2.35.1.2-64-bit.exe
  ██████████████████████████████  47.9 MB / 47.9 MB
インストーラーハッシュが正常に検証されました
パッケージのインストールを開始しています...
インストールが完了しました
ビルドツールのインストール
公式ドキュメントに「Visual Studio (推奨) または Microsoft C++ Build Tools をインストール」とあるが、Build Toolsの方が設定の自由度が高そう(ほんまかな?)なので後者を入れることにする(よく分かっていないのに公式ドキュメントを外れるのはいかがなものか、と後から思った)。
参考
PS C:\Users\name> winget search "Build Tools"
名前                           ID                                     バージョン ソース
----------------------------------------------------------------------------------------
Visual Studio Build Tools 2022 Microsoft.VisualStudio.2022.BuildTools 17.1.0     winget
Visual Studio Build Tools 2019 Microsoft.VisualStudio.2019.BuildTools 16.11.10   winget

PS C:\Users\name> winget install --id Microsoft.VisualStudio.2022.BuildTools
見つかりました Visual Studio Build Tools 2022 [Microsoft.VisualStudio.2022.BuildTools] バージョン 17.1.0
このアプリケーションは所有者からライセンス供与されます。
Microsoft はサードパーティのパッケージに対して責任を負わず、ライセンスも付与しません。
Downloading https://download.visualstudio.microsoft.com/download/pr/c30a4f7e-41da-41a5-afe8-ac56abf2740f/c9c5c694fdfdf0b9295c10416d370e4e9d60f5220c2ab9eee9ee147052294d31/vs_BuildTools.exe
  ██████████████████████████████  1.58 MB / 1.58 MB
インストーラーハッシュが正常に検証されました
パッケージのインストールを開始しています...
インストールが完了しました
rustupのインストール
https://www.rust-lang.org/tools/install から64bit版をダウンロード、実行。
Visual Studio Build Tools 2022が入っているのだが、Build Toolsが必要だとの警告文が出た。
おそらく問題ないので「y」で続けた。
Rust Visual C++ prerequisites

Rust requires the Microsoft C++ build tools for Visual Studio 2013 or
later, but they don't seem to be installed.

The easiest way to acquire the build tools is by installing Microsoft
Visual C++ Build Tools 2019 which provides just the Visual C++ build
tools:

  https://visualstudio.microsoft.com/visual-cpp-build-tools/

Please ensure the Windows 10 SDK and the English language pack components
are included when installing the Visual C++ Build Tools.

Alternately, you can install Visual Studio 2019, Visual Studio 2017,
Visual Studio 2015, or Visual Studio 2013 and during install select
the "C++ tools":

  https://visualstudio.microsoft.com/downloads/

Install the C++ build tools before proceeding.

If you will be targeting the GNU ABI or otherwise know what you are
doing then it is fine to continue installation without the build
tools, but otherwise, install the C++ build tools before proceeding.

Continue? (y/N) y
デフォルトでインストールした。
Welcome to Rust!

This will download and install the official compiler for the Rust
programming language, and its package manager, Cargo.

Rustup metadata and toolchains will be installed into the Rustup
home directory, located at:

  C:\Users\name\.rustup

This can be modified with the RUSTUP_HOME environment variable.

The Cargo home directory located at:

  C:\Users\name\.cargo

This can be modified with the CARGO_HOME environment variable.

The cargo, rustc, rustup and other commands will be added to
Cargo's bin directory, located at:

  C:\Users\name\.cargo\bin

This path will then be added to your PATH environment variable by
modifying the HKEY_CURRENT_USER/Environment/PATH registry key.

You can uninstall at any time with rustup self uninstall and
these changes will be reverted.

Current installation options:

   default host triple: x86_64-pc-windows-msvc
     default toolchain: stable (default)
               profile: default
  modify PATH variable: yes

1) Proceed with installation (default)
2) Customize installation
3) Cancel installation
>1

info: profile set to 'default'
info: default host triple is x86_64-pc-windows-msvc
info: syncing channel updates for 'stable-x86_64-pc-windows-msvc'
info: latest update on 2022-02-24, rust version 1.59.0 (9d1b2106e 2022-02-23)
info: downloading component 'cargo'
info: downloading component 'clippy'
info: downloading component 'rust-docs'
info: downloading component 'rust-std'
info: downloading component 'rustc'
info: downloading component 'rustfmt'
info: installing component 'cargo'
info: installing component 'clippy'
info: installing component 'rust-docs'
 19.4 MiB /  19.4 MiB (100 %)   3.0 MiB/s in  4s ETA:  0s
info: installing component 'rust-std'
 23.7 MiB /  23.7 MiB (100 %)  15.4 MiB/s in  1s ETA:  0s
info: installing component 'rustc'
 55.6 MiB /  55.6 MiB (100 %)  16.9 MiB/s in  3s ETA:  0s
info: installing component 'rustfmt'
info: default toolchain set to 'stable-x86_64-pc-windows-msvc'

  stable-x86_64-pc-windows-msvc installed - rustc 1.59.0 (9d1b2106e 2022-02-23)

Rust is installed now. Great!
cargoコマンドが使えるようになった、と思ったがパスが通っていないのか使えなかった。
一旦アンインストール。
winget uninstall Microsoft.VisualStudio.2022.BuildTools
PS C:\Users\name> .\.cargo\bin\rustup.exe self uninstall
以下の記事から、msvcがついている方がVisual Studio Build Toolsを使う構成らしい。
https://zenn.dev/suauiya/books/ef2d2c67c546361e4518/viewer/7ae9e51108e7b197120a
winget search rust
で見つかるRustlang.Rust.MSVCをインストールしてみたが、.cargoが作成されず、パスも不明(Windows環境構築何もわからない…)。
アンインストールした。
結局、先人の知恵をお借りして
https://zenn.dev/suauiya/books/ef2d2c67c546361e4518/viewer/7ae9e51108e7b197120a
にあるScoopを入れてrustupを入れることに...
PS C:\Users\name> Set-ExecutionPolicy -ExecutionPolicy RemoteSigned -Scope CurrentUser
PS C:\Users\name> Invoke-Expression (New-Object System.Net.WebClient).DownloadString('https://get.scoop.sh')
Initializing...
Downloading scoop...
Extracting...
Creating shim...
Downloading main bucket...
Extracting...
Adding ~\scoop\shims to your path.
'lastupdate' has been set to '2022-02-26T04:46:21.7645623+09:00'
Scoop was installed successfully!
Type 'scoop help' for instructions.
rustupのインストール。
scoop install rustup-msvc
Installing 'rustup-msvc' (1.24.3) [64bit]
rustup-init.exe (8.9 MB) [====================================================================================] 100%
Checking hash of rustup-init.exe ... ok.
Running installer script...
warning: installing msvc toolchain without its prerequisites
info: profile set to 'default'
info: setting default host triple to x86_64-pc-windows-msvc
info: syncing channel updates for 'stable-x86_64-pc-windows-msvc'
info: latest update on 2022-02-24, rust version 1.59.0 (9d1b2106e 2022-02-23)
info: downloading component 'cargo'
info: downloading component 'clippy'
info: downloading component 'rust-docs'
info: downloading component 'rust-std'
info: downloading component 'rustc'
info: downloading component 'rustfmt'
info: installing component 'cargo'
info: installing component 'clippy'
info: installing component 'rust-docs'
 19.4 MiB /  19.4 MiB (100 %)   3.3 MiB/s in  4s ETA:  0s
info: installing component 'rust-std'
 23.7 MiB /  23.7 MiB (100 %)  15.3 MiB/s in  1s ETA:  0s
info: installing component 'rustc'
 55.6 MiB /  55.6 MiB (100 %)  17.2 MiB/s in  3s ETA:  0s
info: installing component 'rustfmt'
info: default toolchain set to 'stable-x86_64-pc-windows-msvc'

  stable-x86_64-pc-windows-msvc installed - rustc 1.59.0 (9d1b2106e 2022-02-23)

Rust is installed now. Great!

To get started you need Cargo's bin directory (C:\Users\name\scoop\persist
\rustup-msvc\.cargo\bin) in your PATH
environment variable. This has not been done automatically.
Persisting .cargo
'rustup-msvc' (1.24.3) was installed successfully!
Notes
-----
To use the MSVC ABI without Visual Studio 2015 (or higher) installed, you will need the Visual Studio 2017 Build Tools:
https://www.visualstudio.com/downloads/#build-tools-for-visual-studio-2017
各種コマンドチェック。
PS C:\Users\name> rustup --version
rustup 1.24.3 (ce5817a94 2021-05-31)
info: This is the version for the rustup toolchain manager, not the rustc compiler.
info: The currently active `rustc` version is `rustc 1.59.0 (9d1b2106e 2022-02-23)`

PS C:\Users\name> cargo --version
cargo 1.59.0 (49d8809dc 2022-02-10)

PS C:\Users\name> rustc --version
rustc 1.59.0 (9d1b2106e 2022-02-23)
Hello Worldしようとすると失敗した。
PS C:\Users\name> cargo new ras

PS C:\Users\name> cd ras

PS C:\Users\name\ras> cargo run
   Compiling ras v0.1.0 (C:\Users\name\ras)
error: linker `link.exe` not found
  |
  = note: program not found

note: the msvc targets depend on the msvc linker but `link.exe` was not found

note: please ensure that VS 2013, VS 2015, VS 2017 or VS 2019 was installed with the Visual C++ option

error: could not compile `ras` due to previous error
Visual Studio Build Toolsをインストールしただけでは必要なパッケージが足りていないらしい。
Visual Studio Installerを起動して、Build Toolsの変更をクリック。
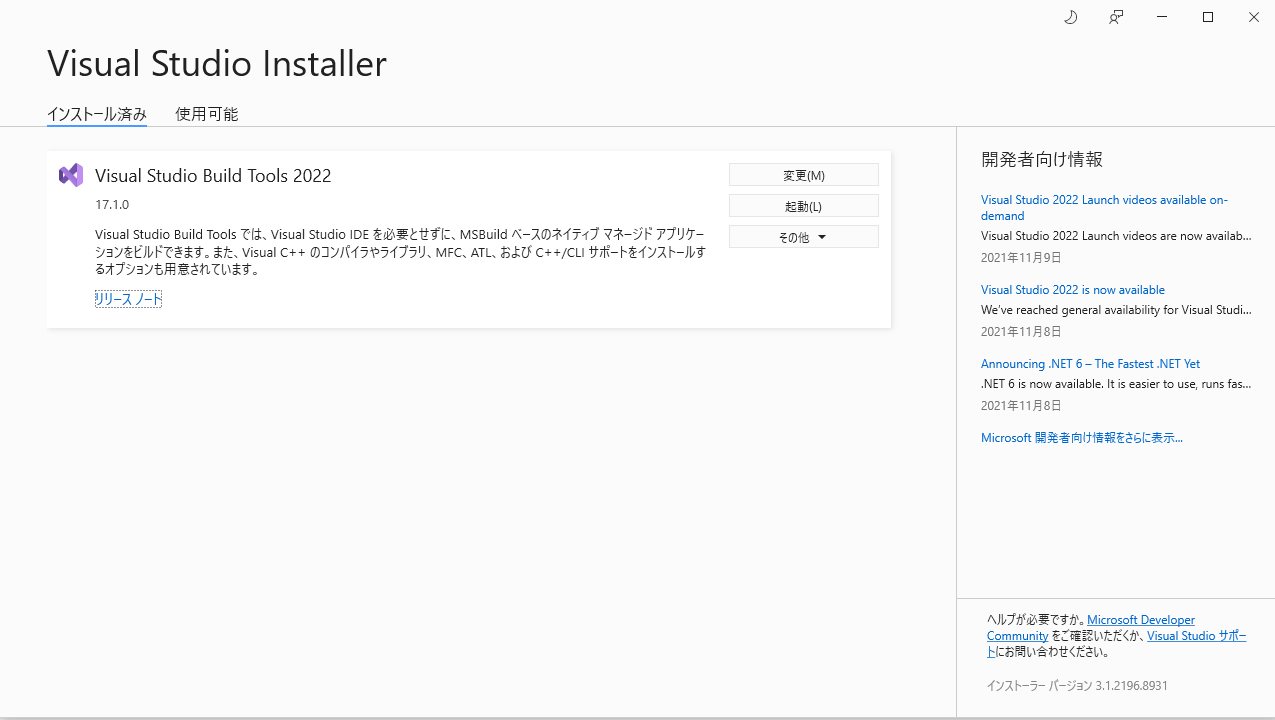
C++によるデスクトップ開発をダウンロードしてダウンロードしながらインストール。
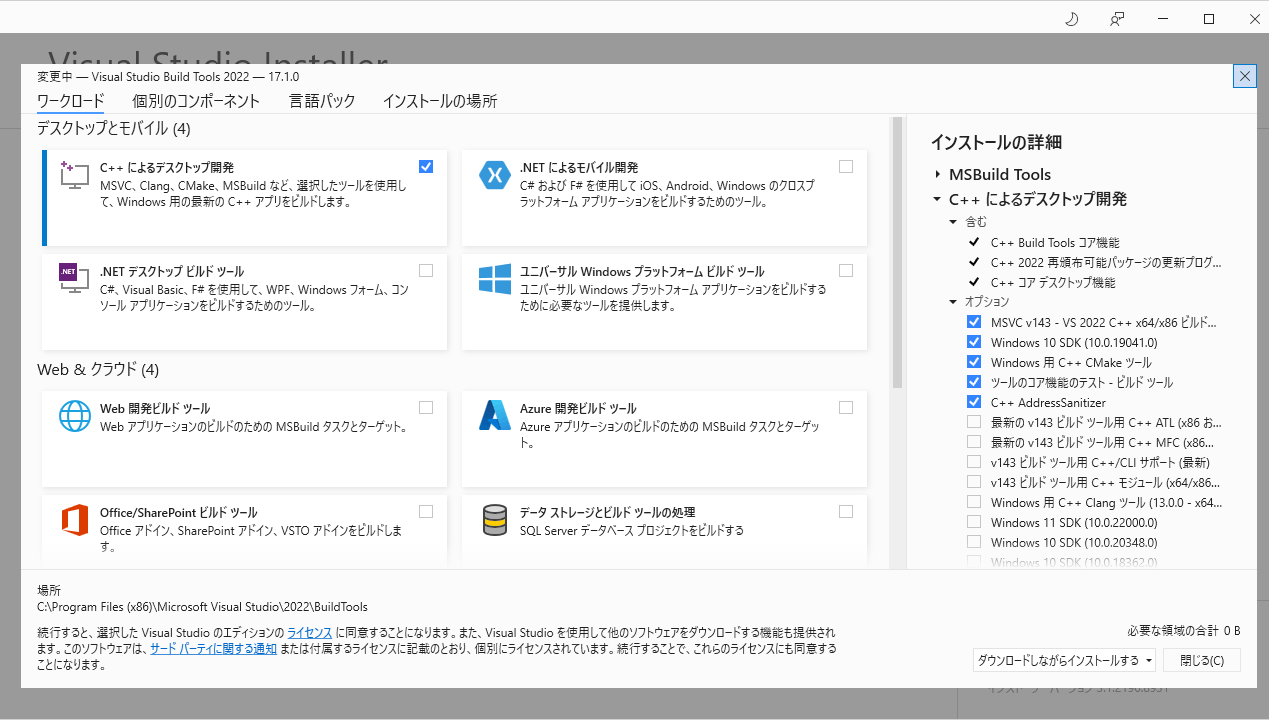
これでHello Worldのcargo runが出来るようになった。
Rust + OpenCV環境構築(Windows)
チュートリアル
以下の記事を見ながら動かす。
https://blog.devgenius.io/rust-and-opencv-bb0467bf35ff
RustでOpenCVを操作できる以下のクレートを使用している。
OpenCV環境構築
opencv-rustのREADME.mdに記載されている。
パッケージマネージャーのchocolateyとvcpkgを使ったインストールの例があった。
wingetでインストール出来るか試みるも、opencvは見つからず。
PS C:\Users\name> winget search OpenCV
入力条件に一致するパッケージが見つかりませんでした。
既に導入しているscoopで確認すると見つかった。
(後でchocolateyでインストールすることになるので、scoopでのインストールは不要)。
PS C:\Users\name> scoop search opencv
'main' bucket:
    opencv (4.5.5)

PS C:\Users\name> scoop search llvm
'main' bucket:
    llvm (13.0.1)
opencvのインストールには少し時間がかかった。
PS C:\Users\name> scoop install opencv llvm
Updating Scoop...
Updating 'main' bucket...
 * 1227283f2 protolint: Update to version 0.37.1                         3 hours ago
 * 869331d3d minio: Update to version 2022-02-26T02-54-46Z               3 hours ago
 * 92855b498 minio-client: Update to version 2022-02-26T03-58-31Z        3 hours ago
 * 21d7eb2f2 ccl: Update to version 1.12.1                               3 hours ago
Scoop was updated successfully!
Installing '7zip' (21.07) [64bit]
7z2107-x64.msi (1.8 MB) [=================================================================================] 100%
Checking hash of 7z2107-x64.msi ... ok.
Extracting 7z2107-x64.msi ... done.
Running pre-install script...
Linking ~\scoop\apps\7zip\current => ~\scoop\apps\7zip\21.07
Creating shim for '7z'.
Creating shortcut for 7-Zip (7zFM.exe)
Persisting Codecs
Persisting Formats
'7zip' (21.07) was installed successfully!
Notes
-----
Add 7-Zip as a context menu option by running: "C:\Users\name\scoop\apps\7zip\current\install-context.reg"
Installing 'llvm' (13.0.1) [64bit]
LLVM-13.0.1-win64.exe (228.4 MB) [========================================================================] 100%
Checking hash of LLVM-13.0.1-win64.exe ... ok.
Extracting dl.7z ... done.
Running pre-install script...
Linking ~\scoop\apps\llvm\current => ~\scoop\apps\llvm\13.0.1
'llvm' (13.0.1) was installed successfully!
Installing 'opencv' (4.5.5) [64bit]
opencv-4.5.5-vc14_vc15.exe (223.0 MB) [===================================================================] 100%
Checking hash of opencv-4.5.5-vc14_vc15.exe ... ok.
Extracting dl.7z ... done.
Linking ~\scoop\apps\opencv\current => ~\scoop\apps\opencv\4.5.5
'opencv' (4.5.5) was installed successfully!
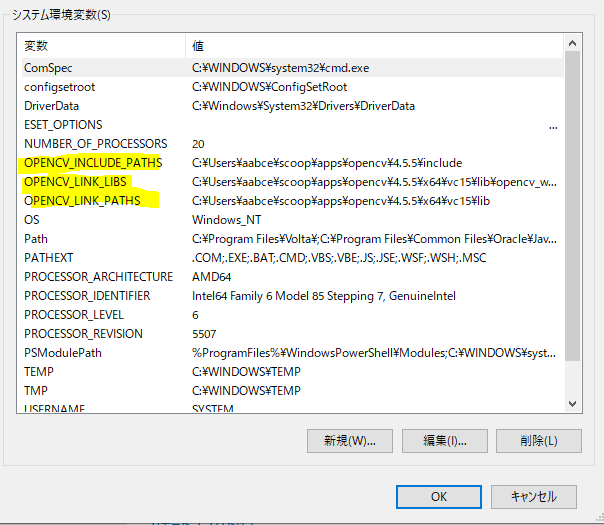
README.mdの説明にあるように、3つの環境変数を設定する。
OpenCVをRustで動かす
PS C:\Users\name> cargo new opencv
     Created binary (application) `opencv` package
PS C:\Users\name> code .\opencv\
Cargo.tomlにopencvとanyhowを追記する。
[dependencies]
opencv = "0.63.0"
anyhow = "*"
buildが通るか確認。
cargo build
PS C:\Users\name\opencv> cargo build
    Updating crates.io index
    略
   Compiling opencv v0.63.0
error: failed to run custom build command for `opencv v0.63.0`

Caused by:
  process didn't exit successfully: `C:\Users\name\opencv\target\debug\build\opencv-20cc65765d41df86\build-script-build` (exit code: 1)
  --- stdout
  cargo:rerun-if-env-changed=OPENCV4_NO_PKG_CONFIG
    略
  --- stderr
  === Crate version: Some("0.63.0")
  === Environment configuration:
     略
  ===   OpenCV_DIR = Some("C:\\Users\\name\\scoop\\apps\\opencv\\current\\x64\\vc14")
  ===   PKG_CONFIG_PATH = None
      略
  ===   XPHOTO
  === Detected probe priority based on environment vars: pkg_config: false, cmake: true, vcpkg: true
  === Probing the OpenCV library in the following order: environment, cmake, vcpkg_cmake, vcpkg, pkg_config
  === Can't probe using: environment, continuing with other methods because: Some environment variables are missing
  === Probing OpenCV library using cmake
  === cmake ninja probe command: "cmake" "-S" "C:\\Users\\name\\scoop\\persist\\rustup-msvc\\.cargo\\registry\\src\\github.com-1ecc6299db9ec823\\opencv-0.63.0\\cmake" "-DOCVRS_PACKAGE_NAME=OpenCV" "-DCMAKE_BUILD_TYPE=Debug" "-G" "Ninja"
  === Probing with cmake ninja generator failed, will try Makefile generator, error: program not found
  === cmake makefiles probe command: "cmake" "-S" "C:\\Users\\name\\scoop\\persist\\rustup-msvc\\.cargo\\registry\\src\\github.com-1ecc6299db9ec823\\opencv-0.63.0\\cmake" "-DOCVRS_PACKAGE_NAME=OpenCV" "-DCMAKE_BUILD_TYPE=Debug" "-G" "Unix Makefiles"
  === Probing with cmake Makefile generator failed, will try deprecated find_package, error: program not
found
  === cmake find-package compile probe command: "cmake" "-S" "C:\\Users\\name\\scoop\\persist\\rustup-msvc\\.cargo\\registry\\src\\github.com-1ecc6299db9ec823\\opencv-0.63.0\\cmake" "-DOCVRS_PACKAGE_NAME=OpenCV" "-DCMAKE_BUILD_TYPE=Debug" "--find-package" "-DCOMPILER_ID=GNU" "-DLANGUAGE=CXX" "-DMODE=COMPILE" "-DNAME=OpenCV"
  === Can't probe using: cmake, continuing with other methods because: program not found
  === Probing OpenCV library using vcpkg_cmake
  === Can't probe using: vcpkg_cmake, continuing with other methods because: Could not find Vcpkg tree: No vcpkg installation found. Set the
VCPKG_ROOT environment variable or run 'vcpkg integrate install'
  === Probing OpenCV library using vcpkg
  === Can't probe using: vcpkg, continuing with other methods because: Could not find Vcpkg tree: No vcpkg installation found. Set the VCPKG_ROOT environment variable or run 'vcpkg integrate install', Could not find Vcpkg tree: No vcpkg installation found. Set the VCPKG_ROOT environment variable or run 'vcpkg integrate install'
  === Probing OpenCV library using pkg_config
  === Can't probe using: pkg_config, continuing with other methods because: Could not run `"pkg-config" "--libs" "--cflags" "opencv4"`
  The pkg-config command could not be found.

  Most likely, you need to install a pkg-config package for your OS.

  If you've already installed it, ensure the pkg-config command is one of the
  directories in the PATH environment variable.

  If you did not expect this build to link to a pre-installed system library,
  then check documentation of the opencv crate for an option to
  build the library from source, or disable features or dependencies
  that require pkg-config., Could not run `"pkg-config" "--libs" "--cflags" "opencv"`
  The pkg-config command could not be found.

  Most likely, you need to install a pkg-config package for your OS.

  If you've already installed it, ensure the pkg-config command is one of the
  directories in the PATH environment variable.

  If you did not expect this build to link to a pre-installed system library,
  then check documentation of the opencv crate for an option to
  build the library from source, or disable features or dependencies
  that require pkg-config.
  Error: "Failed to find OpenCV package using probes: environment, cmake, vcpkg_cmake, vcpkg, pkg_config"PS C:\Users\name\opencv>
エラー文を読んで対処するよりは一旦はドキュメントに従う方がよかろうということで、opencv-rustのREADME.mdの通り、chocolateyを使ったインストール手順に切り替える。
chocolateyのインストール
公式にページに載っているコマンドを打つ。
管理者権限が無いとインストール出来ない旨のエラーが出たので、管理者としてPowerShellを起動しなおして実行した。
Set-ExecutionPolicy Bypass -Scope Process -Force; [System.Net.ServicePointManager]::SecurityProtocol = [System.Net.ServicePointManager]::SecurityProtocol -bor 3072; iex ((New-Object System.Net.WebClient).DownloadString('https://community.chocolatey.org/install.ps1'))
chocolateyを使ったパッケージインストール
choco install llvm opencv
(前に設定したはずのものが移動or消えていた?ので)再度3つの環境変数をセットした。
cargo buildするとエラーが出たが、どうも環境変数の読み込みに再起動が必要らしい。
再起動後cargo buildすると成功した。
再起動後、環境変数が勝手に書き換わった・・・?

cargo runすると実行時エラーになった。
exit code: 0xc0000135, STATUS_DLL_NOT_FOUND
これについてもGithubに対処方法が書かれており、
https://github.com/twistedfall/opencv-rust/issues/118#issuecomment-619608278
のように、opencv_world455.dllをtarget\debug\に配置すると正常に動作した。
opencvのチュートリアルコードを実行し、カメラの映像をwindowに表示できることを確認できた。
use anyhow::Result; // Automatically handle the error types
use opencv::{
    prelude::*,
    videoio,
    highgui
}; // Note, the namespace of OpenCV is changed (to better or worse). It is no longer one enormous.
fn main() -> Result<()> { // Note, this is anyhow::Result
    // Open a GUI window
    highgui::named_window("window", highgui::WINDOW_FULLSCREEN)?;
    // Open the web-camera (assuming you have one)
    let mut cam = videoio::VideoCapture::new(0, videoio::CAP_ANY)?;
    let mut frame = Mat::default(); // This array will store the web-cam data
    // Read the camera
    // and display in the window
    loop {
        cam.read(&mut frame)?;
        highgui::imshow("window", &frame)?;
        let key = highgui::wait_key(1)?;
        if key == 113 { // quit with q
            break;
        }
    }
    Ok(())
}
Rust + OpenCVで人物認識(ソースコード)
haarファイル
opencvのgithubのレポジトリに画像認識の特徴量ファイル(という呼び方であっているのかな)がいくつか用意されている。
haarというのは人物名で、顔認識の文脈でよく出てくる単語らしい。
Haar-Like特徴は、画像の明暗差により特徴を捉えます。
という説明を見たけど、正確な情報を知らない。
opencv-rustで人物認識する
以下のソースコードで、Windowsマシンに接続したwebカメラの映像に人物の顔が映る判定が動いた。
opencv-rustのexampleに少し手を加えただけ。
判定にどのhaarファイルを使うのかによって、全身や顔(前面)などを認識させることが出来た。
.envでどのhaarファイルを使うかを指定して、認識したらそのフレームのtmp.pngを出力するようにしている。
何かキー入力をすると止めることが出来る。
Rust + OpenCV環境構築(Raspberry Pi 4)
ラズパイ4が手に入ったのでこちらで環境構築する。
WindowsのRDPが上手くいかなかった(?)のでリモート接続にはVNCを使うようにした。
以下からダウンロード。
対処法が書かれたブログがあったが、VNCで解決したのでRDPは使ってない。
基本的にはsshしてターミナルで操作、ファイルを読み書きしたいときはVSCodeのRemote SSH、GUIを立ち上げる必要があるとき(アプリ起動時)はVNC、という感じでやっている。
rustupのインストール
curl --proto '=https' --tlsv1.2 -sSf https://sh.rustup.rs | sh
パッケージのアップデート、インストール
もし読まれている方がいたらエラーメッセージはスキップして必要なinstallコマンドだけ全部打つといいと思います。
sudo apt update
sudo apt install -y \
     build-essential \
     ccache \
     cmake \
     pkg-config
とりあえず依存クレートのbuildチェックをする。
git clone https://github.com/SH11235/person-recognition-opencv-rust
cd person-recognition-opencv-rust
cargo check
エラーメッセージ
pi@rasp4:~/person-recognition-opencv-rust $ cargo check
   Compiling clang-sys v1.3.1
    Checking parking_lot_core v0.9.3
    Checking lock_api v0.4.7
    Checking num_cpus v1.13.1
    Checking signal-hook-registry v1.4.0
The following warnings were emitted during compilation:

warning: could not execute `llvm-config` one or more times, if the LLVM_CONFIG_PATH environment variable is set to a full path to valid `llvm-config` executable it will be used to try to find an instance of `libclang` on your system: "couldn't execute `llvm-config --prefix` (path=llvm-config) (error: No such file or directory (os error 2))"

error: failed to run custom build command for `clang-sys v1.3.1`

Caused by:
  process didn't exit successfully: `/home/pi/person-recognition-opencv-rust/target/debug/build/clang-sys-6d16a0f3c652f998/build-script-build` (exit status: 101)
  --- stdout
  cargo:warning=could not execute `llvm-config` one or more times, if the LLVM_CONFIG_PATH environment variable is set to a full path to valid `llvm-config` executable it will be used to try to find an instance of `libclang` on your system: "couldn't execute `llvm-config --prefix` (path=llvm-config) (error: No such file or directory (os error 2))"

  --- stderr
  thread 'main' panicked at 'called `Result::unwrap()` on an `Err` value: "couldn't find any valid shared libraries matching: ['libclang.so', 'libclang-*.so'], set the `LIBCLANG_PATH` environment variable to a path where one of these files can be found (invalid: [])"', /home/pi/.cargo/registry/src/github.com-1ecc6299db9ec823/clang-sys-1.3.1/build/dynamic.rs:211:45
  note: run with `RUST_BACKTRACE=1` environment variable to display a backtrace
warning: build failed, waiting for other jobs to finish...
llvm入っていないので入れる。
sudo apt install -y llvm
cargo check
エラーメッセージ
   Compiling clang-sys v1.3.1
    Checking socket2 v0.4.4
    Checking indexmap v1.8.1
    Checking mio v0.8.2
error: failed to run custom build command for `clang-sys v1.3.1`

Caused by:
  process didn't exit successfully: `/home/pi/person-recognition-opencv-rust/target/debug/build/clang-sys-6d16a0f3c652f998/build-script-build` (exit status: 101)
  --- stderr
  thread 'main' panicked at 'called `Result::unwrap()` on an `Err` value: "couldn't find any valid shared libraries matching: ['libclang.so', 'libclang-*.so'], set the `LIBCLANG_PATH` environment variable to a path where one of these files can be found (invalid: [])"', /home/pi/.cargo/registry/src/github.com-1ecc6299db9ec823/clang-sys-1.3.1/build/dynamic.rs:211:45
  note: run with `RUST_BACKTRACE=1` environment variable to display a backtrace
warning: build failed, waiting for other jobs to finish...
エラーメッセージで調べると下記の記事が見つかる。
sudo apt install libclang-dev
再度cargo checkを実行すると今度はopensslのエラー。
openssl packageのエラー
pi@rasp4:~/person-recognition-opencv-rust $ cargo check
   Compiling clang-sys v1.3.1
    Checking want v0.3.0
    Checking num-traits v0.2.14
    Checking futures-util v0.3.21
    Checking futures-channel v0.3.21
    Checking idna v0.2.3
   Compiling cc v1.0.73
    Checking serde_urlencoded v0.7.1
   Compiling syn v1.0.95
    Checking parking_lot v0.12.0
   Compiling regex v1.5.4
    Checking url v2.2.2
   Compiling openssl-sys v0.9.73
   Compiling clang v1.0.3
error: failed to run custom build command for `openssl-sys v0.9.73`

Caused by:
  process didn't exit successfully: `/home/pi/person-recognition-opencv-rust/target/debug/build/openssl-sys-5c6110667177b22b/build-script-main` (exit status: 101)
  --- stdout
  cargo:rustc-cfg=const_fn
  cargo:rerun-if-env-changed=AARCH64_UNKNOWN_LINUX_GNU_OPENSSL_LIB_DIR
  AARCH64_UNKNOWN_LINUX_GNU_OPENSSL_LIB_DIR unset
  cargo:rerun-if-env-changed=OPENSSL_LIB_DIR
  OPENSSL_LIB_DIR unset
  cargo:rerun-if-env-changed=AARCH64_UNKNOWN_LINUX_GNU_OPENSSL_INCLUDE_DIR
  AARCH64_UNKNOWN_LINUX_GNU_OPENSSL_INCLUDE_DIR unset
  cargo:rerun-if-env-changed=OPENSSL_INCLUDE_DIR
  OPENSSL_INCLUDE_DIR unset
  cargo:rerun-if-env-changed=AARCH64_UNKNOWN_LINUX_GNU_OPENSSL_DIR
  AARCH64_UNKNOWN_LINUX_GNU_OPENSSL_DIR unset
  cargo:rerun-if-env-changed=OPENSSL_DIR
  OPENSSL_DIR unset
  cargo:rerun-if-env-changed=OPENSSL_NO_PKG_CONFIG
  cargo:rerun-if-env-changed=PKG_CONFIG_aarch64-unknown-linux-gnu
  cargo:rerun-if-env-changed=PKG_CONFIG_aarch64_unknown_linux_gnu
  cargo:rerun-if-env-changed=HOST_PKG_CONFIG
  cargo:rerun-if-env-changed=PKG_CONFIG
  cargo:rerun-if-env-changed=OPENSSL_STATIC
  cargo:rerun-if-env-changed=OPENSSL_DYNAMIC
  cargo:rerun-if-env-changed=PKG_CONFIG_ALL_STATIC
  cargo:rerun-if-env-changed=PKG_CONFIG_ALL_DYNAMIC
  cargo:rerun-if-env-changed=PKG_CONFIG_PATH_aarch64-unknown-linux-gnu
  cargo:rerun-if-env-changed=PKG_CONFIG_PATH_aarch64_unknown_linux_gnu
  cargo:rerun-if-env-changed=HOST_PKG_CONFIG_PATH
  cargo:rerun-if-env-changed=PKG_CONFIG_PATH
  cargo:rerun-if-env-changed=PKG_CONFIG_LIBDIR_aarch64-unknown-linux-gnu
  cargo:rerun-if-env-changed=PKG_CONFIG_LIBDIR_aarch64_unknown_linux_gnu
  cargo:rerun-if-env-changed=HOST_PKG_CONFIG_LIBDIR
  cargo:rerun-if-env-changed=PKG_CONFIG_LIBDIR
  cargo:rerun-if-env-changed=PKG_CONFIG_SYSROOT_DIR_aarch64-unknown-linux-gnu
  cargo:rerun-if-env-changed=PKG_CONFIG_SYSROOT_DIR_aarch64_unknown_linux_gnu
  cargo:rerun-if-env-changed=HOST_PKG_CONFIG_SYSROOT_DIR
  cargo:rerun-if-env-changed=PKG_CONFIG_SYSROOT_DIR
  run pkg_config fail: "`\"pkg-config\" \"--libs\" \"--cflags\" \"openssl\"` did not exit successfully: exit status: 1\nerror: could not find system library 'openssl' required by the 'openssl-sys' crate\n\n--- stderr\nPackage openssl was not found in the pkg-config search path.\nPerhaps you should add the directory containing `openssl.pc'\nto the PKG_CONFIG_PATH environment variable\nNo package 'openssl' found\n"

  --- stderr
  thread 'main' panicked at '

  Could not find directory of OpenSSL installation, and this `-sys` crate cannot
  proceed without this knowledge. If OpenSSL is installed and this crate had
  trouble finding it,  you can set the `OPENSSL_DIR` environment variable for the
  compilation process.

  Make sure you also have the development packages of openssl installed.
  For example, `libssl-dev` on Ubuntu or `openssl-devel` on Fedora.

  If you're in a situation where you think the directory *should* be found
  automatically, please open a bug at https://github.com/sfackler/rust-openssl
  and include information about your system as well as this message.

  $HOST = aarch64-unknown-linux-gnu
  $TARGET = aarch64-unknown-linux-gnu
  openssl-sys = 0.9.73

  ', /home/pi/.cargo/registry/src/github.com-1ecc6299db9ec823/openssl-sys-0.9.73/build/find_normal.rs:191:5
  note: run with `RUST_BACKTRACE=1` environment variable to display a backtrace
warning: build failed, waiting for other jobs to finish...
必要なパッケージをインストール。
sudo apt install libssl-dev
リトライ
エラーメッセージ
pi@rasp4:~/person-recognition-opencv-rust $ cargo check
   Compiling tokio-macros v1.7.0
   Compiling tracing-attributes v0.1.21
   Compiling openssl-macros v0.1.0
   Compiling opencv-binding-generator v0.41.0
   Compiling openssl-sys v0.9.73
   Compiling openssl v0.10.40
   Compiling native-tls v0.2.10
    Checking tokio v1.18.2
    Checking tracing v0.1.34
    Checking tokio-util v0.7.2
    Checking tokio-native-tls v0.3.0
    Checking h2 v0.3.13
   Compiling opencv v0.63.0
    Checking hyper v0.14.18
error: failed to run custom build command for `opencv v0.63.0`

Caused by:
  process didn't exit successfully: `/home/pi/person-recognition-opencv-rust/target/debug/build/opencv-439ade70e683fff1/build-script-build` (exit status: 1)
  --- stdout
  cargo:rerun-if-env-changed=OPENCV4_NO_PKG_CONFIG
  cargo:rerun-if-env-changed=PKG_CONFIG_aarch64-unknown-linux-gnu
  cargo:rerun-if-env-changed=PKG_CONFIG_aarch64_unknown_linux_gnu
  cargo:rerun-if-env-changed=HOST_PKG_CONFIG
  cargo:rerun-if-env-changed=PKG_CONFIG
  cargo:rerun-if-env-changed=OPENCV4_STATIC
  cargo:rerun-if-env-changed=OPENCV4_DYNAMIC
  cargo:rerun-if-env-changed=PKG_CONFIG_ALL_STATIC
  cargo:rerun-if-env-changed=PKG_CONFIG_ALL_DYNAMIC
  cargo:rerun-if-env-changed=PKG_CONFIG_PATH_aarch64-unknown-linux-gnu
  cargo:rerun-if-env-changed=PKG_CONFIG_PATH_aarch64_unknown_linux_gnu
  cargo:rerun-if-env-changed=HOST_PKG_CONFIG_PATH
  cargo:rerun-if-env-changed=PKG_CONFIG_PATH
  cargo:rerun-if-env-changed=PKG_CONFIG_LIBDIR_aarch64-unknown-linux-gnu
  cargo:rerun-if-env-changed=PKG_CONFIG_LIBDIR_aarch64_unknown_linux_gnu
  cargo:rerun-if-env-changed=HOST_PKG_CONFIG_LIBDIR
  cargo:rerun-if-env-changed=PKG_CONFIG_LIBDIR
  cargo:rerun-if-env-changed=PKG_CONFIG_SYSROOT_DIR_aarch64-unknown-linux-gnu
  cargo:rerun-if-env-changed=PKG_CONFIG_SYSROOT_DIR_aarch64_unknown_linux_gnu
  cargo:rerun-if-env-changed=HOST_PKG_CONFIG_SYSROOT_DIR
  cargo:rerun-if-env-changed=PKG_CONFIG_SYSROOT_DIR
  cargo:rerun-if-env-changed=OPENCV_NO_PKG_CONFIG
  cargo:rerun-if-env-changed=PKG_CONFIG_aarch64-unknown-linux-gnu
  cargo:rerun-if-env-changed=PKG_CONFIG_aarch64_unknown_linux_gnu
  cargo:rerun-if-env-changed=HOST_PKG_CONFIG
  cargo:rerun-if-env-changed=PKG_CONFIG
  cargo:rerun-if-env-changed=OPENCV_STATIC
  cargo:rerun-if-env-changed=OPENCV_DYNAMIC
  cargo:rerun-if-env-changed=PKG_CONFIG_ALL_STATIC
  cargo:rerun-if-env-changed=PKG_CONFIG_ALL_DYNAMIC
  cargo:rerun-if-env-changed=PKG_CONFIG_PATH_aarch64-unknown-linux-gnu
  cargo:rerun-if-env-changed=PKG_CONFIG_PATH_aarch64_unknown_linux_gnu
  cargo:rerun-if-env-changed=HOST_PKG_CONFIG_PATH
  cargo:rerun-if-env-changed=PKG_CONFIG_PATH
  cargo:rerun-if-env-changed=PKG_CONFIG_LIBDIR_aarch64-unknown-linux-gnu
  cargo:rerun-if-env-changed=PKG_CONFIG_LIBDIR_aarch64_unknown_linux_gnu
  cargo:rerun-if-env-changed=HOST_PKG_CONFIG_LIBDIR
  cargo:rerun-if-env-changed=PKG_CONFIG_LIBDIR
  cargo:rerun-if-env-changed=PKG_CONFIG_SYSROOT_DIR_aarch64-unknown-linux-gnu
  cargo:rerun-if-env-changed=PKG_CONFIG_SYSROOT_DIR_aarch64_unknown_linux_gnu
  cargo:rerun-if-env-changed=HOST_PKG_CONFIG_SYSROOT_DIR
  cargo:rerun-if-env-changed=PKG_CONFIG_SYSROOT_DIR

  --- stderr
  === Crate version: Some("0.63.0")
  === Environment configuration:
  ===   OPENCV_PACKAGE_NAME = None
  ===   OPENCV_PKGCONFIG_NAME = None
  ===   OPENCV_CMAKE_NAME = None
  ===   OPENCV_CMAKE_BIN = None
  ===   OPENCV_VCPKG_NAME = None
  ===   OPENCV_LINK_LIBS = None
  ===   OPENCV_LINK_PATHS = None
  ===   OPENCV_INCLUDE_PATHS = None
  ===   OPENCV_DISABLE_PROBES = None
  ===   CMAKE_PREFIX_PATH = None
  ===   OpenCV_DIR = None
  ===   PKG_CONFIG_PATH = None
  ===   VCPKG_ROOT = None
  ===   VCPKGRS_DYNAMIC = None
  === Enabled features:
  ===   ALPHAMAT
  ===   ARUCO
  ===   BARCODE
  ===   BGSEGM
  ===   BIOINSPIRED
  ===   CALIB3D
  ===   CCALIB
  ===   CUDAARITHM
  ===   CUDABGSEGM
  ===   CUDACODEC
  ===   CUDAFEATURES2D
  ===   CUDAFILTERS
  ===   CUDAIMGPROC
  ===   CUDAOBJDETECT
  ===   CUDAOPTFLOW
  ===   CUDASTEREO
  ===   CUDAWARPING
  ===   CVV
  ===   DEFAULT
  ===   DNN
  ===   DNN_SUPERRES
  ===   DPM
  ===   FACE
  ===   FEATURES2D
  ===   FLANN
  ===   FREETYPE
  ===   FUZZY
  ===   GAPI
  ===   HDF
  ===   HFS
  ===   HIGHGUI
  ===   IMGCODECS
  ===   IMGPROC
  ===   IMG_HASH
  ===   INTENSITY_TRANSFORM
  ===   LINE_DESCRIPTOR
  ===   MCC
  ===   ML
  ===   OBJDETECT
  ===   OPTFLOW
  ===   OVIS
  ===   PHASE_UNWRAPPING
  ===   PHOTO
  ===   PLOT
  ===   QUALITY
  ===   RAPID
  ===   RGBD
  ===   SALIENCY
  ===   SFM
  ===   SHAPE
  ===   STEREO
  ===   STITCHING
  ===   STRUCTURED_LIGHT
  ===   SUPERRES
  ===   SURFACE_MATCHING
  ===   TEXT
  ===   TRACKING
  ===   VIDEO
  ===   VIDEOIO
  ===   VIDEOSTAB
  ===   VIZ
  ===   WECHAT_QRCODE
  ===   XFEATURES2D
  ===   XIMGPROC
  ===   XOBJDETECT
  ===   XPHOTO
  === Detected probe priority based on environment vars: pkg_config: false, cmake: false, vcpkg: false
  === Probing the OpenCV library in the following order: environment, pkg_config, cmake, vcpkg_cmake, vcpkg
  === Can't probe using: environment, continuing with other methods because: Some environment variables are missing
  === Probing OpenCV library using pkg_config
  === Can't probe using: pkg_config, continuing with other methods because: `"pkg-config" "--libs" "--cflags" "opencv4"` did not exit successfully: exit status: 1
  error: could not find system library 'opencv4' required by the 'opencv' crate

  --- stderr
  Package opencv4 was not found in the pkg-config search path.
  Perhaps you should add the directory containing `opencv4.pc'
  to the PKG_CONFIG_PATH environment variable
  No package 'opencv4' found
  , `"pkg-config" "--libs" "--cflags" "opencv"` did not exit successfully: exit status: 1
  error: could not find system library 'opencv' required by the 'opencv' crate

  --- stderr
  Package opencv was not found in the pkg-config search path.
  Perhaps you should add the directory containing `opencv.pc'
  to the PKG_CONFIG_PATH environment variable
  No package 'opencv' found

  === Probing OpenCV library using cmake
  === cmake ninja probe command: "cmake" "-S" "/home/pi/.cargo/registry/src/github.com-1ecc6299db9ec823/opencv-0.63.0/cmake" "-DOCVRS_PACKAGE_NAME=OpenCV" "-DCMAKE_BUILD_TYPE=Debug" "-G" "Ninja"
  === Probing with cmake ninja generator failed, will try Makefile generator, error: cmake returned an error
      stdout: "-- Configuring incomplete, errors occurred!\nSee also \"/home/pi/person-recognition-opencv-rust/target/debug/build/opencv-237e65b85c855b65/out/cmake_probe_build/CMakeFiles/CMakeOutput.log\".\n"
      stderr: "CMake Error: CMake was unable to find a build program corresponding to \"Ninja\".  CMAKE_MAKE_PROGRAM is not set.  You probably need to select a different build tool.\nCMake Error: CMAKE_C_COMPILER not set, after EnableLanguage\nCMake Error: CMAKE_CXX_COMPILER not set, after EnableLanguage\n"
  === cmake makefiles probe command: "cmake" "-S" "/home/pi/.cargo/registry/src/github.com-1ecc6299db9ec823/opencv-0.63.0/cmake" "-DOCVRS_PACKAGE_NAME=OpenCV" "-DCMAKE_BUILD_TYPE=Debug" "-G" "Unix Makefiles"
  === Probing with cmake Makefile generator failed, will try deprecated find_package, error: cmake returned an error
      stdout: "-- The C compiler identification is GNU 10.2.1\n-- The CXX compiler identification is GNU 10.2.1\n-- Detecting C compiler ABI info\n-- Detecting C compiler ABI info - done\n-- Check for working C compiler: /usr/bin/cc - skipped\n-- Detecting C compile features\n-- Detecting C compile features - done\n-- Detecting CXX compiler ABI info\n-- Detecting CXX compiler ABI info - done\n-- Check for working CXX compiler: /usr/bin/c++ - skipped\n-- Detecting CXX compile features\n-- Detecting CXX compile features - done\n-- Configuring incomplete, errors occurred!\nSee also \"/home/pi/person-recognition-opencv-rust/target/debug/build/opencv-237e65b85c855b65/out/cmake_probe_build/CMakeFiles/CMakeOutput.log\".\n"
      stderr: "CMake Error at CMakeLists.txt:5 (find_package):\n  By not providing \"FindOpenCV.cmake\" in CMAKE_MODULE_PATH this project has\n  asked CMake to find a package configuration file provided by \"OpenCV\", but\n  CMake did not find one.\n\n  Could not find a package configuration file provided by \"OpenCV\" with any\n  of the following names:\n\n    OpenCVConfig.cmake\n    opencv-config.cmake\n\n  Add the installation prefix of \"OpenCV\" to CMAKE_PREFIX_PATH or set\n  \"OpenCV_DIR\" to a directory containing one of the above files.  If \"OpenCV\"\n  provides a separate development package or SDK, be sure it has been\n  installed.\n\n\n"
  === cmake find-package compile probe command: "cmake" "-S" "/home/pi/.cargo/registry/src/github.com-1ecc6299db9ec823/opencv-0.63.0/cmake" "-DOCVRS_PACKAGE_NAME=OpenCV" "-DCMAKE_BUILD_TYPE=Debug" "--find-package" "-DCOMPILER_ID=GNU" "-DLANGUAGE=CXX" "-DMODE=COMPILE" "-DNAME=OpenCV"
  === Can't probe using: cmake, continuing with other methods because: cmake returned an error
      stdout: "OpenCV not found.\n"
      stderr: "CMake Error: Problem processing arguments. Aborting.\n\n"
  === Probing OpenCV library using vcpkg_cmake
  === Can't probe using: vcpkg_cmake, continuing with other methods because: Could not find Vcpkg tree: No vcpkg installation found. Set the VCPKG_ROOT environment variable or run 'vcpkg integrate install'
  === Probing OpenCV library using vcpkg
  === Can't probe using: vcpkg, continuing with other methods because: the vcpkg-rs Vcpkg build helper can only find libraries built for the MSVC ABI., the vcpkg-rs Vcpkg build helper can only find libraries built for the MSVC ABI.
  Error: "Failed to find OpenCV package using probes: environment, pkg_config, cmake, vcpkg_cmake, vcpkg"
warning: build failed, waiting for other jobs to finish...
OpenCVをbuildしていないのでまあ色々エラーは出るかな、という事で個々の詳細は見ない。
を見て、以下のパッケージも必要そうなので入れておく。
sudo apt install build-essential cmake unzip pkg-config
sudo apt install libjpeg-dev libpng-dev libtiff-dev
sudo apt install libavcodec-dev libavformat-dev libswscale-dev libv4l-dev
sudo apt install libxvidcore-dev libx264-dev
sudo apt install libatlas-base-dev gfortran
OpenCVのbuild
2022/07/12時点で4.6.0が最新だったのでこれを使う。
公式ドキュメント
wget -O opencv.zip https://github.com/opencv/opencv/archive/refs/tags/4.6.0.zip
wget -O opencv_contrib.zip https://github.com/opencv/opencv_contrib/archive/refs/tags/4.6.0.zip

unzip opencv.zip
unzip opencv_contrib.zip

mv opencv-4.6.0 opencv
mv opencv_contrib-4.6.0 opencv_contrib
のREADME.mdおよび
opencvの公式インストール手順
を見てOpenCVをbuildする。
3~4時間?かかった。
mkdir ~/opencv-build
cd ~/opencv-build
cmake -DOPENCV_EXTRA_MODULES_PATH=~/opencv_contrib/modules ~/opencv
make -j5 #長い
README.mdに
As the result, OpenCV will be built in the <opencv_build_directory> with all modules from opencv_contrib repository. If you don't want all of the modules, use CMake's BUILD_opencv_* options. Like in this example:
とあるが、どのモジュールがいる、いらないの選定を出来ないので、大人しく待つ。
sudo make install
で、/usr/local/libや/usr/local/include/opencv4あたりにファイルが設置された。
アプリのディレクトリでcargo checkすると、clang binaryが無い、というようなエラーが出たので、clangをインストール。
sudo apt install clang
これでcargo buildするとbuildが成功した!
.env.sampleに基づいて.envファイルを作って、適宜変数をセットしてcargo runする。
Webカメラで人物認識→Slackに通知、の動作が確認出来た。
完!
追記
Slack APIを利用するのに
を使おうと思ったが、メンテナンスがとまっていた。
chatなど簡単なものはreqwestでhttp clientを用意してPOSTしてやればよかったが、ファイルuploadのAPIが上手く使えず(fileをどうやって渡せばいいかで詰まった)。
上記のクレートも対応しておらず、ということでRustでSlackAPIを使うのを断念した。
公式がサポートしているSDKにJava、Node、Pythonがあるが、Pythonはラズパイの公式OS
に標準搭載されているのでPythonでSlack APIを叩く処理を作ることにした。