Playwright + reg-suitでVisual Regression Testing(VRT)を導入
はじめに
デザインなどを変更した時に、予期せぬレイアウトの崩れがないか1つ1つ目視で確認するのは大変です。ページ数が多くなればなるほどヒューマンエラーの可能性が高くなります。そんな時、導入したいのがVisual Regression Testing(VRT)。
アプリケーションの前後の状態をキャプチャしたスクリーンショットを比較することで、ビジュアル上の変更や不具合を特定することができます。
今回はPlaywright + reg-suitを利用して、VRTを導入方法を紹介します。
各種インストール
Next.jsをインストール
今回はNext.jsのトップページでテキストを変更してVRTを試してみます。
$ npx create-next-app@latest
✔ What is your project named? … vrt-example
✔ Would you like to use TypeScript? … Yes
✔ Would you like to use ESLint? … Yes
✔ Would you like to use Tailwind CSS? …  Yes
✔ Would you like to use `src/` directory? …  Yes
✔ Would you like to use App Router? (recommended) …  Yes
✔ Would you like to customize the default import alias (@/*)? … No
Playwrightをインストール
Playwrightのスクリーンショット機能を利用して、比較用の画像を取得するのでPlaywrightをインストールします。
$ cd vrt-example
$ npm init playwright@latest
✔ Where to put your end-to-end tests? · tests
✔ Add a GitHub Actions workflow? (y/N) · true
✔ Install Playwright browsers (can be done manually via 'npx playwright install')? (Y/n) · true
reg-suitをインストール
reg-suitはVRTのためのjsライブラリです。Playwrightで撮ったスクリーンショットを画像を比較して差分を見つけ出すために利用します。
$ npm i -D reg-suit
reg-suitの初期設定
$ reg-suit init
# インストールするプラグインを選択。(今回は`reg-keygen-git-hash-plugin`,`reg-notify-github-plugin`,`reg-publish-s3-plugin`の3つ。必要に応じて追加してください)
? Plugin(s) to install (bold: recommended) (Press <space> to select, <a> to toggle all, <i> to invert selection, and <enter> to proceed)
❯◉  reg-keygen-git-hash-plugin : Detect the snapshot key to be compare with using Git hash.
 ◉  reg-notify-github-plugin : Notify reg-suit result to GitHub repository
 ◉  reg-publish-s3-plugin : Fetch and publish snapshot images to AWS S3.
 ◯  reg-notify-chatwork-plugin : Notify reg-suit result to Chatwork channel.
 ◯  reg-notify-github-with-api-plugin : Notify reg-suit result to GHE repository using API
 ◯  reg-notify-gitlab-plugin : Notify reg-suit result to GitLab repository
 ◯  reg-notify-slack-plugin : Notify reg-suit result to Slack channel.

# reg-suitの各種データ保存場所
? Working directory of reg-suit. .reg

# ".reg"を.gitignoreに追加するか
? Append ".reg" entry to your .gitignore file. Yes

# 画像比較対象のディレクトリ
? Directory contains actual images. directory_contains_actual_images

# VRTで検出される変更の許容範囲
? Threshold, ranges from 0 to 1. Smaller value makes the comparison more sensitive. 0

# reg-suit GitHub appからclientIDを取得するか (まだGitHubにリポジトリを作成していないので、Noとします。)
[reg-suit] info Set up reg-notify-github-plugin:
? notify-github plugin requires a client ID of reg-suit GitHub app. Open installation window in your browser No

# reg-suit GitHub appのclientIdを入力 (まだGitHubにリポジトリを作成しておらずclientIDはわからないので一旦そのままEnter)
? This repositoriy's client ID of reg-suit GitHub app

# 新しいS3バケットを作成するか (後ほど作成するのでNoとします)
[reg-suit] info Set up reg-publish-s3-plugin:
? Create a new S3 bucket No

# 既存S3のバケット名 (後ほど作成するので一旦そのままEnter)
? Existing bucket name
[reg-suit] info Configuration:

# regconfigファイルを更新するか
? Update configuration file Yes

# sample画像を作成するか
? Copy sample images to working dir No
Playwrightでスクリーンショットの取得
スクリーンショットの取得処理を実装します。
$ touch ./tests/vrt.spec.ts
import { test, expect } from '@playwright/test';

test('TOPページのスクリーンショット', async ({ page }) => {
  await page.goto('http://localhost:3000');
  await page.screenshot({
    path: './directory_contains_actual_images/top_page.png',
    fullPage: true,
  });
});
Playwrightインストール時に作成されるexample.spec.tsは今回不要なので削除します
rm -f ./tests/example.spec.ts
今回はchromiumだけでテストするので
playwright.config.tsを変更してfirefoxとwebkitはコメントアウトします。
またテスト実行時にサーバーが起動するようにしておきます。
/* Configure projects for major browsers */
projects: [
  {
    name: 'chromium',
    use: { ...devices['Desktop Chrome'] },
  },

- {
-   name: 'firefox',
-   use: { ...devices['Desktop Firefox'] },
- },
-
- {
-   name: 'webkit',
-   use: { ...devices['Desktop Safari'] },
- },

+ // {
+ //   name: 'firefox',
+ //   use: { ...devices['Desktop Firefox'] },
+ // },
+
+ // {
+ //   name: 'webkit',
+ //   use: { ...devices['Desktop Safari'] },
+ // },

/* [...] */
],

/* Run your local dev server before starting the tests */
- // webServer: {
- //  command: 'npm run start',
- //  url: 'http://127.0.0.1:3000',
- //  reuseExistingServer: !process.env.CI,
- // },
+ webServer: {
+   command: 'npm run dev',
+   url: 'http://127.0.0.1:3000',
+   reuseExistingServer: !process.env.CI,
+ },
Playwrightを実行して、スクリーンショットが撮れていることを確認します。
$ npx playwright test
directory_contains_actual_images/にtop_page.pngが作成されていればOKです。

スクリーンショットはGit管理不要なので.gitignoreに追加しておきます。
/test-results/
/playwright-report/
/playwright/.cache/
.reg
+ /directory_contains_actual_images/
AWSの設定
S3 バケット作成
テスト結果やレポートはS3で管理します。
ただ、S3を公開設定にするのはセキュリティリスクがあるので、CloudFront経由でのみS3にアクセスするようにしていきます。
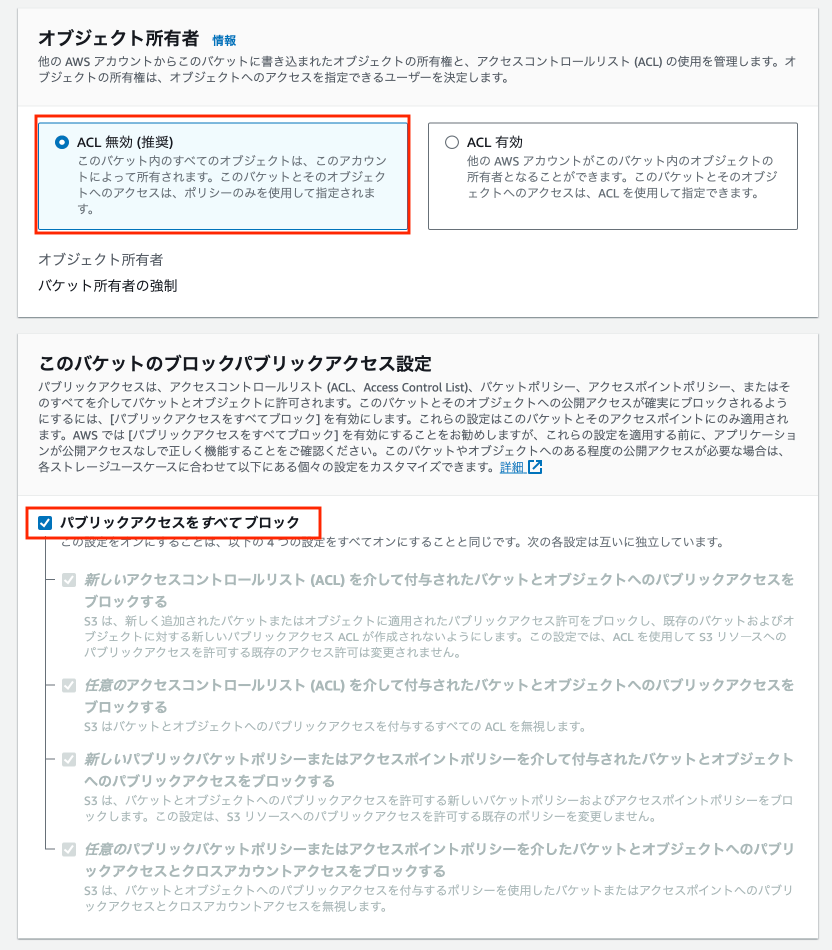
S3作成時、「ACL無効」を選択し、「パブリックアクセスをすべてブロック」にチェックを入れます。
CloudFrontからS3にアクセス
CloudFrontでディストリビューションを作成します。
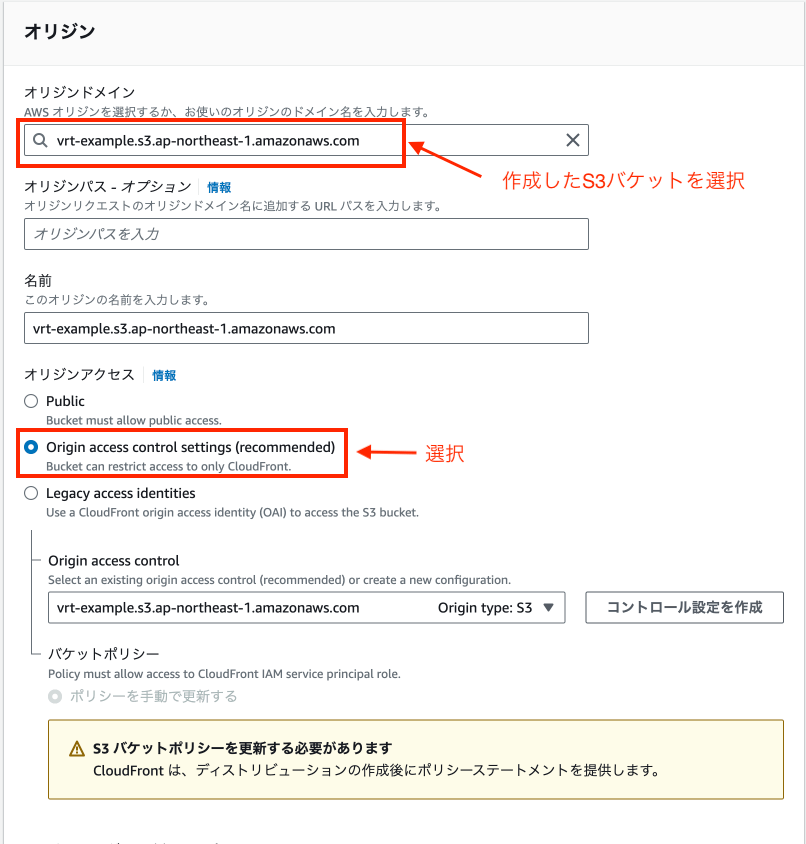
オリジンドメインには、先ほど作成したS3バケットを選択し、オリジンアクセスは「Origin access control settings」を選択します。
ディストリビューション作成後、バケットポリシーを更新するようにメッセージが表示されるので、「ポリシーをコピー」を押下して、コピーしてバケットポリシーを更新します。
{
    "Version": "2008-10-17",
    "Id": "PolicyForCloudFrontPrivateContent",
    "Statement": [
        {
            "Sid": "AllowCloudFrontServicePrincipal",
            "Effect": "Allow",
            "Principal": {
                "Service": "cloudfront.amazonaws.com"
            },
            "Action": "s3:GetObject",
            "Resource": "arn:aws:s3:::<バケット名>/*",
            "Condition": {
                "StringEquals": {
                    "AWS:SourceArn": "arn:aws:cloudfront::XXXXXXXXXXXX:distribution/XXXXXXXXXXXXX"
                }
            }
        }
    ]
}
regconfig.jsonの設定
作成したS3,CloudFrontをregconfig.jsonに設定します。
"reg-publish-s3-plugin": {
+ "bucketName": "バケット名",
+ "acl": "private",
+ "customDomain": "ディストリビューションドメイン名"
}
IAM
IAMユーザーを作成し、下記のポリシーをアタッチします。
{
    "Version": "2012-10-17",
    "Statement": [
        {
            "Sid": "reg-suit-s3-access",
            "Effect": "Allow",
            "Action": [
                "s3:DeleteObject",
                "s3:GetObject",
                "s3:GetObjectAcl",
                "s3:PutObject",
                "s3:PutObjectAcl",
                "s3:ListBucket",
                "s3-object-lambda:Get*",
                "s3-object-lambda:List*"
            ],
            "Resource": "arn:aws:s3:::<バケット名>"
        }
    ]
}
ローカルでVRT実行
GitHub ActionsでVRTを実装する前に、まずはローカルでVRTを試してみようと思います。
IAMからアクセスキーの作成を行い、ローカルからアクセスできるように~/.aws/credentialsもしくは環境変数にアクセスキーとシークレットアクセスキーを登録します。
~/.aws/credentialsの場合
[default]
aws_access_key_id = <your-access-key>
aws_secret_access_key = <your-secret-key>
環境変数の場合
export AWS_ACCESS_KEY_ID=<your-access-key>
export AWS_SECRET_ACCESS_KEY=<your-secret-key>
reg-suit実行
$ npx reg-suit run

New itemsが1になっています。初回のテストなので当然ですが比較対象がなく、追加のみになります。
差分の比較
reg-suitでは"reg-keygen-git-hash-plugin"を利用して、Gitのコミットのハッシュを使用し比較対象であるトピックブランチの親コミットを自動的に検出して差分を比較します。
ですので新しいトピックブランチを作成、コミットしましょう。
トピックブランチ作成
$ git checkout -b change_text
親ブランチとの差分を出すためトップページ(src/app/page.tsx)のテキスト変更します。
<p className='fixed left-0 top-0 flex w-full justify-center border-b border-gray-300 bg-gradient-to-b from-zinc-200 pb-6 pt-8 backdrop-blur-2xl dark:border-neutral-800 dark:bg-zinc-800/30 dark:from-inherit lg:static lg:w-auto lg:rounded-xl lg:border lg:bg-gray-200 lg:p-4 lg:dark:bg-zinc-800/30'>
- Get started by editing
+ Change text for VRT
<code className='font-mono font-bold'>src/app/page.tsx</code>
</p>
スクリーンショットの取得
$ npx playwright test
コミット(page.tsxだけ)
$ git add src/app/page.tsx
$ git commit -m "テキスト変更"
reg-suit 実行
$ npx reg-suit run
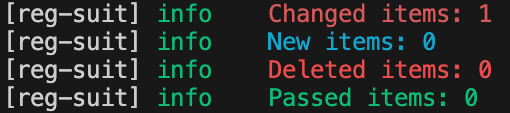
先程の画像から変更があったのでChanged itemsが1になりました。
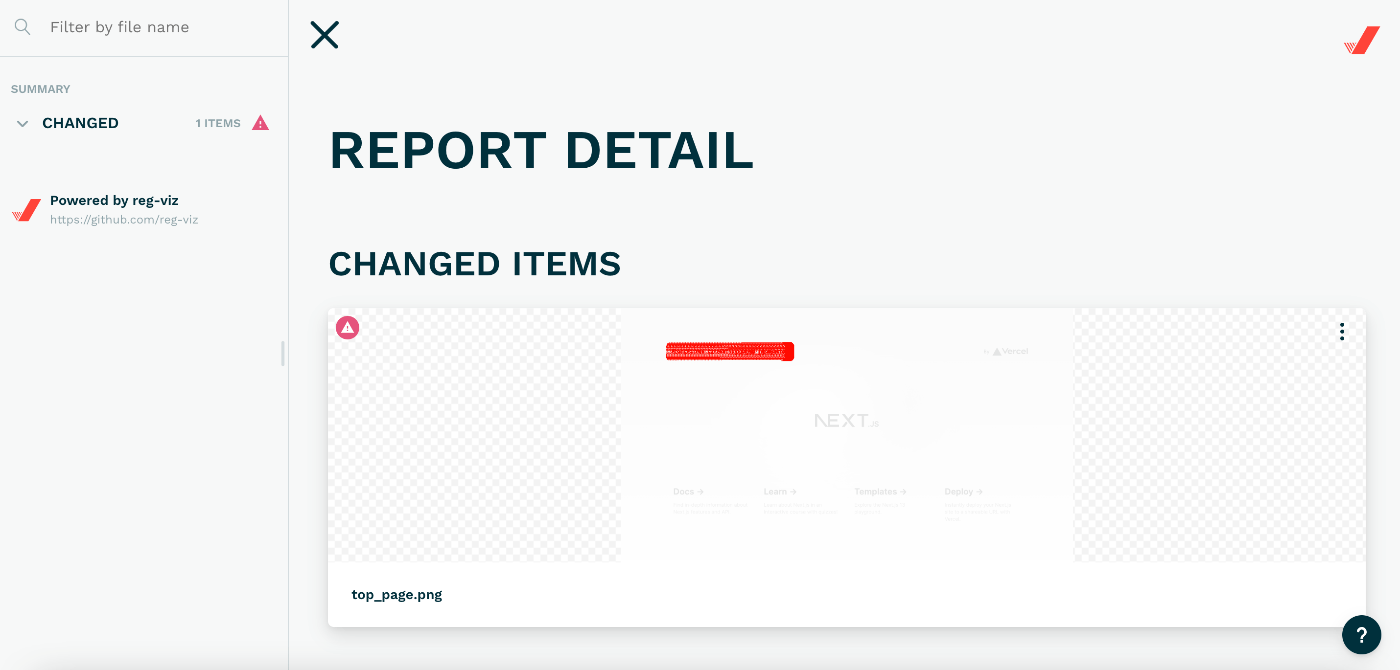
実行後の[reg-suit] info Report URL: のURLにアクセスしてみると各ページの差分を確認することができます。

reg-suitのレポートページ
レポートページでは複数の差分確認方法があり、どこがどのように変わったかを一目で確認することができます。
レポートページにBasic認証
レポートページは現在誰でもアクセスできる状態になっているので、CloudFront functionでBasic認証を実装して、特定のユーザーしかアクセスできないようにします。
前準備
Basic認証情報は以下とします。
ID:vrt-example
Password:basic-pass
下記コマンドを実行します。
echo -n "vrt-example:basic-pass" | base64
出力された文字列をコピーしておきます。
dnJ0LWV4YW1wbGU6YmFzaWMtcGFzcw==
CloudFront functionの作成
サイドメニューの関数から「関数を作成」をクリックします。
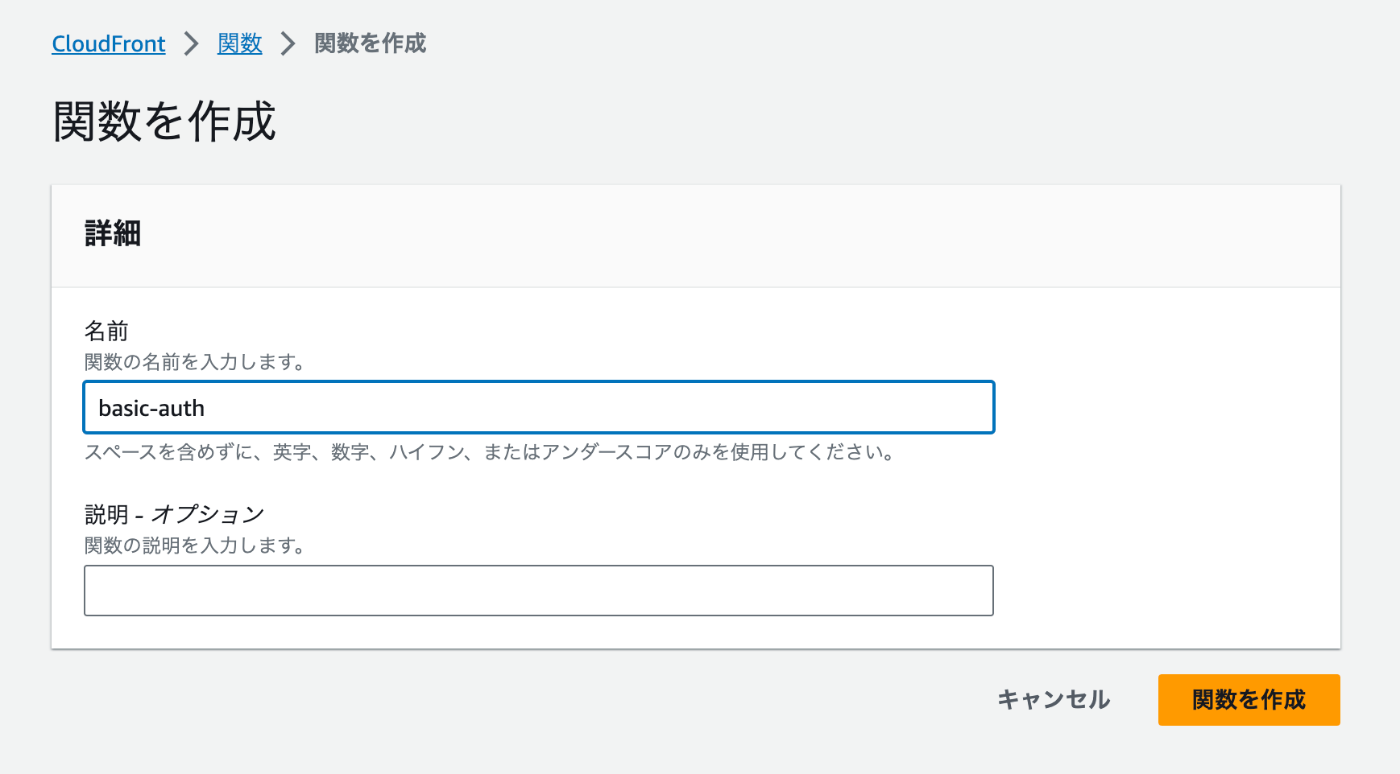
関数名を入力後、関数コードを下記のように実装します。
function handler(event) {
  var request = event.request;
  var headers = request.headers;

  // 出力された文字列
  var authString = "Basic dnJ0LWV4YW1wbGU6YmFzaWMtcGFzcw==";

  if (
    typeof headers.authorization === "undefined" ||
    headers.authorization.value !== authString
  ) {
    return {
      statusCode: 401,
      statusDescription: "Unauthorized",
      headers: { "www-authenticate": { value: "Basic" } }
    };
  }

  return request;
}
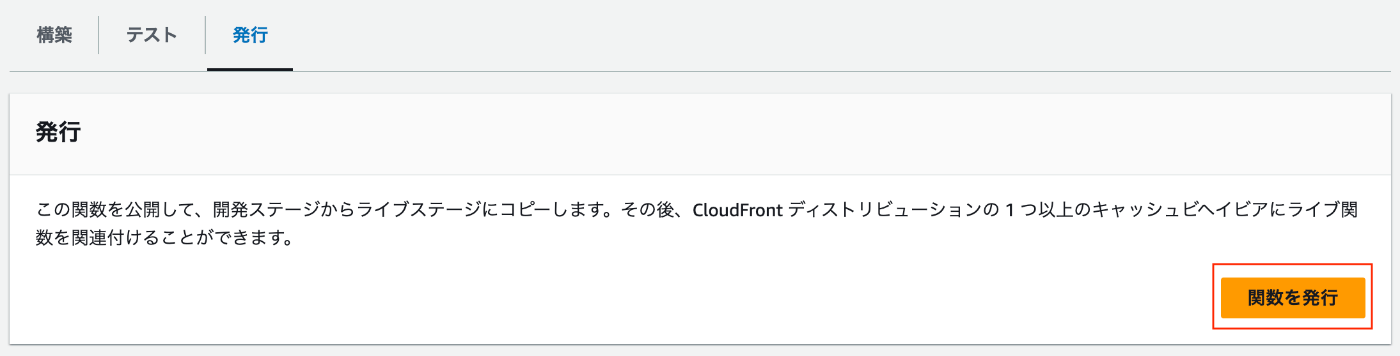
関数作成後に発行タブから「関数を発行」ボタンをクリックするのを忘れないようにしてください。
ディストリビューションの設定
CloudFront の ディストリビューションに戻ってビヘイビアタブから関数の関連付けを行います。
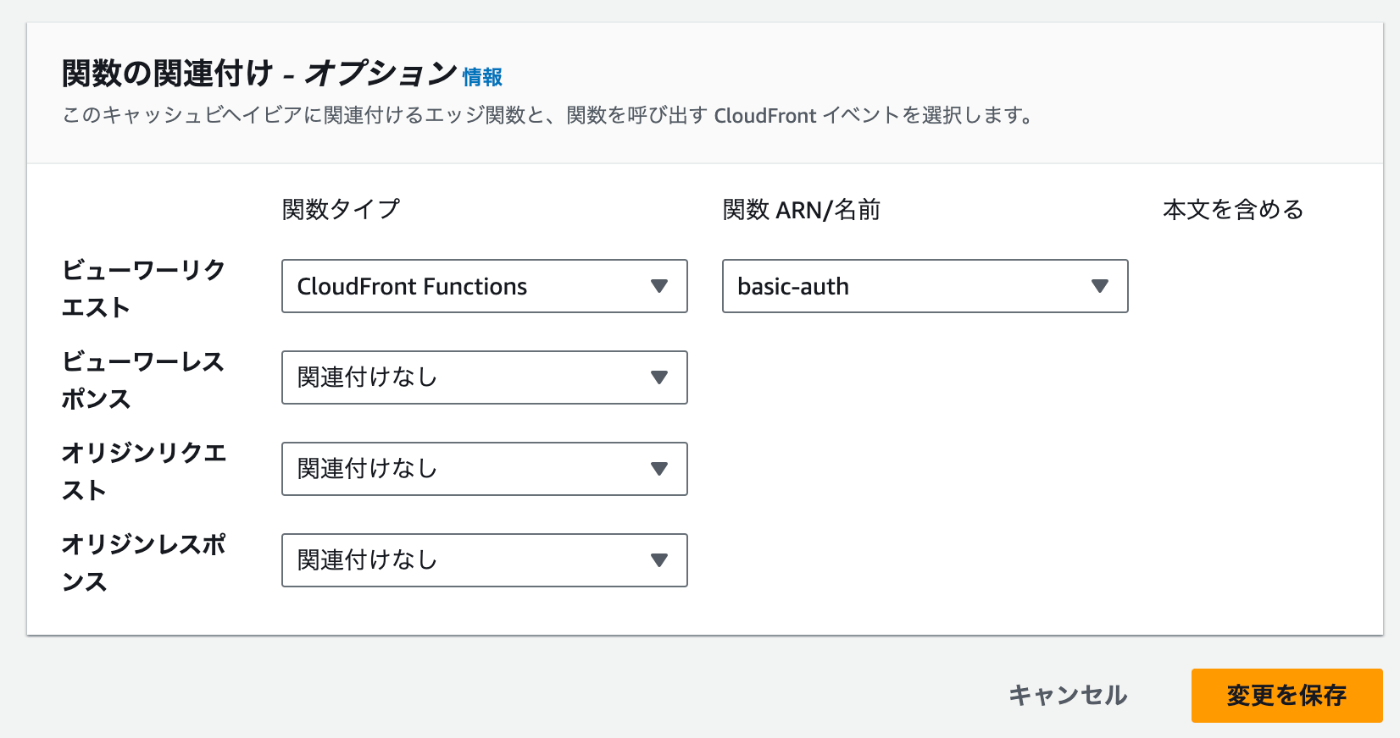
これでBasic認証の設定は完了です。
GitHub ActionsでVRTを実行する
ローカルでVRTを試すことができたので、今度はGitHub Actionsを利用しリモートリポジトリにプッシュ時にVRTが実行されるようにしたいと思います。
リポートリポジトリ作成
GitHubでリポジトリを作成して、mainブランチをプッシュします。
(Playwrightやreg-suitの追加分は後述するGitHub Secretsの値を設定後にコミットしたいため、まだコミットしないでおきます。
$ git checkout main
$ git remote add origin git@github.com:user/repository.git
$ git push -u origin main
クライアントIDを取得
reg-notify-github-pluginでテスト結果を GitHub リポジトリに通知したいので下記のページからGithub App の clientIDを取得します。
取得後、GitHub Secretsに登録します。
GitHub Secretsの設定は Settings > Secrets and variables > Actions のNew repository secretボタンから行えます。
| Name | Secret |
|---|---|
| REG_NOTICE_CLIENT_ID | 取得したclientID |
S3への画像アップロードはGitHub Actions OIDCを利用します。
下記の記事を参考に ID プロバイダと IAM ロールの作成します。
作成後IAM RoleのARNもGitHub Secretsに設定します。
| Name | Secret |
|---|---|
| AWS_ROLE_ARN | arn:aws:iam::<AWSアカウントID>:role/<IAMロール名> |
またregconfigに直接記述していたbucketName, customDomainの値もGitHub Secretsに登録しましょう。
| Name | Secret |
|---|---|
| S3_BUCKET_NAME | バケット名 |
| CLOUDFRONT_DOMAIN | ディストリビューションドメイン名 |
.github/workflowsの変更
- name: Playwright Tests
+ name: VRT
- on:
- push:
-   branches: [main, master]
- pull_request
-   branches: [main, master]
+ on: push
jobs:
  test:
    timeout-minutes: 60
    runs-on: ubuntu-latest
+   permissions:
+     id-token: write
+     contents: read
    steps:
      - uses: actions/checkout@v3
+       with:
+         fetch-depth: 0
+     - name: Configure AWS credentials
+       uses: aws-actions/configure-aws-credentials@v4
+       with:
+         role-to-assume: ${{ secrets.AWS_ROLE_ARN }}
+         aws-region: ap-northeast-1
      - uses: actions/setup-node@v3
        with:
          node-version: 18
      - name: Install dependencies
        run: npm ci
      - name: Install Playwright Browsers
        run: npx playwright install --with-deps
      - name: Run Playwright tests
        run: npx playwright test
-     - uses: actions/upload-artifact@v3
-       if: always()
-       with:
-         name: playwright-report
-         path: playwright-report/
-         retention-days: 30
+     - name: workaround for detached HEAD
+       run: |
+         git checkout ${GITHUB_REF#refs/heads/} || git checkout -b ${GITHUB_REF#refs/heads/} && git pull
+     - name: Run reg-suit
+       run: npx reg-suit run
+       env:
+         REG_NOTICE_CLIENT_ID: ${{ secrets.REG_NOTICE_CLIENT_ID }}
+         S3_BUCKET_NAME: ${{ secrets.S3_BUCKET_NAME }}
+         CLOUDFRONT_DOMAIN: ${{ secrets.CLOUDFRONT_DOMAIN }}
regconfigを変更
"plugins": {
"reg-keygen-git-hash-plugin": true,
"reg-notify-github-plugin": {
  "prComment": true,
  "prCommentBehavior": "default",
+ "clientId": "$REG_NOTICE_CLIENT_ID"
},
"reg-publish-s3-plugin": {
- "bucketName": "バケット名",
+ "bucketName": "$S3_BUCKET_NAME",
  "acl": "private",
- "customDomain": "ディストリビューションドメイン名"
+ "customDomain": "$CLOUDFRONT_DOMAIN"
}
リモートリポジトリにプッシュ
リモートリポジトリにPushする前にローカルでVRTを試した際に作成したS3バケット内のオブジェクトは空にしておきましょう。
S3バケットの空にしたら、ここまでの変更分を全てGitHubにプッシュします。
$ git add .
$ git commit -m "GitHub ActionsにVRT実装"
$ git push
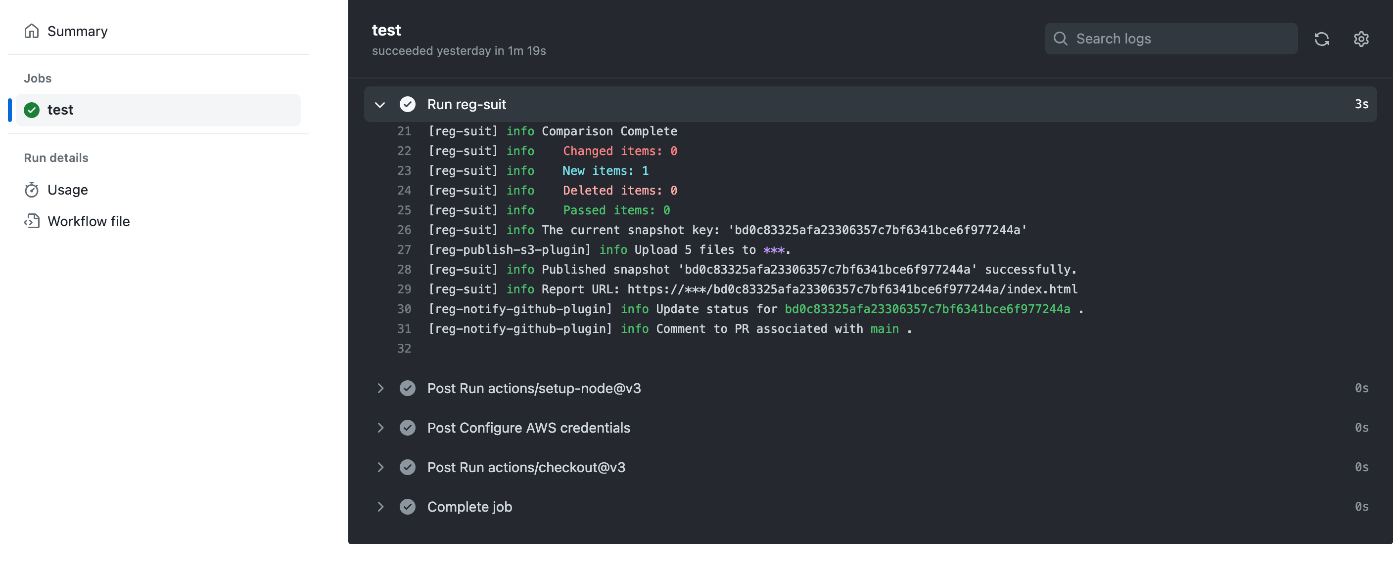
GitHubのActionsを確認するとNew itemsが1になっています。
差分の作成
ローカルで試した時と同じように新しくトピックブランチを作成してVRTが実行されるようにします。
トピックブランチ作成
$ git checkout -b change_text_for_github_actions
親ブランチとの差分を出すためトップページ(src/app/page.tsx)のテキスト変更します。
<p className='fixed left-0 top-0 flex w-full justify-center border-b border-gray-300 bg-gradient-to-b from-zinc-200 pb-6 pt-8 backdrop-blur-2xl dark:border-neutral-800 dark:bg-zinc-800/30 dark:from-inherit lg:static lg:w-auto lg:rounded-xl lg:border lg:bg-gray-200 lg:p-4 lg:dark:bg-zinc-800/30'>
- Get started by editing
+ Change text for VRT
<code className='font-mono font-bold'>src/app/page.tsx</code>
</p>
コミット&プッシュ
$ git add src/app/page.tsx
$ git commit -m "GitHub ActionsでのVRT動作確認のためテキスト変更"
$ git push origin change_text_for_github_actions
GitHubのActionsを確認するとChnaged itemsが1になっています。
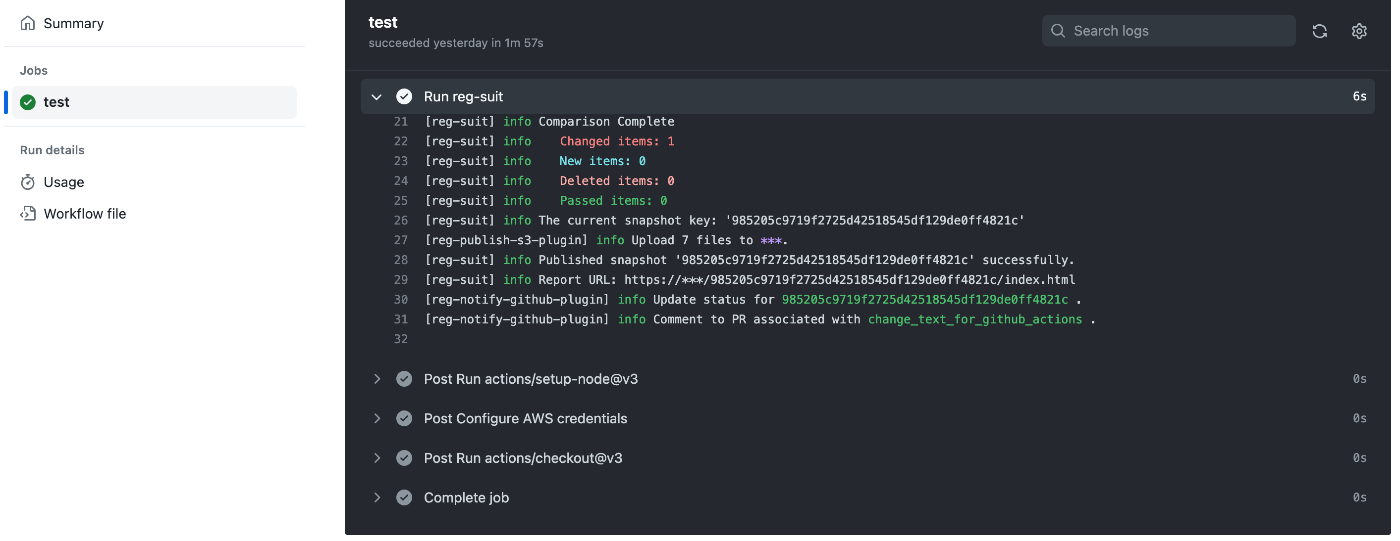
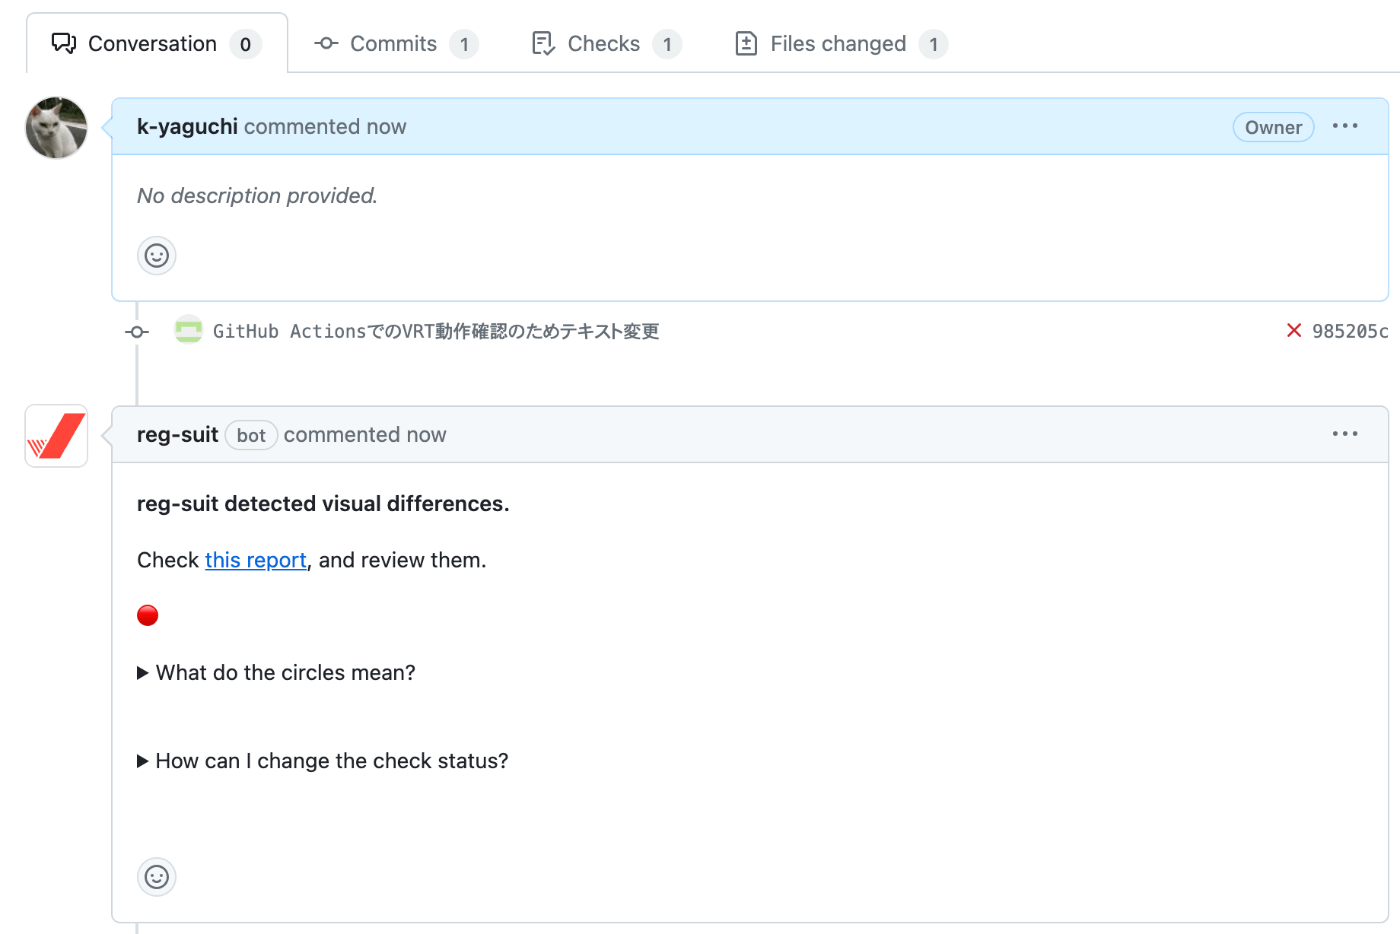
mainブランチへのプルリクエストを作成
mainブランチへのプルリクエストを作成するとコメントでテスト結果が表示されるようになり、VRTの結果を簡単に確認できるようになります。
VRTの導入方法は以上となります。
比較的簡単に導入することができるので、ぜひ導入してデグレーションの防止に役立てれば幸いです!
参考
Discussion