Next.js+Fireastoreでリアルタイムチャットを作る
この記事は合同会社DMM 23卒内定者 Advent Calendar 2022の14日目の記事です
はじめに
こんにちは!
DMM23卒内定者の0yuといいます。
気がつけば師走も終わりかけ、アドカレとしては大遅刻ですが、せっかくなので何か書ければと思い、登録していた枠に差し込み投稿させていただきました。
今回はちょっとした小ネタとして、Firebase Realtime Databaseの練習のため簡単なリアルタイムチャットアプリを作成してみました。
つくったもの

Firebase Realtime Databaseについて
Firebaseには、マルチプラットフォームでユーザー認証機能を実装できるFirebase Authentication や、静的なWebページをデプロイできるFirebase Hosting などのサービスがあります。
今回は、NoSQLデータベースによりリアルタイムでデータを保存し、すべてのクライアント間で同期できるサービスRealtime Database を利用します。
手順
Next.js+TypeScript+ESLint+Prettier+husky+Firebaseの環境構築を行います。
下記のテンプレートリポジトリをcloneすれば、3.リアルタイムチャットを実装する から同様の手順を行うことができます。
1.Next.jsプロジェクトのセットアップ
Create Next Appする
$ npx create-next-app@latest --ts
Need to install the following packages:
  create-next-app@13.1.1
Ok to proceed? (y) y
✔ What is your project named? … realtime-chat
✔ Would you like to use TypeScript with this project? … No / Yes
✔ Would you like to use ESLint with this project? … No / Yes
Creating a new Next.js app in /Users/denham/Documents/realtime-chat.

Using npm.
prettierの導入
$ yarn add -D prettier eslint-config-prettier
eslint-config-prettierの構成を利用して、Prettierと競合する可能性のあるESLint ルールをオフにする
huskyとlint-stagedのインストール
$ yarn add --dev husky lint-staged
$ npx husky install
$ npm pkg set scripts.prepare="husky install"
$ npx husky add .husky/pre-commit "npx lint-staged"
.hasky/pre-commitの修正
#!/usr/bin/env sh
. "$(dirname -- "$0")/_/husky.sh"

- npx lint-staged
+ yarn lint-staged
package.jsonに追記
{
  "lint-staged": {
    "**/*": "prettier --write --ignore-unknown"
  }
}
動いていることを確認
$ git commit -m"add: huskyとlint-stagedのインストール"
✔ Preparing lint-staged...
✔ Running tasks for staged files...
✔ Applying modifications from tasks...
✔ Cleaning up temporary files...
[main 98e8320] add: huskyとlint-stagedのインストール
 4 files changed, 8134 insertions(+), 5628 deletions(-)
 create mode 100755 .husky/pre-commit
eslintとprettierの構成のセットアップ
.eslintrc.jsonの修正
{
  "ignorePatterns": [
    "**/.next/**",
    "**/_next/**",
    "**/dist/**",
    "**/storybook-static/**",
    "**/lib/**"
  ],
  "extends": ["next/core-web-vitals", "prettier"],
  "rules": {
    "react/jsx-sort-props": [
      "error",
      {
        "callbacksLast": true,
        "shorthandLast": true
      }
    ],
    "import/order": "error"
  }
}
prettierの構成を追加
{
  "trailingComma": "all",
  "tabWidth": 2,
  "semi": false,
  "singleQuote": true,
  "jsxSingleQuote": true,
  "printWidth": 100
}
npm scriptの追加
{
  "scripts": {
    "dev": "next dev",
    "build": "next build",
    "start": "next start",
    "lint": "next lint --dir src",
    "lint:fix": "yarn lint --fix",
    "format": "prettier --write --ignore-path .gitignore './**/*.{js,jsx,ts,tsx,json}'",
    "prepare": "husky install"
  },
}
⚠️yarn v3の設定
⚠️注意事項として、Vercelはyarn3+pnpがサポート外となっています。
そのため、ホスティング先にVercelを用いる場合はyarn 1を使うことを推奨します。
リポジトリにyarn v3を設定する
$ yarn init -y
$ yarn set version berry # v2(Berry)を経由してアップグレード
$ touch yarn.lock
$ yarn set version 3.0.0
yarn v2以降 はデフォルトではyarn installからnode_moduleを生成しないため、node_moduleを使う設定を追加する
.yarnrc.yml ファイルを開き、以下の1行を追加する
+ nodeLinker: node-modules

yarnPath: .yarn/releases/yarn-3.0.0.cjs
.gitignore に以下の設定を追加する
# yarn (using Zero-Installs)
.yarn/*
!.yarn/cache
!.yarn/patches
!.yarn/plugins
!.yarn/releases
!.yarn/sdks
!.yarn/versions
yarn v2以降では、node_modulesの代わりに、.pnp.js(Plug'n'Play)という単一のファイルを内部に作成し、パッケージやバージョンの依存関係を解決するZero-Installs という手法がとられています。
これらのキャッシュは、合計1.2GBあるnode_moduleに比べ、合計しても139MBほどのサイズしかありません。そのため、コミットしてもほとんど問題ではありませんが(公式の見解)、後々の肥大化を避けるため.gitignore に追加します。
参考記事
2.Firebaseの設定
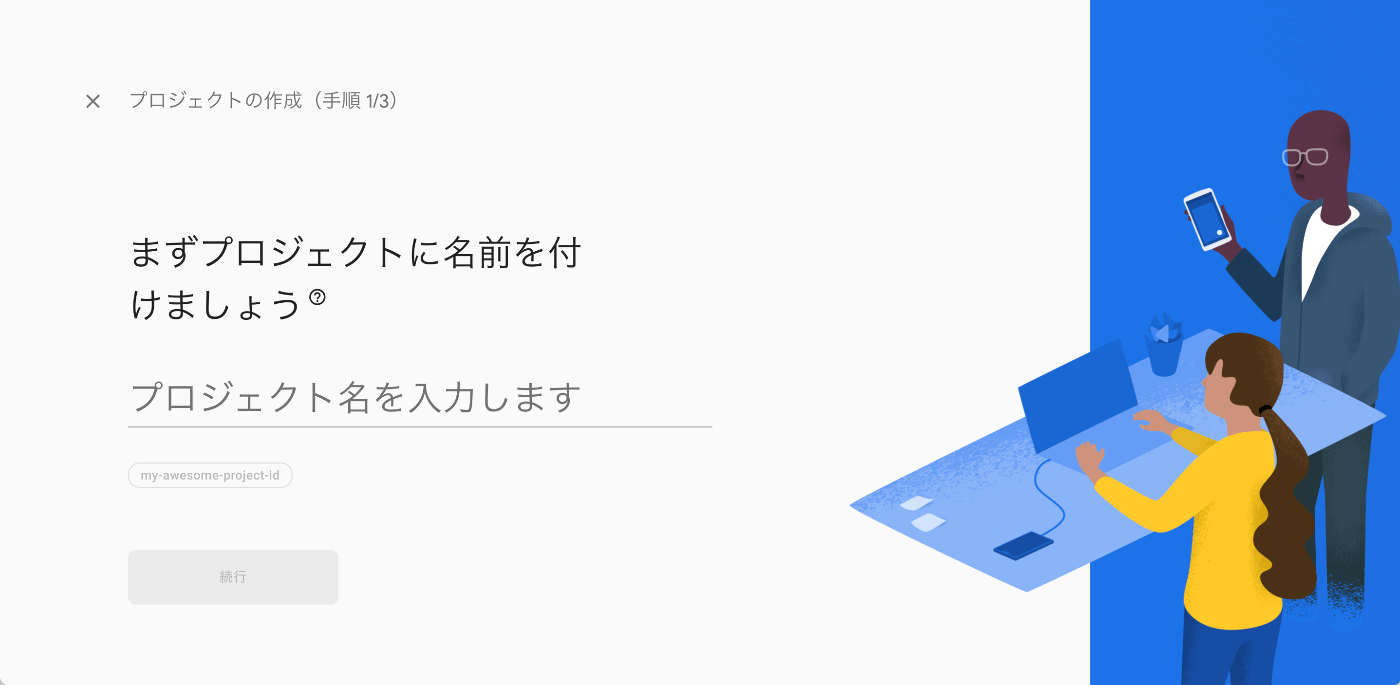
firebase コンソールから任意のプロジェクトを作成する
FirebaseCLIの追加
に従い、curlからインストールする
$ curl -sL https://firebase.tools | bash
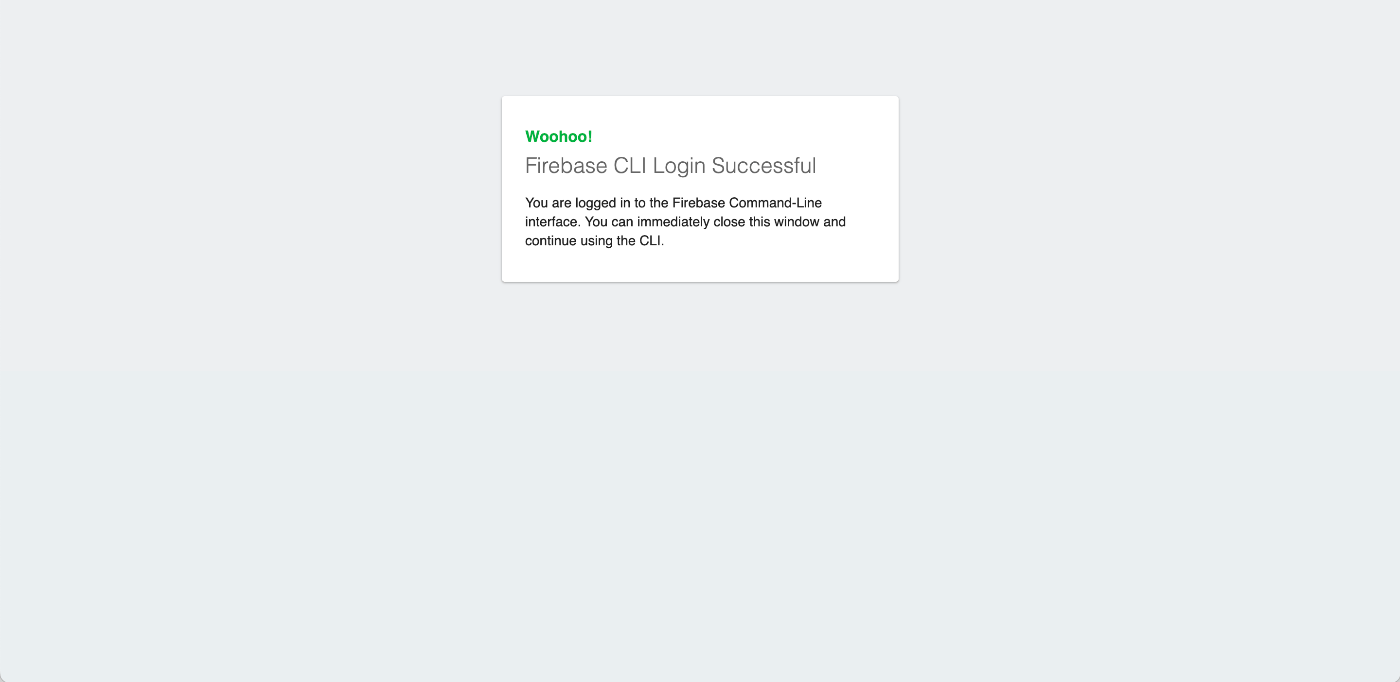
firebase loginで以下のような画面が出たら成功
firebase login
i  Firebase optionally collects CLI and Emulator Suite usage and error reporting information to help improve our products. Data is collected in accordance with Google's privacy policy (https://policies.google.com/privacy) and is not used to identify you.
? Allow Firebase to collect CLI and Emulator Suite usage and error reporting information? Yes
...
リポジトリにfirebaseを追加する
$ yarn add firebase
src/lib/firebase/firebase.tsを作成し、Firebaseの初期設定を行う
$ mkdir -p src/lib/firebase
$ touch src/lib/firebase/firebase.ts
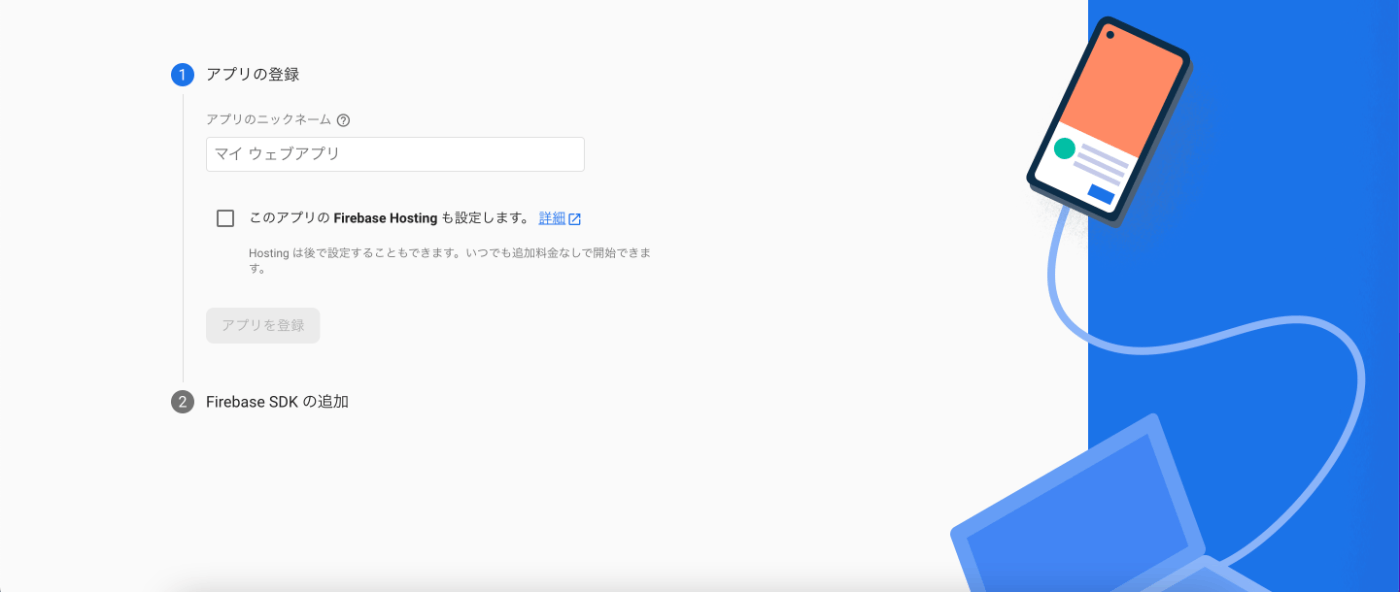
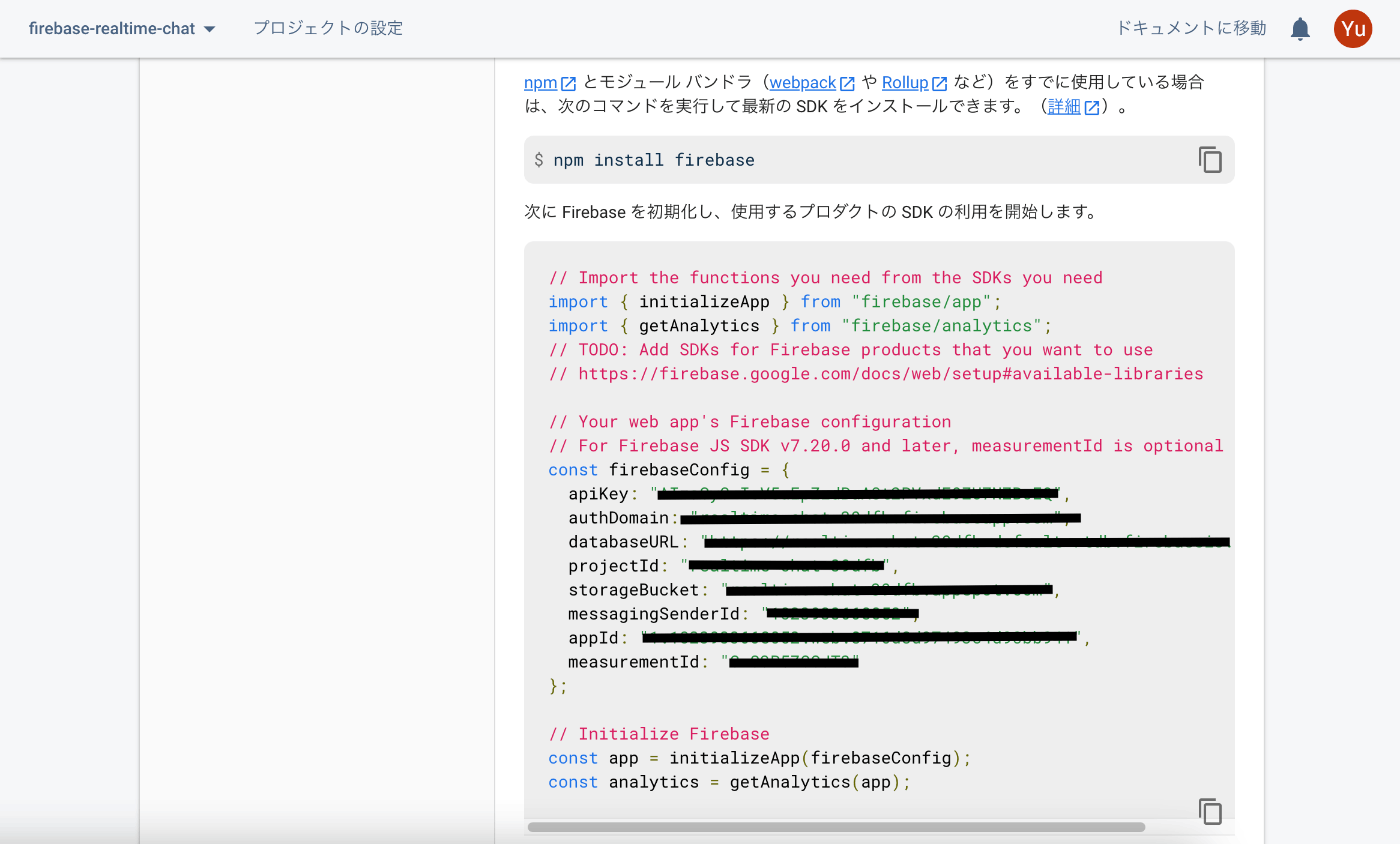
環境変数は画面左の歯車マークからプロジェクトの設定を選択してスクロール後、マイアプリから「アプリの追加」を行うことで確認できます。

import { getApps, getApp, FirebaseOptions, FirebaseApp, initializeApp } from 'firebase/app'

export const config: FirebaseOptions = {
  apiKey: process.env.NEXT_PUBLIC_FIREBASE_API_KEY,
  authDomain: process.env.NEXT_PUBLIC_FIREBASE_AUTH_DOMAIN,
  projectId: process.env.NEXT_PUBLIC_FIREBASE_PROJECT_ID,
  storageBucket: process.env.NEXT_PUBLIC_FIREBASE_STORAGE_BUCKET,
  messagingSenderId: process.env.NEXT_PUBLIC_FIREBASE_MESSAGE_SENDER_ID,
  appId: process.env.NEXT_PUBLIC_FIREBASE_APP_ID,
  measurementId: process.env.NEXT_PUBLIC_AMESUREMENT_ID,
}

export const getFirebaseApp = (): FirebaseApp => {
  return !getApps().length ? initializeApp(config) : getApp()
}
.local.envに環境変数を追加する
NEXT_PUBLIC_FIREBASE_API_KEY=XXXXXXXXXXXXXXXXXXXX
NEXT_PUBLIC_FIREBASE_AUTH_DOMAIN=XXXXXXXXXXXXXXXXXXXX
NEXT_PUBLIC_FIREBASE_PROJECT_ID=XXXXXXXXXXXXXXXXXXXX
NEXT_PUBLIC_FIREBASE_STORAGE_BUCKET=XXXXXXXXXXXXXXXXXXXX
NEXT_PUBLIC_FIREBASE_MESSAGE_SENDER_ID=XXXXXXXXXXXXXXXXXXXX
NEXT_PUBLIC_FIREBASE_APP_ID=XXXXXXXXXXXXXXXXXXXX
NEXT_PUBLIC_FIREBASE_AMESUREMENT_ID=XXXXXXXXXXXXXXXXXXXX
Firebaseの初期化と疎通確認
import '../styles/globals.css'
import type { AppProps } from 'next/app'
+ import { getFirebaseApp } from '../lib/firebase/firebase'

getFirebaseApp()

export default function App({ Component, pageProps }: AppProps) {
  return <Component {...pageProps} />
}
import { getApp } from 'firebase/app'

export default function Home() {
+  console.log(getApp())
  return (
    <>
      <h1>Hello world!</h1>
    </>
  )
}
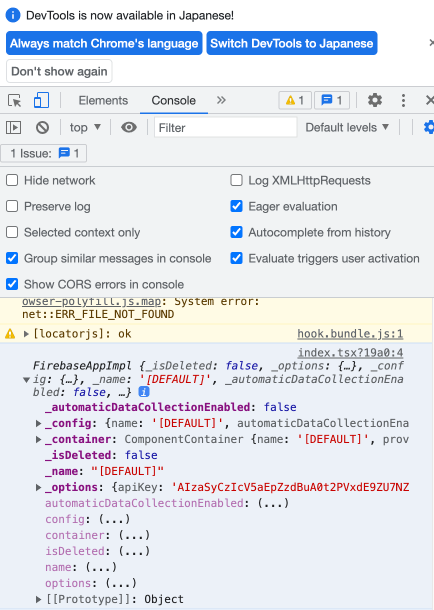
ここで、ブラウザ上でFirebaseAppImplの情報が取得できていれば疎通確認はOKです。
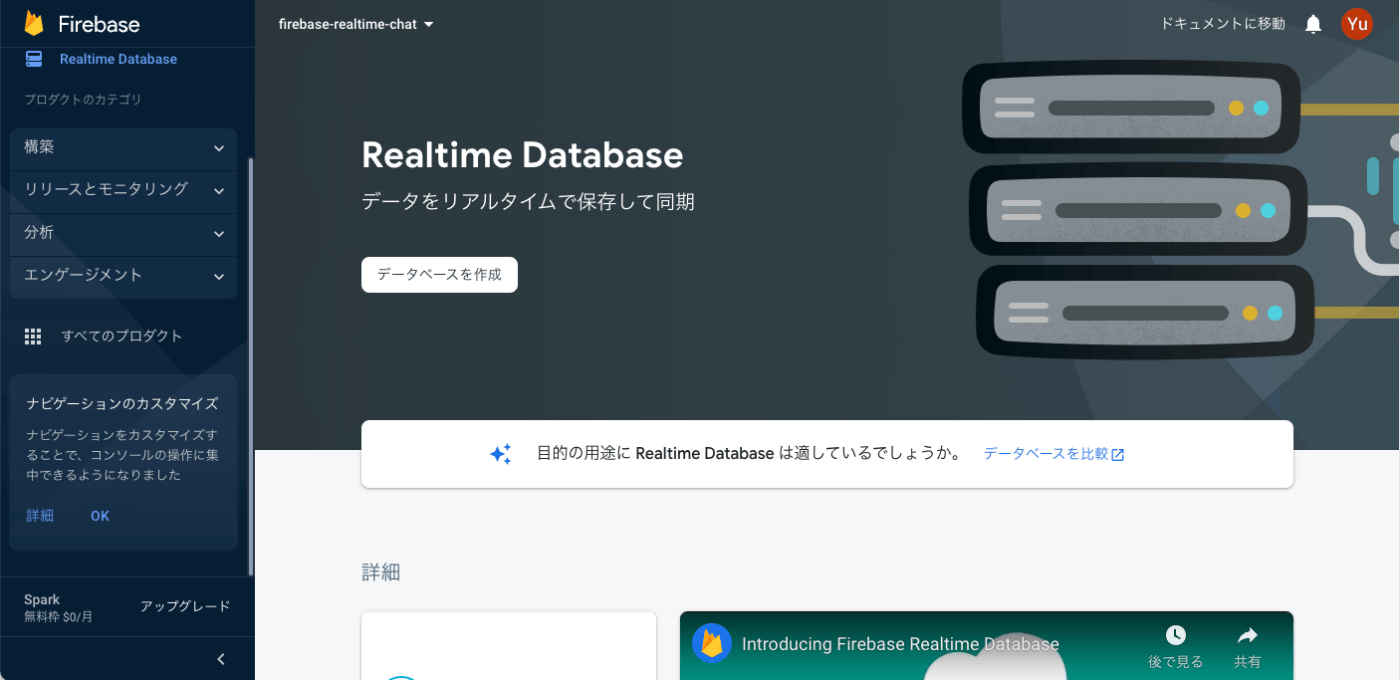
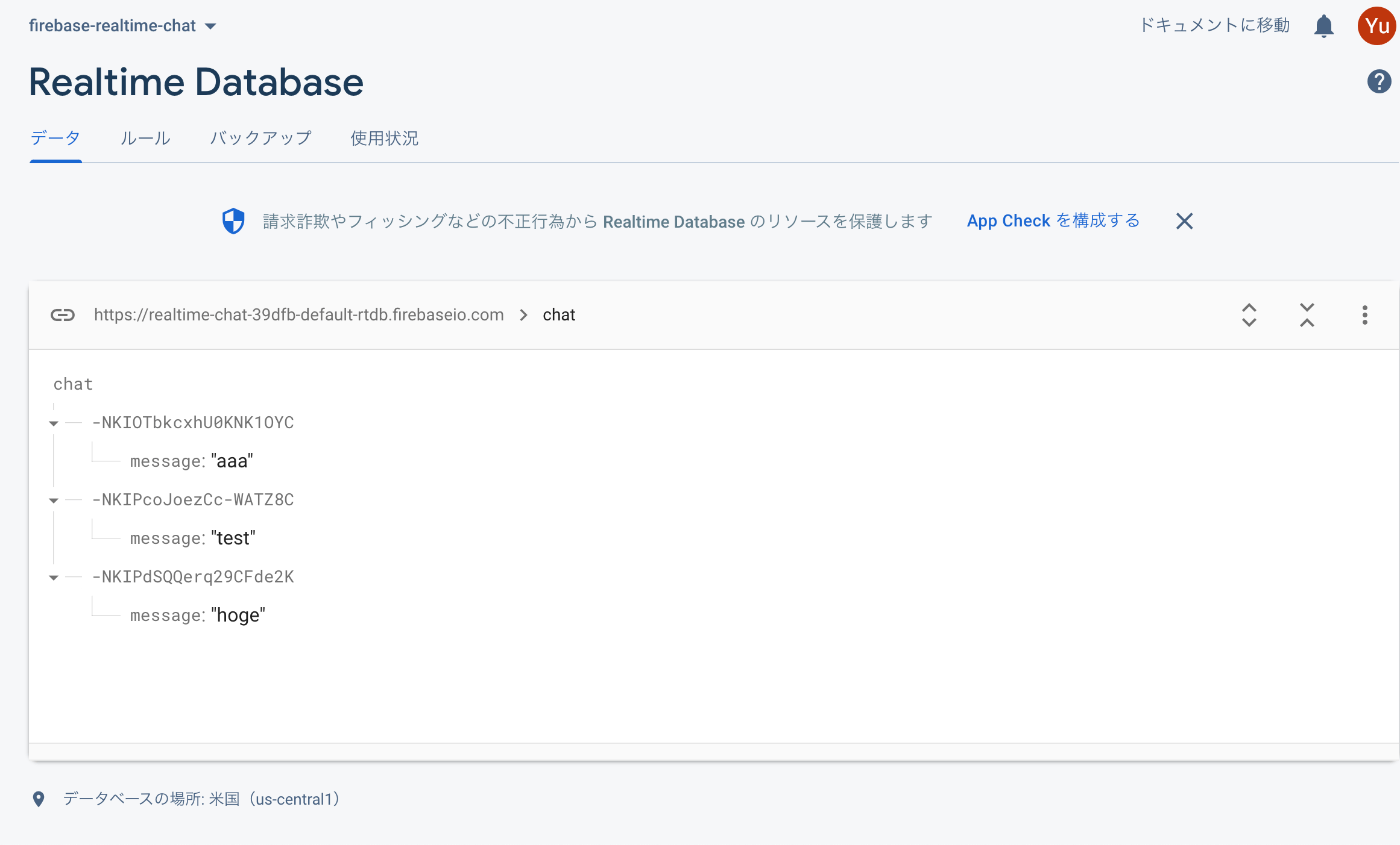
3.Firebase Realtime Databaseの作成
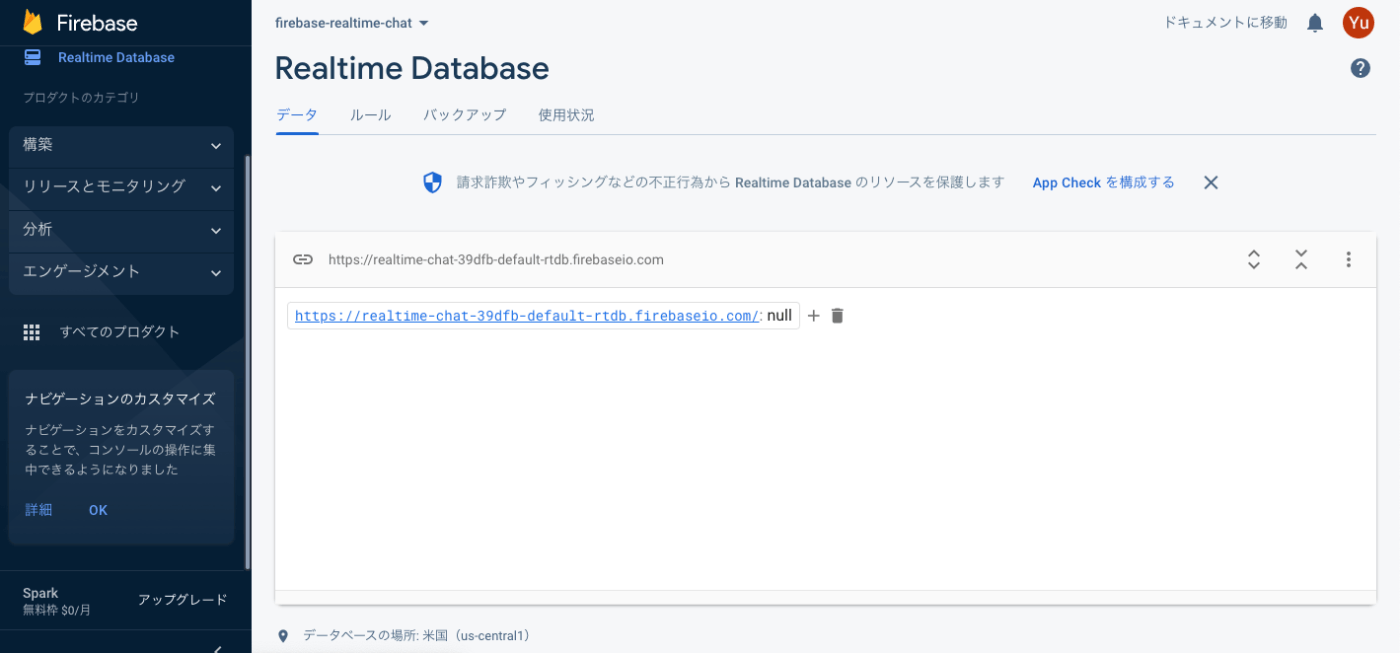
構築 > Realtime Databaseを選択
ロケーションは米国を選択する

後から変更できるため、テストモードで作成する

3.リアルタイムチャットを実装する
チャットの送信機能の実装
チャットの送信機能に必要な、データベースへのデータの保存は下記のリファレンスを参考に行います。
$ touch src/pages/chat/index.tsx
import { FormEvent, useState } from 'react'
// Import Admin SDK
import { getDatabase, push, ref } from '@firebase/database'
import { FirebaseError } from '@firebase/util'
import { NextPage } from 'next'

const ChatPage: NextPage = () => {
  const [message, setMessage] = useState<string>('')

  const handleSendMessage = async (e: FormEvent<HTMLFormElement>) => {
    e.preventDefault()
    try {
      // databaseを参照して取得する
      const db = getDatabase()
      // 取得したdatabaseを紐付けるref(db, 'path')
      const dbRef = ref(db, 'chat')
      // pushはデータを書き込む際にユニークキーを自動で生成する
      // 今回はpush() で生成されたユニークキーを取得する
      // messageというキーに値(message)を保存する
      await push(dbRef, {
        message,
      })
      // 書き込みが成功した際はformの値をリセットする
      setMessage('')
    } catch (e) {
      if (e instanceof FirebaseError) {
        console.log(e)
      }
    }
  }

  return (
    <>
      <h1>チャット</h1>
      <form onSubmit={handleSendMessage}>
        <input value={message} onChange={(e) => setMessage(e.target.value)} />
        <button type={'submit'}>送信</button>
      </form>
    </>
  )
}
export default ChatPage
動作確認
チャットの受信機能の実装
チャットの受信機能に必要な、データベースへのデータの取得は下記のリファレンスを参考に行います。
データベースのチャットログを監視し、変更があれば画面上に表示させるようにします。
import { FormEvent, useEffect, useState } from 'react'
// Import Admin SDK
import { getDatabase, onChildAdded, push, ref } from '@firebase/database'
import { FirebaseError } from '@firebase/util'
import { NextPage } from 'next'
import Message from '@/components/chat/message'

const ChatPage: NextPage = () => {
  const [message, setMessage] = useState<string>('')
  const [chatLogs, setChatLogs] = useState<{ message: string; createdAt: string }[]>([])

  ...

  useEffect(() => {
    try {
      // Get a database reference to our posts
      const db = getDatabase()
      const dbRef = ref(db, 'chat')
      // onChildAddedでデータの取得、監視を行う
      // onChildAddedはqueryとcallbackを引数に取り、Unsubscribeを返して、変更状態をsubscribeする関数
      return onChildAdded(dbRef, (snapshot) => {
        // Attach an asynchronous callback to read the data at our posts reference
        // データベースからのデータはsnapshotで取得する
        // snapshot.val()でany型の値を返す
        const message = String(snapshot.val()['message'] ?? '')
        setChatLogs((prev) => [...prev, { message }])
      })
    } catch (e) {
      if (e instanceof FirebaseError) {
        console.error(e)
      }
      // unsubscribeする
      return
    }
  }, [])

  return (
    <>
      <h1>チャット</h1>
      {chatLogs.map((chat, index) => (
        <Message key={`ChatMessage_${index}`} message={chat.message} />
      ))}
      <form onSubmit={handleSendMessage}>
        <input value={message} onChange={(e) => setMessage(e.target.value)} />
        <button type={'submit'}>送信</button>
      </form>
    </>
  )
}
export default ChatPage
# 受信部分のコンポーネントを作成
$ touch src/components/chat/message/indext.tsx
type MessageProps = {
  message: string
}

const Message = ({ message }: MessageProps) => {
  return (
    <ul>
      <li>
        <text>{message}</text>
      </li>
    </ul>
  )
}

export default Message
動作確認
送信したメッセージが画面上に追加されていくようになっています

Tailwindの導入で見た目を綺麗にする
これだけでは少々殺風景なので、CSSフレームワークのTailwind CSSを利用してUIを整えます。 に従ってセットアップを行います。
$ yarn add -D tailwindcss postcss autoprefixer
$ npx tailwindcss init -p
$ touch tailwind.config.js
/** @type {import('tailwindcss').Config} */
module.exports = {
  content: [
    "./src/pages/**/*.{js,ts,jsx,tsx}", // リポジトリ構成に応じたpathを設定する
    "./src/components/**/*.{js,ts,jsx,tsx}",
  ],
  theme: {
    extend: {},
  },
  plugins: [],
}
src/styles/globals.css を以下のように書き換える
@tailwind base;
@tailwind components;
@tailwind utilities;
src/pages/index.tsx を以下のように書き換える
import { getApp } from 'firebase/app'

export default function Home() {
  console.log(getApp())
  return (
    <>
+       <h1 className='text-3xl font-bold underline'>Hello world!</h1>
    </>
  )
}
ここまでのセットアップ後、tailwindが画面上に反映されないときは、一度.nextを削除してからyarn installしましょう。
VSCodeで開発を行う際は、下記の拡張機能が便利です。
クラス名の自動補完や、ホバーでCSS全体のプレビューをおこなってくれます。
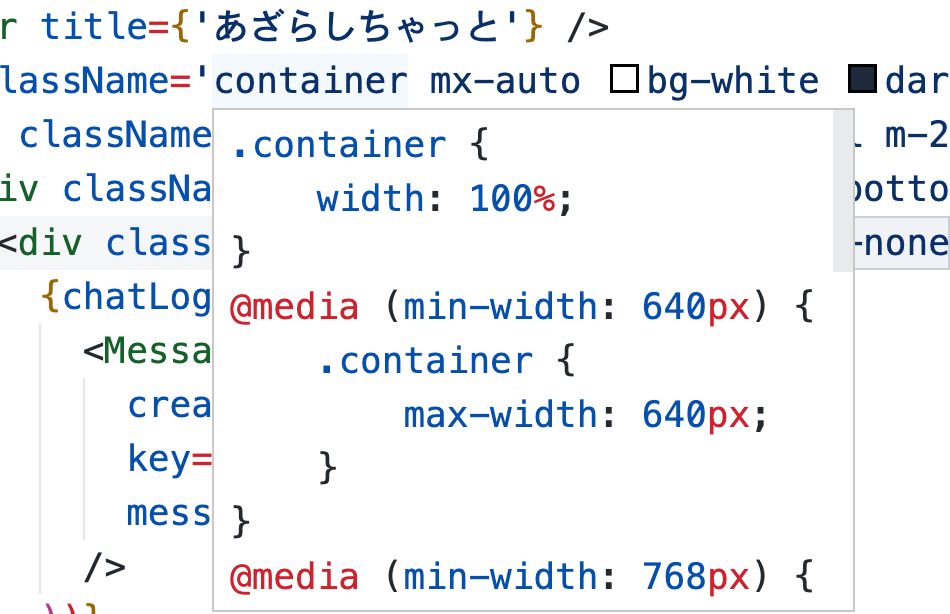
デフォルトだと補完のタイミングが遅いため、ユーザースペースかワークスペース内のsetting.jsonに下記の設定を記述すれば、常に候補を出してくれます。
"editor.quickSuggestions": {
  "strings": true
}
eslintは以下のpluginを導入します。
$ yarn add -D eslint-plugin-tailwindcss
下記のように設定することで、自動ソートなどをいい感じにおこなってくれます。
{
...
+  "plugins": ["tailwindcss"],
+  "extends": ["next/core-web-vitals", "prettier", "plugin:tailwindcss/recommended"],
...
}
tailwindで画面を作っていきます。
import Image from 'next/image'
import { FC } from 'react'
import LogoImage from '../../../assets/logo.jpg'
type MessageProps = {
  message: string
}

const Message: FC<MessageProps> = ({ message }: MessageProps) => {
  return (
+     <div className='flex flex-wrap gap-2'>
      <div>
+         <Image alt='LogoImage' className='h-12 w-12' src={LogoImage} />
      </div>
+       <p className='m-4 rounded bg-sky-200 p-2 text-white'>{message}</p>
    </div>
  )
}

export default Message
import { FC } from 'react'
type HeaderProps = {
  title: string
}
const Header: FC<HeaderProps> = ({ title }: HeaderProps) => {
  return (
    <header>
+       <nav className='relative flex w-full items-center justify-between bg-sky-200 py-2 shadow-md'>
+         <div className='mx-auto flex max-w-sm items-center space-x-4 p-6'>
          <div>
+             <div className='text-xl font-medium text-white'>{title}</div>
          </div>
        </div>
      </nav>
    </header>
  )
}
export default Header
スクロールバーのカスタマイズ
スクロールバーのスタイルは共通なので、global.cssで設定しています。
@tailwind base;
@tailwind components;
@tailwind utilities;

+ ::-webkit-scrollbar {
+   width: 10px;
+ }
+ ::-webkit-scrollbar-track {
+   background-color: transparent;
+   border-radius: 5px;
+ }
+ ::-webkit-scrollbar-thumb {
+   background-color: rgb(186 230 253);
+   border-radius: 5px;
+ }
送信時刻の表示
次に、date-fns というNode.jsのライブラリを使って送信時刻を取得・表示させてみます。
$ yarn add date-fns
    "@types/node": "^18.11.17",
    "@types/react": "18.0.26",
    "@types/react-dom": "18.0.10",
+    "date-fns": "^2.29.3",
    "eslint": "8.30.0",
    "eslint-config-next": "13.1.1",
    "firebase": "^9.15.0",
import LogoImage from '../../../assets/logo.jpg'
type MessageProps = {
  message: string
  createdAt: string
}
-const Message: FC<MessageProps> = ({ message }: MessageProps) => {
+const Message: FC<MessageProps> = ({ message, createdAt }: MessageProps) => +{
  return (
-    <div className='flex flex-wrap gap-2'>
+     <div className='grid auto-cols-max grid-flow-col'>
      <div>
        <Image alt='LogoImage' className='h-12 w-12' src={LogoImage} />
      </div>
      <p className='m-4 rounded bg-sky-200 p-2 text-white'>{message}</p>
      <p className='my-4 pt-4 text-sm'>{createdAt}</p>
    </div>
  )
}
import { FormEvent, useEffect, useLayoutEffect, useRef, useState } from 'react'
// Import Admin SDK
import { getDatabase, onChildAdded, push, ref } from '@firebase/database'
import { FirebaseError } from '@firebase/util'
import { NextPage } from 'next'
import { format } from 'date-fns'
import { ja } from 'date-fns/locale'
import Message from '@/components/chat/message'
import Header from '@/components/common/header'

const ChatPage: NextPage = () => {
  const [message, setMessage] = useState<string>('')
-  const [chatLogs, setChatLogs] = useState<{ message: string }[]>([])
+  const [chatLogs, setChatLogs] = useState<{ message: string; createdAt: string }[]>([])
  const scrollBottomRef = useRef<HTMLDivElement>(null)

+  const createdAt = format(new Date(), 'HH:mm', {
+    locale: ja,
+  })
  const handleSendMessage = async (e: FormEvent<HTMLFormElement>) => {
    e.preventDefault()
    try {
      // Get a database reference to our blog
      const db = getDatabase()
      // 取得したdatabaseを紐付けるref(db, 'path')
      const dbRef = ref(db, 'chat')
      // pushはデータを書き込む際にユニークキーを自動で生成する
      // 今回はpush() で生成されたユニークキーを取得する
      // messageというキーに値(message)を保存する
      await push(dbRef, {
        message,
+        createdAt,
      })
      // 成功した際はformの値をリセットする
      setMessage('')
      scrollBottomRef?.current?.scrollIntoView!({
        behavior: 'smooth',
        block: 'end',
      })
    } catch (e) {
      if (e instanceof FirebaseError) {
        console.log(e)
      }
    }
  }

  useEffect(() => {
    try {
      // Get a database reference to our posts
      const db = getDatabase()
      const dbRef = ref(db, 'chat')
      /** onChildAddedでデータの取得、監視を行う
       * onChildAddedはqueryとcallbackを引数に取り、Unsubscribeを返して、変更状態をsubscribeする関数
       * export declare function onChildAdded(query: Query, callback: (snapshot: DataSnapshot, previousChildName?: string | null) => unknown, cancelCallback?: (error: Error) => unknown): Unsubscribe;
       **/
      return onChildAdded(dbRef, (snapshot) => {
        // Attach an asynchronous callback to read the data at our posts reference
        // Firebaseデータベースからのデータはsnapshotで取得する
        // snapshot.val()でany型の値が返ってくる
        const message = String(snapshot.val()['message'] ?? '')
        const createdAt = String(snapshot.val()['createdAt'] ?? '')
+        setChatLogs((prev) => [...prev, { message, createdAt }])
      })
    } catch (e) {
      if (e instanceof FirebaseError) {
        console.error(e)
      }
      // unsubscribeする
      return
    }
  }, [])

  return (
    <div className='h-screen overflow-hidden'>
      <Header title={'あざらしちゃっと'} />
      <div className='container mx-auto bg-white dark:bg-slate-800'>
        <div className='relative m-2 h-screen items-center rounded-xl'>
+          <div className='absolute inset-x-0 top-4 bottom-32 flex flex-col space-y-2 px-16'>
            <div className='overflow-y-auto'>
              {chatLogs.map((chat, index) => (
+                <Message
+                  createdAt={chat.createdAt}
+                  key={`ChatMessage_${index}`}
+                  message={chat.message}
+                />
              ))}
              <div ref={scrollBottomRef} />
            </div>
            <div className='position-fixed'>
              <form onSubmit={handleSendMessage}>
                <div className='grid grid-flow-row-dense grid-cols-5 gap-4'>
                  <input
+                    className='col-span-3 block w-full overflow-hidden text-ellipsis rounded border py-2 px-4 pl-2 focus:ring-sky-500 sm:text-sm md:col-span-4 md:rounded-lg'
                    placeholder='メッセージを入力してください'
                    value={message}
                    onChange={(e) => setMessage(e.target.value)}
                  />
+                  <button
                    className='col-span-2 rounded bg-sky-200 py-2 px-4 font-bold text-white hover:bg-sky-300 md:col-span-1'
                    type={'submit'}
                  >
                    送信
                  </button>
                </div>
              </form>
            </div>
          </div>
        </div>
      </div>
    </div>
  )
}
export default ChatPage
自動スクロールの作成
メッセージの送信後、最新のメッセージが表示されるように一番下までスクロールさせたいと思います。
下記のように作成したRefを、スクロールさせたい場所にある Element にセットします。
  const [message, setMessage] = useState<string>('')
  const [chatLogs, setChatLogs] = useState<{ message: string; createdAt: string }[]>([])

+    const scrollBottomRef = useRef<HTMLDivElement>(null)
scrollIntoView()でスクロールを設定します。
scrollBottomRef?.current?.scrollIntoView!({
        behavior: 'smooth',
        block: 'end',
      })
スクロールさせたい場所のElementにRefを設定します。
ここでは、メッセージ一覧の末尾に
<div ref={scrollBottomRef} />
をセットします。
...
  return (
    <div className='h-screen overflow-hidden'>
      <Header title={'あざらしちゃっと'} />
      <div className='container mx-auto bg-white dark:bg-slate-800'>
        <div className='relative m-2 h-screen items-center rounded-xl'>
          <div className='absolute inset-x-0 top-4 bottom-32 flex flex-col space-y-2 px-16'>
            <div className='overflow-y-auto'>
              {chatLogs.map((chat, index) => (
                <Message
                  createdAt={chat.createdAt}
                  key={`ChatMessage_${index}`}
                  message={chat.message}
                />
              ))}
+              <div ref={scrollBottomRef} />
...
4.デプロイする
せっかくなのでデプロイしてみましょう。
Vercelでのホスティング方法についてはここでは割愛します。
(事前にVercelの管理画面からenv.localの値をセットするのを忘れないようにしましょう)
完成形は以下のようになります。
おわりに
今回はFirebaseのRealtime Databaseを利用し、簡単なリアルチャットアプリを作成しました。
Realtime Databaseは使いこなせれば色々と応用が効かせられそうなので、何かの形で発展させてアウトプットしてみたいと思います。
参考にさせていただいた記事
追記 12/29
OGPを実装しました
追記 2023/1/1
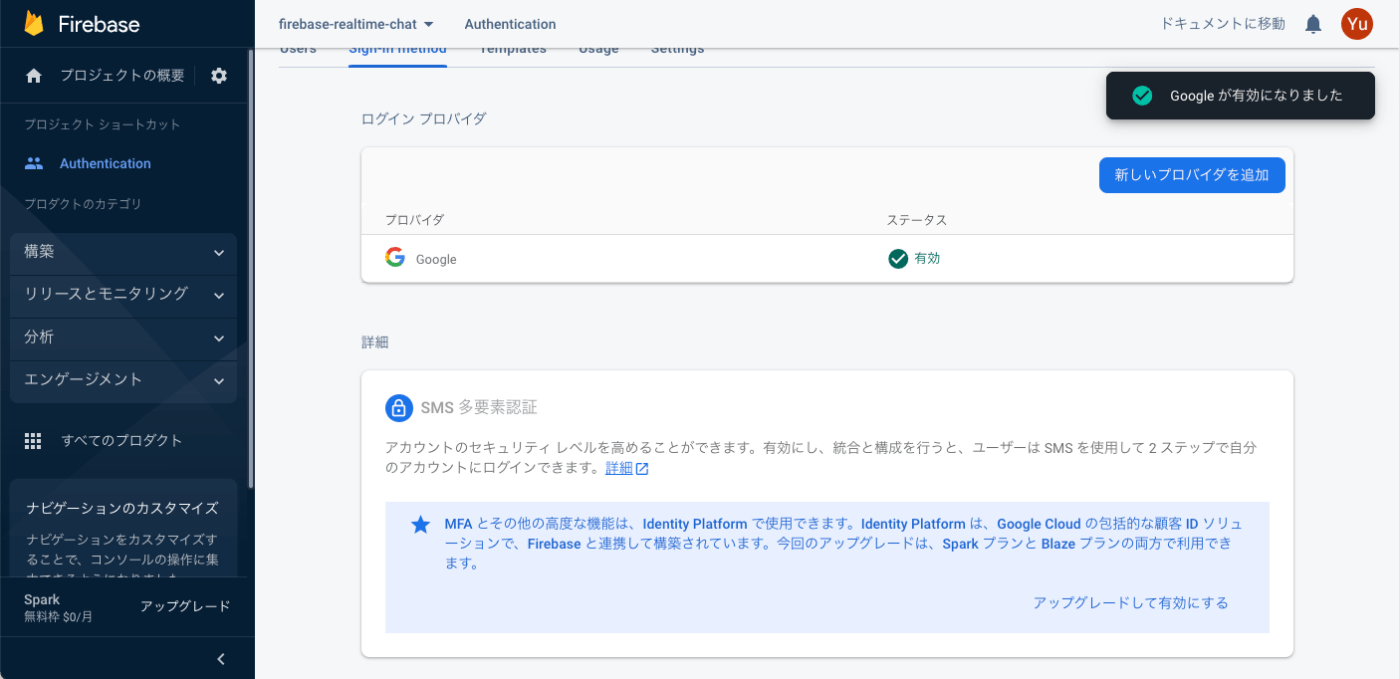
サインイン機能を実装しました
Discussion