VercelのOG Image Generation(vercel/og)を利用してOGP画像を作成する
前回の記事で作成したリアルタイムチャットにOGPを設定してみます。
OGP (Open Graph Protocol)について
OGPとは、Open Graph Protocol(オープン・グラフ・プロトコル)の略称です。
HTMLソースにOGPを設定することで、SEO対策のほか、SNSなどでシェアした際にWebページの情報(タイトル、概要、画像、URL)を見やすい形で表示することができます。
ユーザの目に留まりやすくなるので、クリック率が上昇し、アクセス数の向上などが期待できます。
ところで、2022/10/14、Vercelから「@vercel/og」というライブラリがリリースされました。
従来提供されていた「@vercel/og-image」と同様、OG画像を動的生成してくれるライブラリです。
「@vercel/og-image」では、PuppeteerでChromiumをServerless Functionから起動し、Webページのスクリーンショットを撮影するという手法がとられていました。
Serverless + Headless Browserには、
- 同包のChromiumが重い
- AWS Lambdaのコールドスタート中に解凍される必要があるが、処理が遅い
(Serverless Functionsの実体はVercel経由でデプロイされるAWS Lambda関数になっている)
という課題があったようです。
@vercel/ogでは、「Satori」というコアエンジンがHTMLやCSSを動的にSVG画像に変換してくれるようで、@vercel/og-imageに比べて5倍ほど速くOGP画像が生成できるとのことです。
今回は@vercel/ogを使ってOGP画像を生成し、Vercel HostingでOGPを設定してみたいとおもいます。
OGの生成
公式ドキュメント
のインストール手順に従って、リポジトリ内に@vercel/ogをインストールします。
$ yarn add @vercel/og
公式ドキュメントのサンプル
に習って、/pages/apiに以下のようなog.tsxを作成します。
import { ImageResponse } from '@vercel/og';
import { NextRequest } from 'next/server';

export const config = {
  runtime: 'edge',
};

export default function handler(req: NextRequest) {
  try {
    const { searchParams } = new URL(req.url);

    // ?title=<title>
    const hasTitle = searchParams.has('title');
    const title = hasTitle
      ? searchParams.get('title')?.slice(0, 100)
      : 'My default title';

    return new ImageResponse(
      (
        <div
          style={{
            backgroundColor: 'black',
            backgroundSize: '150px 150px',
            height: '100%',
            width: '100%',
            display: 'flex',
            textAlign: 'center',
            alignItems: 'center',
            justifyContent: 'center',
            flexDirection: 'column',
            flexWrap: 'nowrap',
          }}
        >
          <div
            style={{
              display: 'flex',
              alignItems: 'center',
              justifyContent: 'center',
              justifyItems: 'center',
            }}
          >
            <img
              alt="Vercel"
              height={200}
              src="data:image/svg+xml,%3Csvg width='116' height='100' fill='white' xmlns='http://www.w3.org/2000/svg'%3E%3Cpath d='M57.5 0L115 100H0L57.5 0z' /%3E%3C/svg%3E"
              style={{ margin: '0 30px' }}
              width={232}
            />
          </div>
          <div
            style={{
              fontSize: 60,
              fontStyle: 'normal',
              letterSpacing: '-0.025em',
              color: 'white',
              marginTop: 30,
              padding: '0 120px',
              lineHeight: 1.4,
              whiteSpace: 'pre-wrap',
            }}
          >
            {title}
          </div>
        </div>
      ),
      {
        width: 1200,
        height: 630,
      },
    );
  } catch (e: any) {
    console.log(`${e.message}`);
    return new Response(`Failed to generate the image`, {
      status: 500,
    });
  }
}
$ yarn dev
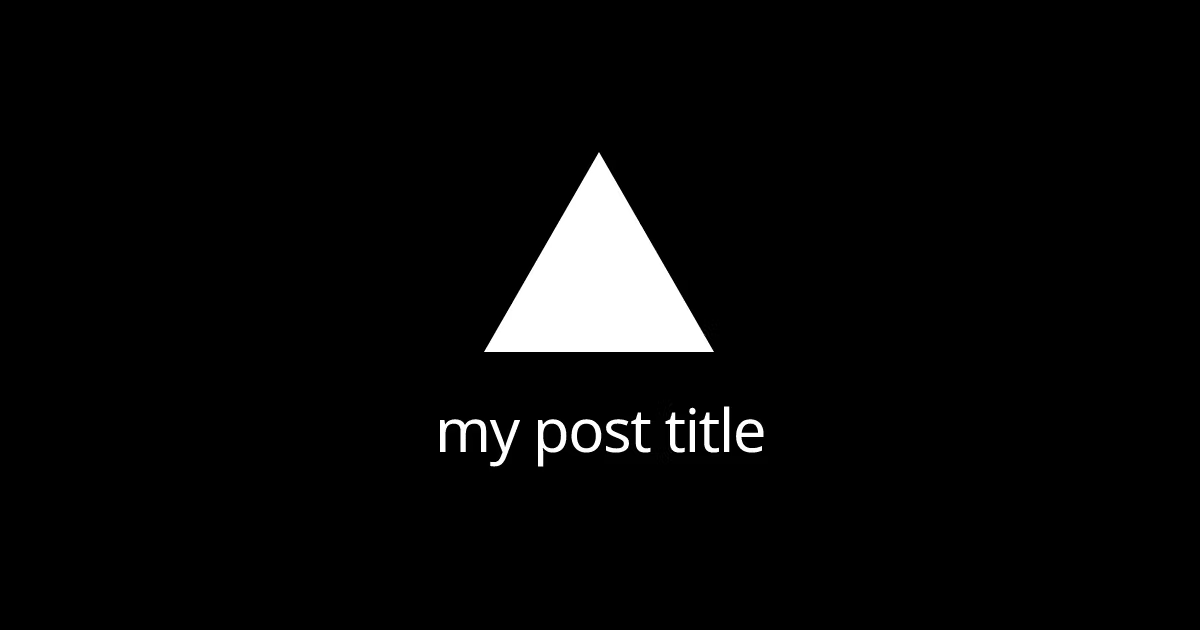
をしてlocalhost:3000/api/og にアクセスし、公式サンプル通りのOG画像が生成されていたら成功です。
ここから上記のサンプルコードをベースにカスタマイズしてみます。
@vercel/ogではsvg型式の画像をサポートしているため、背景画像のsvgを下記のサイトから生成します。
よしなに背景画像を生成したら、3:2(600x900)でexportします。
背景画像のカスタマイズ
ImageResponseコンポーネントのstyleを以下のように書き換えます。
imgのsrcやbackgroundImageにdataURIでSVGを指定する際は、encodeUriComponentでXMLをURIエンコードします。
import { ImageResponse } from '@vercel/og'
import { NextRequest } from 'next/server'

export const config = {
  runtime: 'experimental-edge',
}
export default async function handler(req: NextRequest) {
  try {
    const { searchParams } = new URL(req.url)

    // ?title=<title>
    const hasTitle = searchParams.has('title')
    const title = hasTitle ? searchParams.get('title')?.slice(0, 100) : 'あざらしちゃっと'

    return new ImageResponse(
      (
        <div
          style={{
            backgroundImage: `url(${`data:image/svg+xml,${encodeURIComponent(
              '<svg id="visual" viewBox="0 0 900 600" width="900" height="600" xmlns="http://www.w3.org/2000/svg" xmlns:xlink="http://www.w3.org/1999/xlink" version="1.1"><rect x="0" y="0" width="900" height="600" fill="#BAE6FC"></rect><g transform="translate(420.9767462136944 298.4175692475536)"><path d="M186.2 -169.9C236.2 -136.2 268.1 -68.1 251.7 -16.4C235.4 35.4 170.7 70.7 120.7 109.9C70.7 149 35.4 192 -10.3 202.3C-55.9 212.5 -111.7 190.1 -145.9 150.9C-180.1 111.7 -192.5 55.9 -196.7 -4.1C-200.8 -64.1 -196.6 -128.2 -162.4 -161.9C-128.2 -195.6 -64.1 -198.8 2 -200.8C68.1 -202.8 136.2 -203.6 186.2 -169.9" fill="#FFFFFF"></path></g></svg>',
            )}`})`,
            backgroundRepeat: 'no-repeat',
            backgroundPosition: 'center',
            backgroundSize: '100% 100%',
            width: '100%',
            height: '100%',
            display: 'flex',
            textAlign: 'center',
            alignItems: 'center',
            justifyContent: 'center',
          }}
        >
          <p style={{ fontSize: 50, textShadow: '0px 2px 2px rgba(0, 0, 0, 0.3)' }}>{title}</p>
        </div>
      ),
      {
        width: 900,
        height: 600,
      },
    )
  } catch (e: any) {
    console.log(`${e.message}`)
    return new Response(`Failed to generate the image`, {
      status: 500,
    })
  }
}
SEOコンポーネントの作成
next/head内のmetaタグにogpに関する設定をします。
コンポーネント化し、使いまわせるようにしておきます。
import Head from 'next/head'

type SeoProps = {
  title: string
  description: string
  url: string
  imageUrl: string
}

const Seo = (props: SeoProps) => {
  const { title, description, url, imageUrl } = props
  return (
    <Head>
      <title>{title}</title>
      <meta name='description' content={description} />
      <meta name='twitter:card' content='summary_large_image' />
      <meta property='og:title' content={title} />
      <meta property='og:description' content={description} />
      <meta property='og:url' content={url} />
      <meta property='og:site_name' content={title} />
      <meta property='og:image' content={imageUrl} />
    </Head>
  )
}
export default Seo
og:typeについて
設定できるメタデータの一覧は下記のサイトにまとまっています。
ここで設定したメタデータのそれぞれの意味は以下のようになっています。
og:title
シェアされたページのタイトルを記述します。
og:description
シェアされたページの説明文(要約)を記述します。文字数は全角80〜90文字程度が最適とされています。
og:url
シェアするページのURL(https(http)://から始まるURL)を記述します。
og:image
サムネイル画像(SNSでシェアされたときに表示される画像)のURLを記述します。
⚠️Facebookでは1200x630、1.91:1の比率が推奨となっています。
og:site_name
サイトの基本情報となるサイト名を出力します。
twitter:card
Twitterで表示するタイプを指定するタグです。
WebページにOGPを埋め込む
トップページからSEOコンポーネントを呼び出します。
import { getApp } from 'firebase/app'
import Link from 'next/link'
import Header from '@/components/common/header'
import Seo from '@/lib/seo'

export default function Home() {
  console.log(getApp())
  return (
    <>
      <Seo
        description={
          'Firebase Realtime Databaseでリアルタイムチャットをするサンプルです | あざらしちゃっと'
        }
        imageUrl={`https://${process.env.NEXT_PUBLIC_VERCEL_URL}/api/og?title=${'あざらしちゃっと'}`}
        title={'あざらしちゃっと'}
        url={`https://${process.env.NEXT_PUBLIC_VERCEL_URL}/`}
      />
      <Header title={'あざらしちゃっと'} />
      <div className='mt-32 flex justify-center gap-2 pt-32'>
        <button
          className='rounded bg-sky-200 py-2 px-4 font-bold text-white hover:bg-sky-300 md:col-span-1'
          type={'submit'}
        >
          <Link href='/chat'>ちゃっとぺーじへ</Link>
        </button>
      </div>
    </>
  )
}
下記のドキュメントによると、VERCEL_URLもしくは NEXT_PUBLIC_VERCEL_URLという環境変数に、デプロイ後に生成されるURLが格納されるようです。
imageUrl={`https://${process.env.NEXT_PUBLIC_VERCEL_URL}/api/og?title=${'あざらしちゃっと'}`}
url={`https://${process.env.NEXT_PUBLIC_VERCEL_URL}/`}
でprocess.env.NEXT_PUBLIC_VERCEL_URL を指定し、URLを取得できるようにします。
ここまでの状態、ローカル環境でも
$ yarn dev
をおこない
にアクセスすると、下記のような画像が生成されていると思います。

VercelにHosting後、OGPが展開されていることを確認できました。
以下のサイトにHostingしたURLを入力することで、OGPの動作確認ができます。
参考記事
Discussion