自作マークダウンパーサーとNext13+Prisma+GraphQL+Supabaseでブログを自作した
はじめに
以前RustとWASMでマークダウンパーサーを自作したので、これを使ってブログを作ってみました。
ソースコードは以下にあります。
技術構成
技術構成は以下のようになっています。
全体構成

フロントエンド
- Next.js / Type Script
- Apollo Client(状態管理ライブラリ)
- styled-components
- emotion
- mantine
ミドルウェア
- Prisma
BFF
- GraphQL Yoga(GraphQLサーバー)
- Pothos GraphQL(GraphQL スキーマビルダー)
バックエンド
- Rust+WebAssembly(マークダウンパーサー)
- (Vercel Postgress(サーバレスストレージ))
- Supabase
デプロイ先
- Vercel(FE/BF共通ホスティング先)
認証・認可
- NextAuth
ドメイン取得
- Cloudflare Registrar
DB設計
本ブログのDB設計は以下のようになっています。
当初はNoSQL(MongoDB)とPrismaで設計・実装していたのですが、Vercel Hostingとの噛み合わせにハマり、PostgreSQLとPrismaの構成で再実装しました。
また、途中Vercel PostgresのHobby planの制限を超過したため、開発環境はVercel Postgress、運用環境はSupabaseで開発を行いました。
Vercel Postgressの設定
最初に以下のドキュメントに沿って、Vercel Postgressの設定を行います。
Vercel Postgresのパッケージのインストール
$ npm i @vercel/postgres
Vercel CLIのインストール
$ npm i -g vercel@latest
ダッシュボードからStorageタブを選択し、Create Databaseボタンを押下します。
Create New Database のポップアップが表示されるため、Postgres Serverless SQLを選択した状態で、Continueボタンを押下します。
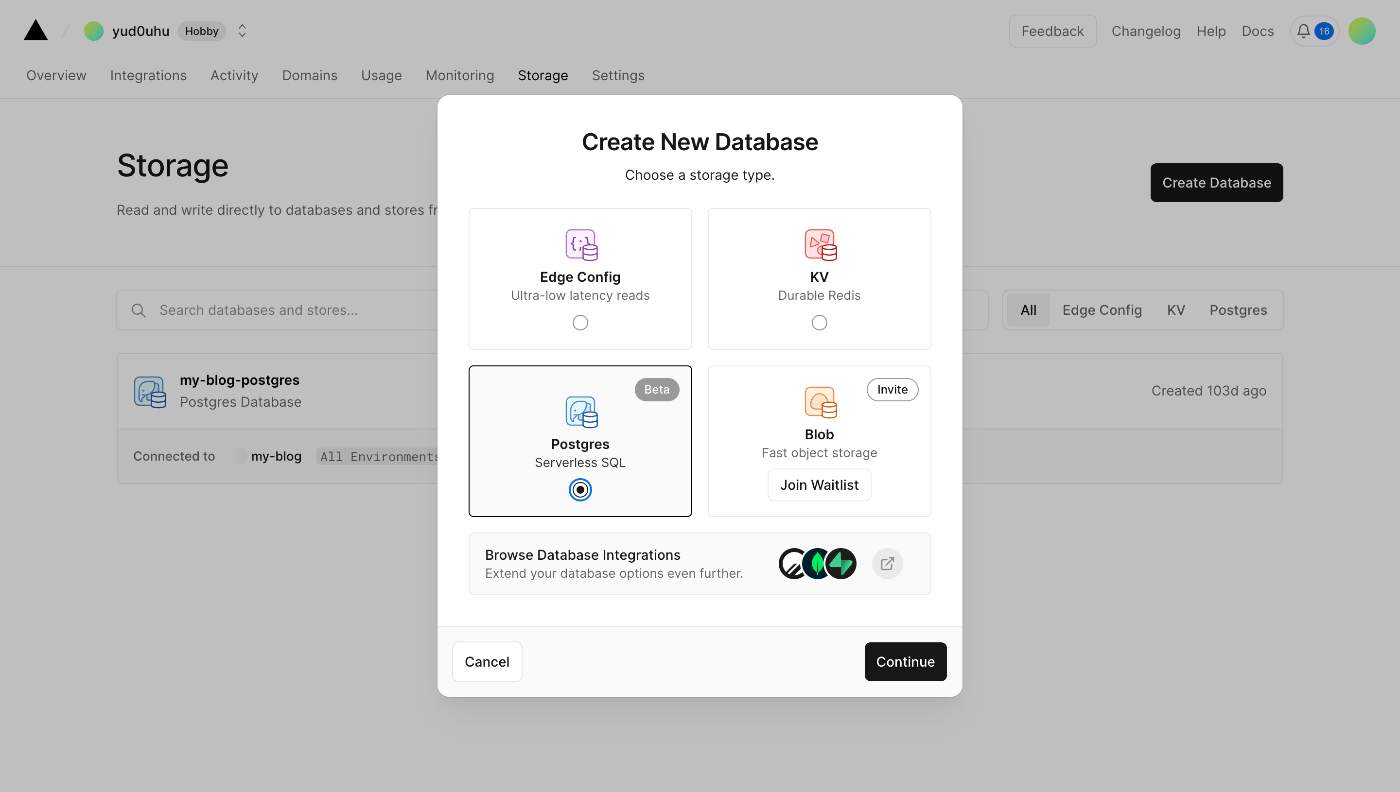
データベース名とリージョンを決定して作成完了です。
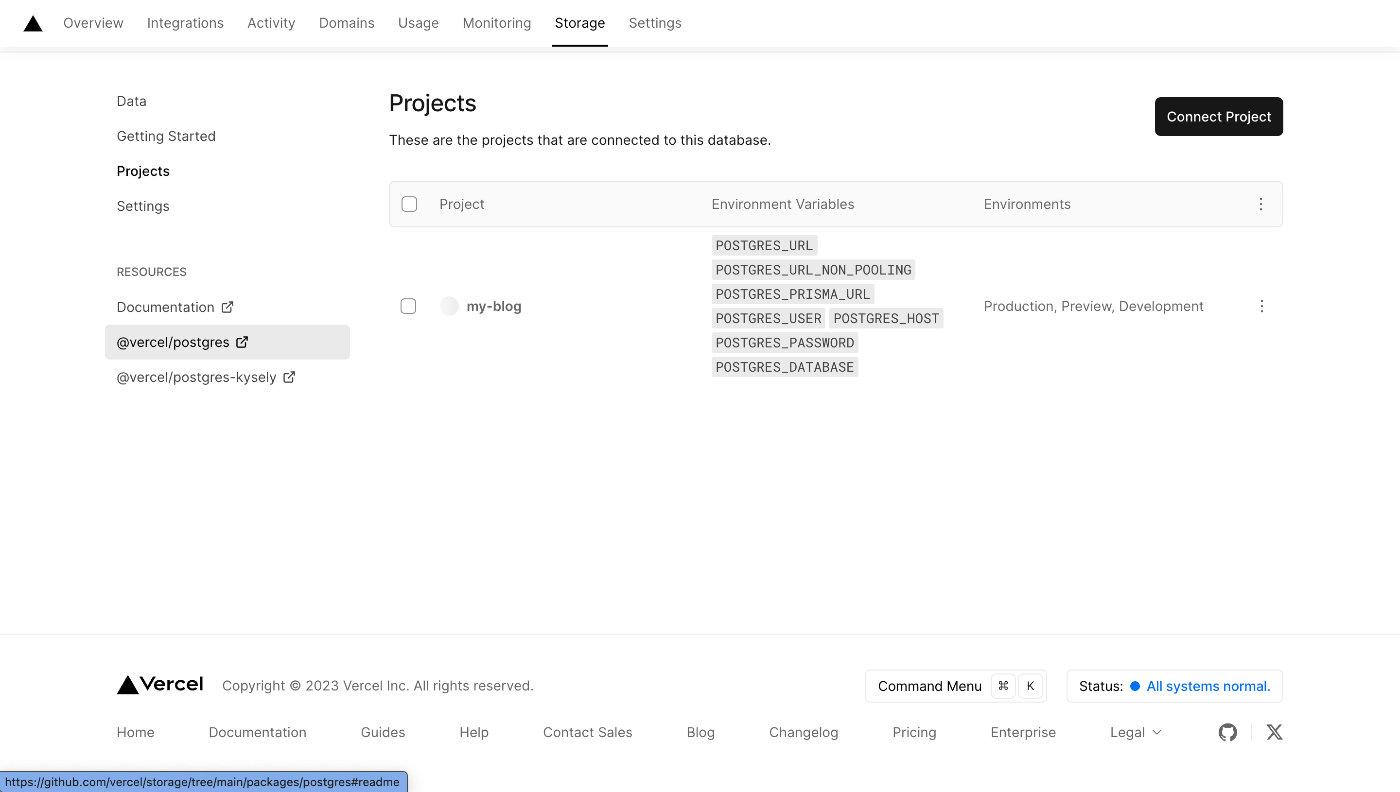
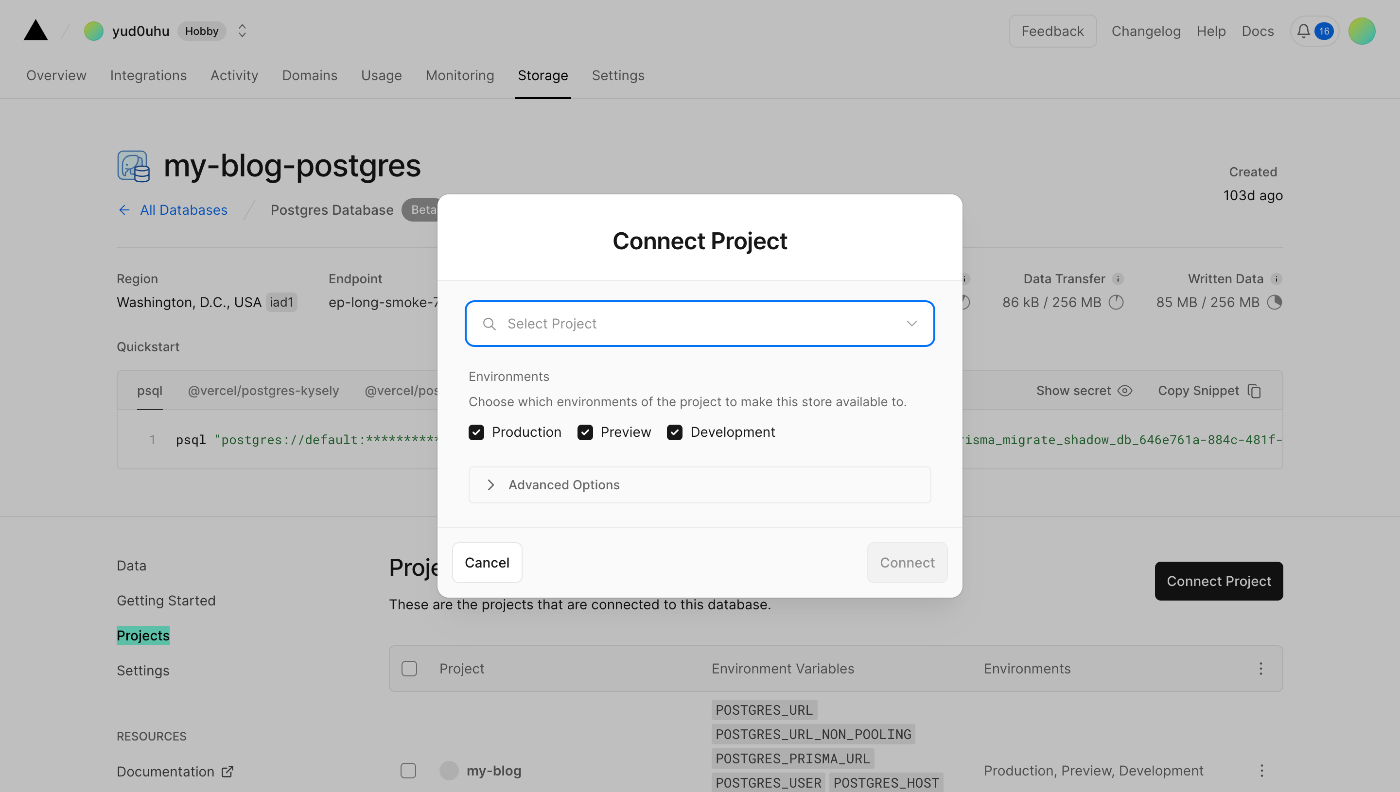
プロジェクトとの紐付けは、ダッシュボードサイドメニューのProjectsタブを選択し、Connect Store ボタンから行います。
参考
Supabaseの設定
こちらもダッシュボードで事前に設定を行います。
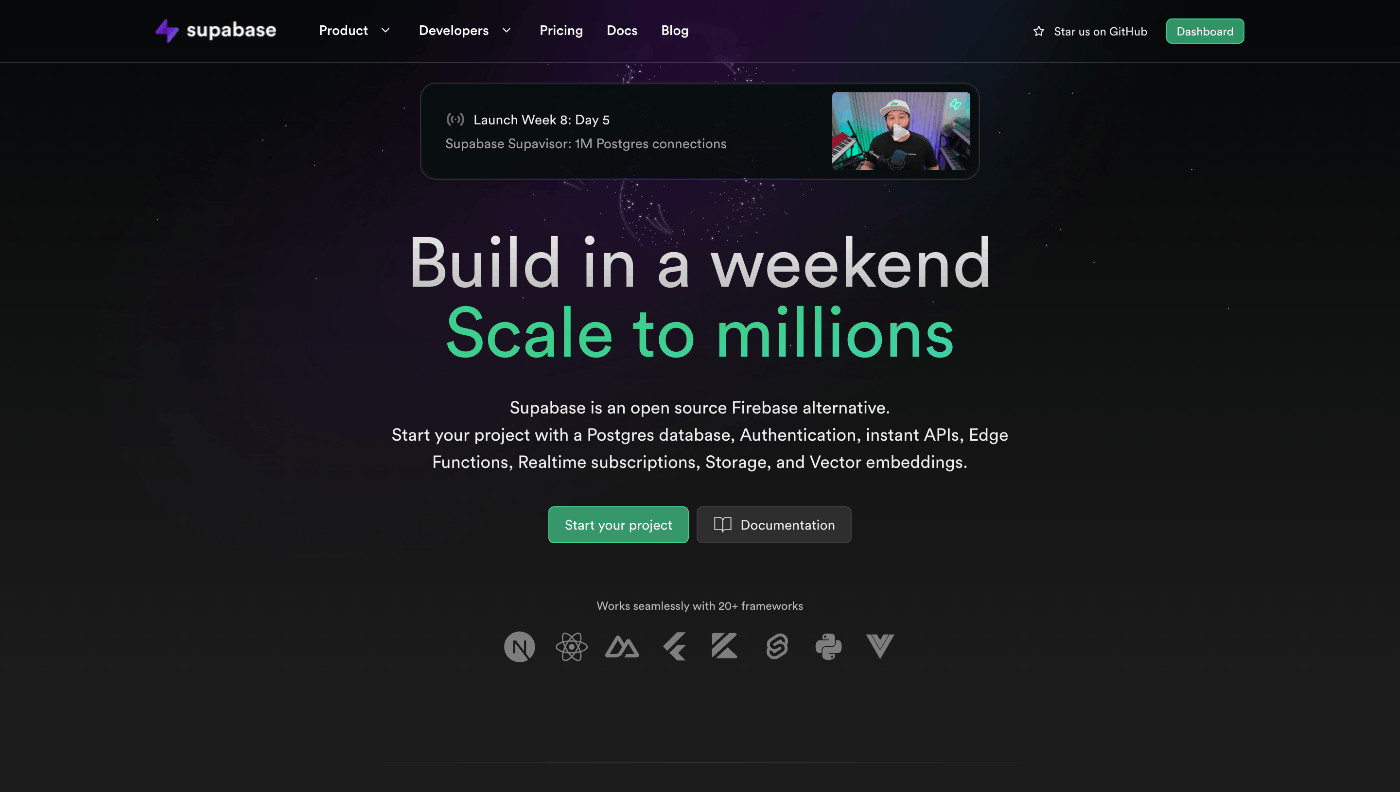
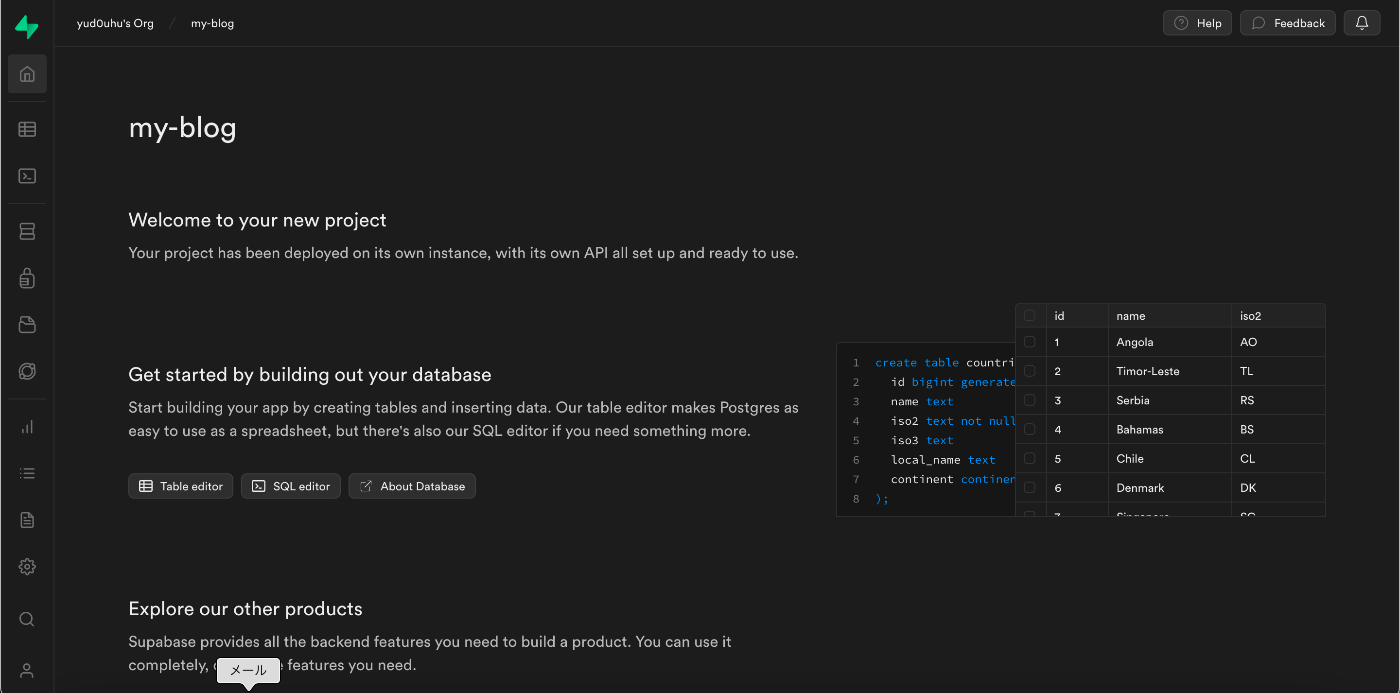
Start your Projectからアカウントの新規作成後、ダッシュボードに遷移します。
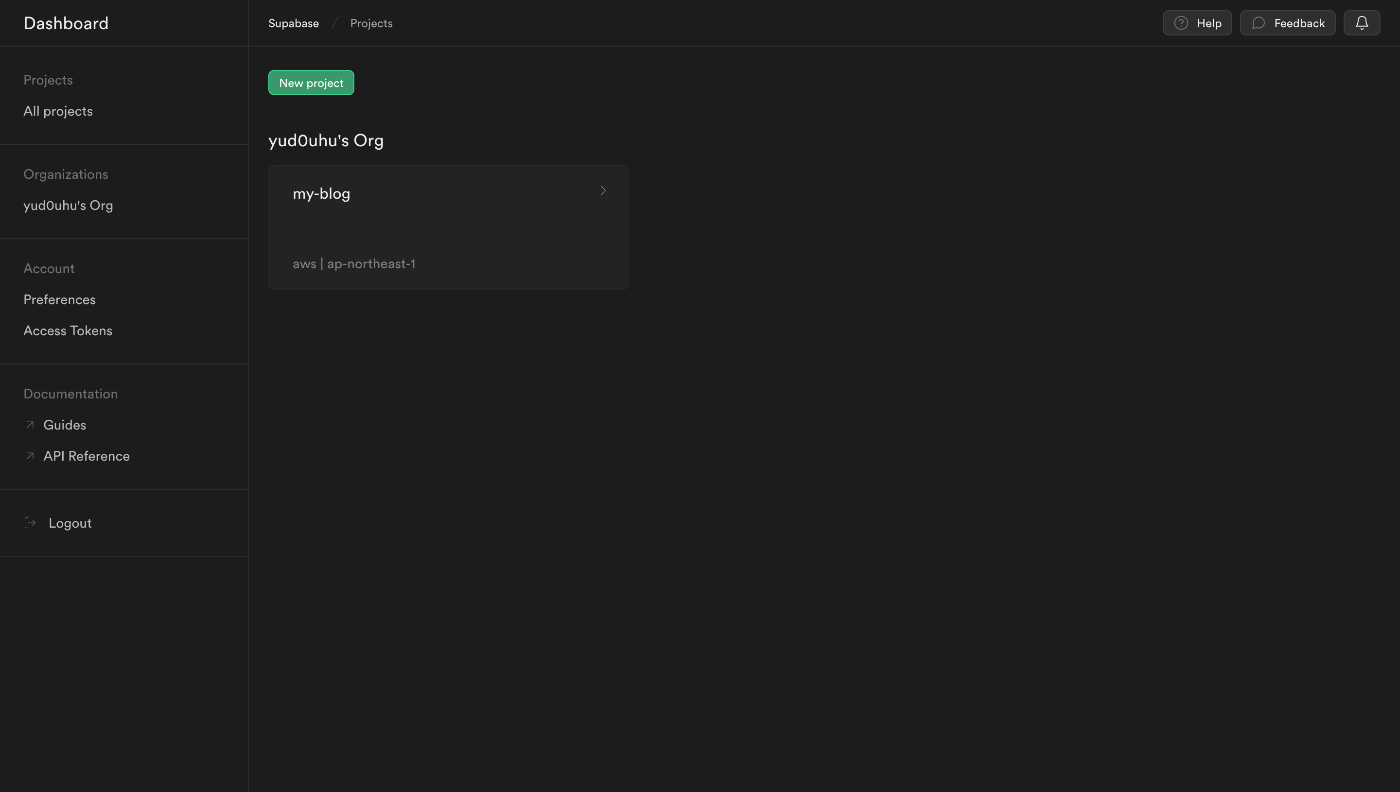
New projectを選択します。
Create a new projectから各項目を埋めていきます。

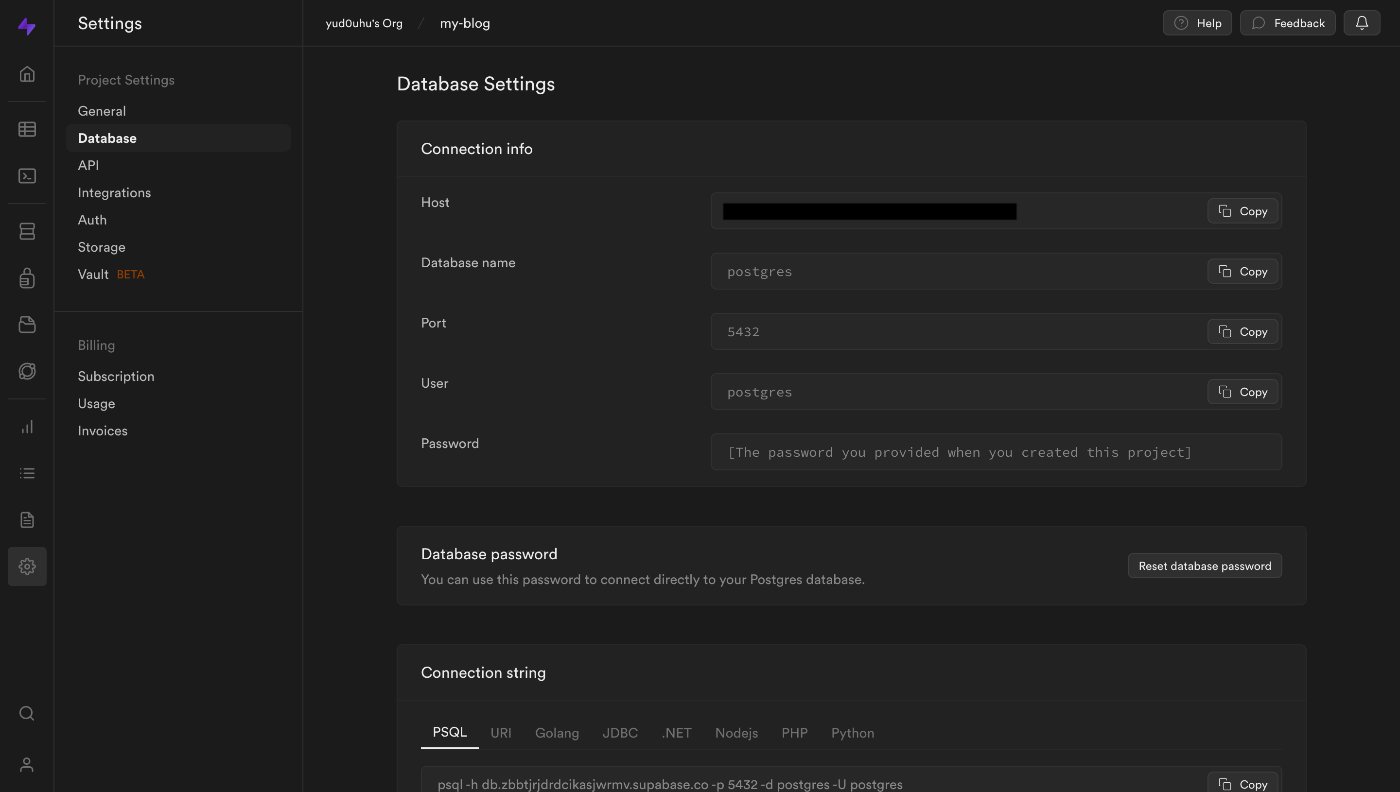
プロジェクトのHome画面から、サイドメニューの歯車アイコンを選択します。
Project SettingsのDatabaseから接続情報の確認ができます。
Prisma
PrismaはNode.js/TypeScript環境で利用できるORMです。
DBをバックエンドに、GraphQLのスキーマからCRUDを行うためのエンドポイントを提供するミドルウェアとして採用しています。
宣言的にDBのマイグレーションを行えたり、TypeScriptに対応していることから型安全な開発ができます。
また、N+1問題を内部で防ぐ機構が備わっているため、GraphQLとの親和性も高いです。
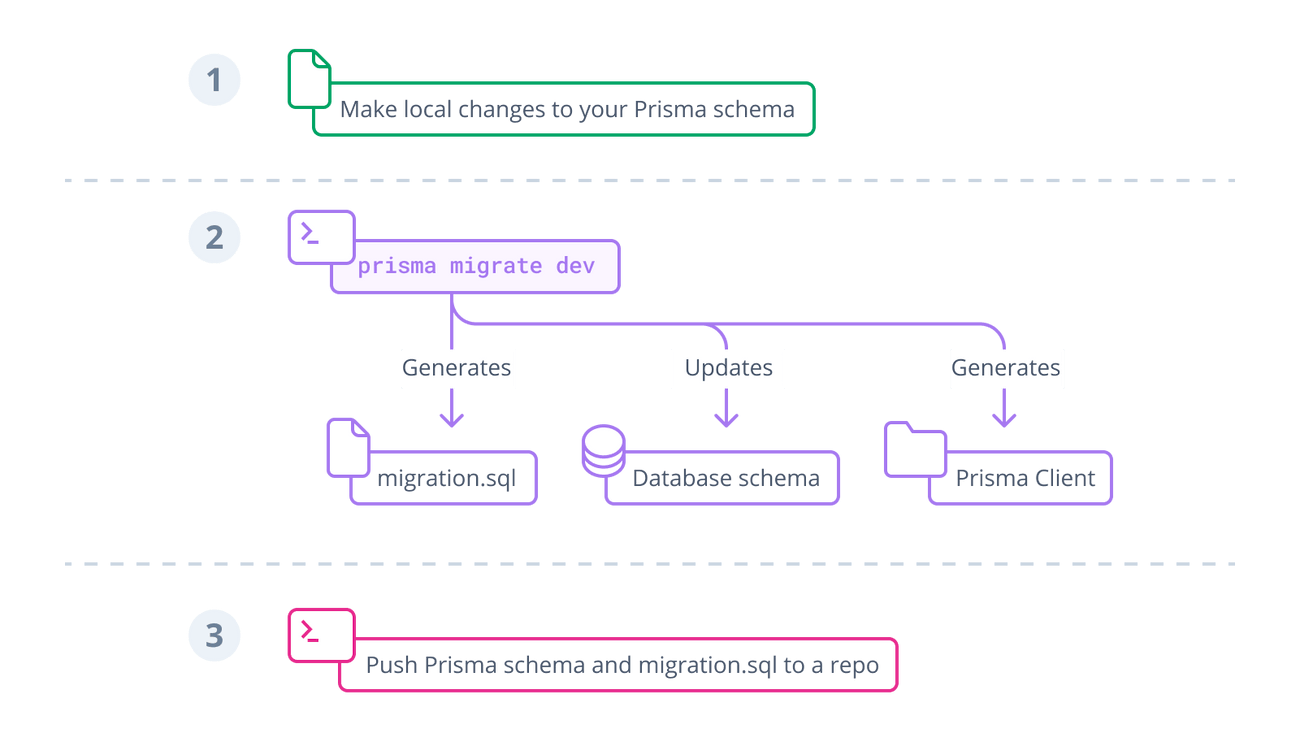
Prisma Migrate Workflow
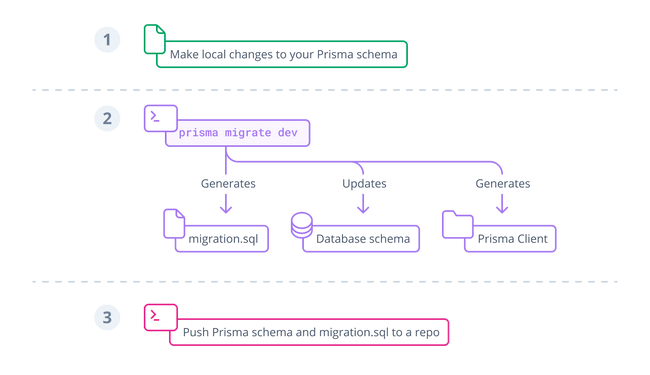
Prisma Migrateのワークフローは以下のようになっています。
- データモデルを手動で定義する
- CLIから
prisma migrate devかprisma migrate deployコマンドを使用してDBを更新する - Prisma Clientを更新し、アプリケーションコードから更新後のDBにアクセスできるようにする
Prisma Migrateによる宣言的マイグレーション
Prisma Migrateは、スキーマファイルと現在のDBの状態の差分を検知し、DBに変更を適用します。
スキーマファイルに以下のようなモデル定義を書きます。
model User {
  id    Int     @id @default(autoincrement())
  name  String?
  posts Post[]
}

model Post {
  authorId  Int?
  content   String?
  id        Int      @id @default(autoincrement())
  published Boolean  @default(false)
  title     String
  author    User?    @relation(fields: [authorId], references: [id])
  createdAt DateTime @default(now())
  updatedAt DateTime @updatedAt
  viewCount Int      @default(0)
  tags      Tag?     @relation(references: [id], fields: [tagId])
  tagId     Int?
}

model Tag {
  id    Int    @id @default(autoincrement())
  label String
  posts Post[]
}
データベースとの接続は以下のように行います。
datasource db {
  provider = "postgresql"
  url      = env("POSTGRESQL_DATABASE_URL")
  shadowDatabaseUrl = env("SHADOW_DATABASE_URL")
}
環境変数は以下で設定しています。
POSTGRESQL_DATABASE_URL="XXXXXXXXXX"
モデルの更新
これに対して、以下のコマンドからマイグレーションを行います。
$ npx prisma migrate dev
あるいは
$ npx prisma db push
dev オプションを付けると、shadowDatabaseUrl で指定した開発環境にデータベース/スキーマが作成されます。
shadowDatabaseUrl について
https://www.prisma.io/docs/concepts/components/prisma-migrate/shadow-database
$ npx prisma migrate reset で作成したデータベース/スキーマの削除を行います。
--create-only オプションを付けることで、migration ファイルを作成するだけに留めることができます。
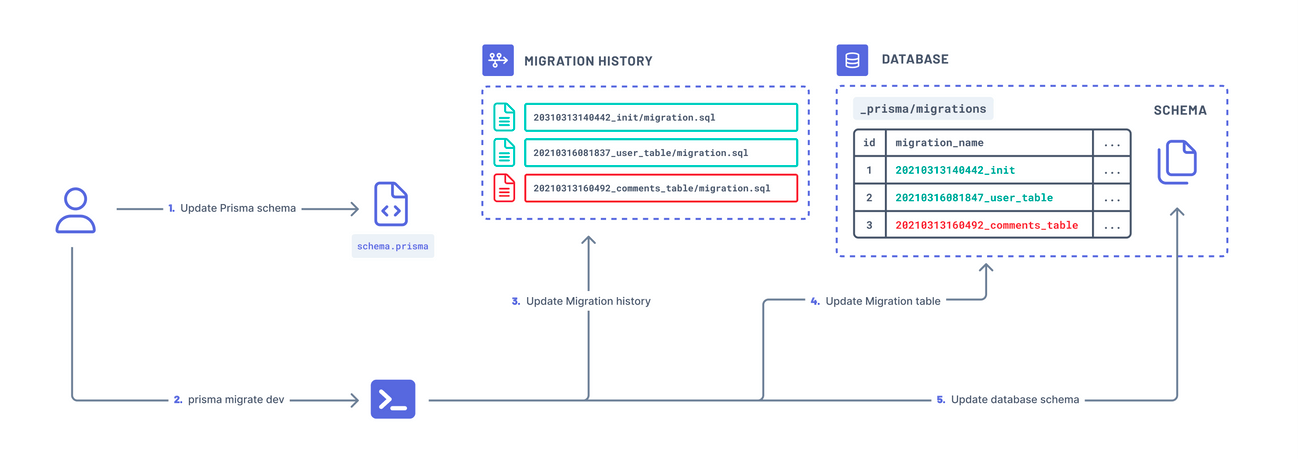
以上から変更がDBに適用され、DBスキーマのマイグレーション履歴がprisma/migrationsに格納されます。
-- CreateTable
CREATE TABLE "User" (
    "id" TEXT NOT NULL,
    "name" TEXT,

    CONSTRAINT "User_pkey" PRIMARY KEY ("id")
);

-- CreateTable
CREATE TABLE "Post" (
    "authorId" TEXT,
    "content" TEXT,
    "published" BOOLEAN NOT NULL DEFAULT false,
    "title" TEXT NOT NULL,
    "createdAt" TIMESTAMP(3) NOT NULL DEFAULT CURRENT_TIMESTAMP,
    "updatedAt" TIMESTAMP(3) NOT NULL,
    "viewCount" INTEGER NOT NULL DEFAULT 0,
    "id" TEXT NOT NULL,

    CONSTRAINT "Post_pkey" PRIMARY KEY ("id")
);

-- CreateTable
CREATE TABLE "Tag" (
    "id" TEXT NOT NULL,
    "label" TEXT NOT NULL,
    "post_id" TEXT,

    CONSTRAINT "Tag_pkey" PRIMARY KEY ("id")
);

-- AddForeignKey
ALTER TABLE "Post" ADD CONSTRAINT "Post_authorId_fkey" FOREIGN KEY ("authorId") REFERENCES "User"("id") ON DELETE SET NULL ON UPDATE CASCADE;

-- AddForeignKey
ALTER TABLE "Tag" ADD CONSTRAINT "Tag_post_id_fkey" FOREIGN KEY ("post_id") REFERENCES "Post"("id") ON DELETE SET NULL ON UPDATE CASCADE;
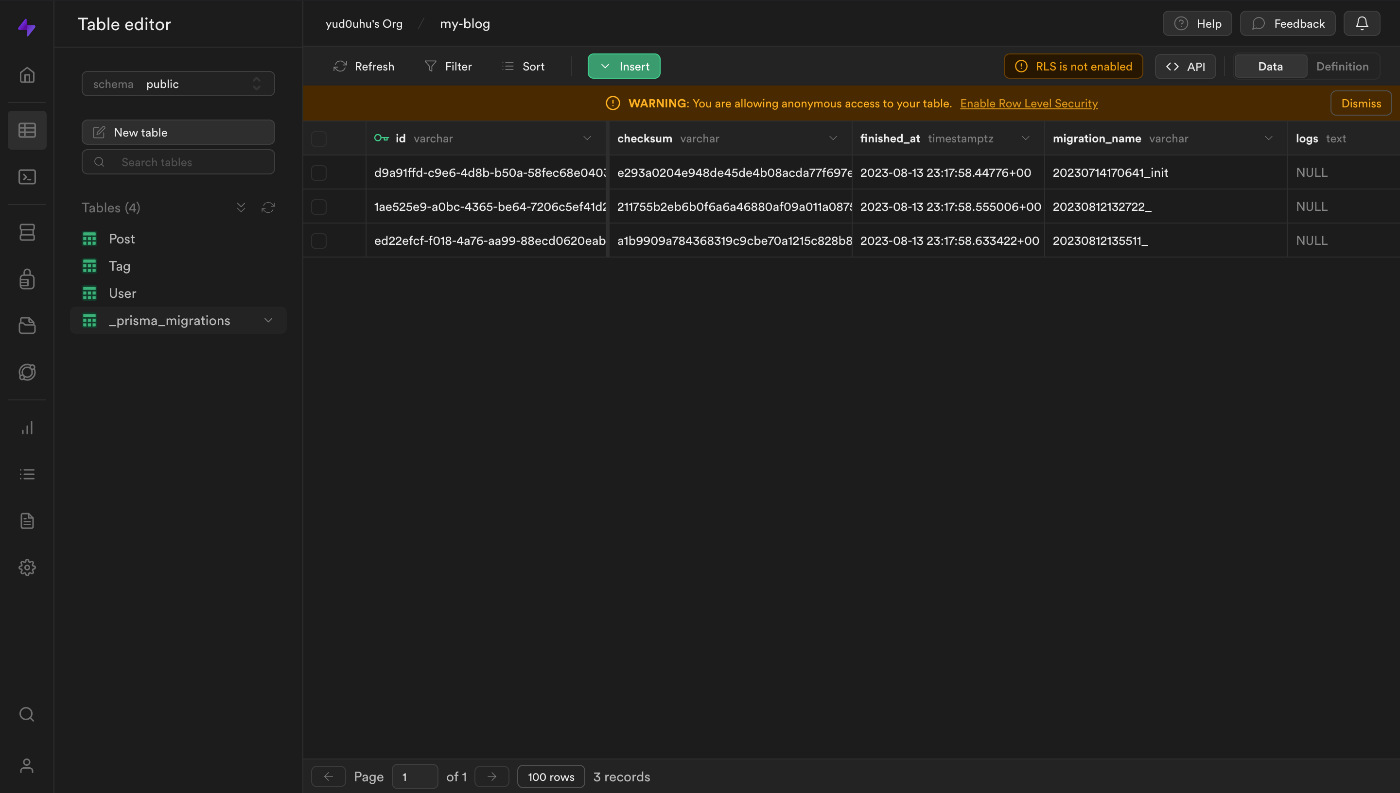
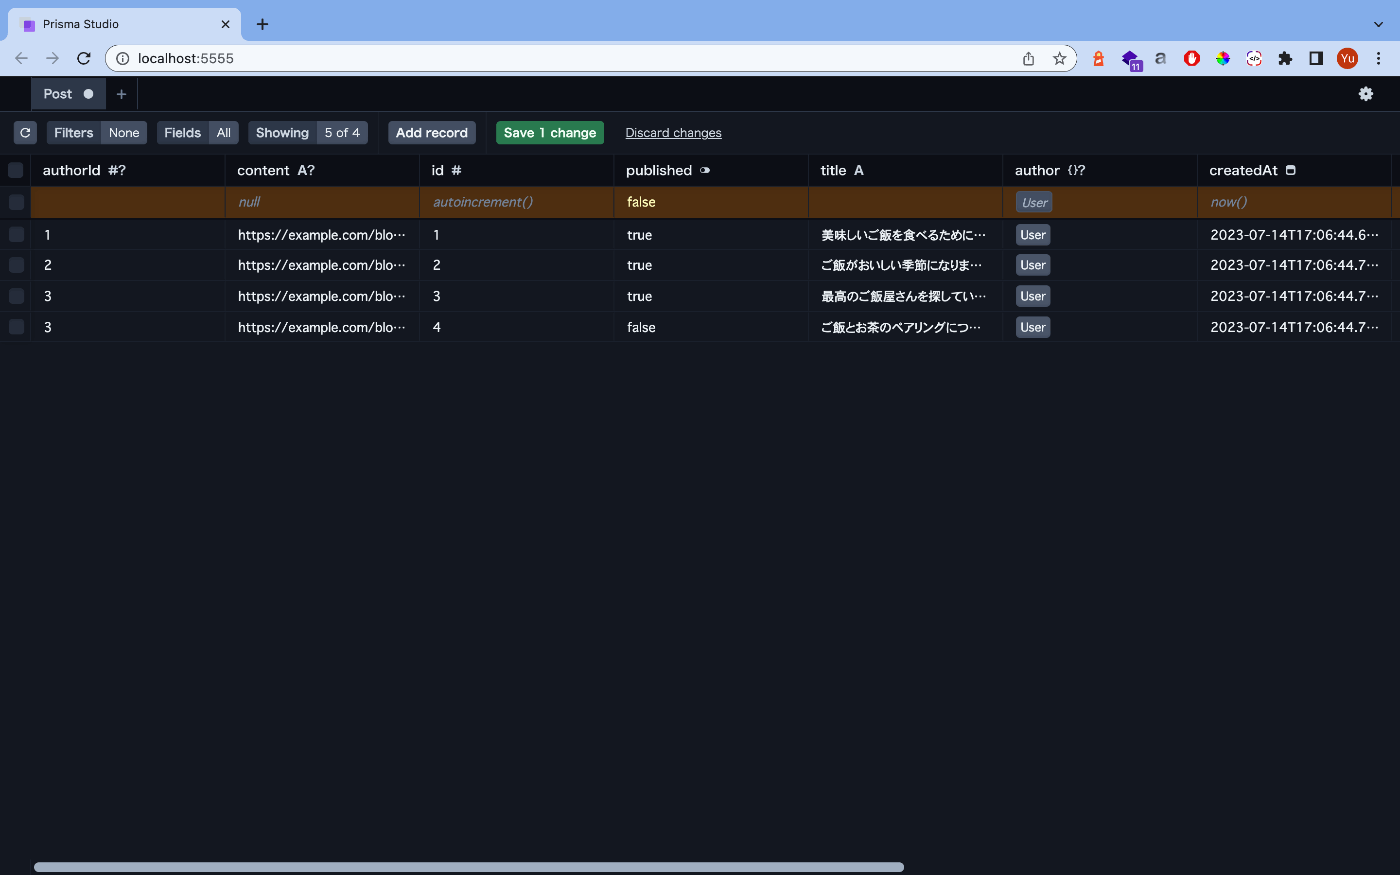
運用環境への反映は、以下のコマンドから行います。
$ prisma migrate deploy
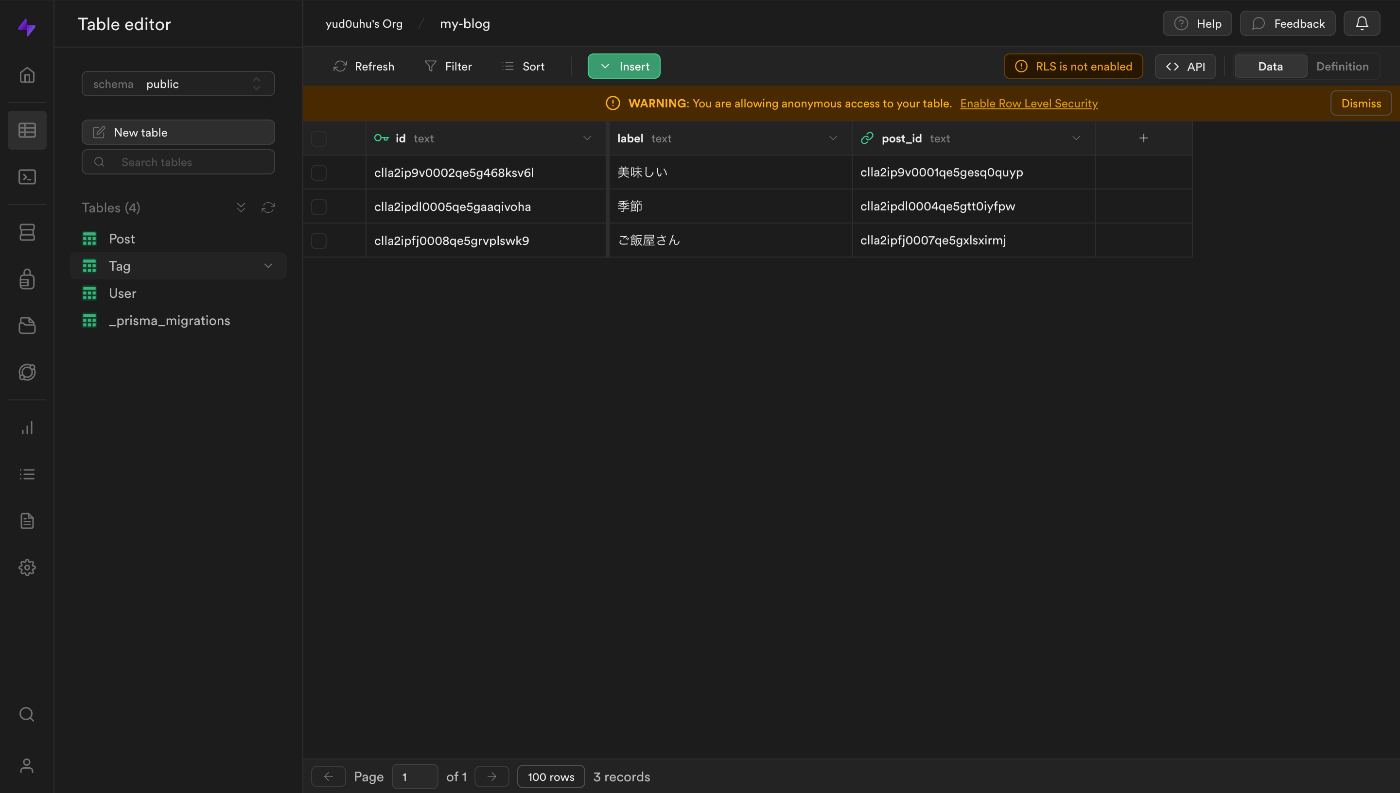
Supabaseのコンソール上でも、データベースが作成されていることが確認できます。

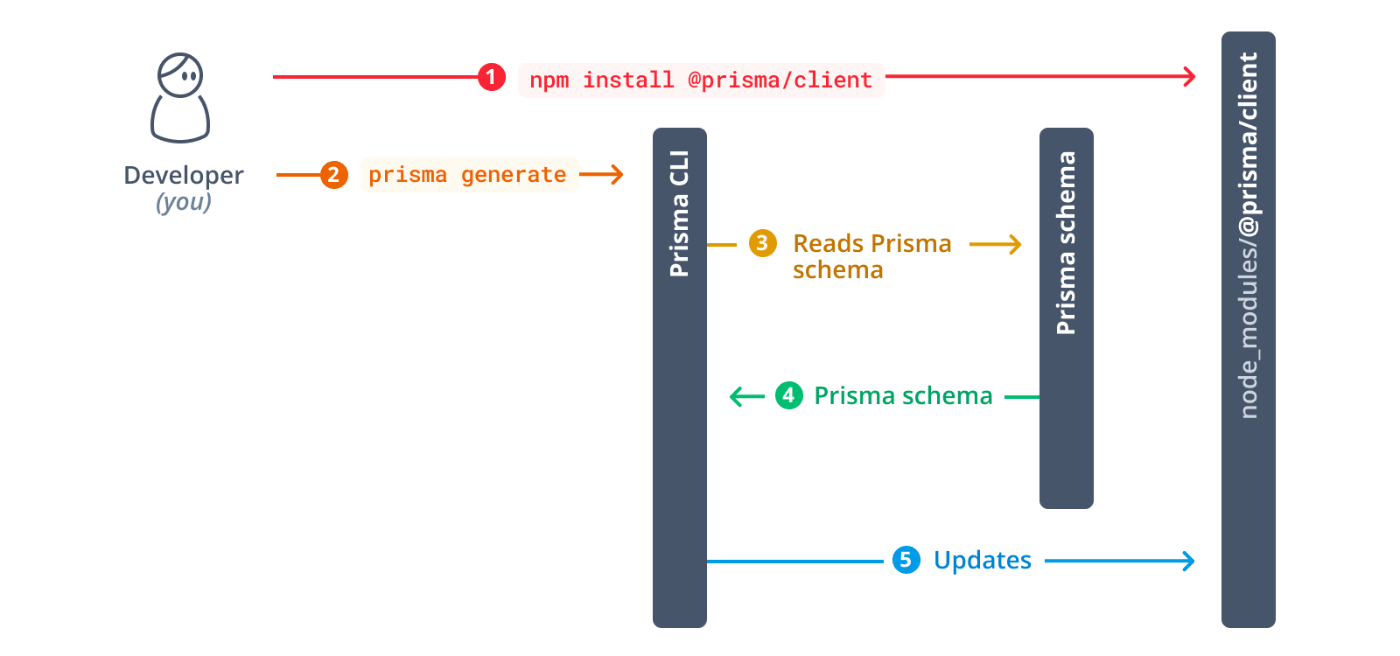
ここまでのマイグレーションの流れについては、以下の図がわかりやすいです。
clientの更新
clientの更新を行い、アプリケーションから最新のモデルデータにアクセスできるようにします。
After you change your data model, you'll need to manually re-generate Prisma Client to ensure the code inside node_modules/.prisma/client gets updated:
以下のコマンドから行います。
$ npx prisma generate
ORM(Object Relational Mapping)
ORMは、SQLでCRUDを記述する代わりにオブジェクトのメソッドを使ってDBの操作を行えるようするための技術です。
Prismaは以下の3つの機能から構成されています。
Prisma Client
Prismaでは、SQLを直接記述して実行する代わりに、JavaScript/TypeScriptのメソッドを利用してDBを操作することができます。
DBの操作(DBへのアクセス・クエリの送信, レコードの取得・更新, ..., etc)に利用するのがPrisma Clientです。
Prisma Migrate
Prismaの設定ファイル(schema.prisma)にデータモデルを記述し、マイグレーションを行ってDBにテーブルを作成します。前述したように、CLI上からprisma migrate devコマンドを実行するだけで、スキーマの生成・更新を検知し、マイグレーションを行うことができます。
Prisma Studio
Prisma Studioは、テーブルをブラウザ上で閲覧するためのビジュアルエディタです。
ブラウザ上からテーブル内のデータを編集したり、モデル間のリレーションの関係を把握することができます。
主要なコマンド
セットアップ(初回のみ)
$ npx prisma init
- 設定ファイル類(prisma/schema.prisma, .envなど)が自動的に生成される
スキーマファイルのフォーマット
$ npx prisma format
DBスキーマの同期
$ npx prisma db push
- マイグレーションファイルを生成せずスキーマを同期する
migrate dev コマンドはMongoDBではサポートされていないため、db push でマイグレーション(DBを更新)する
This command is not supported on MongoDB. Use db push instead.
モデルの更新
$ npx prisma generate
- スキーマ(
prisma/schema.prisma)に定義したデータベースに変更が加わるたび、Prisma Clientを手動で再生成して、ディレクトリ内に生成されたコードを更新する
✔ Generated Prisma Client (4.12.0 | library) to ./node_modules/@prisma/client in 98ms

✔ Generated Pothos integration to ./node_modules/@pothos/plugin-prisma/generated.ts in 15ms
You can now start using Prisma Client in your code. Reference: https://pris.ly/d/client

import { PrismaClient } from '@prisma/client'
const prisma = new PrismaClient()
seedデータの投入
$ npx prisma db seed
Nexus vs Pothos
GraphQLサーバーを開発するために、ライブラリを選定します。
ここでは、以下の二つの観点から選定を行いました。
- スキーマファースト か コードファースト か
- N+1問題を解決する
コードファースト
言語固有のコードでIDL(schema.prisma)を書いて、スキーマ定義ファイル(graphql.schema)を生成する方法です。
スキーマ定義ファイル(graphql.schema)はOpenAPIでいうところの、APIが定義されたYamlもしくはJSONです。
- OpenAPIのコードジェネレーターの例
スキーマファースト
スキーマ定義ファイル(graphql.schema)からSDL(schema.prisma)を生成する方法です。
GraphQLのN+1問題
GraphQLのサーバ実装で発生しがちなN+1問題は、パフォーマンス上の課題の一つです。
GraphQLはクライアントが必要なデータのみをリクエストし、一度に取得できることが強みです。しかしこの特性が原因で、N+1問題が発生することがあります。
特に、リレーションシップが多層に入れ子になっている場合や、親オブジェクトが多数ある場合に顕著です。
例えば、以下のようなGraphQLスキーマについて考えてみます。
type Author {
  id: ID!
  name: String!
  posts: [Post!]!
}

type Post {
  id: ID!
  title: String!
  content: String!
}
これに対して、以下のようなクエリを考えてみます。
{
  authors {
    name
    posts {
      title
    }
  }
}
このクエリでは、複数の作者(authors)とそれぞれの作者が投稿した記事(posts)のタイトルを取得しようとしています。N+1問題では、親オブジェクト(ここでは作者)の数だけN回のリクエストが発生します。
例えば上記の例について、作者が5人いるとします。
まず、1回のリクエストで、全ての作者を取得するクエリauthorsが実行されます。(1回のリクエスト)
各作者ごとに、その作者が投稿した記事を取得するために個別のクエリpostsが発行されます。(5回のリクエスト)
このとき、合計で6回のリクエストが行われることになります(N+1)。
クエリに対して発行されるSQLクエリは、次のようになります。
SELECT id, name FROM Author;
SELECT title FROM Post WHERE author_id = 1;
SELECT title FROM Post WHERE author_id = 2;
-- ...
SELECT title FROM Post WHERE author_id = 6;
一般的な対策としては、
- DataLoaderというライブラリを用いて解決する
- バッチ処理のスケジューラを活用し、クエリのバッチ処理を効率化する
- GraphQLリゾルバの関数内で、一度のクエリで必要なデータを事前に取得しておき、リゾルバ内で結合する - キャッシュを活用してデータの再取得を最小限に抑える
- N+1問題を考慮したORMを用いて解決する
などがあります。
ここでは、N+1問題を考慮したORMを用いて解決するため、Prisma+Pothosというプラグインを試みます。
Prismaは、ネストされた関連データを一括で取得する(Nested reads/Eager Loading)ことでN+1問題を部分的に解消することができます。また、Fluent APIを活用した最適化の仕組みを提供しています。
これにより、以下のような一度のクエリで、全ての作者とそれぞれの作者が投稿した記事の情報を一括で取得することができます。(1回のリクエスト)
{
  authors {
    name
    posts {
      title
    }
  }
}
しかし、リレーションのネスト構造が深すぎたり、大量のバッチ処理が必要となった場合などは、N+1問題を完全に解決することが難しいです。
Pothosというプラグインを組み合わせることで、コードファーストでPrismaのGraphQLサーバーの開発が行えて、N+1問題の対策を強化することができます。
補足:DataLoaderについて
Pothos
PothosはTypeScript/コードファーストで、GraphQLのスキーマを生成することができるPrismaプラグインです。
クエリ最適化やリレーションシップの自動解決をおこなってくれます。
🎨 Prismaモデルに基づいて素早くGraphQLのタイプを定義できます。
🦺 API全体にわたる強力な型安全性があります。
🤝 データベースで定義されたリレーションシップを自動的に解決します。
🎣 クエリの最適化を自動的に行い、クエリを効率的に解決するための特定のデータのロードを行います(一般的なN+1問題を解決します)。
💅 GraphQLスキーマのタイプとフィールドはデータベースの列名や型に暗黙的に結び付けられていません。
🔀 Relayの統合を提供し、効率的にロードできるノードとコネクションを定義できます。
📚 同じデータベースモデルを基にした複数のGraphQLモデルをサポートしています。
🧮 カウントフィールドをオブジェクトやコネクションに簡単に追加できます。
余談ですが、Pothosは元はGiraphQLという名前でしたが、GraphQLと視覚的に区別がつきにくいこと・検索性の問題から改名したようです。
以下を参考に実装を進めていきます。
ジェネレーターの定義
ジェネレーターの定義は以下のように行います。
providerにどのPrismaクライアントを作成するかを定義し、
generator client {
  provider = "prisma-client-js"
}
ジェネレーターにPothosを追加します。
generator pothos {
  provider = "prisma-pothos-types"
}
Resolverを書く
CRUDとGraphQLサーバーの作成を行うため、resolverを実装します。
import { createYoga } from 'graphql-yoga'
import SchemaBuilder from '@pothos/core'

import type PrismaTypes from '@pothos/plugin-prisma/generated'

import { NextApiRequest, NextApiResponse } from 'next'
import prisma from '../../lib/prisma'

import PrismaPlugin from '@pothos/plugin-prisma'

const builder = new SchemaBuilder<{
  PrismaTypes: PrismaTypes
}>({
  plugins: [PrismaPlugin],
  prisma: {
    client: prisma,
  },
})

builder.queryType({})

builder.mutationType({})

builder.prismaObject('User', {
  fields: (t) => ({
    id: t.exposeID('id'),
    name: t.exposeString('name', { nullable: true }),
    posts: t.relation('posts'),
  }),
})

builder.prismaObject('Post', {
  fields: (t) => ({
    id: t.exposeID('id'),
    title: t.exposeString('title'),
    content: t.exposeString('content', { nullable: true }),
    published: t.exposeBoolean('published'),
    author: t.relation('author'),
    tags: t.relation('tags'),
    createdAt: t.string({
      resolve: (parent) => {
        const createdAtDate = new Date(parent.createdAt).toLocaleString(
          'en-US',
          { timeZone: 'Asia/Tokyo' }
        )
        return createdAtDate.toString()
      },
    }),
  }),
})

builder.prismaObject('Tag', {
  fields: (t) => ({
    id: t.exposeString('id'),
    label: t.exposeString('label'),
    posts: t.relation('post'),
  }),
})

builder.queryField('feed', (t) =>
  t.prismaField({
    type: ['Post'],
    resolve: async (query, _parent, _args, _info) =>
      prisma.post.findMany({
        ...query,
        where: { published: true },
      }),
  })
)

builder.queryField('post', (t) =>
  t.prismaField({
    type: 'Post',
    args: {
      id: t.arg.id({ required: true }),
    },
    nullable: true,
    resolve: async (query, _parent, args, _info) =>
      prisma.post.findUnique({
        ...query,
        where: {
          id: args.id.toString(),
        },
      }),
  })
)

builder.queryField('drafts', (t) =>
  t.prismaField({
    type: ['Post'],
    resolve: async (query, _parent, _args, _info) =>
      prisma.post.findMany({
        ...query,
        where: { published: false },
      }),
  })
)

// キーワード検索用
builder.queryField('filterPosts', (t) =>
  t.prismaField({
    type: ['Post'],
    args: {
      searchString: t.arg.string({ required: false }),
      // 公開状態or非公開状態をパラメータの引数に渡して絞り込み
      published: t.arg.boolean({ required: true }),
    },
    resolve: async (query, _parent, args, _info) => {
      const or = args.searchString
        ? {
            OR: [
              { title: { contains: args.searchString } },
              { content: { contains: args.searchString } },
            ],
          }
        : {}
      const published = args.published
      return prisma.post.findMany({
        ...query,

        where: { ...or, published },
      })
    },
  })
)

// タグ検索
builder.queryField('filterPostsByTag', (t) =>
  t.prismaField({
    type: ['Post'],
    args: {
      tagLabel: t.arg.string({ required: true }),
      published: t.arg.boolean({ required: true }),
    },
    resolve: async (query, _parent, args, _info) => {
      const tagLabel = args.tagLabel
      const published = args.published

      return prisma.post.findMany({
        ...query,
        where: {
          tags: {
            some: {
              label: tagLabel,
            },
          },
          published,
        },
      })
    },
  })
)

builder.mutationField('signupUser', (t) =>
  t.prismaField({
    type: 'User',
    args: {
      name: t.arg.string({ required: false }),
    },
    resolve: async (query, _parent, args, _info) =>
      prisma.user.create({
        ...query,
        data: {
          name: args.name,
        },
      }),
  })
)

builder.mutationField('deletePost', (t) =>
  t.prismaField({
    type: 'Post',
    args: {
      id: t.arg.id({ required: true }),
    },
    resolve: async (query, _parent, args, _info) =>
      prisma.post.delete({
        ...query,
        where: {
          id: args.id.toString(),
        },
      }),
  })
)

builder.mutationField('publish', (t) =>
  t.prismaField({
    type: 'Post',
    args: {
      id: t.arg.id({ required: true }),
    },
    resolve: async (query, _parent, args, _info) =>
      prisma.post.update({
        ...query,
        where: {
          id: args.id.toString(),
        },
        data: {
          published: true,
        },
      }),
  })
)

builder.queryField('tags', (t) =>
  t.prismaField({
    type: ['Tag'],
    resolve: async (query, _parent, _args, _info) =>
      prisma.tag.findMany({
        ...query,
      }),
  })
)

builder.mutationField('createDraft', (t) =>
  t.prismaField({
    type: 'Post',
    args: {
      title: t.arg.string({ required: true }),
      content: t.arg.string({ required: true }),
      tags: t.arg.stringList({ required: true }),
    },
    resolve: async (query, _parent, args, _info) => {
      const { tags, ...postData } = args
      const createdPost = await prisma.post.create({
        ...query,
        data: {
          ...postData,
          tags: {
            create: tags.map((label) => ({
              label,
            })),
          },
        },
      })

      return createdPost
    },
  })
)

const schema = builder.toSchema()

export default createYoga<{
  request: NextApiRequest
  response: NextApiResponse
}>({
  schema,
  graphqlEndpoint: '/api/graphql',
})

export const config = {
  api: {
    bodyParser: false,
  },
}
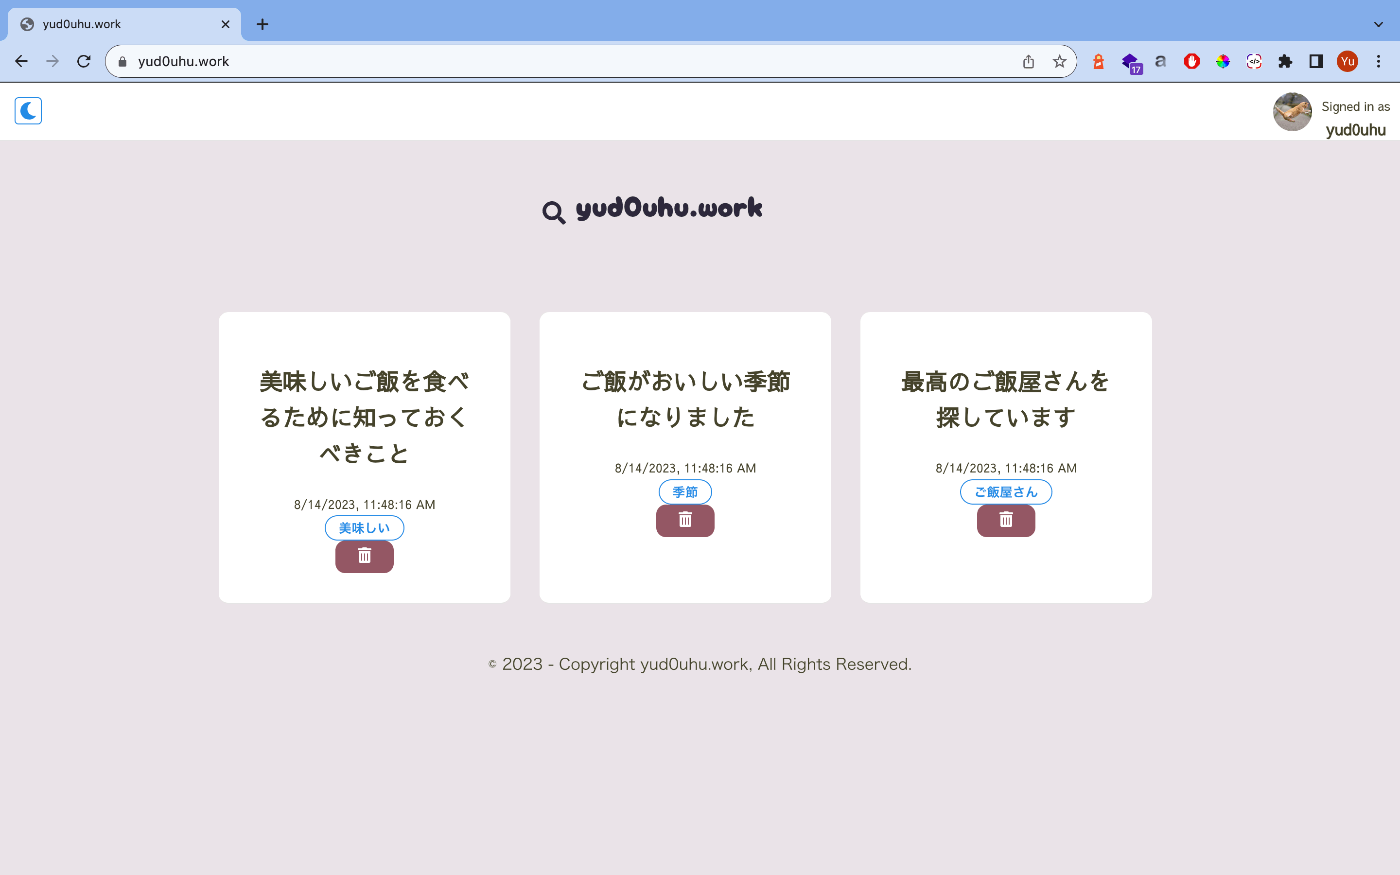
クエリを投げて、データの取得ができることを確認する
クエリの確認
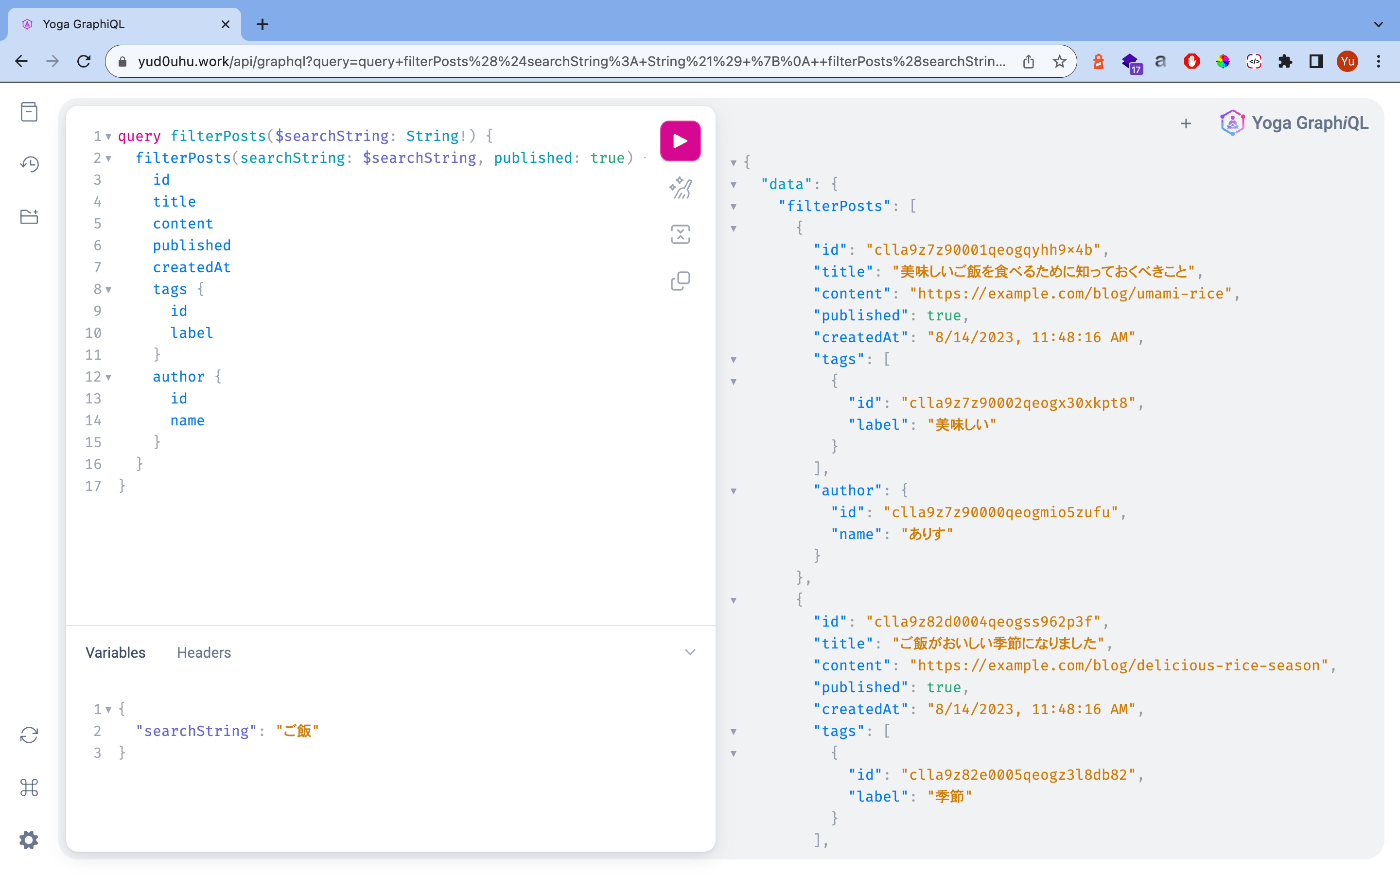
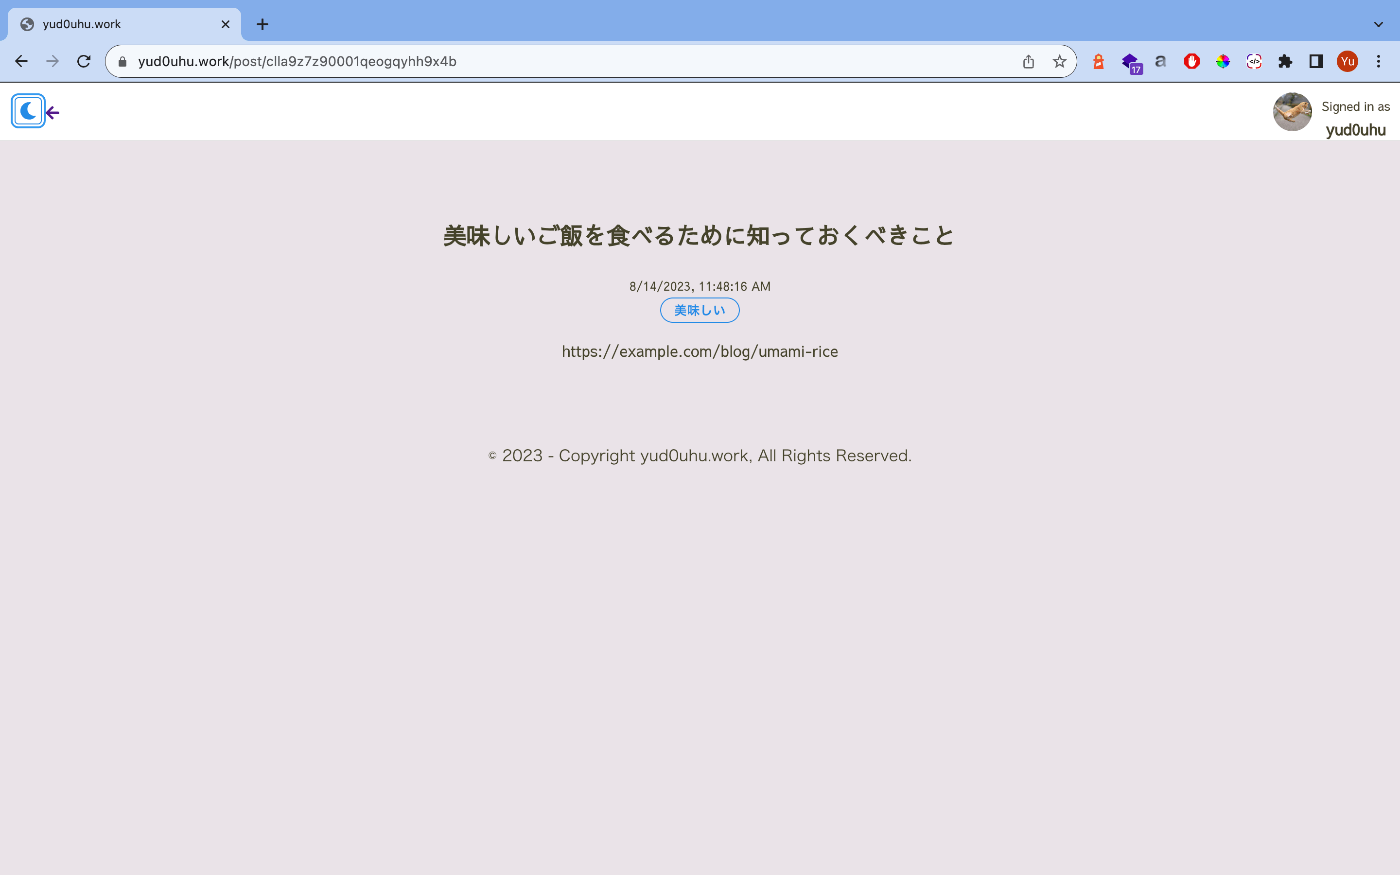
フロントエンドで記事のfeedを取得する
以下のようにクエリを投げて、データが取得できることを確認します。
query filterPosts($searchString: String!) {
  filterPosts(searchString: $searchString, published: true) {
    id
    title
    content
    published
    createdAt
    tags {
      id
      label
    }
    author {
      id
      name
    }
  }
}
// Variables
{
  "searchString": "ご飯"
}
Apollo ClientのuseQueryフックでデータをフェッチし、UIに反映します。
const { loading, error, data } = useQuery(filterPosts, {
    variables: { searchString },
    fetchPolicy: "cache-and-network",
  });
レスポンス速度を上げるため、optionにchache-and-network を指定しています。
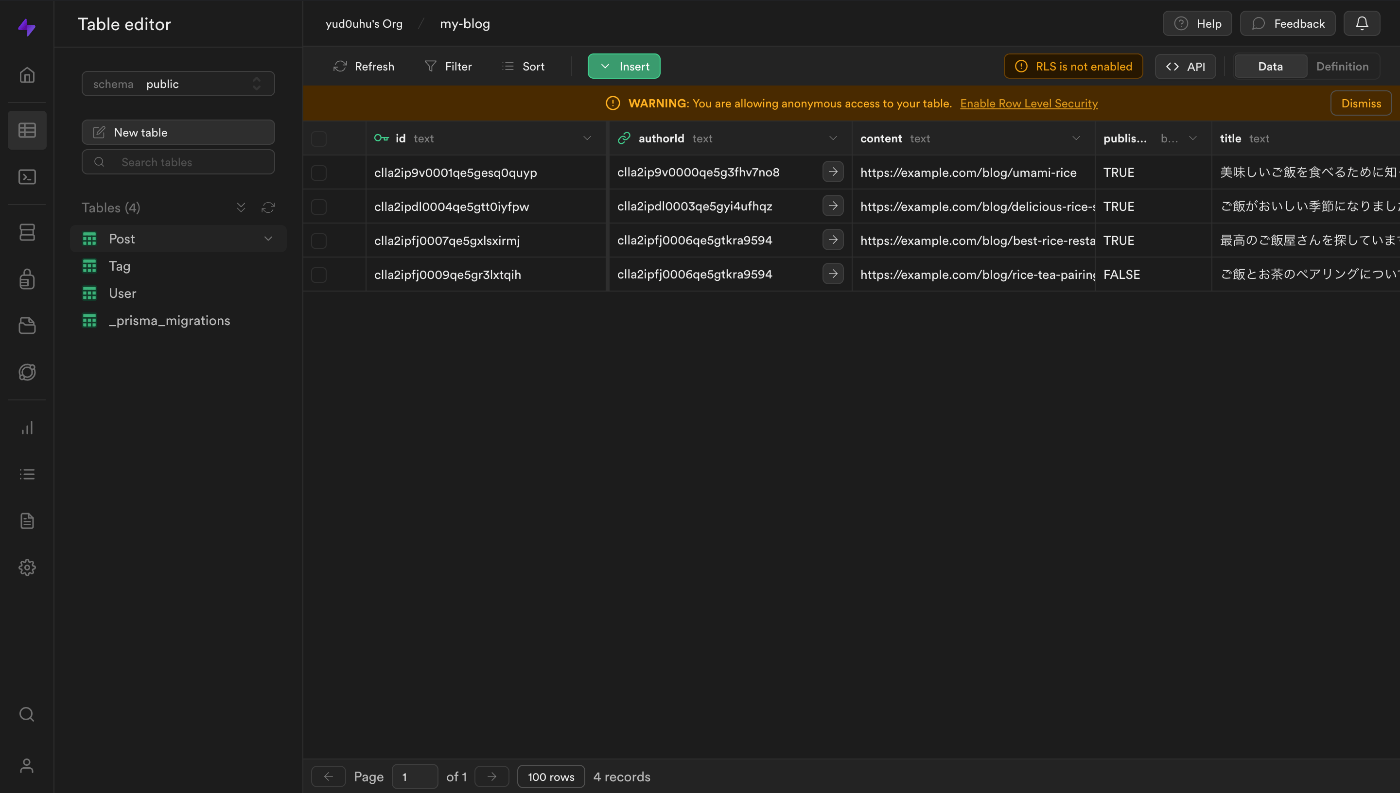
npx prisma db seedで、以下のように作成したテストデータを投入します。
import { PrismaClient, Prisma } from '@prisma/client'

const prisma = new PrismaClient()

const userData: Prisma.UserCreateInput[] = [
  {
    name: 'ありす',
    // email: "alice@prisma.io",
    posts: {
      create: [
        {
          title: '美味しいご飯を食べるために知っておくべきこと',
          content: 'https://example.com/blog/umami-rice',
          published: true,
          tags: {
            create: [
              {
                label: '美味しい',
              },
            ],
          },
        },
      ],
    },
  },
  {
    name: 'にーる',
    // email: "nilu@prisma.io",
    posts: {
      create: [
        {
          title: 'ご飯がおいしい季節になりました',
          content: 'https://example.com/blog/delicious-rice-season',
          published: true,
          viewCount: 42,
          tags: {
            create: [
              {
                label: '季節',
              },
            ],
          },
        },
      ],
    },
  },
  {
    name: 'まーむーど',
    // email: "mahmoud@prisma.io",
    posts: {
      create: [
        {
          title: '最高のご飯屋さんを探しています',
          content: 'https://example.com/blog/best-rice-restaurant',
          published: true,
          viewCount: 128,
          tags: {
            create: [
              {
                label: 'ご飯屋さん',
              },
            ],
          },
        },
        {
          title: 'ご飯とお茶のペアリングについて',
          content: 'https://example.com/blog/rice-tea-pairing',
        },
      ],
    },
  },
]

export async function main() {
  try {
    console.log(`Start seeding ...`)
    for (const u of userData) {
      const user = await prisma.user.create({
        data: u,
      })
      console.log(`Created user with id: ${user.id}`)
    }
    console.log(`Seeding finished.`)
  } catch (err) {
    console.error(err)
    process.exit(1)
  } finally {
    await prisma.$disconnect()
  }
}

main()
記事のfeedが取得できていることを確認します。

補足:パフォーマンスについて
Apolloクライアントは、ポーリングとrefetchをサポートしています。
クエリのキャッシュされたデータをサーバーのデータを固定間隔でリアルタイムに同期したいときは、optionにpollIntervalを指定することで実現できます。
リアルタイム同期はサーバーに負荷がかかることや、ブログの場合は内容の更新が頻繁に行われることがなく、リアルタイムなデータ同期は必要ないため、今回は指定していません。
ブログサイトは静的なコンテンツが多いため、キャッシュ機構をうまく活用することで、クエリのパフォーマンスを向上させることができます。
今回はnext.config.jsにキャッシュ制御ヘッダーを追加し、public, max-age=31536000, immutable で1年間ブラウザがキャッシュからリソースを取得するように設定しています。
  async headers() {
    return [
      {
        source: "/(.*)",
        headers: [
          {
            key: "Cache-Control",
            value: "public, max-age=31536000, immutable",
          },
        ],
      },
    ];
  },
ライフサイクル周りの設定を行ったことで、LigthHouseの数値は以下まで改善されました。


マークダウンパーサーの導入
エディタをRust+WASMで動くマークダウンパーサーに置き換えます。
submoduleで紐付けを行い、クライアントサイドでWASMを扱えるように、next.config.jsでWebPackの設定を行います。
/**
 * @type {import('next').NextConfig}
 */
module.exports = {
  webpack: (config, { isServer }) => {
    config.experiments = {
      asyncWebAssembly: true,
      layers: true,
    };
    config.output.webassemblyModuleFilename =
      (isServer ? "../" : "") + "static/wasm/[modulehash].wasm";
    return config;
  },
};
pkgをそのままimportすることで使うことができます。
import { text_to_token } from "../../markdown-parser/pkg";
ここでインポートしたtext_to_tokenに入力したマークダウンテキストを渡し、convertContentでインナーHTMLにコンバートします。
あまり行儀がよくないですが、dangerouslySetInnerHTMLでインナーHTMLをコンバートしています。
...
{markdownContent && (
            <div
              className="text-align:right"
+              dangerouslySetInnerHTML={{ __html: markdownContent }}
            />
          )}
...
NextAuthによる認証・認可
以下の手順を参考に、OAuthプロバイダーによるソーシャル認証を実装します。
pages/api配下に、auth/[...nextauth].ts[js]を作成し、使用するOAuthプロバイダーを指定します。
今回はGitHubによる認証機能を実装します。
import NextAuth, { NextAuthOptions } from 'next-auth'
import GithubProvider from 'next-auth/providers/github'

/**
 * Docs: https://next-auth.js.org/deployment
 */
export const authOptions: NextAuthOptions = {
  secret: process.env.NEXT_PUBLIC_SECRET || '',
  providers: [
    GithubProvider({
      clientId: process.env.GITHUB_ID || '',
      clientSecret: process.env.GITHUB_SECRET || '',
    }),
  ],
  session: {
    strategy: 'jwt',
    maxAge: 30 * 24 * 60 * 60,
  },
  callbacks: {
    async jwt({ token }) {
      token.userRole = 'admin'
      return token
    },
  },
}

export default NextAuth(authOptions)
_app.tsxで、コンポーネントをSessionProviderでラップします。
import { ApolloProvider } from "@apollo/client";
import client from "../lib/apollo-client";
import type { AppProps, NextWebVitalsMetric } from "next/app";
+ import { SessionProvider } from "next-auth/react";
import {
  ColorScheme,
  ColorSchemeProvider,
  MantineProvider,
} from "@mantine/core";
import { useState } from "react";
import Seo from "../lib/seo";

+ function MyApp({ Component, pageProps: { session, ...pageProps } }: AppProps) {
  const [colorScheme, setColorScheme] = useState<ColorScheme>("light");
  const toggleColorScheme = (value?: ColorScheme) =>
    setColorScheme(value || (colorScheme === "dark" ? "light" : "dark"));
  const userName = "yud0uhu";
  const title = "yud0uhu.work";

  return (
    <div className="app">
      <Seo
        description={"0yu @ yud0uhu"}
        imageUrl={`https://${process.env.NEXT_PUBLIC_VERCEL_URL}/api/og?title=${title}&userName=${userName}`}
        title={title}
        url={`https://${process.env.NEXT_PUBLIC_VERCEL_URL}/`}
      />
+       <SessionProvider session={session}>
        <ApolloProvider client={client}>
          <ColorSchemeProvider
            colorScheme={colorScheme}
            toggleColorScheme={toggleColorScheme}
          >
            <MantineProvider
              theme={{ colorScheme }}
              withGlobalStyles
              withCSSVariables
              withNormalizeCSS
            >
              <Component {...pageProps} />
            </MantineProvider>
          </ColorSchemeProvider>
        </ApolloProvider>
+       </SessionProvider>
    </div>
  );
}

export default MyApp;
これによって、useSessionフックから認証情報、状態を取得することができます。
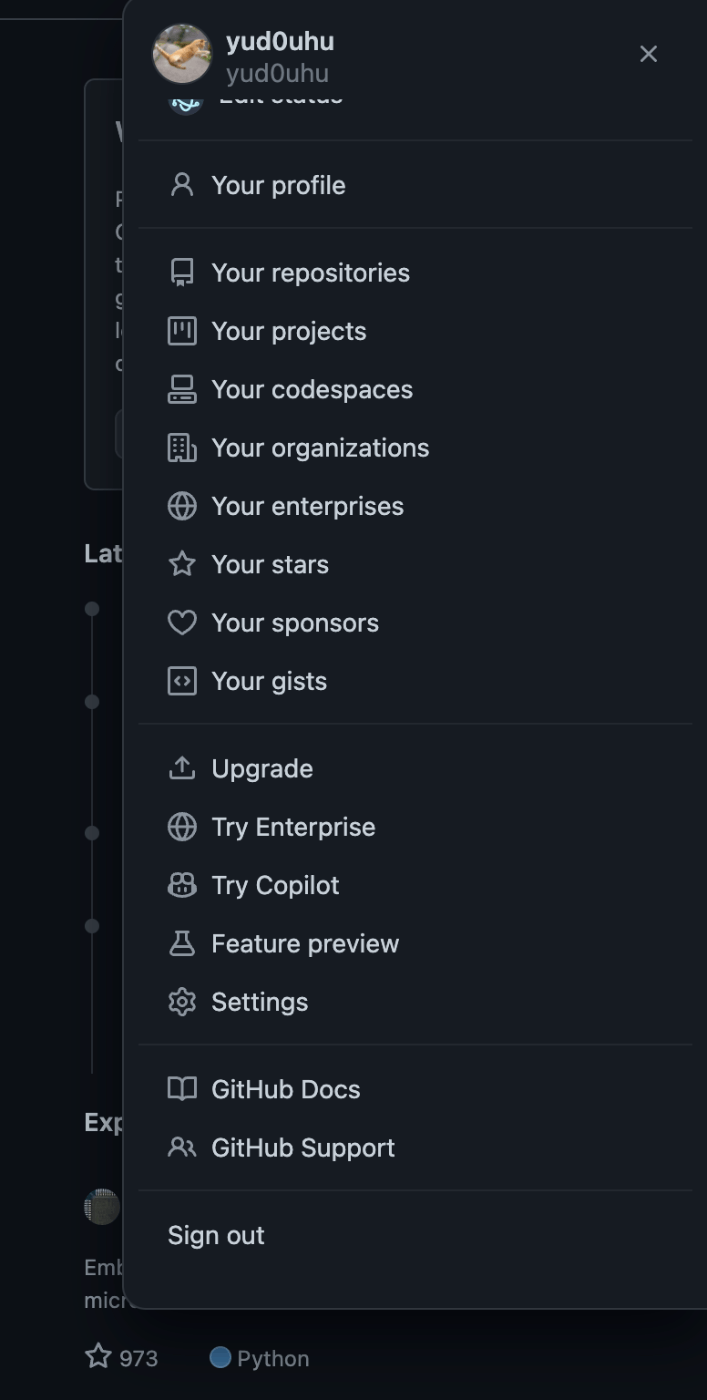
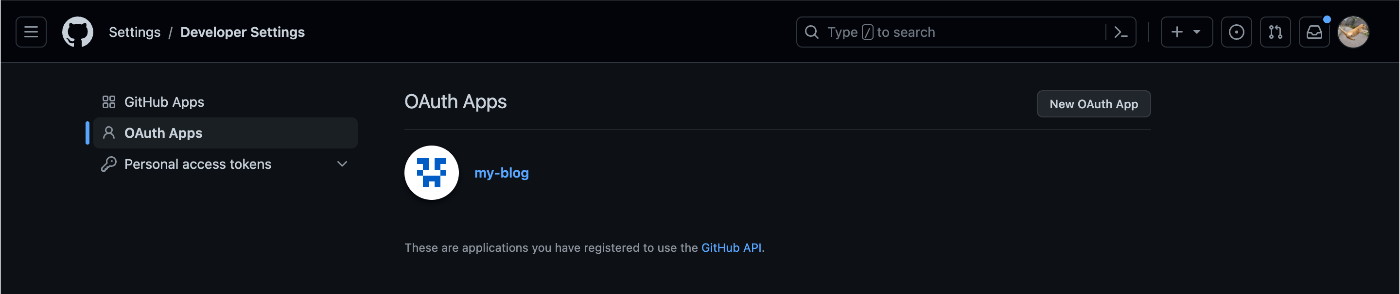
GitHub OAuth Appsの設定
GitHubによるOAuth認証の設定を行います。
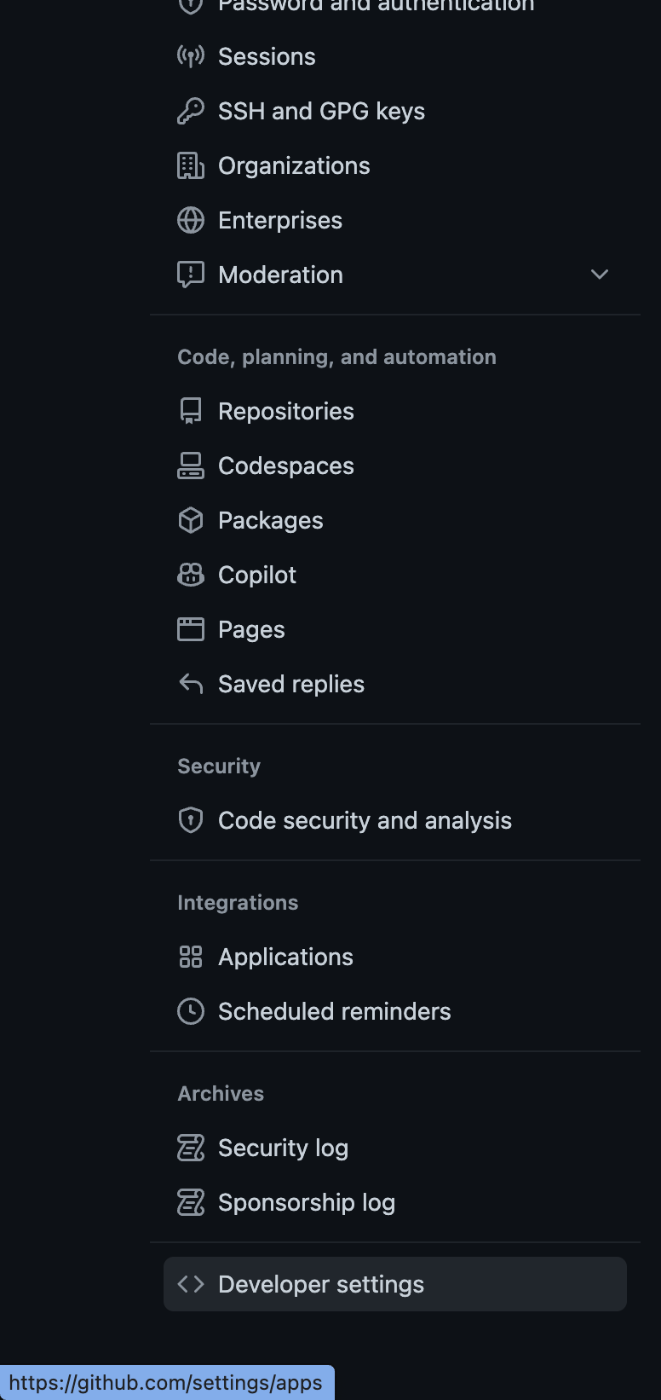
Settings > Developer settings > OAuth Apps を選択し、[New OAuth Apps]のボタンからOAuthの情報を登録します。
callback URLには以下を指定します。
[origin]/api/auth/callback/[provider]
[origin]にはlocalhost:3000(ローカル環境)またはカスタムドメイン(本番環境)を指定します。
ここでは、以下のURLを設定します。
https://yud0uhu.work/api/auth/callback/github
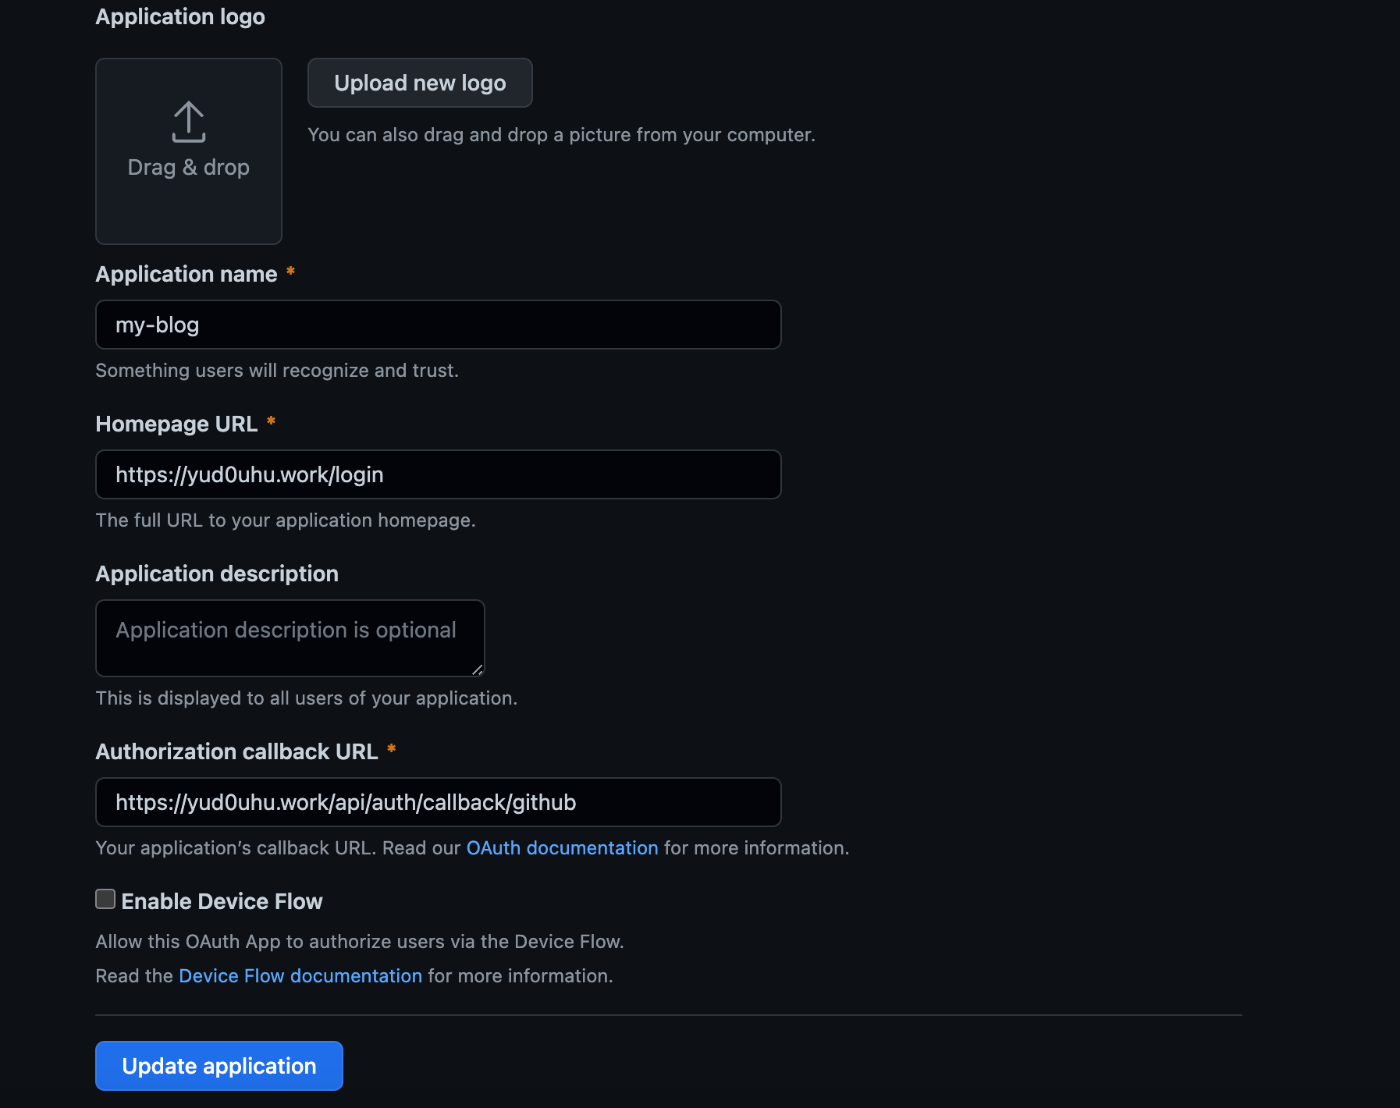
GitHub OAuth Apps のClient IDとClient secretが取得できたので、.envに環境変数を設定します。
GITHUB_CLIENT_ID="取得したClient ID"
GITHUB_CLIENT_SECRET="取得したClient secret"
認証用のヘッダーを作成します。
import { ActionIcon } from '@mantine/core'
import { getServerSession } from 'next-auth'
import { getSession, signIn, signOut, useSession } from 'next-auth/react'
import Router from 'next/router'
import { GetServerSidePropsContext } from 'next/types'
import { useEffect, useState } from 'react'
import { FaMoon, FaSun } from 'react-icons/fa'
import { authOptions } from '../../../pages/api/auth/[...nextauth]'
import {
  ButtonContainer,
  StyledButton,
  MenuIcon,
  MenuItem,
  MenuContainer,
  SawarabiGothic,
  GlobalStyle,
} from '../../layout/styles'
import { setHeaderStyles } from './styles/HeaderStyles'

export default function ServerSidePage() {
  const { data: session } = useSession()
  const [colorScheme, setColorScheme] = useState('light')
  useEffect(() => {
    const localStorageTheme = localStorage.getItem('theme')
    setColorScheme(localStorageTheme || 'light')

    setHeaderStyles(colorScheme)
  }, [colorScheme])

  const handleColorSchemeChange = () => {
    const newColorScheme = colorScheme === 'light' ? 'dark' : 'light'
    setColorScheme(newColorScheme)
    localStorage.setItem('theme', newColorScheme)
  }

  const [isOpen, setIsOpen] = useState(false)

  const handleMenuToggle = () => {
    setIsOpen(!isOpen)
  }

  return (
    <>
      <GlobalStyle />
      <div className="header" style={SawarabiGothic.style}>
        <ButtonContainer>
          <ActionIcon
            className="icon"
            variant="outline"
            color={colorScheme === 'dark' ? 'yellow' : 'blue'}
            onClick={() => handleColorSchemeChange()}
            title="Toggle color scheme"
          >
            {colorScheme === 'dark' ? (
              <FaSun size="1.1rem" />
            ) : (
              <FaMoon size="1.1rem" />
            )}
          </ActionIcon>
          {!session?.user && (
            <StyledButton
              onClick={(e) => {
                e.preventDefault()
                signIn()
              }}
            >
              ログイン
            </StyledButton>
          )}
          {session && (
            <>
              <MenuIcon
                src={`https://github.com/${session.user?.name}.png`}
                alt="Menu"
                onClick={handleMenuToggle}
              />
              <span>
                <small>Signed in as</small>
                <br />
                <strong>{session?.user?.name}</strong>
              </span>
              <MenuContainer isOpen={isOpen}>
                <MenuItem
                  className="menu-item"
                  onClick={(e) => {
                    e.preventDefault()
                    signOut()
                  }}
                >
                  ログアウト
                </MenuItem>
                <MenuItem
                  onClick={() => Router.push('/create')}
                  className="menu-item"
                >
                  投稿する
                </MenuItem>
              </MenuContainer>
            </>
          )}
        </ButtonContainer>
      </div>
    </>
  )
}

export async function getServerSideProps(context: GetServerSidePropsContext) {
  const session = await getSession(context)
  if (!session) {
    return { props: {} }
  }
  return {
    props: {
      session: await getServerSession(context.req, context.res, authOptions),
    },
  }
}
getServerSideProps から、getSession()フックを利用してサーバーサイドでレンダリングされる際にセッション情報を取得し、コンポーネントに渡すようにしています。
コンポーネント側からは、useSession フックでデータを取得しています。
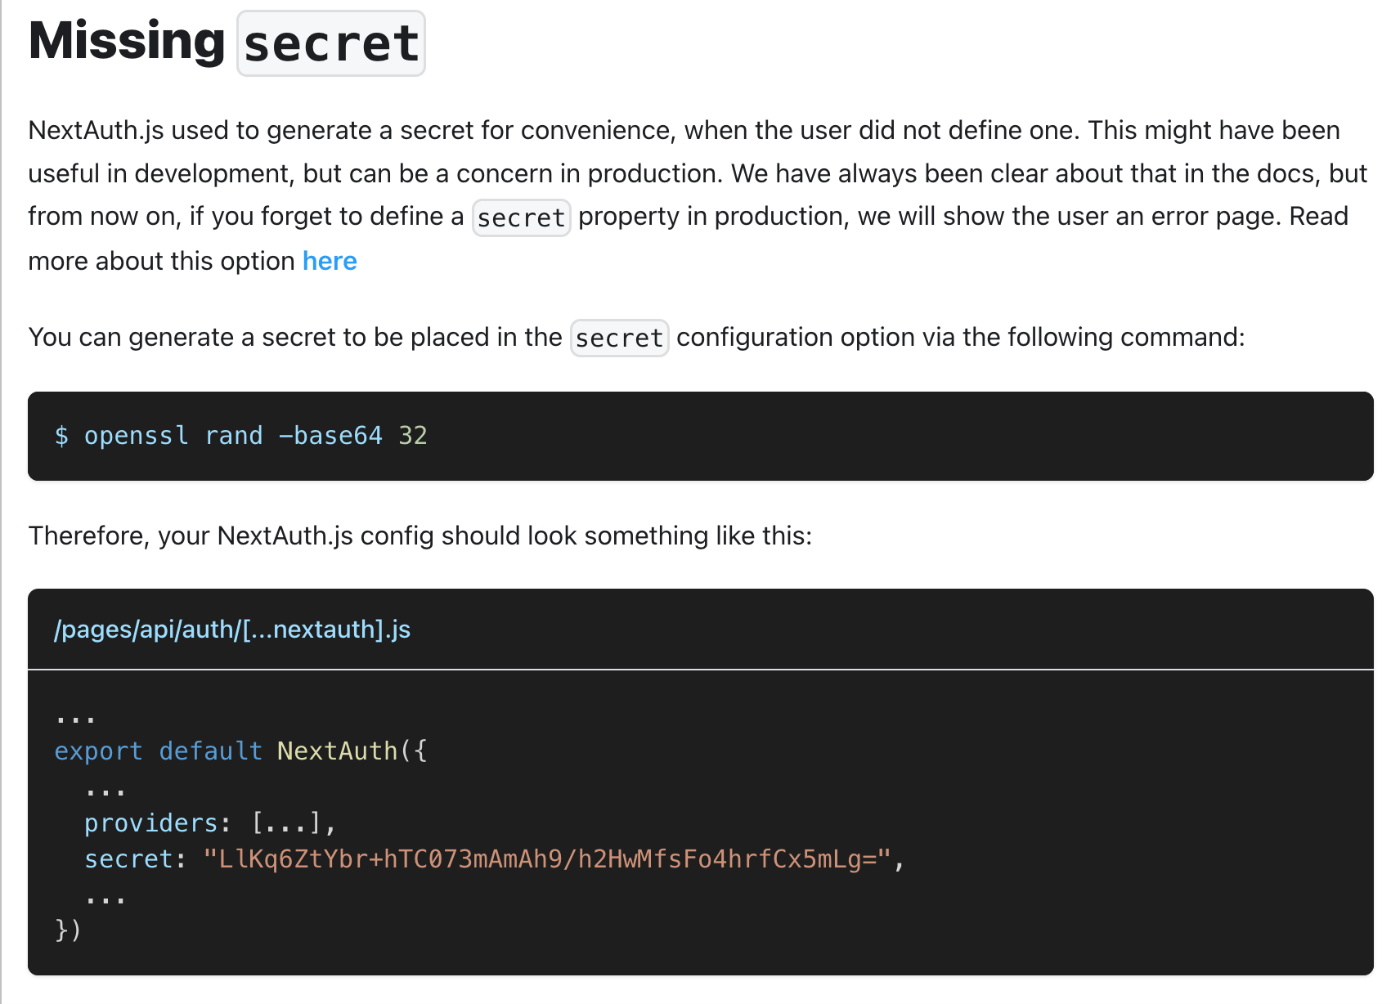
ハマったところ
ここで、Vercelにホスティングを行う場合、[...nextauth].jsにsecretを記述する必要があります。
開発環境では便宜的にsecretを生成してくれるものの、本番環境では何もしてくれないため、ここでsecretを渡さないとエラーページを見続ける羽目になります。
import NextAuth, { NextAuthOptions } from "next-auth";
import GithubProvider from "next-auth/providers/github";

export const authOptions: NextAuthOptions = {
+   secret: process.env.NEXT_PUBLIC_SECRET || '',
};

export default NextAuth(authOptions);
secretにはランダムな文字列を設定します。
ターミナルでopenssl rand -base64 32のコマンドを叩くか、 https://generate-secret.vercel.app/32 から生成できます。
取得したsecretの環境変数を.envのNEXT_PUBLIC_SECRETに設定します。
GITHUB_ID="取得したClient ID"
GITHUB_SECRET="取得したClient secret"
+ NEXT_PUBLIC_SECRET="ランダムな文字列"
VercelにNext.jsのアプリケーションをホスティングする場合、prefixにNEXT_PUBLICをつける必要があるようです。
動作確認
/ にアクセスすると、以下の認証画面に遷移します。

Sign in with GitHubのボタンを押すと、認証画面に遷移します。
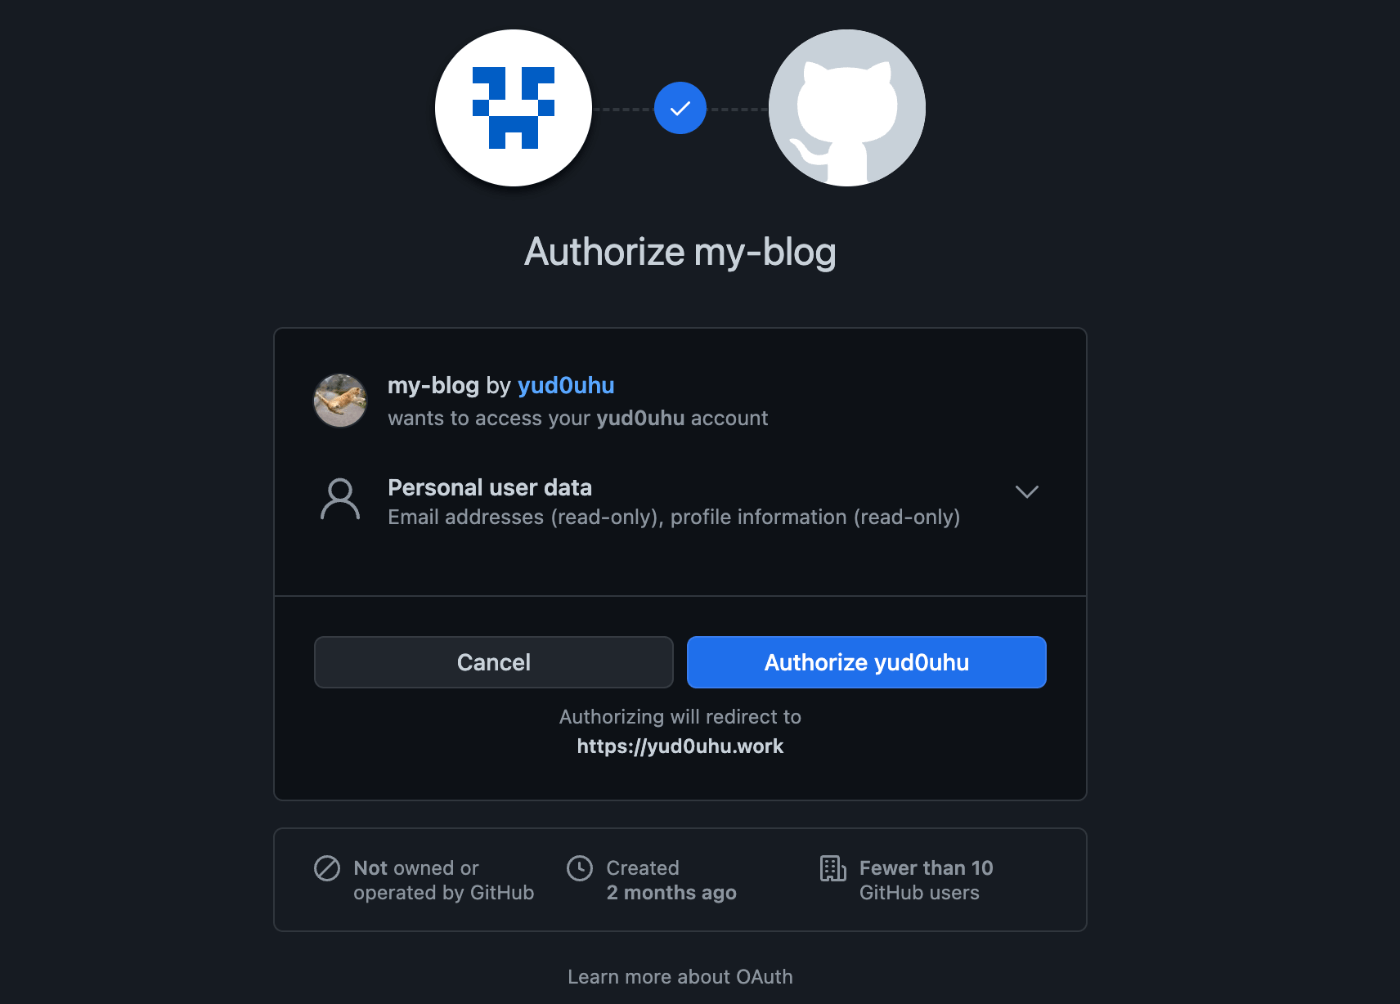
認証が完了すると、ルートパスにリダイレクトされます。

参考記事
独自ドメインの設定
Cloudflare Registrarでカスタムドメインを買って、Vercelで設定します。
以下のドキュメントの手順に沿って進めていきます。
Cloudfrare Registrarで購入したいドメインを検索し、購入します。
.workは$6.18/年でした。(2023/7/11時点)
デフォルトでは、ドメインは1年で自動更新されるようになっています。
Cloudfrare側の設定
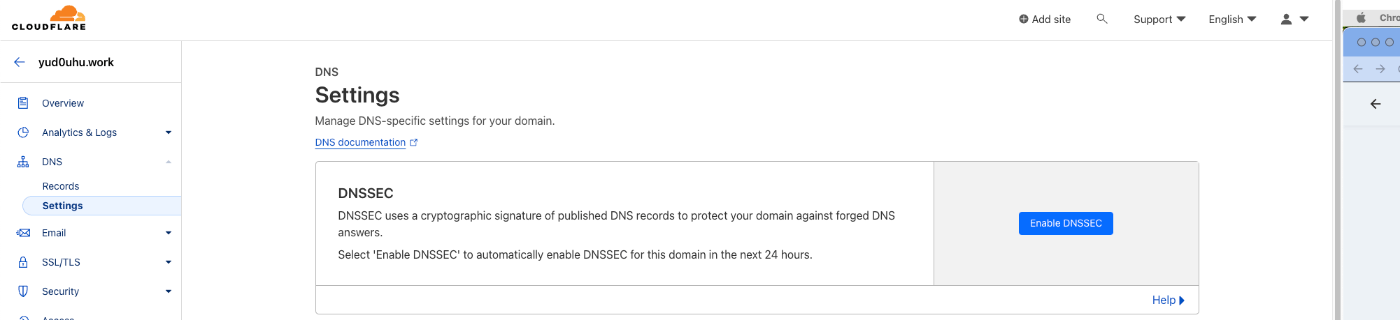
以下のボタンからDNSSEC(Domain Name System Security Extensions)の有効化を行います。
DNSSECは、暗号署名を使用してDNSレコードを検証することで、偽造されたDNS応答からドメインを保護します。DNSキャッシュポイズニング攻撃などの対策になるため、念のため有効化しておくとよさそうです。
DNSキャッシュポイズニング攻撃
偽のDNS応答をキャッシュDNSサーバーにキャッシュさせることで偽のサイトに誘導し、ドメインの乗っ取りやフィッシングなどを図る攻撃手法
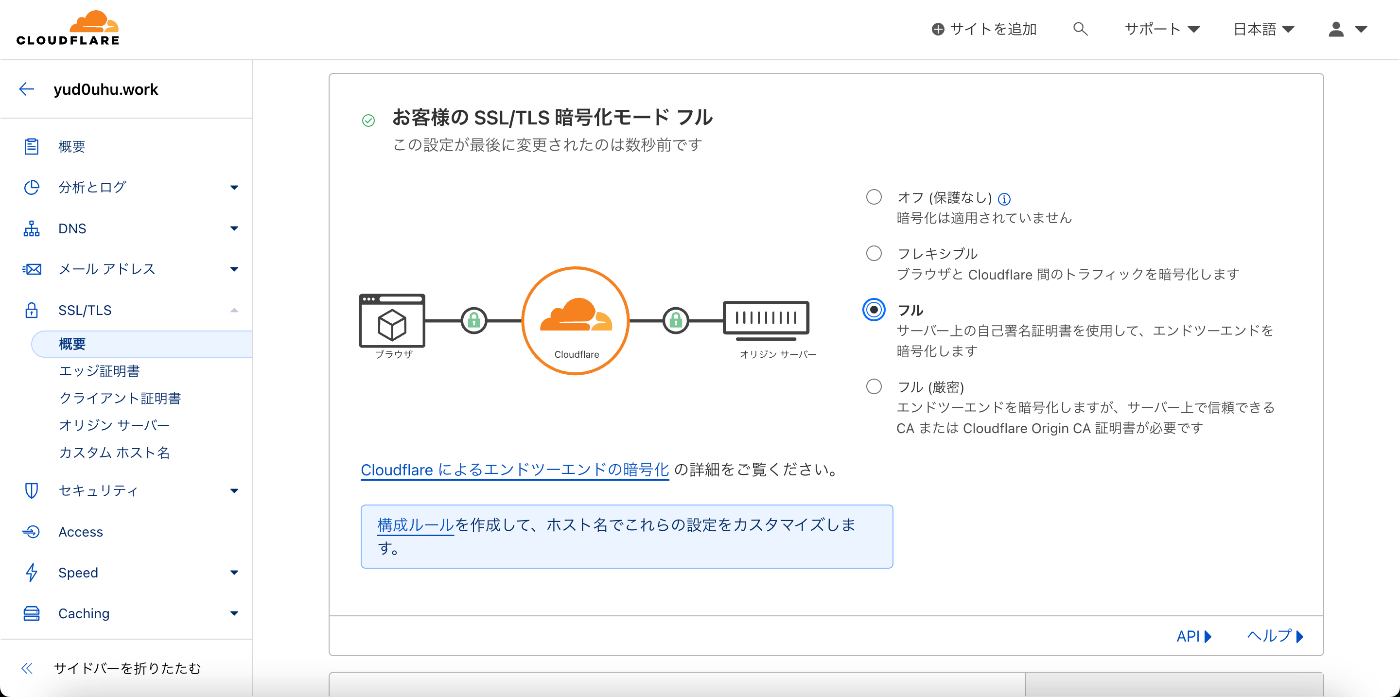
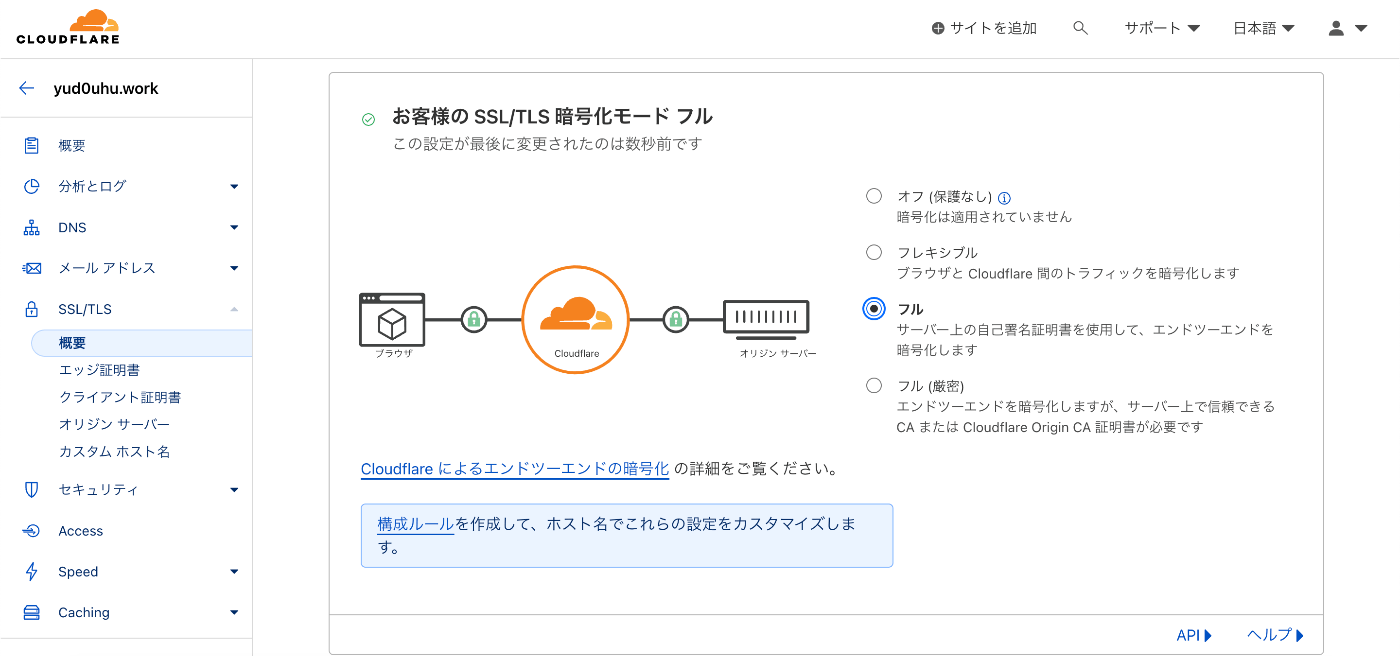
続いて、SSL/TSL設定を行います。
Vercel側の設定
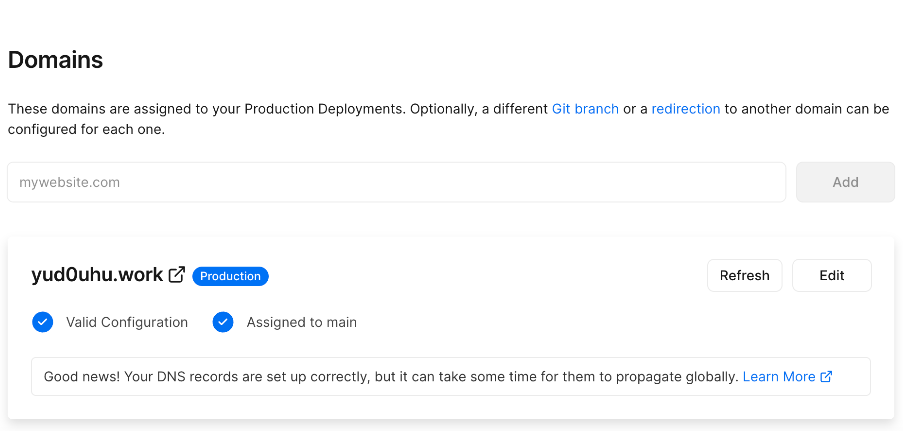
VercelのSettingsタブ>Domains に移動し、フォーム内に購入したドメイン名を入力し、Addボタンを押下します。(ここではyud0uhu.work)
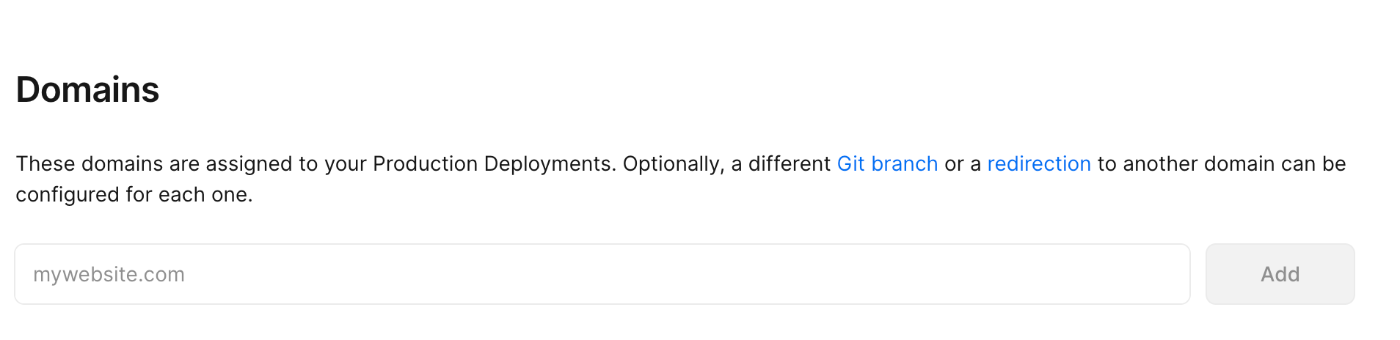
https://yud0uhu.work へのアクセスは https://www.yud0uhu.work にリダイレクトさせるのが推奨となっているため、変えずにAddボタンを押下します。
VercelのSettingsタブ>Domains>View DNS Records & More for yud0uhu.work →から、Cloudfrare側でDNSレコードに追加する値を確認します。
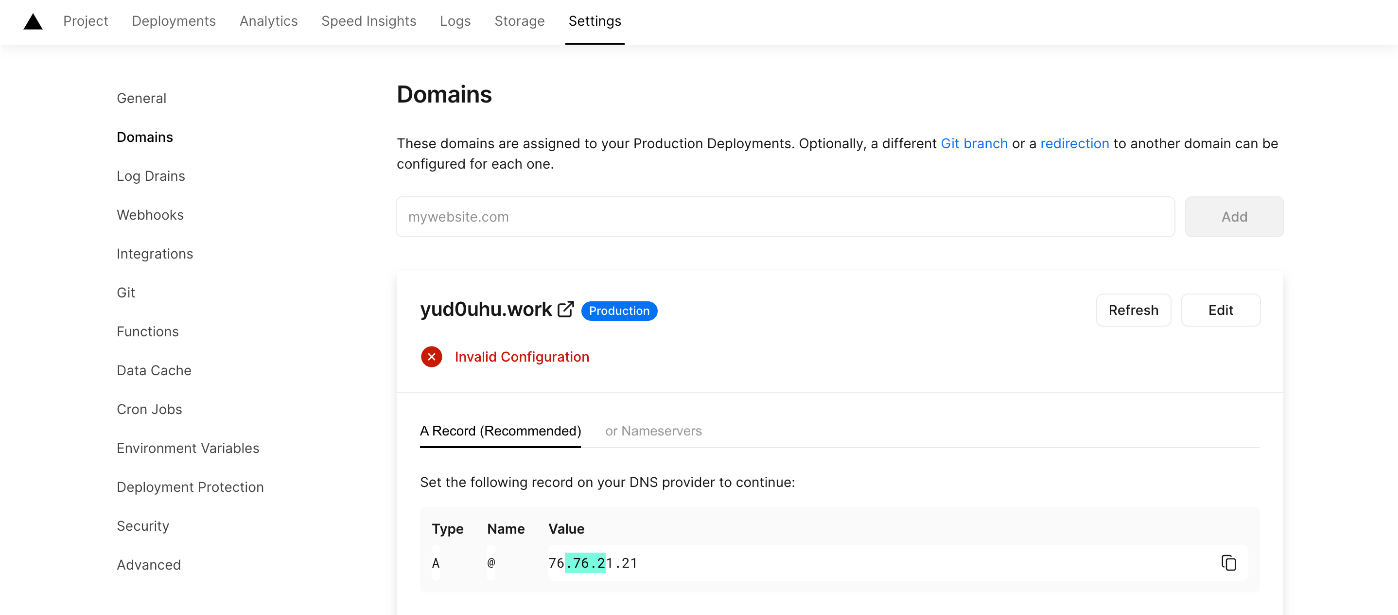
TypeがA、VALUEが76.76.21.21になっていることが確認できます。
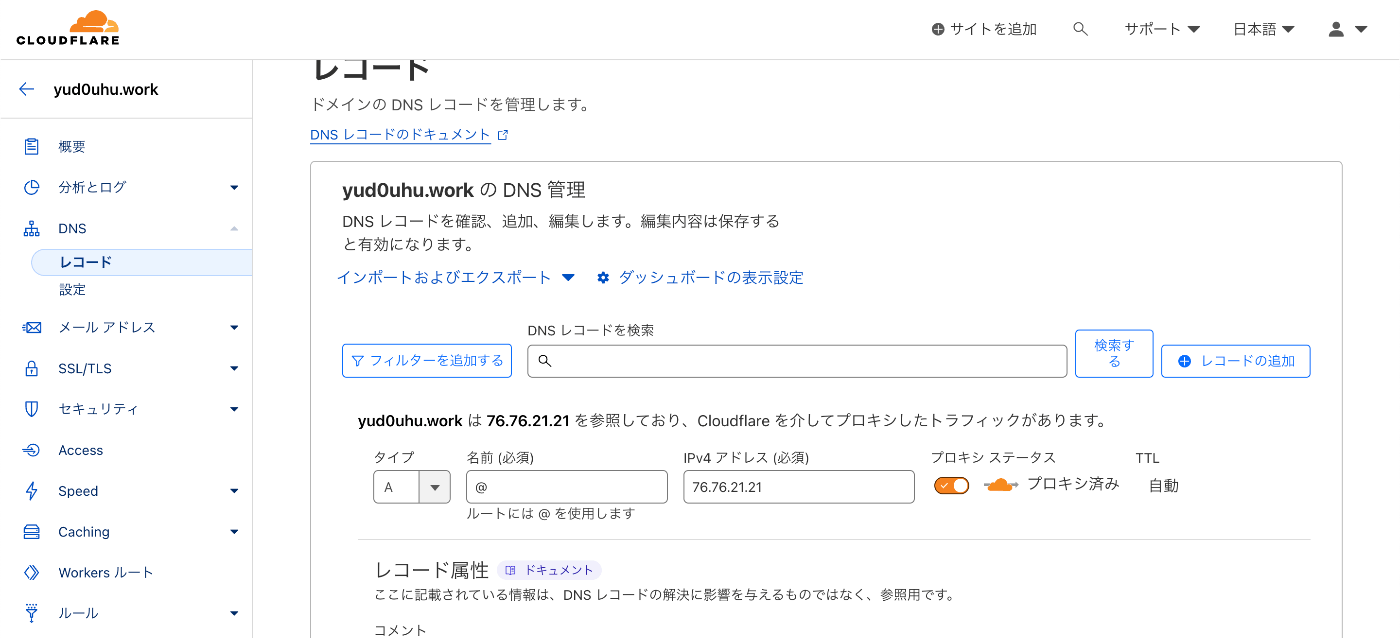
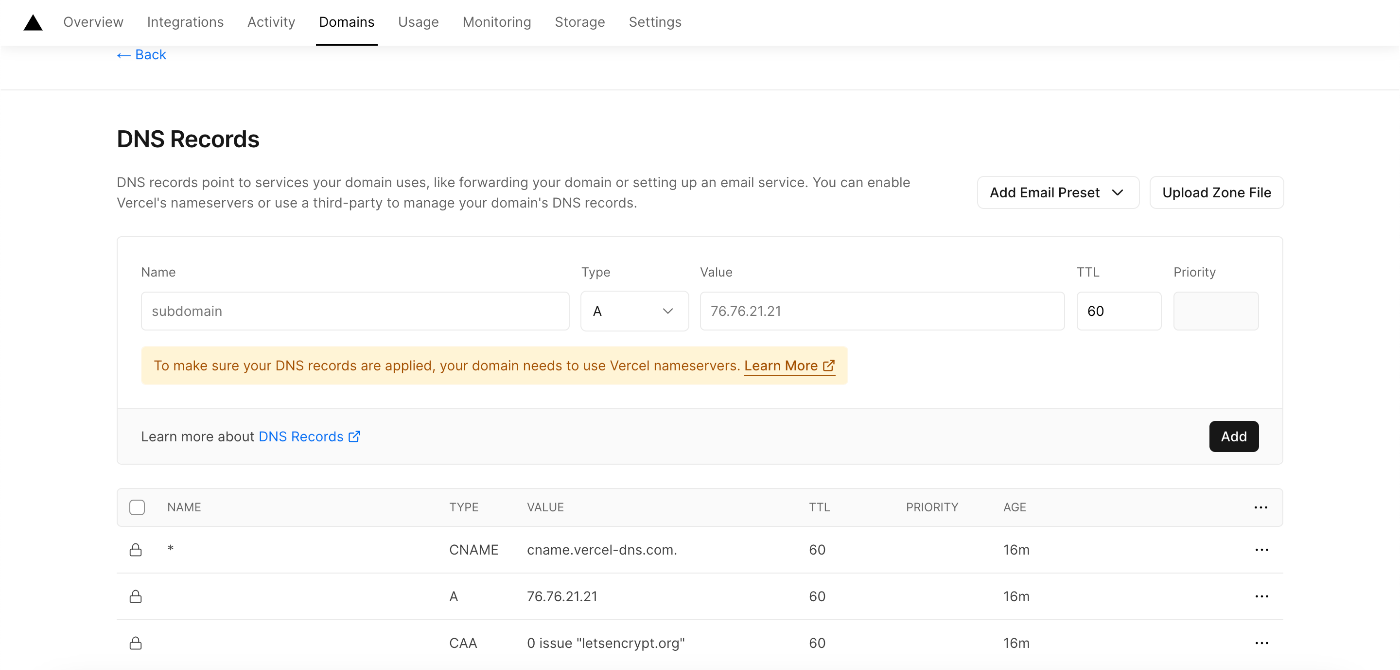
続いて、Cloudfrare側でDNSレコードの追加を行います。
以下のVercelのコンソールですべての項目にチェックがついたらドメインの設定が反映されます。
OGの作成
vercel/ogを利用したOGの作り方については以下の記事にまとめています。
Vercelにホスティングする
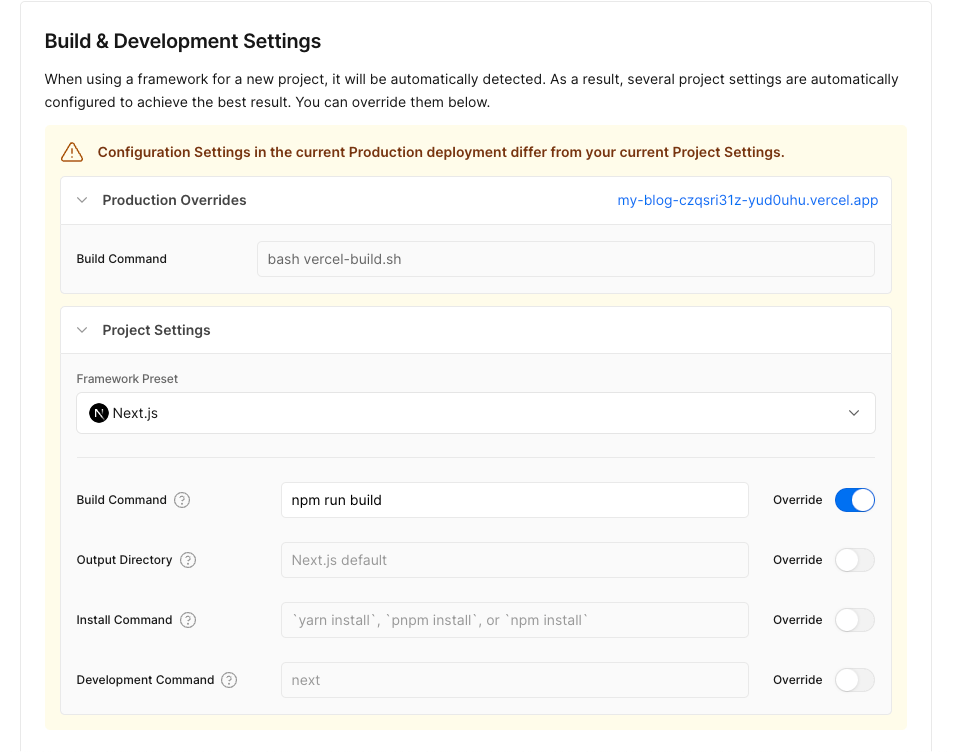
Vercelホスティングを行う前に、wasmとprismaのビルドの設定を行います。
rustupとwasm-packをインストールし、npx prisma generateを行うビルドスクリプトを書いて、vercel.jsonでそれを実行するように設定します。
{
  "buildCommand": "bash vercel-build.sh"
}
curl --proto '=https' --tlsv1.2 -sSf https://sh.rustup.rs | sh -s -- -y
source "$HOME/.cargo/env"
curl https://rustwasm.github.io/wasm-pack/installer/init.sh -sSf | sh -s -- -y
npx prisma generate
npm run build:wasm && npm run build:next
 "scripts": {
    "build": "run-s build:wasm build:prisma build:next",
    "build:prisma": "prisma generate",
    "build:next": "next build",
    "dev": "next dev",
    "start": "next start",
    "lint": "next lint",
    "build:wasm": "cd markdown-parser && wasm-pack build --target web"
  }
Build & Development Settingsは以下のように設定します。
アクセシビリティ対応:Next.jsのHTMLタグに動的にlangを設定する
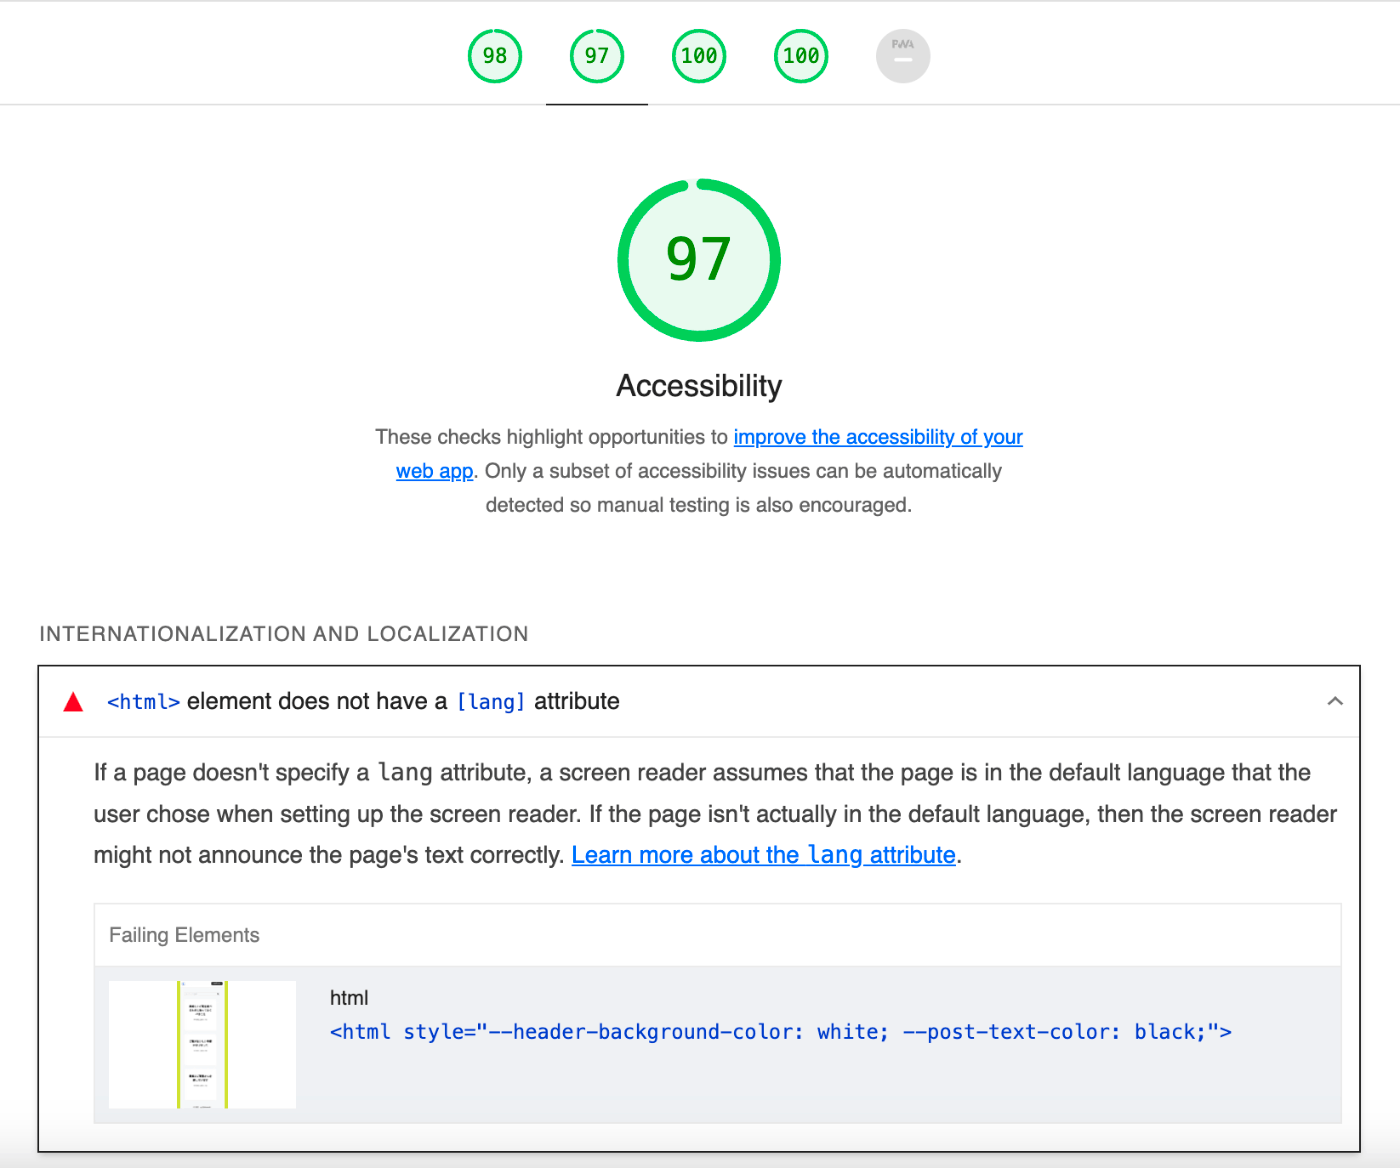
Lighthouseのアクセシビリティのスコアを100点にするため、以下を参考にlang="ja"の設定を行います
やりたいこと
これをNext.jsのプロジェクトで実現するために、いくつかの手順を踏みます。
<html lang="ja">
  <head>
    <title>タイトル</title>
  </head>
</html>
_document.tsxを作成する
Next.jsのpagesコンポーネントは、デフォルトで<head>タグと<body>タグを定義してくれます。
これらを拡張したい場合は./pages/_document.js作成し、デフォルトのDocumentをオーバーライドするようにします。
ここで、lang="ja"を<html>タグへと追加したいときには以下のように記述します。
カスタム属性はpropsとして渡すことができます。
<Html lang="ja">
通常、以下のドキュメントのとおりに作成します。
import { Html, Head, Main, NextScript } from 'next/document'

export default function Document() {
  return (
    <Html lang="en">
      <Head />
      <body>
        <Main />
        <NextScript />
      </body>
    </Html>
  )
}
このブログサイトではEmotionとstyled-componentsを使用しているため、以下のドキュメントを参考にrenderPageのカスタマイズを行うようにします。
import Document, {
  Html,
  Head,
  Main,
  NextScript,
  DocumentContext,
  DocumentInitialProps,
} from 'next/document'

class MyDocument extends Document {
  static async getInitialProps(
    ctx: DocumentContext
  ): Promise<DocumentInitialProps> {
    const originalRenderPage = ctx.renderPage

    // Run the React rendering logic synchronously
    ctx.renderPage = () =>
      originalRenderPage({
        // Useful for wrapping the whole react tree
        enhanceApp: (App) => App,
        // Useful for wrapping in a per-page basis
        enhanceComponent: (Component) => Component,
      })

    // Run the parent `getInitialProps`, it now includes the custom `renderPage`
    const initialProps = await Document.getInitialProps(ctx)

    return initialProps
  }

  render() {
    return (
      <Html lang="en">
        <Head />
        <body>
          <Main />
          <NextScript />
        </body>
      </Html>
    )
  }
}

export default MyDocument
注意点として、
- _document.tsxはサーバー上でのみレンダリングされます(
onClickなどのクライアントサイド固有の処理は書けません) - ページが適切にレンダリングされるためには
<Html>と<Head />と<Main />と<NextScript />が必要です - _document.tsxで使う
<Head />は、next/headとは異なります- ここで使われている
<Head />コンポーネントは、すべてのページに共通する<head>のコードにのみ使われるべきものです -
titleタグのようなメタデータを扱いたいときは、pageまたはcomponentでnext/headに対して付けることことが推奨されています
- ここで使われている
スコアの改善結果

@next/fontを使ってGoogle Fontsを読み込む
@next/font はNext13から導入されたフォント最適化機能で、以下のような特徴があります。
- あらゆるフォントファイル(カスタムフォントを含む)をセルフホスティングして最適化する
- CSSの「size-adjust」プロパティを使用してレイアウトシフトをなくす
- フォントはCSSファイルとともにビルド時に静的アセットとしてセルフホスティングされるため、フォント読み込みのための外部リクエストを送信することなく使うことができる
next/font/google 関数からすべてのGoogleフォントを使用することができます。
以下に書かれた利用方法を参考に設定を行います。
import { Sawarabi_Gothic } from 'next/font/google'

export const SawarabiGothic = Sawarabi_Gothic({
  // 任意の変数名を指定する
  variable: '--font-sawarabi_gothic',
  // デフォルトではpreloadがtrueとなっており、その場合はsubsets指定が必須
  subsets: ['latin'],
  // 可変フォントを使用できない場合は、weightを指定する。weightは配列を使用することもできる
  weight: '400',
})
補足:subsetについて
にある通り、Google Fontは最適化のため自動的にサブセット化されます。
そのため、サブセットのうちどれをプリロードするかを定義する必要があります。
指定しなかった場合、以下のようなエラーにより読み込みに失敗します。
`next/font` error:
Preload is enabled but no subsets were specified for font `Inter`. Please specify subsets or disable preloading if your intended subset can't be preloaded.
Available subsets: `cyrillic`, `cyrillic-ext`, `greek`, `greek-ext`, `latin`, `latin-ext`, `vietnamese`

Read more: https://nextjs.org/docs/messages/google-fonts-missing-subsets
フォントごとの設定(subsetsやfont-weightなど)の詳細は、以下のドキュメントから参照できます。
これを適用したいコンポーネントのstyleプロパティに渡します。
import {
+   SawarabiGothic,
} from '../../layout/styles'
...
  return (
    <>
      <GlobalStyle />
+       <div className="header" style={SawarabiGothic.style}>
...
styled-components+mantine
@emotion/styled というnpmパッケージを使用します。
Emotionは、ButtonやTextなどのPolymorphic components からprop typesを抽出することができないため、これらのコンポーネントをカスタマイズするには、@emotion/styled でスタイルを再定義する必要があるそうです。
styled-componentsでは、各コンポーネントのAPIのStatic selectorを使用してMantineコンポーネントのスタイルにアクセスします。
export const StyledTextInput = styled(TextInput)`
  & .mantine-TextInput-input {
    margin: 0px 0px 10px 0px;
    border-width: 0rem;
    background-color: var(--textarea-background-color);
    width: 100%;
  }
  & .mantine-TextInput-input:focus {
    outline: 0.125rem solid #aca4ce;
  }
`
Static selectorの値は、各コンポーネントのAPIドキュメントから参照できます。
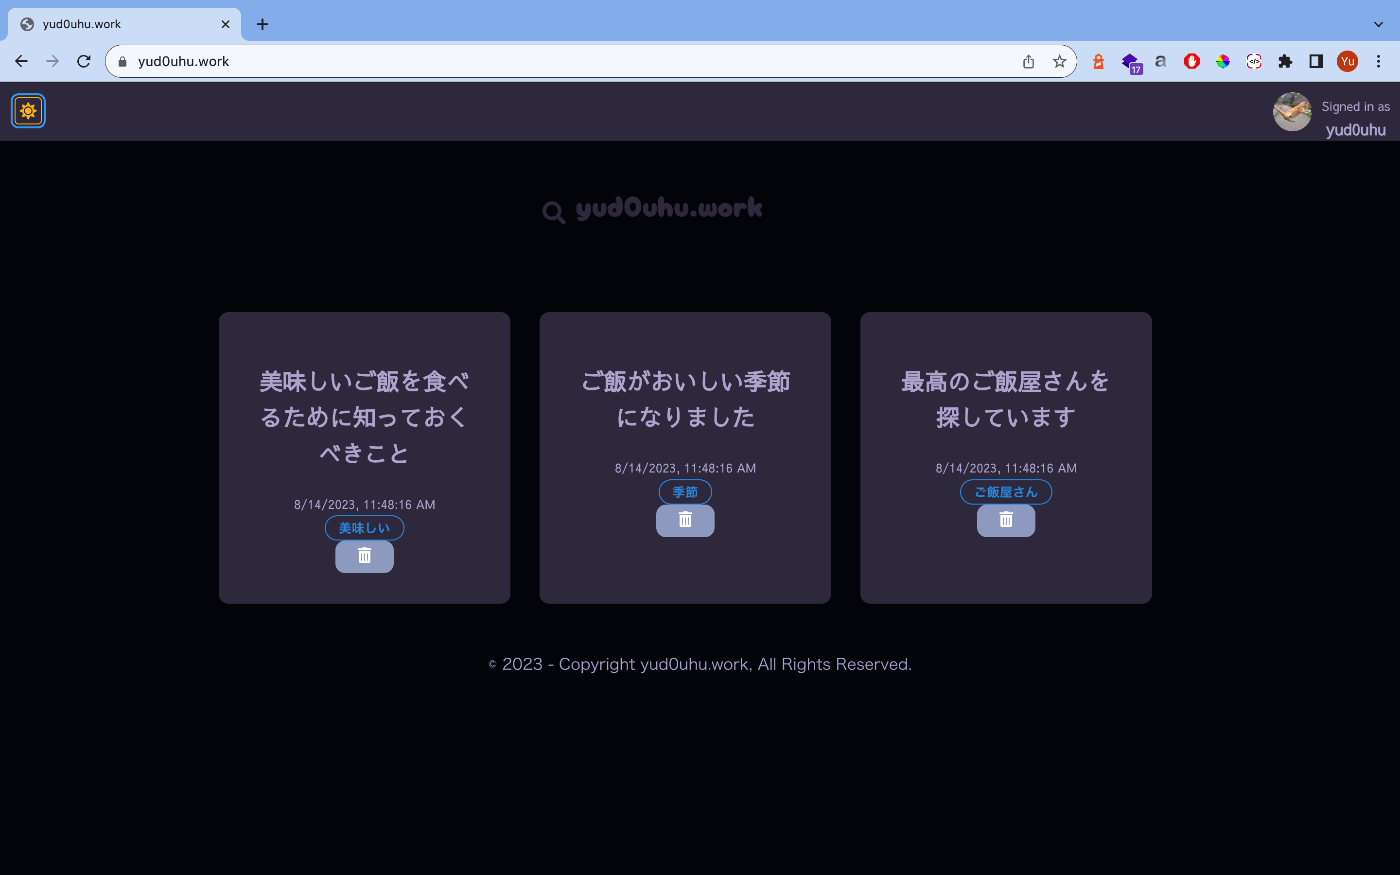
ダークモードの実装
Mantineを使ってダークモードの実装を行います。
_app.tsxでサイト全体をColorSchemeProviderとMantineProviderでラップします。
MantineProviderにより、theme.colors.darkからダークカラースキームを使用できるようになります。
ColorSchemeProviderにより、動的なカラースキームの変更が行えるようになります。
import type { AppProps } from 'next/app'
import {
  ColorScheme,
  ColorSchemeProvider,
  MantineProvider,
} from '@mantine/core'
function MyApp({ Component, pageProps: { session, ...pageProps } }: AppProps) {
  const [colorScheme, setColorScheme] = useState<ColorScheme>('light')
  const toggleColorScheme = (value?: ColorScheme) =>
    setColorScheme(value || (colorScheme === 'dark' ? 'light' : 'dark'))
  ...

  return (
    ...
      <div className="app">
        ...
            <ColorSchemeProvider
              colorScheme={colorScheme}
              toggleColorScheme={toggleColorScheme}
            >
              <MantineProvider
                theme={{ colorScheme }}
                withGlobalStyles
                withCSSVariables
                withNormalizeCSS
              >
                <Component {...pageProps} />
              </MantineProvider>
            </ColorSchemeProvider>
      ...
  )
}

export default MyApp
次に、ヘッダーアイコンから動的なカラーテーマの変更が行えるようにします。
useEffectで、ページのレンダリング後とcolorSchemeの変更時にストレージからカラーテーマの状態を取得して、setHeaderStyles(colorScheme);とsetHeaderStyles(colorScheme);で更新をセットします。
setHeaderStylesは、styled-componentsでダークモードを実現するためのCSS変数をまとめた定義ファイルです。
また、ハンドラ関数のhandleColorSchemeChangeを使って、トグルからカラーテーマの状態を切り替えます。
useLocalStoragフックを使用してテーマの状態をlocalStorageに保存し、ページをリロードした際やタブ間で、選択したテーマの状態の同期が行えるようにします。
import { MantineProvider, ColorSchemeProvider, ColorScheme } from '@mantine/core';
  const [colorScheme, setColorScheme] = useState('light')
  useEffect(() => {
    const localStorageTheme = localStorage.getItem('theme')
    setColorScheme(localStorageTheme || 'light')

    setHeaderStyles(colorScheme)
  }, [colorScheme])

  const handleColorSchemeChange = () => {
    const newColorScheme = colorScheme === 'light' ? 'dark' : 'light'
    setColorScheme(newColorScheme)
    localStorage.setItem('theme', newColorScheme)
  }
...
  return (
          <ActionIcon
            className="icon"
            variant="outline"
            color={colorScheme === 'dark' ? 'yellow' : 'blue'}
            onClick={() => handleColorSchemeChange()}
            title="Toggle color scheme"
          >
            {colorScheme === 'dark' ? (
              <FaSun size="1.1rem" />
            ) : (
              <FaMoon size="1.1rem" />
            )}
          </ActionIcon>
HeaderStylesには以下のようにカスタムカラーテーマの情報を設定します。
export const setHeaderStyles = (colorScheme: string) => {
  document.documentElement.style.setProperty(
    '--header-background-color',
    colorScheme === 'light' ? 'white' : '#2D283B'
  )
...
  document.documentElement.style.setProperty(
    '--menu-hover-color',
    colorScheme === 'light' ? '#eae3e8' : 'black'
  )
}
HeaderStylesにcolorSchemeの状態を渡すことで、CSS変数で定義された背景色などを任意の配色に切り替えています。
export const StyledTextInput = styled(TextInput)`
  & .mantine-TextInput-input {
    margin: 0px 0px 10px 0px;
    border-width: 0rem;
    background-color: var(--textarea-background-color);
    width: 100%;
  }
  & .mantine-TextInput-input:focus {
    outline: 0.125rem solid #aca4ce;
  }
`
補足:createglobalstyleについて
通常、styled-componentsは自動的にローカルにスコープされるため、他のコンポーネントから分離されます。
createglobalstyleというヘルパー関数を用いることで、基本スタイルシート(bodyなど)に対してもスタイルが適用できるようになります。
アプリケーション全体に適用させたいカラーテーマについてはここに定義しています。
export const GlobalStyle = createGlobalStyle`
  .header {
    background-color: var(--header-background-color);
    border-bottom: 1px solid rgba(0, 0, 0, 0.1);
    width: 100%;
    height: 60px;
    position: fixed;
    top: 0;
    left: 0;
    right: 0;
    z-index: 999;
  }

  .icon {
    top: 15px;
    left: 15px;
    position: fixed;
  }

  html {
    box-sizing: border-box;
  }

  *, *:before, *:after {
    box-sizing: inherit;
  }

  body {
    color: var(--post-text-color);
    margin: 0;
    padding: 0;
    font-size: 16px;
    /* font-family: -apple-system, BlinkMacSystemFont, "Segoe UI", Roboto, Helvetica, Arial, sans-serif, "Apple Color Emoji", "Segoe UI Emoji", "Segoe UI Symbol"; */
    background-color: var(--background-color); /* CSS変数を参照して背景色を適用 */
    background-blend-mode: lighten;
  }

  input, textarea {
    font-size: 16px;
  }

  .tag-remove-button {
  background-color: transparent;
  border: none;
  cursor: pointer;
}
その他
テキストの内容がサーバーでレンダリングされたHTMLと一致しない
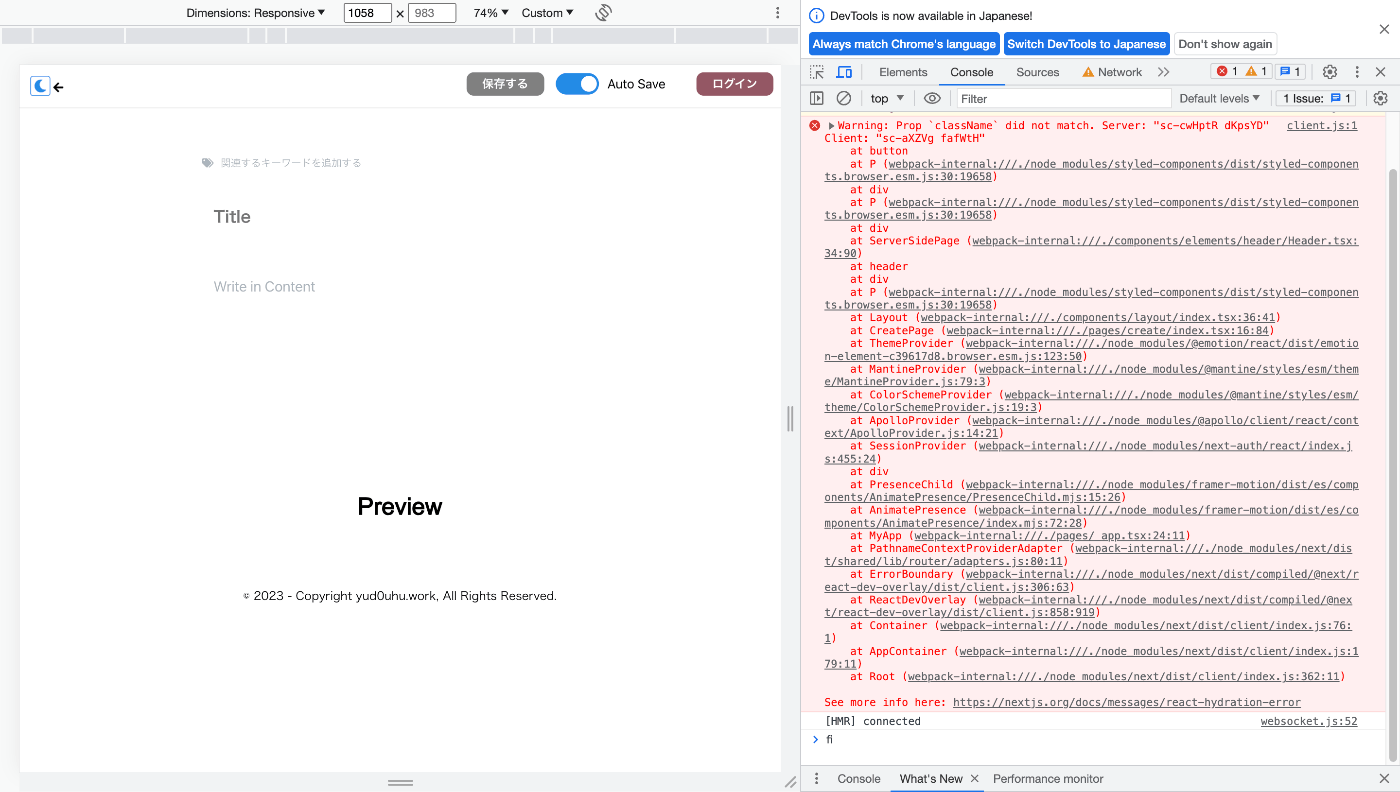
サーバーから事前にレンダリングされたReactツリーと、ブラウザーでの最初のレンダリング (Hydration/ハイドレーション) 中にレンダリングされたReactツリーの間に違いが生じたため。(今回のケースだと、classNameの不一致)
Reactのハイドレーションとレンダリングの仕組み
ここでは、ドキュメントの解決方法に書かれている
Solution 1: Using useEffect to run on the client only
Ensure that the component renders the same content server-side as it does during the initial client-side render to prevent a hydration mismatch. You can intentionally render different content on the client with the useEffect hook.
を参考に、フックを使用してレンダリングのタイミングを意図的に制御します。
import React, { Suspense, useEffect, useState } from 'react'
import Layout from '../../components/layout'
import init from '../../markdown-parser/pkg/markdown_parser'
import Create from '../../features/create/components/Create'

function CreatePage() {
  const [isClient, setIsClient] = useState(false)
  // init関数は、コンポーネントのマウント時ではなく、外部のebAssemblyモジュールを非同期でロードするため、useEffectフックを使用する
  useEffect(() => {
    const loadWasm = async () => {
      await init()
    }
    setIsClient(true)
    loadWasm()
  }, [])

  return (
    <>
      {isClient ? (
        <Layout>
          <Create />
        </Layout>
      ) : (
        <Suspense fallback={<p>Loading feed...</p>}> </Suspense>
      )}
    </>
  )
}

export default CreatePage
これにより、リロードしてもスタイルが崩れなくなりました。
ハイドレーションについては、以下の記事に非常にわかりやすくまとまっているため、一部抜粋させていただきます。
ハイドレーションとは
サーバから受け取った「乾いたHTML」に、クライアントサイドのインタラクティブな機能を注ぎ込むこと
イベントリスナを登録したり、ステート管理やその他の動的な機能を追加する
ハイドレーションエラーとは
「サーバから受け取った初期HTML」と「クライアントサイドJSが予期するHTML」が一致しない場合に起こるエラー
予想と違うHTMLが来ると、どの要素に機能を注ぎ込めばいいか特定できず、再利用できない
ハイドレーションエラーを起こさないためには
「サーバから受け取った初期HTML」と「クライアントサイドJSが予期するHTML」が一致するようにコードを書く
本来は
「サーバから受け取った初期HTML」と「クライアントサイドJSが予期するHTML」が一致するようにコードを書く
べきであるため、フックの利用はあまりお行儀の良い対処方法ではないかもしれません。
ホスティング後、以下のエラーで弾かれた
- error Error [TypeError]: Cannot read properties of undefined (reading 'Symbol(Pothos.contextCache)')
    at file:///Users/denham/Documents/my-blog-hasura/node_modules/@pothos/core/esm/utils/context-cache.js:10:33
    at SchemaBuilder.prismaObject (file:///Users/denham/Documents/my-blog-hasura/node_modules/@pothos/plugin-prisma/esm/schema-builder.js:18:22)
    at eval (webpack-internal:///(api)/./pages/api/graphql.ts:27:9) {
  digest: undefined
}
- wait compiling /_error (client and server)...
- event compiled client and server successfully in 2.4s (1476 modules)
- warn Fast Refresh had to perform a full reload due to a runtime error.
npx prisma generate のときに出ていた、以下の警告が臭います
warn Versions of prisma@4.13.0 and @prisma/client@4.16.2 don't match.
This might lead to unexpected behavior.
Please make sure they have the same version.
解決方法
@prisma/clientのバージョンは明示的に@prismaに合わせる
- "@prisma/client": "^4.13.0"
+ "@prisma/client": "4.13.0"
最後に
だいぶ形になってきたので、今後は以下に着手していきたいです。
- LightHouseのスコア改善(パフォーマンス100点を目指す)
- ラベル検索の実装
- プロフィールページの作成
- App Routerへの移行
- 現状Mantineが非対応のため。リリースされ次第移行する。
- https://github.com/mantinedev/mantine/issues/2815
Discussion