Menderで始める組み込みOTA 第3回 : Quickstart Part2 : Raspberry Pi 3/4を接続
MenderはオープンソースベースのLinux向けOTA(Over the Air Update)ソリューションです。

筆者の会社コードギアではこのたびご縁あってMenderの技術サポートを提供する機会を得ました。
この一連の記事ではMender OTAソリューションの技術的な側面を紹介します。
「Menderで始める組み込みOTA」記事インデックス
- 第0回 : 組み込み製品、IoTシステムに適したOTAとは?
- 第1回 : Menderのご紹介
- 第2回 : Quickstart Part1 : mender.ioの試用アカウントを取得
- 第3回 : Quickstart Part2 : Raspberry Pi 3/4を接続 (本記事)
- 第4回 : Quickstart Part3 : アプリケーションを更新(その1)
- 第5回 : Quickstart Part4 : アプリケーションを更新(その2)
- 第6回 : Quickstart Part5 : OSアップデートを実行
- 第7回 : Quickstart Part6 : コンテナアップデートを実行
- 第8回 : Quickstart Part7 : リモートターミナル機能のご紹介
- 第9回 : 接続編1 : QEMUエミュレータを接続
- 第10回 : 接続編2 : Armadillo IoT G3を接続
- 第11回 : 接続編3 : Jetson AGX Orinを接続
はじめに
この回はRaspbery Pi 3/4 を用意してSaaSのmender.ioに接続するまでを紹介します。
基本的な流れは docs.mender.io にあるPrepare a Raspberry Pi deviceの内容と同じです。
Raspberry Piは以下の機種が利用可能です。
- Raspberry Pi 3 Model B
- Raspberry Pi 3 Model B+
- Raspberry Pi 4 Model B
また、8GB以上のマイクロSDメモリカードを利用します。書き込み時にはTranscend社のTS-RDF5 アダプタを利用しました。
開発PCとしてWindows 10 PCまたはUnbuntu 20.04 をインストールしたLinux PCを想定しています。
Raspberry Pi OSを マイクロSDメモリカードに書き込む
以下のRaspberry Piドキュメントを参考に、Raspberry Pi Imagerツールを利用してマイクロSDメモリカードにRaspberry Pi OSを書き込みます。
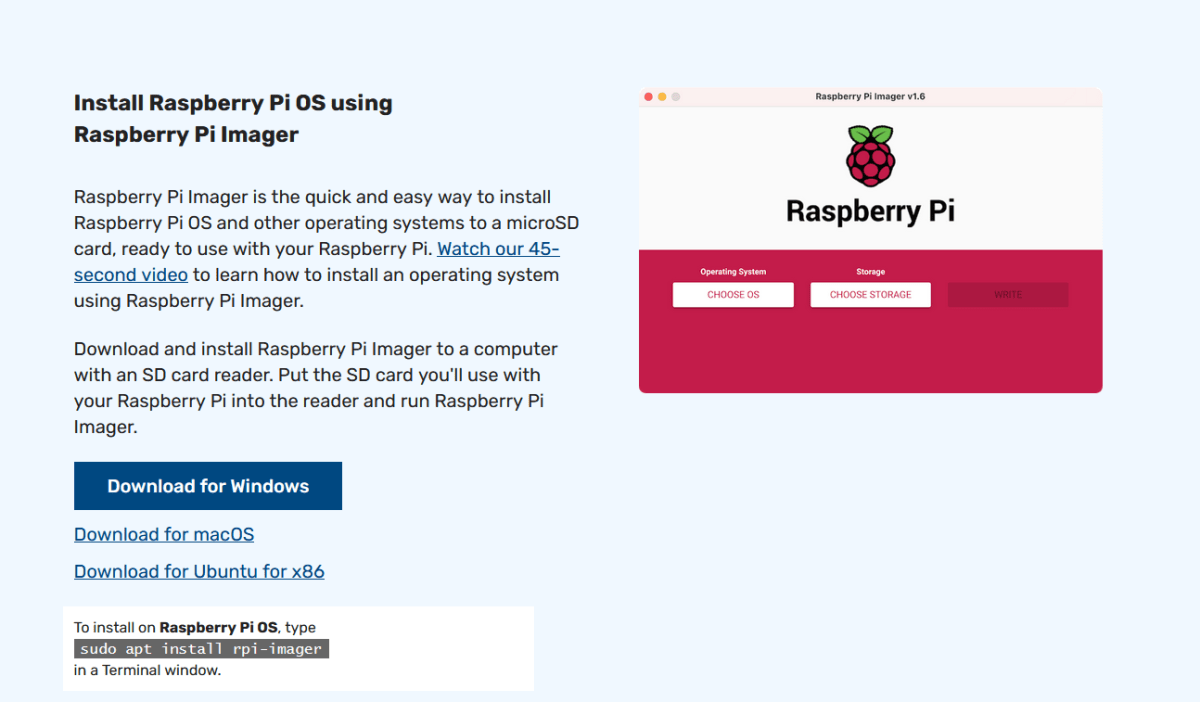
ダウンロードするイメージファイルは以下(2022年5月現在)
Raspberry Pi 3 Model B/B+用
https://d4o6e0uccgv40.cloudfront.net/2021-10-30-raspios-bullseye-armhf-lite/arm/2021-10-30-raspios-bullseye-armhf-lite-raspberrypi3-mender-convert-2.6.2.img.xz
Raspberry Pi 4 Model B用
https://d4o6e0uccgv40.cloudfront.net/2021-10-30-raspios-bullseye-armhf-lite/arm/2021-10-30-raspios-bullseye-armhf-lite-raspberrypi4-mender-convert-2.6.2.img.xz
ここで提供されているイメージはmenderで使用するためにカスタマイズ済みの Bullseye イメージです。世代的にはDebian 10 'buster' との互換性があります。
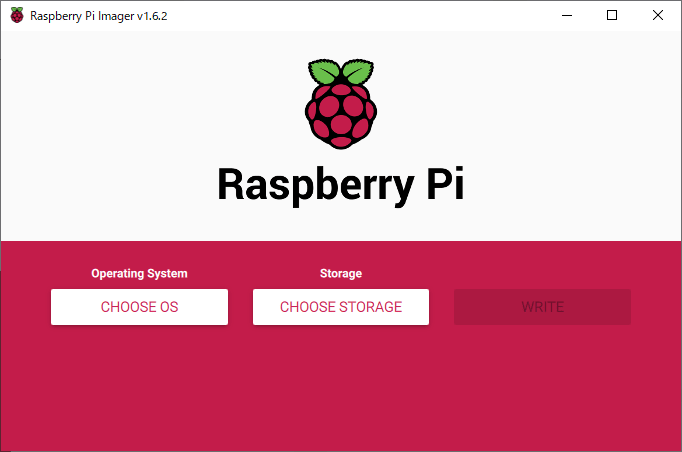
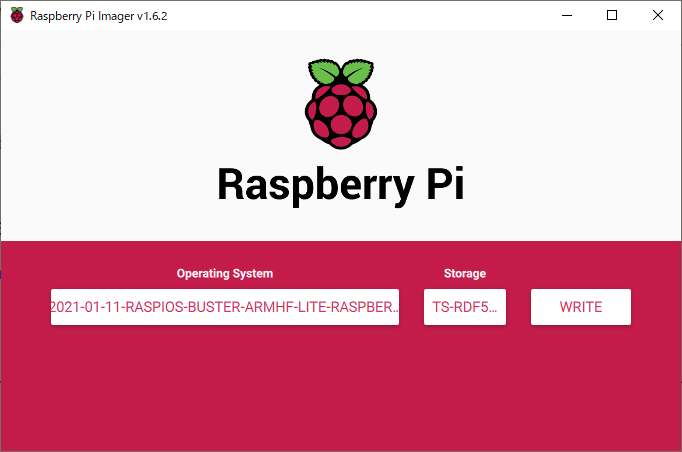
↓ Raspberry Pi Imager を起動
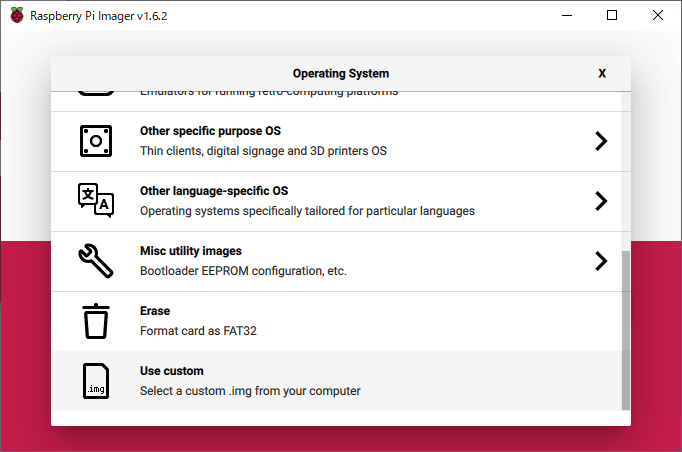
↓ 「Use Custom」で書き込みファイルを選択
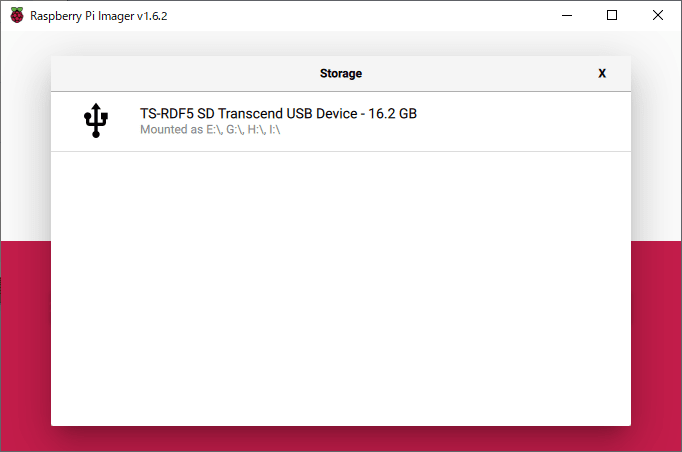
↓ 書き込み先マイクロSDメモリを選択
↓ 設定完了したので「Write」を押す
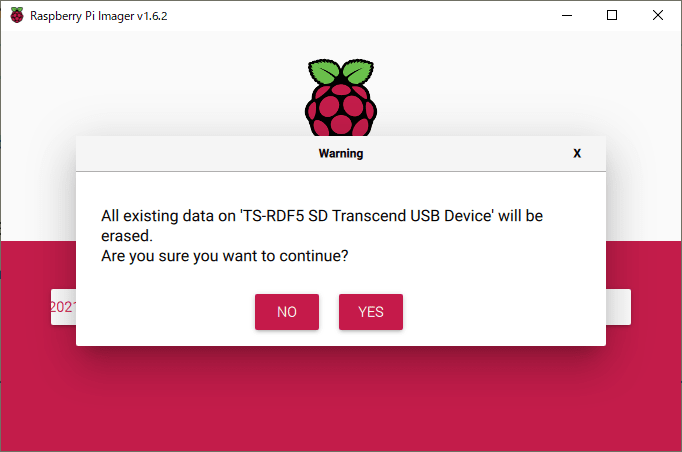
↓ 書き込み開始
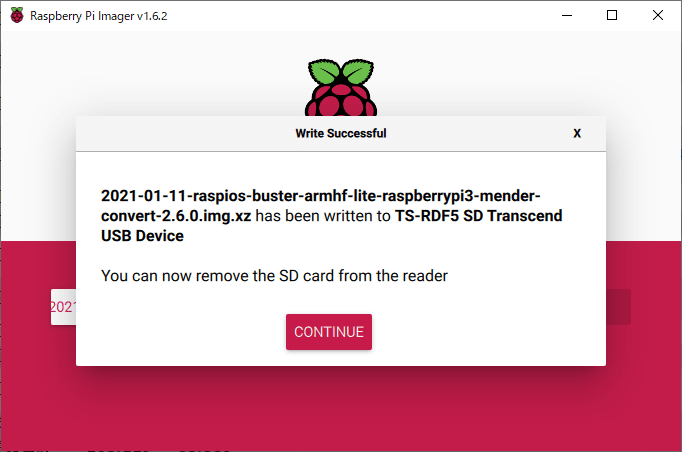
↓ 書き込み終了
Raspberry Piをネットワーク接続する準備を行う
以下のいずれかの手順でRaspberry Piの sshサーバー機能 を有効にします。
有線Ethernetを利用するか、WiFiを設定することもできます。
Linux PCが手元にある場合には以下のHeadless手順で直接マイクロSDメモリ内の設定を変更してWiFi接続が可能です。
Option #1: Configure wireless network and enable SSH in headless mode
Setting up a Headless Raspberry Pi
手元にWindows PCしかない場合は、モニタとUSBキーボード/マウスを接続して、Raspberry Pi起動後にモニタ画面を見ながら設定を書き換えます。
Option #2: Configure wireless network and enable SSH by attach a keyboard and monitor
有線LANネットワークににDHCPを利用して接続する際はsshサーバーを有効にするだけです。このために、(いったんログインした後)raspi-configを実行し、sshを有効にします。
Run sudo raspi-config
Navigate to Interfacing Options and Select SSH
Choose Yes, OK and Finish
実行後に systemctl を利用すると、sshdが起動していることが確認できます。
pi@raspberrypi:~ $ systemctl status sshd
● ssh.service - OpenBSD Secure Shell server
     Loaded: loaded (/lib/systemd/system/ssh.service; enabled; vendor preset: e>
     Active: active (running) since Fri 2022-05-20 14:35:12 BST; 8min ago
       Docs: man:sshd(8)
             man:sshd_config(5)
    Process: 1274 ExecStartPre=/usr/sbin/sshd -t (code=exited, status=0/SUCCESS)
   Main PID: 1275 (sshd)
      Tasks: 1 (limit: 1597)
        CPU: 1.114s
     CGroup: /system.slice/ssh.service
             └─1275 sshd: /usr/sbin/sshd -D [listener] 0 of 10-100 startups

May 20 14:35:12 raspberrypi systemd[1]: Starting OpenBSD Secure Shell server...
May 20 14:35:12 raspberrypi sshd[1275]: Server listening on 0.0.0.0 port 22.
May 20 14:35:12 raspberrypi sshd[1275]: Server listening on :: port 22.
May 20 14:35:12 raspberrypi systemd[1]: Started OpenBSD Secure Shell server.
May 20 14:39:37 raspberrypi sshd[1356]: Connection closed by 192.168.5.20 port >
May 20 14:40:14 raspberrypi sshd[1358]: Accepted password for pi from 192.168.5>
May 20 14:40:14 raspberrypi sshd[1358]: pam_unix(sshd:session): session opened >
pi@raspberrypi:~ $
Raspberry Piを起動し、PCからssh 接続する
sshの接続先IPアドレスがわからないときは、How to Find your IP Addressの記述に従って調べてみます。たいていは以下のようにpingコマンドで判明します。
Windows10 のコマンドプロンプトから
Microsoft Windows [Version 10.0.19044.1706]
(c) Microsoft Corporation. All rights reserved.

C:\Users\hiron>ping raspberrypi.local

raspberrypi.local [192.168.5.39]に ping を送信しています 32 バイトのデータ:
192.168.5.39 からの応答: バイト数 =32 時間 =26ms TTL=64
192.168.5.39 からの応答: バイト数 =32 時間 =2ms TTL=64
192.168.5.39 からの応答: バイト数 =32 時間 =2ms TTL=64
192.168.5.39 からの応答: バイト数 =32 時間 =2ms TTL=64

192.168.5.39 の ping 統計:
    パケット数: 送信 = 4、受信 = 4、損失 = 0 (0% の損失)、
ラウンド トリップの概算時間 (ミリ秒):
    最小 = 2ms、最大 = 26ms、平均 = 8ms

C:\Users\hiron>
Ubuntu 20.04 の例 (実際にはWSL2ですが...)
勝手には止まらないので Control-C を入力して止めます。
codegear@Pavilion24:~$ ping raspberrypi.local
PING raspberrypi.local (192.168.5.39) 56(84) bytes of data.
64 bytes from 192.168.5.39 (192.168.5.39): icmp_seq=1 ttl=63 time=3.04 ms
64 bytes from 192.168.5.39 (192.168.5.39): icmp_seq=2 ttl=63 time=2.43 ms
64 bytes from 192.168.5.39 (192.168.5.39): icmp_seq=3 ttl=63 time=2.61 ms
64 bytes from 192.168.5.39 (192.168.5.39): icmp_seq=4 ttl=63 time=2.98 ms
64 bytes from 192.168.5.39 (192.168.5.39): icmp_seq=5 ttl=63 time=3.17 ms
^C
--- raspberrypi.local ping statistics ---
5 packets transmitted, 5 received, 0% packet loss, time 4034ms
rtt min/avg/max/mdev = 2.428/2.845/3.172/0.279 ms
codegear@Pavilion24:~$
このように判明したIPアドレスに対して、以下のようにsshコマンドを実行しログインします。
piユーザーの初期パスワードはraspberryです。
Windows10 のコマンドプロンプトから
C:\Users\hiron>ssh raspberrypi.local -l pi
The authenticity of host 'raspberrypi.local (192.168.5.39)' can't be established.
ECDSA key fingerprint is SHA256:6pdbjWQcdiwXgd99qJzySelhLexU4EkDWFRaQOdn10A.
Are you sure you want to continue connecting (yes/no/[fingerprint])? yes  ← 「yes」を入力
Warning: Permanently added 'raspberrypi.local,192.168.5.39' (ECDSA) to the list of known hosts.
pi@raspberrypi.local's password:  ← パスワードを入力 (piユーザーの初期パスワードは「raspberry」)
Linux raspberrypi 5.4.83-v7+ #1379 SMP Mon Dec 14 13:08:57 GMT 2020 armv7l

The programs included with the Debian GNU/Linux system are free software;
the exact distribution terms for each program are described in the
individual files in /usr/share/doc/*/copyright.

Debian GNU/Linux comes with ABSOLUTELY NO WARRANTY, to the extent
permitted by applicable law.
Last login: Wed Dec 22 05:51:01 2021 from 192.168.5.40

SSH is enabled and the default password for the 'pi' user has not been changed.
This is a security risk - please login as the 'pi' user and type 'passwd' to set a new password.

pi@raspberrypi:~ $ uname -a
Linux raspberrypi 5.4.83-v7+ #1379 SMP Mon Dec 14 13:08:57 GMT 2020 armv7l GNU/Linux
pi@raspberrypi:~ $ df
Filesystem     1K-blocks    Used Available Use% Mounted on
/dev/root        3526592 1413628   1914104  43% /
devtmpfs          440240       0    440240   0% /dev
tmpfs             473520       0    473520   0% /dev/shm
tmpfs             473520   12176    461344   3% /run
tmpfs               5120       0      5120   0% /run/lock
tmpfs             473520       0    473520   0% /sys/fs/cgroup
/dev/mmcblk0p1    258095   41188    216907  16% /uboot
/dev/mmcblk0p4   7944640     620   7597552   1% /data
tmpfs              94704       0     94704   0% /run/user/1000
pi@raspberrypi:~ $ exit ← 「exit」を入力してログアウト
logout
Connection to raspberrypi.local closed.

C:\Users\hiron>
Ubuntu 20.04 の例
codegear@Pavilion24:~$ ssh raspberrypi.local -l pi
The authenticity of host 'raspberrypi.local (192.168.5.39)' can't be established.
ECDSA key fingerprint is SHA256:6pdbjWQcdiwXgd99qJzySelhLexU4EkDWFRaQOdn10A.
Are you sure you want to continue connecting (yes/no/[fingerprint])? yes ← 「yes」を入力
Warning: Permanently added 'raspberrypi.local,192.168.5.39' (ECDSA) to the list of known hosts.
pi@raspberrypi.local's password: ← パスワードを入力 (piユーザーの初期パスワードは「raspberry」)
Linux raspberrypi 5.4.83-v7+ #1379 SMP Mon Dec 14 13:08:57 GMT 2020 armv7l

The programs included with the Debian GNU/Linux system are free software;
the exact distribution terms for each program are described in the
individual files in /usr/share/doc/*/copyright.

Debian GNU/Linux comes with ABSOLUTELY NO WARRANTY, to the extent
permitted by applicable law.
Last login: Thu May 19 09:41:35 2022 from 192.168.5.20

SSH is enabled and the default password for the 'pi' user has not been changed.
This is a security risk - please login as the 'pi' user and type 'passwd' to set a new password.

pi@raspberrypi:~ $ exit ← 「exit」を入力してログアウト
logout
Connection to raspberrypi.local closed.
codegear@Pavilion24:~$
SaaSのmender.ioにログイン
Raspberry Piで動作中のFireFoxブラウザでログインするか、開発PCで動作中の任意の Webブラウザでログインします。
いずれの場合もこの後 Raspberry Piで動作中のシェル (GUIまたはssh)を利用してmender-clientをインストールします。
ログインURLは以下
mender.ioのWebUI上で CONNECT A DEVICE を実行
Raspberry Piをはじめとするdebian系のターゲットでは、mender側で用意された.deb形式のバイナリ実行ファイルのダウンロード・インストール・実行が可能です。
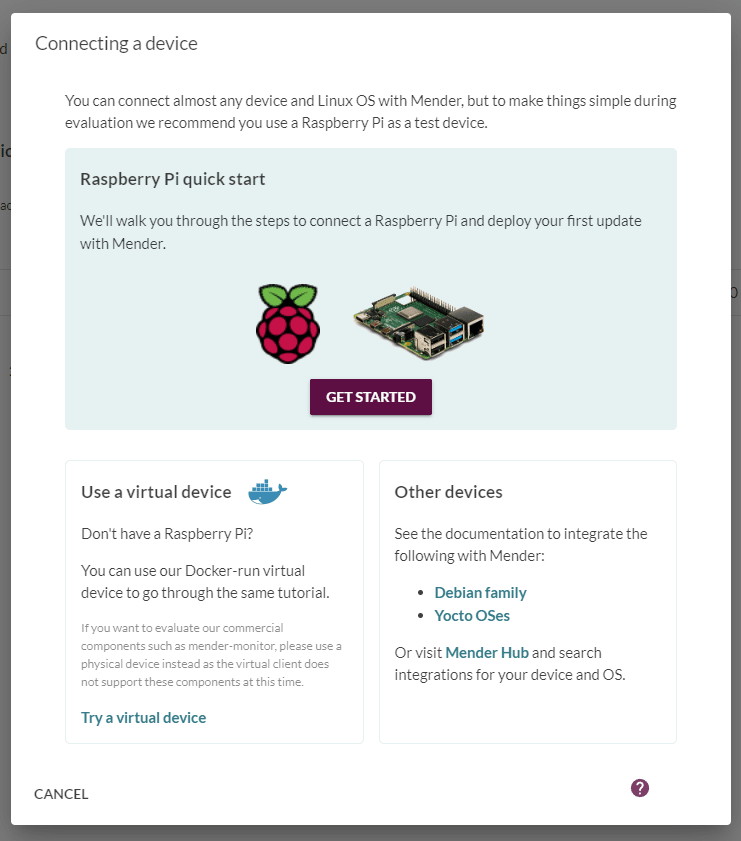
WebUIで「CONNECT A DEVICE」ボタンを押します。
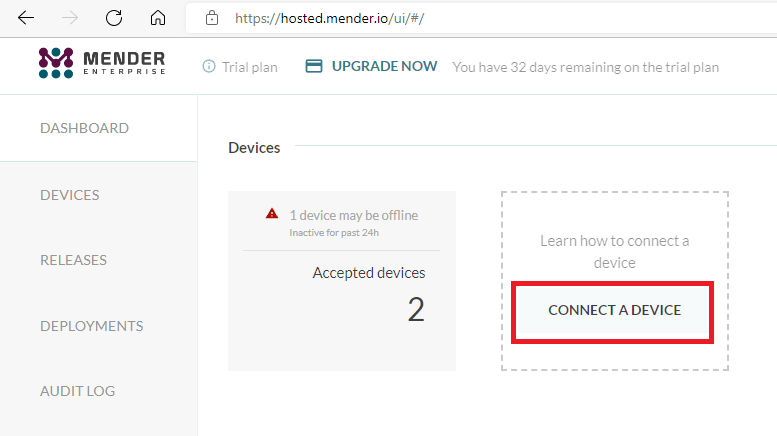
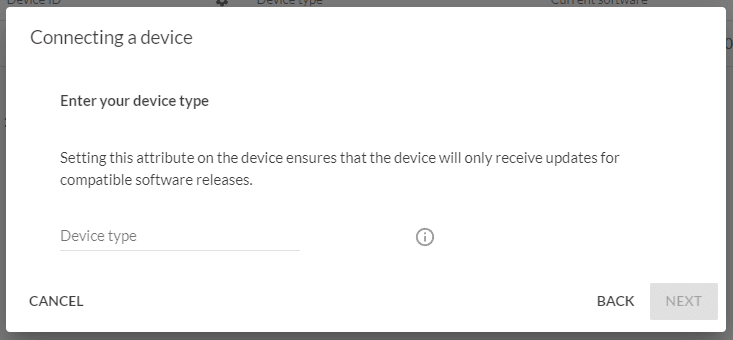
以下の画面で「GET STARTED」ボタンを押すと、デバイスの種別の入力画面になります。
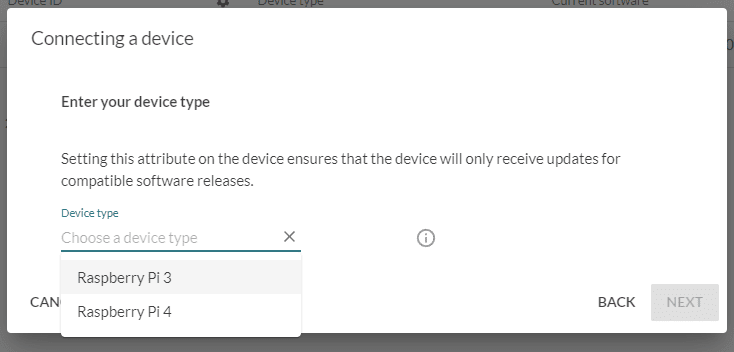
ここは本来どのような文字列を入力しても良いのですが、後のDeploymentデモのためにあらかじめ用意されている「Raspberry Pi 3」「Raspberry Pi 4」のいずれか該当するものを選択して「NEXTボタン」を押します。
表示される文字列をコピーして実行します。
「COPY TO CLIPBOARD」ボタンを押してコピーした後、GUI上のターミナルまたはsshウインドウにコピーして実行します。
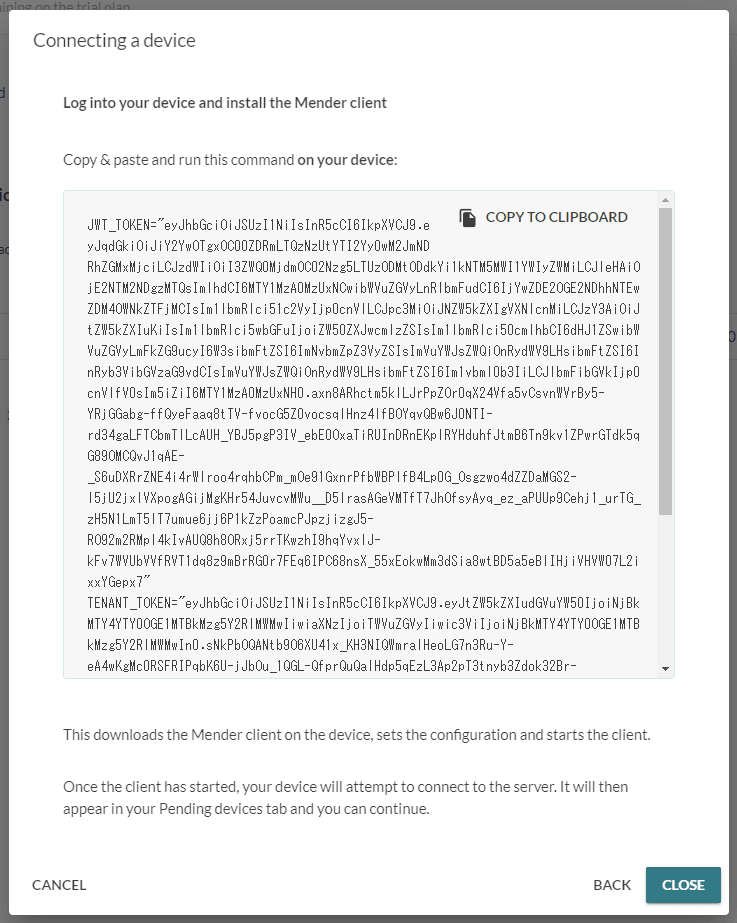
実際にやってみると以下のような画面が表示されます。
この手順では JWT_TOKEN、TENANT_TOKEN を環境変数に設定した後、get.mender.ioからインストールスクリプトをダウンロードして実行します。結果的に debuan/ubuntu用の .debモジュールがダウンロード/インストールされます。
pi@raspberrypi:~ $ JWT_TOKEN="eyJhbGciOiJSUzI1NiIsInR5cCI6IkpXVCJ9.eyJqdGkiOiJiY2YwOTgxOC00ZDRmLTQzNzUtYTI2Yy0wM2JmNDRhZGMxMjciLCJzdWIiOiI3ZWQ0MjdmOC02Nzg5LTUzODMtODdkYi1kNTM5MWI1YWIyZWMiLCJleHAiOjE2NTM2NDgzMTQsImlhdCI6MTY1MzA0MzUxNCwibWVuZGVyLnRlbmFudCI6IjYwZDE2OGE2NDhhNTEwZDM4OWNkZTFjMCIsIm1lbmRlci51c2VyIjp0cnVlLCJpc3MiOiJNZW5kZXIgVXNlcnMiLCJzY3AiOiJtZW5kZXIuKiIsIm1lbmRlci5wbGFuIjoiZW50ZXJwcmlzZSIsIm1lbmRlci50cmlhbCI6dHJ1ZSwibWVuZGVyLmFkZG9ucyI6W3sibmFtZSI6ImNvbmZpZ3VyZSIsImVuYWJsZWQiOnRydWV9LHsibmFtZSI6InRyb3VibGVzaG9vdCIsImVuYWJsZWQiOnRydWV9LHsibmFtZSI6Im1vbml0b3IiLCJlbmFibGVkIjp0cnVlfV0sIm5iZiI6MTY1MzA0MzUxNH0.axn8ARhctm5klLJrPpZOr0qX24Vfa5vCsvnWVrBy5-YRjGGabg-ffQyeFaaq8tTV-fvocG5Z0vocsqlHnz4lfBOYqvQBw6J0NTI-rd34gaLFTCbmTlLcAUH_YBJ5pgP3IV_ebE0OxaTiRUInDRnEKplRYHduhfJtmB6Tn9kv1ZPwrGTdk5qG89OMCQvJ1qAE-_S6uDXRrZNE4i4rWlroo4rqhbCPm_mOe91GxnrPfbWBPlfB4Lp0G_Osgzwo4dZZDaMGS2-l5jU2jxlVXpogAGijMgKHr54JuvcvMWu__D5lrasAGeVMTfT7JhOfsyAyq_ez_aPUUp9Cehj1_urTG_zH5N1LmT5lT7umue6jj6P1kZzPoamcPJpzjizgJ5-RO92m2RMpl4kIvAUQ8h8ORxj5rrTKwzhI9hqYvxlJ-kFv7WVUbVVfRVT1dq8z9mBrRG0r7FEq6IPC68nsX_55xEokwMm3dSia8wtBD5a5eBlIHjiVHVW07L2ixxYGepx7"
SUzI1NiIsInR5cCI6IkpXVCJ9pi@raspberrypi:~ $ TENANT_TOKEN="eyJhbGciOiJSUzI1NiIsInR5cCI6IkpXVCJ9.eyJtZW5kZXIudGVuYW50IjoiNjBkMTY4YTY0OGE1MTBkMzg5Y2RlMWMwIiwiaXNzIjoiTWVuZGVyIiwic3ViIjoiNjBkMTY4YTY0OGE1MTBkMzg5Y2RlMWMwIn0.sNkPbOQANtb9O6XU41x_KH3NIQWmralHeoLG7n3Ru-Y-eA4wKgMc0RSFRIPqbK6U-jJbOu_1QGL-QfprQuQalHdp5qEzL3Ap2pT3tnyb3Zdok32Br-f535dPiymHA4lUQox6G2ZGbRWc841MX2iqaqPMfM56azazotMQ8cYCpmHut15EGoPsWlnjIj-b8AdA-YIKoDgatuP04UzPVM5XXwNbPIUFhV5zBzwC317U2Bdric_jdUkKlfDkfiWllbAnHbKsxgMRLBYt9W5C0LZnxAH_VUw6u-bdKr0tNcQ7vPQownZInnt-fMYaJQ7rk_1sUanL2yWCSW1JdHINIVMq3Mpalp-Fc8pO6KUPgs4kTAt5qB5KmqXEaG7hC2X9YMGo5YdJlg1dODh4daNyBS6wt2GmknOwrvTBiVTgQPM1d4HHFpKB8_ncyXhGTll56yFNA4tA3dDIcyvndkcS6CA7Aa-Pv0Pb7tzna8gOrge"
pi@raspberrypi:~ $ wget -O- https://get.mender.io | sudo bash -s -- --demo --commercial --jwt-token $JWT_TOKEN -- --quiet --device-type "raspberrypi3" --tenant-token $TENANT_TOKEN --retry-poll 300 --update-poll 1800 --inventory-poll 28800 --hosted-mender
--2022-05-20 12:04:57--  https://get.mender.io/
Resolving get.mender.io (get.mender.io)... 34.107.174.45
Connecting to get.mender.io (get.mender.io)|34.107.174.45|:443... connected.
HTTP request sent, awaiting response... 302 Moved Temporarily
Location: https://downloads.mender.io/repos/scripts/install-mender.sh [following]
--2022-05-20 12:04:57--  https://downloads.mender.io/repos/scripts/install-mender.sh
Resolving downloads.mender.io (downloads.mender.io)... 18.65.196.123, 18.65.196.55, 18.65.196.54, ...
Connecting to downloads.mender.io (downloads.mender.io)|18.65.196.123|:443... connected.
HTTP request sent, awaiting response... 200 OK
Length: 14214 (14K) [text/plain]
Saving to: ‘STDOUT’

-                   100%[===================>]  13.88K  --.-KB/s    in 0s

2022-05-20 12:04:58 (107 MB/s) - written to stdout [14214/14214]


                          _
 _ __ ___   ___ _ __   __| | ___ _ __
| '_ ` _ \ / _ \ '_ \ / _` |/ _ \ '__|
| | | | | |  __/ | | | (_| |  __/ |
|_| |_| |_|\___|_| |_|\__,_|\___|_|

Running the Mender installation script.
--

  Detected distribution:
        raspbian/buster
  Detected architecture:
        armhf
  Installing from channel:
        stable
  Selected components:
        mender-client
        mender-configure
        mender-connect
        mender-configure-demo
        mender-configure-timezone
        mender-monitor
        mender-monitor-demo
(Reading database ... 40796 files and directories currently installed.)
Preparing to unpack .../gpgv_2.2.27-2+deb11u1_armhf.deb ...
Unpacking gpgv (2.2.27-2+deb11u1) over (2.2.27-2) ...
Setting up gpgv (2.2.27-2+deb11u1) ...

(中略)

  Setting up mender with options: --quiet --device-type raspberrypi3 --tenant-token eyJhbGciOiJSUzI1NiIsInR5cCI6IkpXVCJ9.eyJtZW5kZXIudGVuYW50IjoiNjBkMTY4YTY0OGE1MTBkMzg5Y2RlMWMwIiwiaXNzIjoiTWVuZGVyIiwic3ViIjoiNjBkMTY4YTY0OGE1MTBkMzg5Y2RlMWMwIn0.sNkPbOQANtb9O6XU41x_KH3NIQWmralHeoLG7n3Ru-Y-eA4wKgMc0RSFRIPqbK6U-jJbOu_1QGL-QfprQuQalHdp5qEzL3Ap2pT3tnyb3Zdok32Br-f535dPiymHA4lUQox6G2ZGbRWc841MX2iqaqPMfM56azazotMQ8cYCpmHut15EGoPsWlnjIj-b8AdA-YIKoDgatuP04UzPVM5XXwNbPIUFhV5zBzwC317U2Bdric_jdUkKlfDkfiWllbAnHbKsxgMRLBYt9W5C0LZnxAH_VUw6u-bdKr0tNcQ7vPQownZInnt-fMYaJQ7rk_1sUanL2yWCSW1JdHINIVMq3xcvech6ji-mT9s1MdLh6pBnW6Mpalp-Fc8pO6KUPgs4kTAt5qB5KmqXEaG7hC2X9YMGo5YdJlg1dODh4daNyBS6wt2GmknOwrvTBiVTgQPM1d4HHFpKB8_ncyXhGTll56yFNA4tA3dDIcyvndkcS6CA7Aa-Pv0Pb7tzna8gOrge --retry-poll 300 --update-poll 1800 --inventory-poll 28800 --hosted-mender
871
  Success!
  Setting up mender-connect with user 'root' and shell 'bash'
871
  Success!
pi@raspberrypi:~ $
何度かインストールがリトライされたあと、最終的に「Success!」と表示されbashプロンプトが表示されたらインストール終了です。
いくつかの mender関連サービスが実行中であることがわかります。
pi@raspberrypi:~ $ systemctl -all | grep mender
  mender-client.service                           loaded    active   running   Mender OTA update service
  mender-connect.service                          loaded    active   running   Mender Connect service
  mender-grow-data.service                        loaded    inactive dead      Mender service to grow data partition size
  mender-monitor.service                          loaded    active   running   Mender Monitoring service
● mender.service                                  not-found inactive dead      mender.service
pi@raspberrypi:~ $
以下のsystemd サービスが実行中です。
mender-clientがOTA用のサービス。mender-connectとmender-monitorは add-on機能のサービスです。
mender-client.service
mender-connect.service
mender-monitor.service
mender.io の WebUIでデバイスの接続を承認
デバイス側からの接続リクエストはサーバー側で無条件に受け入れられるわけではなく、最初はpending状態のデバイスとしてWebUIのDASHBOARD画面に表示されます。
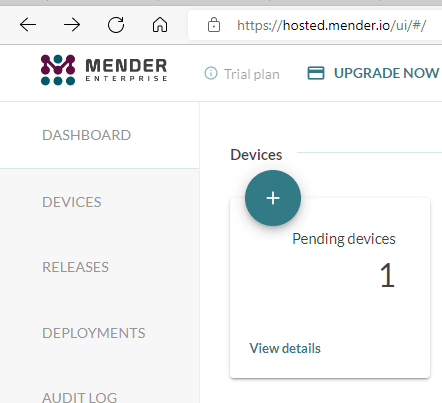
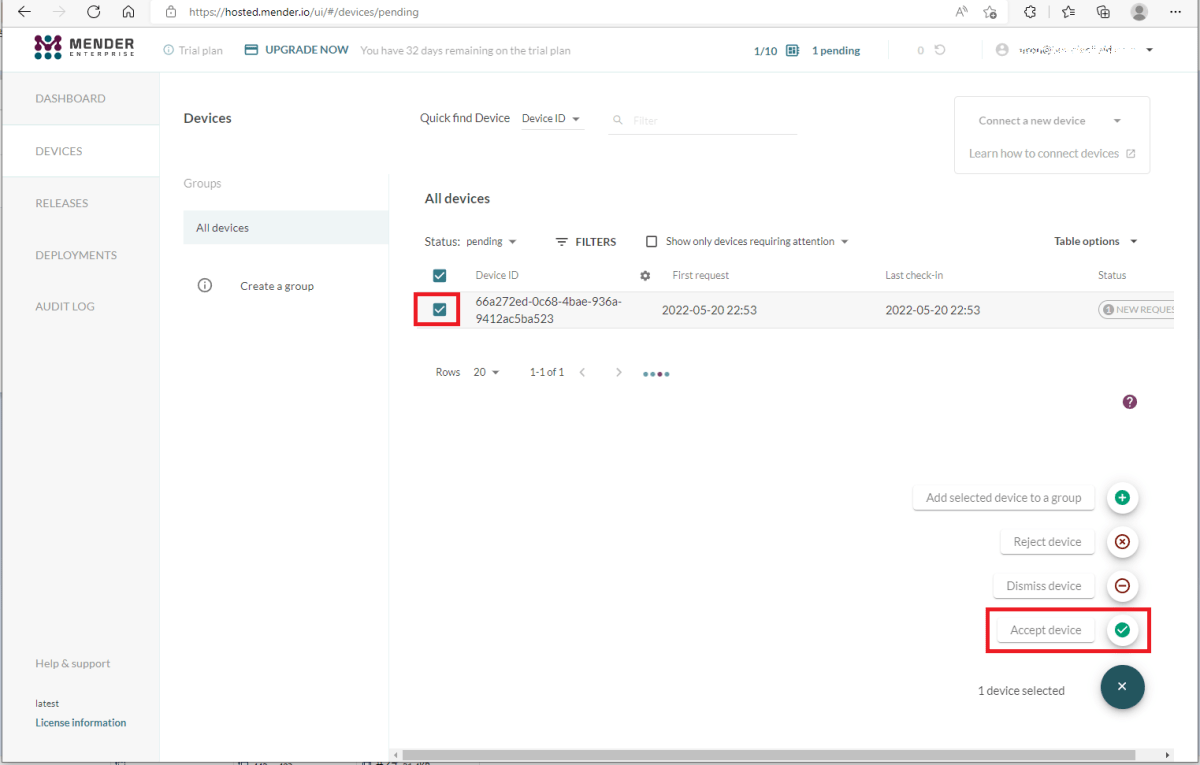
画面上の「+」をクリックすると、DEVICES画面に移行し「pending」状態のデバイスが表示されます。チェックボックスにチェックを入れると下のように右下に「+」ボタンが表示され、これにマウスオーバーすると「Accept Device」ボタンが現れるので、緑のチェックマーク部分を押します。
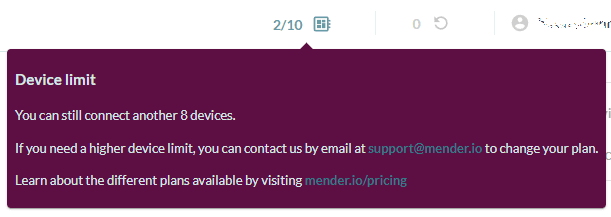
これで Raspberry Piが mender.io と接続されました。上の方にある接続済デバイス数のカウントが一つ増えました。
この記事のまとめ
SaaSの mender.io のWebUIを利用して Raspberry Pi 3/4 に対して mender-client モジュールを配布し、また接続先設定を組み込むことができました。
これを利用してmedner.io に接続された事が確認できました。
今後の予定
コードギアでは 「Menderで始める組み込みOTA」 のタイトルで以下のZenn記事を公開しています。
- 第0回 : 組み込み製品、IoTシステムに適したOTAとは?
- 第1回 : Menderのご紹介
- 第2回 : Quickstart Part1 : mender.ioの試用アカウントを取得
- 第3回 : Quickstart Part2 : Raspberry Pi 3/4を接続 (本記事)
- 第4回 : Quickstart Part3 : アプリケーションを更新(その1)
- 第5回 : Quickstart Part4 : アプリケーションを更新(その2)
- 第6回 : Quickstart Part5 : OSアップデートを実行
- 第7回 : Quickstart Part6 : コンテナアップデートを実行
- 第8回 : Quickstart Part7 : リモートターミナル機能のご紹介
- 第9回 : 接続編1 : QEMUエミュレータを接続
- 第10回 : 接続編2 : Armadillo IoT G3を接続
これ以降の記事も準備中です。ご期待ください。
Discussion