はじめに
実際のデバイス(ラズベリーパイ)使って、iot hubへメッセージを送信したいと思います
本記事の作業範囲

- 前記事の環境(Azure IoT Hub)をベースにする
- Pythonコードから、デバイスとしてクラウド側にメッセージを送信する
- メッセージがAzure内のストレージに保存されることを確認する
関連記事
- Azure Portalでの環境構築とVSCode IoT拡張機能によるメッセージ送信
- コードベースでAzure IoT hubにメッセージ送信
- ラズパイからAzure IoT hubにメッセージ送信🔴本記事🔴
- クラウド側のメッセージをデバイスで受信
作業手順
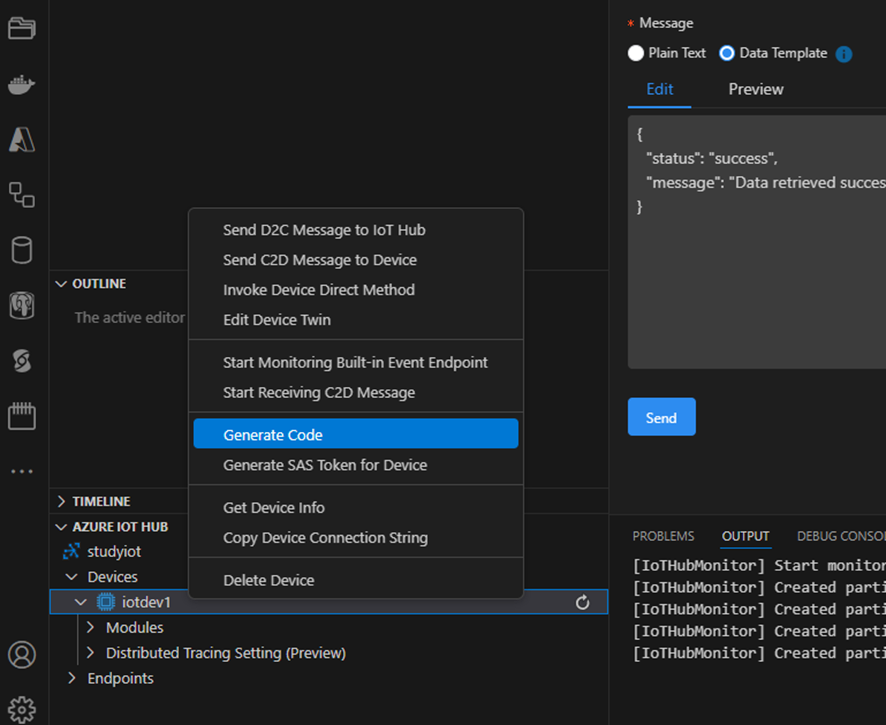
vscode拡張機能 - iot hubをコードのひな形を作成する
- デバイスを右クリックし、"Generate Code"を選択する
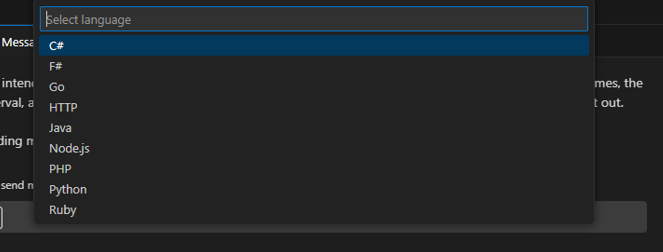
- "Python"を選択する
- "Send device-to-cloud message"を選択する

- コードのひな形が作成される

Python環境の構築
ラズベリーパイ4Bにて確認しています
$ uname -a
Linux pi4home 6.6.51+rpt-rpi-v8 #1 SMP PREEMPT Debian 1:6.6.51-1+rpt3 (2024-10-08) aarch64 GNU/Linux
venvで仮想環境下に作成します。
$ python -m venv .venv
$ source .venv/bin/activate
$ pip install azure-iot-device
$ pip install --upgrade azure-iot-device # 不要かもしれません
コードを修正する
自動生成されたコードは、ダミーの温度・湿度を送信するコードになっています。
温度湿度は不要なため、削除します。
また、前記事のiot hubルーティングにて、メッセージに"status=error"を含める必要があります。
下記が修正したコードとになります。
import asyncio
from azure.iot.device.aio import IoTHubDeviceClient
from azure.iot.device import Message

# IoT Hubへの接続文字列(使用する接続情報)
CONNECTION_STRING = "HostName=studyiot.azure-devices.net;DeviceId=iotdev1;SharedAccessKey=XXXXXXXXXXXXXXXXXXXXXXXXXXX"

async def main():
    try:
        # IoT Hubクライアントを接続文字列から生成
        client = IoTHubDeviceClient.create_from_connection_string(CONNECTION_STRING)
        await client.connect()  # IoT Hubに接続
        print("IoT Hub simulated device sending periodic messages. Ctrl-C to exit.\n")

        while True:
            # 固定のエラーメッセージ(JSON形式)を作成
            message_string = "{'status':'error', 'message':'error from pycode'}"
            message = Message(message_string)
            # メッセージのエンコーディングとコンテンツタイプを設定
            message.content_encoding = "utf-8"
            message.content_type = "application/json"

            # 現在時刻とメッセージ内容を表示
            print(f"{asyncio.get_running_loop().time()} > Sending message: {message_string}")
            try:
                # IoT Hubへメッセージを送信
                await client.send_message(message)
            except Exception as ex:
                print(f"Error sending message: {ex}")

            # 次の送信まで10秒間待機
            await asyncio.sleep(10)

    except Exception as iothub_error:
        print(f"Unexpected error from IoTHub: {iothub_error}")
    except asyncio.CancelledError:
        # キャンセル時にクライアントのシャットダウンを実行
        await client.shutdown()
        print("Shutting down device client")

if __name__ == '__main__':
    print("IoT Hub simulated device")
    print("Press Ctrl-C to exit")
    try:
        # 非同期メイン関数を実行
        asyncio.run(main())
    except KeyboardInterrupt:
        print("Keyboard Interrupt - sample stopped")
実行
ターミナルから実行する
$ python d2c.py
IoT Hub simulated device
Press Ctrl-C to exit
IoT Hub simulated device sending periodic messages. Ctrl-C to exit.

3282526.932411159 > Sending message: {'status':'error', 'message':'error from pycode3bbb'}
3282537.116333808 > Sending message: {'status':'error', 'message':'error from pycode3bbb'}
3282547.242890183 > Sending message: {'status':'error', 'message':'error from pycode3bbb'}
3282557.376802184 > Sending message: {'status':'error', 'message':'error from pycode3bbb'}
3282567.515335712 > Sending message: {'status':'error', 'message':'error from pycode3bbb'}
3282577.643682922 > Sending message: {'status':'error', 'message':'error from pycode3bbb'}
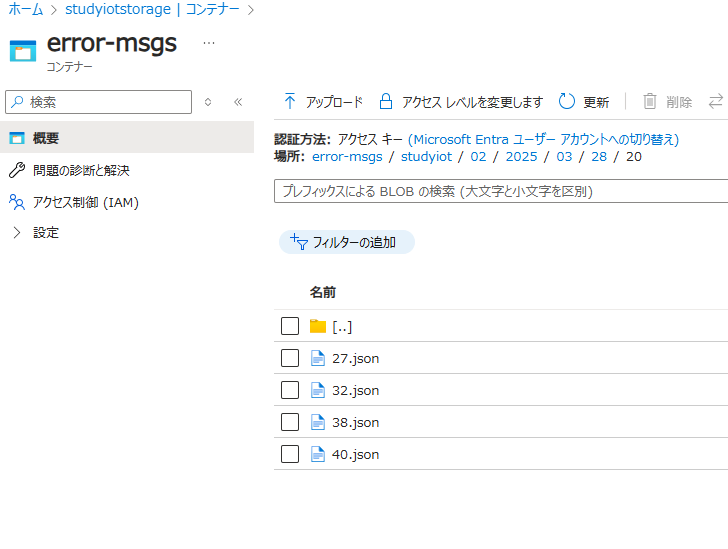
Azure側を確認(ストレージのコンテナを確認)
-
指定したストレージコンテナをみるとjsonファイル(分名)が存在する
-
上記のファイルを開く
{"EnqueuedTimeUtc":"2025-03-28T23:52:15.9740000Z","Properties":{},"SystemProperties":{"connectionDeviceId":"iotdev1","connectionAuthMethod":"{\"scope\":\"device\",\"type\":\"sas\",\"issuer\":\"iothub\"}","connectionDeviceGenerationId":"638787901862736111","contentType":"application/json","contentEncoding":"utf-8","enqueuedTime":"2025-03-28T23:52:15.9740000Z"},"Body":{'status':'error', 'message':'error from pycode'}}
{"EnqueuedTimeUtc":"2025-03-28T23:52:26.1140000Z","Properties":{},"SystemProperties":{"connectionDeviceId":"iotdev1","connectionAuthMethod":"{\"scope\":\"device\",\"type\":\"sas\",\"issuer\":\"iothub\"}","connectionDeviceGenerationId":"638787901862736111","contentType":"application/json","contentEncoding":"utf-8","enqueuedTime":"2025-03-28T23:52:26.1140000Z"},"Body":{'status':'error', 'message':'error from pycode'}}
送信データを確認できました
まとめ
デバイスから送信できるようになりました
次は、クラウド側からデバイスに対するメッセージを受信したいと思います
GitHubで編集を提案

Discussion