ChatGPTのFunction CallingでUIを動的レンダリングしたら楽しかった
OpenAI が公開した Function Calling の API を使用すれば、定義した関数の情報を渡すことで、自然言語からどの関数を使用すべきかどうかを判定し、引数も json スキーマに従ってレスポンスしてくれます。
この情報を使って API クエリを実行し、レスポンスを元に UI を動的にレンダリングすれば、自然言語から UI が描画され面白いのではないかと思い実践してみました。
この例では、Function として OpenWeatherMapと REST Countriesを定義しています。
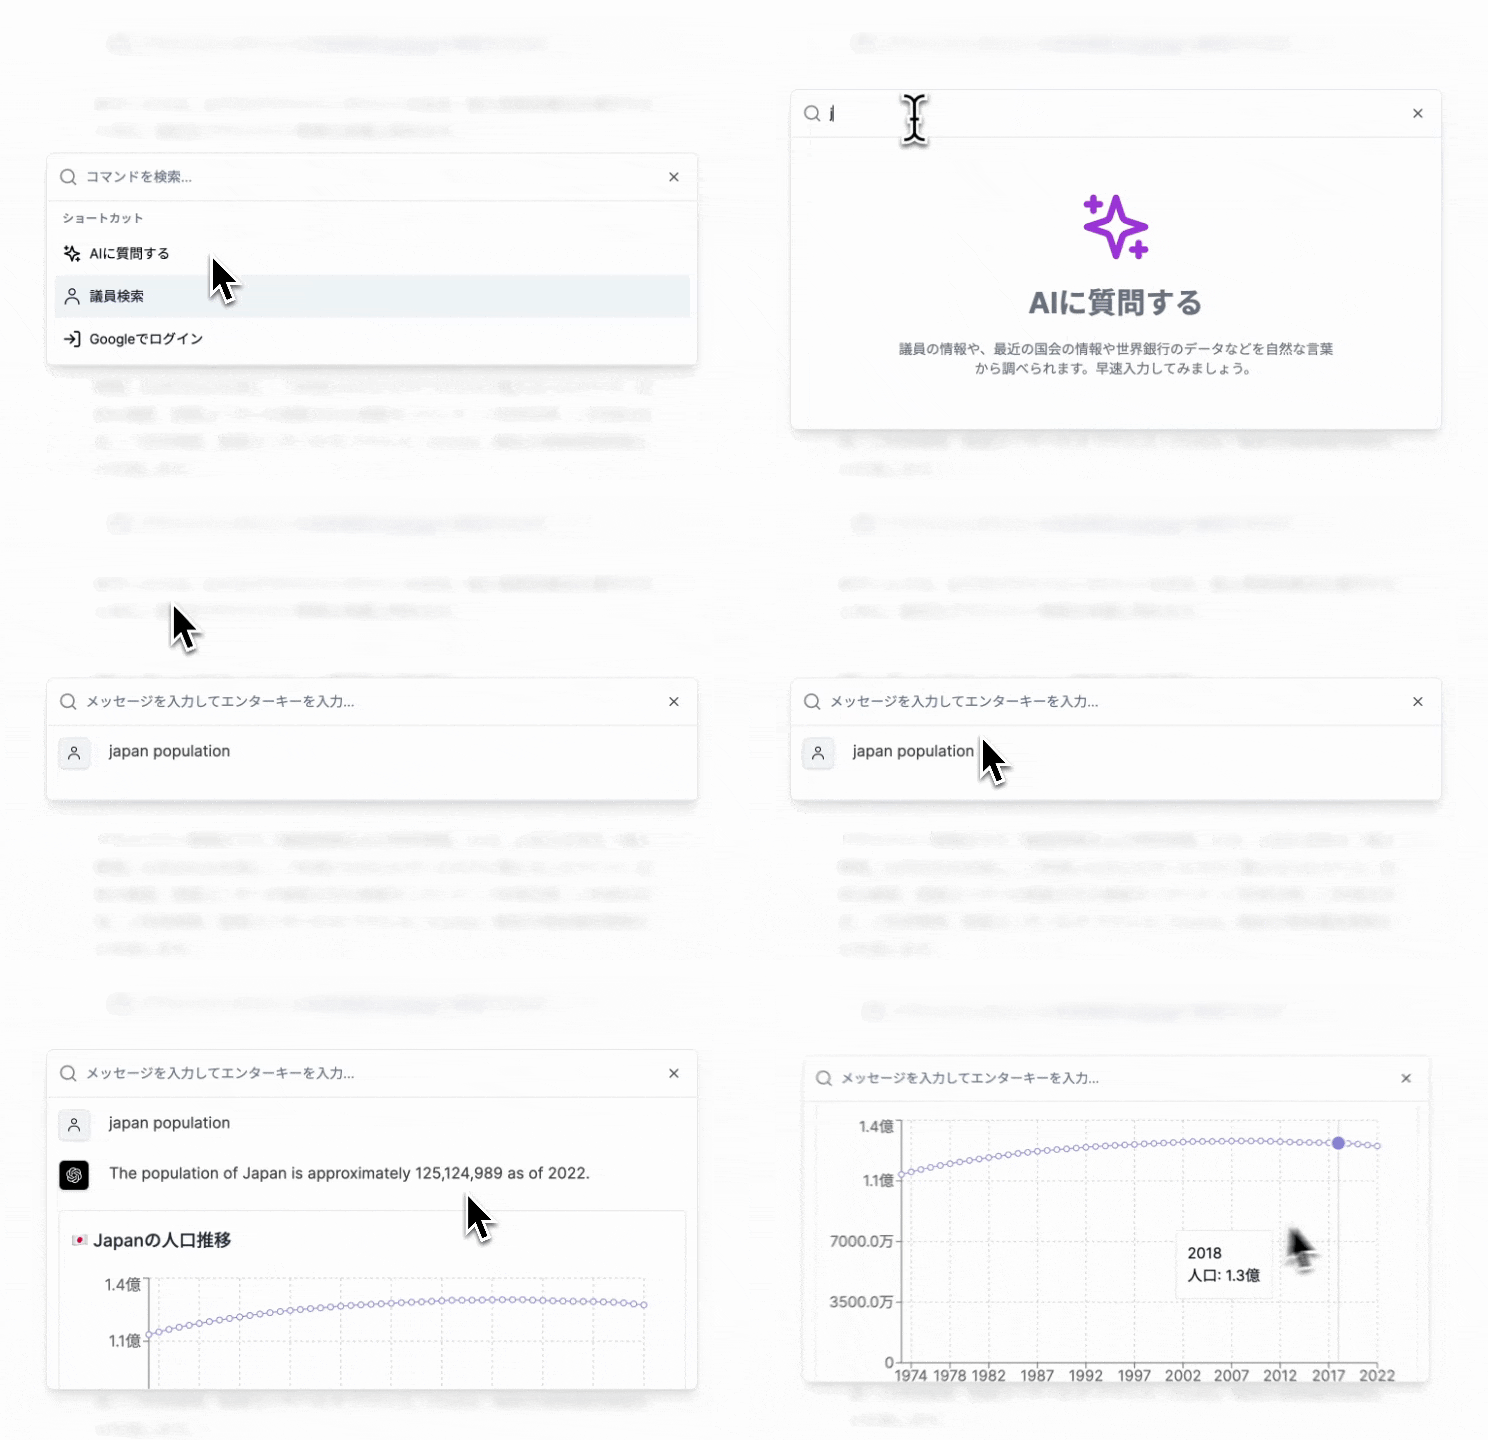
その他にも世界銀行の人口データからチャートを表示したりと、自然言語とコンピューター言語の融合がますます進みそうでかなりワクワクしました。

やりかた
今回は Next.js (App Router) と Vercel AI SDK を使用しました。全体的な実装は GitHub に載せているのでぜひご覧ください。
Vercel AI SDK をインストールする
Vercel AI SDK は Edge 環境で OpenAI の API を扱いやすくするためのラッパーです。他には、LangChain、Anthropic、Cohere、Fireworks、Hugging Inference API などなどにも対応しています。
なぜ Edge Runtime である必要があるのかというと、Vercel の Hobby プランのサーバーレス関数は Lamda の制限も相まって 10 秒でタイムアウトしてしまいます。
しかし、Edge であれば、最初のレスポンスを 30 秒以内に返せば現時点では特に制限はありません。
因みに、この SDK は Cloudflare Workers と Hono.js の組み合わせでも動作しました。
bun i openai ai
Function を定義する
functions.tsなどのファイルに、JSON スキーマ形式で Function の説明を定義し、実際の Function も定義します。
詳しい定義方法はドキュメントと型を見てください。
ちゃんとやる場合はエラー処理も書くと良いと思います。
import type { ChatCompletionCreateParams } from "openai/resources/chat/completions";

export async function runFunction(name: string, args: any) {
  switch (name) {
    case "get_current_weather":
      return await get_current_weather(args["city_name"]);
    case "get_country_info":
      return await get_country_info(args["country_code"]);
    default:
      return null;
  }
}

export const functions: ChatCompletionCreateParams.Function[] = [
  {
    name: "get_current_weather",
    description:
      "Learn about the current weather in your country or region from OpenWeatherMap",
    parameters: {
      type: "object",
      properties: {
        city_name: {
          type: "string",
          description: "Specify city name in English",
        },
      },
      required: ["city_name"],
    },
  },
  {
    name: "get_country_info",
    description: "Get country information from the REST Countries API",
    parameters: {
      type: "object",
      properties: {
        country_code: {
          type: "string",
          description: "cca2, ccn3, cca3 or cioc country code",
        },
      },
      required: ["country_code"],
    },
  },
];

async function get_current_weather(cityName: string) {
  const baseURL = "https://api.openweathermap.org/data/2.5/weather";

  const queryString = `?q=${encodeURIComponent(
    cityName
  )}&appid=${encodeURIComponent(
    process.env.OPENWEATHERMAP_APP_ID as string
  )}&units=metric&lang=ja`;

  try {
    const response = await fetch(baseURL + queryString, {
      method: "GET",
      headers: {
        "Content-Type": "application/json",
      },
    });

    const data = await response.json();

    if (!response.ok) {
      return "Network response was not ok";
    }

    return data;
  } catch (error) {
    console.error("Error fetching weather data:", error);
    return null;
  }
}

async function get_country_info(country_code: string) {
  const response = await fetch(
    `https://restcountries.com/v3.1/alpha/${country_code}`,
    {
      method: "GET",
      headers: {
        "Content-Type": "application/json",
      },
    }
  );

  const data = await response.json();

  return data[0];
}
API を作る
先程定義した Function と Vercel AI SDK で Edge で動く API を作ります。実際に使う場合は Redis などでキャッシュやレート制限を持たせてください。
experimental_StreamData で、SSE で追加データをストリーミングしています。
index はクライアント側でどのメッセージに対する追加データなどかどうかをマッピングするために必要です。
import OpenAI from "openai";
import {
  OpenAIStream,
  StreamingTextResponse,
  experimental_StreamData,
} from "ai";
import { functions, runFunction } from "./functions";

export const runtime = "edge";

const openai = new OpenAI({
  apiKey: process.env.OPENAI_API_KEY,
});

export async function POST(req: Request) {
  const { messages } = await req.json();

  const lastIndex = messages.length - 1;

  const response = await openai.chat.completions.create({
    model: "gpt-3.5-turbo",
    stream: true,
    messages,
    functions,
  });

  const data = new experimental_StreamData();

  const stream = OpenAIStream(response, {
    experimental_onFunctionCall: async (
      { name, arguments: args },
      createFunctionCallMessages
    ) => {
      const result = await runFunction(name, args);
      const newMessages = createFunctionCallMessages(result);

      data.append({
        type: name,
        sources: result,
        index: lastIndex + 1,
      });
      return openai.chat.completions.create({
        messages: [...messages, ...newMessages],
        stream: true,
        model: "gpt-3.5-turbo-0613",
        functions,
      });
    },
    onFinal(completion) {
      data.close();
    },
    experimental_streamData: true,
  });

  return new StreamingTextResponse(stream, {}, data);
}
クライアント側
あとはクライアント側のコンポーネントを実装するだけです。
追加データの index と message の index がマッチするアイテムを調べてコンポーネントにマッピングします。
"use client";

import { useChat } from "ai/react";

export default function Chat() {
  const { data, messages, input, handleInputChange, handleSubmit } = useChat();

  return (
    <div className="mx-auto py-12 px-3 max-w-4xl">
      {messages.map((m, i) => {
        const correspondingData = data
          ? data.find((d: any) => d.index === i)
          : null;
        return <MessageItem key={i} m={m} data={correspondingData} />;
      })}
      <form onSubmit={handleSubmit}>
        <input
          className="w-full"
          value={input}
          placeholder="プロンプトを入力..."
          onChange={handleInputChange}
        />
      </form>
    </div>
  );
}
後は、typeフィールドを元にコンポーネントを条件分岐で描画を切り替えてあげればいいだけですね。
import { Message } from "ai";
import Weather from "@/components/weather";
import Country from "@/components/country";
import ReactMarkdown from "react-markdown";
import { MeOutlinedIcon } from "@xpadev-net/designsystem-icons";
import { SiOpenai } from "react-icons/si";
import clsx from "clsx";

export default function MessageItem({ m, data }: { m: Message; data: any }) {
  return (
    <div className="mb-5">
      <div className="flex items-start">
        <div
          className={clsx(
            "flex h-8 w-8 shrink-0 select-none items-center justify-center rounded-md border shadow",
            m.role === "user" ? "bg-gray-100" : "bg-black"
          )}
        >
          {m.role === "user" ? (
            <MeOutlinedIcon
              width="1em"
              height="1em"
              fill="currentColor"
              className="h-4 w-4"
            />
          ) : (
            <SiOpenai className="h-4 w-4 text-white" />
          )}
        </div>
        <ReactMarkdown className="prose prose-neutral prose-a:text-blue-500 prose-a:no-underline hover:prose-a:underline prose-img:rounded-lg prose-img:shadow ml-4 max-w-none flex-1 space-y-2 overflow-hidden px-1">
          {m.content}
        </ReactMarkdown>
      </div>
      <div className="mt-5">
        {data?.type === "get_current_weather" ? (
          <Weather weather={data.sources} />
        ) : (
          data?.type === "get_country_info" && (
            <Country country={data.sources} />
          )
        )}
      </div>
    </div>
  );
}
是非試して作ってみましょう!
Discussion
Vercel Edge Functionの裏側はCF Workersなのでそうですね
です!ベンダーロックじゃないのがいいですね