TerraformでNext.jsをS3+CloudFrontに簡単デプロイ!
概要
この記事では最初にNext.jsをS3にデプロイしていき、その後にNext.jsをS3+CloudFrontにデプロイすることでCloudFrontを使うとなぜいいのかを実感してもらえるような構成にしました。
では初めて行きます。
前提条件
ターミナルでterraformコマンドを実行できてAWSサービスを利用したことがある方は読み飛ばしてもらって大丈夫です。
以下3つの条件をクリアしていなければエラーが出てしまいますので、設定できる記事を貼り付けておきます。
- aws cliのインストール
- コマンドでawsを操作する設定
- Terraformのインストール
aws cliのインストール
macOSの方はこちら
Windowsの方はこちら
コマンドでawsを操作する設定
Terraformのインストール
MacOSの方はこちら
brew tap hashicorp/tap
brew install hashicorp/tap/terraform
terraform --version
Windowsの方はこちら
winget install Hashicorp.Terraform
terraform --version
参考
公式
フォルダ構成
terraform-tutorial
│
├── terraform-s3-front/
│
├── terraform/
terraform-tutorialディレクトリだけ作って準備完了です。
Next.jsのインストール
terraform-tutorialフォルダの中で以下のコマンドを実行します
npx create-next-app@14.2.4
実行すると以下のような画面が出てきます
お好みですが合わせてやりたいあなたへ。
npx create-next-app@14.2.4
Need to install the following packages:
create-next-app@14.2.4
Ok to proceed? (y)
√ What is your project named? ... terraform-s3-front       //terraform-s3-front
√ Would you like to use TypeScript? ... No / Yes                            //Yes
√ Would you like to use ESLint? ... No / Yes                                //No
√ Would you like to use Tailwind CSS? ... No / Yes                          //No
√ Would you like to use src/ directory? ... No / Yes                        //Yes
? Would you like to use App Router? (recommended) » No / Yes               //Yes
√ Would you like to customize the default import alias (@/*)? ... No / Yes //Yes
√ What import alias would you like configured? ... @/*                    //Enter
next.config.jsを以下のように修正してください。
/** @type {import('next').NextConfig} */
const nextConfig = {
output: "export", //ビルドしたらoutフォルダが出力される設定
trailingSlash: true, //pagesフォルダ配下の`/about/page.tsx`を表示するのに`url/about`でよくなる設定。これしないと`url/about.html`じゃないと表示されない。
};

export default nextConfig;
package.jsonのscriptsを以下のように修正してください。
"scripts": {
    "dev": "next dev",
    "build": "next build && next export",
    "start": "next start",
    "lint": "next lint"
  }
上の二つの編集をしないとoutフォルダ(静的ファイル)が作成されず、S3にアップロードできないです。
npm run build
これでNext.js側の設定はOKです
Terraform使ってS3にNext.jsをデプロイ
これから作っていくイメージになります。

簡単に言えば、さっき作ったNext.jsをS3に入れていきます。
さっきのでNext.jsの準備が完了しましたので、terraform-tutorial内でterraformフォルダを作成します。
terraform-tutorial
│
├── terraform-s3-front/
│
├── terraform/  //追加
terraformフォルダ内でmain.tfを作成して以下のコードを貼り付けます。
terraform {
  # Terraform本体に対するバージョン指定
  required_version = "~> 1.9.1"
  required_providers {
    aws = {
      source = "hashicorp/aws"
      # Providerに対するバージョン指定
      version = "~> 5.62.0"
    }
  }
}

# providerの設定
provider "aws" {
  region = "ap-northeast-1"
}

# バケットの作成
resource "aws_s3_bucket" "web_hosting_bucket" {
  bucket        = "deploy-s3-cloudfront" # 世界で一つだけの名前を指定
  force_destroy = true

}

# バケットポリシーの設定
resource "aws_s3_bucket_policy" "bucket_policy" {
  bucket = aws_s3_bucket.web_hosting_bucket.id
  policy = data.aws_iam_policy_document.policy_document.json
}

# バケットポリシーをアタッチ
data "aws_iam_policy_document" "policy_document" {
  statement {
    sid    = "Statement1"
    effect = "Allow"
    principals {
      type        = "*"
      identifiers = ["*"]
    }
    # 許可されるアクションは読み込み
    actions = [
      "s3:GetObject"
    ]
    # bucket内の全てのリソースに対してactionsの適用
    resources = [
      "${aws_s3_bucket.web_hosting_bucket.arn}/*"
    ]
  }
}

# S3バケットを静的ウェブサイト
resource "aws_s3_bucket_website_configuration" "web_hosting_bucket_config" {
  bucket = aws_s3_bucket.web_hosting_bucket.id

  index_document {
    suffix = "index.html" #outフォルダのindex.htmlを参照
  }

  error_document {
    key = "error.html"
  }
}

# outフォルダの中身をS3バケットへデプロイする準備
module "template_files" {
  source   = "hashicorp/dir/template"
  base_dir = "../terraform-s3-front/out" # Next.jsのビルドフォルダ(outフォルダ)を指定
}

# outフォルダの中身をS3バケットへデプロイ
resource "aws_s3_object" "bucket_object" {
  for_each     = module.template_files.files
  bucket       = aws_s3_bucket.web_hosting_bucket.id
  key          = each.key
  source       = each.value.source_path
  content_type = each.value.content_type
  etag         = filemd5(each.value.source_path)
}

output "s3_url" {
  value = aws_s3_bucket.web_hosting_bucket.website_endpoint
}
Next.jsをs3にデプロイする処理が書かれています。
現状これではローカルにしかないのでterraformコマンドを使って、AWS上にNext.jsをs3にデプロイする処理を反映させていきます。
terraformコマンドは拡張子.tfのあるディレクトリで実行しなければならないので移動して以下のコマンドを順番に実行します。
cd terraform
terraform initはAWS上に反映するときの下準備みたいなものです。
terraform init
terraform planは変なところがあればエラーを出してくれます。
terraform plan
terraform applyはローカルのterraformコードをAWS上に反映させる処理です。
terraform apply
実行するとEnter a value:と出てくるのでyesとします。

以上の処理が問題なく行われれば、S3にNext.jsがデプロイされたはずなので確認していきます。
ターミナルのs3_url部分にURLが出力されるようになっているので開いてください。

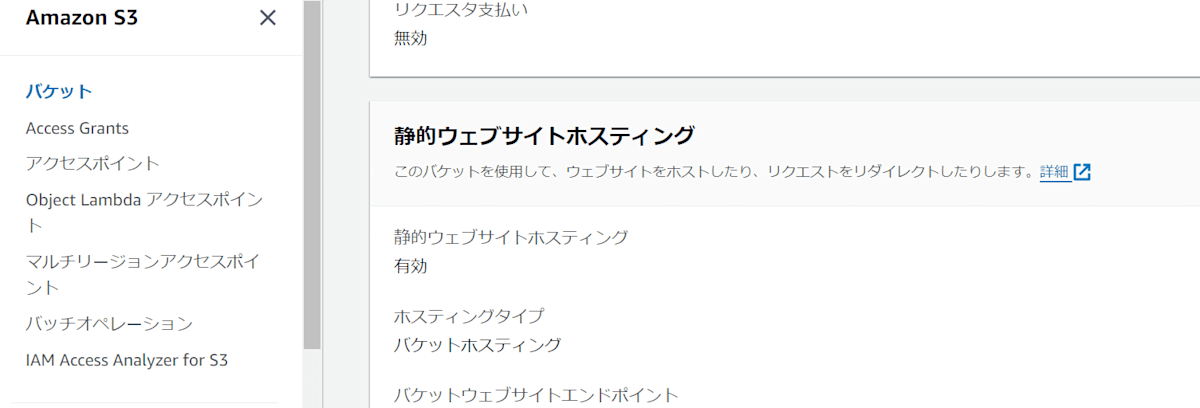
AWSコンソールの方でも確認はできます。以下の手順を行ってください。
S3→作ったバケットをクリック→プロパティ→静的ウェブサイトホスティングのURL

これでデプロイしたサイトに飛べたと思います。
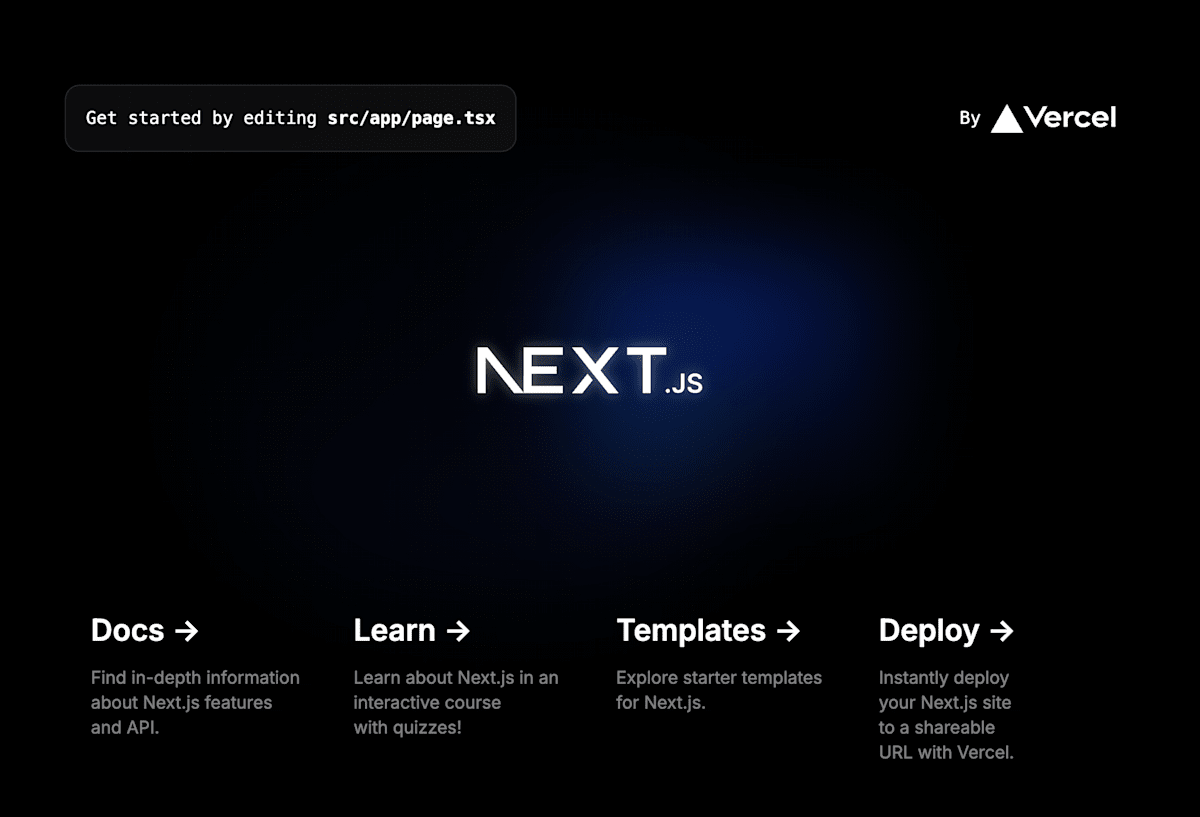
表示される画面

S3にNext.jsをデプロイしたサイトをスーパーリロードするとTimeは76ms(パフォーマンスは環境によって違います)となりました。
CloudFrontを導入した時のTimeと後ほど比較していきます。

Next.jsをS3+CloudFrontにデプロイ
先ほどまでは、S3から直接ブラウザにコンテンツを表示させていましたが、今回はS3とNext.jsの間にCloudFrontを導入し、CloudFrontのエッジサーバーを経由してブラウザにコンテンツを表示させるようにします。
イメージとしてはこんな感じです。

先ほどS3にNext.jsを入れて、S3とユーザー間でやり取りを行なっていました。
しかし、間にCloudFrontを導入することで、事前にエッジサーバへコンテンツがキャッシュされるので、S3は直にアクセスされる回数が減ります。
これによって、S3への通信が削減されるので、負担が少なくなることも期待されますし、コンテンツの表示速度も向上します。
以下のコードを先ほどのコードを上書きする形でコピペしてください。
terraform {
  # Terraform本体に対するバージョン指定
  required_version = "~> 1.9.1"
  required_providers {
    aws = {
      source = "hashicorp/aws"
      # Providerに対するバージョン指定
      version = "~> 5.62.0"
    }
  }
}

# providerの設定
provider "aws" {
  region = "ap-northeast-1"
}

# バケットの作成
resource "aws_s3_bucket" "web_hosting_bucket" {
  bucket        = "deploy-s3-cloudfront" # 世界で一つだけの名前を指定
  force_destroy = true

}

# バケットポリシーの設定
resource "aws_s3_bucket_policy" "bucket_policy" {
  bucket = aws_s3_bucket.web_hosting_bucket.id
  policy = data.aws_iam_policy_document.policy_document.json
}

# バケットポリシーをアタッチ
data "aws_iam_policy_document" "policy_document" {
  statement {
    sid    = "Statement1"
    effect = "Allow"
    principals {
      type        = "*"
      identifiers = ["*"]
    }
    # 許可されるアクションは読み込み
    actions = [
      "s3:GetObject"
    ]
    # bucket内の全てのリソースに対してactionsの適用
    resources = [
      "${aws_s3_bucket.web_hosting_bucket.arn}/*"
    ]
  }
}

# S3バケットを静的ウェブサイト
resource "aws_s3_bucket_website_configuration" "web_hosting_bucket_config" {
  bucket = aws_s3_bucket.web_hosting_bucket.id

  index_document {
    suffix = "index.html" #outフォルダのindex.htmlを参照
  }

  error_document {
    key = "error.html"
  }
}

# outフォルダの中身をS3バケットへデプロイする準備
module "template_files" {
  source   = "hashicorp/dir/template"
  base_dir = "../terraform-s3-front/out" # Next.jsのビルドフォルダ(outフォルダ)を指定
}

# outフォルダの中身をS3バケットへデプロイ
resource "aws_s3_object" "bucket_object" {
  for_each     = module.template_files.files
  bucket       = aws_s3_bucket.web_hosting_bucket.id
  key          = each.key
  source       = each.value.source_path
  content_type = each.value.content_type
  etag         = filemd5(each.value.source_path)
}


############################
# CloudFrontを追加する記述
############################

resource "aws_cloudfront_distribution" "s3_distribution" {
  origin {
    domain_name = aws_s3_bucket.web_hosting_bucket.bucket_regional_domain_name
    origin_id   = aws_s3_bucket.web_hosting_bucket.id
  }

  enabled             = true
  is_ipv6_enabled     = true
  comment             = "Some comment"
  default_root_object = "index.html"

  default_cache_behavior {
    allowed_methods  = ["GET", "HEAD"]
    cached_methods   = ["GET", "HEAD"]
    target_origin_id = aws_s3_bucket.web_hosting_bucket.id

    forwarded_values {
      query_string = false

      cookies {
        forward = "none"
      }
    }

    viewer_protocol_policy = "allow-all"
    min_ttl                = 0
    default_ttl            = 3600
    max_ttl                = 86400
  }

  ordered_cache_behavior {
    path_pattern     = "/content/immutable/*"
    allowed_methods  = ["GET", "HEAD", "OPTIONS"]
    cached_methods   = ["GET", "HEAD", "OPTIONS"]
    target_origin_id = aws_s3_bucket.web_hosting_bucket.id

    forwarded_values {
      query_string = false
      headers      = ["Origin"]

      cookies {
        forward = "none"
      }
    }

    min_ttl                = 0
    default_ttl            = 86400
    max_ttl                = 31536000
    compress               = true
    viewer_protocol_policy = "redirect-to-https"
  }

  # Cache behavior with precedence 1
  ordered_cache_behavior {
    path_pattern     = "/content/*"
    allowed_methods  = ["GET", "HEAD", "OPTIONS"]
    cached_methods   = ["GET", "HEAD"]
    target_origin_id = aws_s3_bucket.web_hosting_bucket.id

    forwarded_values {
      query_string = false

      cookies {
        forward = "none"
      }
    }

    min_ttl                = 0
    default_ttl            = 3600
    max_ttl                = 86400
    compress               = true
    viewer_protocol_policy = "redirect-to-https"
  }

  price_class = "PriceClass_200"

  restrictions {
    geo_restriction {
      restriction_type = "whitelist"
      locations        = ["JP"]
    }
  }


  viewer_certificate {
    cloudfront_default_certificate = true
  }
}

output "s3_url" {
  value = aws_s3_bucket.web_hosting_bucket.website_endpoint
}

output "cloudfront_url" {
  value = aws_cloudfront_distribution.s3_distribution.domain_name
}
以下のコマンドを実行していきます。
terraform plan
-auto-approveをつけることで yes/no の記述をしなくて良くなります。
terraform apply -auto-approve
URLはターミナルに表示されます。

S3+CloudFrontにNext.jsをデプロイしたサイトをスーパーリロードするとTimeは40msとなりました。

先ほどS3にデプロイした際のTimeは70msでしたが、CloudFrontを導入したことで40msとなり、パフォーマンスが向上したことを確認できました。
パフォーマンスは環境によって異なると思うのですが、違いを確認できればOKです。
CloudFrontすごいと思ってもらえたでしょうか!
料金が発生しないようにお片付け
terraform destroyをすることでAWSに反映された内容が全て削除されます。
これによって今回構成したインフラに関しては料金が発生しなくなります。
terraform destroy -auto-approve
参考サイト
静的なファイルを出力する設定
S3+CloudFrontについて
Discussion