AWS IoTとRaspberry Piを接続
モノの作成
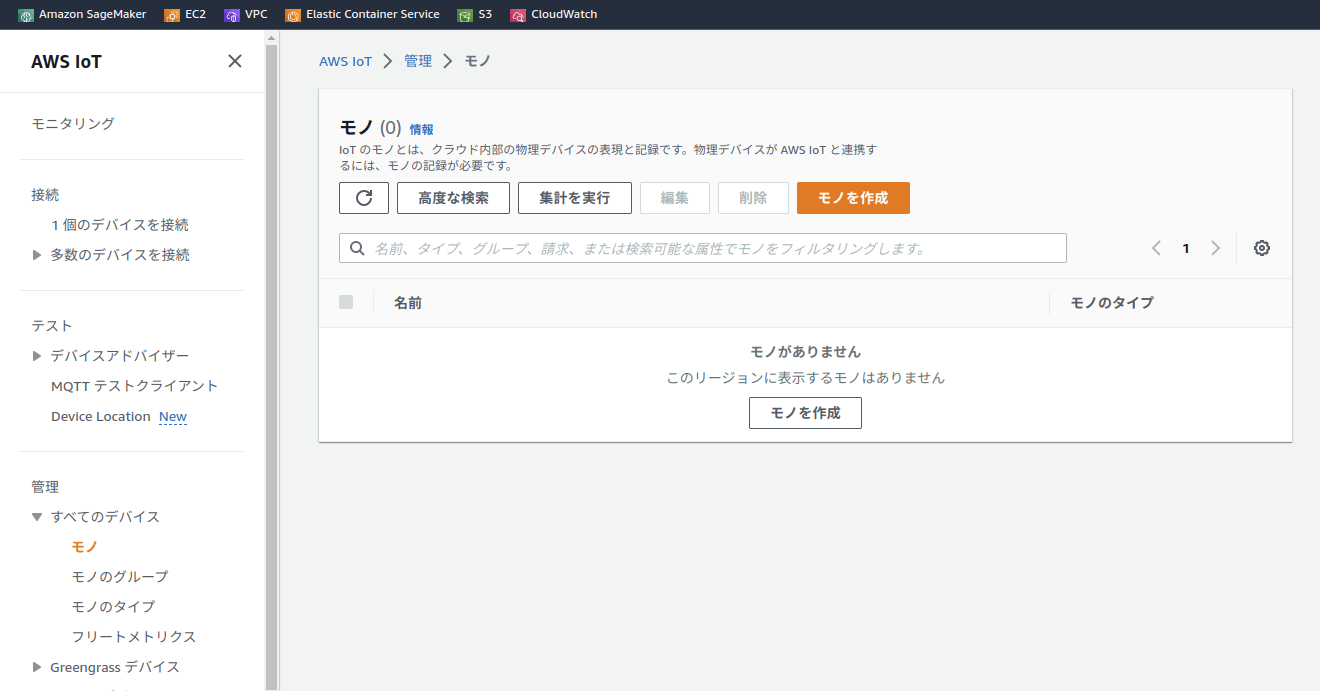
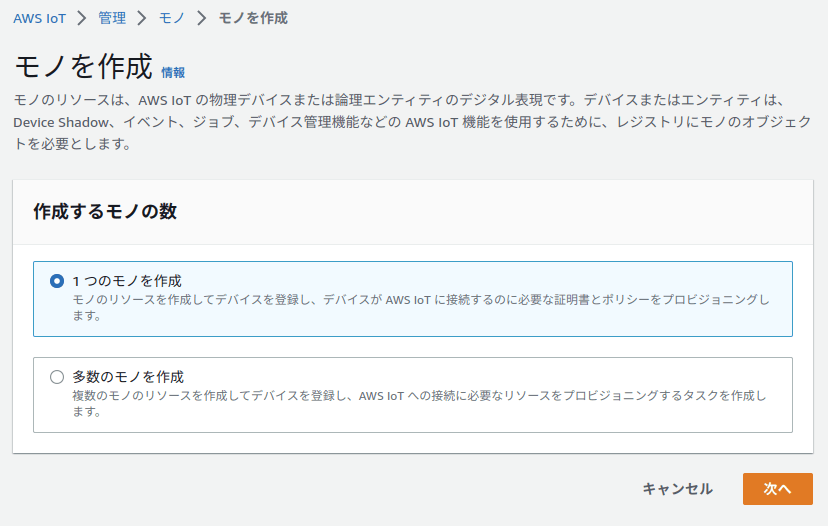
モノを作成
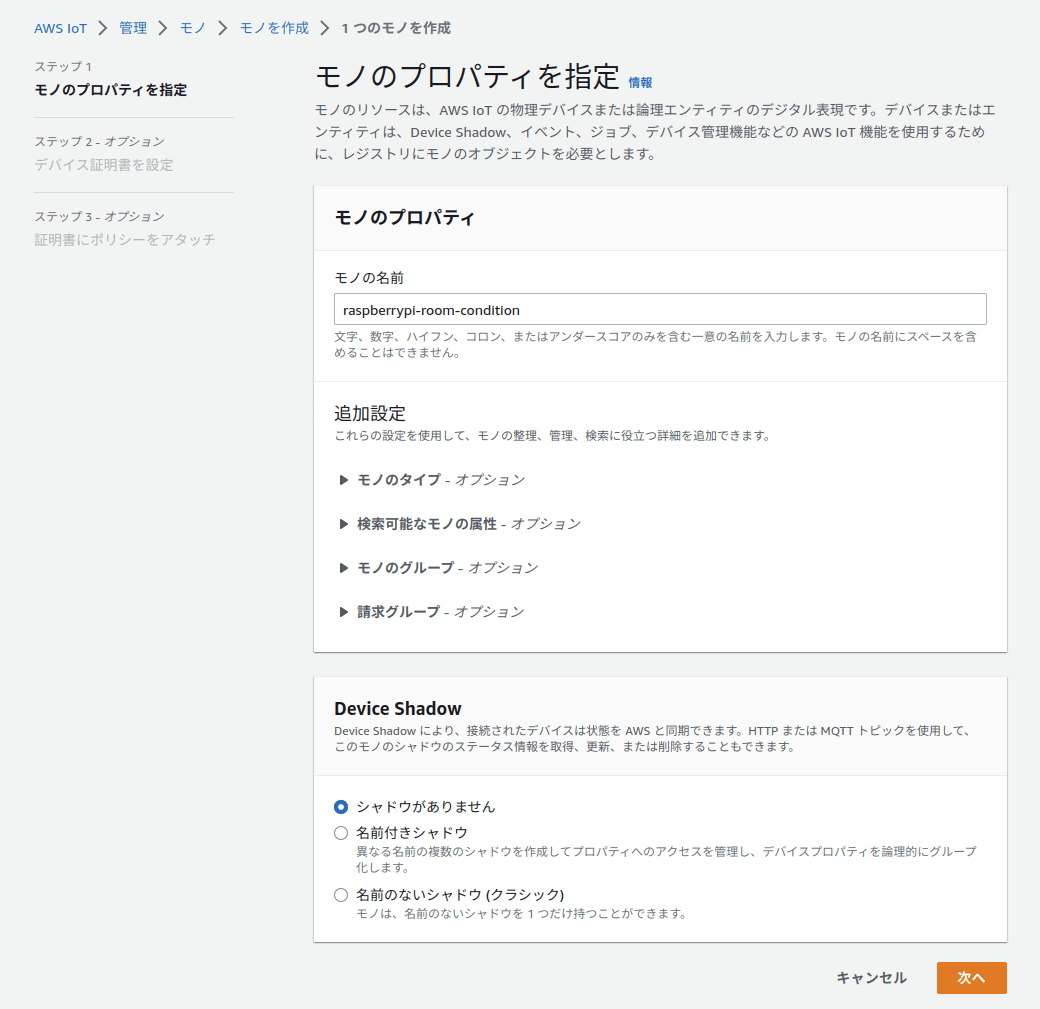
モノのプロパティを指定
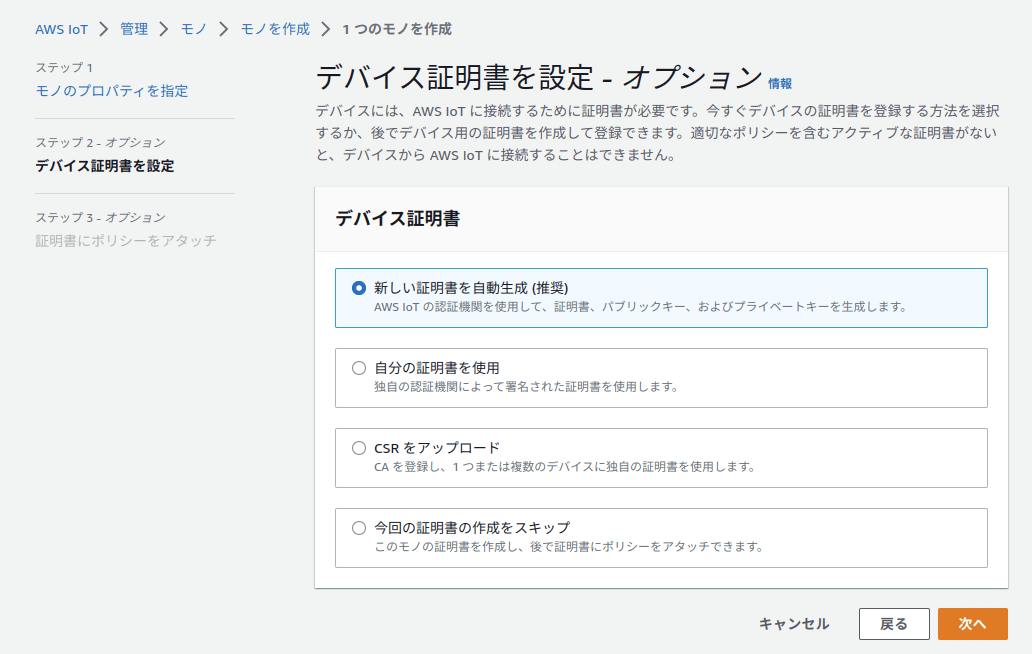
デバイス証明書を設定
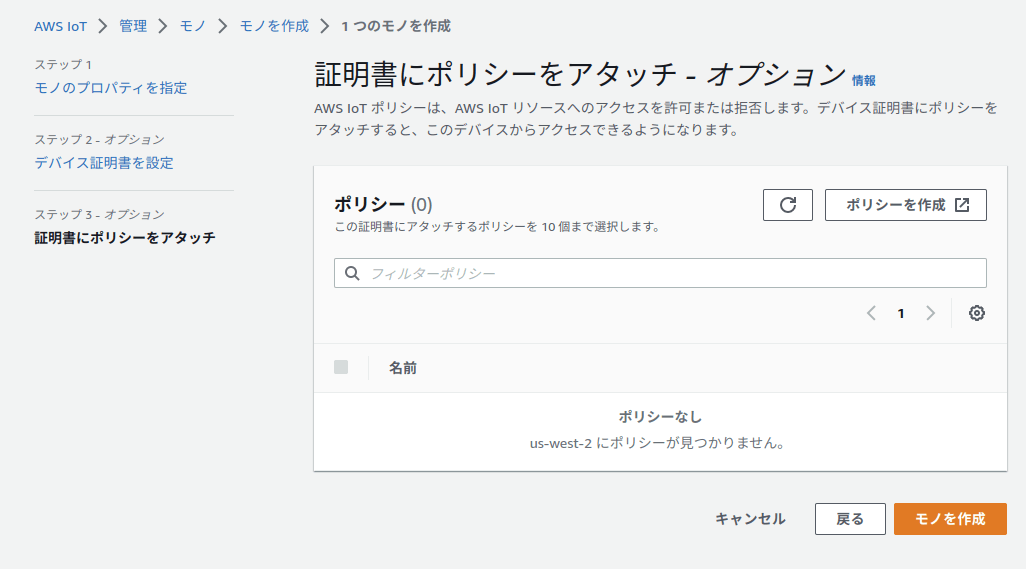
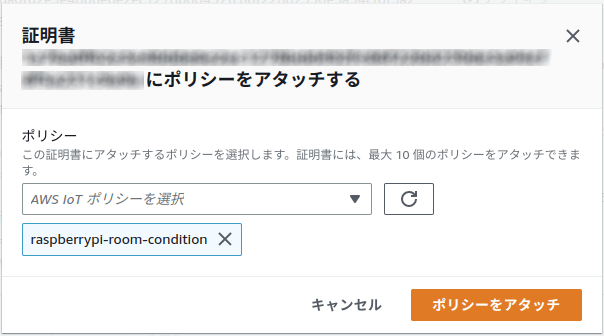
証明書にポリシーをアタッチ
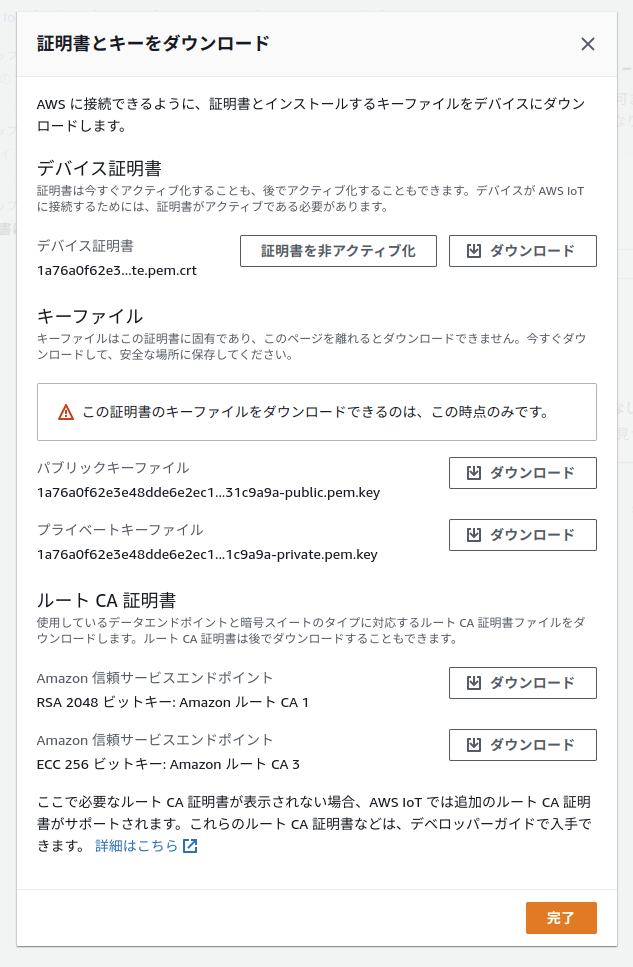
証明書とキーをダウンロード
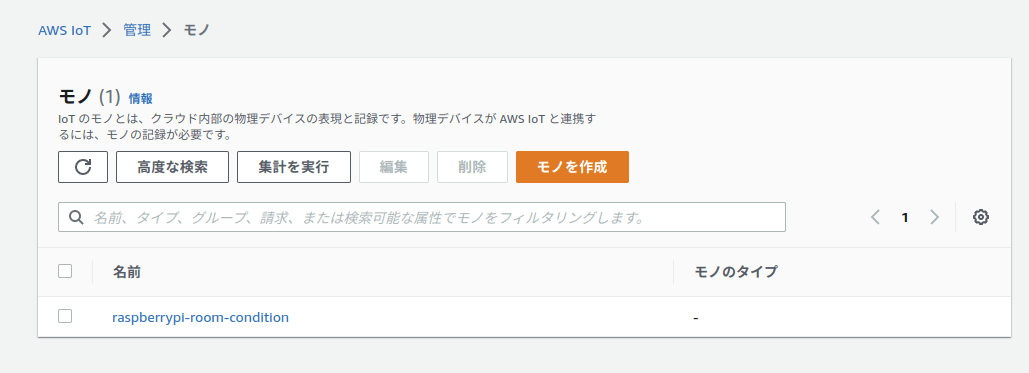
作成されたモノ
モノの詳細
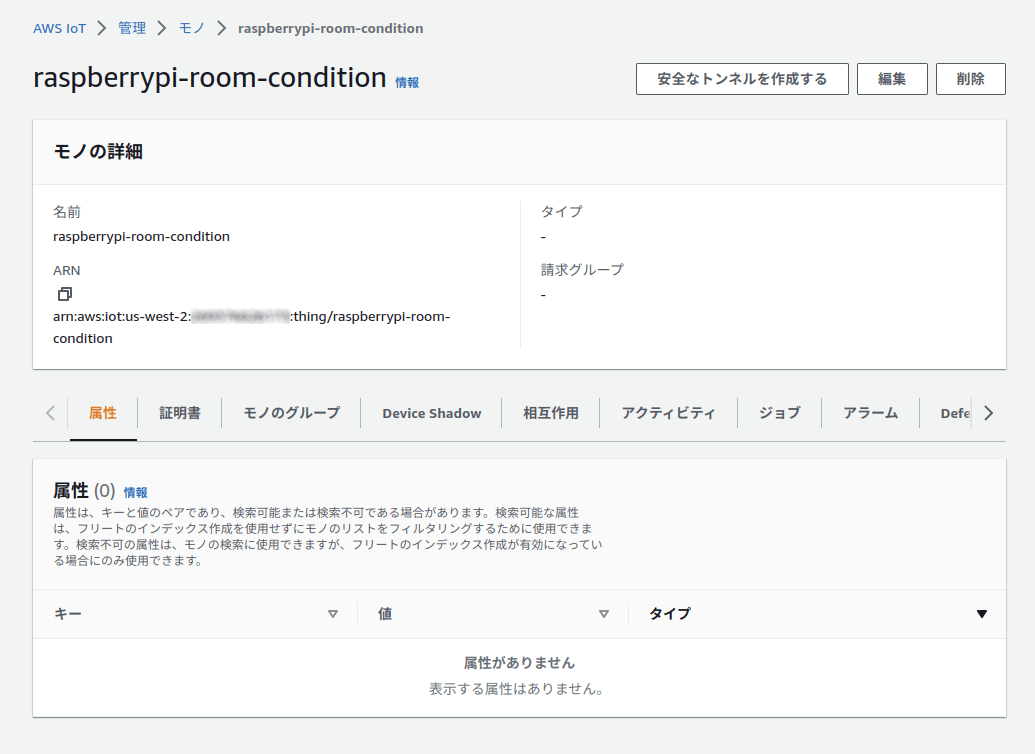
ARNをコピー
ポリシー
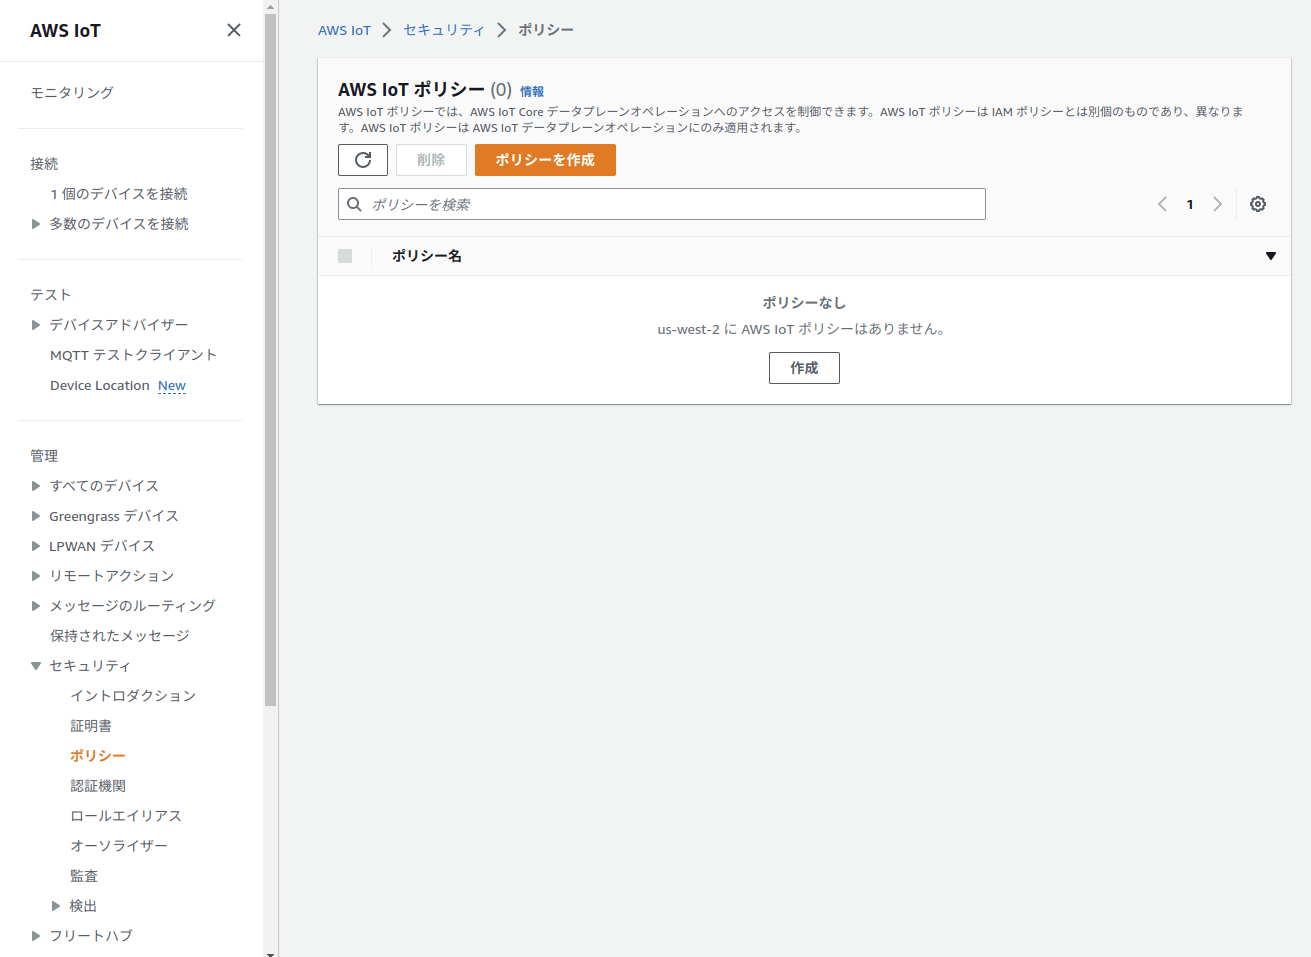
ポリシーを作成
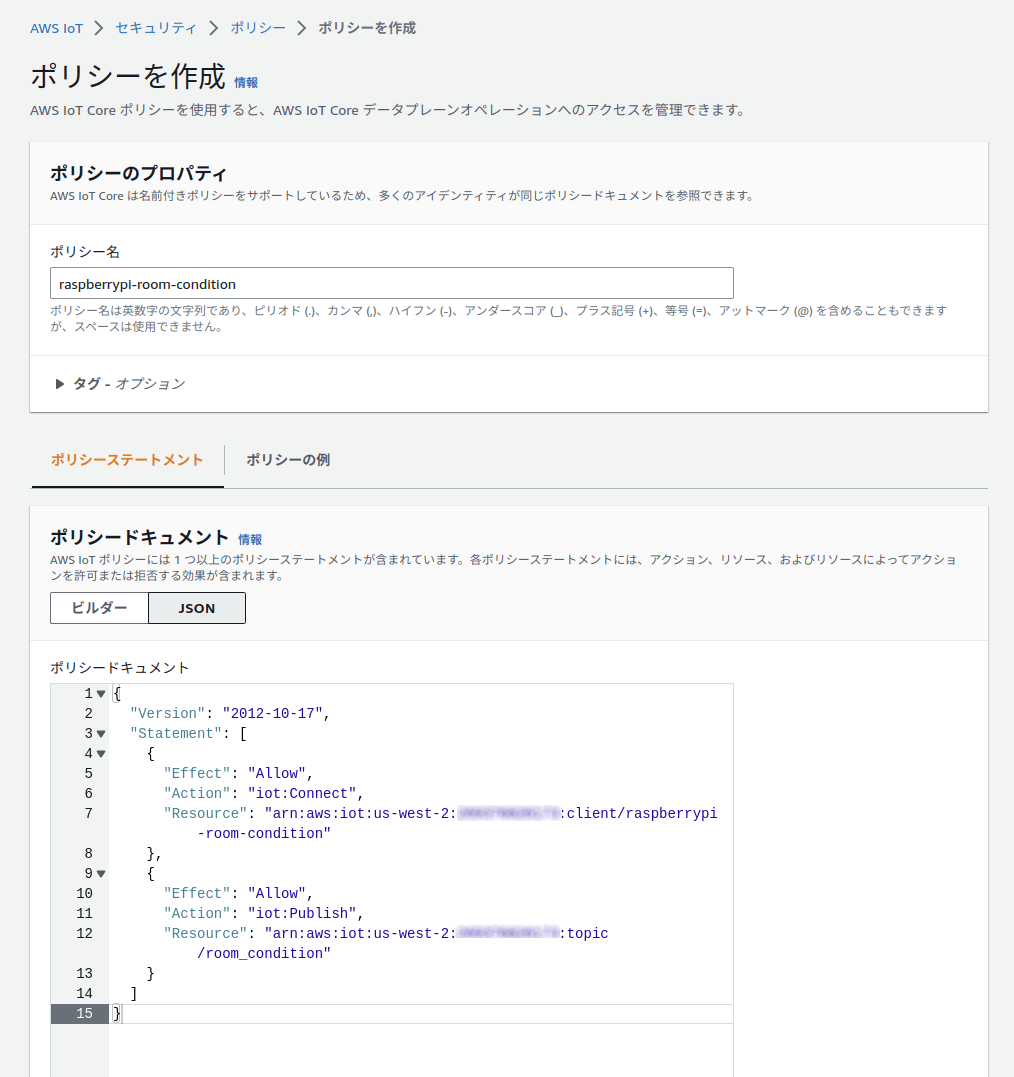
Resourceは、
-
iot:Connect:arn:aws:iot:リージョン名:AWSアカウントID:client/raspberrypi-room-condition -
iot:Publish:arn:aws:iot:リージョン名:AWSアカウントID:topic/room_condition
で設定
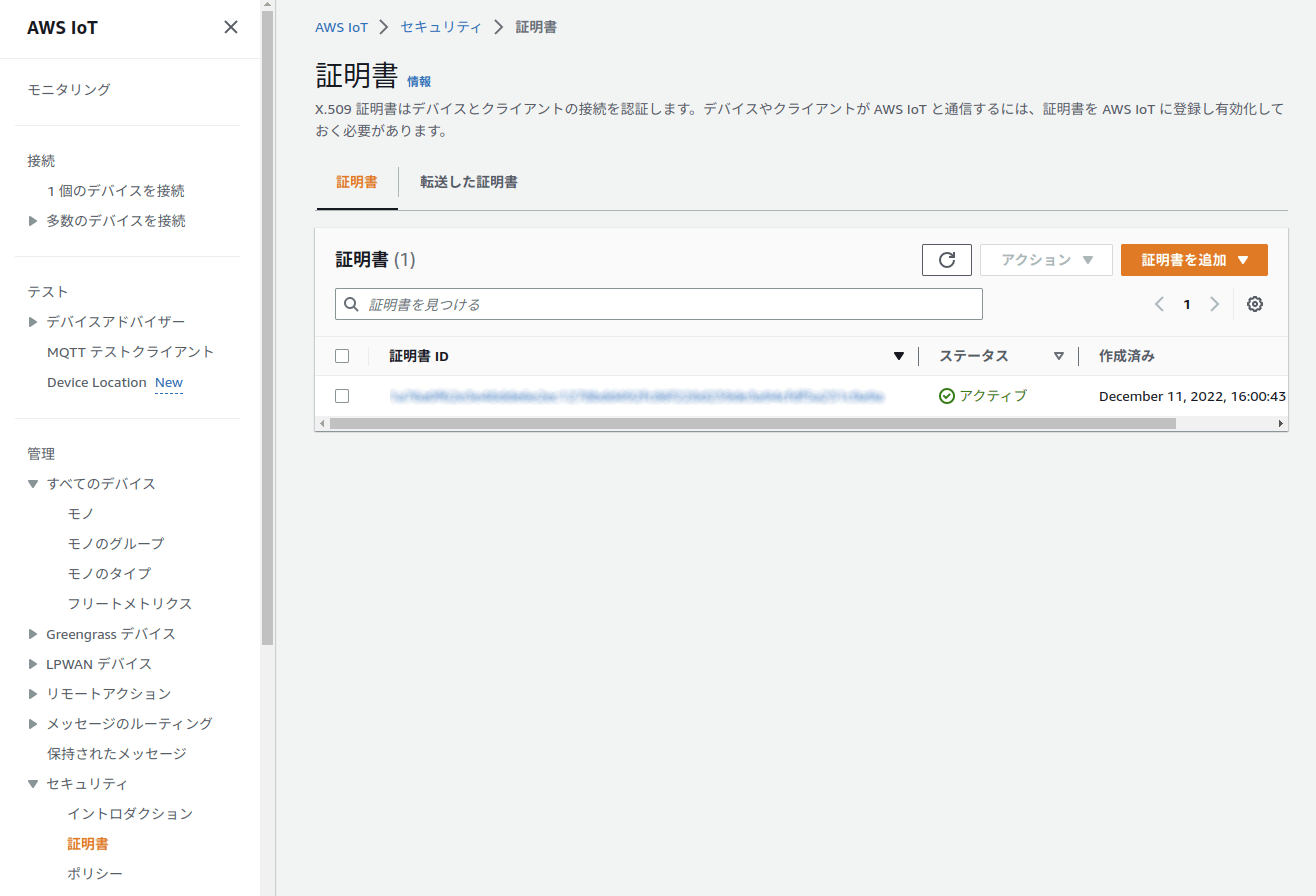
証明書
証明書の詳細
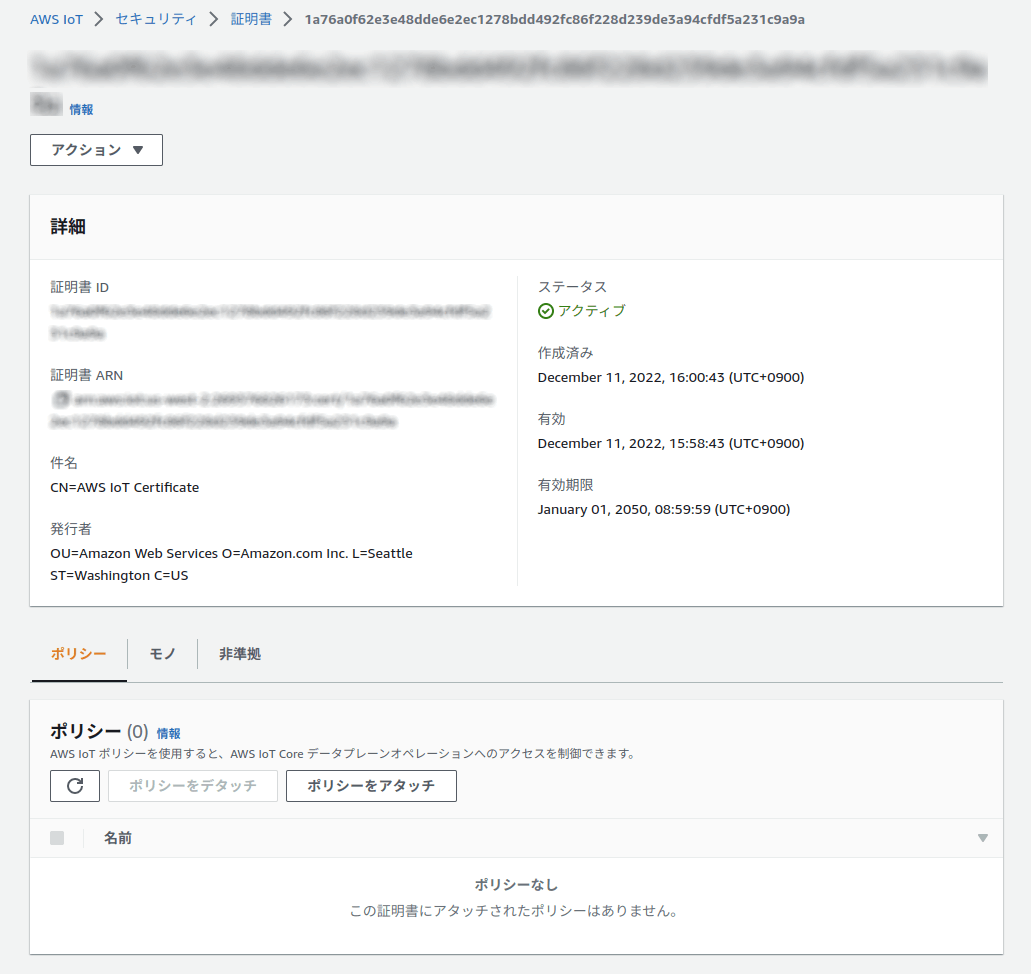
ポリシーをアタッチ
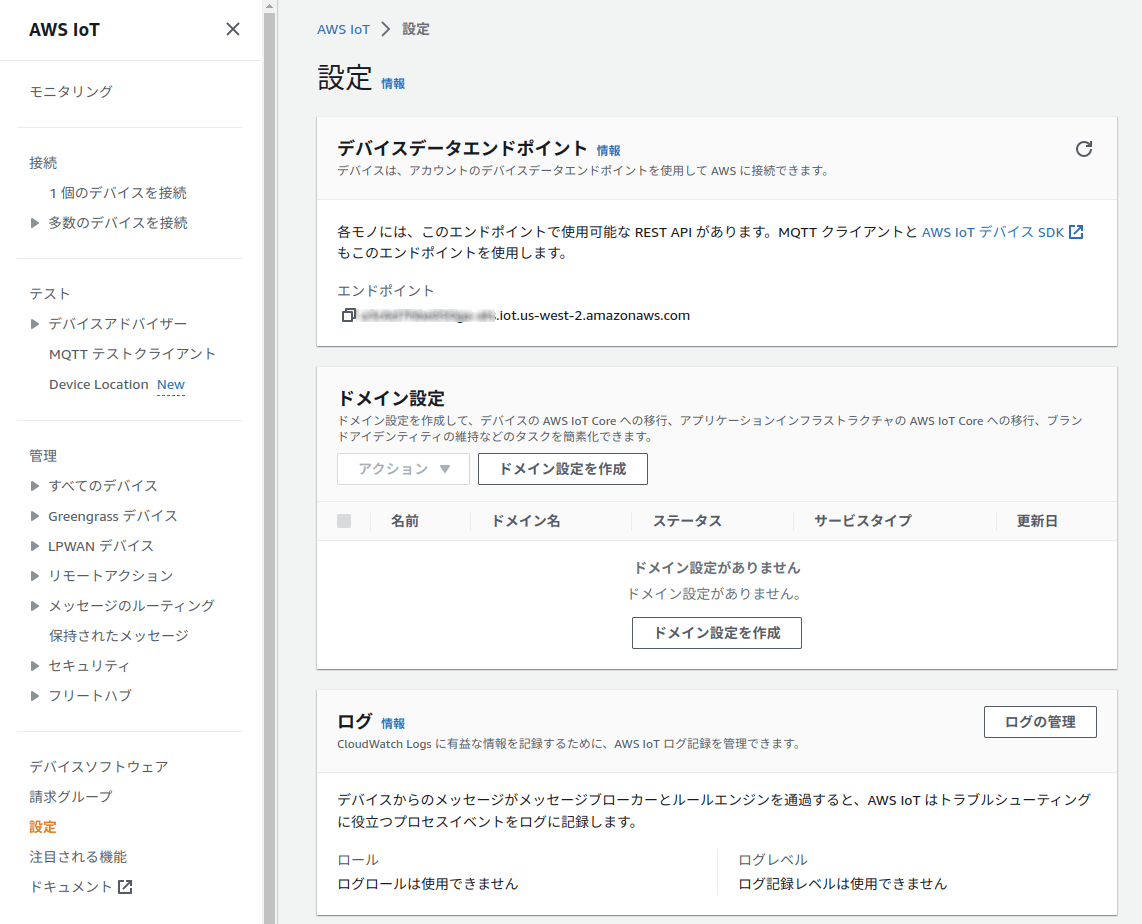
デバイスデータエンドポイント
Raspberry Piで以下のコマンドを実行して、AWS IoT SDK for Python v2 をインストールします。
sudo pip install awsiotsdk
Raspberry Piで以下のコマンドを実行し、証明書等を格納するディレクトリを作成します。
mkdir certificates
証明書等をダンロードしたPCから、必要なものをRaspberry Piにコピーします。
scp XXXXXXXXXXXXXXXXXXXXXXXXXXXXXXXXXXXXXXXXXXXXXXXXXXXXXXXXXXXXXXXXX-certificate.pem.crt pi@raspberrypi.local:~/certificates
scp XXXXXXXXXXXXXXXXXXXXXXXXXXXXXXXXXXXXXXXXXXXXXXXXXXXXXXXXXXXXXXXXX-private.pem.key  pi@raspberrypi.local:certificates
scp AmazonRootCA1.pem pi@raspberrypi.local:certificates
以下のファイルを作成
#!/usr/bin/env python3

import time
import json
import sys

import digitalio
import board
from PIL import Image, ImageDraw, ImageFont
from adafruit_rgb_display import ili9341

from scd30_i2c import SCD30

from awscrt import io, mqtt, auth, http
from awsiot import mqtt_connection_builder

# Define ENDPOINT, CLIENT_ID, PATH_TO_CERTIFICATE, PATH_TO_PRIVATE_KEY, PATH_TO_AMAZON_ROOT_CA_1, MESSAGE, TOPIC, and RANGE
ENDPOINT = "XXXXXXXXXXXXXX-XXX.iot.us-west-2.amazonaws.com"
CLIENT_ID = "raspberrypi-room-condition"
PATH_TO_CERTIFICATE = "certificates/XXXXXXXXXXXXXXXXXXXXXXXXXXXXXXXXXXXXXXXXXXXXXXXXXXXXXXXXXXXXXXXXX-certificate.pem.crt"
PATH_TO_PRIVATE_KEY = "certificates/XXXXXXXXXXXXXXXXXXXXXXXXXXXXXXXXXXXXXXXXXXXXXXXXXXXXXXXXXXXXXXXXX-private.pem.key"
PATH_TO_AMAZON_ROOT_CA_1 = "certificates/AmazonRootCA1.pem"
TOPIC = "room_condition"

def init_display():
    """Initialize display, and return display object"""
    # Configuration for CS and DC pins (these are PiTFT defaults):
    cs_pin = digitalio.DigitalInOut(board.CE0)
    dc_pin = digitalio.DigitalInOut(board.D25)
    reset_pin = digitalio.DigitalInOut(board.D24)

    # Config for display baudrate (default max is 24mhz):
    BAUDRATE = 24000000

    # Setup SPI bus using hardware SPI:
    spi = board.SPI()

    # pylint: disable=line-too-long
    # Create the display:
    disp = ili9341.ILI9341(
        spi,
        rotation=0,  # 2.2", 2.4", 2.8", 3.2" ILI9341
        cs=cs_pin,
        dc=dc_pin,
        rst=reset_pin,
        baudrate=BAUDRATE,
    )

    return disp

disp = init_display()

height = disp.height
width = disp.width

image = Image.new("RGB", (width, height))

# Get drawing object to draw on image.
draw = ImageDraw.Draw(image)

# Draw a black filled box to clear the image.
draw.rectangle((0, 0, width, height), outline=0, fill=(0, 0, 0))
disp.image(image)


# Load a ipaexfont-gothic font.
font1 = ImageFont.truetype("/usr/share/fonts/opentype/ipaexfont-gothic/ipaexg.ttf", 70)
font2 = ImageFont.truetype("/usr/share/fonts/opentype/ipaexfont-gothic/ipaexg.ttf", 55)
font3 = ImageFont.truetype("/usr/share/fonts/opentype/ipaexfont-gothic/ipaexg.ttf", 25)
font4 = ImageFont.truetype("/usr/share/fonts/opentype/ipaexfont-gothic/ipaexg.ttf", 22)
font5 = ImageFont.truetype("/usr/share/fonts/opentype/ipaexfont-gothic/ipaexg.ttf", 17)
font6 = ImageFont.truetype("/usr/share/fonts/opentype/ipaexfont-gothic/ipaexg.ttf", 12)

text_color1 = "#D9E5FF"

# Spin up resources
event_loop_group = io.EventLoopGroup(1)
host_resolver = io.DefaultHostResolver(event_loop_group)
client_bootstrap = io.ClientBootstrap(event_loop_group, host_resolver)
mqtt_connection = mqtt_connection_builder.mtls_from_path(
            endpoint=ENDPOINT,
            cert_filepath=PATH_TO_CERTIFICATE,
            pri_key_filepath=PATH_TO_PRIVATE_KEY,
            client_bootstrap=client_bootstrap,
            ca_filepath=PATH_TO_AMAZON_ROOT_CA_1,
            client_id=CLIENT_ID,
            clean_session=False,
            keep_alive_secs=6
            )

print("Connecting to {} with client ID '{}'...".format(ENDPOINT, CLIENT_ID), file=sys.stderr)

# Make the connect() call
connect_future = mqtt_connection.connect()
# Future.result() waits until a result is available
connect_future.result()
print("Connected!", file=sys.stderr)

# Setup SCD30
scd30 = SCD30()

measurment_interval_sec = 10
scd30.set_measurement_interval(measurment_interval_sec)
scd30.start_periodic_measurement()

time.sleep(2)

day_of_week = ["月", "火", "水", "木", "金", "土", "日"]

while True:
    if not scd30.get_data_ready():
        time.sleep(0.2)
        continue

    m = scd30.read_measurement()
    if m is None:
        time.sleep(measurment_interval_sec)
        continue

    local_time = time.localtime()
    current_date = '{}月{}日({})'.format(local_time.tm_mon, local_time.tm_mday, day_of_week[local_time.tm_wday])
    current_time = time.strftime('%H:%M', local_time)
    print(time.strftime('%Y-%m-%dT%H:%M:%S%z', local_time) + "," + f"{m[0]:.1f},{m[1]:.1f},{m[2]:.1f}")

    # Draw a black filled box to clear the image.
    draw.rectangle((0, 0, width, height), outline=0, fill=(0, 0, 0))

    # date and time
    draw.text((width / 2, 15), current_date, align='center', anchor="ma", font=font3, fill=text_color1)
    draw.text((width / 2, 55), current_time, align='center', anchor="ma", font=font1, fill=text_color1)

    # Temperature
    temp =format(float(m[1]), '.1f')
    draw.text((195, 145), temp, align='right', anchor='rt', font=font2, fill=text_color1)
    draw.text((197, 145), "℃", font=font3, fill=text_color1)

    # Concentration of CO2
    co2 =format(float(m[0]), '.1f')
    draw.text((195, 205), co2, align='right', anchor='rt', font=font2, fill=text_color1)
    draw.text((197, 205), "ppm", font=font5, fill=text_color1)
    draw.text((197, 230), "CO", font=font5, fill=text_color1)
    draw.text((225, 235), "2", font=font6, fill=text_color1)

    # Humidity
    humi =format(float(m[2]), '.1f')
    draw.text((195, 265), humi, align='right', anchor='rt', font=font2, fill=text_color1)
    draw.text((197, 265), "%", font=font4, fill=text_color1)
    draw.text((197, 288), "RH", font=font4, fill=text_color1)

    disp.image(image)

    message = {"temperature" : temp, "co2": co2, "humidity": humi}
    mqtt_connection.publish(topic=TOPIC, payload=json.dumps(message), qos=mqtt.QoS.AT_LEAST_ONCE)
    print("Published: '" + json.dumps(message) + "' to the topic: '" + TOPIC + "'", file=sys.stderr)

    time.sleep(measurment_interval_sec)
ファイルに実行属性を追加します。
chmod +x measure_room_condition.py
以下の自動的起動スクリプトを作成
#! /bin/sh

### BEGIN INIT INFO
# Provides:             scd30d
# Required-Start:       $remote_fs $syslog $network $named
# Required-Stop:        $remote_fs $syslog
# Default-Start:        2 3 4 5
# Default-Stop:
# Short-Description:    Measure room condition
### END INIT INFO

(cd /home/pi && ./measure_room_condition.py)
起動スクリプトをsystemdに登録して自動的起動するようにします。
cd /etc/init.d
sudo chmod +x measure_room_condion
sudo update-rc.d measure_room_condition defaults
次回のOS起動時から自動起動するようになります。
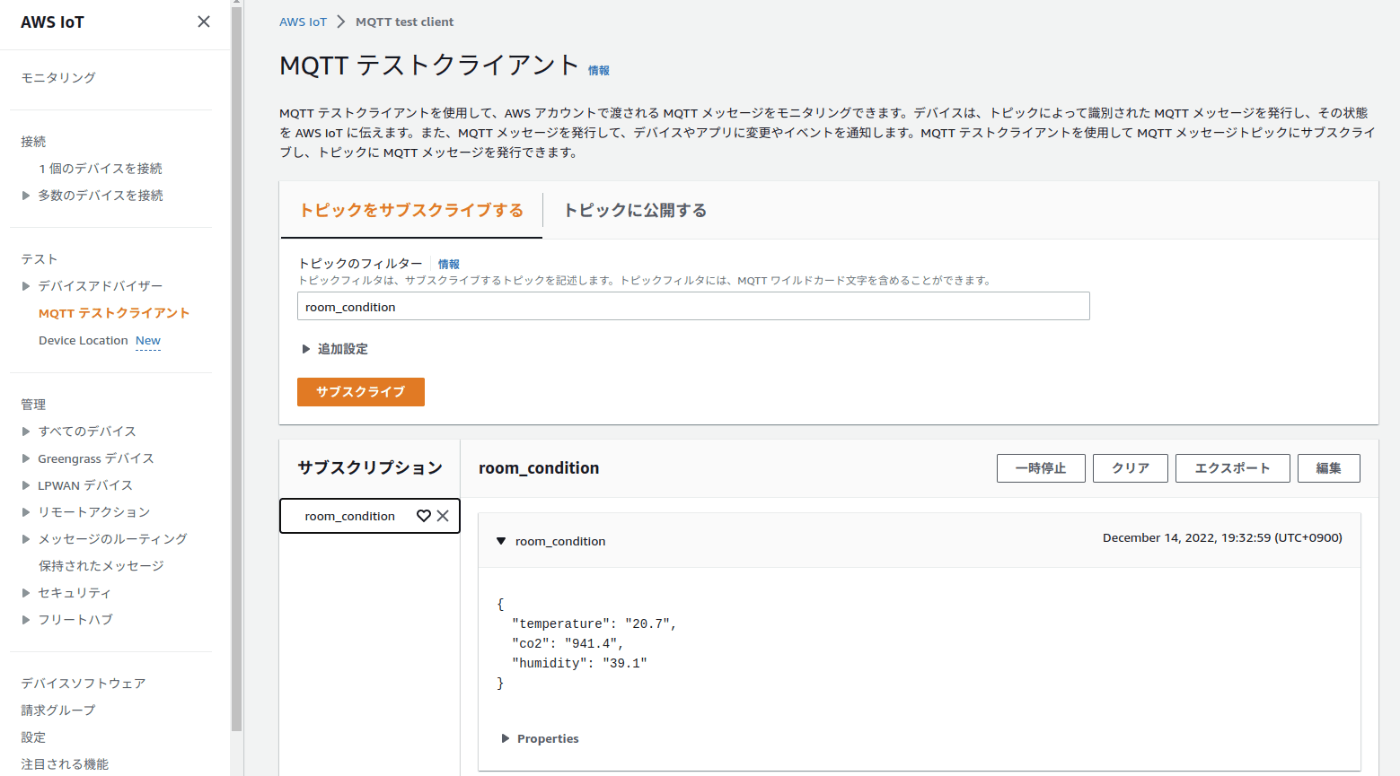
AWS側での受信の様子
AWS IoT CoreからAWS Lambdaを実行する。Serverless Frameworkを使ってLambdaをデプロイする。
mkdir aws_lambda
cd aws_lambda/
以下のコマンドを使って、Serverless Frameworkのプロジェクトを作成する。
serverless create --template aws-python3
以下の2つのファイルが作成されます。
$ ls
handler.py  serverless.yml
ファイルを編集して、AWS IoT Coreからのデータを受け取れるようにします。
import json

def hello(event, context):
    print(event)

    return {
        "message": "Go Serverless v1.0! Your function executed successfully!",
        "event": event
    }
service: aws-lambda

provider:
  name: aws
  runtime: python3.8

  region: us-west-2

functions:
  hello:
    handler: handler.hello
    events:
      - iot:
         sql: "SELECT * FROM 'room_condition'"
デプロイする
$ serverless deploy

Deploying aws-lambda to stage dev (us-west-2)

✔ Service deployed to stack aws-lambda-dev (49s)

functions:
  hello: aws-lambda-dev-hello (270 B)
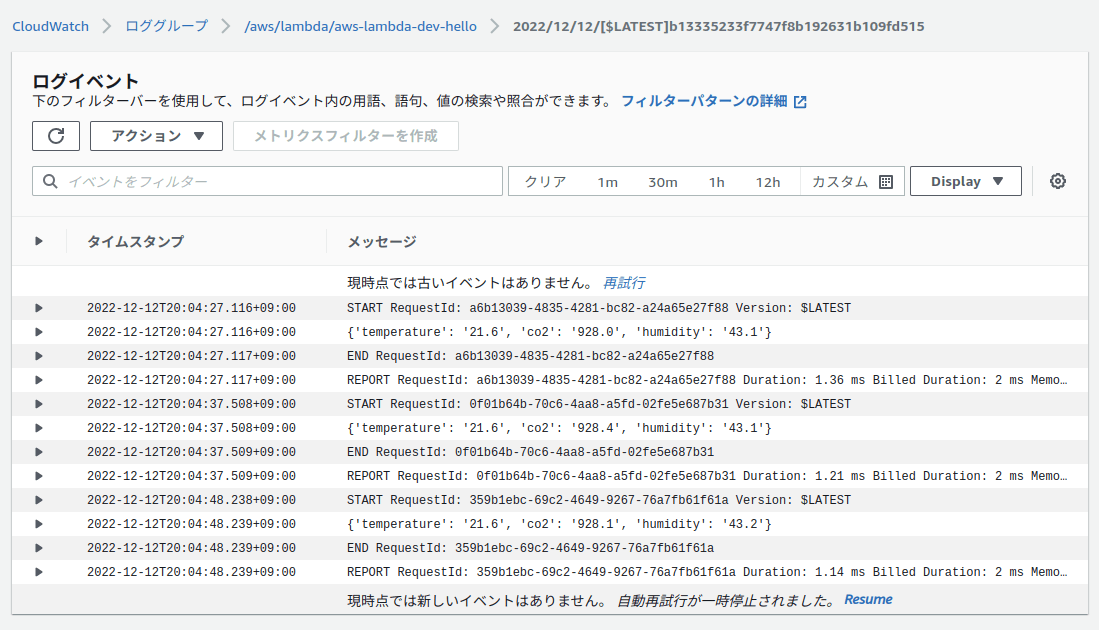
CloudWatchのログに、温度、CO2濃度、湿度が表示されます。
Timestreamにデータを保存する。
の通りに、Timestream でDBを作成する。
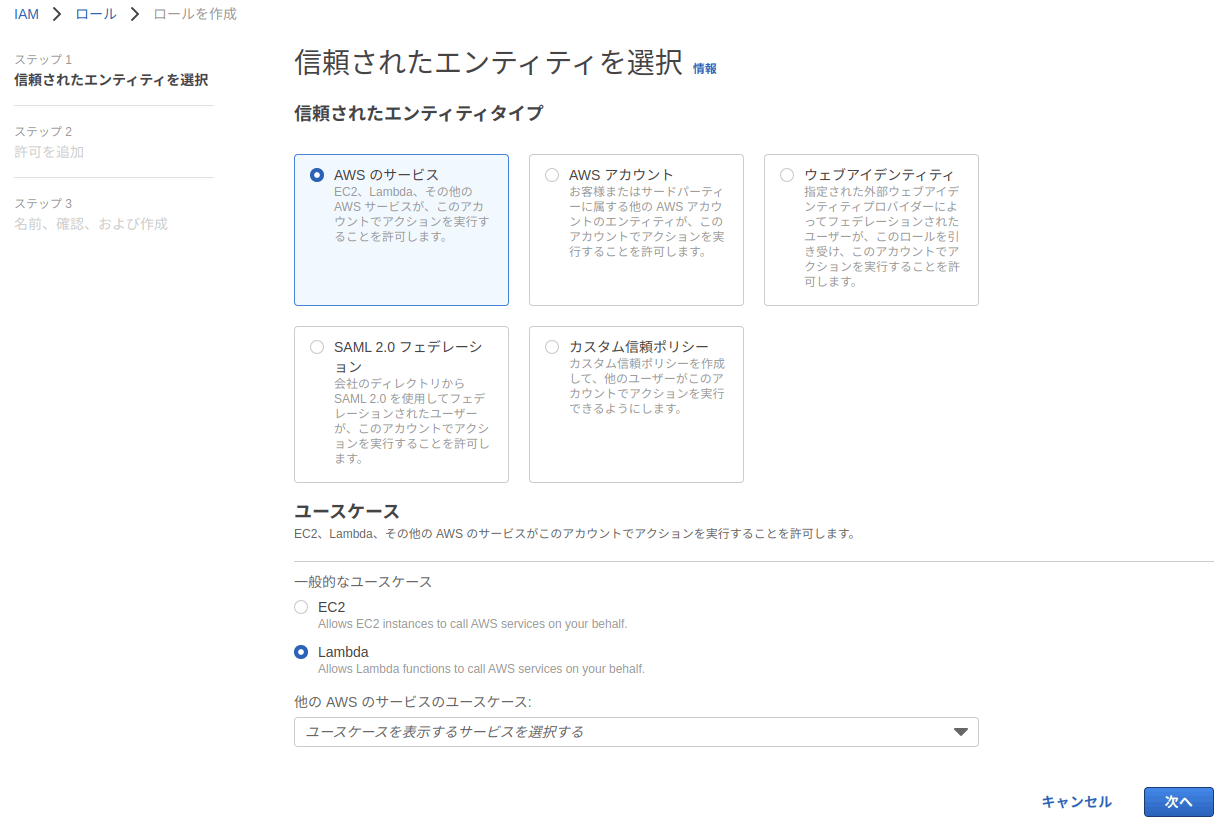
IAMロールを作成する。
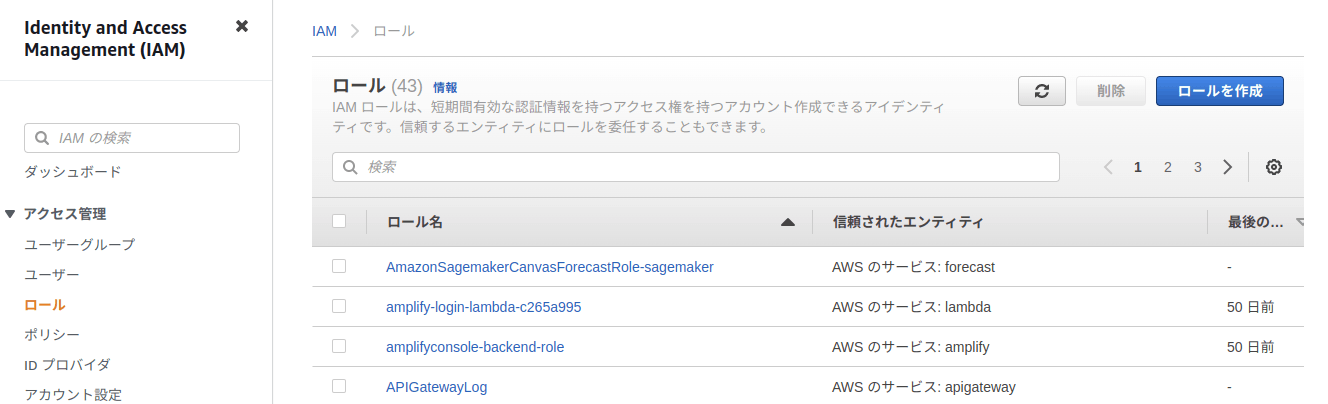
エンティティを選択
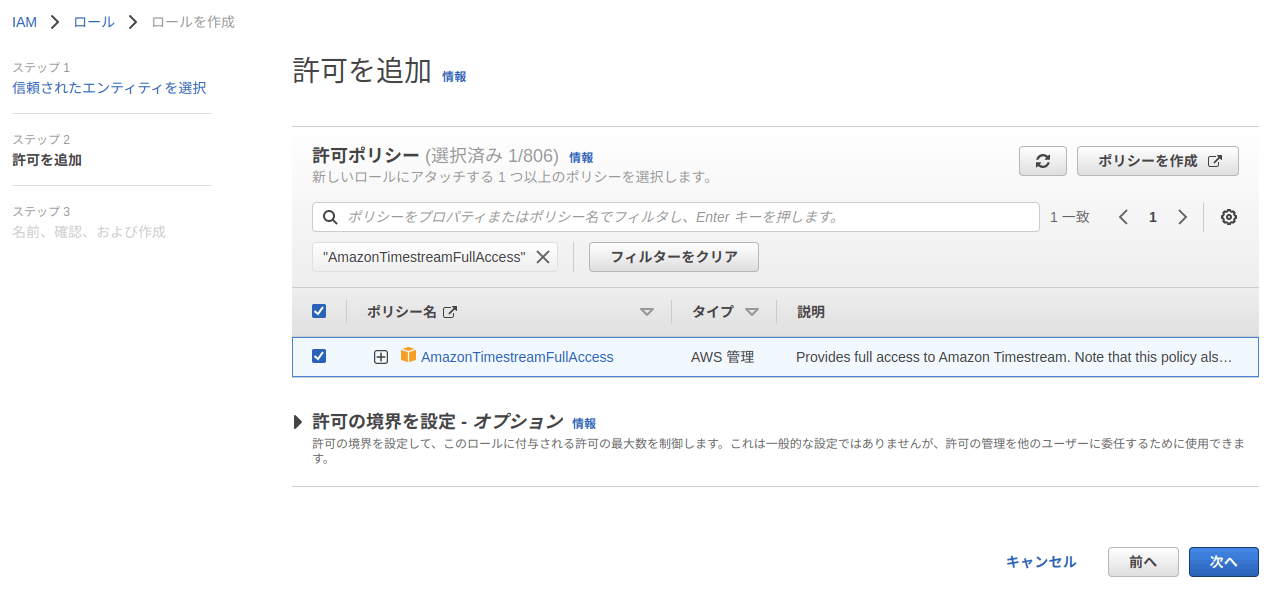
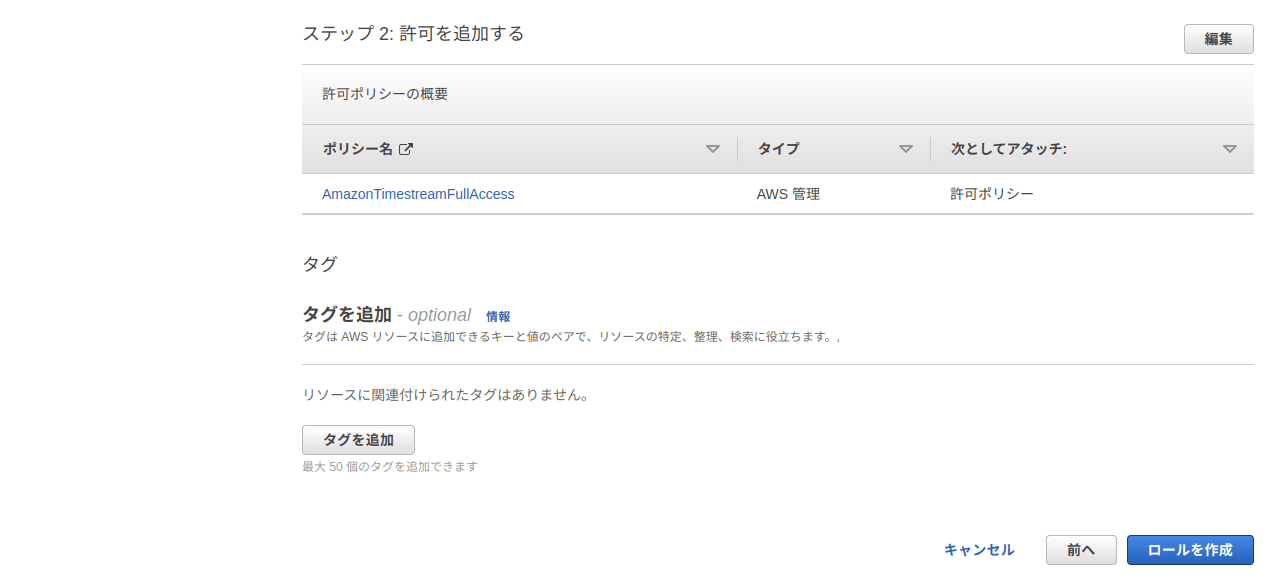
許可を追加
ロールを作成をクリック

lambdaを修正して、Timestreamにデータを転送するようにします。
import boto3
import time

DatabaseName = 'RoomCondition'
TableName = 'conditions'

def current_milli_time():
    return round(time.time() * 1000)

client = boto3.client('timestream-write', region_name='us-west-2')

def write_record(event, context):
    print(event)

    temperature = event['temperature']
    co2 = event['co2']
    humidity = event['humidity']

    current_time = str(current_milli_time())

    dimensions = [
        {'Name': 'deviceId', 'Value': '1'},
    ]

    co2_record = {
        'Dimensions': dimensions,
        'MeasureName': 'co2',
        'MeasureValue': str(co2),
        'MeasureValueType': 'DOUBLE',
        'Time': current_time
    }

    temperature_record = {
        'Dimensions': dimensions,
        'MeasureName': 'temperature',
        'MeasureValue': str(temperature),
        'MeasureValueType': 'DOUBLE',
        'Time': current_time
    }

    humidity_record = {
        'Dimensions': dimensions,
        'MeasureName': 'humidity',
        'MeasureValue': str(humidity),
        'MeasureValueType': 'DOUBLE',
        'Time': current_time
    }

    records = [co2_record, temperature_record, humidity_record]

    result = client.write_records(DatabaseName=DatabaseName, TableName=TableName, Records=records, CommonAttributes={})

    return result
Yamlファイルを修正します。
service: aws-lambda
frameworkVersion: '3'

provider:
  name: aws
  runtime: python3.8
  region: us-west-2
  iam:
    role: arn:aws:iam::XXXXXXXXXXXX:role/lambda-timestream-role

functions:
  room_condition:
    handler: handler.write_record
    events:
      - iot:
         sql: "SELECT * FROM 'room_condition'"
XXXXXXXXXXXXはAWSのアカウントIDを設定する。
再度デプロイする。
serverless deploy
のようにAWSコンソール上でクエリをかけられる。
Grafana Cloudを試してみる
から free accountを作成する。
AWS CLIでTimestreamのクエリ用のエンドポイントを確認する。リージョンは適宜変更。
aws timestream-query describe-endpoints --region us-west-2 | jq -r '.Endpoints[].Address'
アカウントを作成して、ログインしてダッシュボード画面を表示します。

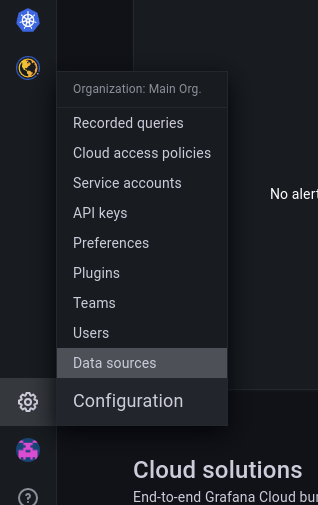
画面の左下の、Configration - Plugins を選択。

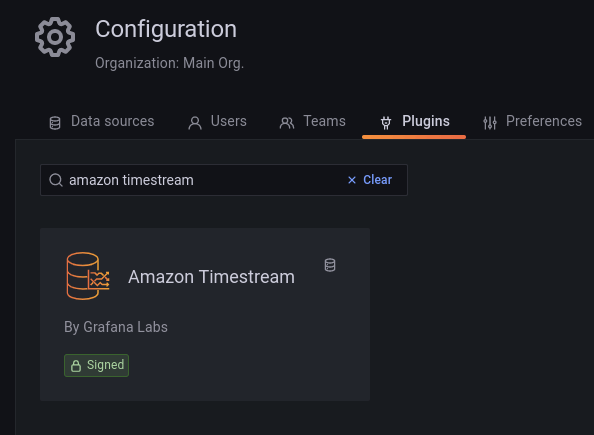
Configuration画面の検索ボックスでamazon timestreamを入力し、検索結果のAmazon Timestreamをクリック。
Install via grafana.comをクリック。
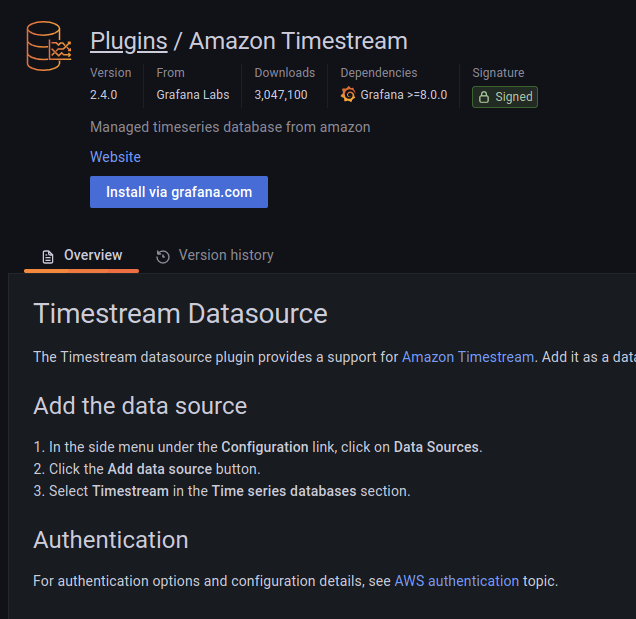
別タブでInstall pluginをクリック。

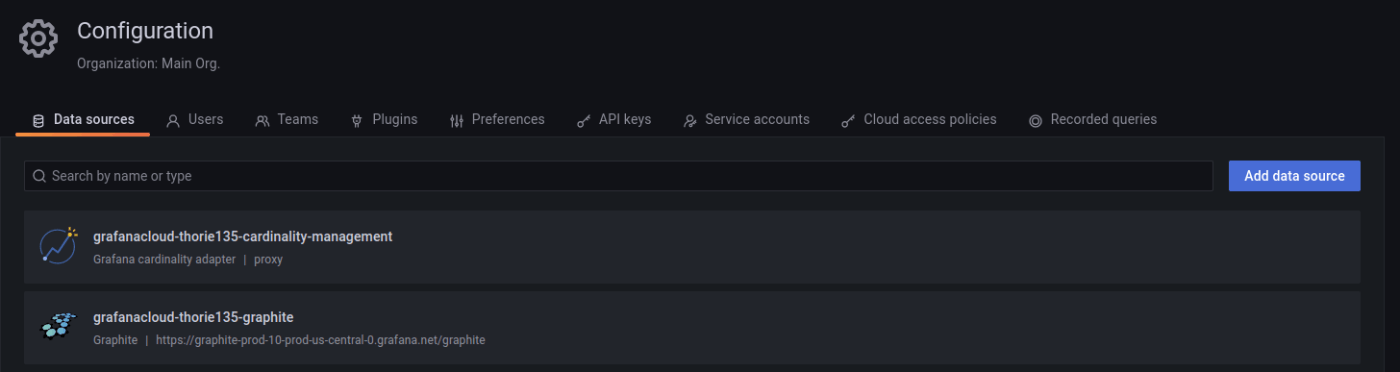
元の画面に戻って、画面の左下の、Configration - Data sources を選択。
Add data sourceをクリック。
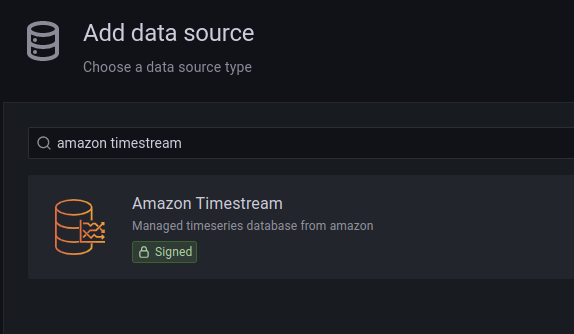
Add data source画面の検索ボックスでamazon timestreamを入力し、検索結果のAmazon Timestreamをクリック。
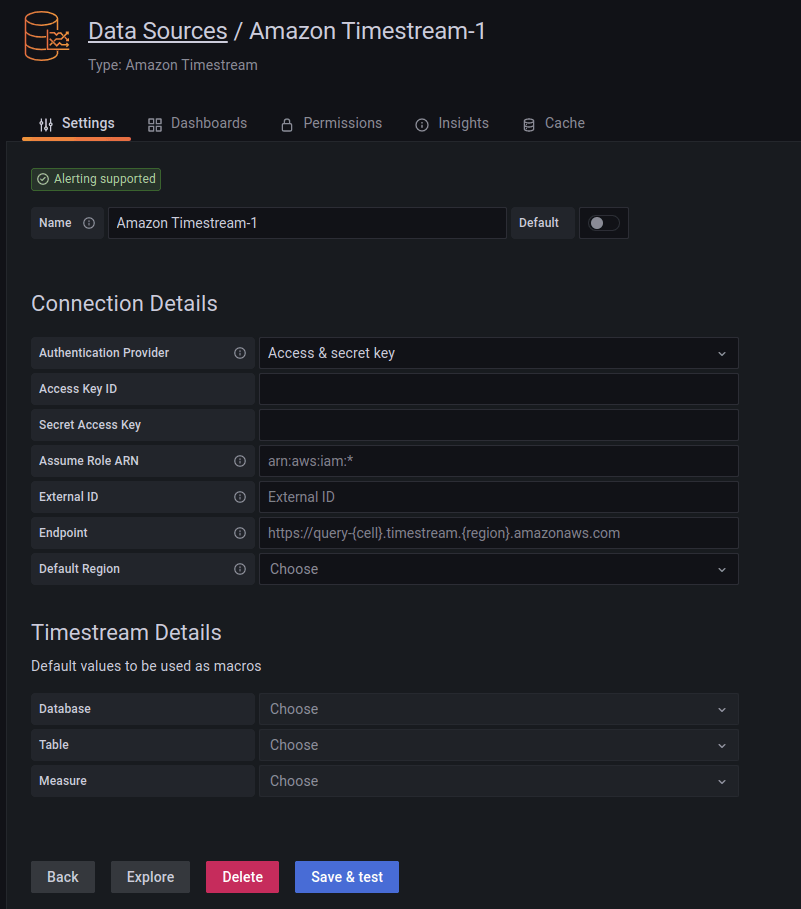
Authentication Provider は、Access & secret key を選択し、以下のように設定し、Save & Testをクリックする。
| 項目 | 値 |
|---|---|
| Authentication Provider | Access & secret key |
| Access Key ID | IAMユーザーのアクセスキーID |
| Secret Access Key | IAMユーザーのシークレットアクセスキー |
| Assume Role ARN | 空欄のまま |
| External ID | 空欄のまま |
| Endpoint | AWS CLIで調べたqueryエンドポイント |
| Default Region | us-west-2 |
元の画面に戻って、画面の左下の、Configration - Data sources を選択。
Add data sourceをクリック。
Add data source画面の検索ボックスでamazon timestreamを入力し、検索結果のAmazon Timestreamをクリック。
Authentication Provider は、Access & secret key を選択し、以下のように設定し、Save & Testをクリックする。
| 項目 | 値 |
|---|---|
| Authentication Provider | Access & secret key |
| Access Key ID | IAMユーザーのアクセスキーID |
| Secret Access Key | IAMユーザーのシークレットアクセスキー |
| Assume Role ARN | 空欄のまま |
| External ID | 空欄のまま |
| Endpoint | AWS CLIで調べたqueryエンドポイント |
| Default Region | us-west-2 |
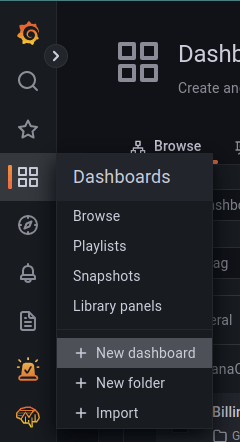
Dashboards - + New dashboardをクリック
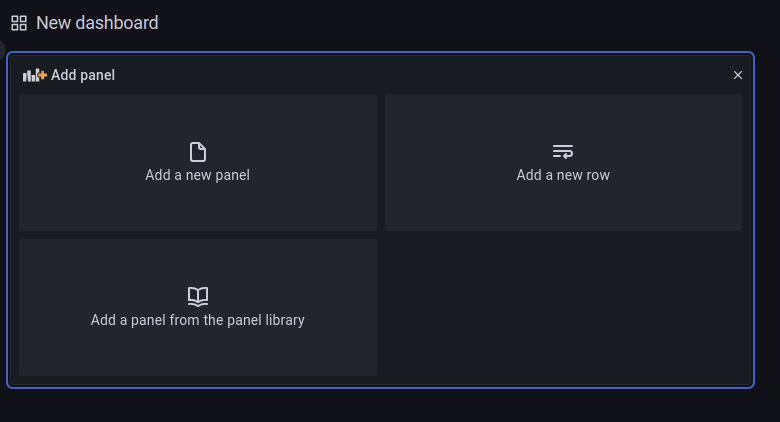
Add a new panelをクリック
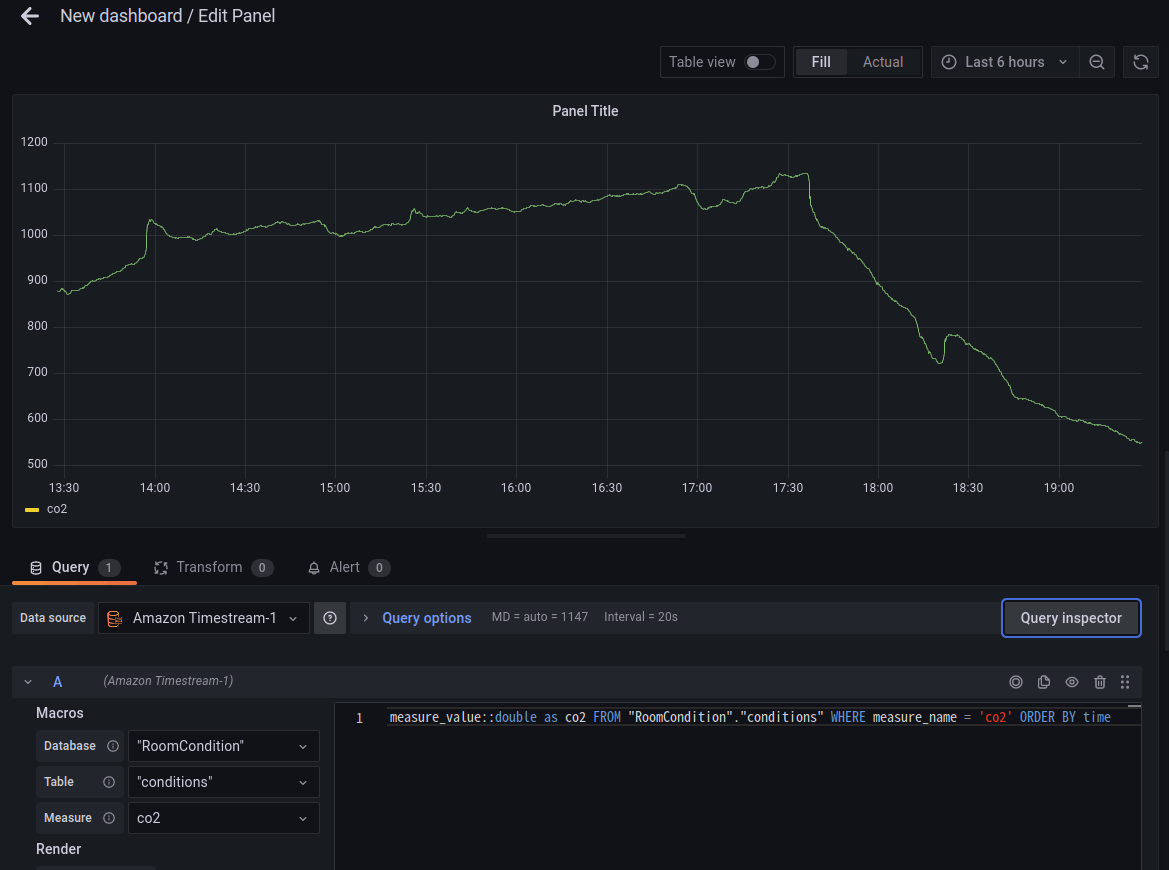
Data sourceを選択し、Database、Table、Measureを選択し、クエリに以下を入力し、右上のApplyをクリックします。
SELECT time, measure_name, measure_value::double as co2 FROM "RoomCondition"."conditions" WHERE measure_name = 'co2' ORDER BY time
温度、湿度も同様にパネルを追加した結果。
