✨
pyinstallerとGitHub Actions(CI/CD)組んでみる
はじめに
Pyinstallerとqt5を使って様々なスタジオへいろんなものをバンドして配布する機会がありました。
今回は、Pyinstallerを使ったパッケージ作成(windows/mac)までの工程をチュートリアル形式でここに残したいと思います。
また、今回はCI/CDにはGitHub Actionsを使って行います。
チュートリアルの流れ
- UVを使って、ローカルでPyQt5を使った簡単アプリの起動
- GitHub Actionsのワークフローを作成(DL)
- タグの作成とリリース
サンプルレポ
開発環境
- macOS Sequoia 15.5
- VsCode
- zsh 5.9 (arm64-apple-darwin24.0)
前提条件
システムに以下がインストールされていることを確認してください:
- Python 3.10
- uv pip (インストールはこちら)
ローカルでのセットアップ
-
プロジェクトフォルダの作成
mkdir pyinstaller-CICD cd pyinstaller-CICD -
UVを使ってプロジェクトの作成
uv init -p 3.10 uv add pyqt5 pyinstaller -
app.pyの作成cat <<EOL > app.py import sys from PyQt5.QtWidgets import QApplication, QWidget, QLabel, QVBoxLayout class HelloWindow(QWidget): def __init__(self): super().__init__() self.setWindowTitle("Hello PyQt5") self.setGeometry(100, 100, 300, 100) layout = QVBoxLayout() label = QLabel("Hello from PyQt5!") layout.addWidget(label) self.setLayout(layout) if __name__ == "__main__": app = QApplication(sys.argv) window = HelloWindow() window.show() sys.exit(app.exec_()) EOL -
ローカル起動テスト
uv run app.py -
ローカルパッケージ作成テスト
uv run pyinstaller app.py -
パッケージ起動のテスト
uv run dist/app/app
GitHub ActionsでCI/CDを組む
-
.github/workflows/pyinstaller-build.ymlのダウンロード# 保存先ディレクトリ TARGET_DIR=".github/workflows" # 保存先ディレクトリを作成(存在しない場合のみ) mkdir -p "$TARGET_DIR" # ダウンロードするファイルの正しいURL FILE_URL="https://raw.githubusercontent.com/testkun08080/pyinstaller-CICD/main/.github/workflows/pyinstaller-build.yml" # ファイルをダウンロード curl -o "$TARGET_DIR/pyinstaller-build.yml" "$FILE_URL" # 結果の確認 if [ -f "$TARGET_DIR/pyinstaller-build.yml" ]; then echo "ファイルが正常に保存されました: $TARGET_DIR/pyinstaller-build.yml" else echo "ダウンロードに失敗しました。" exit 1 fi -
project.tomlへ設定を追加cat <<EOF >> pyproject.toml [tool.uv] environments = [ "sys_platform == 'win32'", "sys_platform == 'darwin'", ] constraint-dependencies = [ "pyqt5-qt5<=5.15.2; sys_platform == 'win32'", "pyqt5-qt5>=5.15.17; sys_platform == 'darwin'", ] EOF -
新しいレポジトリの作成
gh repo create username/pyinstaller-CICD --public --source=. --remote=origin -
コミットとプッシュ
git init . git add . git commit -m "Initial commit" git branch -M main git remote add origin git@github.com:testkun08080/pyinstaller-CICD.git git push -u origin main -
タグの作成
git tag -a v1.0.0 -m "Release version 1.0.0" -
リリース
git push origin v1.0.0 -
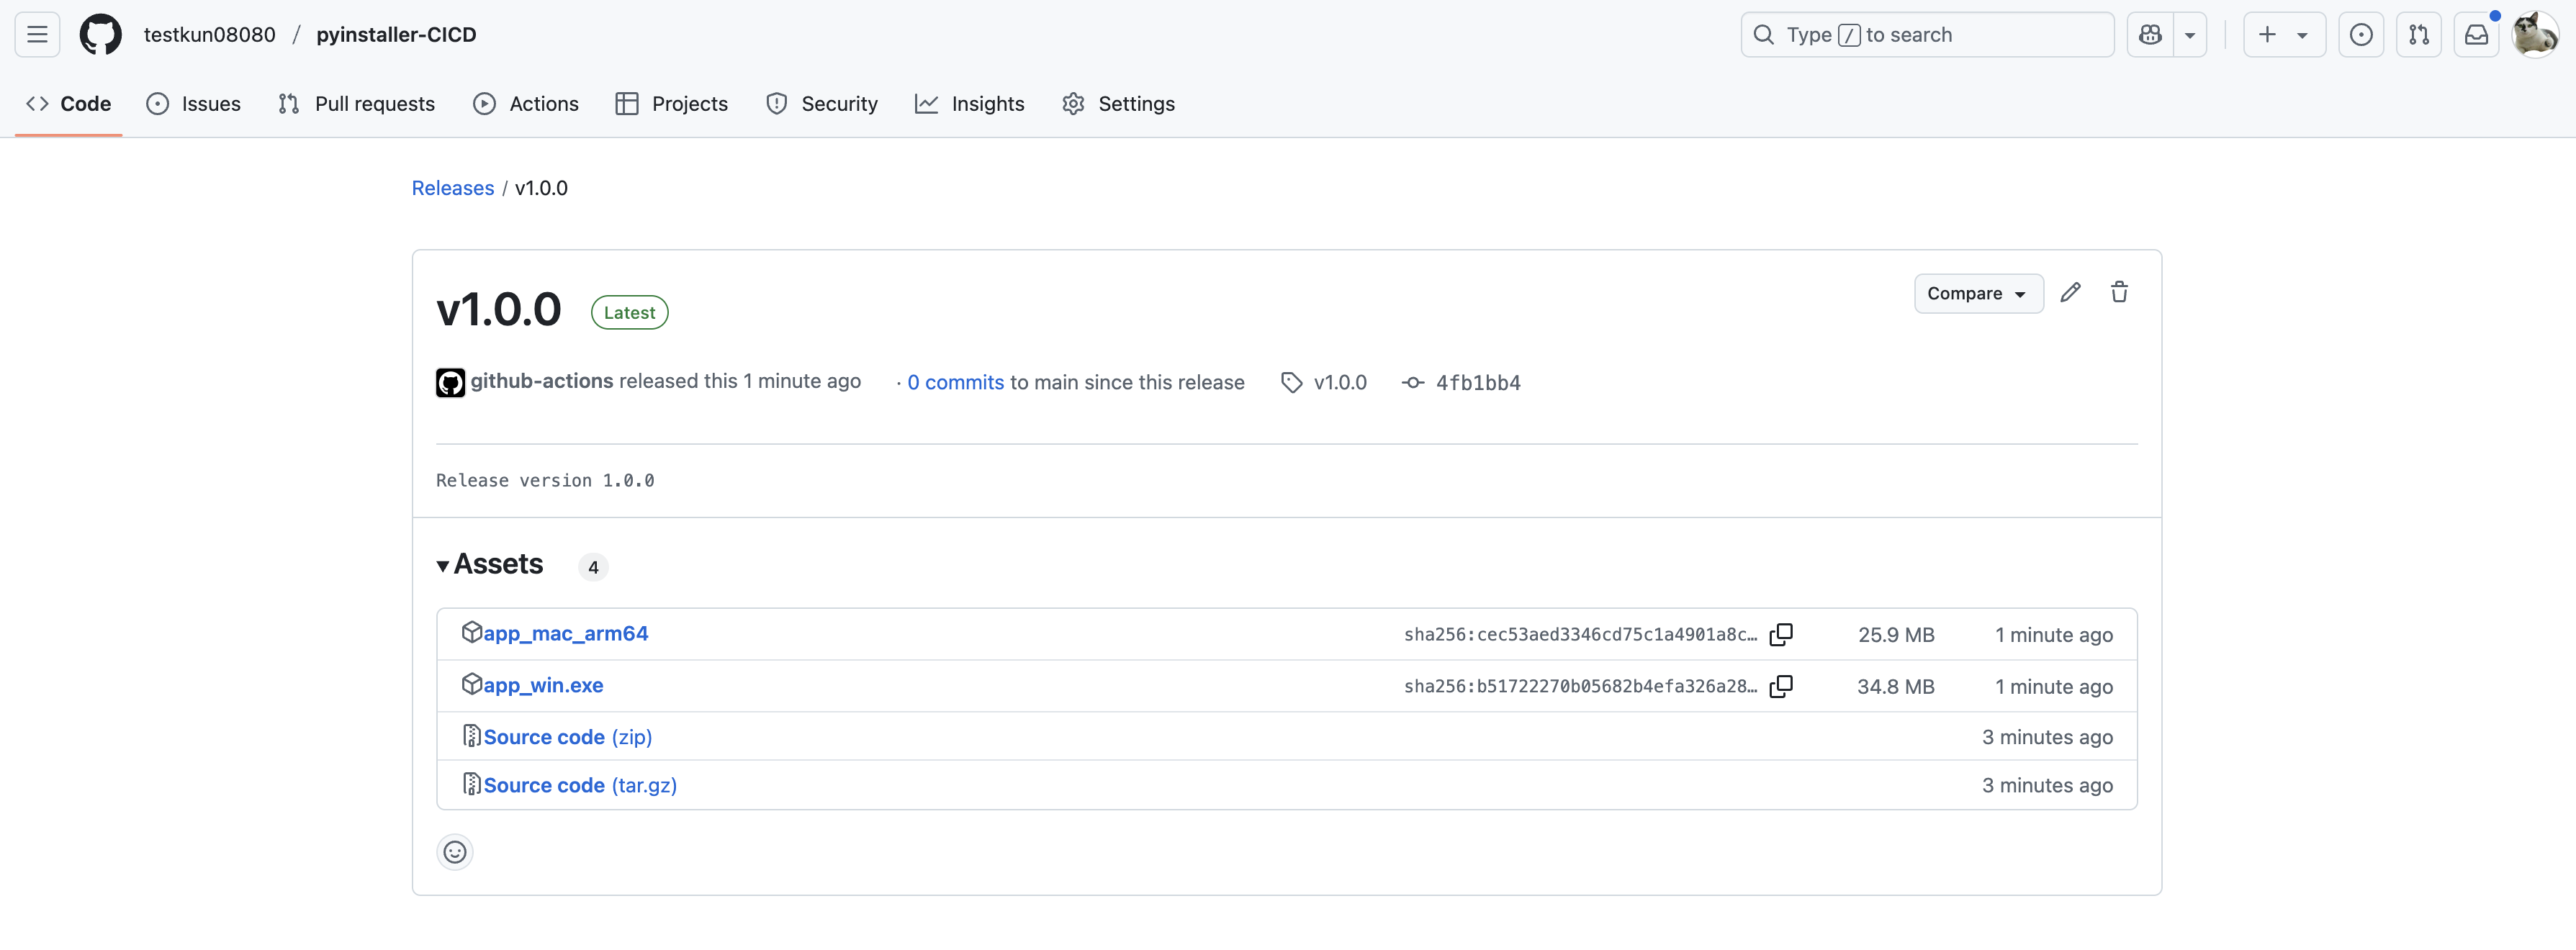
ご自身のリリースページへ行って以下の様にリリースされていれば成功です。

このレポのリリースページはこんな感じです。
テストでパッケージを作成しまくって、消す際に役立ったコマンド集
-
タグ確認
git tag git ls-remote --tags origin -
タグ消し
git tag -d $(git tag) git push origin --delete $(git tag -l) -
リリース確認
gh release list git ls-remote --tags origin -
リリース消去
gh release list | awk '{print $1}' | xargs -n1 gh release delete -y
まとめ
Actionsのワークフローを組むときに、uvの設定ファイルで少し手こずってしまいました。
win_amd64とsys_platformには書いていましたが、正解はwin32でした。(🤔)
pyinstaller と GitHubActionsを使う人に役立てたら幸いです。
何かミスなどがあれば、コメントください〜
では!
Discussion