Strapi を試してみる
このスクラップについて
このスクラップでは Node.js の Headless CMS である Strapi を試してみる。
まだよく Strapi のことをわかっていないが管理画面みたいなものを簡単に作れるのではないかと期待している。
前回のスクラップ
前回は決済サービスの Stripe を試してみた。
どうでも良いが Strapi と Stripe の字面が似ているので一瞬迷う。
はじめの一歩
今日は Quick Start を終わらせる所までを目標とする。
新しいプロジェクトの作成
npx create-strapi-app hello-strapi --quickstart
create-strapi-app のオプション
npx create-strapi-app -h で確認できる。
Usage:  create-strapi-app [options] [directory]

create a new application

Options:
  -V, --version              output the version number
  --no-run                   Do not start the application after it is created
  --use-npm                  Force usage of npm instead of yarn to create the
                             project
  --debug                    Display database connection error
  --quickstart               Quickstart app creation
  --dbclient <dbclient>      Database client
  --dbhost <dbhost>          Database host
  --dbport <dbport>          Database port
  --dbname <dbname>          Database name
  --dbusername <dbusername>  Database username
  --dbpassword <dbpassword>  Database password
  --dbssl <dbssl>            Database SSL
  --dbfile <dbfile>          Database file path for sqlite
  --dbforce                  Overwrite database content if any
  --template <templateurl>   Specify a Strapi template
  --ts, --typescript         Use TypeScript to generate the project
  -h, --help                 display help for command
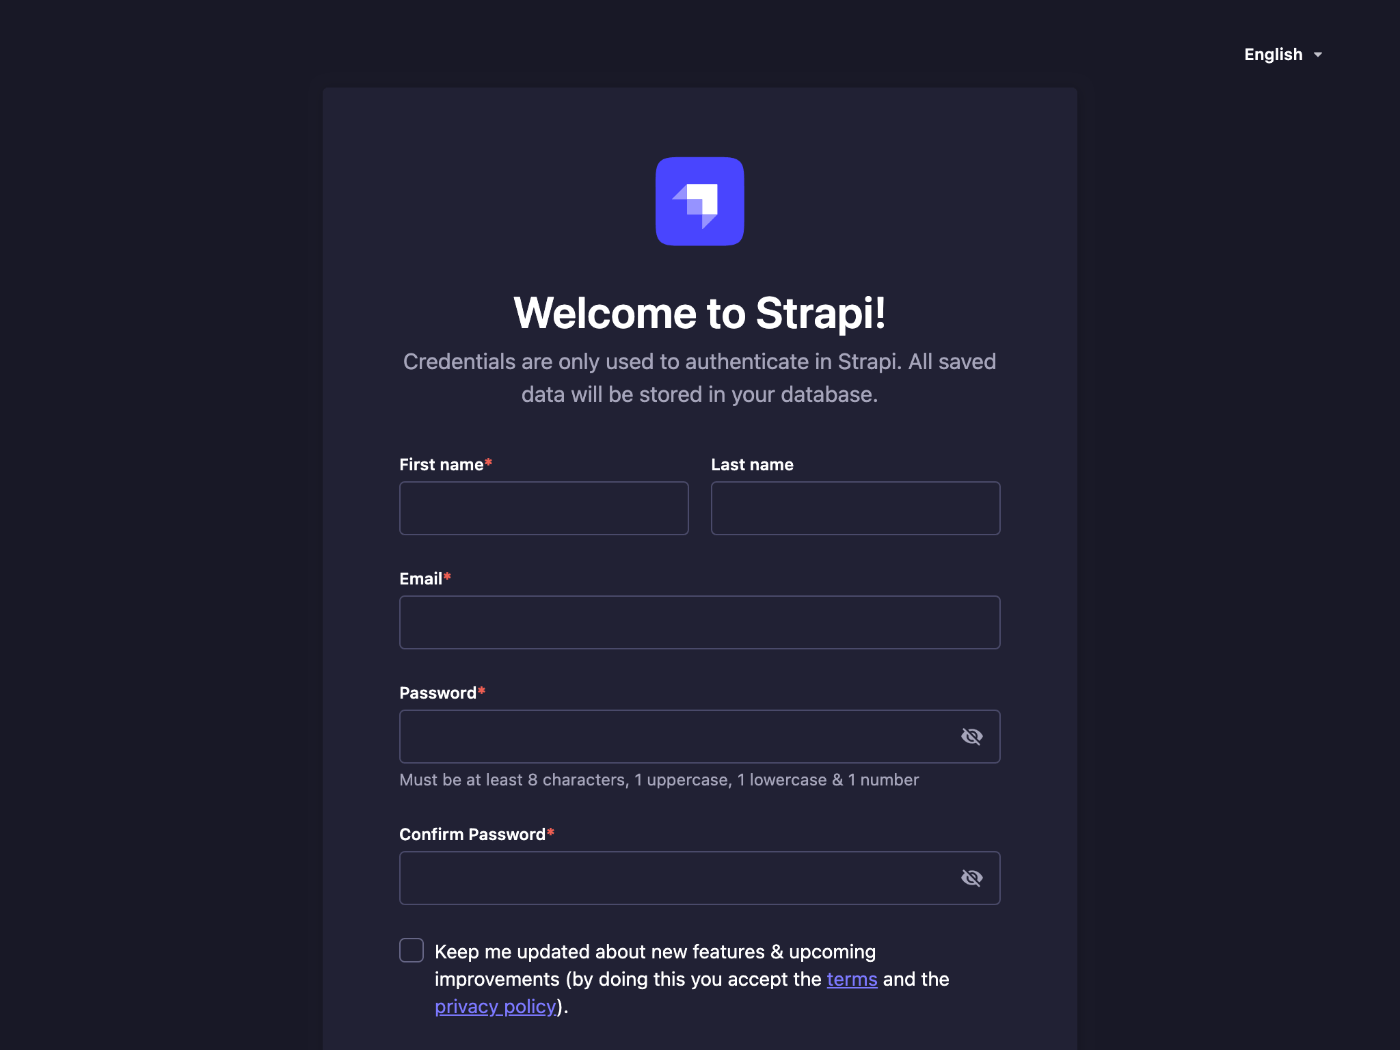
管理ユーザーの登録
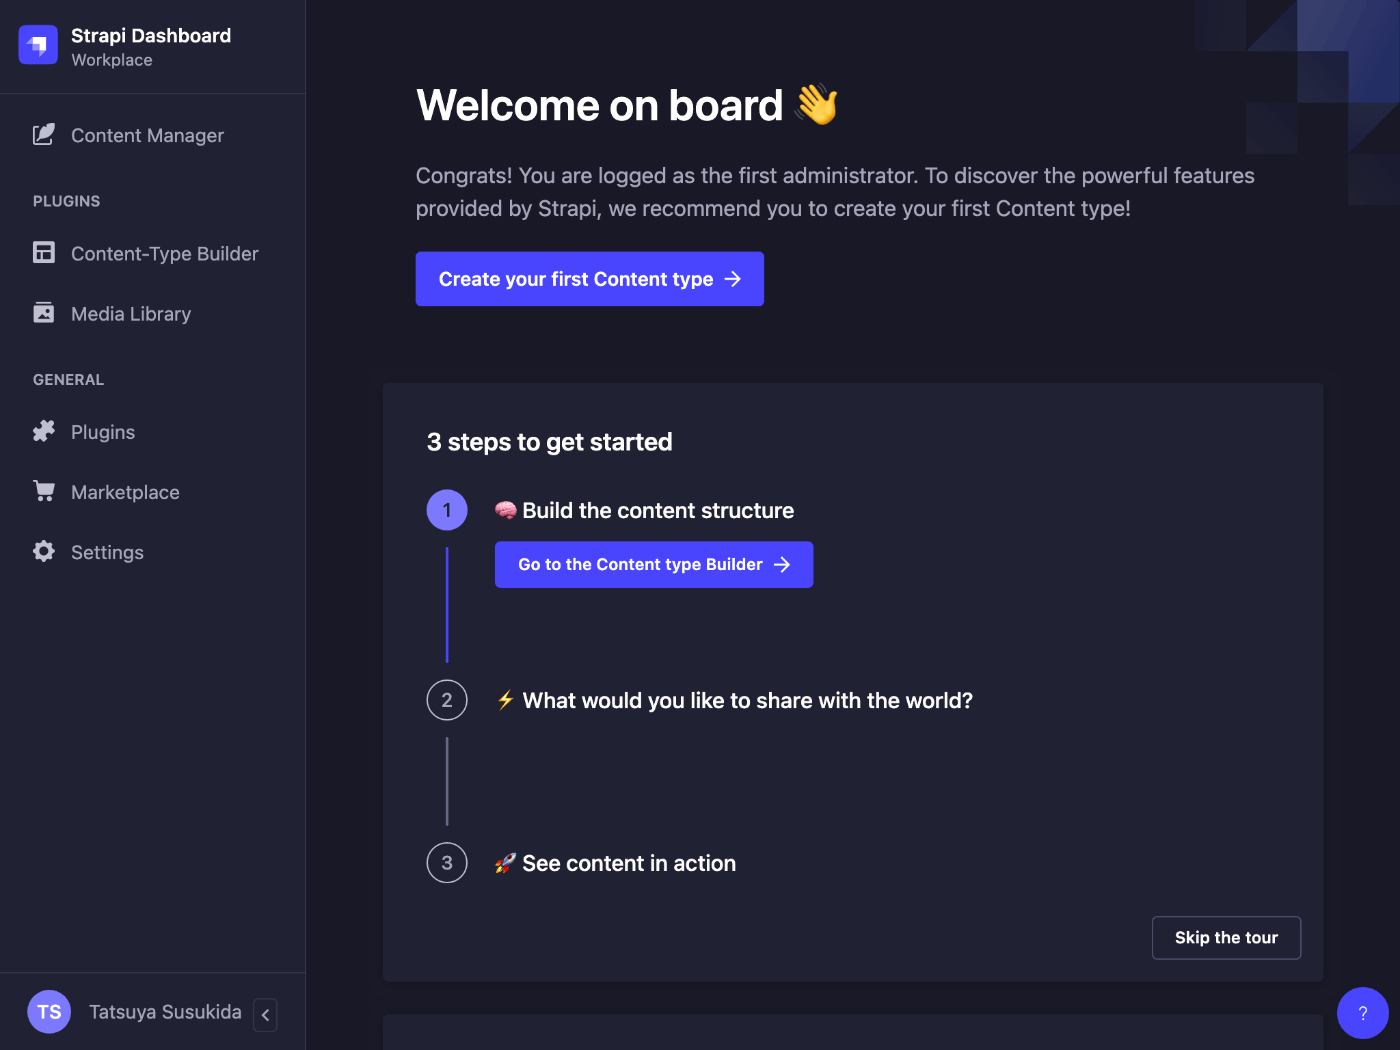
インストールが完了すると自動的に http://localhost:1337/admin/auth/register-admin がブラウザで開く。

ユーザー登録が完了するとダッシュボードが表示される。
create-strapi-app の出力
プロジェクトで利用可能なコマンドが記載されている。
Available commands in your project:

  npm run develop
  Start Strapi in watch mode. (Changes in Strapi project files will trigger a server restart)

  npm run start
  Start Strapi without watch mode.

  npm run build
  Build Strapi admin panel.

  npm run strapi
  Display all available commands.

You can start by doing:

  cd /Users/susukida/workspace/js/hello-strapi
  npm run develop
Strapi の再起動
Ctrl + C してから下記のコマンドを実行する。
cd hello-strapi
npm run develop
起動に要する時間は数秒程度。
Strapi の起動にはかなり時間がかかると聞いていたが現時点では特に遅いような様子は見受けられない。
これから色々な設定を加えていくと遅くなるのかな?
遅くなったとしてもビルドした上で非ウォッチモードで起動すれば回避できるような気がする。
コレクションタイプを作成できない
下記のようなメッセージが表示される。
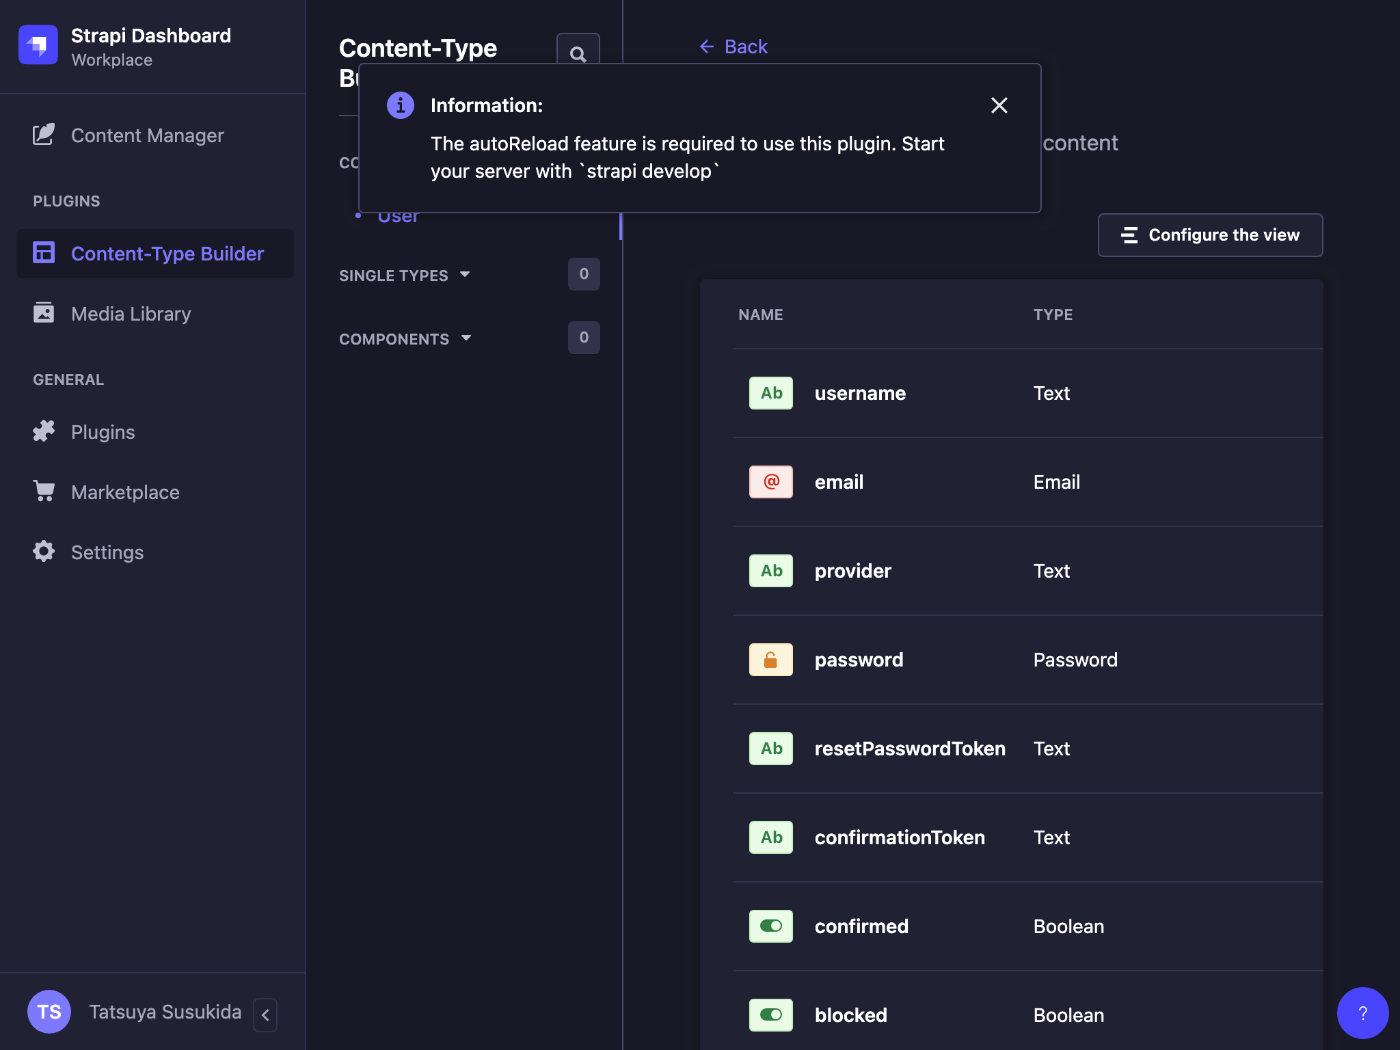
再ログインしたら改善した
ログアウトするには左下の自分の名前を押す。
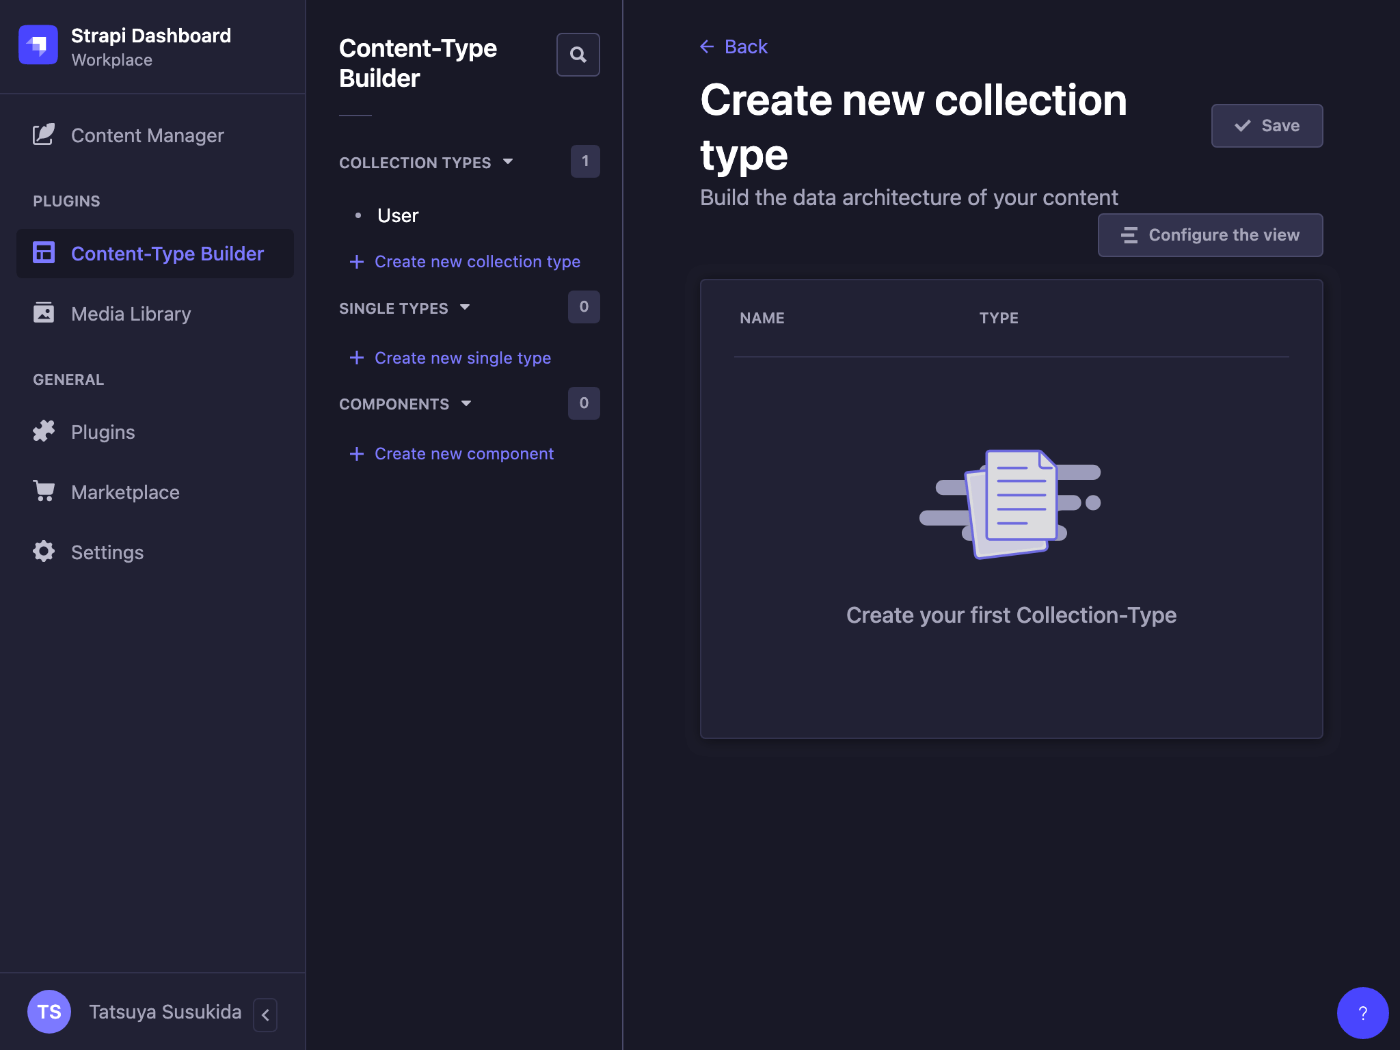
コレクションの作成

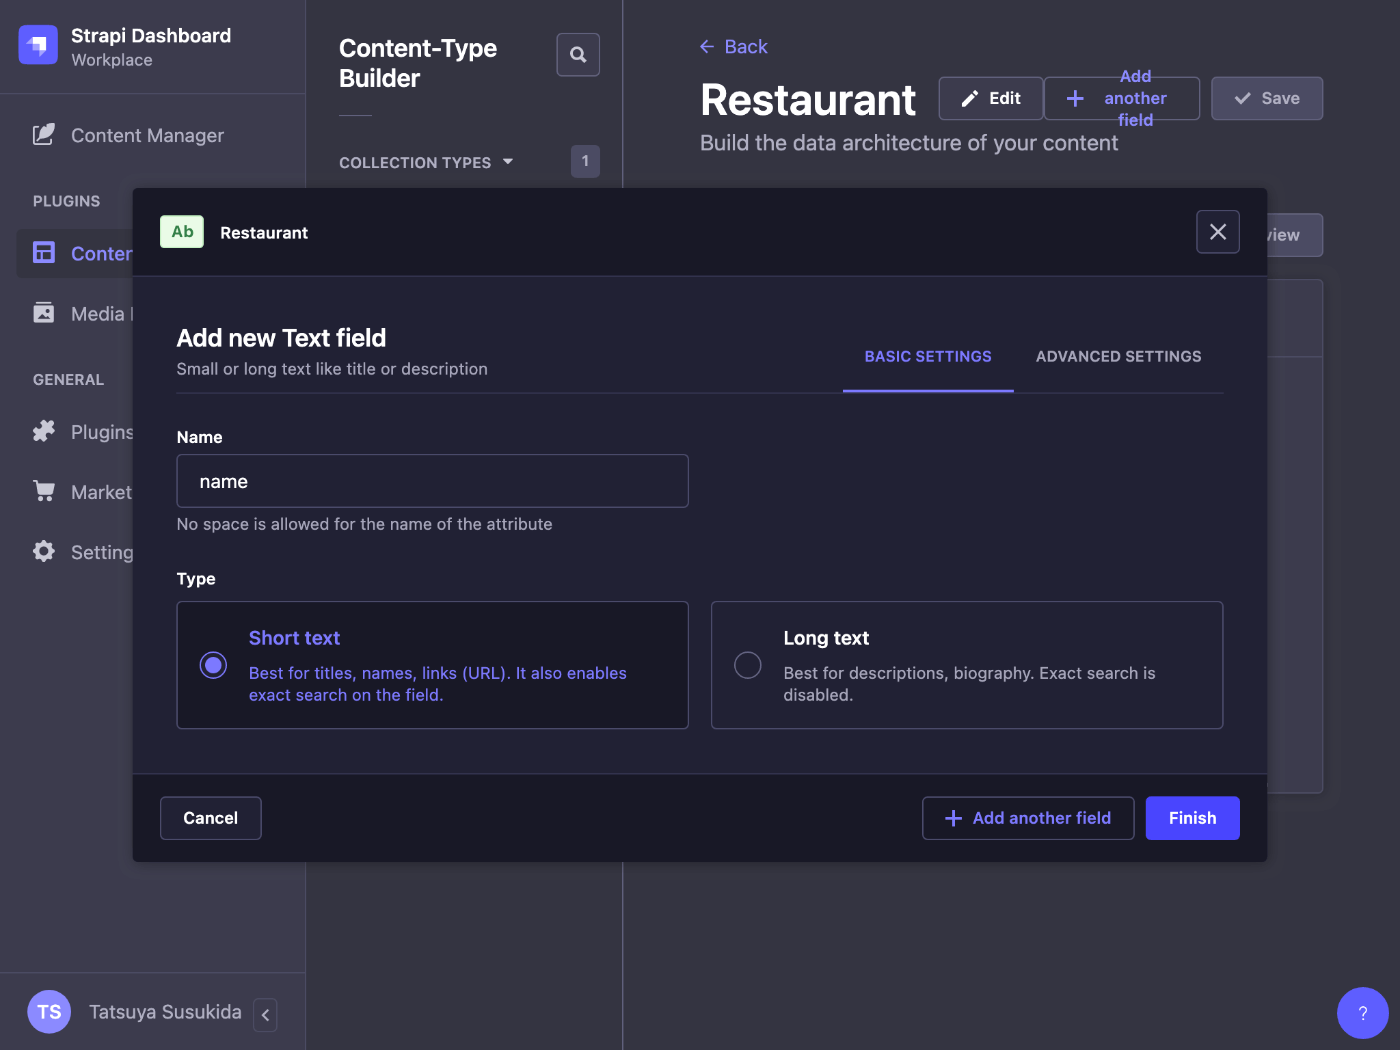

勢い余って登録してしまったが required & unique にする必要があるようだ。
ペンのアイコンをクリックして編集する。
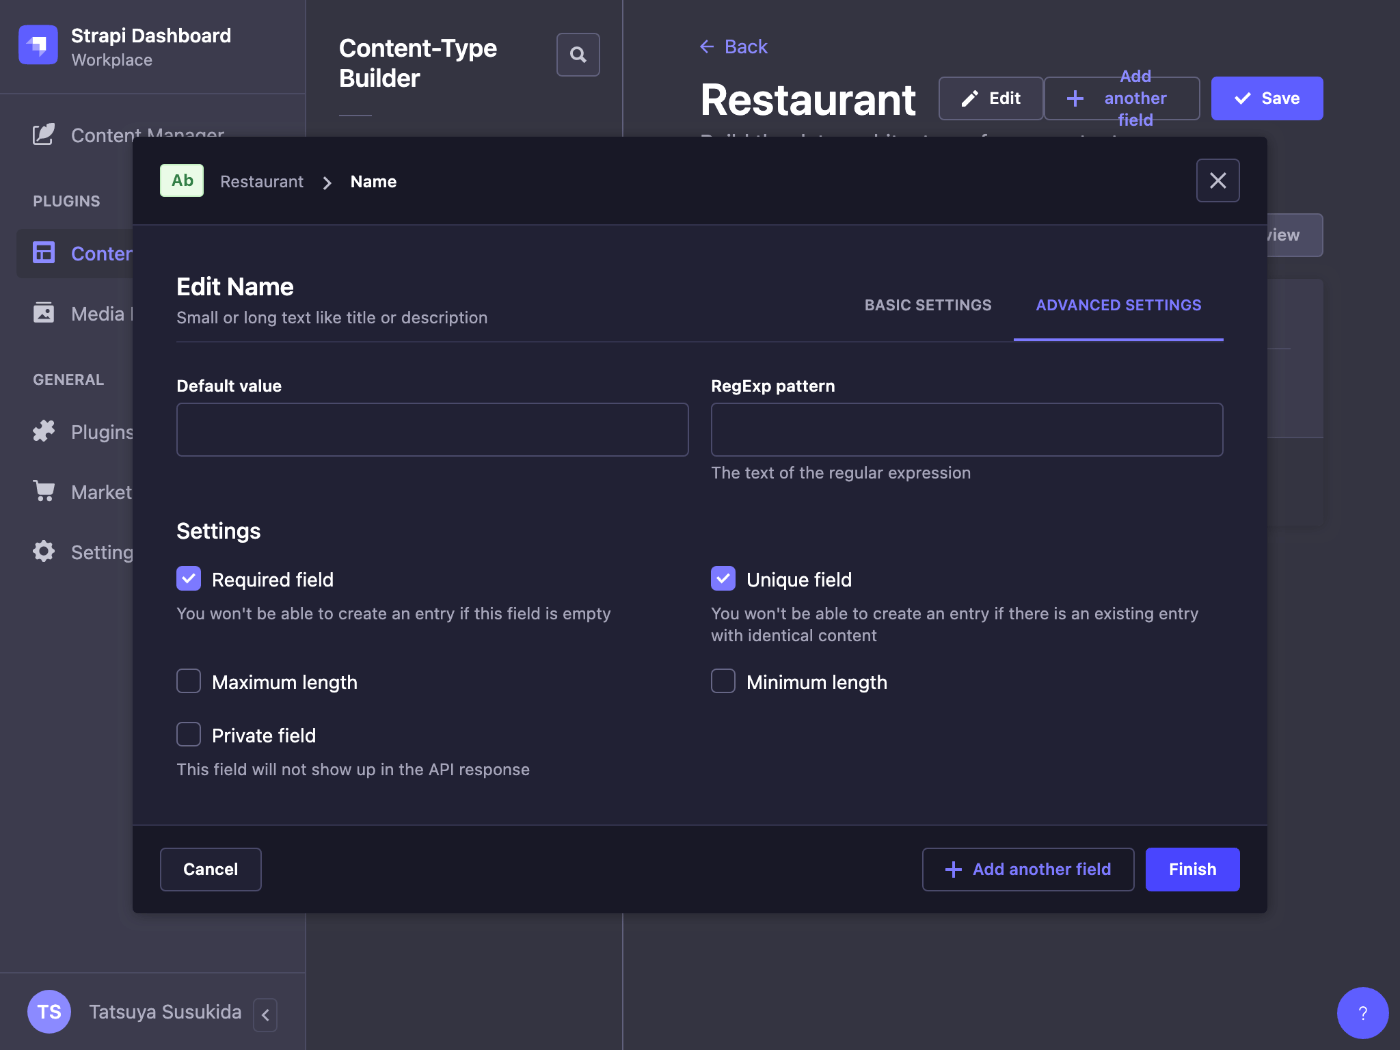

Save ボタンを押すと Strapi が再起動する。

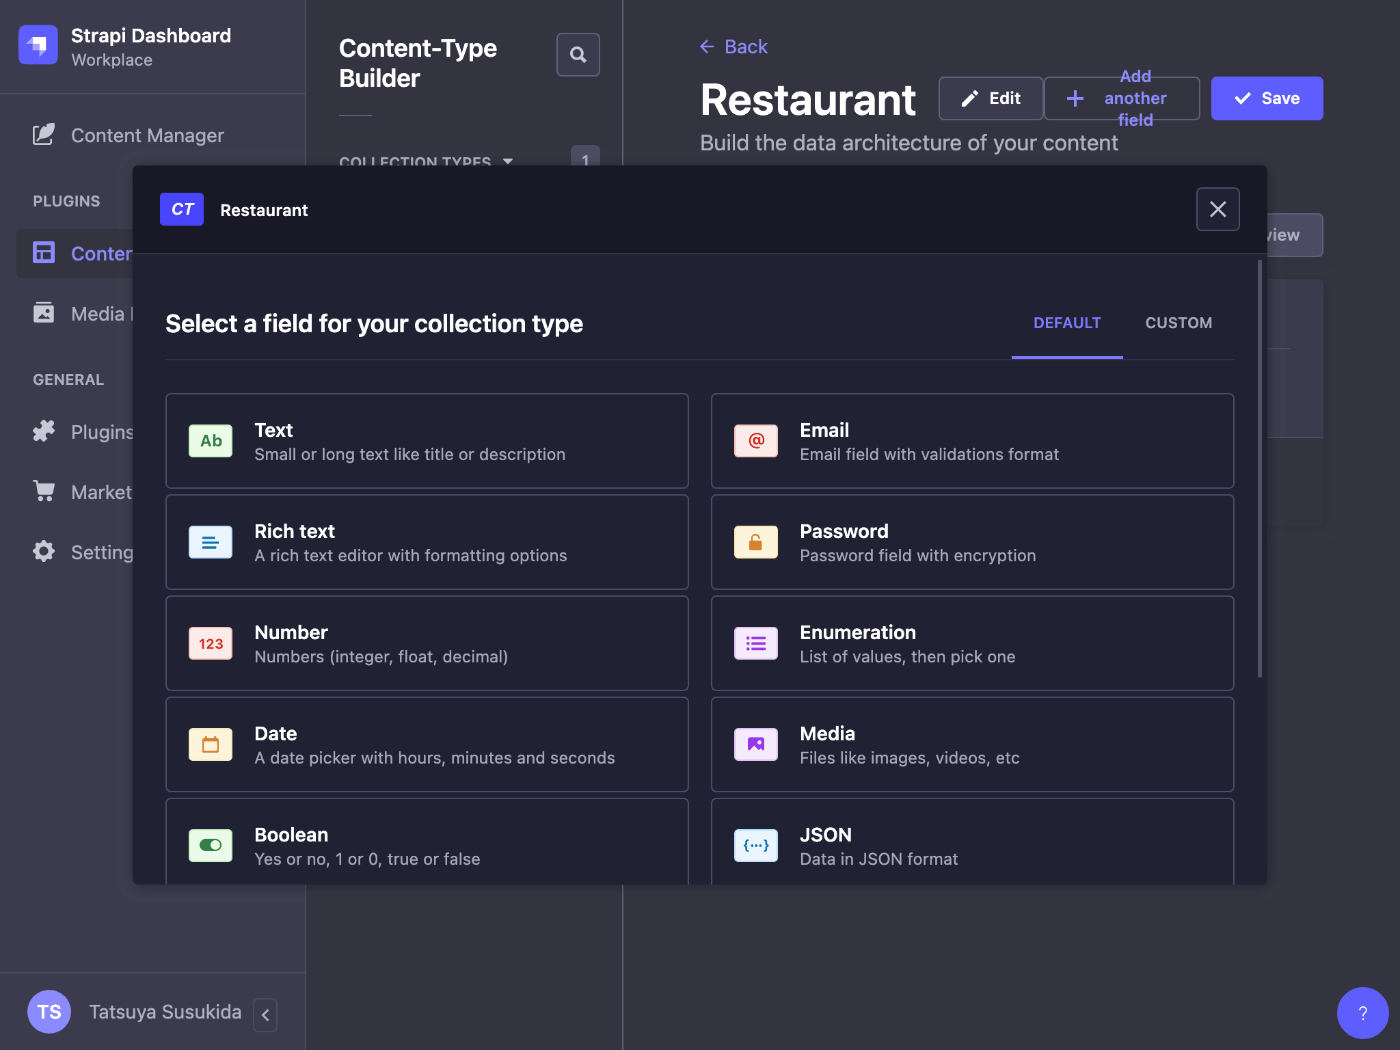
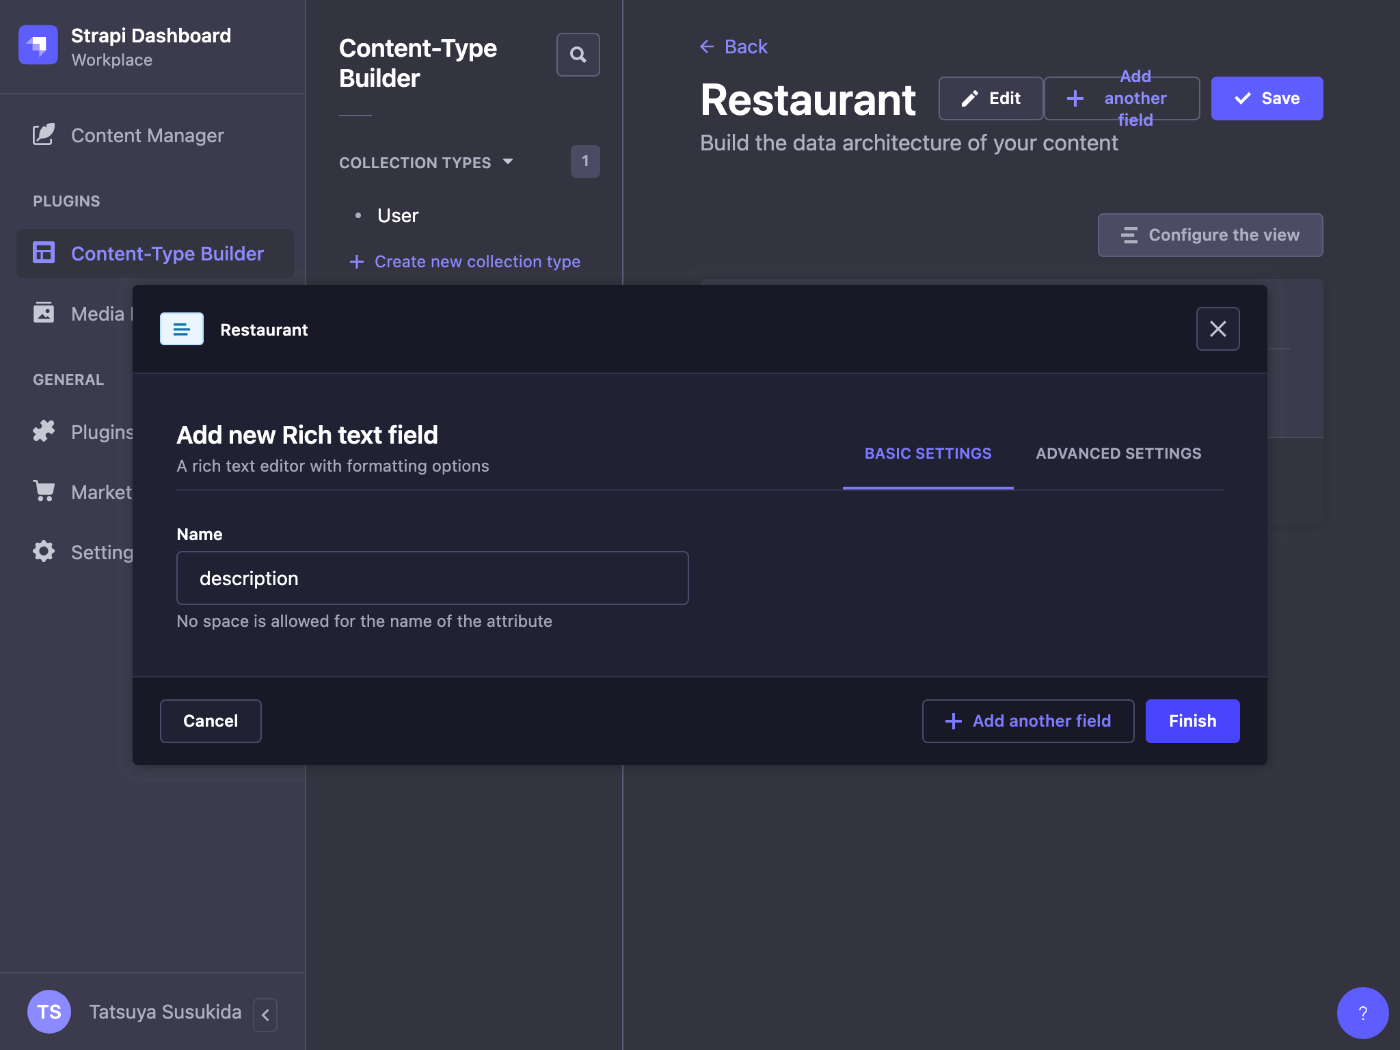
Category コレクションタイプの登録
同様の手順で name フィールドを持つ Category コレクションタイプを登録する。

次に Relation フィールドを追加する。

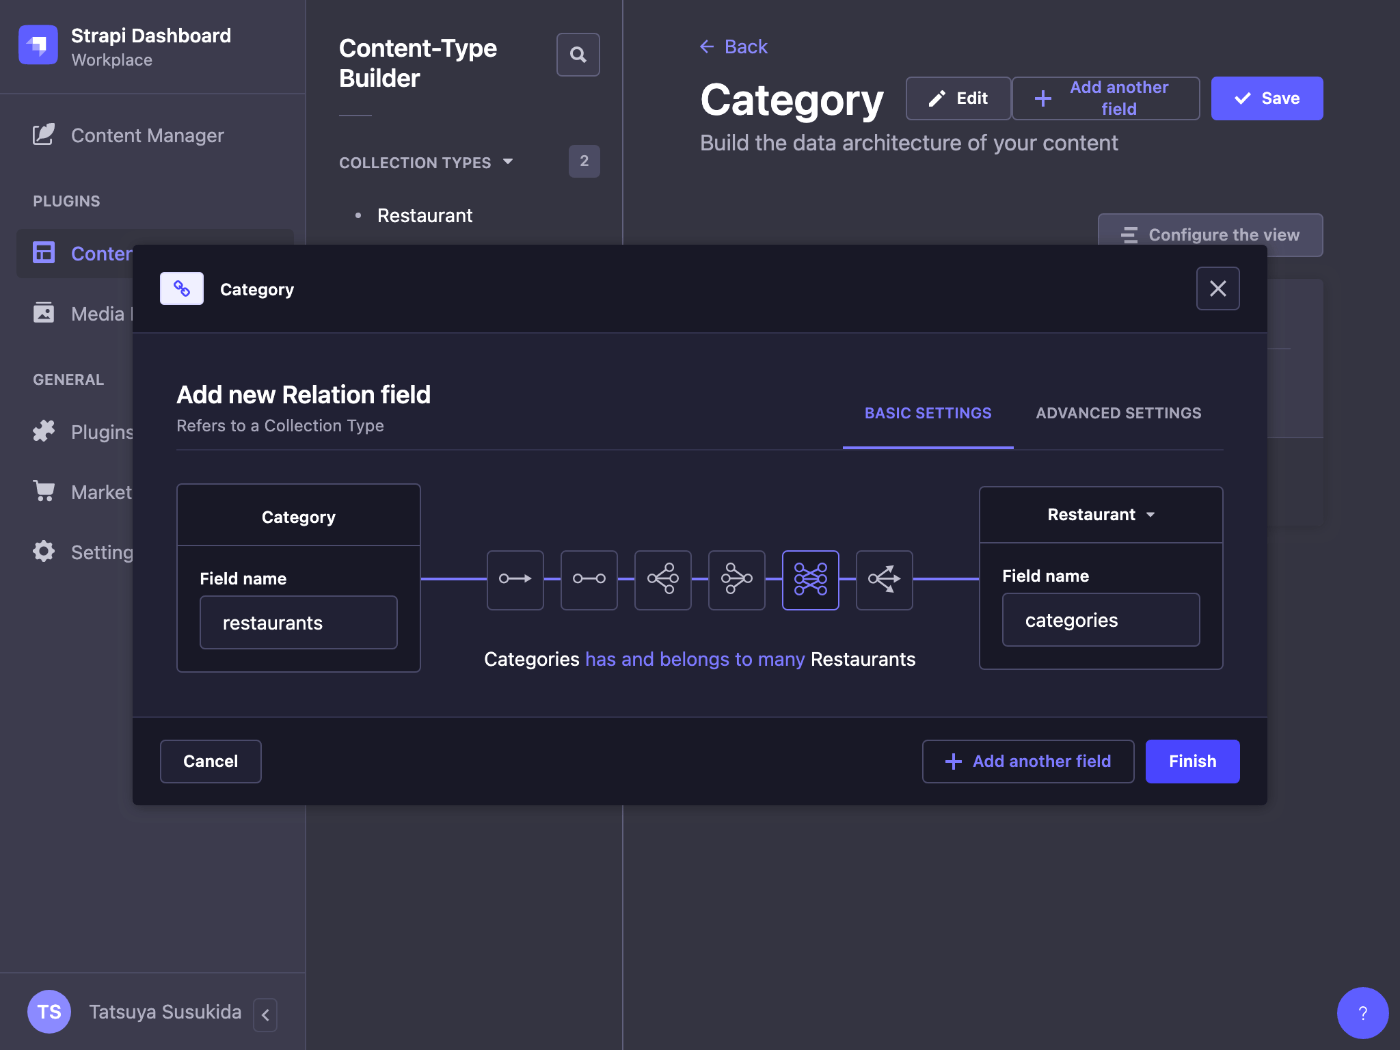
Save ボタンを忘れずに押す。

カテゴリの登録
ページ左のナビゲーションから Content Manager > Category > Create new entry を選ぶ。
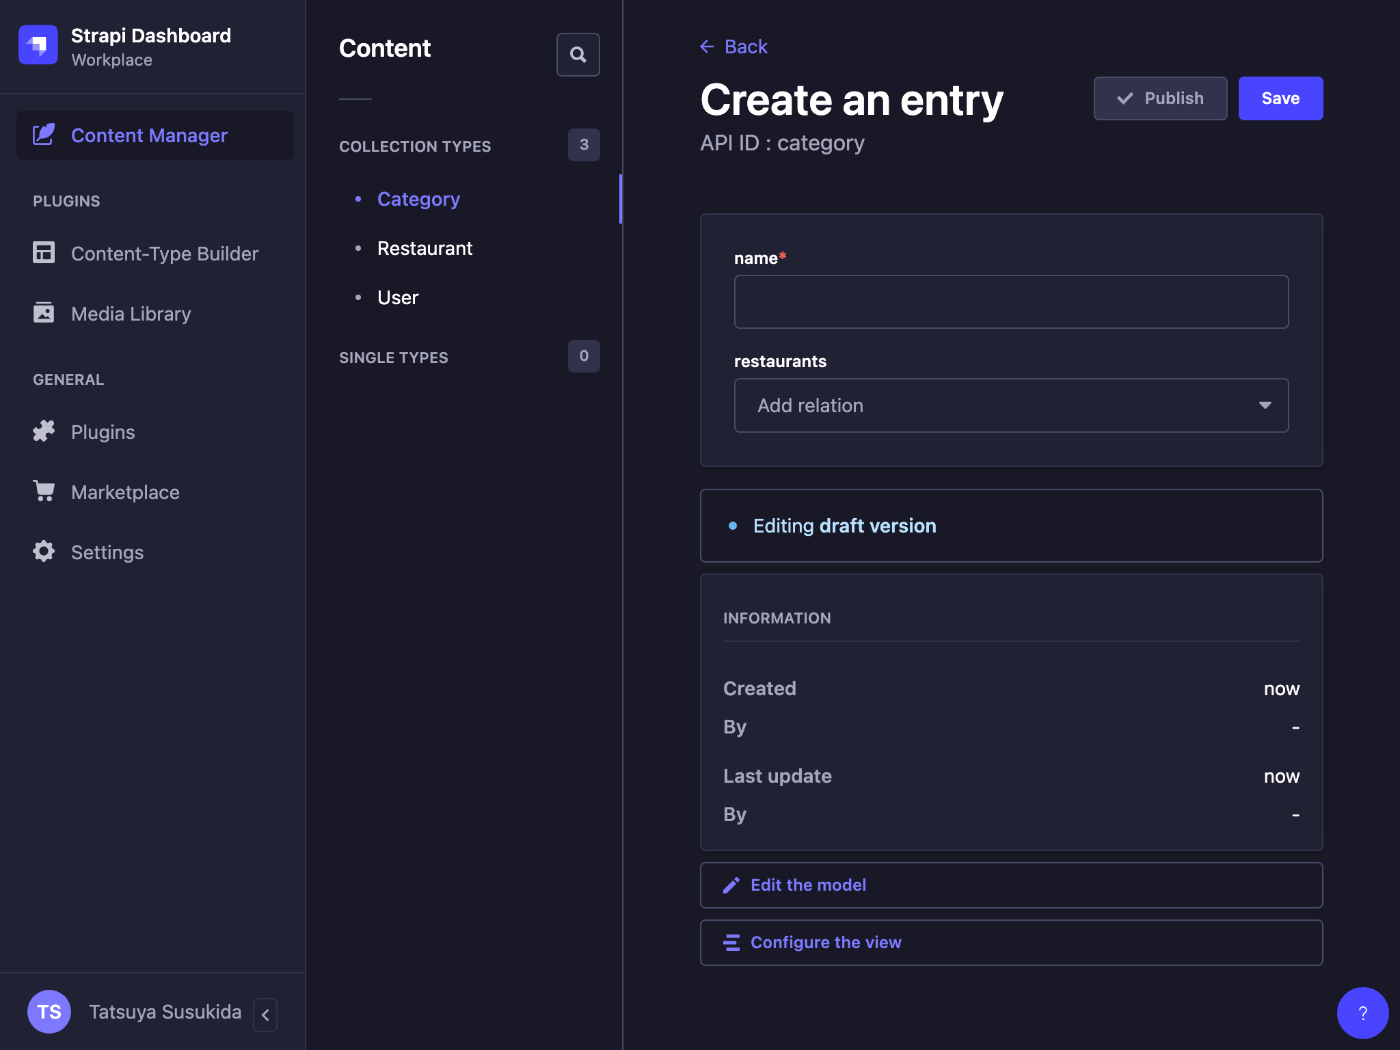
French Food と Brunch の 2 つのカテゴリを登録する。
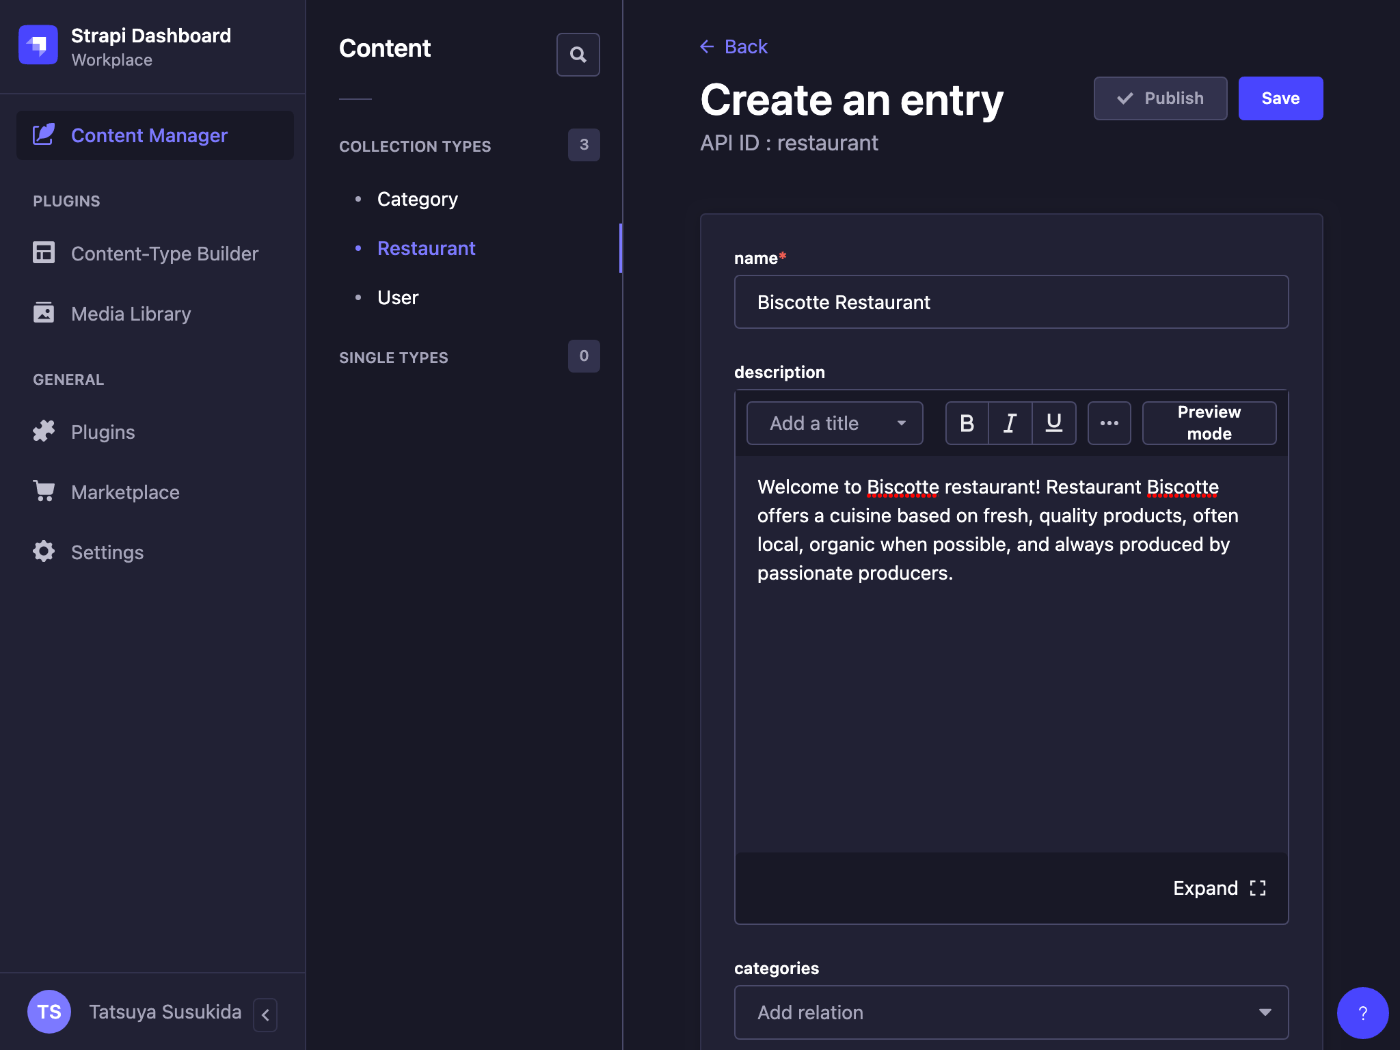
レストランの登録
あら、手順を 1 つ飛ばしていた。
本来はレストランを登録してからカテゴリを登録するようだ。
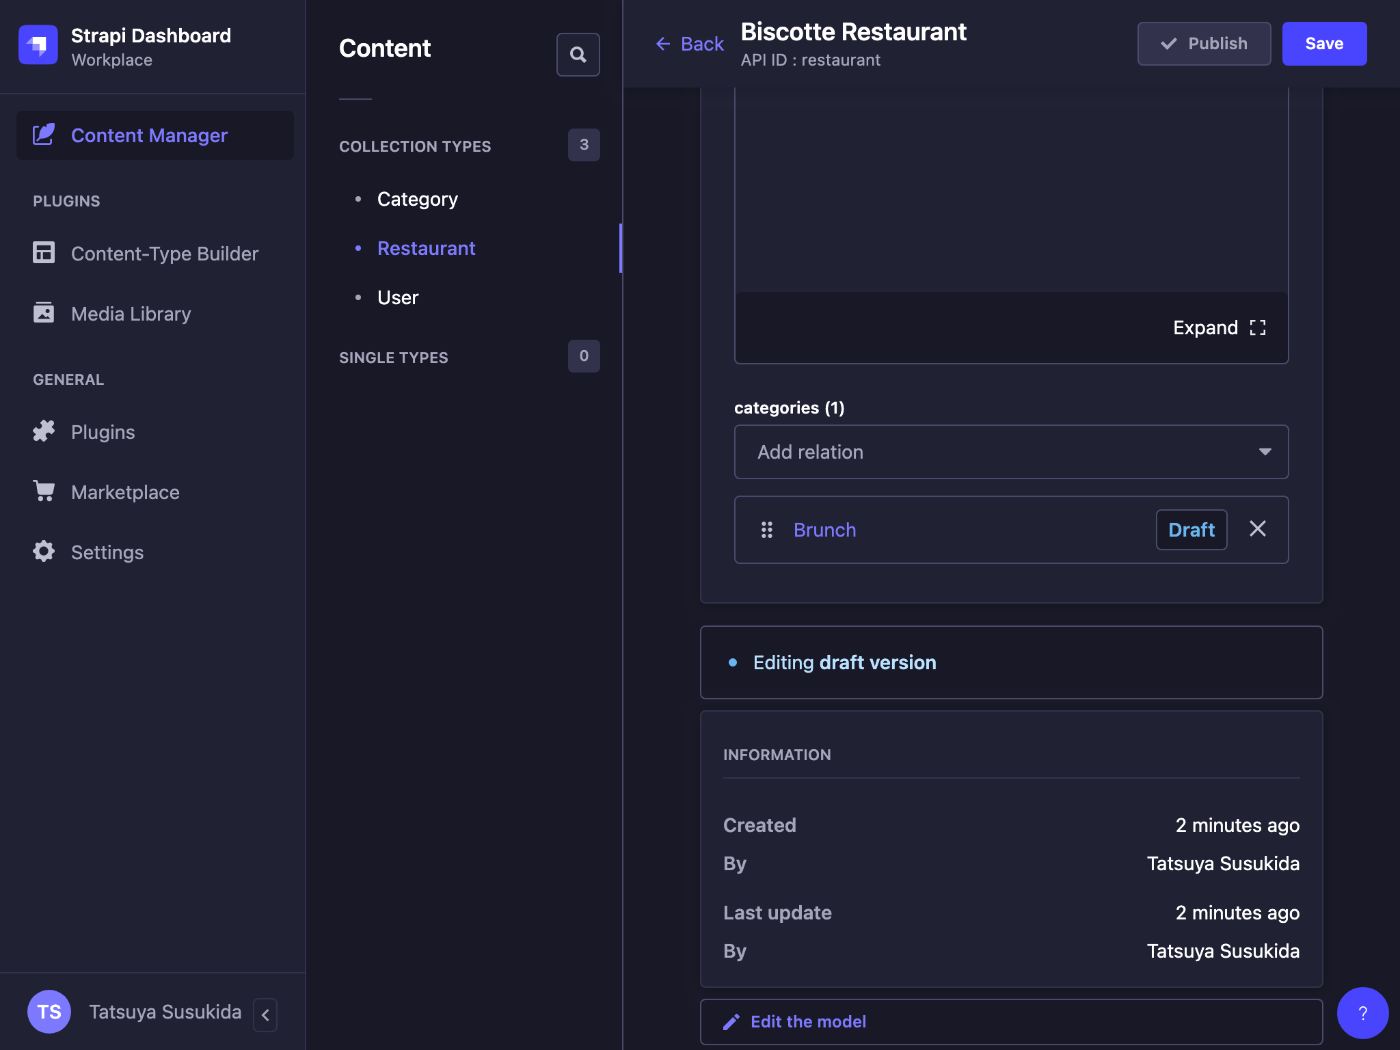
レストランとの紐付け
登録したレストラン情報を編集してカテゴリとレストランを紐付ける。
パーミッションの設定
サイドナビゲーションから Settings > Roles > Public を選ぶ。

カテゴリとレストランの find + findone を許可する。
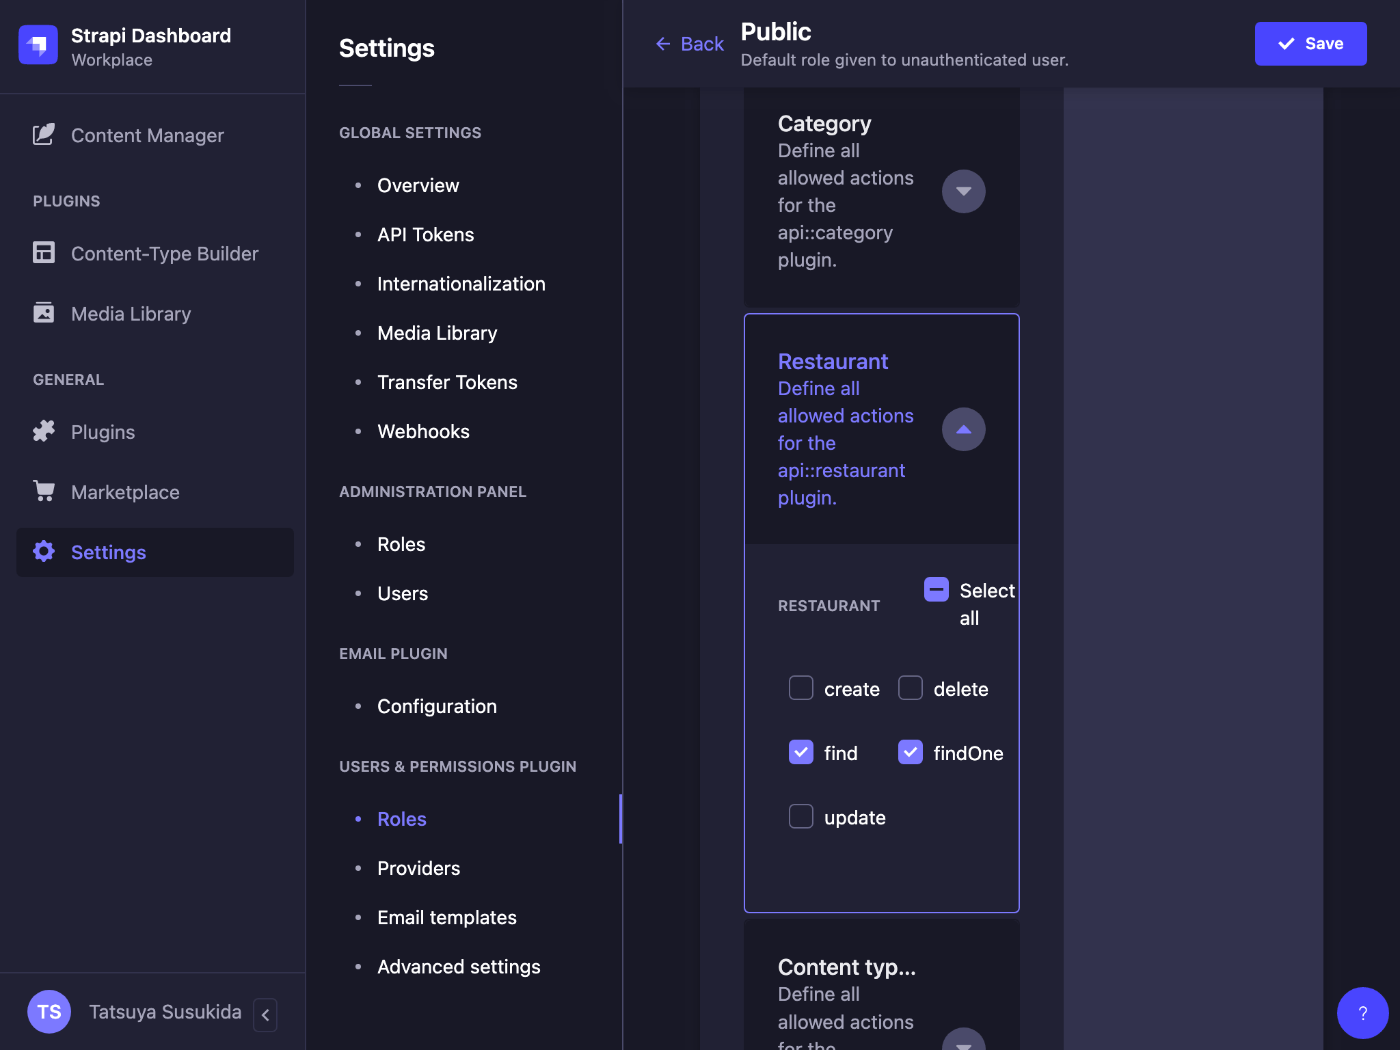
忘れずに Save ボタンを押す。
コンテンツの公開
カテゴリ 2 件とレストラン 1 件の編集ページへ移動して Publish ボタンを押す。
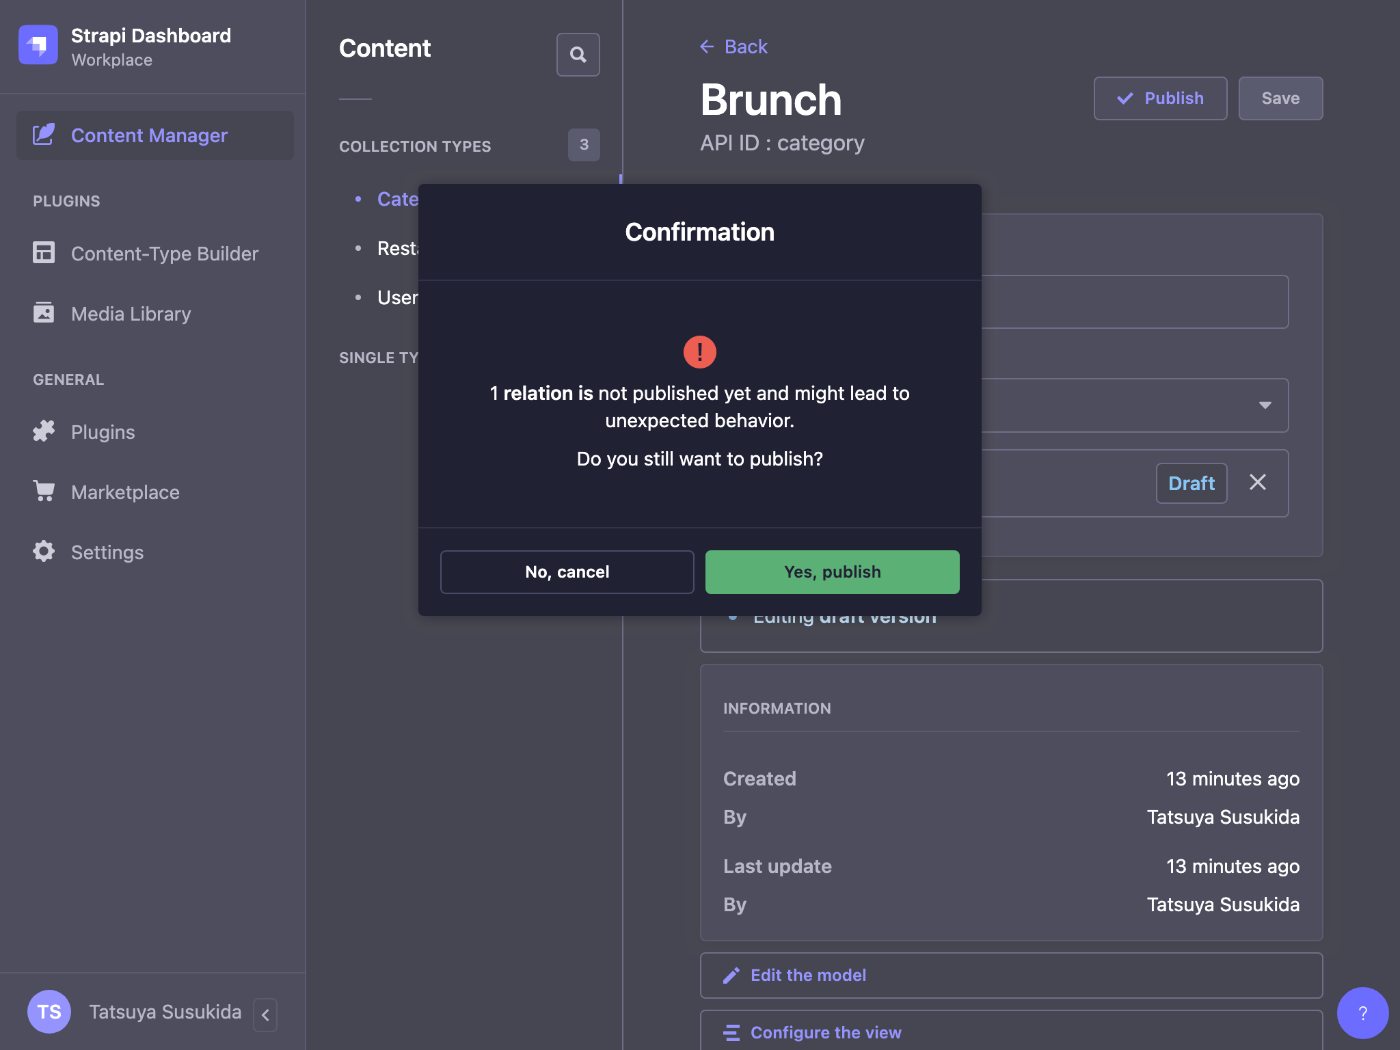
Brunch カテゴリでは確認モーダルが表示されるけど Yes, publish ボタンを押して大丈夫。
API の使用
ブラウザで http://localhost:1337/api/restaurants にアクセスする。
下記の JSON レスポンスが表示されれば成功。
{
  "data": [
    {
      "id": 1,
      "attributes": {
        "name": "Biscotte Restaurant",
        "description": "Welcome to Biscotte restaurant! Restaurant Biscotte offers a cuisine based on fresh, quality products, often local, organic when possible, and always produced by passionate producers.\n",
        "createdAt": "2023-03-11T10:25:45.475Z",
        "updatedAt": "2023-03-11T10:37:10.638Z",
        "publishedAt": "2023-03-11T10:37:10.637Z"
      }
    }
  ],
  "meta": {
    "pagination": { "page": 1, "pageSize": 25, "pageCount": 1, "total": 1 }
  }
}
今日はここまで
来週は日本語化する方法、ユーザー種別を追加する方法、Prisma と連携する方法について調べてみたい。
Prisma との連携
npx prisma db pull コマンドが利用できそう。
調べたいこと追加
Strapi を CloudRun で運用する方法についても調べたい。
下記の記事が参考になりそう。
なんとなくだけど Strapi を CloudRun で運用する場合はデータベース構造を変更しない方が良さそう。
あと環境変数から接続文字列を取得できると良いな。
さらに言うと Cloud SQL を使えると良いな。
FAQ が本当に参考になる
公式ドキュメントの FAQ が気になっていた部分について書かれていてとても勉強になる。
ファイルアップロードに AWS S3 を使える
下記の記事が分かりやすそう。
MySQL を試す
まずは重要度の高い Cloud Run + Cloud SQL を検証したい所だがその前に MySQL を試してみよう。
npx create-strapi-app hello-strapi-mysql を実行すると対話モードが開始するので下記のように回答する。
- Choose your installation type: Custom (manual settings)
- Choose your preferred language: TypeScript
- Choose your default database client: mysql
- Database name: strapi_db
- Host: 127.0.0.1
- Port: 3306
- Username: strapi_user
- Password: strapi_pass
- Enable SSL connection: N
下記のコマンドを実行してデータベースを作成する。
mysql -u root -e 'create database strapi_db charset utf8'
mysql -u root -e 'create user strapi_user@localhost identified by "strapi_pass"'
mysql -u root -e 'grant all privileges on strapi_db.* to strapi_user@localhost'
cd hello-strapi-mysql してから npm run develop を実行すると下記のようなエラーメッセージが表示される。
[2023-03-13 08:30:35.263] debug: ⛔️ Server wasn't able to start properly.
[2023-03-13 08:30:35.265] error: ER_NOT_SUPPORTED_AUTH_MODE: Client does not support authentication protocol requested by server; consider upgrading MySQL client
原因は Strapi が mysql2 ではなく mysql パッケージを使っていて MySQL 8 に対応していないことのようだ。
仕方がないので mysql_native_password を使う。
mysql -u root -e 'alter user strapi_user@localhost identified with mysql_native_password by "strapi_pass"'
今度はうまく行った。

データベースを覗いてみる
下記のコマンドを実行する。
mysql -u root strapi_db -e 'show tables'
+-----------------------------------------------+
| Tables_in_strapi_db                           |
+-----------------------------------------------+
| admin_permissions                             |
| admin_permissions_role_links                  |
| admin_roles                                   |
| admin_users                                   |
| admin_users_roles_links                       |
| files                                         |
| files_folder_links                            |
| files_related_morphs                          |
| i18n_locale                                   |
| strapi_api_token_permissions                  |
| strapi_api_token_permissions_token_links      |
| strapi_api_tokens                             |
| strapi_core_store_settings                    |
| strapi_database_schema                        |
| strapi_migrations                             |
| strapi_transfer_token_permissions             |
| strapi_transfer_token_permissions_token_links |
| strapi_transfer_tokens                        |
| strapi_webhooks                               |
| up_permissions                                |
| up_permissions_role_links                     |
| up_roles                                      |
| up_users                                      |
| up_users_role_links                           |
| upload_folders                                |
| upload_folders_parent_links                   |
+-----------------------------------------------+
コレクションタイプの追加
name フィールドを持つ Category コレクションタイプを追加してから下記のコマンドを実行する。
mysql -u root strapi_db -e 'show create table categories \G'
*************************** 1. row ***************************
       Table: categories
Create Table: CREATE TABLE `categories` (
  `id` int unsigned NOT NULL AUTO_INCREMENT,
  `name` varchar(255) DEFAULT NULL,
  `created_at` datetime(6) DEFAULT NULL,
  `updated_at` datetime(6) DEFAULT NULL,
  `published_at` datetime(6) DEFAULT NULL,
  `created_by_id` int unsigned DEFAULT NULL,
  `updated_by_id` int unsigned DEFAULT NULL,
  PRIMARY KEY (`id`),
  KEY `categories_created_by_id_fk` (`created_by_id`),
  KEY `categories_updated_by_id_fk` (`updated_by_id`),
  CONSTRAINT `categories_created_by_id_fk` FOREIGN KEY (`created_by_id`) REFERENCES `admin_users` (`id`) ON DELETE SET NULL,
  CONSTRAINT `categories_updated_by_id_fk` FOREIGN KEY (`updated_by_id`) REFERENCES `admin_users` (`id`) ON DELETE SET NULL
) ENGINE=InnoDB DEFAULT CHARSET=utf8mb3
コレクションタイプの設定はどこに保存される?
src/api/category/content-types/category/schema.json にあった。
その他、何がどこにあるかについては下記が詳しい。
開発環境から本番環境にデータベース構造を移行する
どうすれば良い?
まずは Data Transfer の機能を試してみよう。
Heroku を参考に Cloud Run へのデプロイを考える
Strapi では production の場合はコレクションタイプなどを変更できない認識だが、もしかしてデータベースのテーブルは無い場合に自動的に作ってもらえるのかな?
Cloud SQL への接続方法
まずは開発用に借りている CloudSQL で試してみようと思う。
ローカルから CloudSQL への接続方法については Cloud SQL Proxy を使用する。
cd ~/bin
curl -o cloud-sql-proxy https://storage.googleapis.com/cloud-sql-connectors/cloud-sql-proxy/v2.0.0/cloud-sql-proxy.darwin.amd64
cloud-sql-proxy --help を実行してヘルプを表示する。
全部はとても長いので後半の一部のみ抜粋する。
Usage:
  cloud-sql-proxy INSTANCE_CONNECTION_NAME... [flags]

Flags:
  -a, --address string                       (*) Address to bind Cloud SQL instance listeners. (default "127.0.0.1")
      --admin-port string                    Port for localhost-only admin server (default "9091")
  -i, --auto-iam-authn                       (*) Enables Automatic IAM Authentication for all instances
  -c, --credentials-file string              Use service account key file as a source of IAM credentials.
      --debug                                Enable the admin server on localhost
      --disable-metrics                      Disable Cloud Monitoring integration (used with --telemetry-project)
      --disable-traces                       Disable Cloud Trace integration (used with --telemetry-project)
      --fuse string                          Mount a directory at the path using FUSE to access Cloud SQL instances.
      --fuse-tmp-dir string                  Temp dir for Unix sockets created with FUSE (default "/var/folders/_m/_rcrfjyd4_5gtg9v65gyld7w0000gn/T/csql-tmp")
  -g, --gcloud-auth                          Use gcloud's user credentials as a source of IAM credentials.
      --health-check                         Enables health check endpoints /startup, /liveness, and /readiness on localhost.
  -h, --help                                 Display help information for cloud-sql-proxy
      --http-address string                  Address for Prometheus and health check server (default "localhost")
      --http-port string                     Port for Prometheus and health check server (default "9090")
      --impersonate-service-account string   Comma separated list of service accounts to impersonate. Last value
                                             is the target account.
  -j, --json-credentials string              Use service account key JSON as a source of IAM credentials.
      --max-connections uint                 Limit the number of connections. Default is no limit.
      --max-sigterm-delay duration           Maximum number of seconds to wait for connections to close after receiving a TERM signal.
  -p, --port int                             (*) Initial port for listeners. Subsequent listeners increment from this value.
      --private-ip                           (*) Connect to the private ip address for all instances
      --prometheus                           Enable Prometheus HTTP endpoint /metrics on localhost
      --prometheus-namespace string          Use the provided Prometheus namespace for metrics
      --quiet                                Log error messages only
      --quota-project string                 Specifies the project to use for Cloud SQL Admin API quota tracking.
                                             The IAM principal must have the "serviceusage.services.use" permission
                                             for the given project. See https://cloud.google.com/service-usage/docs/overview and
                                             https://cloud.google.com/storage/docs/requester-pays
      --sqladmin-api-endpoint string         API endpoint for all Cloud SQL Admin API requests. (default: https://sqladmin.googleapis.com)
  -l, --structured-logs                      Enable structured logging with LogEntry format
      --telemetry-prefix string              Prefix for Cloud Monitoring metrics.
      --telemetry-project string             Enable Cloud Monitoring and Cloud Trace with the provided project ID.
      --telemetry-sample-rate int            Set the Cloud Trace sample rate. A smaller number means more traces. (default 10000)
  -t, --token string                         Use bearer token as a source of IAM credentials.
  -u, --unix-socket string                   (*) Enables Unix sockets for all listeners with the provided directory.
      --user-agent string                    Space separated list of additional user agents, e.g. cloud-sql-proxy-operator/0.0.1
  -v, --version                              Print the cloud-sql-proxy version
# 念のためコンフィグレーションを有効化してログインする。
gcloud config configurations activate xxxx
gcloud auth application-default login

# 接続先のデータベースを探す。
gcloud sql instances list
gcloud sql instances describe xxxx | grep connectionName

# Cloud SQL Proxy を起動する。
# ローカルの MySQL サーバーとポート番号が競合するので 13306 を指定する。
cloud-sql-proxy --address 0.0.0.0 --port 13306 xxxx:yyyy:zzzz
うまくいくと下記の成功メッセージが表示される。
2023/03/16 08:02:39 Authorizing with Application Default Credentials
2023/03/16 08:02:40 [xxxx:yyyy:zzzz] Listening on [::]:13306
2023/03/16 08:02:40 The proxy has started successfully and is ready for new connections!
うまくいかない場合は Cloud SQL Admin API が有効になっていることを確認する。
新規ターミナルを開いて下記のコマンドを実行する。
mysql -u root -p -h 127.0.0.1 -P 13306
パスワードが正しければ MySQL 起動メッセージが表示される。
Welcome to the MySQL monitor.  Commands end with ; or \g.
Your MySQL connection id is 339944
Server version: 8.0.26-google (Google)

Copyright (c) 2000, 2023, Oracle and/or its affiliates.

Oracle is a registered trademark of Oracle Corporation and/or its
affiliates. Other names may be trademarks of their respective
owners.

Type 'help;' or '\h' for help. Type '\c' to clear the current input statement.

mysql>
Unix ソケットを使用した接続
Cloud Run では Unix ソケットを使用して接続することになる。
Strapi で Unix ソケットを接続できるかも気になるので試しておく。
mkdir -p ~/cloudsql
cloud-sql-proxy --unix-socket /cloudsql xxxx:yyyy:zzzz
2023/03/16 08:14:31 Authorizing with Application Default Credentials
2023/03/16 08:14:32 [kashima-prod:asia-northeast1:kashima-db-prod] Listening on /Users/susukida/cloudsql/kashima-prod:asia-northeast1:kashima-db-prod
2023/03/16 08:14:32 The proxy has started successfully and is ready for new connections!
新規ターミナルを開いて下記コマンドを実行する。
mysql -u root -p -S ~/cloudsql/xxxx:yyyy:zzzz
Welcome to the MySQL monitor.  Commands end with ; or \g.
Your MySQL connection id is 340066
Server version: 8.0.26-google (Google)

Copyright (c) 2000, 2023, Oracle and/or its affiliates.

Oracle is a registered trademark of Oracle Corporation and/or its
affiliates. Other names may be trademarks of their respective
owners.

Type 'help;' or '\h' for help. Type '\c' to clear the current input statement.

mysql>
Strapi 用のデータベース作成
下記の SQL 文を実行する。
create database strapi_db charset utf8;
create user strapi_user@'%' identified with mysql_native_password by 'strapi_pass';
grant all privileges on strapi_db.* to strapi_user@'%';
よく考えたら
ローカルで 2 つデータベース作れば開発環境から本番環境への移行の検証ができるのでわざわざ Cloud SQL を使う必要がなかった。
まあ Cloud Run で確認する時に結局になるし、Unix ソケットの確認には必要だったので結果オーライか。
Quick Start Again
npx create-strapi-app --quickstart hello-strapi-again
hello_strapi_again

Strapi Admin 管理者登録ページが表示されるが SQLite なので何もせずに閉じる。
ターミナルでも Ctrl + C で終了する。
SQLite → MySQL への書き換え
.env を編集する。
DATABASE_CLIENT=mysql
DATABASE_NAME=strapi_db
DATABASE_USERNAME=strapi_user
DATABASE_PASSWORD=strapi_pass
DATABASE_SOCKET=/Users/susukida/cloudsql/xxxx:yyyy:zzzz
色々試してみたけど MySQL で Unix ソケットを使う場合は config/database.js に socketPath のオプションを加える必要がある。
  const connections = {
    mysql: {
      connection: {
        connectionString: env("DATABASE_URL"),
        host: env("DATABASE_HOST", "localhost"),
        port: env.int("DATABASE_PORT", 3306),
        database: env("DATABASE_NAME", "strapi"),
        user: env("DATABASE_USERNAME", "strapi"),
        password: env("DATABASE_PASSWORD", "strapi"),
        socketPath: env("DATABASE_SOCKET", undefined), // この行を追加した。
        ssl: env.bool("DATABASE_SSL", false) && {
          key: env("DATABASE_SSL_KEY", undefined),
          cert: env("DATABASE_SSL_CERT", undefined),
          ca: env("DATABASE_SSL_CA", undefined),
          capath: env("DATABASE_SSL_CAPATH", undefined),
          cipher: env("DATABASE_SSL_CIPHER", undefined),
          rejectUnauthorized: env.bool(
            "DATABASE_SSL_REJECT_UNAUTHORIZED",
            true
          ),
        },
      },
      pool: {
        min: env.int("DATABASE_POOL_MIN", 2),
        max: env.int("DATABASE_POOL_MAX", 10),
      },
    },
  }
パッケージをインストールする、ついでに sqlite3 のパッケージをアンインストールする。
npm install mysql --save
npm uninstall better-sqlite3
紛らわしいのでローカルの方のデータベースやユーザーを削除しておく。
mysql -u root -e 'drop database strapi_db'
mysql -u root -e 'drop user strapi_user@localhost'
現時点では strapi_db は空であることを確認しておく。
use strapi_db;
show tables strapi_db;
Strapi を起動する。
npm run develop
初回起動時はテーブルなどを作成するため時間がかかる。
うまく行けば Strapi Admin 管理者登録ページが表示される。
Unix ソケットを使用して接続できることがわかって良かった。
移行の動作
開発環境 → 本番環境へ移行した場合にどうなるのか?
特にデータベース構造に変更があった場合はどうなるのか?
ローカルの MySQL サーバーで検証してみる。
まずは開発用と本番用のデータベースをそれぞれ作成する。
mysql -u root
create database strapi_db_dev charset utf8;
create database strapi_db_prod charset utf8;
create user strapi_user@localhost identified with mysql_native_password by 'strapi_pass';
grant all privileges on strapi_db_dev.* to strapi_user@localhost;
grant all privileges on strapi_db_prod.* to strapi_user@localhost;
環境変数を開発用に設定する。
DATABASE_CLIENT=mysql
DATABASE_NAME=strapi_db_dev
DATABASE_USERNAME=strapi_user
DATABASE_PASSWORD=strapi_pass
NODE_ENV=development
Strapi を起動する。
npm run develop
管理者登録して適当なコレクションタイプを追加して Save する。
テーブルが作成されたことは mysql コマンドで確認できる。
mysql -u root strapi_db_dev -e 'show create table restaurants \G'
一旦 Ctrl + C で Strapi を終了する。
環境変数を本番用に設定する。
DATABASE_CLIENT=mysql
DATABASE_NAME=strapi_db_prod
DATABASE_USERNAME=strapi_user
DATABASE_PASSWORD=strapi_pass
NODE_ENV=production
Strapi を start で起動する。
npm start
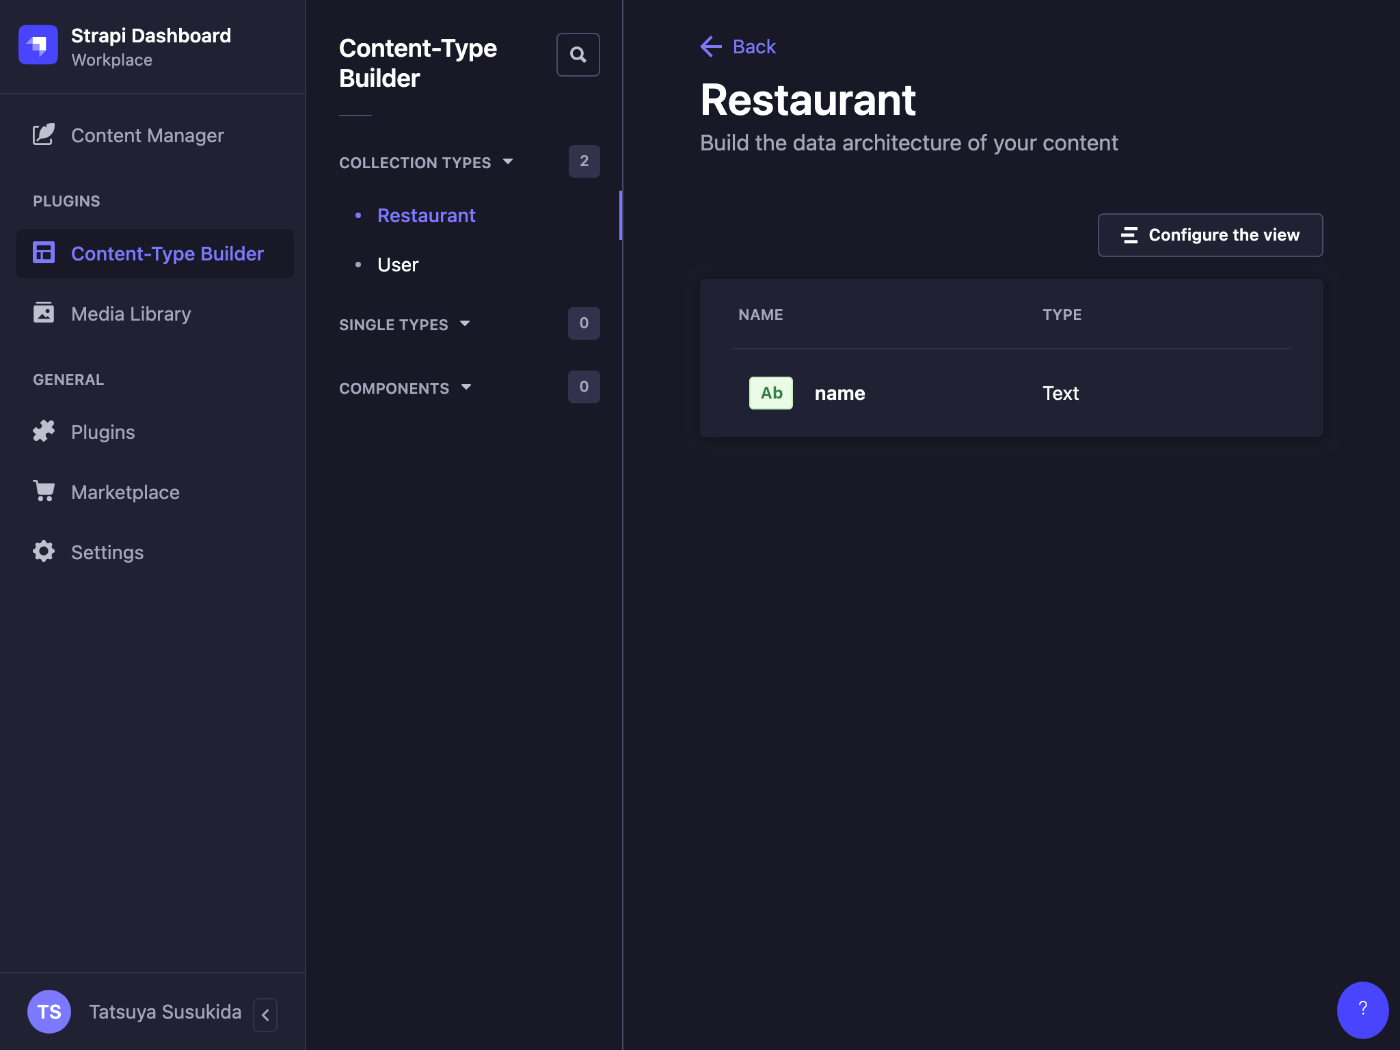
管理者登録をして Content-Type Builder を見てみる。

ちゃんと Restaurant が登録されていることがわかる。
テーブルはどうだろう?
mysql -u root strapi_db_prod -e 'show create table restaurants \G'
しっかり作成されている、素晴らしい。
コレクションタイプとフィールドを追加してみる
開発環境の方で追加した場合は本番環境に反映されるのだろうか?
Ctrl + C で Strapi を終了して環境変数を開発用に設定する。
DATABASE_CLIENT=mysql
DATABASE_NAME=strapi_db_dev
DATABASE_USERNAME=strapi_user
DATABASE_PASSWORD=strapi_pass
NODE_ENV=development
npm run develop
http://localhost:1337/admin にアクセスしてログインする。
適当なコレクションタイプを追加し、既存のコレクションタイプに適当なフィールドを追加する。
Save を忘れない。
この時点でデータベース構造を確認してみる。
mysql -u root strapi_db_dev -e 'show create table restaurants \G'
mysql -u root strapi_db_dev -e 'show create table categories \G'
CREATE TABLE `restaurants` (
  `id` int unsigned NOT NULL AUTO_INCREMENT,
  `name` varchar(255) DEFAULT NULL,
  `created_at` datetime(6) DEFAULT NULL,
  `updated_at` datetime(6) DEFAULT NULL,
  `published_at` datetime(6) DEFAULT NULL,
  `created_by_id` int unsigned DEFAULT NULL,
  `updated_by_id` int unsigned DEFAULT NULL,
  `address` varchar(255) DEFAULT NULL,
  PRIMARY KEY (`id`),
  KEY `restaurants_created_by_id_fk` (`created_by_id`),
  KEY `restaurants_updated_by_id_fk` (`updated_by_id`),
  CONSTRAINT `restaurants_created_by_id_fk` FOREIGN KEY (`created_by_id`) REFERENCES `admin_users` (`id`) ON DELETE SET NULL,
  CONSTRAINT `restaurants_updated_by_id_fk` FOREIGN KEY (`updated_by_id`) REFERENCES `admin_users` (`id`) ON DELETE SET NULL
) ENGINE=InnoDB DEFAULT CHARSET=utf8mb3
CREATE TABLE `categories` (
  `id` int unsigned NOT NULL AUTO_INCREMENT,
  `name` varchar(255) DEFAULT NULL,
  `created_at` datetime(6) DEFAULT NULL,
  `updated_at` datetime(6) DEFAULT NULL,
  `published_at` datetime(6) DEFAULT NULL,
  `created_by_id` int unsigned DEFAULT NULL,
  `updated_by_id` int unsigned DEFAULT NULL,
  PRIMARY KEY (`id`),
  KEY `categories_created_by_id_fk` (`created_by_id`),
  KEY `categories_updated_by_id_fk` (`updated_by_id`),
  CONSTRAINT `categories_created_by_id_fk` FOREIGN KEY (`created_by_id`) REFERENCES `admin_users` (`id`) ON DELETE SET NULL,
  CONSTRAINT `categories_updated_by_id_fk` FOREIGN KEY (`updated_by_id`) REFERENCES `admin_users` (`id`) ON DELETE SET NULL
) ENGINE=InnoDB DEFAULT CHARSET=utf8mb3
期待した通り。
続いて本番環境。
mysql -u root strapi_db_prod -e 'show create table restaurants \G'
mysql -u root strapi_db_prod -e 'show create table categories \G'
CREATE TABLE `restaurants` (
  `id` int unsigned NOT NULL AUTO_INCREMENT,
  `name` varchar(255) DEFAULT NULL,
  `created_at` datetime(6) DEFAULT NULL,
  `updated_at` datetime(6) DEFAULT NULL,
  `published_at` datetime(6) DEFAULT NULL,
  `created_by_id` int unsigned DEFAULT NULL,
  `updated_by_id` int unsigned DEFAULT NULL,
  PRIMARY KEY (`id`),
  KEY `restaurants_created_by_id_fk` (`created_by_id`),
  KEY `restaurants_updated_by_id_fk` (`updated_by_id`),
  CONSTRAINT `restaurants_created_by_id_fk` FOREIGN KEY (`created_by_id`) REFERENCES `admin_users` (`id`) ON DELETE SET NULL,
  CONSTRAINT `restaurants_updated_by_id_fk` FOREIGN KEY (`updated_by_id`) REFERENCES `admin_users` (`id`) ON DELETE SET NULL
) ENGINE=InnoDB DEFAULT CHARSET=utf8mb3
ERROR 1146 (42S02) at line 1: Table 'strapi_db_prod.categories' doesn't exist
こちらも期待した通り、categories はないのでエラーが正しい。
Ctrl + C で Strapi を終了して環境変数を設定する。
DATABASE_CLIENT=mysql
DATABASE_NAME=strapi_db_prod
DATABASE_USERNAME=strapi_user
DATABASE_PASSWORD=strapi_pass
NODE_ENV=production
Strapi を起動。
npm start
ログインしている場合はログインし直した方が良い。

すごいな、コレクションタイプもフィールドもしっかり追加されている。
データベース構造も再度確認する。
mysql -u root strapi_db_prod -e 'show create table restaurants \G'
mysql -u root strapi_db_prod -e 'show create table categories \G'
CREATE TABLE `restaurants` (
  `id` int unsigned NOT NULL AUTO_INCREMENT,
  `name` varchar(255) DEFAULT NULL,
  `created_at` datetime(6) DEFAULT NULL,
  `updated_at` datetime(6) DEFAULT NULL,
  `published_at` datetime(6) DEFAULT NULL,
  `created_by_id` int unsigned DEFAULT NULL,
  `updated_by_id` int unsigned DEFAULT NULL,
  `address` varchar(255) DEFAULT NULL,
  PRIMARY KEY (`id`),
  KEY `restaurants_created_by_id_fk` (`created_by_id`),
  KEY `restaurants_updated_by_id_fk` (`updated_by_id`),
  CONSTRAINT `restaurants_created_by_id_fk` FOREIGN KEY (`created_by_id`) REFERENCES `admin_users` (`id`) ON DELETE SET NULL,
  CONSTRAINT `restaurants_updated_by_id_fk` FOREIGN KEY (`updated_by_id`) REFERENCES `admin_users` (`id`) ON DELETE SET NULL
) ENGINE=InnoDB DEFAULT CHARSET=utf8mb3
CREATE TABLE `categories` (
  `id` int unsigned NOT NULL AUTO_INCREMENT,
  `name` varchar(255) DEFAULT NULL,
  `created_at` datetime(6) DEFAULT NULL,
  `updated_at` datetime(6) DEFAULT NULL,
  `published_at` datetime(6) DEFAULT NULL,
  `created_by_id` int unsigned DEFAULT NULL,
  `updated_by_id` int unsigned DEFAULT NULL,
  PRIMARY KEY (`id`),
  KEY `categories_created_by_id_fk` (`created_by_id`),
  KEY `categories_updated_by_id_fk` (`updated_by_id`),
  CONSTRAINT `categories_created_by_id_fk` FOREIGN KEY (`created_by_id`) REFERENCES `admin_users` (`id`) ON DELETE SET NULL,
  CONSTRAINT `categories_updated_by_id_fk` FOREIGN KEY (`updated_by_id`) REFERENCES `admin_users` (`id`) ON DELETE SET NULL
) ENGINE=InnoDB DEFAULT CHARSET=utf8mb3
これも期待通り。
推測するに Strapi は起動時にデータベースの定義をファイルから読み取って実際のデータベース構造と比較し、差異がある場合には自動的に ALTER 文を発行しているようだ。
追加はわかったけど削除はどうなるのか?
引き続き検証してみよう。
コレクションタイプとフィールドを削除してみる
同様の手順で開発環境でコレクションタイプとフィールドを削除し、本番環境でやってみる。
手順の説明については割愛する。
結果としてはコレクションタイプとフィールドを追加する前の状態に戻った。
mysql -u root strapi_db_prod -e 'show create table restaurants \G'
mysql -u root strapi_db_prod -e 'show create table categories \G'
CREATE TABLE `restaurants` (
  `id` int unsigned NOT NULL AUTO_INCREMENT,
  `name` varchar(255) DEFAULT NULL,
  `created_at` datetime(6) DEFAULT NULL,
  `updated_at` datetime(6) DEFAULT NULL,
  `published_at` datetime(6) DEFAULT NULL,
  `created_by_id` int unsigned DEFAULT NULL,
  `updated_by_id` int unsigned DEFAULT NULL,
  PRIMARY KEY (`id`),
  KEY `restaurants_created_by_id_fk` (`created_by_id`),
  KEY `restaurants_updated_by_id_fk` (`updated_by_id`),
  CONSTRAINT `restaurants_created_by_id_fk` FOREIGN KEY (`created_by_id`) REFERENCES `admin_users` (`id`) ON DELETE SET NULL,
  CONSTRAINT `restaurants_updated_by_id_fk` FOREIGN KEY (`updated_by_id`) REFERENCES `admin_users` (`id`) ON DELETE SET NULL
) ENGINE=InnoDB DEFAULT CHARSET=utf8mb3
ERROR 1146 (42S02) at line 1: Table 'strapi_db_prod.categories' doesn't exist
すごいな。
自動でテーブルやカラムの追加削除ができない場合
入力必須の数値型カラムなど一定のケースではカラムの追加削除が失敗しそう。
そんな時はローカルの DB を参考にして手動で ALTER 文を発行すれば良さそう。
もやもやしていた部分だったので理解できてよかった。
実験的だがマイグレーション機能もあるようだ。
These migrations are run automatically when the application starts and are executed before the automated schema migrations that Strapi also performs on boot.
よく読むと Strapi がブート時に自動的なスキーマのマイグレーションを実行することが書いてある。
Cloud Run へのデプロイ
touch .gcloudignore
.gcloudignore の内容についてはまずは .gitignore の内容をコピーすれば間に合いそう。
gcloud meta list-files-for-upload
package.json に gcp-build と deploy のスクリプトを追加する。
{
  "scripts": {
    "gcp-build": "npm run build",
    "deploy": "gcloud run deploy hello-strapi --source . --region asia-northeast1 --platform managed --allow-unauthenticated"
  }
}
下記コマンドを実行してデプロイする。
npm run deploy
ビルドは成功するが環境変数を設定していないので起動は失敗する。
下記の環境変数を Web コンソールや CLI を使って設定する。
- NODE_ENV: production
- APP_KEYS: ランダム
- API_TOKEN_SALT: ランダム
- ADMIN_JWT_SECRET: ランダム
- JWT_SECRET: ランダム
- TRANSFER_TOKEN_SALT: ランダム
- DATABASE_CLIENT: mysql
- DATABASE_NAME: strapi_db
- DATABASE_USERNAME: strapi_user
- DATABASE_PASSWORD: strapi_pass
- DATABASE_SOCKET: /cloudsql/xxxx:yyyy:zzzz
Cloud SQL への接続を追加することも忘れない。
Cloud Run でのデプロイに成功したら https://hello-strapi-xxxx-an.a.run.app/admin にアクセスする。
xxxx の部分は GCP プロジェクトによって異なる。
設定が正しければ Strapi ログインページが表示される。
今日はここまで
Strapi を MySQL で Cloud Run + Cloud SQL で運用できることがわかって良かった。
Strapi の自動スキーママイグレーション機能についても検証できて良かった。
コレクションタイプやフィールド(テーブルやカラム)を追加するくらいだったら自動スキーママイグレーション機能で十分そうなので運用中にデータベース構造が変わってもあまり手間なく対応できそうだ。
明日は Strapi + Prisma の連携について調べよう。
User Guide
ドキュメントに使い方に関する説明が少ないなと思っていたら User Guide の方にまとめられていた。
今から 2 時間くらい基本的な使い方を学ぼうと思う。
ワークスペースの準備
クイックスタートでワークスペースを準備する。
npx create-strapi-app strapi-quickstart --quickstart
データベースは SQLite で問題なさそう。
シングルタイプについて
シングルタイプはエントリーが 1 つしかないコレクションタイプのようなもの。
サイトやシステムの共通設定などはシングルタイプの方が良さそう。
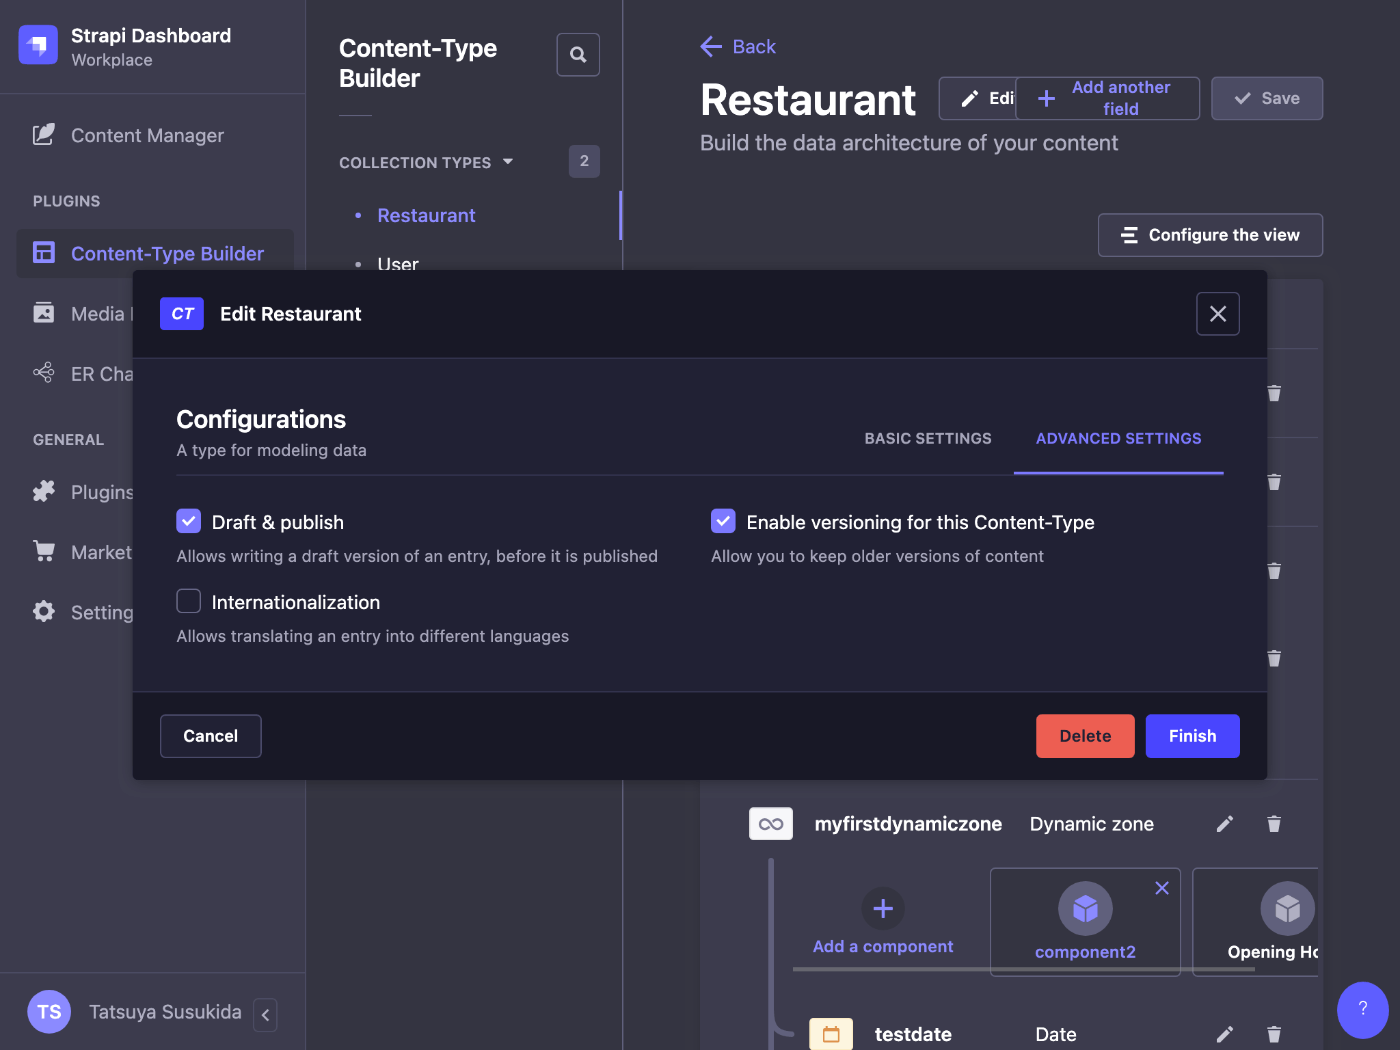
コンテンツのバージョニング
プラグインを使って可能のようだ。
Opening_hours フィールド
どのタイプを使っているのだろう、コンポーネントかな?

リッチテキストは Markdown なのか
エンジニア以外のユーザーの人も Markdown って書けるものなのだろうか。
コンポーネントについて
コンポーネントという概念を使うとフィールドをグループにまとめられる。
郵便番号や住所などをまとめる時に便利。
1 つのレコードに複数のコンポーネントを登録することもできる。
ダイナミックゾーンについて
When using dynamic zones, different components cannot have the same field name with different types (or with enumeration fields, different values).
ダイナミックゾーンでは同じ名前で型が異なるフィールドを持つコンポーネントを使うことができないようだ。
正直どういう時に使えば良いのかイメージが湧かない。
REST API での表示
http://localhost:1337/api/restaurants?populate=* にアクセスする。
{
  "data": [
    {
      "id": 1,
      "attributes": {
        "name": "testname",
        "createdAt": "2023-03-21T04:34:26.916Z",
        "updatedAt": "2023-03-21T05:23:01.840Z",
        "publishedAt": "2023-03-21T05:23:01.837Z",
        "content": "testcontent",
        "component": { "id": 1, "start": null },
        "dynamicZone": [
          { "id": 2, "__component": "test.opening-hours", "fieldname": "test" },
          {
            "id": 1,
            "__component": "test.component2",
            "testdate": "2023-03-07"
          }
        ]
      }
    }
  ],
  "meta": {
    "pagination": { "page": 1, "pageSize": 25, "pageCount": 1, "total": 1 }
  }
}
レビュー機能は Enterprise じゃないと使用できない
試したいことの整理
- 日本語化
- GraphQL
- ER 図
- バージョニング
- トランザクション
- Cloud Storage メディアライブラリ
- ロールとユーザー
トランザクションについては下記のブログが参考になりそう。
日本語化
touch src/admin.app.js
const config = {
  locales: ["ja"],
};

const bootstrap = (app) => {
  console.log(app);
};

export default {
  config,
  bootstrap,
};
Ctrl + C で停止して再起動。
npm run develop

実行結果
言語の切り替えはログインページじゃないとできないのかな?
ER 図のプラグイン
GraphQL は重そうなので ER 図から試そう
npm install strapi-plugin-entity-relationship-chart
コマンドはマーケットプレイスページからもコピーできる。
ターミナルで Ctrl + C を押して終了し、ビルドしてから再起動する。
npm run build
npm run develop
Plugins > ER Chart にアクセスすると ER 図が表示される。

表示はされたけどリレーションが表示されてかなり見ずらい。
touch config/plugins.js
"use strict";

module.exports = () => ({
  "entity-relationship-chart": {
    enabled: true,
    config: {
      // By default all contentTypes and components are included.
      // To exlclude strapi's internal models, use:
      exclude: [
        "strapi::core-store",
        "webhook",
        "admin::permission",
        "admin::user",
        "admin::role",
        "admin::api-token",
        "plugin::upload.file",
        "plugin::i18n.locale",
        "plugin::users-permissions.permission",
        "plugin::users-permissions.role",
      ],
    },
  },
});
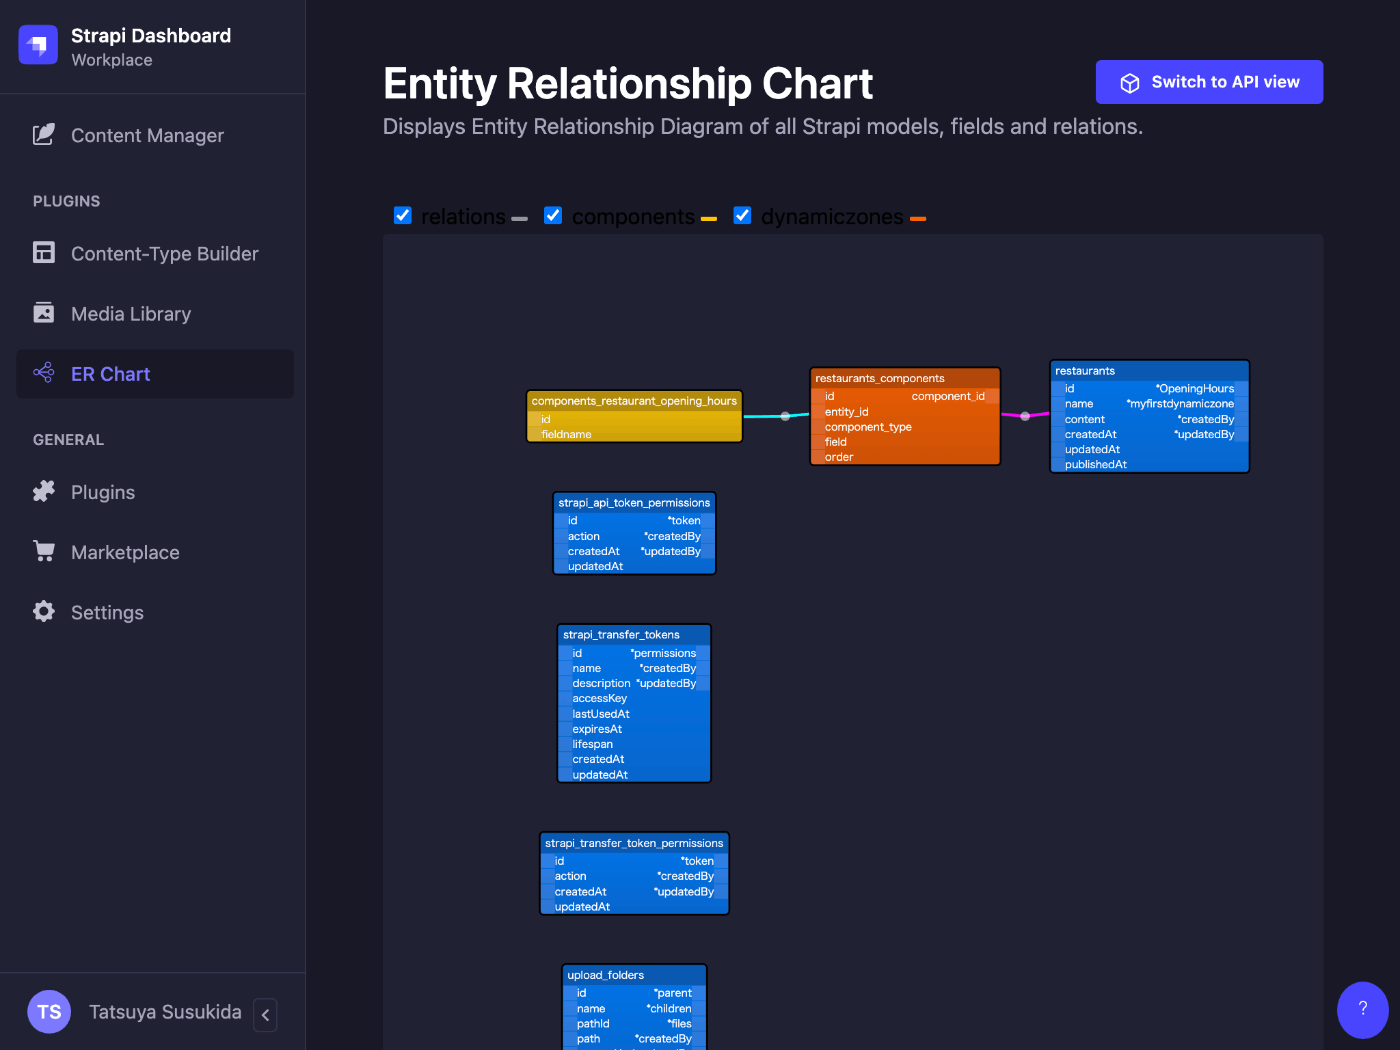
だいぶ見やすくなった。
バージョニング
# Ctrl + C
npm install @notum-cz/strapi-plugin-content-versioning
npm run build
npm run develop
module.exports = () => ({
  "content-versioning": {
    enabled: true,
  },
});
Content-Type Builder からバージョンニングを使用したいコンテンツタイプを選んで Edit ページの Advanced タブで有効化する必要がある。
Unique 制約があるとバージョンニングに失敗する。
なんとなくだが安易に使わない方が良いプラグインだと感じた。
GraphQL
だいぶ日が空いたが GraphQL を試してみる。
npx create-strapi-app --quickstart strapi-graphql
GraphQL プラグインのインストール
npm install @strapi/plugin-graphql
# または
npm run strapi install graphql
下のコマンドを実行すると @strapi/plugin-graphql がインストールされるので実質同じ。
GraphQL Playground
http://localhost:1337/graphql にアクセスすると GraphQL Playground にアクセスできる。

画面右側の SCHEMA をクリックするとスキーマが表示される。
スキーマの最後の方に認証系のミューテーションを確認できる。
type Mutation {
  login(input: UsersPermissionsLoginInput!): UsersPermissionsLoginPayload!

  # Register a user
  register(input: UsersPermissionsRegisterInput!): UsersPermissionsLoginPayload!

  # Request a reset password token
  forgotPassword(email: String!): UsersPermissionsPasswordPayload

  # Reset user password. Confirm with a code (resetToken from forgotPassword)
  resetPassword(
    password: String!
    passwordConfirmation: String!
    code: String!
  ): UsersPermissionsLoginPayload

  # Change user password. Confirm with the current password.
  changePassword(
    currentPassword: String!
    password: String!
    passwordConfirmation: String!
  ): UsersPermissionsLoginPayload

  # Confirm an email users email address
  emailConfirmation(confirmation: String!): UsersPermissionsLoginPayload
}
はじめてのクエリ
name というフィールドを持つ Restaurant というコレクションタイプを作成した。
Playground を使用してクエリを実行してみる。
query {
  restaurants {
    data {
      id
      attributes {
        name
      }
    }
  }
}
{
  "errors": [
    {
      "message": "Forbidden access",
      "extensions": {
        "error": {
          "name": "ForbiddenError",
          "message": "Forbidden access",
          "details": {}
        },
        "code": "FORBIDDEN"
      }
    }
  ],
  "data": {
    "restaurants": null
  }
}
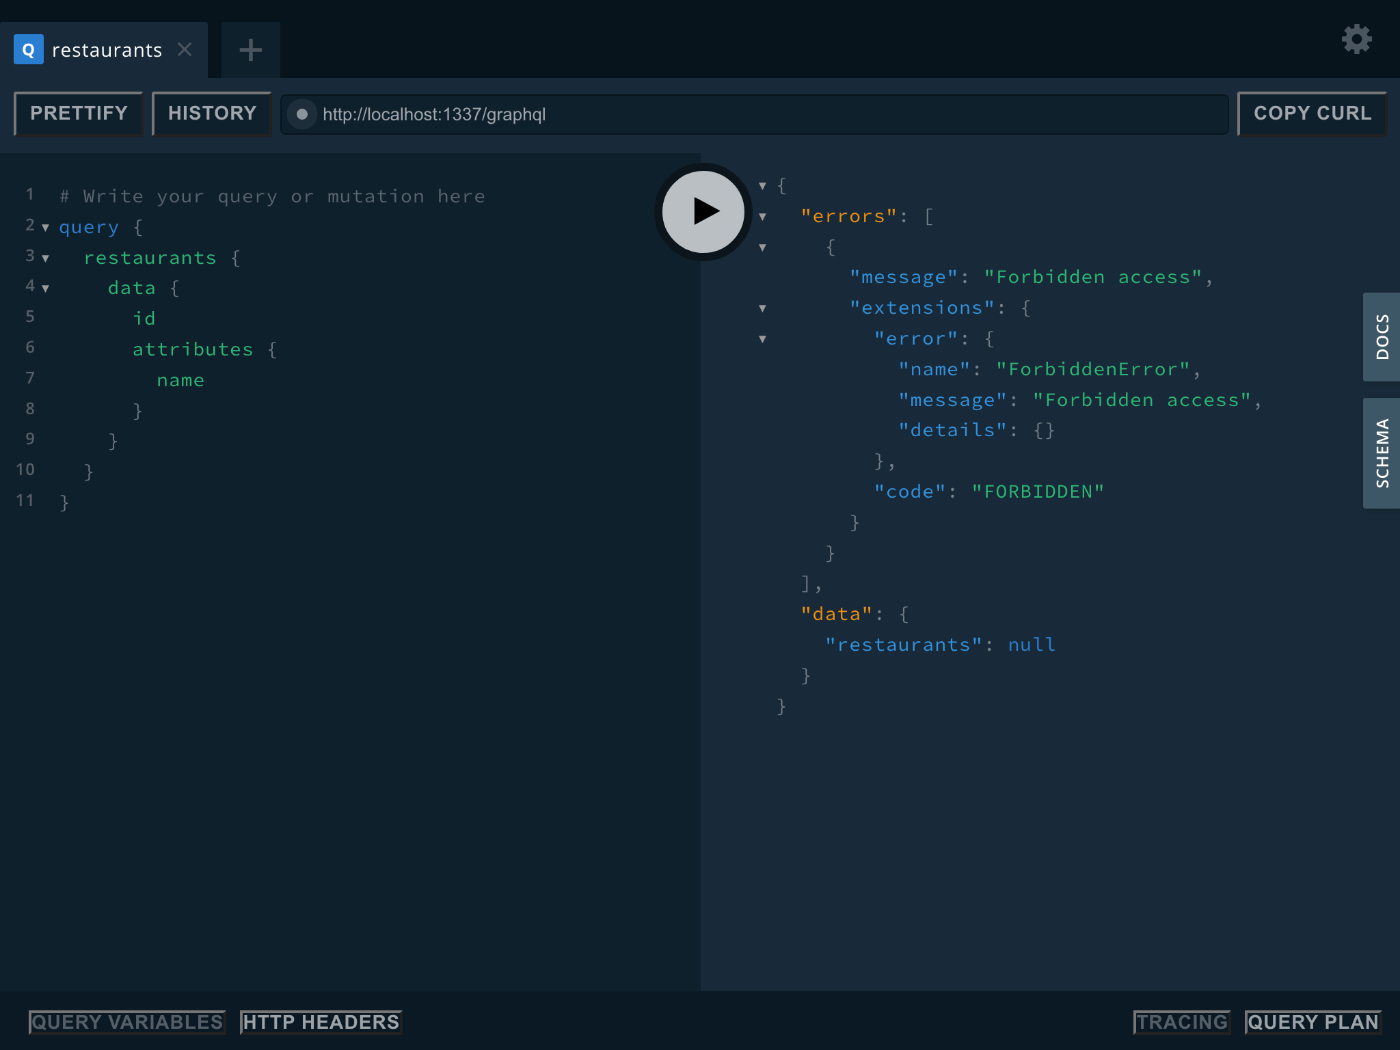
ログインも何もしていないので Forbidden となる。
設定を変更して未認証ユーザーによる find を許可してみる。

この状態で再実行するとデータを取得できる。
{
  "data": {
    "restaurants": {
      "data": [
        {
          "id": "1",
          "attributes": {
            "name": "ここに名前が入ります"
          }
        }
      ]
    }
  }
}
GraphQL スキーマの取得
GUI を使ってもできるが CLI でもできる。
rover graph introspect http://localhost:1337/graphql
ユーザー登録
mutation {
  register(input:{
    username: "susukida@example.com",
    email: "susukida@example.com",
    password: "password"
  }) {
    jwt
  }
}
{
  "data": {
    "register": {
      "jwt": "eyJhbGciOiJIUzI1NiIsInR5cCI6IkpXVCJ9.eyJpZCI6MSwiaWF0IjoxNjc5OTA5NDMzLCJleHAiOjE2ODI1MDE0MzN9.wJmJd68we2vjMOFZhc22MAXTZ_ckyiXyJDPkLn_XYWQ"
    }
  }
}
管理パネルを見てみる。
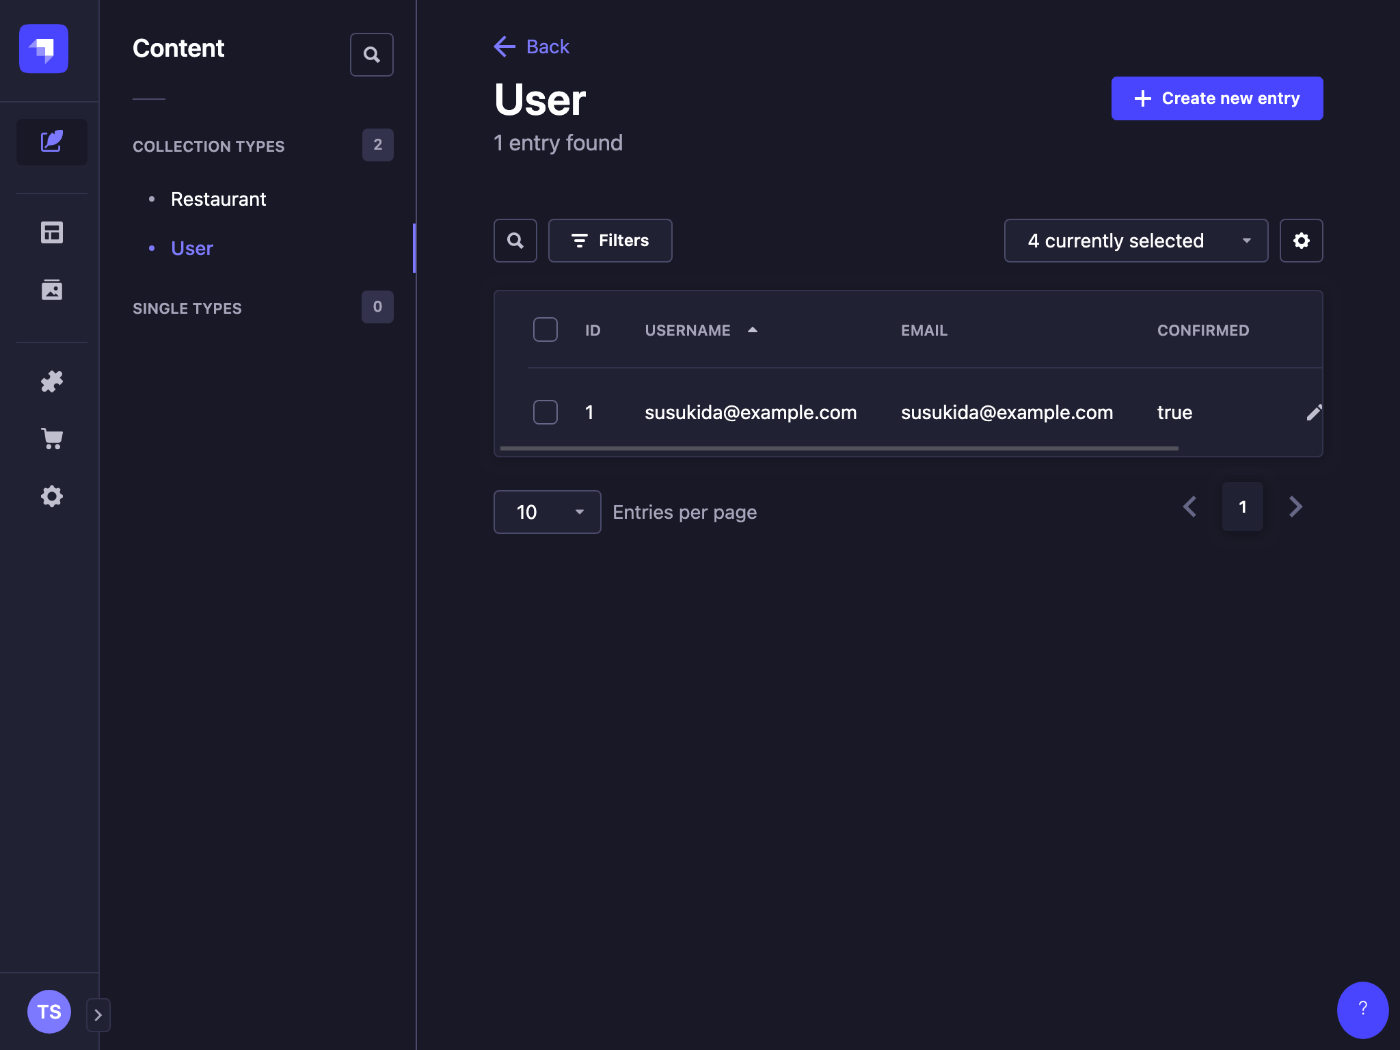
エントリーが作成されているのがわかる。
せっかくなので JWT も使ってみよう。
Playground のページ下側の HTTP HEADERS をクリックして下記の内容を入力する。
{
  "Authorization": "Bearer eyJhbGciOiJIUzI1NiIsInR5cCI6IkpXVCJ9.eyJpZCI6MSwiaWF0IjoxNjc5OTA5NDMzLCJleHAiOjE2ODI1MDE0MzN9.wJmJd68we2vjMOFZhc22MAXTZ_ckyiXyJDPkLn_XYWQ"
}
下記のようにロール設定を変更する。
- Public の Restaurant.find を無効にする
- Authenticated の Restaurant.find を有効にする
この状態で Authenticated の時だけクエリが成功すれば JWT は期待通り機能している。
次回
下記あたりを試してみたい。
- Email verification
- Policies
- Extending the schema
- Admin Role
- トランザクション
今日はメールから試してみる
SendGrid も良いが Amazon SES を試してみようと思う。
npx create-strapi-app --quickstart strapi-email
各種リンク
Strapi 公式
npm パッケージ
内部的に使用されている npm パッケージ
インストール
npm install @strapi/provider-email-amazon-ses --save
設定
touch config/plugins.js
module.exports = ({ env }) => ({
  email: {
    config: {
      provider: "amazon-ses",
      providerOptions: {
        key: env("AWS_SES_KEY"),
        secret: env("AWS_SES_SECRET"),
        amazon: "https://email.us-east-1.amazonaws.com",
      },
      settings: {
        defaultFrom: "strapi@example.com",
        defaultReplyTo: "strapi@example.com",
      },
    },
  },
});
AWS_SES_KEY / SECRET については何を指定して良いのかわからないが Amazon SES で SMTP 認証情報を新たに作成して設定してみようと思う。
SMTP ユーザー名とパスワードが表示されるがドキュメントを読む限りはパスワードと SECRET は別のもののようだ。
認証情報を作成すると AmazonSesSendingAccess ポリシーが紐づけられた IAM ユーザーが作成される。
このポリシーでは SendRawEmail が許可されている。
IAM Web コンソールからアクセスキーを作成する。
これでアクセスキーが 2 つ手に入ったけど本当に 1 つ目のアクセスキーが利用できないかを確認してみよう。
AWS_SES_KEY="AKIAXXXX"
AWS_SES_SECRET="XXXX"
Strapi からテストメールを送信しようとしてみたがエラーメッセージが表示された。
Error: Couldn't send test email: undefined.
    at Object.test (/Users/susukida/workspace/js/strapi-email/node_modules/@strapi/plugin-email/server/controllers/email.js:50:15)
    at processTicksAndRejections (node:internal/process/task_queues:96:5)
    at async returnBodyMiddleware (/Users/susukida/workspace/js/strapi-email/node_modules/@strapi/strapi/lib/services/server/compose-endpoint.js:52:18)
    at async policiesMiddleware (/Users/susukida/workspace/js/strapi-email/node_modules/@strapi/strapi/lib/services/server/policy.js:24:5)
    at async /Users/susukida/workspace/js/strapi-email/node_modules/@strapi/strapi/lib/middlewares/body.js:58:9
    at async /Users/susukida/workspace/js/strapi-email/node_modules/@strapi/strapi/lib/middlewares/logger.js:25:5
    at async /Users/susukida/workspace/js/strapi-email/node_modules/@strapi/strapi/lib/middlewares/powered-by.js:16:5
    at async cors (/Users/susukida/workspace/js/strapi-email/node_modules/@koa/cors/index.js:107:16)
    at async /Users/susukida/workspace/js/strapi-email/node_modules/@strapi/strapi/lib/middlewares/errors.js:13:7
    at async session (/Users/susukida/workspace/js/strapi-email/node_modules/koa-session/index.js:41:7)
エラーメッセージが undefined なのはしんどいな。
続いて 2 つ目に取得した API キーを試してみる。
環境変数を書き換えてから再起動する。
Error: Couldn't send test email: undefined.
    at Object.test (/Users/susukida/workspace/js/strapi-email/node_modules/@strapi/plugin-email/server/controllers/email.js:50:15)
    at processTicksAndRejections (node:internal/process/task_queues:96:5)
    at async returnBodyMiddleware (/Users/susukida/workspace/js/strapi-email/node_modules/@strapi/strapi/lib/services/server/compose-endpoint.js:52:18)
    at async policiesMiddleware (/Users/susukida/workspace/js/strapi-email/node_modules/@strapi/strapi/lib/services/server/policy.js:24:5)
    at async /Users/susukida/workspace/js/strapi-email/node_modules/@strapi/strapi/lib/middlewares/body.js:58:9
    at async /Users/susukida/workspace/js/strapi-email/node_modules/@strapi/strapi/lib/middlewares/logger.js:25:5
    at async /Users/susukida/workspace/js/strapi-email/node_modules/@strapi/strapi/lib/middlewares/powered-by.js:16:5
    at async cors (/Users/susukida/workspace/js/strapi-email/node_modules/@koa/cors/index.js:107:16)
    at async /Users/susukida/workspace/js/strapi-email/node_modules/@strapi/strapi/lib/middlewares/errors.js:13:7
    at async session (/Users/susukida/workspace/js/strapi-email/node_modules/koa-session/index.js:41:7)
同じエラーメッセージが表示される。
@strapi/plugin-email/server/controllers/email.js の 50 行目に console.log(e) を追加すると本当の原因がわかる。
User `arn:aws:iam::388590557352:user/ses-smtp-user.20230329-155644-StrapiTest' is not authorized to perform `ses:SendEmail' on resource `arn:aws:ses:us-east-1:388590557352:identity/loremipsum.co.jp'
SendEmail の権限を与える必要があるようだ。
{
    "Version": "2012-10-17",
    "Statement": [
        {
            "Effect": "Allow",
            "Action": [
                "ses:SendEmail",
                "ses:SendRawEmail"
            ],
            "Resource": "*"
        }
    ]
}
ようやく送信が成功した。
日本語のメールは送信できる?
メールのヘッダーを見ると Content-Type: text/plain; charset=utf-8 とあるので行けそう。
@strapi/plugin-email/server/controllers/email.js の test() 関数を書き換えて試してみる。
  async test(ctx) {
    const { to } = ctx.request.body;

    if (!to) {
      throw new ApplicationError('No recipient(s) are given');
    }

    const email = {
      to,
      subject: `日本語のタイトル / Strapi test mail to: ${to}`,
      text: `日本語のテキスト / Great! You have correctly configured the Strapi email plugin with the ${strapi.config.get(
        'plugin.email.provider'
      )} provider. \r\nFor documentation on how to use the email plugin checkout: https://docs.strapi.io/developer-docs/latest/plugins/email.html`,
    };

    try {
      await strapi.plugin('email').service('email').send(email);
    } catch (e) {
      if (e.statusCode === 400) {
        throw new ApplicationError(e.message);
      } else {
        console.log(e);
        throw new Error(`Couldn't send test email: ${e.message}.`);
      }
    }

    // Send 200 `ok`
    ctx.send({});
  },
再起動して Strapi からメール送信したら問題なく日本語が表示された。
OIDC ログイン
一応下記にやり方が書いてあるが node_modules にパッチを充ててまでやる必要があるのかという疑問がある。
試してみたい気持ちもあるが今後 Strapi を使って本当に開発すべきかどうかがかなり怪しいので一旦クローズしよう。