Next.js で React Three Fiber を使ってロボットアームを作る
このスクラップについて
このスクラップでは Next.js で Three.js を使ってロボットアームを表示できるようにするまでの過程を記録していきたい。
関連スクラップ
React で Three.js
@react-three/fiber が良さそう。
pmndrs のリポジトリだと安心感がある。
使い方については下記のページが参考になりそう。
国土交通省の Web サイトにこのようなページを設けていることが驚き。
プロジェクトの作成
npx create-next-app \
  --typescript \
  --tailwind \
  --eslint \
  --app \
  --src-dir \
  --import-alias "@/*" \
  --use-npm \
  robot-arm-v2
真っ白な画面にする
@tailwind base;
@tailwind components;
@tailwind utilities;
export default function Home() {
  return (
    <main>
      <h1>Home</h1>
    </main>
  );
}
npm パッケージインストール
npm install three @types/three @react-three/fiber
はじめてのコーディング
"use client";

import { Canvas, ThreeElements, useFrame } from "@react-three/fiber";
import { useRef, useState } from "react";

function Box(props: ThreeElements["mesh"]) {
  const ref = useRef<THREE.Mesh>(null!);
  const [hovered, hover] = useState(false);
  const [clicked, click] = useState(false);

  useFrame((state, delta) => (ref.current.rotation.x += delta));

  return (
    <mesh
      {...props}
      ref={ref}
      scale={clicked ? 1.5 : 1}
      onClick={(event) => click(!clicked)}
      onPointerOver={(event) => hover(true)}
      onPointerOut={(event) => hover(false)}
    >
      <boxGeometry args={[1, 1, 1]}></boxGeometry>
      <meshStandardMaterial
        color={hovered ? "hotpink" : "orange"}
      ></meshStandardMaterial>
    </mesh>
  );
}

export default function Home() {
  return (
    <main>
      <h1>Home</h1>
      <Canvas>
        <pointLight position={[10, 10, 10]}></pointLight>
        <Box position={[-1.2, 0, 0]}></Box>
        <Box position={[1.2, 0, 0]}></Box>
      </Canvas>
    </main>
  );
}
実行結果

クリックやホバーすると変化する
@react-three/drei について
便利なヘルパーがたくさんあるので便利そう。
ちなみに drei とはドイツ語で 3 を意味するようだ。
drei のインストール
npm install @react-three/drei
Fiber や Drei のドキュメント
Drei で書き替えてみる
"use client";

import { Box } from "@react-three/drei";
import { Canvas, ThreeElements, useFrame } from "@react-three/fiber";
import { useRef, useState } from "react";

function MyBox(props: ThreeElements["mesh"]) {
  const ref = useRef<THREE.Mesh>(null!);
  const [hovered, hover] = useState(false);
  const [clicked, click] = useState(false);

  useFrame((state, delta) => (ref.current.rotation.x += delta));

  return (
    <Box
      {...props}
      ref={ref}
      args={[1, 1, 1]}
      scale={clicked ? 1.5 : 1}
      onClick={(event) => click(!clicked)}
      onPointerOver={(event) => hover(true)}
      onPointerOut={(event) => hover(false)}
      material-color={hovered ? "hotpink" : "orange"}
    ></Box>
  );
}

export default function Home() {
  return (
    <main>
      <h1>Home</h1>
      <Canvas>
        <pointLight position={[10, 10, 10]}></pointLight>
        <MyBox position={[-1.2, 0, 0]}></MyBox>
        <MyBox position={[1.2, 0, 0]}></MyBox>
      </Canvas>
    </main>
  );
}
それほど短くはならない。
Canvas を大きくしたい
あっているか自信がないが Canvas の style 属性を使えば良さそう。
export default function Home() {
  return (
    <main>
      <h1>Home</h1>
      <Canvas style={{ width: "100vw", height: "100vh" }}>
        <pointLight position={[10, 10, 10]}></pointLight>
        <MyBox position={[-1.2, 0, 0]}></MyBox>
        <MyBox position={[1.2, 0, 0]}></MyBox>
      </Canvas>
    </main>
  );
}
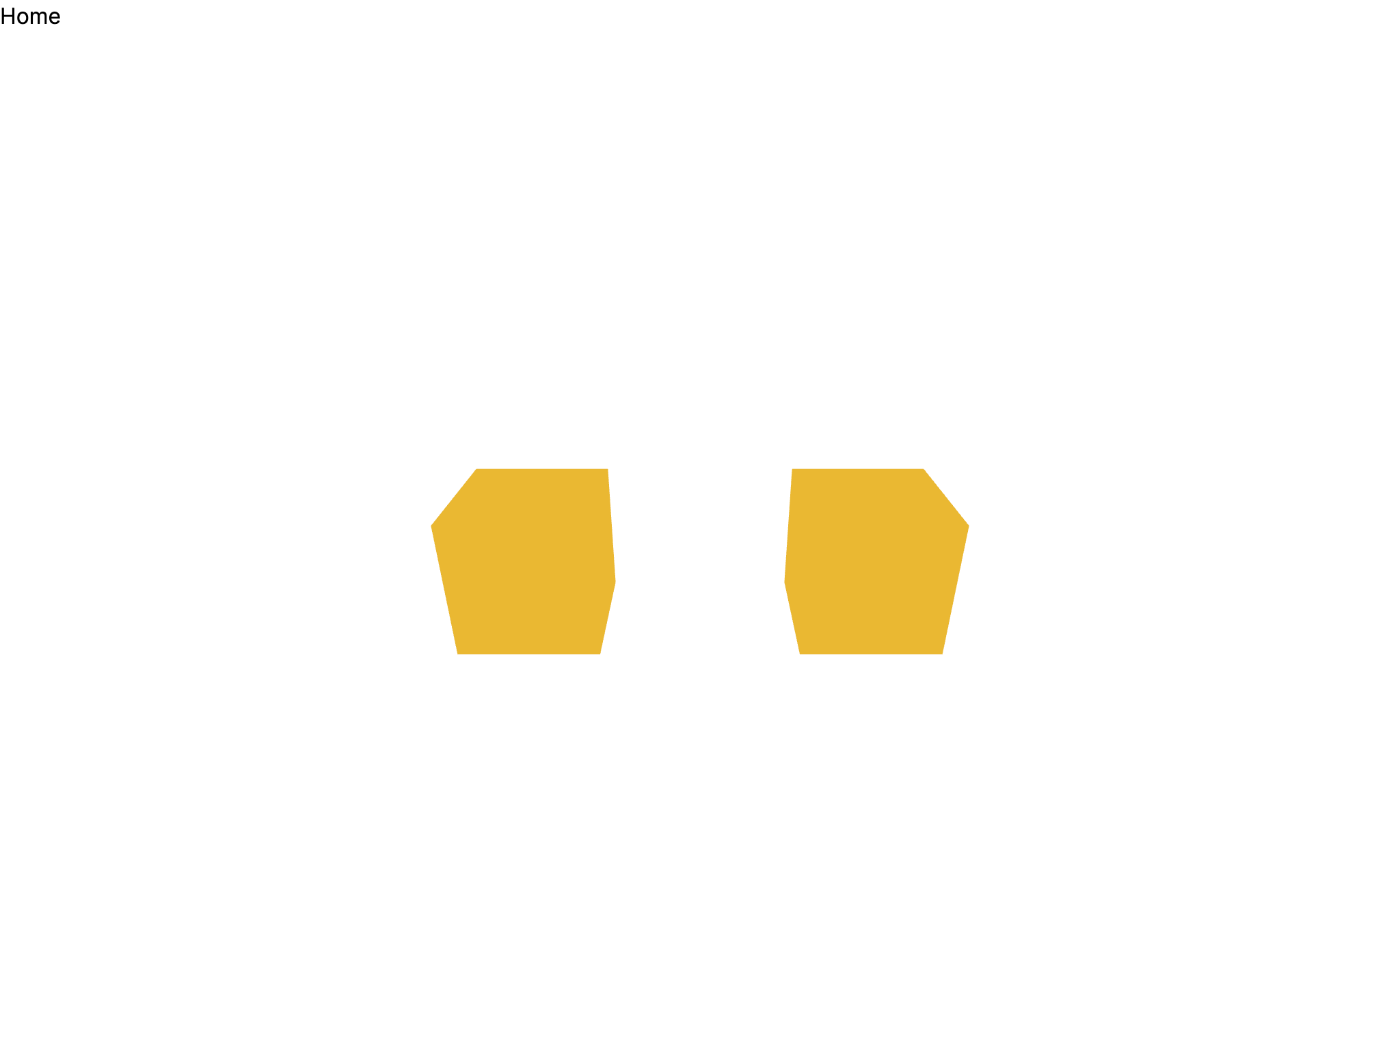
Canvas が大きくなった
OrbitControl が欲しい
なんとこれだけで良い。
export default function Home() {
  return (
    <main>
      <h1>Home</h1>
      <Canvas style={{ width: "100vw", height: "100vh" }}>
        <pointLight position={[10, 10, 10]}></pointLight>
        <MyBox position={[-1.2, 0, 0]}></MyBox>
        <MyBox position={[1.2, 0, 0]}></MyBox>
        <OrbitControls></OrbitControls>
      </Canvas>
    </main>
  );
}
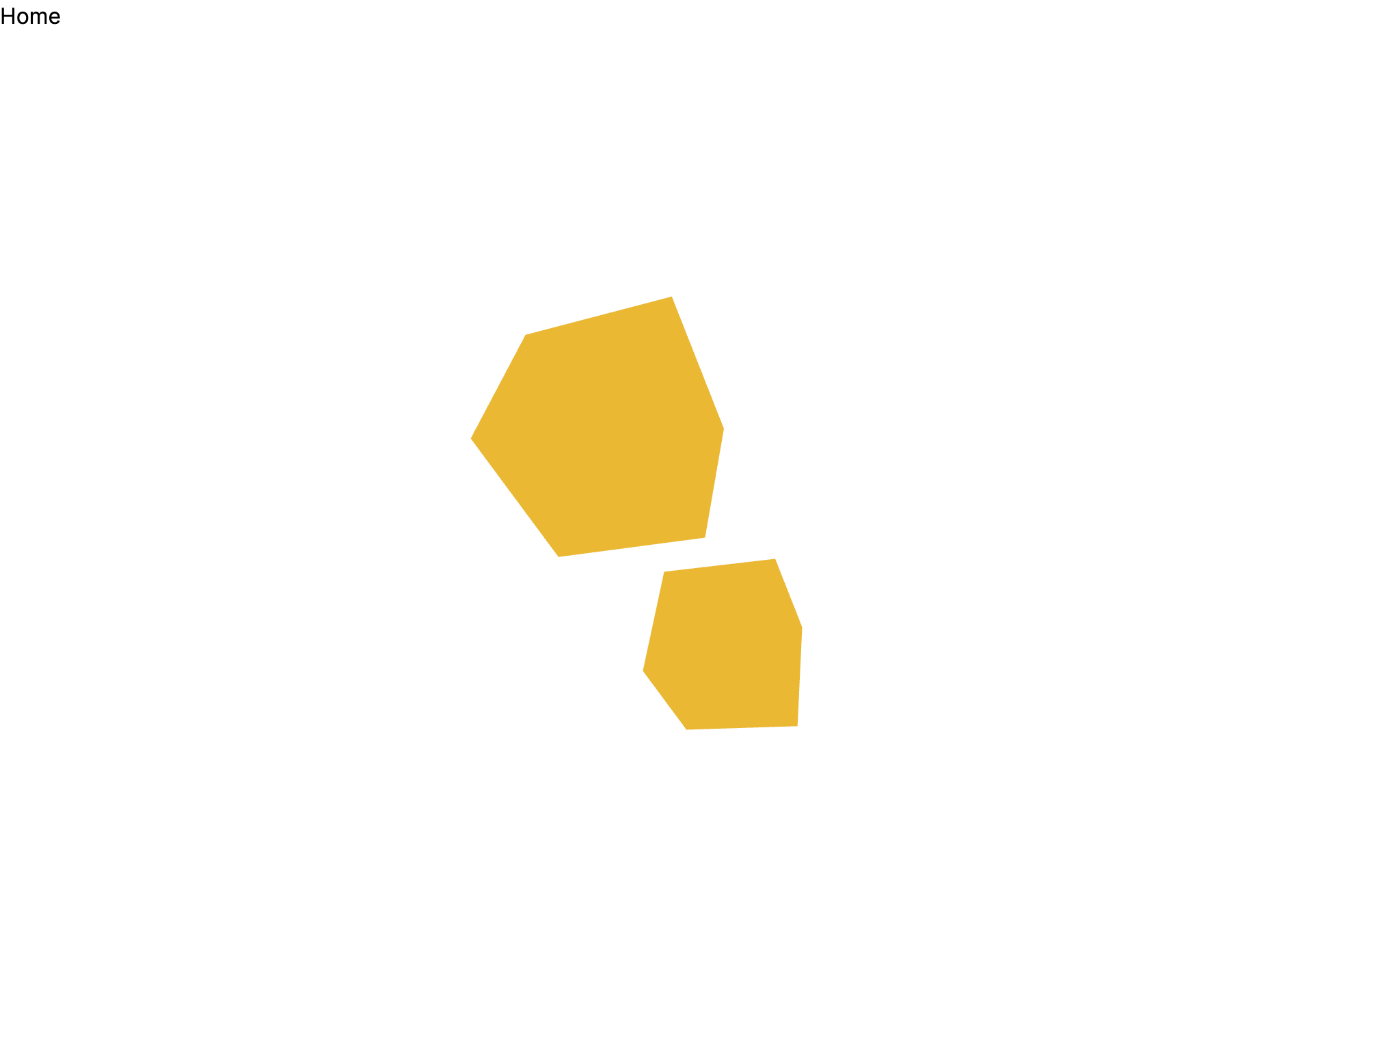
ドラッグすることで視点を変えられる
シリンダを表示させたい
"use client";

import { Cylinder, OrbitControls } from "@react-three/drei";
import { Canvas } from "@react-three/fiber";

export default function Home() {
  return (
    <main>
      <h1>Home</h1>
      <Canvas style={{ width: "100vw", height: "100vh" }}>
        <pointLight position={[10, 10, 10]}></pointLight>
        <OrbitControls></OrbitControls>
        <Cylinder args={[1, 1, 2, 6]}></Cylinder>
      </Canvas>
    </main>
  );
}
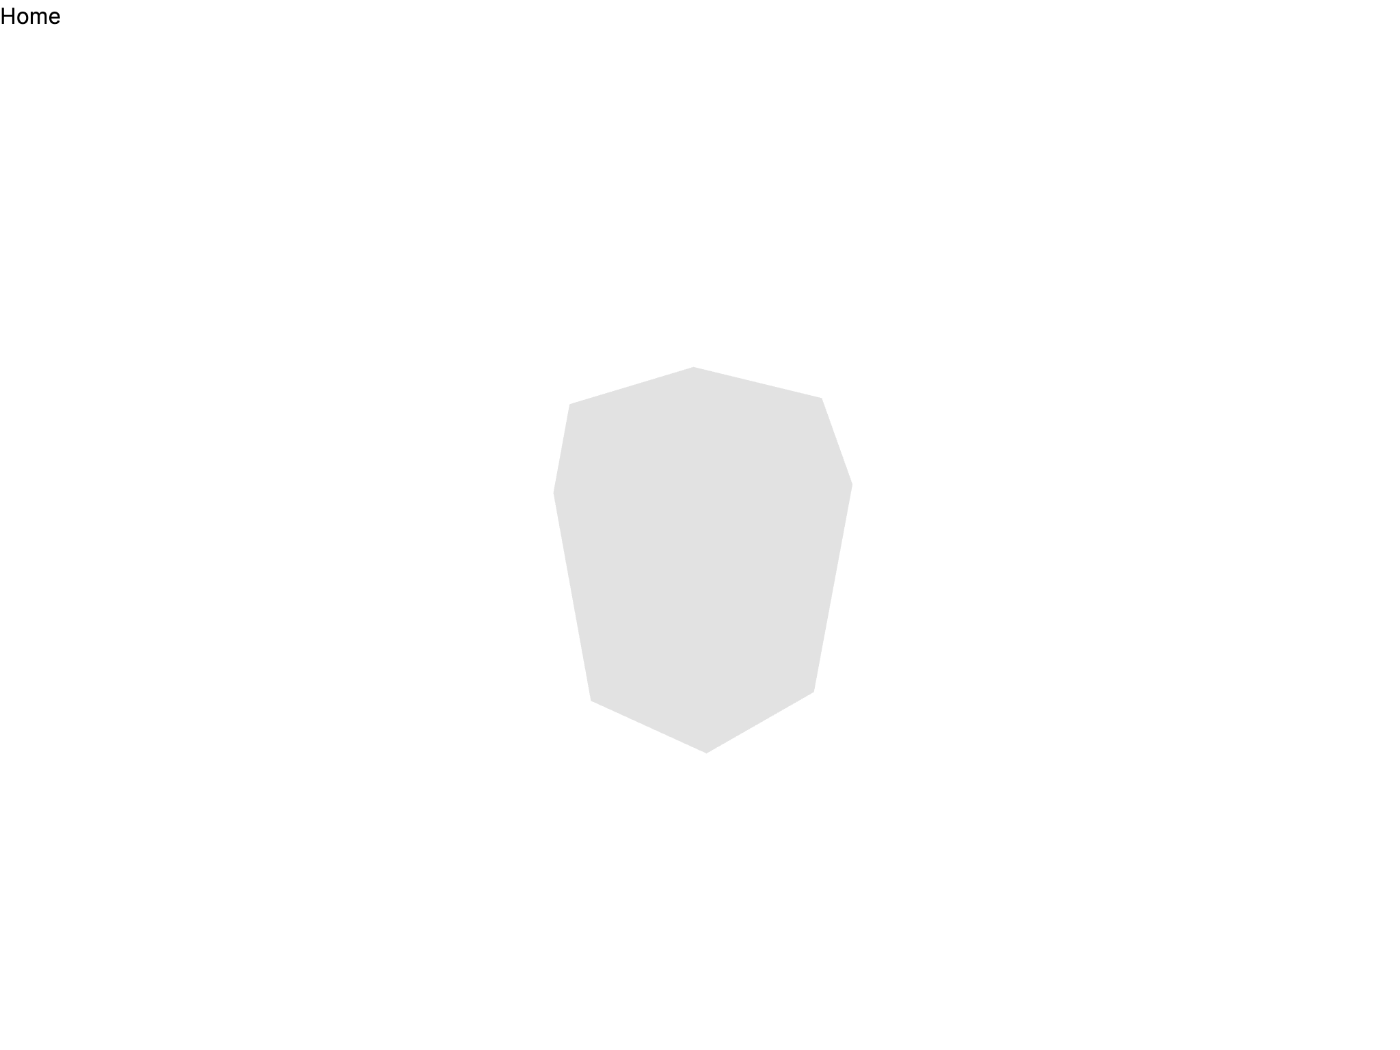
回転時にわかりやすいように断面 6 角形にした
影が欲しい
"use client";

import { Cylinder, OrbitControls } from "@react-three/drei";
import { Canvas } from "@react-three/fiber";

export default function Home() {
  return (
    <main>
      <h1>Home</h1>
      <Canvas style={{ width: "100vw", height: "100vh" }}>
        <pointLight position={[10, 10, 10]}></pointLight>
        <OrbitControls></OrbitControls>
        <Cylinder args={[1, 1, 2, 6]}>
          <meshPhongMaterial color="#f3f3f3"></meshPhongMaterial>
        </Cylinder>
      </Canvas>
    </main>
  );
}
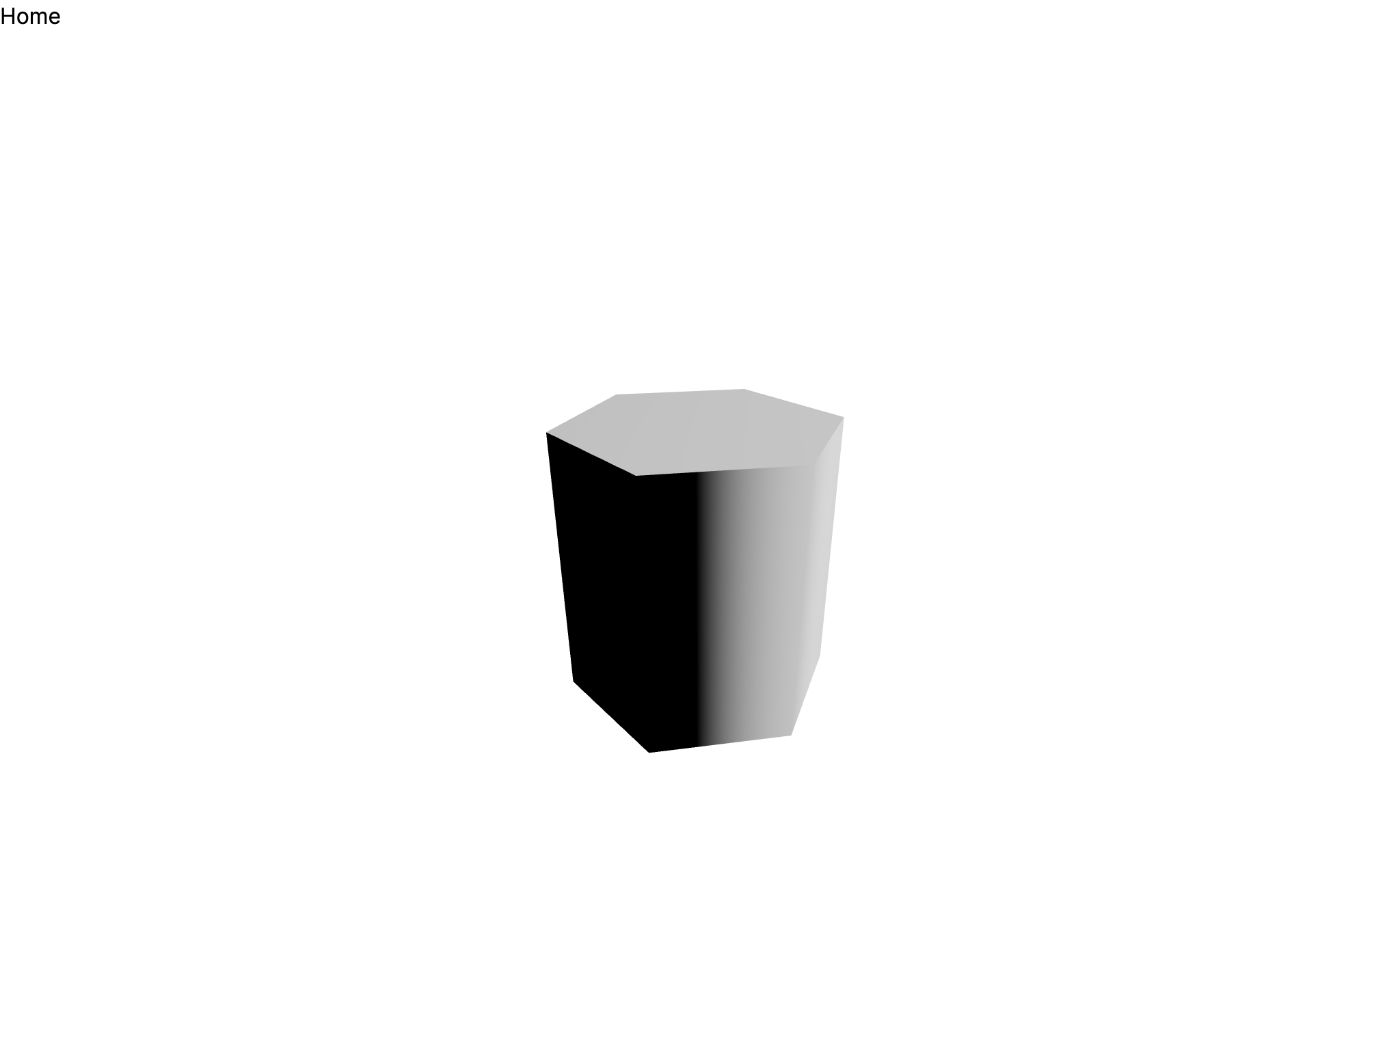
なんだ!この影のつき方は!
おそらく法線ベクトルが断面円形を前提に設定されているのだろう。
断面円形が前提のシリンダを断面多角形として流用しようとしているからこうなった。
回してみる
"use client";

import { Cylinder, OrbitControls } from "@react-three/drei";
import { Canvas, useFrame } from "@react-three/fiber";
import { useState } from "react";

export default function Home() {
  return (
    <main>
      <h1>Home</h1>
      <Canvas style={{ width: "100vw", height: "100vh" }}>
        <Scene></Scene>
      </Canvas>
    </main>
  );
}

function Scene() {
  const [rotation, setRotation] = useState(0);

  useFrame((state, delta) => setRotation(rotation + delta));

  return (
    <>
      <pointLight position={[10, 10, 10]}></pointLight>
      <OrbitControls></OrbitControls>
      <Cylinder args={[1, 1, 2, 12]} rotation={[0, rotation, 0]}>
        <meshPhongMaterial color="#f3f3f3"></meshPhongMaterial>
      </Cylinder>
    </>
  );
}

静止画ではわかりにくいが Y 軸を中心に回転している
円柱の上に立方体を乗っける
function Scene() {
  const [rotation, setRotation] = useState(0);

  useFrame((state, delta) => setRotation(rotation + delta));

  return (
    <>
      <pointLight position={[10, 10, 10]}></pointLight>
      <OrbitControls></OrbitControls>
      <Cylinder args={[1, 1, 2, 12]} rotation={[0, rotation, 0]}>
        <meshPhongMaterial color="#f3f3f3"></meshPhongMaterial>
      </Cylinder>
      <Box position={[0, 1.5, 0]}></Box>
    </>
  );
}
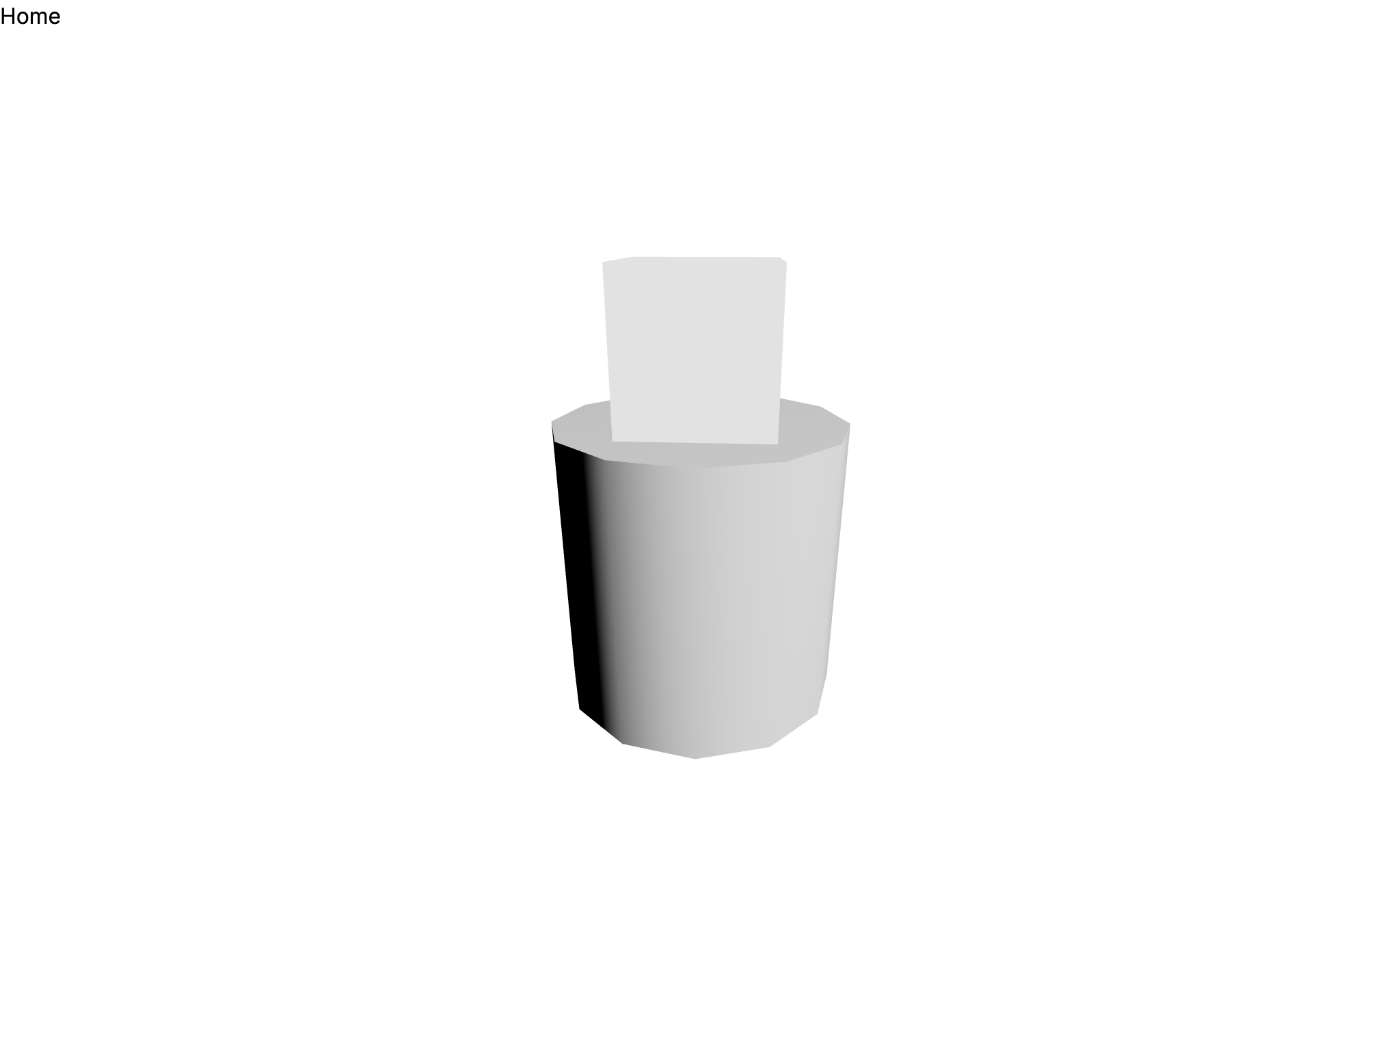
円柱は回転するが立方体は動かない
Group を使う
function Scene() {
  const [rotation, setRotation] = useState(0);

  useFrame((state, delta) => setRotation(rotation + delta));

  return (
    <>
      <pointLight position={[10, 10, 10]}></pointLight>
      <OrbitControls></OrbitControls>
      <group rotation={[0, rotation, 0]}>
        <Cylinder args={[1, 1, 2, 12]}>
          <meshPhongMaterial color="#f3f3f3"></meshPhongMaterial>
        </Cylinder>
        <Box position={[0, 1.5, 0]}>
          <meshPhongMaterial color="#f3f3f3"></meshPhongMaterial>
        </Box>
      </group>
    </>
  );
}
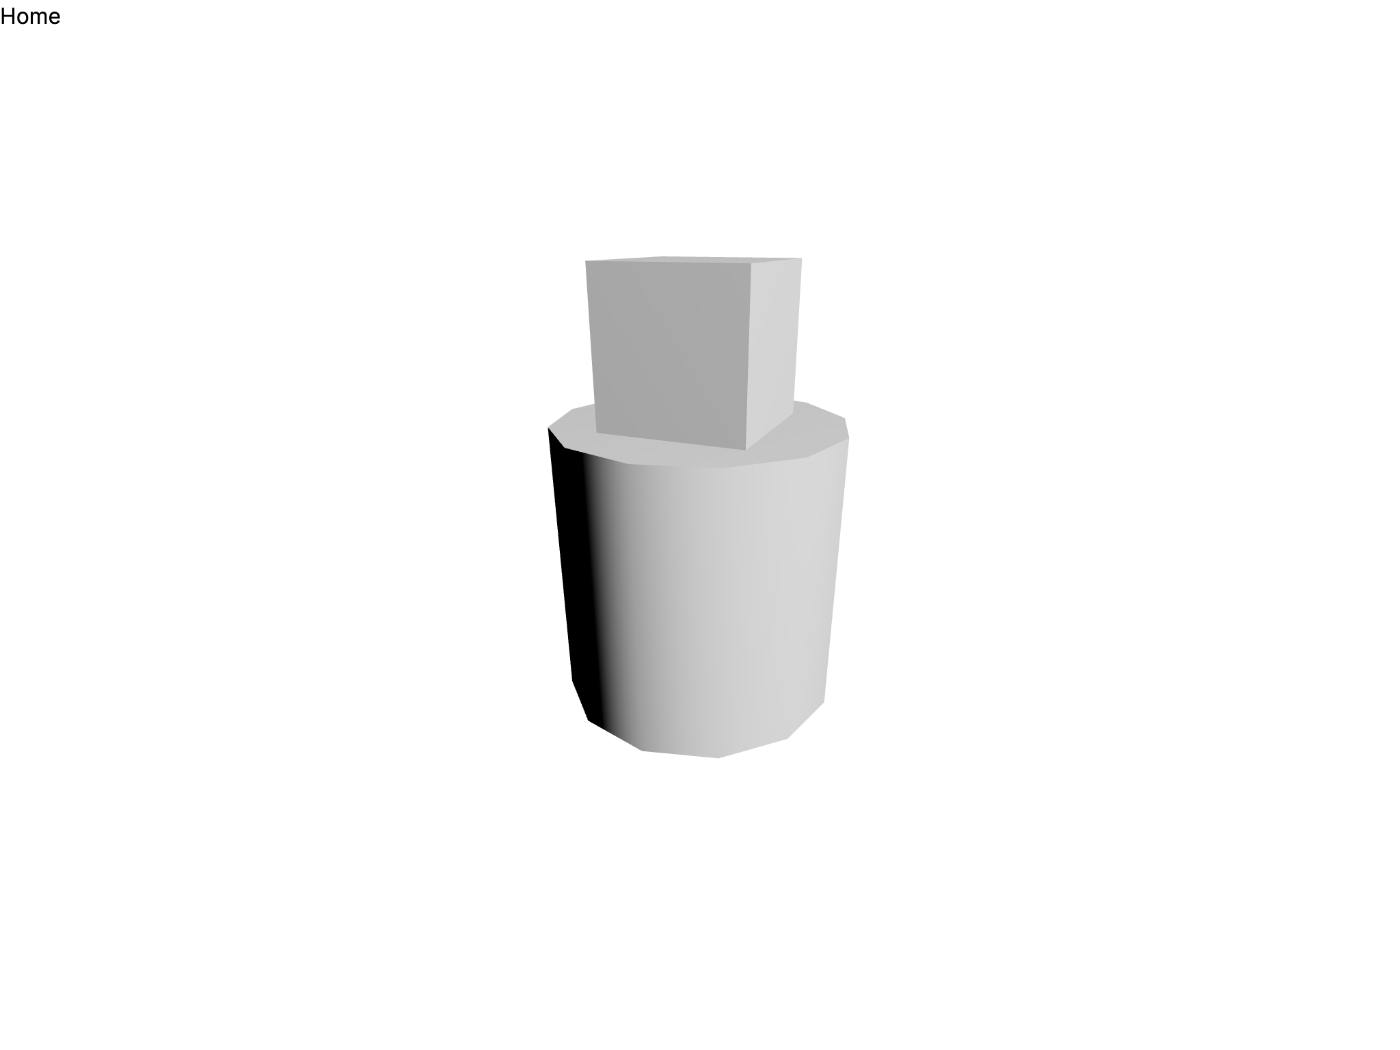
立方体も一緒に回るようになった
今日はここまで
あとは同じ要領で Group を入れ子にしていけばロボットアームみたいなものができそう。
3DCG 楽しいな。
今日はここから
まずは軸を増やしていこう。
2 軸目を増やした
function Scene() {
  const [rotation, setRotation] = useState(0);
  const material = <meshPhongMaterial color="#f3f3f3"></meshPhongMaterial>;

  // useFrame((state, delta) => setRotation(rotation + delta));

  return (
    <>
      <pointLight position={[10, 10, 10]}></pointLight>
      <OrbitControls></OrbitControls>
      <group rotation={[0, rotation - Math.PI / 4, 0]}>
        <Cylinder args={[1, 1, 2, 12]}>{material}</Cylinder>
        <Box position={[-0.5, 1.75, 0]} scale={[0.2, 1.5, 1]}>
          {material}
        </Box>
        <group rotation={[rotation - Math.PI / 4, 0, 0]} position={[0, 2, 0]}>
          <Cylinder
            args={[1, 1, 2, 12]}
            position={[-1.1, 0, 0]}
            scale={[0.5, 0.5, 0.5]}
            rotation={[0, 0, Math.PI / 2]}
          >
            {material}
          </Cylinder>
          <Box position={[0.1, 1, 0]} scale={[1, 3, 1]}>
            {material}
          </Box>
        </group>
      </group>
    </>
  );
}
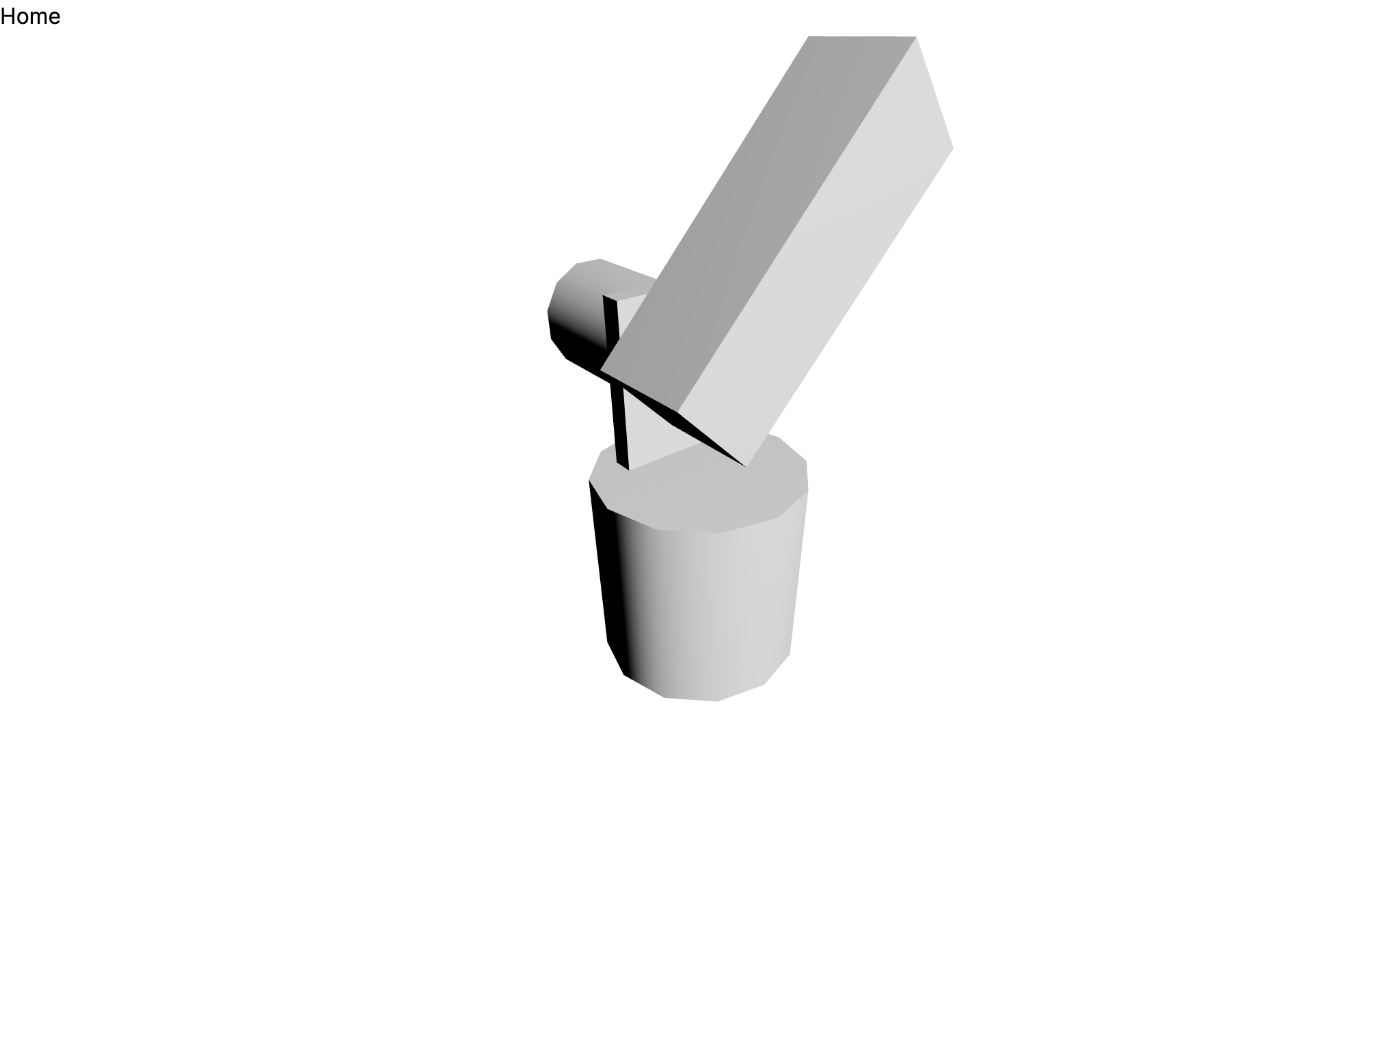
良い感じに角度を付けてみた
3 軸目を増やした
function Scene() {
  const [rotation, setRotation] = useState(0);
  const material = <meshPhongMaterial color="#f3f3f3"></meshPhongMaterial>;

  // useFrame((state, delta) => setRotation(rotation + delta));

  return (
    <>
      <pointLight position={[10, 10, 10]}></pointLight>
      <OrbitControls></OrbitControls>
      <group rotation={[0, rotation - Math.PI / 4, 0]}>
        <Cylinder args={[1, 1, 2, 12]}>{material}</Cylinder>
        <Box position={[-0.5, 1.75, 0]} scale={[0.2, 1.5, 1]}>
          {material}
        </Box>
        <group rotation={[rotation - Math.PI / 4, 0, 0]} position={[0, 2, 0]}>
          <Cylinder
            args={[1, 1, 2, 12]}
            position={[-1.1, 0, 0]}
            scale={[0.5, 0.5, 0.5]}
            rotation={[0, 0, Math.PI / 2]}
          >
            {material}
          </Cylinder>
          <Box position={[0.1, 1, 0]} scale={[1, 3, 1]}>
            {material}
          </Box>
          <Box position={[-0.3, 3.2, 0]} scale={[0.2, 1.4, 1]}>
            {material}
          </Box>
          <group
            position={[0, 3.4, 0]}
            rotation={[rotation + Math.PI / 4, 0, 0]}
          >
            <Cylinder
              args={[1, 1, 2, 12]}
              position={[-0.8, 0, 0]}
              scale={[0.4, 0.4, 0.4]}
              rotation={[0, 0, Math.PI / 2]}
            >
              {material}
            </Cylinder>
            <Box position={[0.2, 0.15, 0]} scale={[0.8, 1, 1]}>
              {material}
            </Box>
            <Box position={[0.2, 1.15, -0.4]} scale={[0.8, 1, 0.2]}>
              {material}
            </Box>
          </group>
        </group>
      </group>
    </>
  );
}
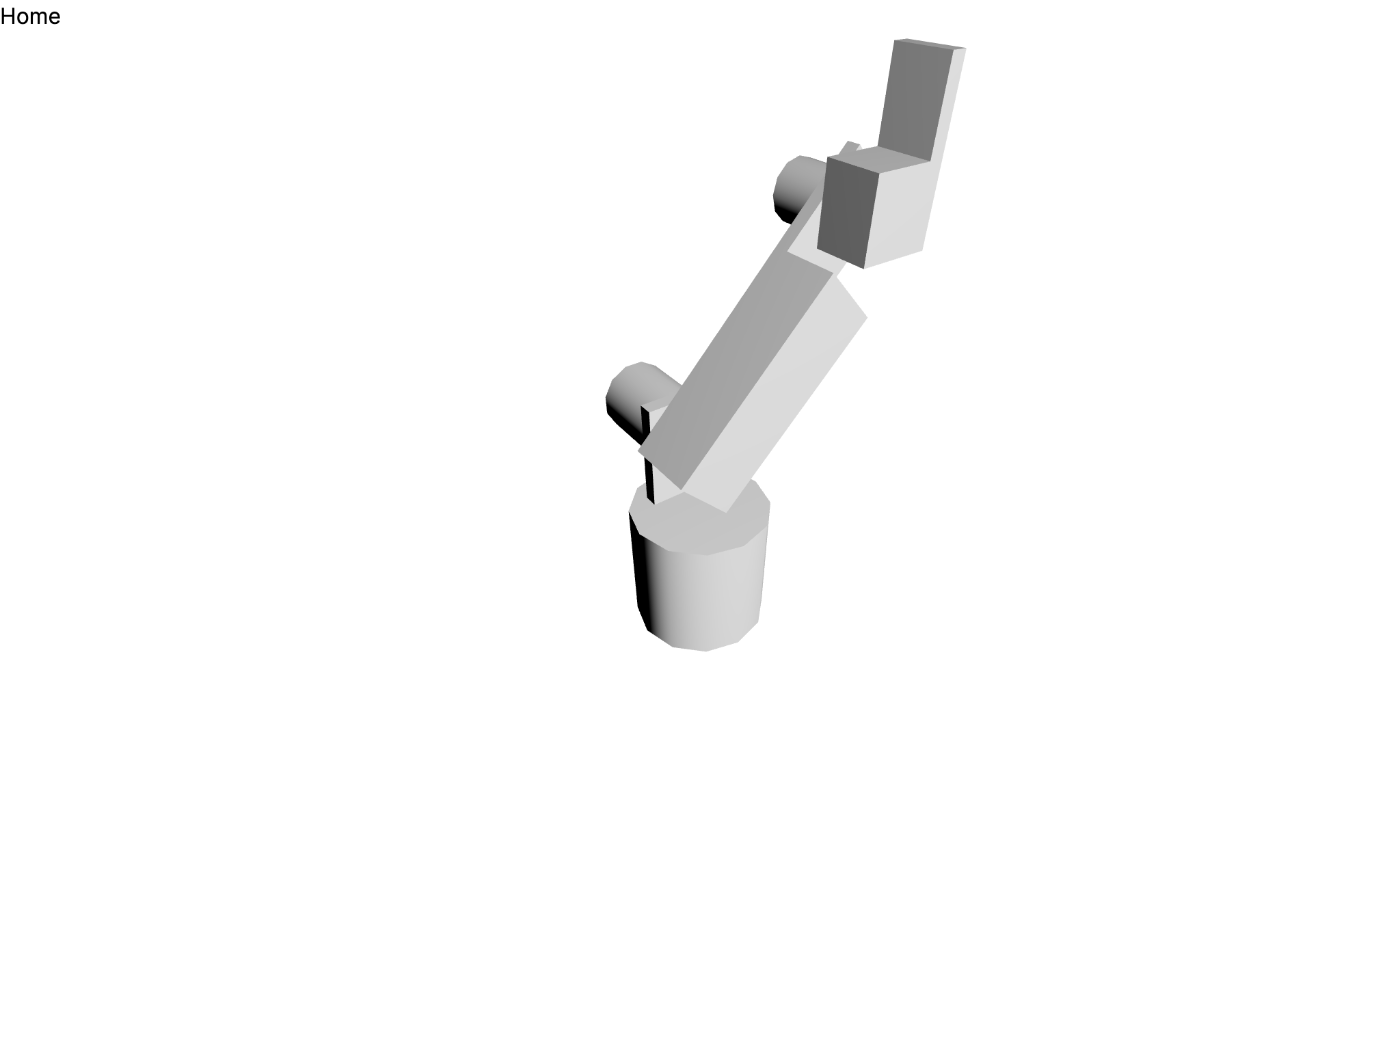
だいぶロボットアームっぽくなってきた
今日はここから
今日は 4 軸目を増やす。
4 軸めを増やした
"use client";

import { Box, Cylinder, OrbitControls } from "@react-three/drei";
import { Canvas, useFrame } from "@react-three/fiber";
import { useState } from "react";

export default function Home() {
  return (
    <main>
      <h1>Home</h1>
      <Canvas style={{ width: "100vw", height: "100vh" }}>
        <Scene></Scene>
      </Canvas>
    </main>
  );
}

function Scene() {
  const [rotationAll, setRotationAll] = useState(0);
  const [rotation, setRotation] = useState(0);
  const material = <meshPhongMaterial color="#f3f3f3"></meshPhongMaterial>;

  // useFrame((state, delta) => setRotation(rotation + delta));
  useFrame((state, delta) => setRotation(rotation + delta));

  return (
    <>
      <pointLight position={[10, 10, 10]}></pointLight>
      <OrbitControls></OrbitControls>
      <group rotation={[0, rotationAll - Math.PI / 4, 0]}>
        <Cylinder args={[1, 1, 2, 12]}>{material}</Cylinder>
        <Box position={[-0.5, 1.75, 0]} scale={[0.2, 1.5, 1]}>
          {material}
        </Box>
        <group
          rotation={[rotationAll - Math.PI / 4, 0, 0]}
          position={[0, 2, 0]}
        >
          <Cylinder
            args={[1, 1, 2, 12]}
            position={[-1.1, 0, 0]}
            scale={[0.5, 0.5, 0.5]}
            rotation={[0, 0, Math.PI / 2]}
          >
            {material}
          </Cylinder>
          <Box position={[0.1, 1, 0]} scale={[1, 3, 1]}>
            {material}
          </Box>
          <Box position={[-0.3, 3.2, 0]} scale={[0.2, 1.4, 1]}>
            {material}
          </Box>
          <group
            position={[0, 3.4, 0]}
            rotation={[rotationAll + Math.PI / 4, 0, 0]}
          >
            <Cylinder
              args={[1, 1, 2, 12]}
              position={[-0.8, 0, 0]}
              scale={[0.4, 0.4, 0.4]}
              rotation={[0, 0, Math.PI / 2]}
            >
              {material}
            </Cylinder>
            <Box position={[0.2, 0.15, 0]} scale={[0.8, 1, 1]}>
              {material}
            </Box>
            <Box position={[0.2, 1.15, -0.4]} scale={[0.8, 1, 0.2]}>
              {material}
            </Box>
            <group
              position={[0.2, 1.2, 0]}
              rotation={[0, 0, rotation + (0 * Math.PI) / 4]}
            >
              <Cylinder
                args={[1, 1, 2, 12]}
                position={[0, 0, 0.06]}
                scale={[0.36, 0.36, 0.36]}
                rotation={[Math.PI / 2, 0, 0]}
              >
                {material}
              </Cylinder>

              <Box
                position={[0, 0, -1.3]}
                scale={[0.6, 1.6, 0.6]}
                rotation={[Math.PI / 2, 0, 0]}
              >
                {material}
              </Box>
            </group>
          </group>
        </group>
      </group>
    </>
  );
}
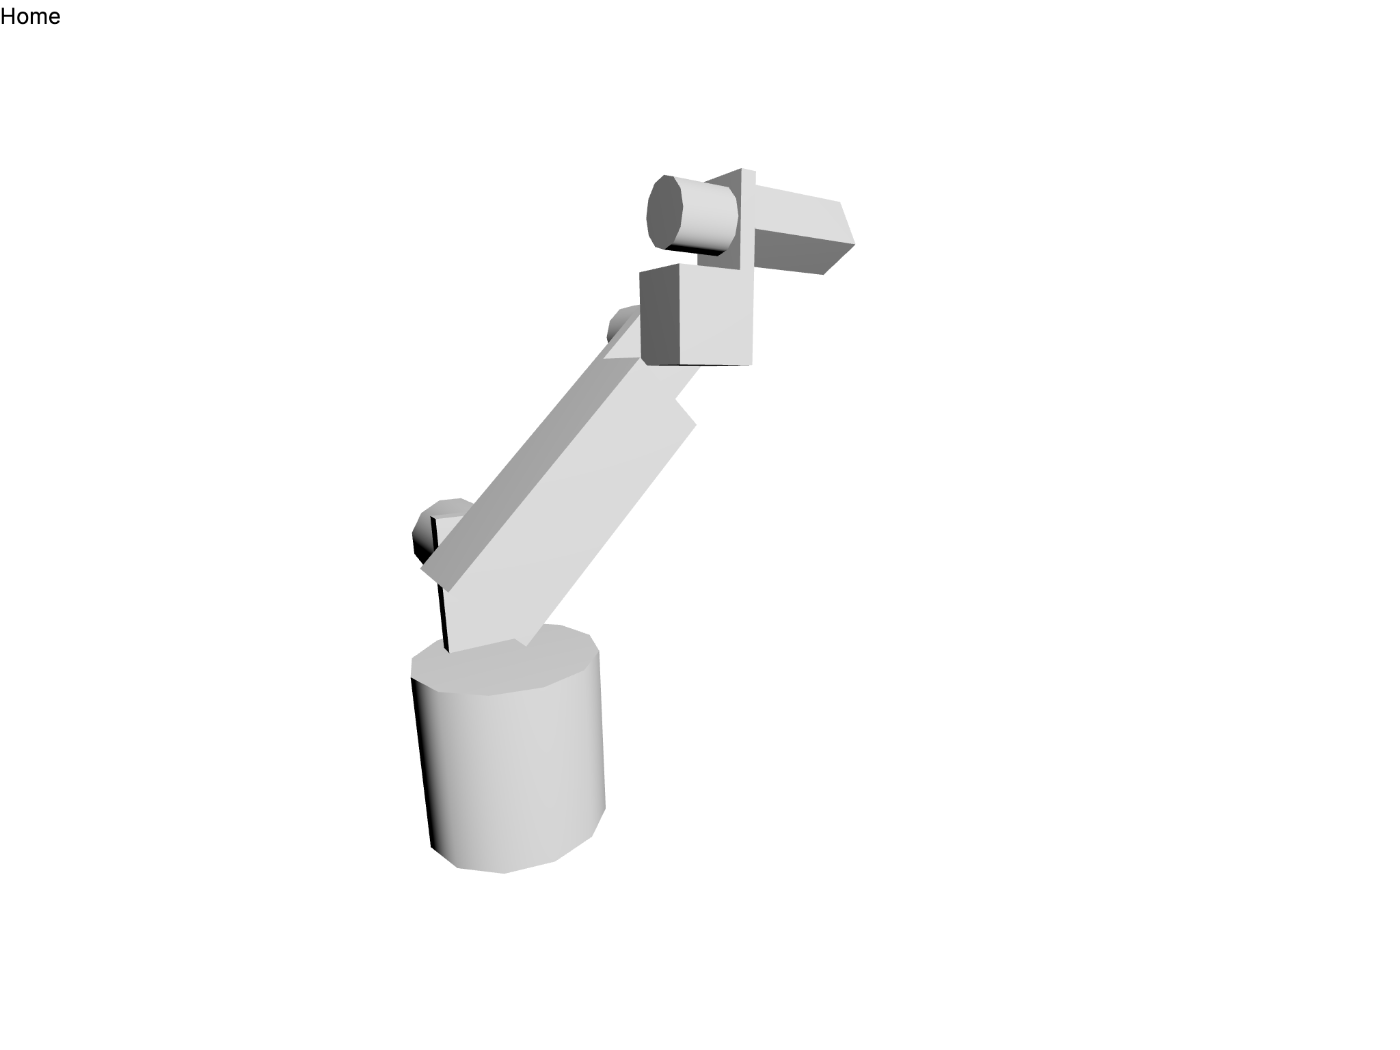
だいぶ頭がこんがらがってきた
今更だけど
反対側から作っていった方が簡単だったかも知れない。
5 軸目を増やす
"use client";

import { Box, Cylinder, OrbitControls } from "@react-three/drei";
import { Canvas, useFrame } from "@react-three/fiber";
import { useState } from "react";

export default function Home() {
  return (
    <main>
      <h1>Home</h1>
      <Canvas style={{ width: "100vw", height: "100vh" }}>
        <Scene></Scene>
      </Canvas>
    </main>
  );
}

function Scene() {
  const [rotationAll, setRotationAll] = useState(0);
  const [rotation, setRotation] = useState(0);
  const material = <meshPhongMaterial color="#f3f3f3"></meshPhongMaterial>;

  // useFrame((state, delta) => setRotation(rotation + delta));
  useFrame((state, delta) => setRotation(rotation + delta));

  return (
    <>
      <pointLight position={[10, 10, 10]}></pointLight>
      <OrbitControls></OrbitControls>
      <group rotation={[0, rotationAll - Math.PI / 4, 0]}>
        <Cylinder args={[1, 1, 2, 12]}>{material}</Cylinder>
        <Box position={[-0.5, 1.75, 0]} scale={[0.2, 1.5, 1]}>
          {material}
        </Box>
        <group
          rotation={[rotationAll - Math.PI / 4, 0, 0]}
          position={[0, 2, 0]}
        >
          <Cylinder
            args={[1, 1, 2, 12]}
            position={[-1.1, 0, 0]}
            scale={[0.5, 0.5, 0.5]}
            rotation={[0, 0, Math.PI / 2]}
          >
            {material}
          </Cylinder>
          <Box position={[0.1, 1, 0]} scale={[1, 3, 1]}>
            {material}
          </Box>
          <Box position={[-0.3, 3.2, 0]} scale={[0.2, 1.4, 1]}>
            {material}
          </Box>
          <group
            position={[0, 3.4, 0]}
            rotation={[rotationAll + Math.PI / 4, 0, 0]}
          >
            <Cylinder
              args={[1, 1, 2, 12]}
              position={[-0.8, 0, 0]}
              scale={[0.4, 0.4, 0.4]}
              rotation={[0, 0, Math.PI / 2]}
            >
              {material}
            </Cylinder>
            <Box position={[0.2, 0.15, 0]} scale={[0.8, 1, 1]}>
              {material}
            </Box>
            <Box position={[0.2, 1.15, -0.4]} scale={[0.8, 1, 0.2]}>
              {material}
            </Box>
            <group
              position={[0.2, 1.2, 0]}
              rotation={[0, 0, rotationAll + (1 * Math.PI) / 4]}
            >
              <Cylinder
                args={[1, 1, 2, 12]}
                position={[0, 0, 0.06]}
                scale={[0.36, 0.36, 0.36]}
                rotation={[Math.PI / 2, 0, 0]}
              >
                {material}
              </Cylinder>

              <Box
                position={[0, 0, -1.3]}
                scale={[0.6, 1.6, 0.6]}
                rotation={[Math.PI / 2, 0, 0]}
              >
                {material}
              </Box>
              <Box
                position={[-0.25, 0, -1.3 - 1.6 / 2 - 0.8 / 2]}
                scale={[0.1, 0.8, 0.6]}
                rotation={[Math.PI / 2, 0, 0]}
              >
                {material}
              </Box>
              <group
                position={[0, 0, -2.6]}
                rotation={[rotationAll + (-1 * Math.PI) / 4, 0, 0]}
              >
                <Cylinder
                  args={[1, 1, 2, 12]}
                  position={[-0.54, 0, 0]}
                  scale={[0.24, 0.24, 0.24]}
                  rotation={[0, 0, Math.PI / 2]}
                >
                  {material}
                </Cylinder>
                <Box
                  position={[0, 0, -0.5]}
                  scale={[0.4, 1.4, 0.4]}
                  rotation={[Math.PI / 2, 0, 0]}
                >
                  {material}
                </Box>
              </group>
            </group>
          </group>
        </group>
      </group>
    </>
  );
}

もう何が何だかよくわからない
アニメーションを設ける
function Scene() {
  const [currentTime, setRotationAllT] = useState(0);
  const [rotation, setRotation] = useState(0);
  const material = <meshPhongMaterial color="#f3f3f3"></meshPhongMaterial>;

  useFrame((state, delta) => setRotationAllT(currentTime + delta));
  useFrame((state, delta) => setRotation(rotation + delta));

  const interval = 4000;
  const triangleWave = Math.abs(
    (((currentTime * 1000) % interval) * 2) / interval - 1.0
  );

  const maxRotationDegree = Math.PI / 4;
  const degreeToRotate = triangleWave * maxRotationDegree;

  return (
    <>
      <pointLight position={[10, 10, 10]}></pointLight>
      <OrbitControls></OrbitControls>
      <group rotation={[0, degreeToRotate - Math.PI / 4, 0]}>
        <Cylinder args={[1, 1, 2, 12]}>{material}</Cylinder>
        <Box position={[-0.5, 1.75, 0]} scale={[0.2, 1.5, 1]}>
          {material}
        </Box>
        <group
          rotation={[degreeToRotate - Math.PI / 4, 0, 0]}
          position={[0, 2, 0]}
        >
          <Cylinder
            args={[1, 1, 2, 12]}
            position={[-1.1, 0, 0]}
            scale={[0.5, 0.5, 0.5]}
            rotation={[0, 0, Math.PI / 2]}
          >
            {material}
          </Cylinder>
          <Box position={[0.1, 1, 0]} scale={[1, 3, 1]}>
            {material}
          </Box>
          <Box position={[-0.3, 3.2, 0]} scale={[0.2, 1.4, 1]}>
            {material}
          </Box>
          <group
            position={[0, 3.4, 0]}
            rotation={[degreeToRotate + Math.PI / 4, 0, 0]}
          >
            <Cylinder
              args={[1, 1, 2, 12]}
              position={[-0.8, 0, 0]}
              scale={[0.4, 0.4, 0.4]}
              rotation={[0, 0, Math.PI / 2]}
            >
              {material}
            </Cylinder>
            <Box position={[0.2, 0.15, 0]} scale={[0.8, 1, 1]}>
              {material}
            </Box>
            <Box position={[0.2, 1.15, -0.4]} scale={[0.8, 1, 0.2]}>
              {material}
            </Box>
            <group
              position={[0.2, 1.2, 0]}
              rotation={[0, 0, degreeToRotate + (1 * Math.PI) / 4]}
            >
              <Cylinder
                args={[1, 1, 2, 12]}
                position={[0, 0, 0.06]}
                scale={[0.36, 0.36, 0.36]}
                rotation={[Math.PI / 2, 0, 0]}
              >
                {material}
              </Cylinder>

              <Box
                position={[0, 0, -1.3]}
                scale={[0.6, 1.6, 0.6]}
                rotation={[Math.PI / 2, 0, 0]}
              >
                {material}
              </Box>
              <Box
                position={[-0.25, 0, -1.3 - 1.6 / 2 - 0.8 / 2]}
                scale={[0.1, 0.8, 0.6]}
                rotation={[Math.PI / 2, 0, 0]}
              >
                {material}
              </Box>
              <group
                position={[0, 0, -2.6]}
                rotation={[degreeToRotate + (-1 * Math.PI) / 4, 0, 0]}
              >
                <Cylinder
                  args={[1, 1, 2, 12]}
                  position={[-0.54, 0, 0]}
                  scale={[0.24, 0.24, 0.24]}
                  rotation={[0, 0, Math.PI / 2]}
                >
                  {material}
                </Cylinder>
                <Box
                  position={[0, 0, -0.5]}
                  scale={[0.4, 1.4, 0.4]}
                  rotation={[Math.PI / 2, 0, 0]}
                >
                  {material}
                </Box>
              </group>
            </group>
          </group>
        </group>
      </group>
    </>
  );
}
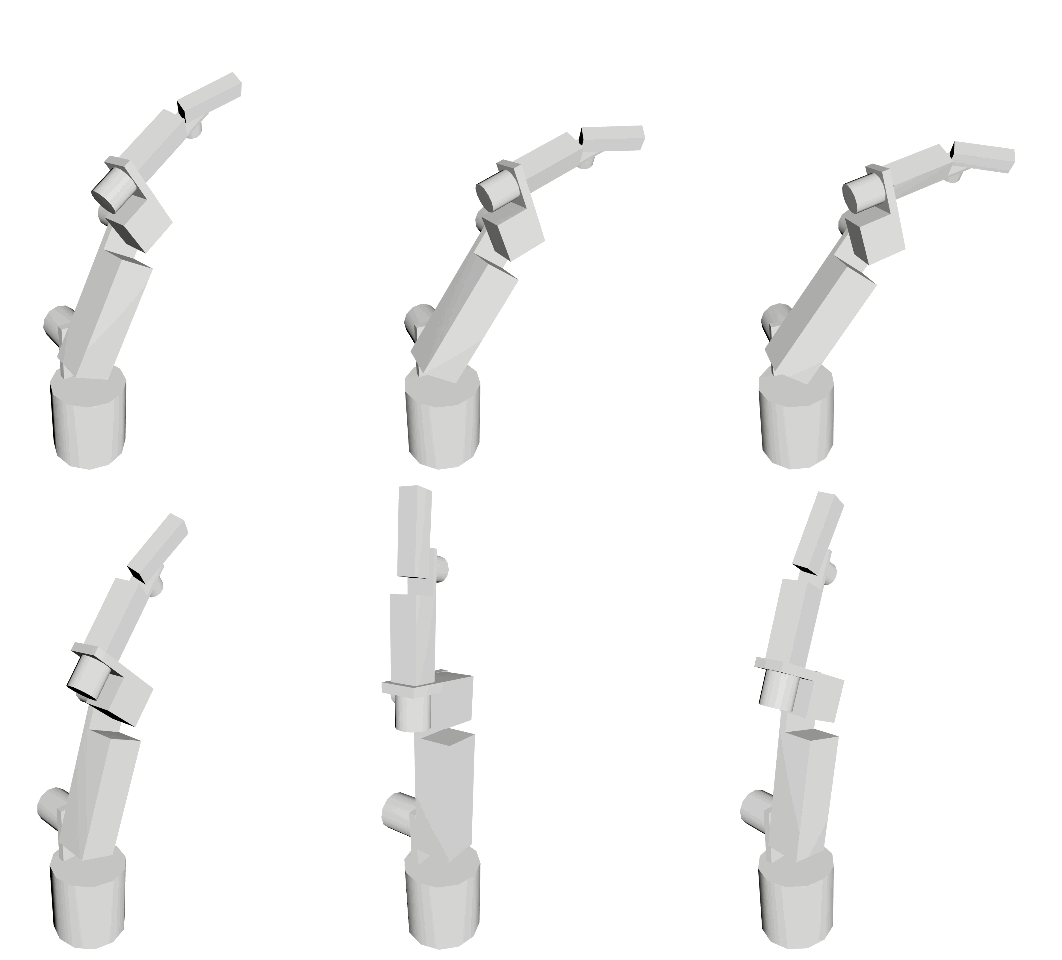
やっぱり動くと面白いな
今日はここまで
次回はまとめてクローズしよう。
いや、その前にスライダーなどでインタラクティブに動かせるようにすると面白いかも。
やってみよう。
円柱や直方体を STL にすればだいぶん見栄えがよくなりそうだ。
初期位置の変更
Scene にカメラを加える。
      <PerspectiveCamera
        makeDefault
        fov={75}
        near={0.1}
        far={1000}
        position={[0, 5, 15]}
      ></PerspectiveCamera>
スライダーの追加
npm install jotai
"use client";

import {
  Box,
  Cylinder,
  OrbitControls,
  PerspectiveCamera,
} from "@react-three/drei";
import { Canvas, useFrame } from "@react-three/fiber";
import { atom, useAtom, useAtomValue } from "jotai";
import { FC, useState } from "react";

const axisDegreesAtom = atom([-45, -45, 45, 45, -45]);
const axisRadiansAtom = atom((get) =>
  get(axisDegreesAtom).map((degree) => (degree * Math.PI) / 180)
);

export default function Home() {
  return (
    <main>
      <h1>Robot Arm V2</h1>
      <form>
        {[...Array(5)].map((_, i) => (
          <AxisDegreeSlider index={i} key={i}></AxisDegreeSlider>
        ))}
      </form>
      <Canvas style={{ width: "100vw", height: "100vh" }}>
        <Scene></Scene>
      </Canvas>
    </main>
  );
}

const AxisDegreeSlider: FC<{ index: number }> = ({ index }) => {
  const [axisDegrees, setAxisDegrees] = useAtom(axisDegreesAtom);

  return (
    <div className="flex items-center">
      <label htmlFor={`axis${index}`} className="mr-3">
        Axis {index}
      </label>
      <input
        name={`axis${index}`}
        id={`axis${index}`}
        type="range"
        min={-180}
        max={180}
        step={1}
        value={axisDegrees[index]}
        onChange={(event) =>
          setAxisDegrees((axisDegrees) => [
            ...axisDegrees.slice(0, index),
            parseInt(event.target.value, 10),
            ...axisDegrees.slice(index + 1),
          ])
        }
      />
    </div>
  );
};

function Scene() {
  const axisRadians = useAtomValue(axisRadiansAtom);
  const [currentTime, setCurrentTime] = useState(0);
  const material = <meshPhongMaterial color="#f3f3f3"></meshPhongMaterial>;

  useFrame((state, delta) => setCurrentTime(currentTime + delta));

  const interval = 4000;
  const triangleWave = Math.abs(
    (((currentTime * 1000) % interval) * 2) / interval - 1.0
  );

  const maxRotationDegree = Math.PI / 4;
  const degreeToRotate = triangleWave * maxRotationDegree;

  return (
    <>
      <pointLight position={[10, 10, 10]}></pointLight>
      <OrbitControls></OrbitControls>
      <PerspectiveCamera
        makeDefault
        fov={75}
        near={0.1}
        far={1000}
        position={[0, 5, 15]}
      ></PerspectiveCamera>
      <group rotation={[0, axisRadians[0], 0]}>
        <Cylinder args={[1, 1, 2, 12]}>{material}</Cylinder>
        <Box position={[-0.5, 1.75, 0]} scale={[0.2, 1.5, 1]}>
          {material}
        </Box>
        <group rotation={[axisRadians[1], 0, 0]} position={[0, 2, 0]}>
          <Cylinder
            args={[1, 1, 2, 12]}
            position={[-1.1, 0, 0]}
            scale={[0.5, 0.5, 0.5]}
            rotation={[0, 0, Math.PI / 2]}
          >
            {material}
          </Cylinder>
          <Box position={[0.1, 1, 0]} scale={[1, 3, 1]}>
            {material}
          </Box>
          <Box position={[-0.3, 3.2, 0]} scale={[0.2, 1.4, 1]}>
            {material}
          </Box>
          <group position={[0, 3.4, 0]} rotation={[axisRadians[2], 0, 0]}>
            <Cylinder
              args={[1, 1, 2, 12]}
              position={[-0.8, 0, 0]}
              scale={[0.4, 0.4, 0.4]}
              rotation={[0, 0, Math.PI / 2]}
            >
              {material}
            </Cylinder>
            <Box position={[0.2, 0.15, 0]} scale={[0.8, 1, 1]}>
              {material}
            </Box>
            <Box position={[0.2, 1.15, -0.4]} scale={[0.8, 1, 0.2]}>
              {material}
            </Box>
            <group position={[0.2, 1.2, 0]} rotation={[0, 0, axisRadians[3]]}>
              <Cylinder
                args={[1, 1, 2, 12]}
                position={[0, 0, 0.06]}
                scale={[0.36, 0.36, 0.36]}
                rotation={[Math.PI / 2, 0, 0]}
              >
                {material}
              </Cylinder>

              <Box
                position={[0, 0, -1.3]}
                scale={[0.6, 1.6, 0.6]}
                rotation={[Math.PI / 2, 0, 0]}
              >
                {material}
              </Box>
              <Box
                position={[-0.25, 0, -1.3 - 1.6 / 2 - 0.8 / 2]}
                scale={[0.1, 0.8, 0.6]}
                rotation={[Math.PI / 2, 0, 0]}
              >
                {material}
              </Box>
              <group position={[0, 0, -2.6]} rotation={[axisRadians[4], 0, 0]}>
                <Cylinder
                  args={[1, 1, 2, 12]}
                  position={[-0.54, 0, 0]}
                  scale={[0.24, 0.24, 0.24]}
                  rotation={[0, 0, Math.PI / 2]}
                >
                  {material}
                </Cylinder>
                <Box
                  position={[0, 0, -0.5]}
                  scale={[0.4, 1.4, 0.4]}
                  rotation={[Math.PI / 2, 0, 0]}
                >
                  {material}
                </Box>
              </group>
            </group>
          </group>
        </group>
      </group>
    </>
  );
}
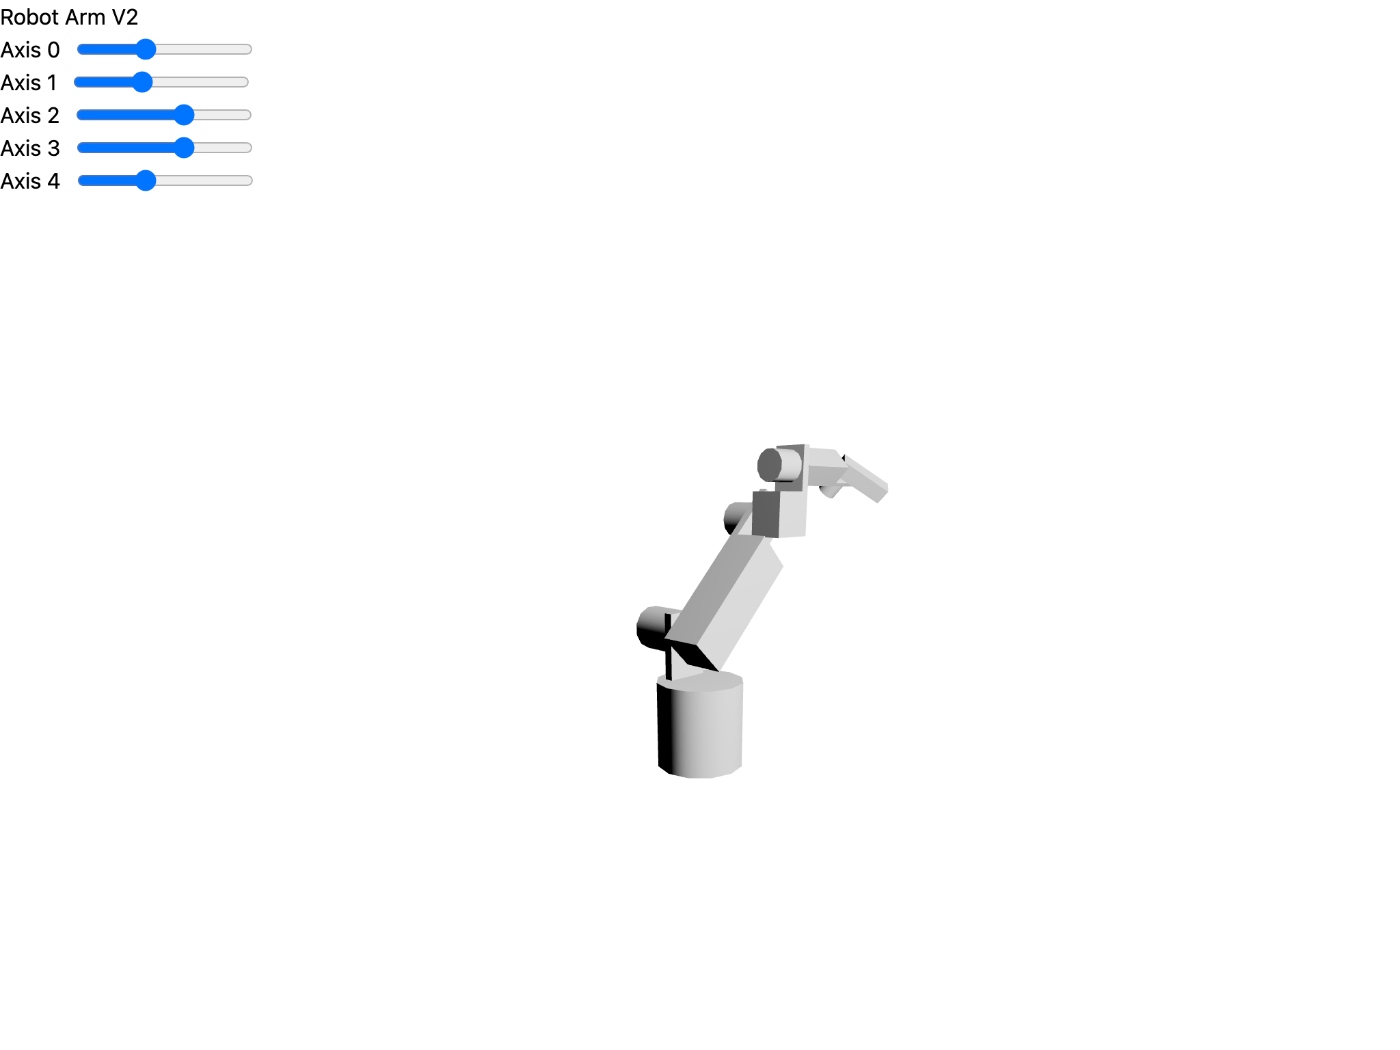
スライダーに連動するようになった
今日はここまで(2 回目)
ここまで作業時間は 5 時間くらい?
5/22 (月) はここから
Cloudflare にデプロイしたらクローズしようかな。
ローカルでビルドできる?
npm run build
> next build

- info Creating an optimized production build
- info Compiled successfully
- info Linting and checking validity of types
- info Collecting page data
- info Generating static pages (4/4)
- info Finalizing page optimization

Route (app)                                Size     First Load JS
┌ ○ /                                      207 kB          284 kB
└ ○ /favicon.ico                           0 B                0 B
+ First Load JS shared by all              76.9 kB
  ├ chunks/139-002b31d82a1d4f5d.js         24.5 kB
  ├ chunks/2443530c-7eefc34b15e3bd81.js    50.5 kB
  ├ chunks/main-app-9f2f089e5a0bf896.js    214 B
  └ chunks/webpack-64d95c37b5463075.js     1.68 kB

Route (pages)                              Size     First Load JS
─ ○ /404                                   178 B            86 kB
+ First Load JS shared by all              85.8 kB
  ├ chunks/main-ec7b1d67e0a9d0ca.js        83.9 kB
  ├ chunks/pages/_app-c544d6df833bfd4a.js  192 B
  └ chunks/webpack-64d95c37b5463075.js     1.68 kB

○  (Static)  automatically rendered as static HTML (uses no initial props)
ビルドは成功した。
特に何も設定しなくてもいけるかもしれない。
Cloudflare の設定

Cloudflare にログインして Workers & Pages の作成ページへ移動する
CLI もあるようだが数日前にリリースされたばかりのようだ。
ちょっと怖いけどせっかくだから使ってみようかな。
やはり GUI から
npm create cloudflare@latest を実行するとプロジェクトが作成されそうになり、違うなと思ったので素直に Web GUI を使ってデプロイする。
まずは「Git に接続」ボタンを押してリポジトリを選ぶ。

フレームワークプリセットを「Next.js」とする
下記の記事によると App Router にも対応しているようだ。
しまった Node.js バージョン指定を忘れた
ビルドは失敗するだろう。
今はどんなバージョンの Node.js でも使えるようだ。
今回は最新 LTS の NODE_VERSION=18 を指定しよう。
エラーメッセージ
当然成功したと思ったらまさかのエラーメッセージが表示された。
Error: Could not access built-in node modules, please make sure that your Cloudflare Pages project has the 'nodejs_compat' compatibility flag set.
どうやら nodejs_compat フラグが必要のようだ。
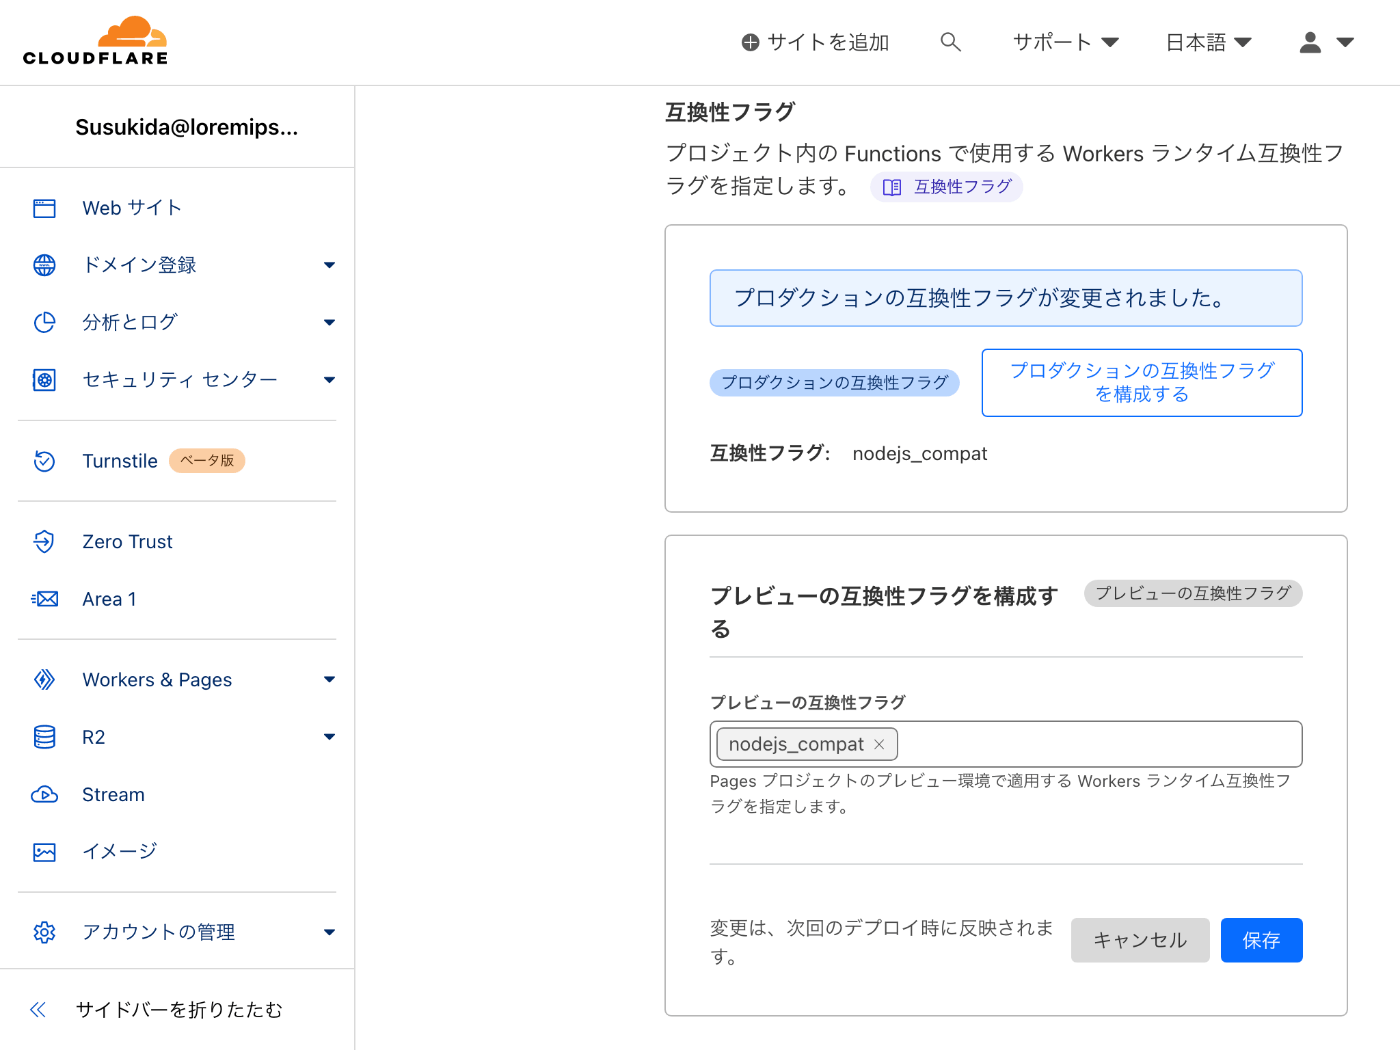
先に紹介した Zenn 記事がとても参考になる。
現時点だと static export でも十分な気がするがせっかくなのでこのまま進めてみよう。
GitHub リポジトリ
こちらでございます。
作業時間
今日は 1 時間くらいなので合計で 1 時間くらいかな?
振り返り
- @react-three/fiber を使うと React / Next.js で宣言的に Three.js が使える。
- @react-three/drei には便利なヘルパーがたくさんあるので自分で作らずまずは探してみる。
- マウスで操作できるようにするには OrbitControls を使う。
- 円柱が 6 角形など少ない状態でライティングすると法線ベクトルの関係で影が期待通りにはつかない。
- X, Y, Z軸を中心に回転させるには group コンポーネントで囲んで rotation 属性を指定する。
- group が X 軸を中心に回転するなら group の position 属性の X 成分は 0 になる、Y と Z も同様。
- 初期位置を変更するには PerspectiveCamera を使う。
- Cloudflare で Next.js(非 static export)アプリとして動かすには nodejs_compat フラグ指定が必要。
おわりに
@react-three/fiber はとても便利な一方で検索した時の情報量が生の Three.js より少ないので少し込み入ったことをする時には調べるのに時間がかかりそうだと感じた。
型定義についても自動補完優先であまり人間が読むようにはなっていないので型定義を見て使用可能なオプションを理解するというのも難しそうだ。
できれば @react-three/fiber でこのまま続けたいが挫折したら生の Three.js に戻ってくるかも知れない。
