WebContainersで作るブラウザー開発環境
WebContainersとは
みなさん、WebContainersをご存知でしょうか?
WebContainersはStackBlitzが開発している、ブラウザー上で開発環境を構築するためのツールです。
なんとブラウザーだけでNode.jsやNext.jsなどのアプリケーションが動かせてしまいます。
すでにこのツールを使ってSvelteのPlaygroundが用意されていたりします。
現在WebContainersを使って作っているもの
現在、以下の動画のようなブラウザーだけでNext.jsやReactを使った開発ができるツールを作っています。
ここに開発中のエディターのリンクを貼っておきます。
すでにこのエディターで以下のようなことが可能です。
- ファイルの作成、削除、リネーム
- ターミナルの操作(jsh)
- ファイルの編集(VSCodeのようなエディター)
- ブラウザーでの実行結果のプレビュー
このツールを作り切ったら現在運営しているWeb学習サービスmosyaにこのツールを使ってReactを学習できる新たなプランを用意しようと考えています。
WebContainersを使った開発環境の作り方
今回はこのWebContainersを使った開発環境の作り方を簡単に解説したいと思います。
WebContainersの起動
まず、WebContainersの起動方法についてです。
WebContainersは以下のようにして起動することができます。
import { WebContainer } from "@webcontainer/api";

const container = await WebContainer.boot();
ファイルツリーとの紐付け
以下のようなオブジェクトを作ることでWebContainersにファイルをマウントすることができます。
const files = {
  // This is a directory - provide its name as a key
  src: {
    // Because it's a directory, add the "directory" key
    directory: {
      // This is a file - provide its path as a key:
      'main.js': {
        // Because it's a file, add the "file" key
        file: {
          contents: `
            console.log('Hello from WebContainers!')
          `,
        },
      },
      // This is another file inside the same folder
      'main.css': {
        // Because it's a file, add the "file" key
        file: {
          contents: `
            body {
              margin: 0;
            }
          `,
        },
      },
    },
  },
  // This is a file outside the folder
  'package.json': {
    /* Omitted for brevity */
  },
  // This is another file outside the folder
  'index.html': {
    /* Omitted for brevity */
  },
};
container.mount(files);
ディレクトリの場合はそのディレクトリーのキー名に対してさらにdirectoryというキーを下に追加する必要があり色々とめんどくさいです。
そこで、以下のような関数を作っています。各オブジェクトのキー名のパスからファイルツリーを作成する関数です。
filesToSystemTree関数
export type Files = {
  [key: string]: {
    value: string;
    language: string;
    active?: boolean;
    hidden?: boolean;
    tabbed?: boolean;
  };
};
export function filesToSystemTree(input: Files): FileSystemTree {
  const output: FileSystemTree = {};

  for (const key in input) {
    // Remove any './' from the beginning of the key
    const adjustedKey = key.startsWith("./") ? key.slice(2) : key;

    const splitKeys = adjustedKey.split("/").filter(Boolean);

    let currentOutput = output;
    for (let i = 0; i < splitKeys.length; i++) {
      const subKey = splitKeys[i];

      // If we're at a file, assign it as file with contents
      if (i === splitKeys.length - 1) {
        currentOutput[subKey] = { file: { contents: input[key].value } };
      } else {
        // Otherwise, create a new directory if it doesn't exist
        if (!currentOutput[subKey]) {
          currentOutput[subKey] = { directory: {} };
        }

        // Move our pointer to this directory
        currentOutput = currentOutput[subKey].directory!;
      }
    }
  }

  return output;
}
依存ライブラリのインストール
WebContainersにはコマンドを実行する関数が用意されていて、これを使うことでnpmやyarnを使って依存ライブラリをインストールすることができます。
// Install dependencies
const installProcess = await container.spawn("npm", ["install"]);
// Wait for install command to exit
await installProcess.exit;
ターミナルとの紐付け
また、Xterm.jsというライブラリーを使ってターミナルを実装しています。これはWebContainersととても相性がいいです。
以下のようにWebContainersのプロセスの出力をXterm.jsの出力にパイプすることができます。
import { Terminal } from "xterm";

const terminal = new Terminal();
const installProcess = await container.spawn("npm", ["install"]);
installProcess.output.pipeTo(
  new WritableStream({
    write(data) {
      terminal.write(data);
    },
  })
);
また反対にXtermに入力があった場合は以下のようにしてWebContainersのプロセスにパイプすることができます。
const shellProcess = await container.spawn("jsh", {
  terminal: {
    cols: terminal.cols,
    rows: terminal.rows,
  },
});
shellProcess.output.pipeTo(
  new WritableStream({
    write(data) {
      terminal.write(data);
    },
  })
);

const input = shellProcess.input.getWriter();
terminal.onData((data) => {
  input.write(data);
});
アプリの起動
最後にWebContainersを起動します。起動するのは普段Next.jsを使っている時と同じようにnpmコマンドを使ってdevコマンドを実行するだけです。
const startProcess = await container.spawn("npm", ["run", "dev"]);
startProcess.output.pipeTo(
  new WritableStream({
    write(data) {
      terminal.write(data);
    },
  })
);
// Wait for `server-ready` event
return new Promise<string>((resolve) => {
  container.on("server-ready", (port, url) => {
    resolve(url);
  });
});
また、containerのサーバーが起動した際にはserver-readyイベントが発火するので、これを待つことでサーバーが起動したことを検知することができ、同時にサーバーのURLを取得することができます。
これをiframeのsrcに渡すことで、iframeにアプリを表示することができます。
まとめると以下のようなコードになります。
まとめ
import React, { useEffect } from "react";
import { HashLoader } from "react-spinners";
import { Terminal } from "xterm";

import type { Files } from "./types";

import { useBrowserEditor } from "./hooks/use-browser-editor";
import { transform } from "./utils/file-system";
import { getWebContainerInstance } from "./utils/webcontainer";
import { getTerminalInstance } from "./utils/terminal";

async function bootinstance(files: Files) {
  const webcontainerInstance = await getWebContainerInstance();
  await webcontainerInstance.mount(transform(files));
}

async function installDependencies(terminal: Terminal) {
  // Install dependencies
  const webcontainerInstance = await getWebContainerInstance();
  const installProcess = await webcontainerInstance.spawn("npm", ["install"]);
  installProcess.output.pipeTo(
    new WritableStream({
      write(data) {
        terminal.write(data);
      },
    })
  );
  // Wait for install command to exit
  return installProcess.exit;
}

async function startDevServer(terminal: Terminal) {
  const webcontainerInstance = await getWebContainerInstance();
  // Run `npm run start` to start the Express app
  const startProcess = await webcontainerInstance.spawn("npm", ["run", "dev"]);
  startProcess.output.pipeTo(
    new WritableStream({
      write(data) {
        terminal.write(data);
      },
    })
  );
  // Wait for `server-ready` event
  return new Promise<string>((resolve) => {
    webcontainerInstance.on("server-ready", (port, url) => {
      resolve(url);
    });
  });
}

async function startShell(terminal: Terminal) {
  const webcontainerInstance = await getWebContainerInstance();
  const shellProcess = await webcontainerInstance.spawn("jsh", {
    terminal: {
      cols: terminal.cols,
      rows: terminal.rows,
    },
  });
  shellProcess.output.pipeTo(
    new WritableStream({
      write(data) {
        terminal.write(data);
      },
    })
  );

  const input = shellProcess.input.getWriter();
  terminal.onData((data) => {
    input.write(data);
  });

  // shellProcess.

  return shellProcess;
}

async function run(files: Files) {
  const terminal = getTerminalInstance();
  await bootinstance(files);
  await installDependencies(terminal);
  const url = await startDevServer(terminal);
  await startShell(terminal);
  return url;
}

export const Preview = () => {
  const { files } = useBrowserEditor();
  const [url, setUrl] = React.useState("");
  const [boot, setBoot] = React.useState(false);
  useEffect(() => {
    if (boot || !files || Object.keys(files).length === 0) {
      return;
    }
    setBoot(true);
    run(files).then((url) => {
      setUrl(url);
    });
  }, [files]);

  return (
    <div className="rounded-md flex-1 h-full overflow-hidden">
      <div className="w-full h-11 rounded-t-lg bg-gray-200 flex justify-start items-center space-x-1.5 px-3">
        <span className="w-3 h-3 rounded-full bg-red-400"></span>
        <span className="w-3 h-3 rounded-full bg-yellow-400"></span>
        <span className="w-3 h-3 rounded-full bg-green-400"></span>
      </div>
      {url && (
        <iframe
          src={url}
          sandbox="allow-scripts allow-same-origin allow-popups-to-escape-sandbox allow-popups"
          className="h-full bg-gray-50 p-2 w-full"
        ></iframe>
      )}
      {!url && (
        <div className="grid place-items-center h-full w-full">
          <HashLoader color="#36d7b7" />
        </div>
      )}
    </div>
  );
};
ファイルツリーの可視化
次にファイルツリーの可視化です。
ファイルツリーの可視化には@sinm/react-file-treeというライブラリを使っています。
このライブラリ、拡張子に応じてアイコンを表示してくれてとてもいい感じです!
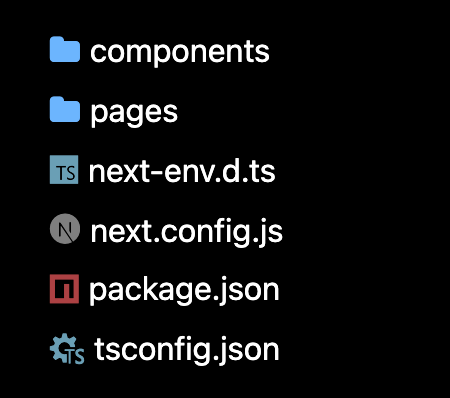
スター数は2023年8/10現在、たった3つしかないのですがとても優秀です!
エディター部分の実装
エディターの実装にはお馴染みMonaco Editorを使っています。
難しかったのがライブラリの型情報と表示なのですが、
esm.shから型情報を引っ張ってきてそれをMonaco Editorに渡すことで解決しました。
例えば、reactの型情報を取得したい場合はhttps://esm.sh/reactにアクセスし、そのレスポンスヘッダーのx-typescript-typesに型情報のURLが入っているので、さらにそのURLにアクセスすることで型情報を取得できます。
export const resolveModuleType = async (
  module: string,
): Promise<void> => {
  const res = await fetch(`https://esm.sh/${module}`);
  const dtsUrl = res.headers.get("x-typescript-types");
  if (!dtsUrl) return;
  const dts = await fetch(dtsUrl);
  const dtsText = await dts.text();
  // 取得した型をMonaco Editorに渡す
  monaco.languages.typescript.typescriptDefaults.addExtraLib(
    dtsText,
    `file:///node_modules/@types/${module}/index.d.ts`
  );
};

// reactの型を取得
resolveModuleType("react");
Monaco EditorでJSXをハイライトする
Monaco Editorはjsxのハイライトに標準で現在のところ対応していないので、monaco-textmateというライブラリを使ってjsxのハイライトを実現します。
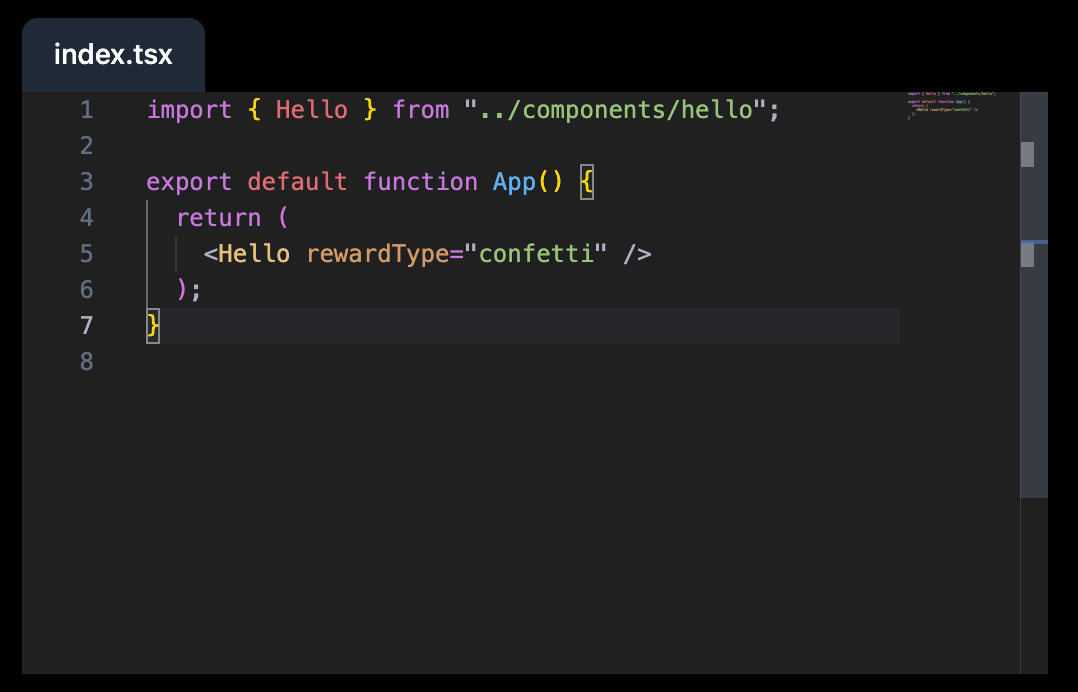
コードは以下のようになります。それぞれ言語に応じたハイライトに必要な定義ファイルを読み込みます。
今回は便利なのでVS Codeの定義ファイルを直接読み込んでいます。
JSXのハイライト
import { wireTmGrammars } from "monaco-editor-textmate";
import { Registry } from "monaco-textmate"; // peer dependency
import { loadWASM } from "onigasm"; // peer dependency of 'monaco-textmate'

const textmatePath =
  "https://esm.sh/githubusercontent/microsoft/vscode/main/extensions";

const registry = new Registry({
  getGrammarDefinition: async (scopeName) => {
    if (scopeName === "source.tsx") {
      const response = await fetch(
        `${textmatePath}/typescript-basics/syntaxes/TypeScriptReact.tmLanguage.json`
      );
      return {
        format: "json",
        content: await response.text(),
      };
    }
    if (scopeName === "source.ts") {
      const response = await fetch(
        `${textmatePath}/typescript-basics/syntaxes/TypeScriptReact.tmLanguage.json`
      );
      return {
        format: "json",
        content: await response.text(),
      };
    }
    if (scopeName === "source.js") {
      const response = await fetch(
        `${textmatePath}/javascript/syntaxes/JavaScriptReact.tmLanguage.json`
      );
      return {
        format: "json",
        content: await response.text(),
      };
    }
    if (scopeName === "source.jsx") {
      const response = await fetch(
        `${textmatePath}/javascript/syntaxes/JavaScriptReact.tmLanguage.json`
      );
      return {
        format: "json",
        content: await response.text(),
      };
    }
    if (scopeName === "source.css") {
      const response = await fetch(
        `${textmatePath}/css/syntaxes/css.tmLanguage.json`
      );
      return {
        format: "json",
        content: await response.text(),
      };
    }
    if (scopeName === "text.html.basic") {
      const response = await fetch(
        `${textmatePath}/html/syntaxes/html.tmLanguage.json`
      );
      return {
        format: "json",
        content: await response.text(),
      };
    }
    if (scopeName === "source.json") {
      const response = await fetch(
        `${textmatePath}/json/syntaxes/JSON.tmLanguage.json`
      );
      return {
        format: "json",
        content: await response.text(),
      };
    }
    return {
      format: "json",
      content: "",
    };
  },
});

export const initEditor = async () => {
  await loadWASM("https://esm.sh/onigasm@2.2.5/lib/onigasm.wasm");
  monaco.editor.defineTheme("myTheme", theme);
  monaco.editor.setTheme("myTheme");
  const grammers = new Map();
  grammers.set("typescript", "source.tsx");
  grammers.set("javascript", "source.jsx");
  grammers.set("css", "source.css");
  grammers.set("html", "text.html.basic");
  grammers.set("json", "source.json");
  await wireTmGrammars(monaco, registry, grammers);
};
まとめ
StackBlitz社が開発したWebContainersを使うことで、ブラウザー上でNext.jsを開発できる環境を簡単に用意できました。
これにXterm.jsやMonaco Editorなどのライブラリを組み合わせることで、可能性は無限大です。
初学者にはなかなか環境構築は難しく挫折しやすいポイントです。
このようにブラウザーで環境を用意してあげて敷居を下げることで、より多くの人がプログラミングを始められるきっかけになるといいなと思います。
また、学習用に限らず、作ったライブラリのPlaygroundを用意するときなどにも使えると思うので、ぜひ試してみてください。
今後の課題
今後もっとこのエディターをブラッシュアップしていけたらいいなと考えていて以下のような改善や機能追加を考えています。
- Git連携
- 開いたタブを閉じる
-
npm installなどした後にpackage.jsonを更新する - Prismaなどのデータベースを使うライブラリのサポート
- 作ったコードの共有など
WebContainersでSQLiteを動かすことができるそうなので、Prismaを動かすのは多分できそうです!
Discussion