はじめに
こんにちは。はじめまして。まるべいじ(malvageee)と申します!
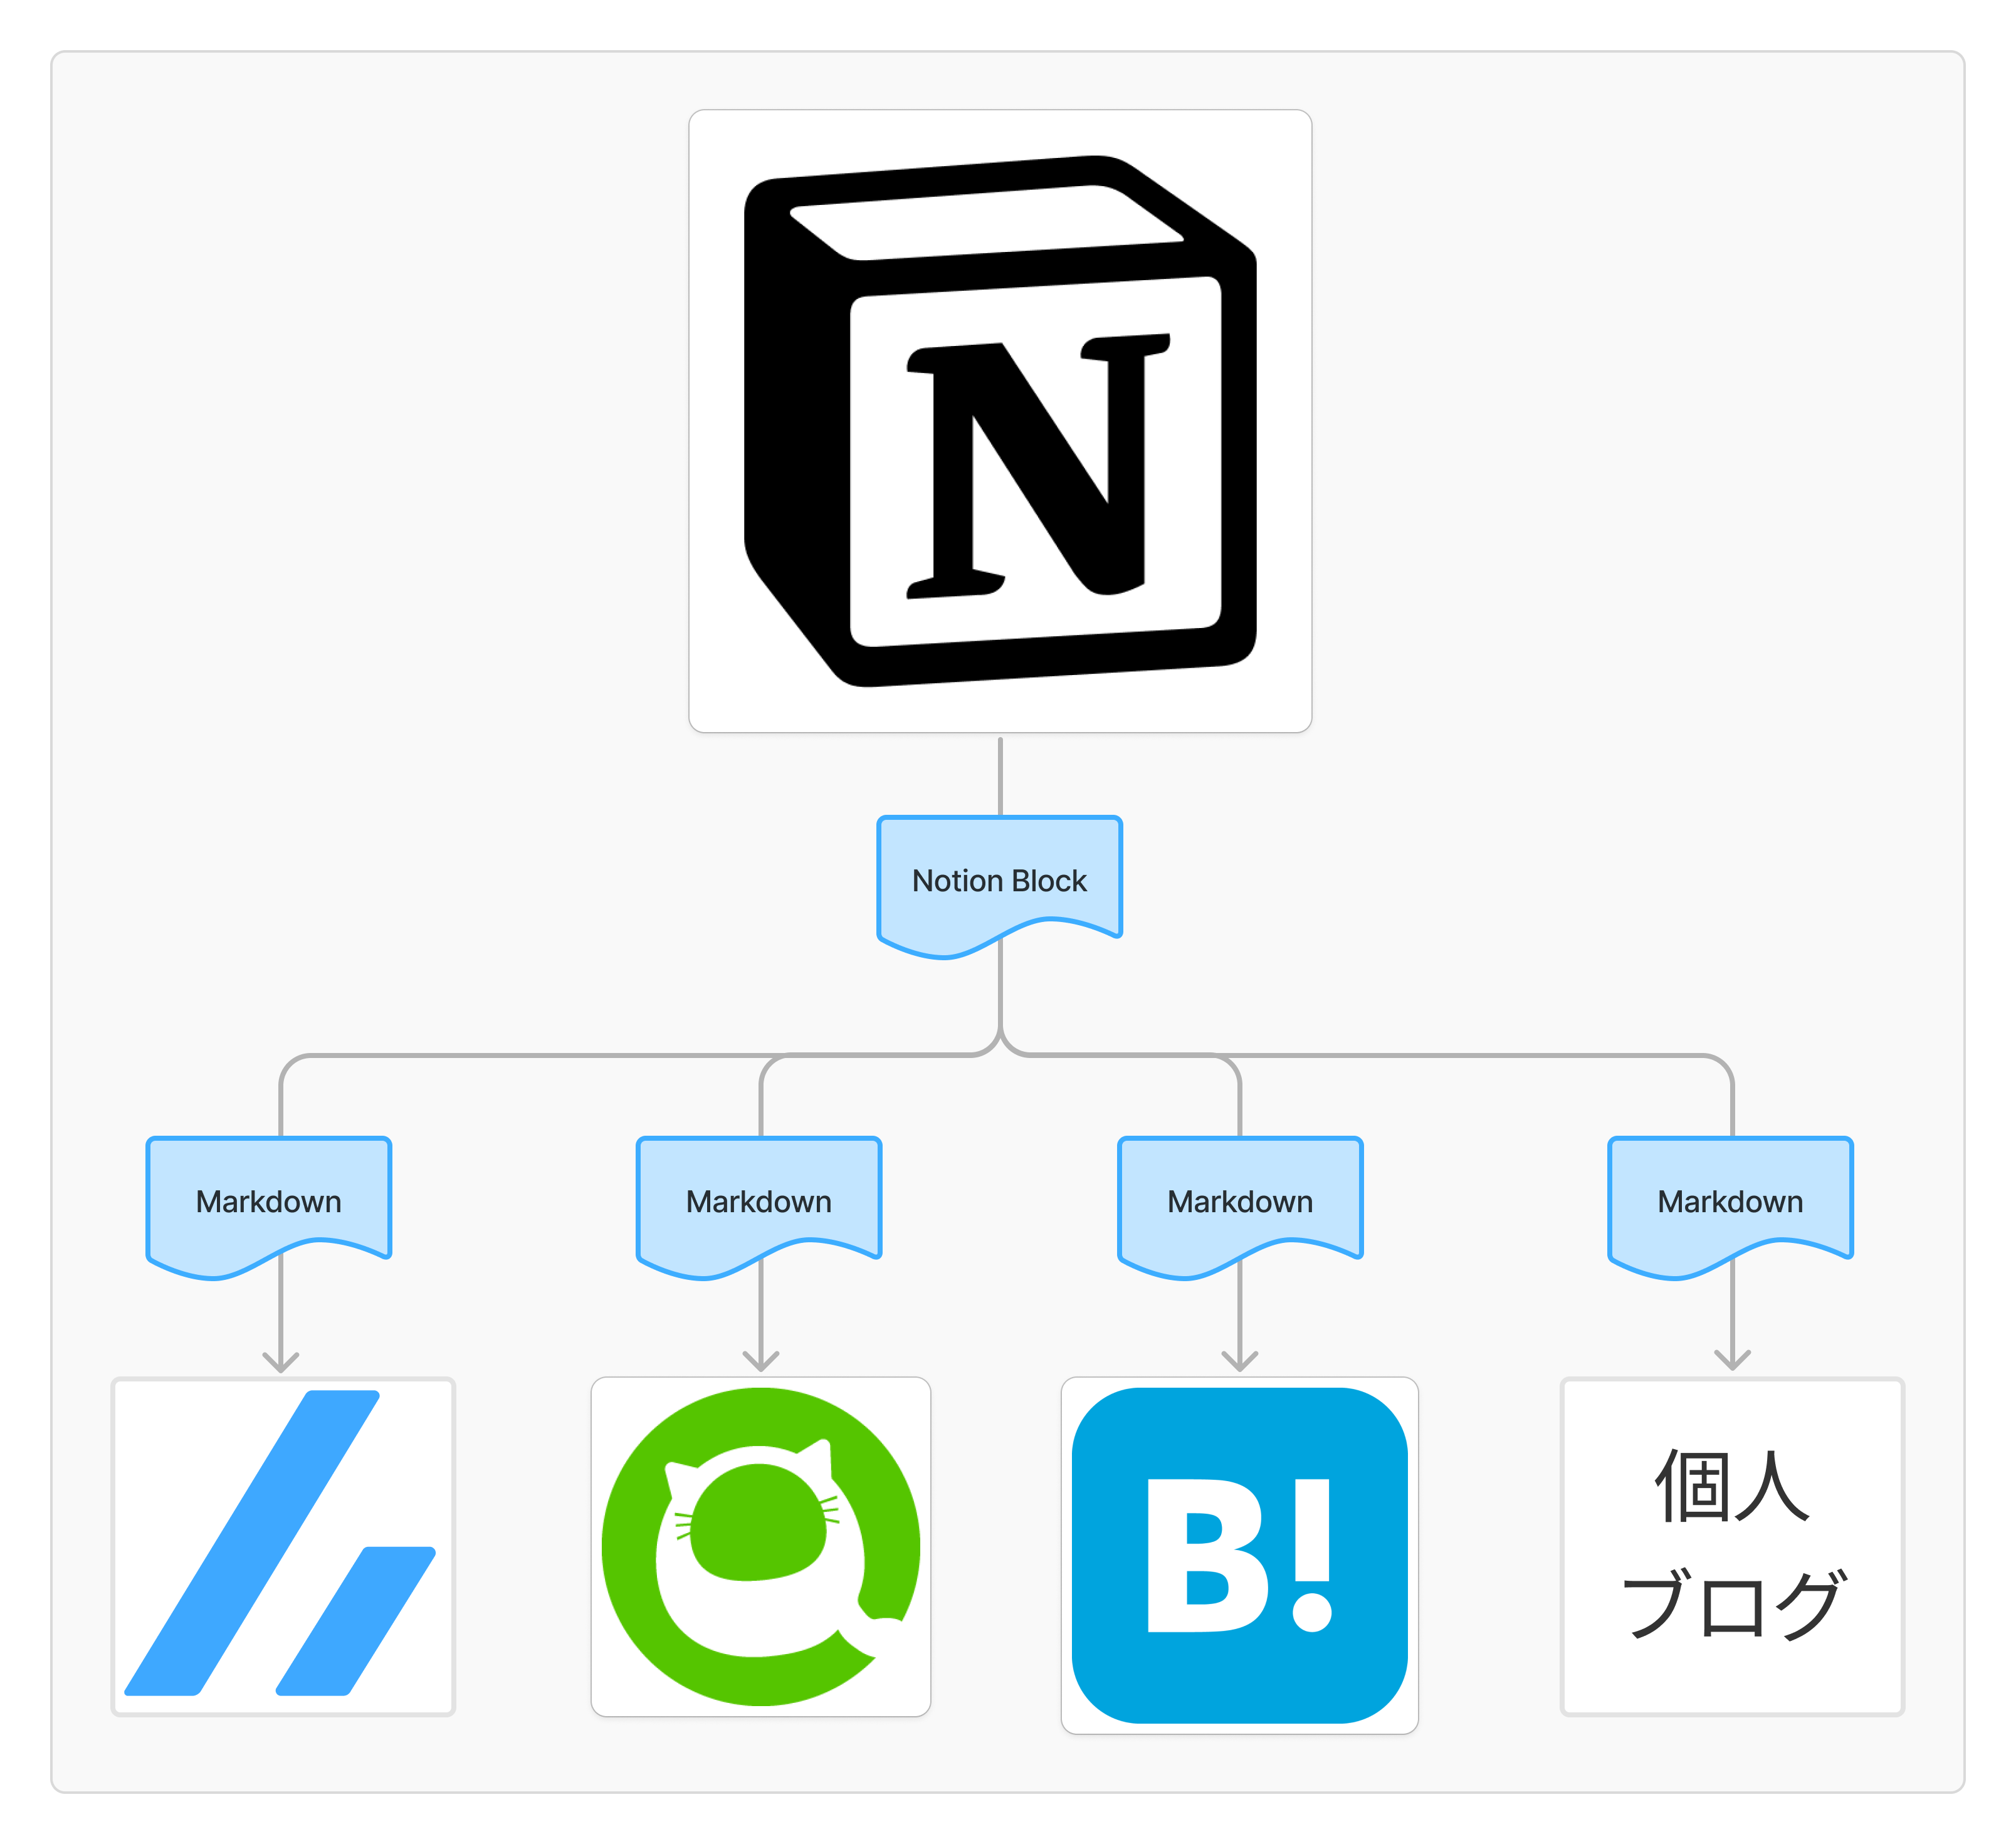
まだ完成系じゃないですが、Notionからmarkdownに変換するライブラリをOSSとして公開したので、経緯など含めて紹介しようと思います。

変換されたMarkdownはこちらから確認できます。https://zenn.dev/salvage0707/articles/4105ccdf1690c8
この記事もこのライブラリを使って変換処理されたMarkdownを使ってます。
Notion記事:https://malvageee.notion.site/Notion-markdown-OSS-Zenn-19b2ad69d3ce80679f86f3feeee4b611
(2025/3/1) デモサイトを公開しました!
Notionページを簡単にMarkdownに変換できるオープンソースツールのデモサイトです。
NotionのOAuth認証を使って、あなたの指定したページを各プラットフォームに合わせたMarkdownに変換します。複雑なセットアップや専用アカウント作成は不要で、ゲストモードですぐに利用できます。
なぜつくったか
1番の理由は、Notionを全てのプラットフォームの記事執筆の環境にしたかったからです!
(あと、シンプルに変換ライブラリ作るの楽しそうだったから)
記事を公開する時には、技術記事はZennやQiita。エンジニアリングに関係しない記事ははてブなど個人ブログにしたり、内容によってプラットフォームを変えるようにしています。
ただ、それを実現するには、各プラットフォームで管理する必要があるので、記事の管理が分散してしまいます。また、プラットフォームがmarkdownをサポートしていてもコードブロックや独自タグなど仕様が微妙に異なります。
これをどうにか脱却したくて、全ての記事をNotionできるようにすれば良いのでは?となったのが始まりです!
まずはライブラリ紹介!
このライブラリをつかうとこんなことができます。
- 記事の管理をNotionに集約できる
- NotionをヘッドレスCMSのようにできる
Notionを執筆環境にすることで、Notionが持つ機能をほぼ全て使えるので執筆が捗ります。
個人的にはスマホで執筆するハードルが下がったので、電車とかでもかけるのが嬉しい。
- スマホで執筆
- データベース使って細かく管理
- 各デバイスで同期
- などなど
使い方
インストール
個人で実行するにはかなり使いにくくなってしまっているので、今後はnpmに公開してcloneせず使えるようにしたり、CLIを作って簡単にExportできるように整備していく予定です…!
npmに公開しました! git cloneせずに使えるようになったので、より簡単に実行できるようになりました。
git cloneして使う方法
$ git clone https://github.com/salvage0707/notion-md-converter.git
$ cd notion-md-converter
$ pnpm install
exampleディレクトリで試す
notion-md-converter-example ディレクトリであれば全ての機能が使えるようにしてるので、お試しはこのディレクトリにスクリプト書いて実行お願いします。
(exampleディレクトリが荒れてるのはご愛嬌)
$ cd packages/notion-md-converter-example
$ mkdir -p src/example/custome
$ touch src/example/custome/main.ts
import {
  $getPageFullContent,
  NotionMarkdownConverter,
} from "@notion-md-converter/core";
import { Client } from "@notionhq/client";
import dotenv from "dotenv";

dotenv.config();


const main = async () => {
  const client = new Client({
    auth: process.env.NOTION_API_SECRET,
  });

  const pageId = "some-page-id"; // 適宜書き換える
  const content = await $getPageFullContent(client, pageId);

  const executor = new NotionMarkdownConverter();
  const result = executor.execute(content);
  console.log(result);
}

main()
$ cp .env.sample .env でenvを作る
NOTION_API_SECRET=ntn_xxxxxx
$ pnpm tsx src/example/custome/main.ts 実行する
Converterの使い方
import {
  $getPageFullContent,
  NotionMarkdownConverter,
} from "@notion-md-converter/core";
import { Client } from "@notionhq/client";

const client = new Client({
  auth: API_KEY,
});

const pageId = "some-page-id";
const content = await $getPageFullContent(client, pageId);

// ここがメイン処理
const executor = new NotionMarkdownConverter();
const result = executor.execute(content);
Zenn形式のmarkdown出力
Zenn変換用のパッケージがあるので、個人でカスタマイズせずに最小のコードで変換ができます。
import {
  $getPageFullContent,
  NotionMarkdownConverter,
} from "@notion-md-converter/core";
import {
  NotionZennMarkdownConverter,
} from "@notion-md-converter/zenn";
import { Client } from "@notionhq/client";

const client = new Client({
  auth: API_KEY,
});

const pageId = "some-page-id";
const content = await $getPageFullContent(client, pageId);

// 呼び出すConverterを変えるだけ
- const executor = new NotionMarkdownConverter();
+ const executor = new NotionZennMarkdownConverter();
const result = executor.execute(content);
カスタマイズ(出力する構文を変える)
Calloutブロックを引用ではなくコードブロックにするようにしてみましょう。
まずはカスタムTransformerを定義します。
import { MarkdownUtils, createBasicCalloutTransformer } from "@notion-md-converter/core";

export const createCustomMarkdownCalloutTransformer = () => {
  // これがTrasformerの作成ヘルパー関数
  return createBasicCalloutTransformer(({ block, children }) => {
    const text = MarkdownUtils.richTextsToMarkdown(block.callout.rich_text);
    let result = text;
    if (children !== "") {
      result += `\n${children}`;
    }
    return MarkdownUtils.wrapWithNewLines(MarkdownUtils.codeBlock(result));
  });
};
作成したTransformerを設定します。
import {
  $getPageFullContent,
  NotionMarkdownConverter,
} from "@notion-md-converter/core";
import { Client } from "@notionhq/client";

const client = new Client({
  auth: API_KEY,
});

const pageId = "some-page-id";
const content = await $getPageFullContent(client, pageId);

- const executor = new NotionMarkdownConverter();
+ const executor = new NotionMarkdownConverter({
+   callout: createCustomMarkdownCalloutTransformer()
+ });
const result = executor.execute(content);
これでカスタマイズ完了です!
カスタマイズ(画像ファイルを別のサイトでホスティングする)
Notionにアップロードした画像は、1時間の有効期限が付いてます。
なので、記事として公開するには別の場所にホスティングさせる必要があります。
import { createFileAdapter } from "@notion-md-converter/core";

export const createCustomFileObjectAdapter = () => {
  return createFileAdapter(({ url }) => {
    // urlを使ってアップロードしたいところにアップロードする処理を実装する
    const client = new SomeHostingClient();
    const accessUrl = client.upload(url)
    return {
      url: accessUrl,
    };
  });
};
import {
  $getPageFullContent,
  NotionMarkdownConverter,
} from "@notion-md-converter/core";
import { Client } from "@notionhq/client";

const client = new Client({
  auth: API_KEY,
});

const pageId = "some-page-id";
const content = await $getPageFullContent(client, pageId);

- const executor = new NotionMarkdownConverter();
+ const executor = new NotionMarkdownConverter({
+   image: createMarkdownImageTransformer({
+     fileAdapter: createCustomFileObjectAdapter(),
+   }),
+ });
const result = executor.execute(content);
これでカスタマイズ完了です!
個人でカスタマイズは面倒なので、画像アップロード部分のロジックを簡単に変えられるように、いろいろな画像変換アダプターを今後追加していきます(Gyazoに対応したい)。
今後の展望
こんな感じでさらに拡張していきたいです
- 画像・ファイルアップロードオプションの追加
-
npmへの公開 - CLI追加
- 対応プラットフォーム増やす
- Qiita
- GitHub
- はてブ
- note(完全対応は難しいが、、、)
- CI/CDの整備
- バグ修正
- ディレクトリ整備
最後に
個人開発いつも終わらせられずに諦めることが多かったのですが、思いつきでパッと作ってみたこのライブラリは最低限動くところまでは持っていけてよかったです。
ロードマップしっかり引いて作るよりも思いつきで即行動する方が最後まで持っていけますね。
他の方に使ってもらえるようになるには、まだまだ改善の余地がたくさんあるので、開発進めていきたいと思います
良いなと思ったら、GitHub starやいいねお願いします!

Discussion