🤖
VSCode+Spring Boot環境で"Hello World!"
目的
前の記事で作成した環境を使ってSpring Bootの簡単な動作確認を行います。
※既にDevContainersに接続されている状態からスタート
環境
- Visual Studio Code + Spring Boot Extension Pack
- 動作確認はこちらのサイトを参考にしてます
1. Spring InitializrでSpring Bootプロジェクト作成
-
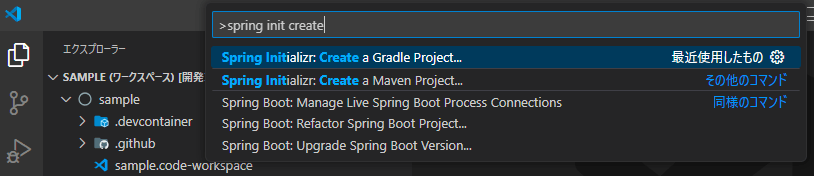
Ctrl+Shift+PでVSCodeのコマンドパレットを開く
-
「spring init create」で検索し「Spring Initializr: Create a Gradle Project...」を選択
※今回はとりあえずGradleを使用
-
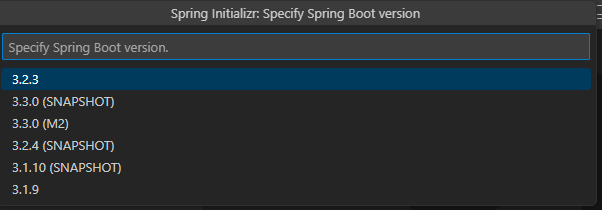
「3.2.3」を選択 ※任意
-
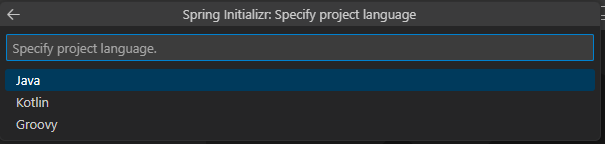
「Java」を選択
-
グループIDはデフォルトのまま「com.example」でEnter

-
Artifact Idもデフォルトのまま「demo」でEnter

-
パッケージング:Jar

-
バージョン:17 ※任意

-
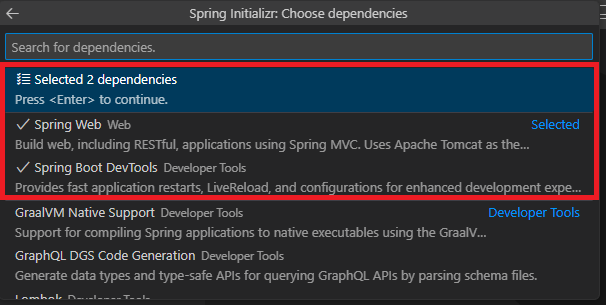
依存関係(dependencies)では2つ選択する
9-1. Spring Web

9-2. Spring Boot DevTools
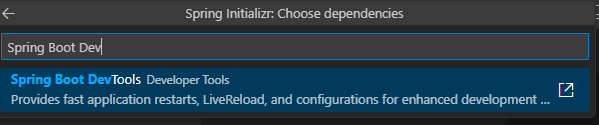
9-3. 「Selected 2 dependencies」で、先ほどの2つにチェックがあればEnter
-
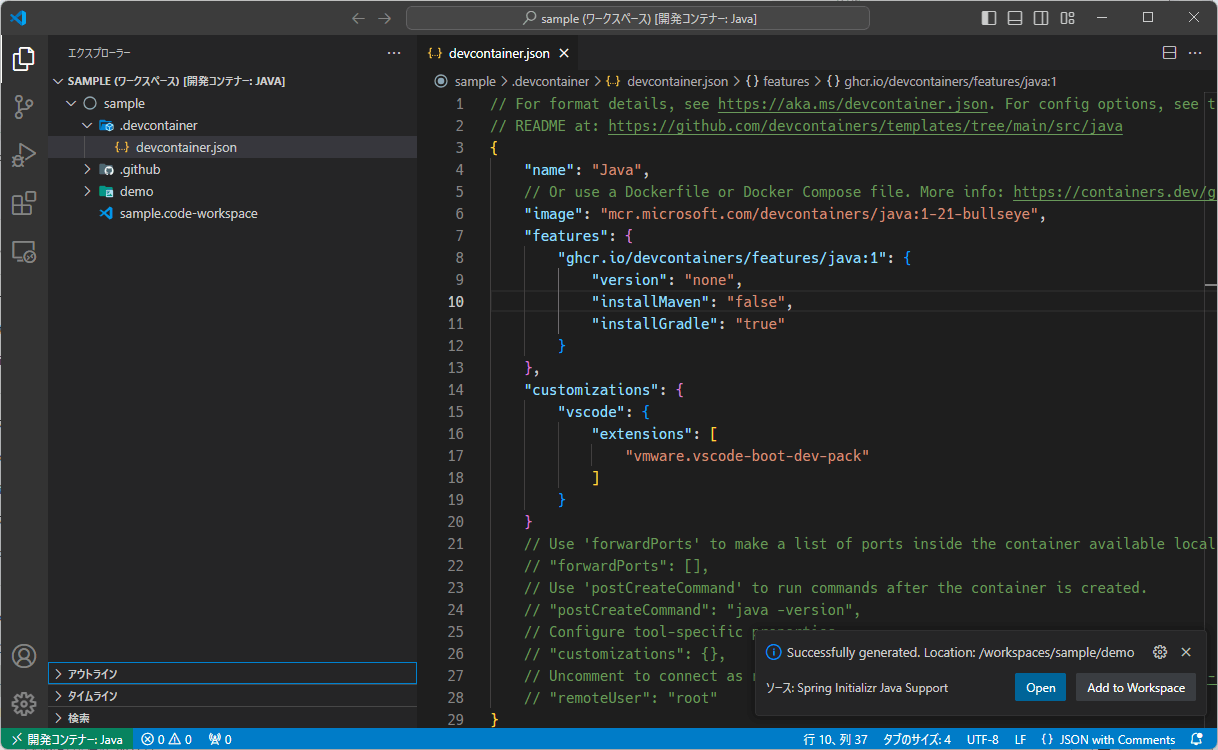
保存場所は任意。今回はデフォルトのまま。

-
右下に成功通知
左側にdemoフォルダが存在することを確認
2. ソースコード修正
src/main/java/com/example/demo フォルダーの DemoApplication.java ファイルを開き以下をコピペ
package com.example.demo;
import org.springframework.boot.SpringApplication;
import org.springframework.boot.autoconfigure.SpringBootApplication;
import org.springframework.web.bind.annotation.GetMapping;
import org.springframework.web.bind.annotation.RequestParam;
import org.springframework.web.bind.annotation.RestController;

@SpringBootApplication
@RestController
public class DemoApplication {
    public static void main(String[] args) {
      SpringApplication.run(DemoApplication.class, args);
    }
    @GetMapping("/hello")
    public String hello(@RequestParam(value = "name", defaultValue = "World") String name) {
      return String.format("Hello %s!", name);
    }
}
3. Spring実行+アクセス確認(Hello World!)
・左のバーのアイコンクリック(Spring Boot Dashboard)
・APPSの右側に出現するRunをクリック
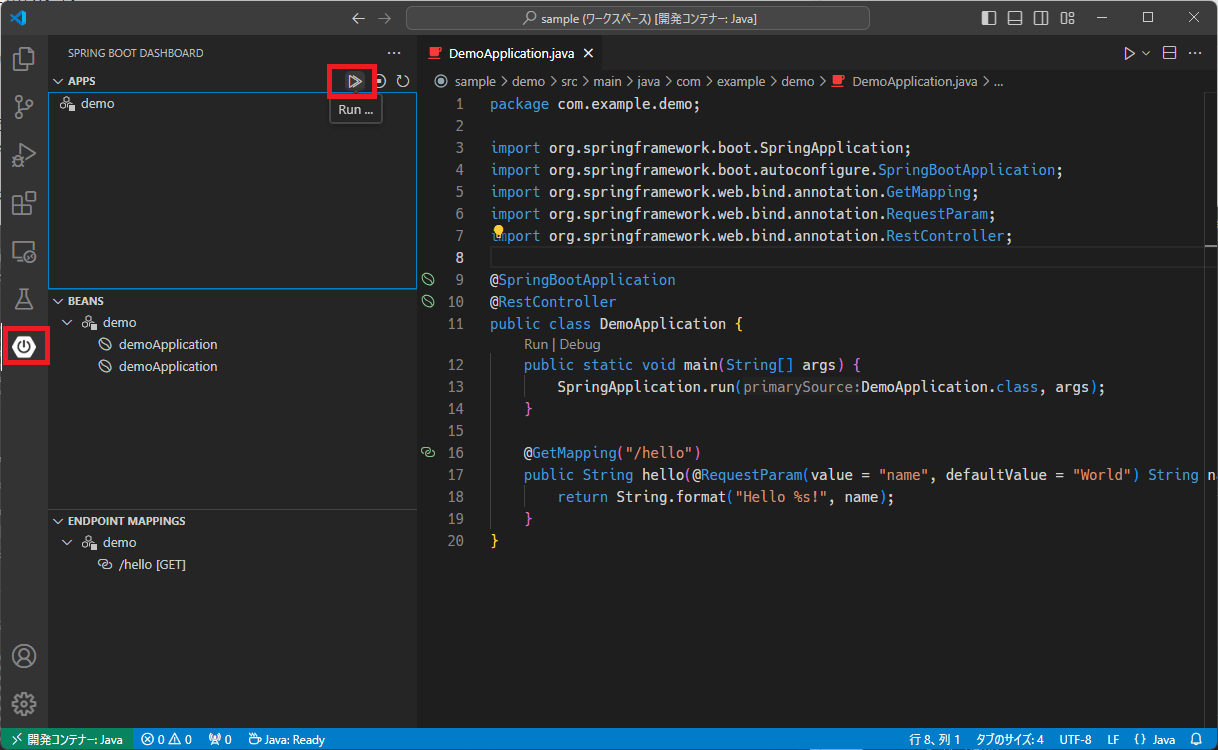
・右下のログでSpringの実行を確認
・「http://localhost:8080/hello 」にアクセスしHello World!の表示確認

Discussion