textlintプラグインの作り方(例:オンドゥル語変換) 準備編
先日textlintの新しいプラグイン a3rt-proofreading-v2 をリリースしました。そしてtextlint a3rt-proofreading-v2をリリースしましたと記事にしましたが、備忘録も兼ねてプラグインの作り方を記事にします。
長くなりそうなので記事を分割します!
本記事概要
プラグインを作成するにあたって必要な、以下の手順を記載していきます。
具体的なロジックだけ知りたい人は次のプラグイン作成編に進んでください。
- create-textlint-ruleを使ったテンプレートの作成
- Linter(eslint/prettier/husky/lint-staged)のインストール
- textlintのインストール
作成するプラグインの概要
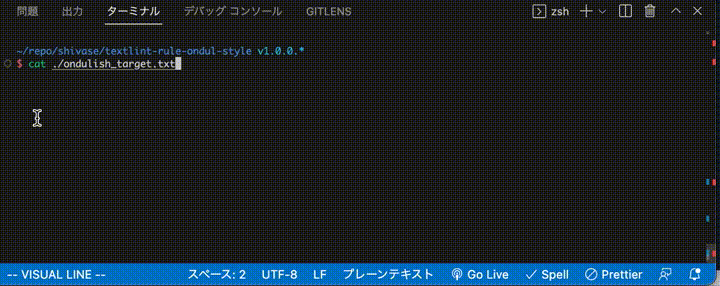
対象の文字列をオンドゥル語として正しいかチェックする。サジェスションへのFixにも対応する。
前提知識
以下はすでにインストール済みとし、ある程度コマンド自体は知っている前提で進めていきます。
- node
- yarn(and npm)
- Git
- Visual Studio Code
プラグインを公開するために以下のサイトを利用します。
- GitHub
- NPM
私の環境はmacですので、windowsの方はうまく読み取って実行お願いします。
コマンドは基本的にvisual studio code上で実行しています。
準備
ベースフォルダーの作成
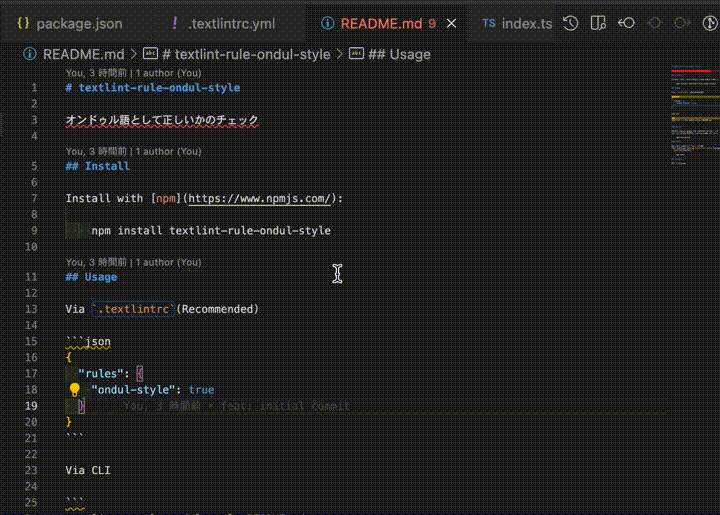
プラグイン名を ondul-style にするため、フォルダー名は textlint-rule-ondul-style として適当な場所に作成してください。
texlint plugin generatorをインストール
npm install create-textlint-rule -g
generatorを実行
開発言語を Typescript 、パッケージ管理をnpmではなく yarn で作成します(お好みで)。
以下のようにいろいろ聞いてきますので、環境に合わせ入れてください。
$ create-textlint-rule . --typescript --yarn

package name: (textlint-rule-ondul-style)
version: (1.0.0)
description: オンドゥル語として正しいかを判定するプラグインです
git repository: https://github.com/shivase/textlint-rule-ondul-style.git
author: shivase
license: (ISC) MIT
Git init
環境をGitで管理するために git init を実行。初期コミット後、ブランチを v1.0.0 で作ります。
$ git init
$ git add .
$ git commit -m "feat: initial commit"
$ git branch -M main
$ git remote add origin https://github.com/shivase/textlint-rule-ondul-style.git
$ git push -u origin main
$ git checkout -b v1.0.0
Switched to a new branch 'v1.0.0'
Linterの追加(ESLint/prettier/husky/lint-staged)
開発中のエラーにいちはやく気付ける+自動的に修正してくれるように各種Linterを追加します。
ESLintインストール
必要なモジュールのインストール。
yarn add -D eslint eslint-plugin-import eslint-config-airbnb-typescript eslint-import-resolver-typescript @typescript-eslint/eslint-plugin @typescript-eslint/parser
eslint定義ファイル作成。
touch .eslintrc.yml
内容はお任せですが、私のは以下のような感じです。使い回しなのでいろいろごみ混じっていますが。
textlint-rule-a3rt-proofreading-v2/.eslintrc.yml
touch .eslintignore
内容はシンプルに以下。
node_modules
lib
prettierインストール
必要なモジュールのインストールとファイル作成。
yarn add -D prettier eslint-config-prettier eslint-plugin-prettier
touch .prettierrc
touch .prettierignore
.prettierrc は以下の通り。
{
  "printWidth": 80,
  "tabWidth": 2,
  "singleQuote": true,
  "bracketSpacing": true,
  "bracketSameLine": true,
  "trailingComma": "all",
  "endOfLine": "auto"
}
.prettierignore は以下の通り。
node_modules
lib
huskyとlint-stageインストール
Gitでcommit時に、自動的に上でインストールしたlinterを実行してくれるように、husky と lint-staged を入れていきます。
$ yarn add -D husky lint-staged npm-run-all rimraf
$ husky install
husky - Git hooks installed
$ touch .husky/pre-commit
$ chmod +x .husky/pre-commit
pre-commitのファイル内容は以下の通り。
#!/usr/bin/env sh
. "$(dirname -- "$0")/_/husky.sh"

yarn lint-staged
package.jsonの修正
package.jsonを修正し、インストールしたLinterが動くようにします。
   /* scriptsはすでにあるので、以下の6行を追加です */
  "scripts": {
    "prepare": "husky install",
    /* build時に、古いlibフォルダを削除 */
    "prebuild": "rimraf lib",
    "lint": "run-s lint:*",
    "lint:eslint": "eslint . --ext .ts --fix",
    "lint:prettier": "prettier --write .",
    /* npmでpublishするとき前に、buildされるように定義(既存定義の修正です) */
    "prepublish": "yarn build",
  },
  /* 最下行に追加してください */
  "lint-staged": {
    "*.ts": [
      "prettier --write --loglevel=error",
      "eslint --fix"
    ]
  }
さっそく実行して試しましょう。yarn lint を実行すると、存在するTypeScriptファイルでエラーが出るので、以下のようになってくれたら成功です。
$ yarn lint
yarn run v1.22.19
run-s lint:*
eslint . --ext .ts --fix

/textlint-rule-ondul-style/src/index.ts
   9:31  error  'report' is already declared in the upper scope on line 8 column 7                                         @typescript-eslint/no-shadow
  10:35  error  Prefer using nullish coalescing operator (`??`) instead of a logical or (`||`), as it is a safer operator  @typescript-eslint/prefer-nullish-coalescing

✖ 2 problems (2 errors, 0 warnings)

error Command failed with exit code 1.
info Visit https://yarnpkg.com/en/docs/cli/run for documentation about this command.
ERROR: "lint:eslint" exited with 1.
error Command failed with exit code 1.
info Visit https://yarnpkg.com/en/docs/cli/run for documentation about this command.
src/index.ts を修正しましょう。
reportの定義が被っているので関数名の変更と、 || を ?? に変えます。
import { TextlintRuleModule } from '@textlint/types';

export interface Options {
  // if the Str includes `allows` word, does not report it
  allows?: string[];
}

const reporter: TextlintRuleModule<Options> = (context, options = {}) => {
  const { Syntax, RuleError, report, getSource } = context;
  const allows = options.allows ?? [];

  return {
    [Syntax.Str](node) {
      // "Str" node
      const text = getSource(node); // Get text
      const matches = /bugs/g.exec(text); // Found "bugs"
      if (!matches) {
        return;
      }
      const isIgnored = allows.some((allow) => text.includes(allow));
      if (isIgnored) {
        return;
      }
      const indexOfBugs = matches.index;
      const ruleError = new RuleError('Found bugs.', {
        index: indexOfBugs, // padding of index
      });
      report(node, ruleError);
    },
  };
};
export default reporter;
そして再度 yarn lint を実行してエラーがなければOKです!
$ yarn lint
yarn run v1.22.19
run-s lint:*
eslint . --ext .ts --fix
prettier --write .
.eslintrc.yml 49ms
.prettierrc 52ms
package-lock.json 173ms
package.json 179ms
README.md 205ms
src/index.ts 577ms
test/index-test.ts 69ms
tsconfig.json 3ms
✨  Done in 7.71s.
textlintのインストール
最後にローカルでtextlintを実行して検証できるように、 textlint を入れておきます。
yarn add -D textlint
変更のcommit
これで必要最低限の準備はできました。さっそくcommitしてGitHubにあげましょう。
$ git add .

# commit時に以下のようにlinterが走ればhuskyは正常に設定できています
# 何も実行されない場合、chmod +x を忘れている可能性大
$ git commit -m "feat: linterを準備"
yarn run v1.22.19
.bin/lint-staged
✔ Preparing lint-staged...
✔ Hiding unstaged changes to partially staged files...
✔ Running tasks for staged files...
✔ Applying modifications from tasks...
✔ Restoring unstaged changes to partially staged files...
✔ Cleaning up temporary files...
✨  Done in 8.26s.
[v1.0.0 e66bfce] feat: linterを準備
 9 files changed, 1536 insertions(+), 71 deletions(-)
 create mode 100644 .eslintignore
 create mode 100644 .eslintrc.yml
 create mode 100644 .husky/pre-commit
 create mode 100644 .prettierignore
 create mode 100644 .prettierrc
Visual Studio Codeの拡張機能追加
linterをvisual studio codeで動かすため、そして作ったtextlintプラグインの動作を検証するために、visual studio codeの拡張機能をインストールしましょう。
手順は割愛しますが、以下をインストールしてください。
- ESLint
- Prettier
- vscode-textlint
vscodeの設定に以下を追記。
{
  "editor.defaultFormatter": "esbenp.prettier-vscode",
  "editor.formatOnSave": true,
  ...
}
以上で準備編は終わりです。
Discussion