🪪
Remix v2でGoogleログイン

はじめに
本記事では、Remix v2 で remix-auth、remix-auth-googleを用いた、Googleログインの実装方法についてまとめます。
確認用のコードのため、CSSでの装飾は行っていません。
前提
- Remix v2 を使用
- npm を使用
- Google Cloud のアカウントを所有している
- Google ログインのみ行いたい
- Cloudflare は使用していない
ディレクトリ構成
⭐️ が今回使用するファイルです。
/
├── .env ⭐️
├── .eslintrc.cjs
├── .gitignore
├── README.md
├── app
│   ├── entry.client.tsx
│   ├── entry.server.tsx
│   ├── root.tsx
│   ├── routes
│   │   ├── _index.tsx
│   │   ├── auth.google.callback.tsx ⭐️
│   │   ├── auth.google.tsx ⭐️
│   │   ├── login.tsx ⭐️
│   │   ├── logout.tsx ⭐️
│   │   └── success.tsx ⭐️
│   └── services ⭐️
│       ├── auth.server.ts ⭐️
│       └── session.server.ts ⭐️
├── package-lock.json
├── package.json
├── public
│   └── favicon.ico
├── tsconfig.json
└── vite.config.ts
上記は、以下のコマンドで出力しました。
$ tree -a -L 3 -I node_modules -I .git
実装手順
Remix v2 をセットアップ
Remixアプリを作成します。今回のプロジェクト名は、google-auth-sampleとして作成します。
npx create-remix@latest
Need to install the following packages:
create-remix@2.8.1
Ok to proceed? (y) y

 remix   v2.8.1 💿 Let's build a better website...

   dir   Where should we create your new project?
         google-auth-sample

      ◼  Using basic template See https://remix.run/guides/templates for more
      ✔  Template copied

   git   Initialize a new git repository?
         Yes

  deps   Install dependencies with npm?
         Yes

      ✔  Dependencies installed

      ✔  Git initialized

  done   That's it!

         Enter your project directory using cd ./google-auth-sample
         Check out README.md for development and deploy instructions.

         Join the community at https://rmx.as/discord
- セットアップ完了後にディレクトリを移動する
cd google-auth-sample/ - 起動を確認する
npm run dev> dev > remix vite:dev ➜ Local: http://localhost:5173/ ➜ Network: use --host to expose ➜ press h + enter to show help- ブラウザで
http://localhost:5173/にアクセスできることを確認する - 確認できたら、
Ctr + Cで停止する
- ブラウザで
remix-auth と remix-auth-google をインストール
googleログインには、 remix-auth と remix-auth-google を用います。
npm install remix-auth remix-auth-google
Google Cloud の認証情報作成
以下の手順に従って、認証情報を作成します。
| 項目 | 値 |
|---|---|
| 承認済みのJavaScript生成元 | http://localhost:5173/ |
| 承認済みのリダイレクトURI | http://localhost:5173/auth/google/callback |
詳細は省略します。
サーバーサイド(ログイン処理)
セッションシークレットの作成
- セッションシークレットを生成する
openssl rand -base64 32 -
.envファイルを作成するtouch .env - 生成したセッションシークレットを
.envに保存するSESSION_SECRET=xxxxxxxxx
session.server.ts の作成
-
appディレクトリ配下にservicesディレクトリを作成するmkdir app/services -
app/services/session.server.tsを作成する- 今回クッキーの名前は
_sessionとする -
secureは、本番環境のみtrueになるようにする -
maxAgeは、30日とする
app/services/session.server.tsimport { createCookieSessionStorage } from "@remix-run/node"; const sessionSecret = process.env.SESSION_SECRET; if (!sessionSecret){ throw new Error("SESSION_SECRETを設定してください。"); } export const sessionStorage = createCookieSessionStorage({ cookie: { name: "_session", sameSite: "lax", path: "/", httpOnly: true, secrets: [sessionSecret], secure: process.env.NODE_ENV === "production", maxAge: 60 * 60 * 24 * 30, }, }); - 今回クッキーの名前は
    const sessionSecret = process.env.SESSION_SECRET;
    if (!sessionSecret){
      throw new Error("SESSION_SECRETを設定してください。");
    }
auth.server.ts の作成
-
.envにGoogleログインに必要な環境変数を設定する-
CLIENT_URL: クライアントのURL。今回はローカル環境のURLを指定する。 -
GOOGLE_CLIENT_ID: Google Cloud の認証情報を生成されたクライアントIDを指定する。 -
GOOGLE_CLIENT_SECRET: Google Cloud の認証情報を生成されたクライアントシークレットを指定する。
.envSESSION_SECRET=xxxxxxxxx + CLIENT_URL=http://localhost:5173 + GOOGLE_CLIENT_ID=xxxxxxxxx + GOOGLE_CLIENT_SECRET=xxxxxxxxx -
-
app/services/auth.server.tsを作成する- GoogleStrategy の設定を行う。
- Googleログイン処理のロジックです。
- コールバックURLは、
/auth/google/callbackとしています。
app/services/auth.server.tsimport { Authenticator } from "remix-auth"; import { GoogleStrategy } from "remix-auth-google"; import { sessionStorage } from './session.server' export type AuthUserType = { id: string, name: string, email: string, image: string } const authenticator = new Authenticator<AuthUserType>(sessionStorage) if ( !( process.env.GOOGLE_CLIENT_ID && process.env.GOOGLE_CLIENT_SECRET && process.env.CLIENT_URL ) ) { throw new Error( 'GOOGLE_CLIENT_ID、GOOGLE_CLIENT_SECRET、CLIENT_URLが設定されていません。', ) } const googleStrategy = new GoogleStrategy<AuthUserType>( { clientID: process.env.GOOGLE_CLIENT_ID || '', clientSecret: process.env.GOOGLE_CLIENT_SECRET || '', callbackURL: `${process.env.CLIENT_URL}/auth/google/callback`, }, async ({ profile }) => { return { id: profile.id, name: profile.displayName, email: profile.emails.length > 0 ? profile.emails[0].value : '', image: profile.photos.length > 0 ? profile.photos[0].value : '', } } ); authenticator.use(googleStrategy); export { authenticator }
if (
  !(
    process.env.GOOGLE_CLIENT_ID &&
    process.env.GOOGLE_CLIENT_SECRET &&
    process.env.CLIENT_URL
  )
) {
  throw new Error(
    'GOOGLE_CLIENT_ID、GOOGLE_CLIENT_SECRET、CLIENT_URLが設定されていません。',
  )
}
export type GoogleProfile = {
    id: string;
    displayName: string;
    name: {
        familyName: string;
        givenName: string;
    };
    emails: [{
        value: string;
    }];
    photos: [{
        value: string;
    }];
    _json: {
        sub: string;
        name: string;
        given_name: string;
        family_name: string;
        picture: string;
        locale: string;
        email: string;
        email_verified: boolean;
        hd: string;
    };
}
フロントエンド
login.tsx の作成
ログインページのコードです。サンプルコードのためCSSの装飾はしていません。
app/routes/login.tsx
import type { LoaderFunction, LoaderFunctionArgs } from '@remix-run/node'
import { redirect } from "@remix-run/node";
import { Form } from "@remix-run/react";
import { authenticator } from '~/services/auth.server'

export const loader: LoaderFunction = async ({ request }: LoaderFunctionArgs) => {
  const user = await authenticator.isAuthenticated(request)
  if (user) { // ログイン済みのユーザーはサクセスページにリダイレクト
    return redirect('/success')
  }
  return {}
};

export default function Login() {
  return (
    <Form action="/auth/google" method="post">
      <button>Login with Google</button>
    </Form>
  )
}
export const loader: LoaderFunction = async ({ request }: LoaderFunctionArgs) => {
  const user = await authenticator.isAuthenticated(request)
  if (user) { // ログイン済みのユーザーはサクセスページにリダイレクト
    return redirect('/success')
  }
  return {}
};
auth.google.tsx の作成
[Login with Google]ボタンが押されるとアクセスされるページのコードです。
app/routes/auth.google.tsx
import type { ActionFunction, ActionFunctionArgs, LoaderFunction } from '@remix-run/node'
import { redirect } from '@remix-run/node'
import { authenticator } from '~/services/auth.server'

export const action: ActionFunction = async ({ request }: ActionFunctionArgs) => {
  return authenticator.authenticate('google', request)
}

export const loader: LoaderFunction = async () => {
  return redirect("/");
};
- ログイン処理を行う。
export const action: ActionFunction = async ({ request }: ActionFunctionArgs) => {
  return authenticator.authenticate('google', request)
}
-
GET /auth/googleでアクセスされた場合は、ルートページにリダイレクトする。export const loader: LoaderFunction = async () => { return redirect("/"); };
auth.google.callback.tsx の作成
Google認証後のコールバックでアクセスされるページのコードです。
app/routes/auth.google.callback.tsx
import { LoaderFunction, LoaderFunctionArgs } from '@remix-run/node'
import { authenticator } from '~/services/auth.server'
export const loader: LoaderFunction = async ({ request }: LoaderFunctionArgs) => {
return authenticator.authenticate('google', request, {
successRedirect: '/success',
failureRedirect: '/login',
})
}
-
successRedirect: ログイン成功時のリダイレクト先を指定する -
failureRedirect: ログイン失敗時のリダイレクト先を指定する
success.tsx の作成
- ログイン成功時にアクセスするページのコード。
- ログイン済みの場合は、アクセスできる。
- 未ログインの場合は、ログインページにリダイレクトする。
- ログイン済みの場合に、ユーザー名とアバター画像が表示するようにしています。
app/routes/success.tsx
import type { LoaderFunction, LoaderFunctionArgs } from '@remix-run/node'
import { redirect, json } from "@remix-run/node";
import { useLoaderData } from '@remix-run/react'
import { authenticator, AuthUserType } from '~/services/auth.server'
export const loader: LoaderFunction = async ({ request }: LoaderFunctionArgs) => {
const user = await authenticator.isAuthenticated(request)
if (!user) { // 未ログインのユーザーはログインページにリダイレクト
return redirect('/login')
}
return json<LoaderData>({
user
})
};
type LoaderData = {
user: AuthUserType
}
export default function SuccessIndex() {
const { user } = useLoaderData() as LoaderData;
return (
<>
<h1>Hello {user.name}さん</h1>
<img src={user.image} alt={user.name} />
<div>ログイン成功しました。</div>
<div>
<form action="/logout" method="post">
<button type="submit">ログアウト</button>
</form>
</div>
</>
);
}
const user = await authenticator.isAuthenticated(request)
if (!user) { // 未ログインのユーザーはログインページにリダイレクト
return redirect('/login')
}
logout.tsx の作成
ログアウト時にアクセスされるページのコード。
app/routes/logout.tsx
import type { ActionFunctionArgs, ActionFunction, LoaderFunction } from "@remix-run/node";
import { redirect } from "@remix-run/node";
import { authenticator } from "~/services/auth.server";
export const action: ActionFunction = async ({ request }: ActionFunctionArgs) => {
return await authenticator.logout(request, { redirectTo: "/login" });
};
export const loader: LoaderFunction = async () => {
  return redirect("/");
};
- ログアウト処理を行う。
export const action: ActionFunction = async ({ request }: ActionFunctionArgs) => { return await authenticator.logout(request, { redirectTo: "/login" }); }; -
GET /logoutでアクセスされた場合は、ルートページにリダイレクトする。export const loader: LoaderFunction = async () => { return redirect("/"); };
動作確認
- アプリを起動させる
npm run dev> dev > remix vite:dev ➜ Local: http://localhost:5173/ ➜ Network: use --host to expose ➜ press h + enter to show help -
http://localhost:5173/loginにアクセスする- シンプルな[Login with Google]ボタンが表示されている
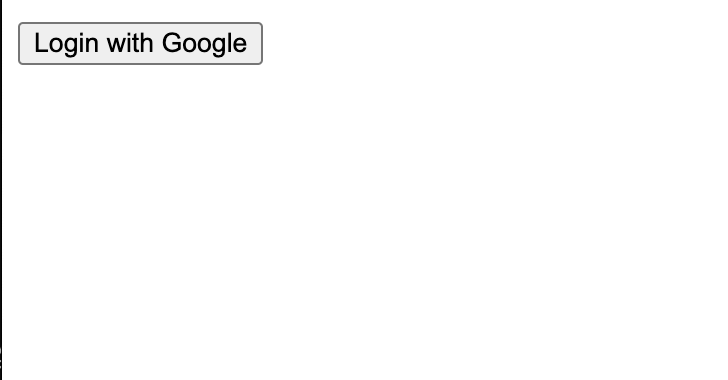
- シンプルな[Login with Google]ボタンが表示されている
- [Login with Google]ボタンをクリックする
- Google認証画面が表示される
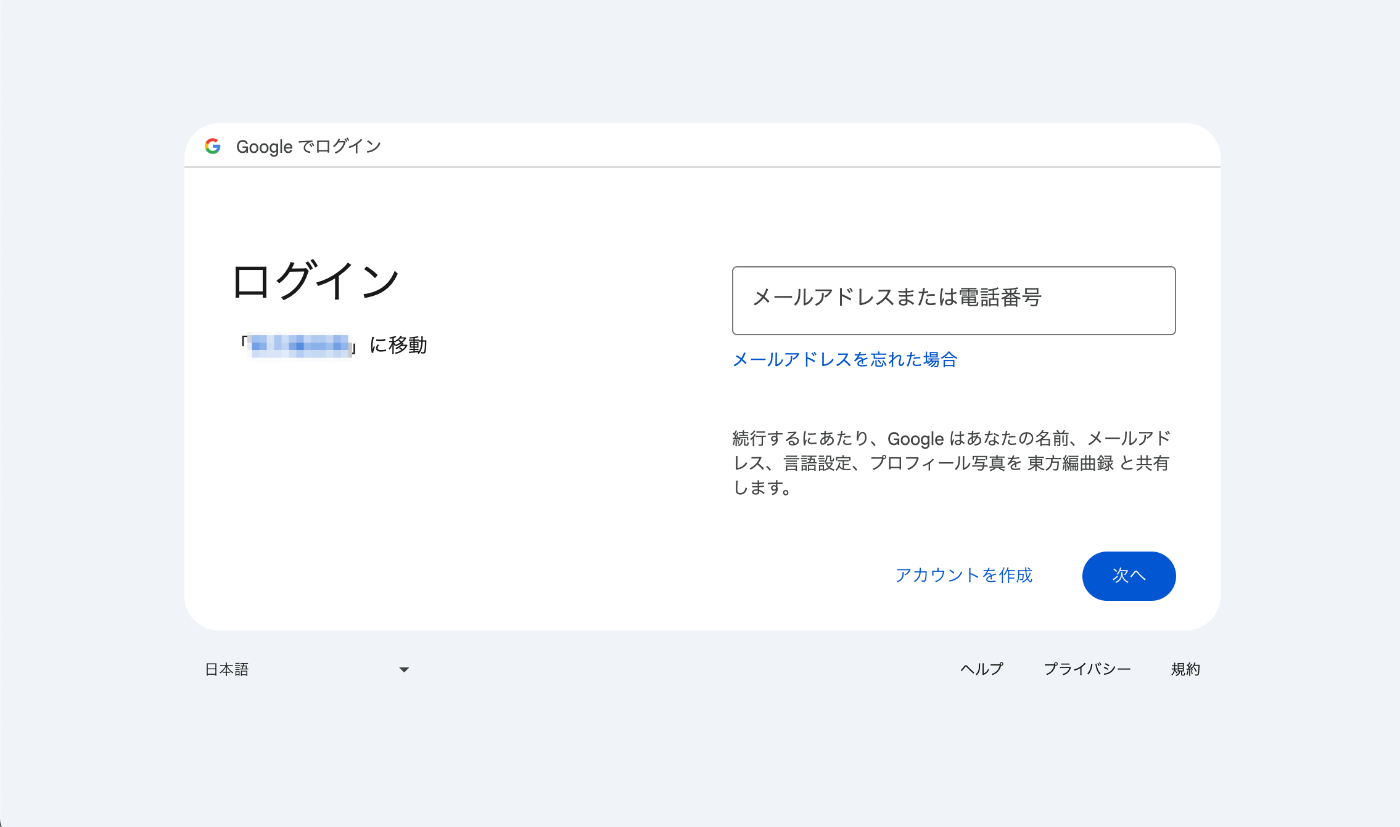
- Google認証画面が表示される
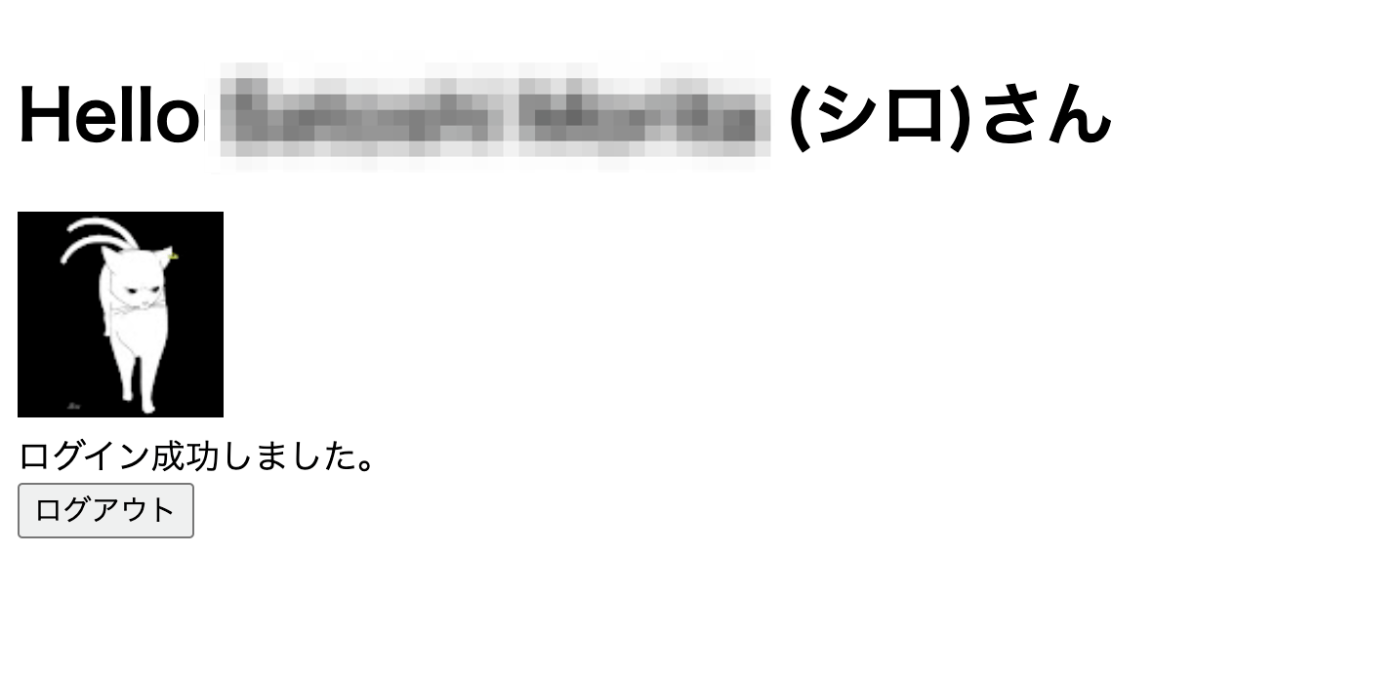
- Googleログイン後に、コールバックを経由し、サクセスページにリダイレクトする
- ユーザー名とアバター画像が表示される
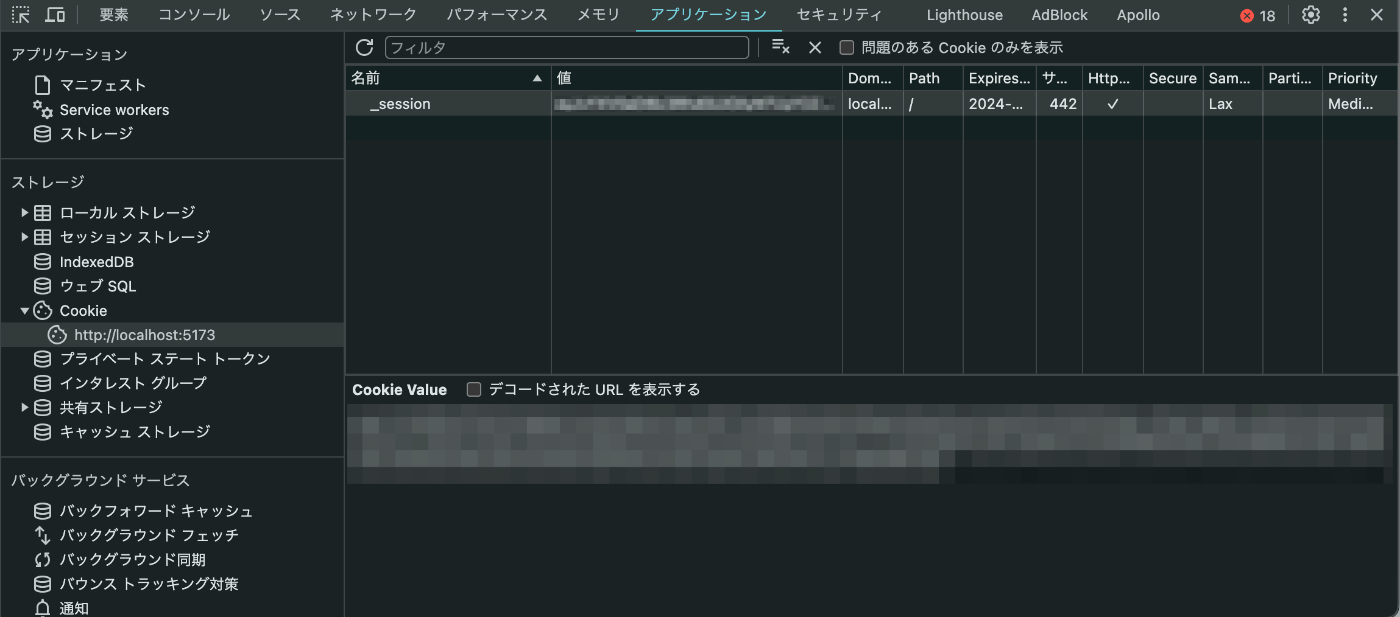
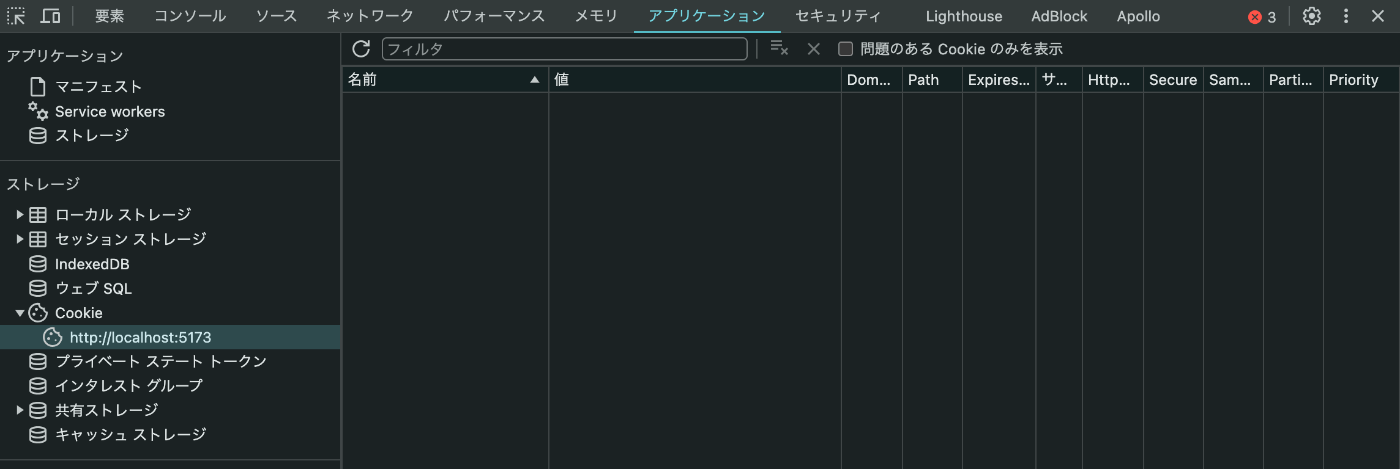
- Cookie情報を確認すると
session.server.tsで設定した_sessionの名前で保存されていることがわかる
- ユーザー名とアバター画像が表示される
- ログイン済みの状態で、
http://localhost:5173/loginにアクセスするとサクセスページにリダイレクトされる - [ログアウト]ボタンをクリックする
ログインページにリダイレクトされる
ログアウトするとCookie情報の_sessionが削除される
おわりに
ここまで読んでいただきありがとうございます。
Remix v2 でGoogleログインのみのサンプルが少なかったですが、貴重な先人の記事が大変参考になりました。
そのおかげで思ったより簡単にGoogleログインが実装できました。ありがとうございます!
参考文献
今回の環境
| Package | Version |
|---|---|
| @remix-run/node | ^2.8.1 |
| @remix-run/react | ^2.8.1 |
| @remix-run/serve | ^2.8.1 |
| isbot | ^4.1.0 |
| react | ^18.2.0 |
| react-dom | ^18.2.0 |
| remix-auth | ^3.6.0 |
| remix-auth-google | ^2.0.0 |
| typescript | ^5.1.6 |
| vite | ^5.1.0 |
Discussion