[Deprecated] Windows 10 + WSL2 + USB Camera + Serial
1. Introduction
Note: The steps in this article are deprecated. Please see the next most recent article instead. October 12, 2021 Windows 11/10 + WSL2 + USB Camera + Serial
I don't really like the Windows environment, but I had to use it for work reasons, so I built the environment. I do not know much about the Linux kernel, so I am not responsible for anything that happens. Please do the work entirely at your own risk. If you want to use a GPU, you will need the Insider Preview Build of Windows 10 as of October 3, 2021. Build: 22000.160 on devchannel, 19044.1200 on release preview channel
2. Environment
- Windows10 Pro 21H1 (build: 19043.1237)
- WSL2 (kernel: 5.4.72)
- Ubuntu20.04
- VirtualHere
- VcXsrv (X server) for Windows host
- USB Camera
3. Sites that I have used for reference
4. Procedure
4-1. WSL2 settings
Execute the following command on the Ubuntu terminal of WSL2.
$ git clone https://github.com/ContentsViewer/sh-setup.git
$ cd sh-setup && sudo chmod 755 setup.sh
$ ./setup.sh

# Copy and paste all four lines in one step
$ cat << 'EOT' >> ${HOME}/.bashrc
export DISPLAY=$(cat /etc/resolv.conf | grep nameserver | awk '{print $2}'):0.0
export LIBGL_ALWAYS_INDIRECT=0
EOT
4-2. Check the kernel version
Execute the following command on the Ubuntu terminal of WSL2.
$ uname -v -r
5.4.72-microsoft-standard-WSL2+ #1 SMP ...
4-3. Install a set of working tools
$ sudo apt update && sudo apt upgrade -y
$ sudo apt install -y build-essential flex bison libssl-dev libgtk2.0-dev \
libelf-dev libncurses-dev autoconf libudev-dev libtool zip unzip v4l-utils \
python3-pip
4-4. Building the Linux kernel
From this URL (https://github.com/microsoft/WSL2-Linux-Kernel/releases), find the program version that is the same as the kernel version you checked in 4-2. Then checout with the git clone command using the corresponding Tag name.
For example,

e.g. TAGVERNUM -> 5.10.16.3
e.g. TAGVER -> linux-msft-wsl-${TAGVERNUM}
I chose linux-msft-5.4.72.
$ cd /usr/src
$ TAGVERNUM=5.4.72
$ TAGVER=linux-msft-${TAGVERNUM}
$ sudo git clone -b ${TAGVER} \
https://github.com/microsoft/WSL2-Linux-Kernel.git \
${TAGVERNUM}-microsoft-standard && cd ${TAGVERNUM}-microsoft-standard
$ sudo cp /proc/config.gz config.gz && \
sudo gunzip config.gz && sudo mv config .config
$ sudo make menuconfig
-
Device Drivers
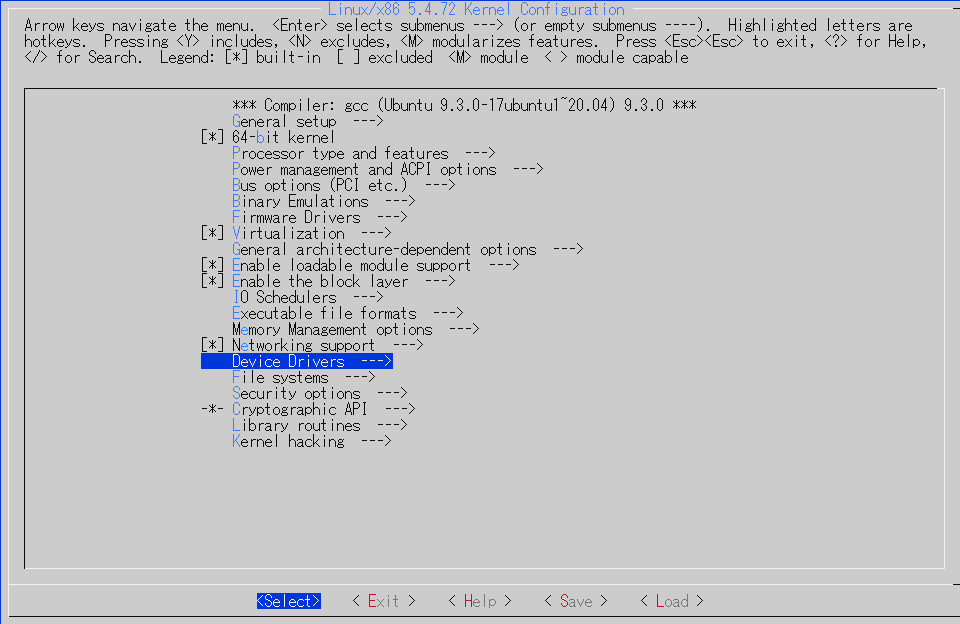
-
Device Drivers-
[ ] USB support->[*] USB support
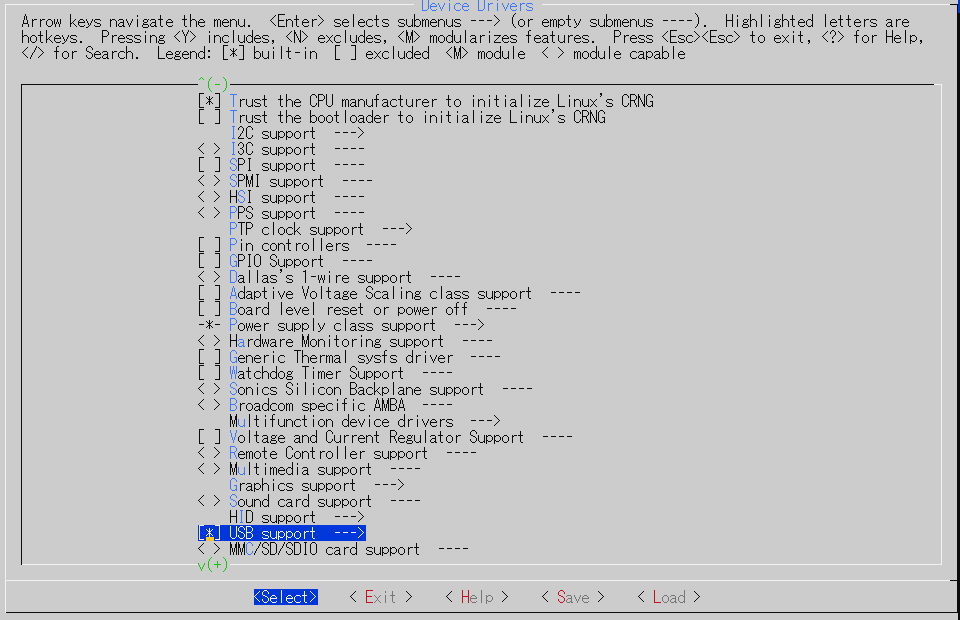
-
-
Device Drivers-
[*] USB support-
< > Support for Host-side USB-><M> Support for Host-side USB -
[ ] Enable USB persist by default->[*] Enable USB persist by default -
[ ] USB Modem (CDC ACM) support->[M] USB Modem (CDC ACM) support
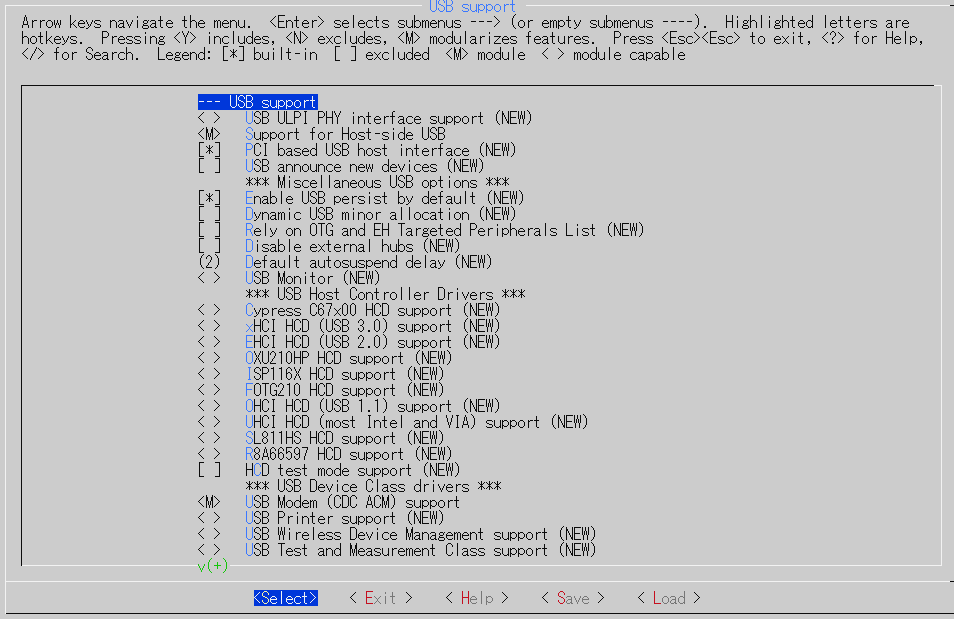
-
< > USB Mass Storage support-><M> USB Mass Storage support -
< > USB/IP support-><M> USB/IP support -
< > VHCI hcd-><M> VHCI hcd (8) Number of ports per USB/IP virtual host controller-
(1) Number of USB/IP virtual host controllers
-
-
-
Device Drivers-
[*] USB support-
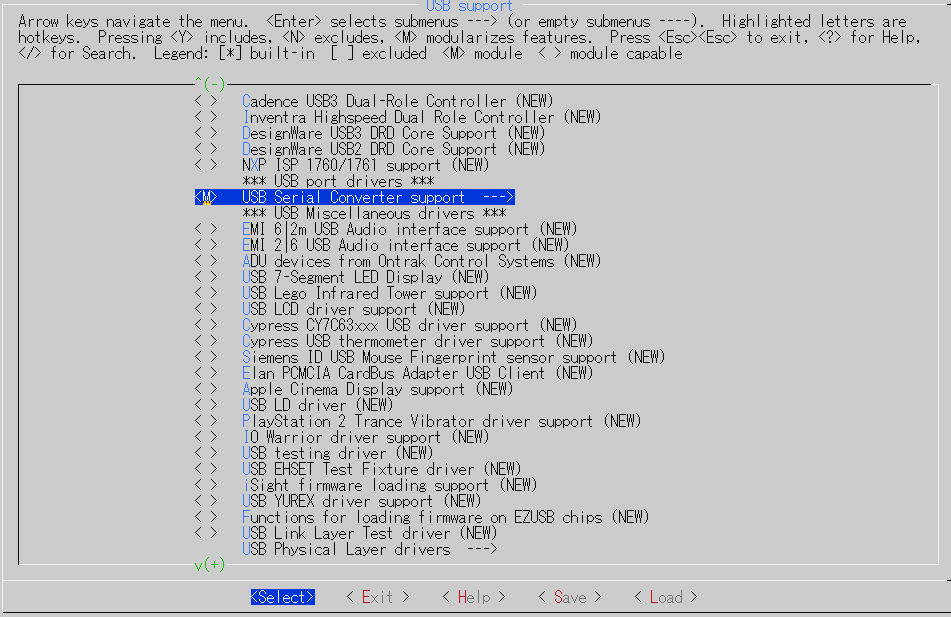
< > USB Serial Converter support-><M> USB Serial Converter support
-
-
-
Device Drivers-
[*] USB support-
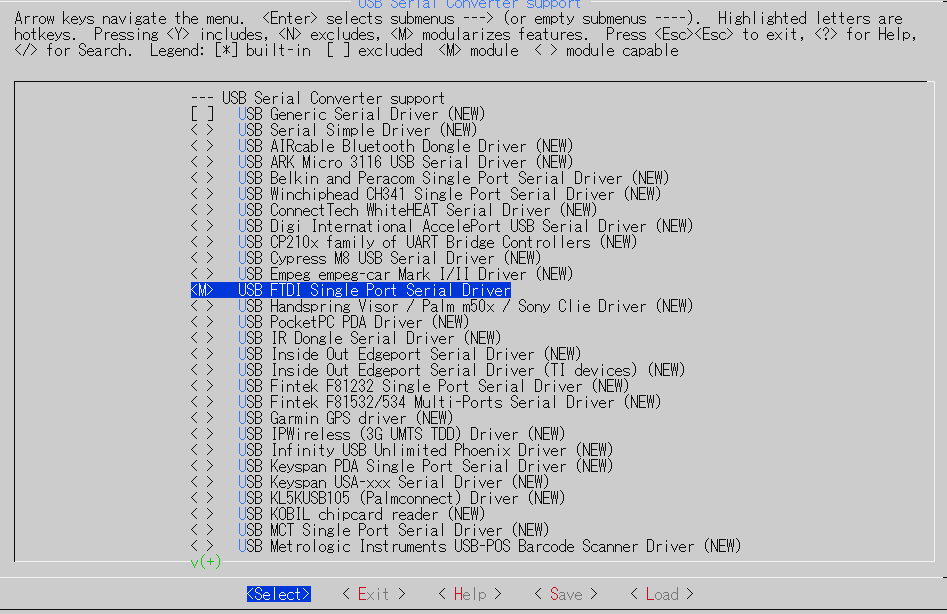
<M> USB Serial Converter support-
< > USB FTDI Single Port Serial Driver-><M> USB FTDI Single Port Serial Driver -
<ESC><ESC>
-
-
-
-
Device Drivers-
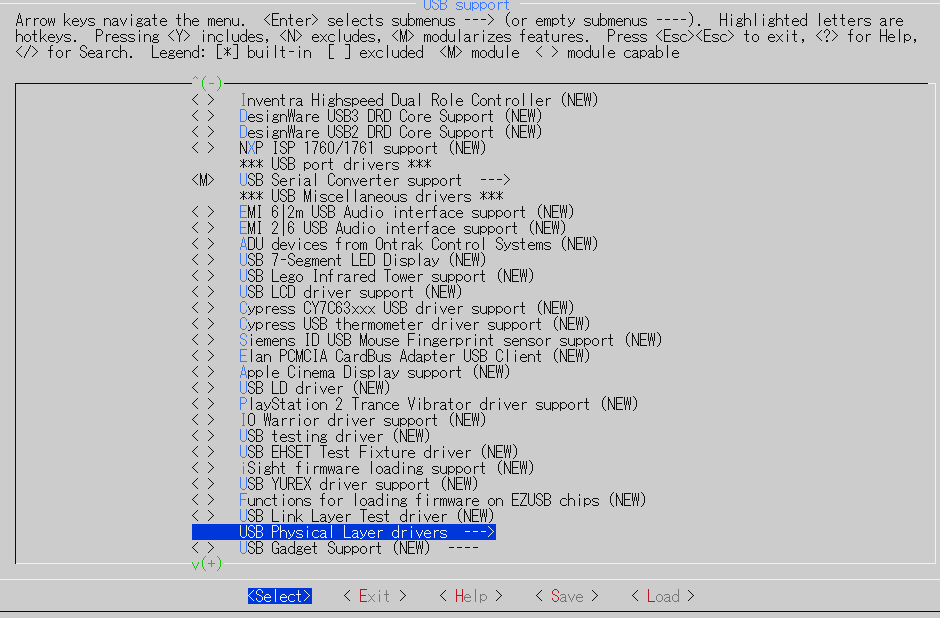
[*] USB support-
USB Physical Layer drivers
-
-
-
Device Drivers-
[*] USB support-
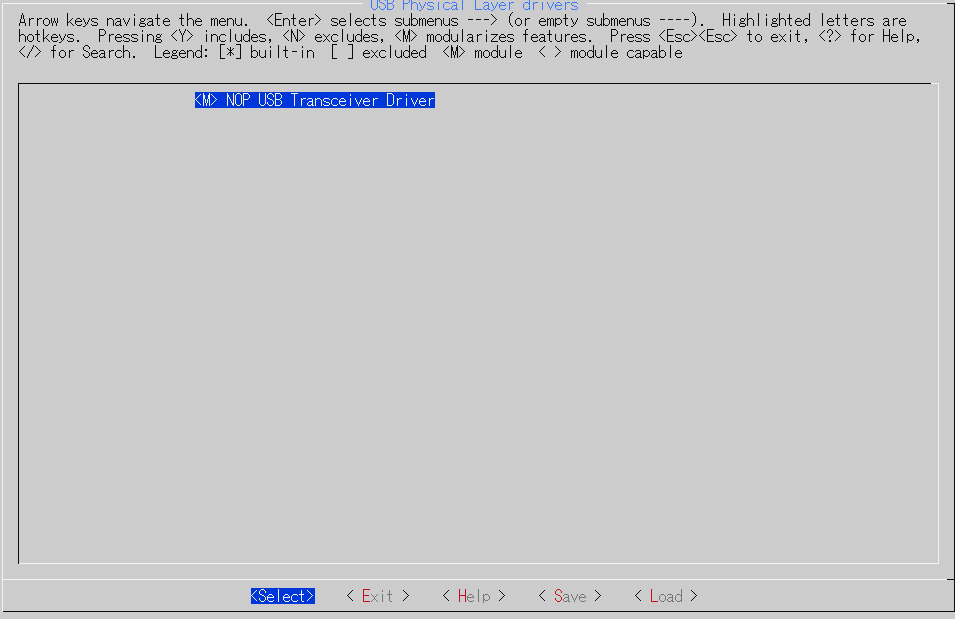
USB Physical Layer drivers-
< > NOP USB Transceiver Driver-><M> NOP USB Transceiver Driver -
<ESC><ESC><ESC><ESC>
-
-
-
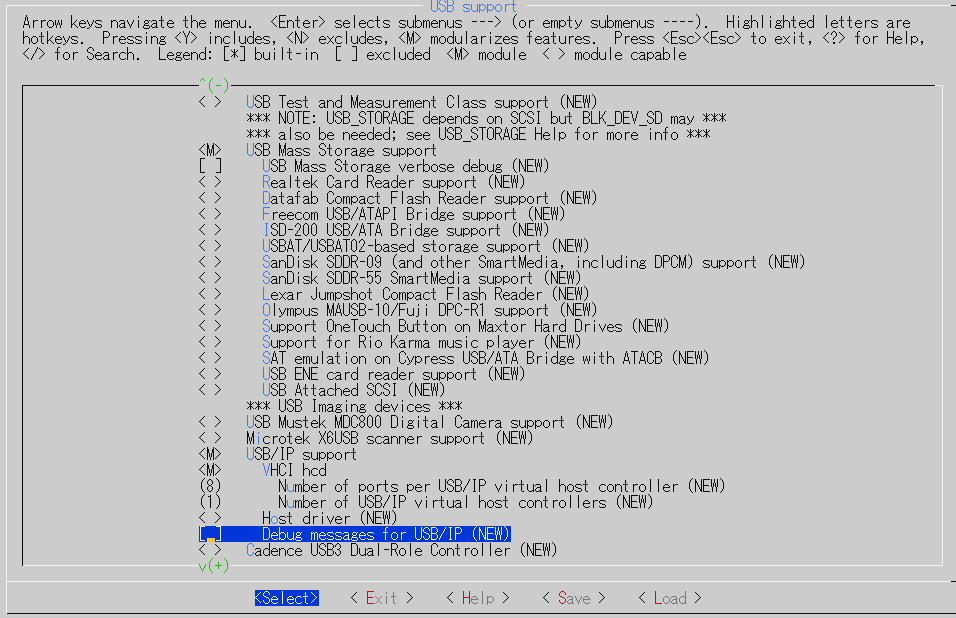
Images omitted from the following.
-
Device Drivers-
[ ] Network device support->[M] Network device support-
[ ] USB Network Adapters->[M] USB Network Adapters-
[ ] Multi-purpose USB Networking Framework->[M] Multi-purpose USB Networking Framework -M- CDC Ethernet support (smart devices such as cable modems)-
[ ] Host for RNDIS and ActiveSync devices->[M] Host for RNDIS and ActiveSync devices <ESC><ESC><ESC><ESC>
-
-
-
-
Device Drivers-
[ ] Multimedia support->[M] Multimedia support-
[ ] Cameras/video grabbers support->[*] Cameras/video grabbers support -
[ ] Media USB Adapters->[*] Media USB Adapters-
< > USB Video Class (UVC)-><M> USB Video Class (UVC)[*] UVC input events device support
-
-
-
< Save > -> < Exit > -> < Exit > -> < Exit > -> < Exit >
$ sudo make -j$(nproc) && \
sudo make modules_install -j$(nproc) && \
sudo make install -j$(nproc)
List of installed Linux kernel modules. The number of kernel modules will vary depending on the version of the kernel you have built. This list will be used in 4-6.
  INSTALL drivers/hid/hid-generic.ko
  INSTALL drivers/hid/hid.ko
  INSTALL drivers/hid/usbhid/usbhid.ko
  INSTALL drivers/media/common/videobuf2/videobuf2-common.ko
  INSTALL drivers/media/common/videobuf2/videobuf2-memops.ko
  INSTALL drivers/media/common/videobuf2/videobuf2-v4l2.ko
  INSTALL drivers/media/common/videobuf2/videobuf2-vmalloc.ko
  INSTALL drivers/media/usb/gspca/gspca_main.ko
  INSTALL drivers/media/usb/uvc/uvcvideo.ko
  INSTALL drivers/media/v4l2-core/v4l2-dv-timings.ko
  INSTALL drivers/media/v4l2-core/videodev.ko
  INSTALL drivers/net/mii.ko
  INSTALL drivers/net/phy/libphy.ko
  INSTALL drivers/net/usb/asix.ko
  INSTALL drivers/net/usb/ax88179_178a.ko
  INSTALL drivers/net/usb/cdc_ether.ko
  INSTALL drivers/net/usb/cdc_ncm.ko
  INSTALL drivers/net/usb/cdc_subset.ko
  INSTALL drivers/net/usb/net1080.ko
  INSTALL drivers/net/usb/rndis_host.ko
  INSTALL drivers/net/usb/usbnet.ko
  INSTALL drivers/net/usb/zaurus.ko
  INSTALL drivers/usb/class/cdc-acm.ko
  INSTALL drivers/usb/common/usb-common.ko
  INSTALL drivers/usb/core/usbcore.ko
  INSTALL drivers/usb/phy/phy-generic.ko
  INSTALL drivers/usb/serial/usbserial.ko
  INSTALL drivers/usb/storage/usb-storage.ko
  INSTALL drivers/usb/usbip/usbip-core.ko
  INSTALL drivers/usb/usbip/vhci-hcd.ko
Replace the <windows username> with the name of the user account you are logging into Windows with.
$ cd tools/usb/usbip/
$ sudo ./autogen.sh && sudo ./configure
$ sudo sed 's/-Werror//g' -i Makefile
$ sudo sed 's/-Werror//g' -i src/Makefile
$ sudo sed 's/-Werror//g' -i libsrc/Makefile
$ sudo make install -j$(nproc)
$ sudo cp libsrc/.libs/libusbip.so.0 /lib/libusbip.so.0
$ sudo rm /mnt/c/Users/<windows username>/vmlinux
$ sudo cp /usr/src/${TAGVERNUM}-microsoft-standard/vmlinux /mnt/c/Users/<windows username>/
Run the following command on a Windows machine to set up WSL2 to load the kernel you have built.
C:\> echo [WSL2] >> c:\Users\<windows username>\.wslconfig
C:\> echo kernel=C:\\Users\\<windows username>\\vmlinux >> c:\Users\<windows username>\.wslconfig
Run the following command on a Windows PC.
C:\> wsl --shutdown
Start WSL2 again.
4-5. Check the application status of the kernel you built
Make sure that the date is different from the date when you first checked the kernel version, and that the Linux kernel is up to date. Execute the following command in the console in the rebooted WSL2.
$ uname -r -v
5.4.72-microsoft-standard-WSL2+ #1 SMP Fri Oct 1 10:37:51 JST 2021
4-6. Create a script for loading a kernel module for USB integration and check its operation
Create a script as shown below, referring to the list displayed after installing the kernel in 4-4. Simply remove the .ko extension from the end of the file name to make it a list.
$ cat << 'EOT' > ${HOME}/startusb.sh
#!/bin/bash
sudo modprobe usbcore
sudo modprobe usb-common
sudo modprobe hid-generic
sudo modprobe hid
sudo modprobe usbhid
sudo modprobe videobuf2-common
sudo modprobe videobuf2-memops
sudo modprobe videobuf2-v4l2
sudo modprobe videobuf2-vmalloc
sudo modprobe gspca_main
sudo modprobe uvcvideo
sudo modprobe v4l2-dv-timings
sudo modprobe videodev
sudo modprobe mii
sudo modprobe libphy
sudo modprobe asix
sudo modprobe ax88179_178a
sudo modprobe cdc_ether
sudo modprobe cdc_ncm
sudo modprobe cdc_subset
sudo modprobe net1080
sudo modprobe rndis_host
sudo modprobe usbnet
sudo modprobe zaurus
sudo modprobe cdc-acm
sudo modprobe phy-generic
sudo modprobe usbserial
sudo modprobe usb-storage
sudo modprobe usbip-core
sudo modprobe vhci-hcd
echo $(cat /etc/resolv.conf | grep nameserver | awk '{print $2}')
EOT

$ sudo chmod +x startusb.sh
$ sudo ./startusb.sh
172.18.32.1
$ lsmod

Module                  Size  Used by
vhci_hcd               32768  0
usbip_core             16384  1 vhci_hcd
usb_storage            61440  0
usbserial              40960  0
phy_generic            16384  0
cdc_acm                32768  0
zaurus                 16384  0
rndis_host             16384  0
net1080                16384  0
cdc_subset             16384  0
cdc_ncm                28672  0
cdc_ether              16384  2 zaurus,rndis_host
ax88179_178a           28672  0
asix                   40960  0
usbnet                 36864  8 zaurus,cdc_subset,cdc_ncm,rndis_host,net1080,cdc_ether,asix,ax88179_178a
libphy                 73728  1 asix
mii                    16384  3 usbnet,asix,ax88179_178a
v4l2_dv_timings        36864  0
uvcvideo              106496  0
gspca_main             28672  0
videobuf2_vmalloc      16384  2 gspca_main,uvcvideo
videobuf2_v4l2         24576  2 gspca_main,uvcvideo
videodev              204800  3 gspca_main,videobuf2_v4l2,uvcvideo
videobuf2_memops       16384  1 videobuf2_vmalloc
videobuf2_common       49152  3 gspca_main,videobuf2_v4l2,uvcvideo
usbhid                 28672  0
hid_generic            16384  0
hid                   114688  2 usbhid,hid_generic
usbcore               208896  16 gspca_main,usbserial,zaurus,usbnet,cdc_subset,usbhid,cdc_acm,cdc_ncm,usb_storage,rndis_host,net1080,uvcvideo,cdc_ether,asix,ax88179_178a,vhci_hcd
usb_common             16384  3 usbcore,uvcvideo,vhci_hcd
4-7. Download VirtualHere USB Client
Download the VirtualHere USB Client from within WSL2.
$ wget https://www.virtualhere.com/sites/default/files/usbclient/vhuit64 && \
sudo chmod 777 vhuit64
$ sudo ./vhuit64
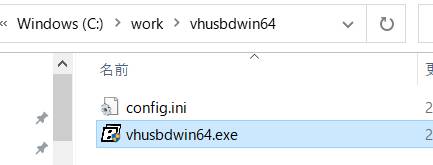
4-8. Download Windows USB Server
Download the Windows USB Server on the Windows host PC.
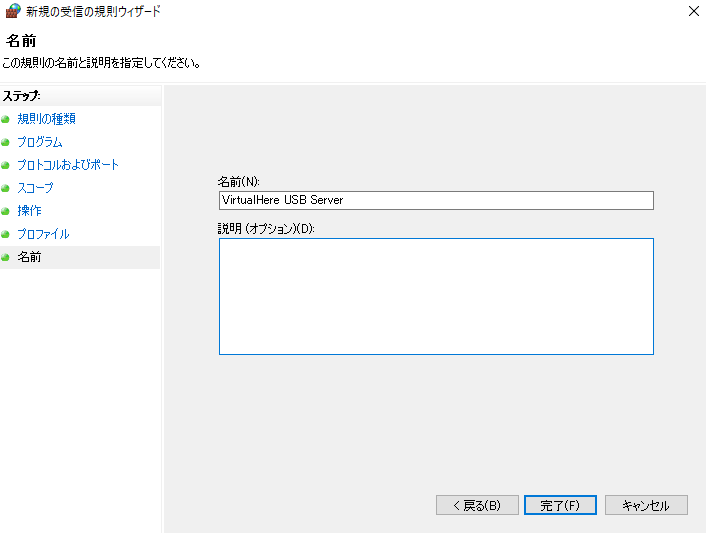
4-9. Windows Defender Firewall settings
- Run
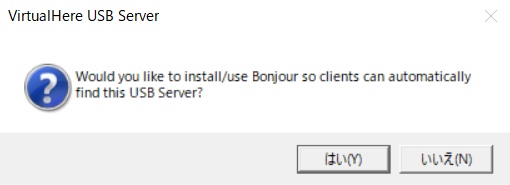
vhusbdwin64.exe - Yes
- Run
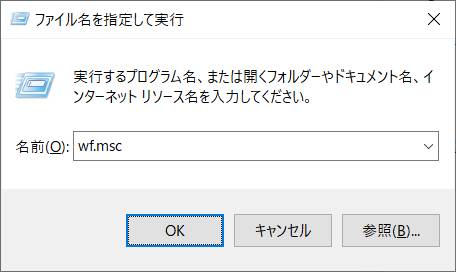
Windows Defender Firewall.Windows Key + R->wf.msc
-
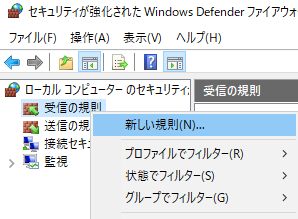
Reception Rules->New Rules
-
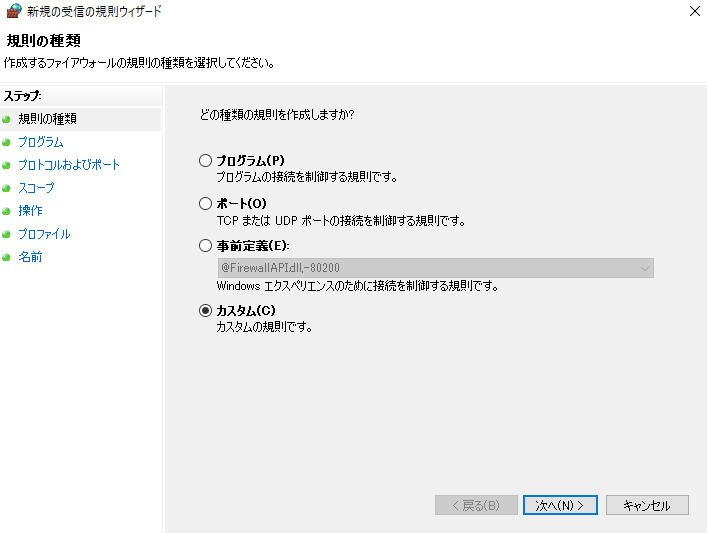
Custom
- Specify the path where
vhusbdwin64.exeis saved.
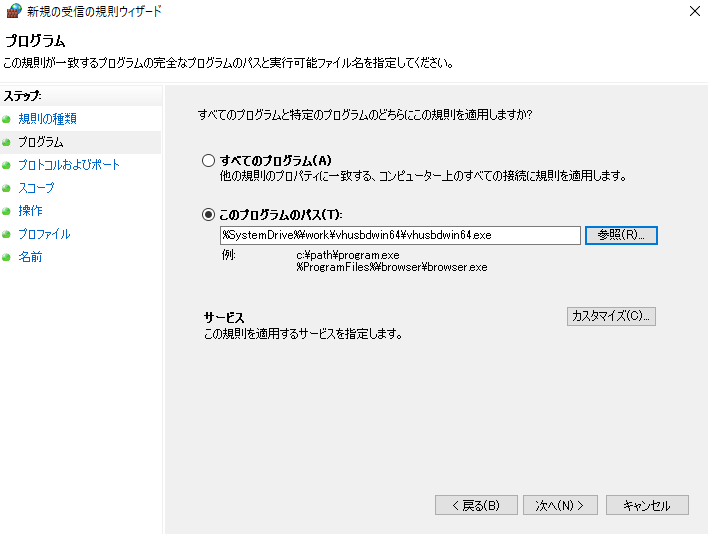
- Nmae:
VirtualHere USB Server

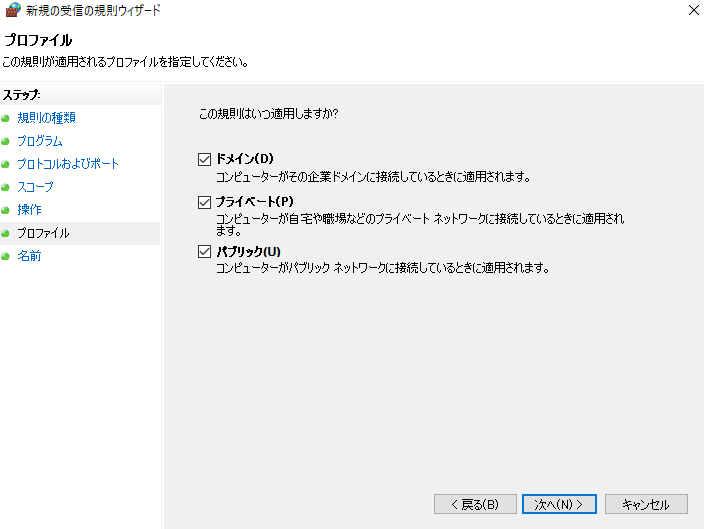
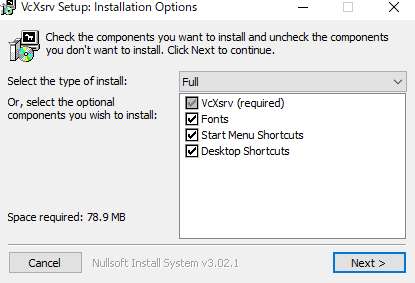
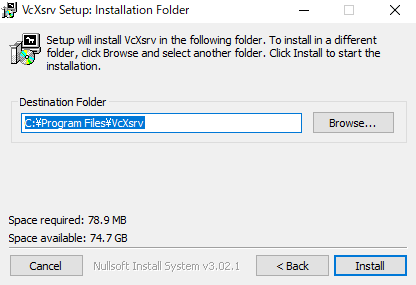
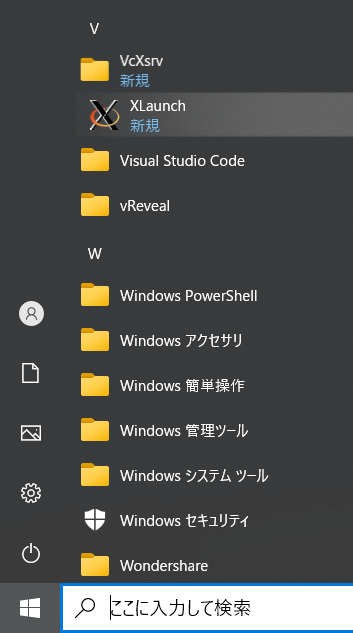
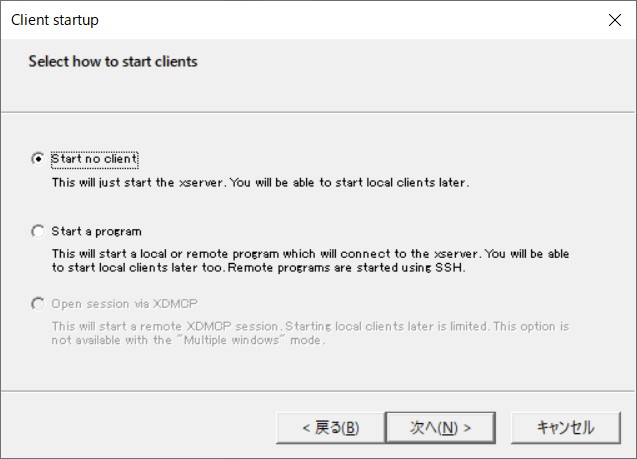
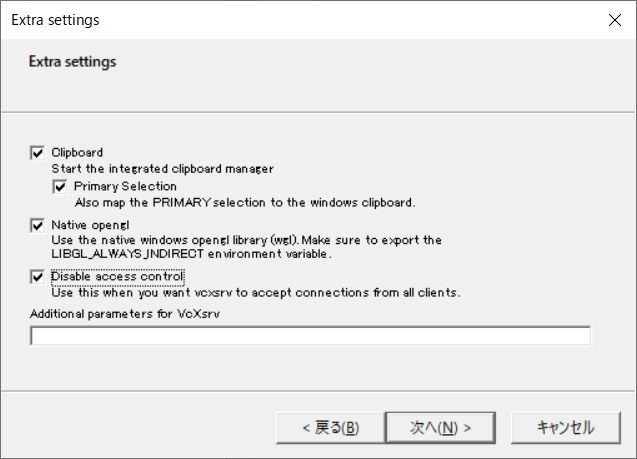
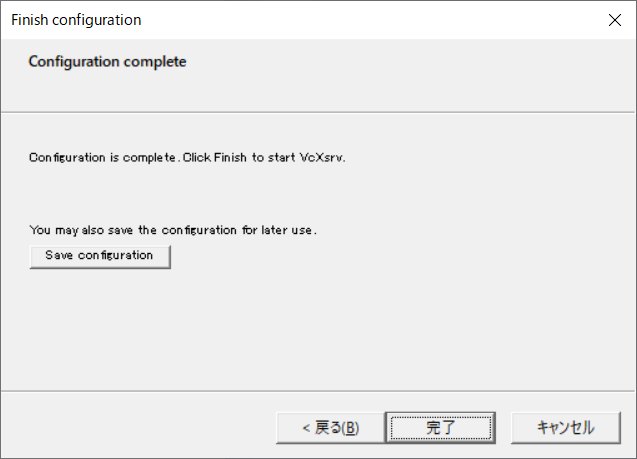
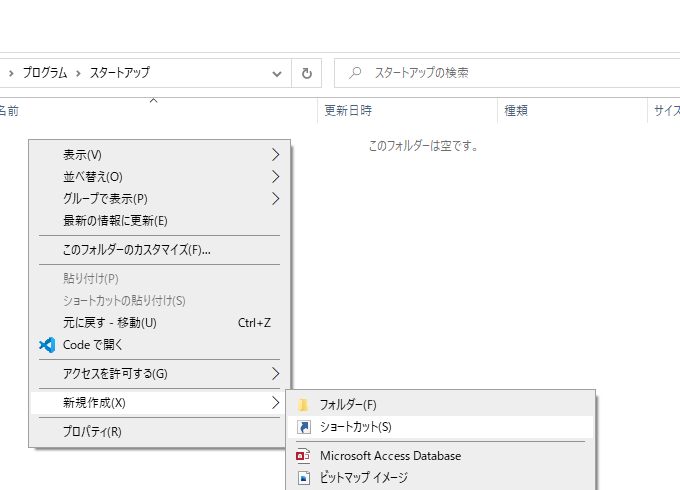
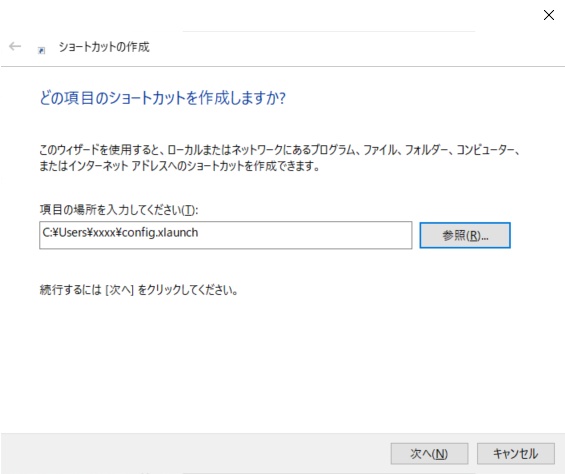
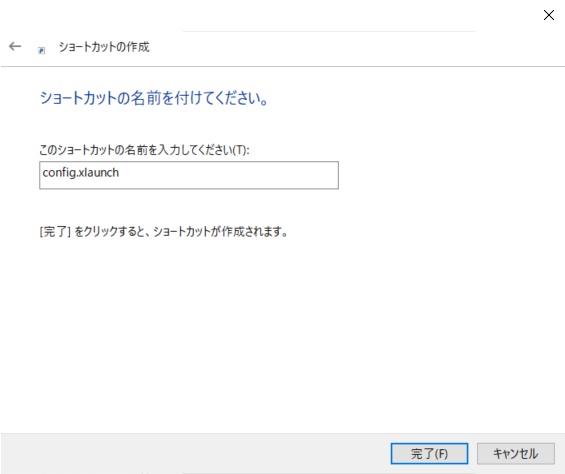
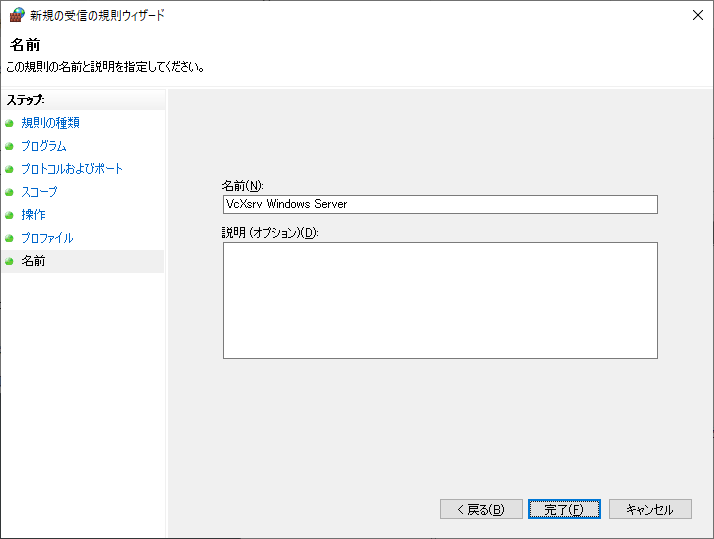
4-10. Install VcXsrv (X server)
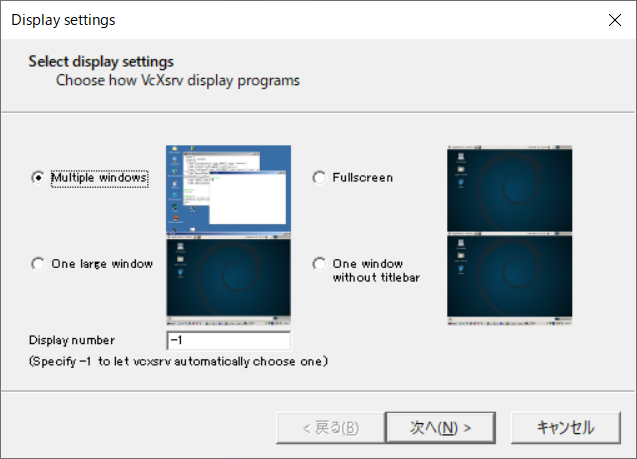
After pressing the save configuration button, press the Finish button.
Windows Key + R -> shell:startup

Run Windows Defender Firewall. Windows Key + R -> wf.msc
Reception Rules -> New Rules
Custom
%ProgramFiles%\VcXsrv\vcxsrv.exe
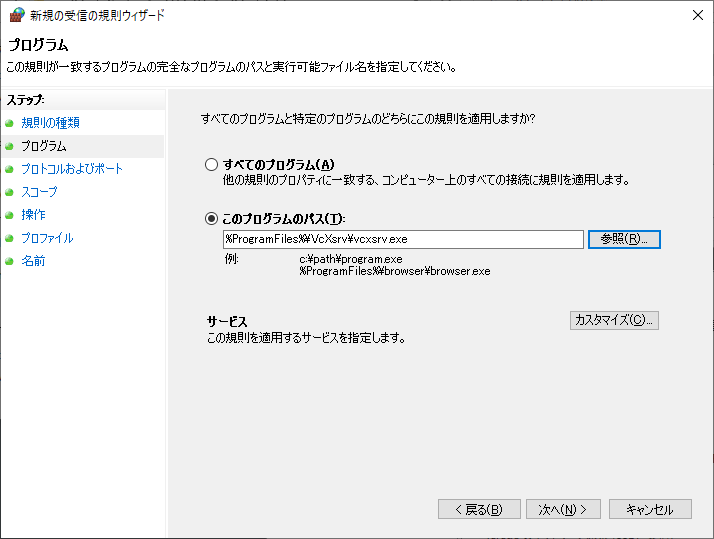
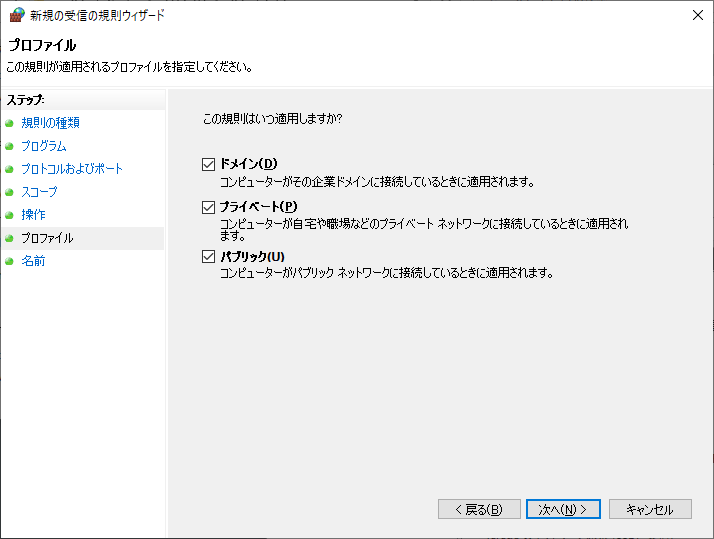
Name: VcXsrv Windows Server

4-11. Stop third party security software or set permission to run "Windows USB Server"
If you have McAfee, Virus Buster, or any other anti-virus software installed, stop it or set the permissions for the applications installed in this process to run.
5. Operation check
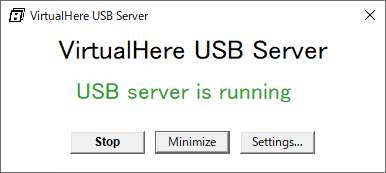
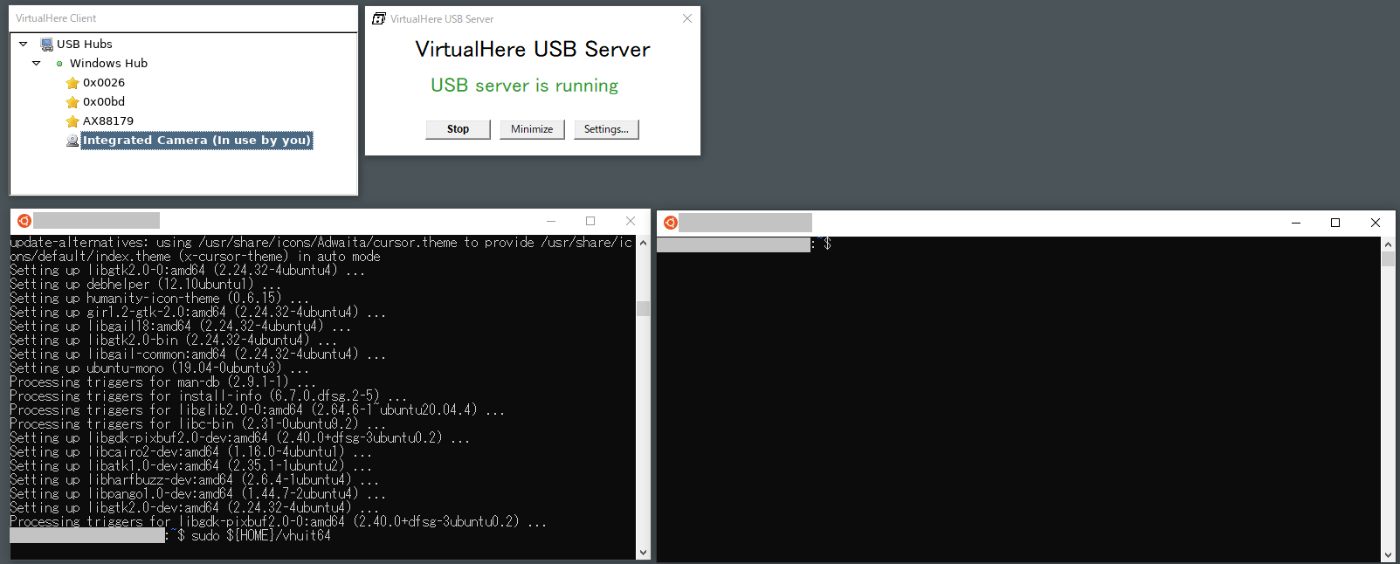
5-1. Execute VirtualHere Windows USB Server
Run vhusbdwin64.exe on the Windows host PC.
5-2. Excecute VirtualHere USB Client
Execute the following command on Ubuntu with WSL2.
$ sudo ${HOME}/startusb.sh
172.21.192.1
$ sudo ${HOME}/vhuit64
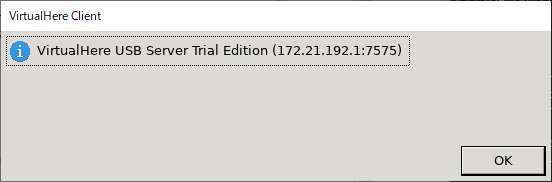
It will be displayed on the Windows host PC side. OK
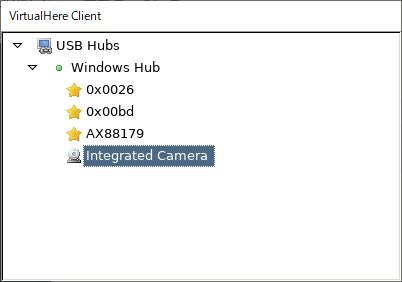
Select USB Camera.
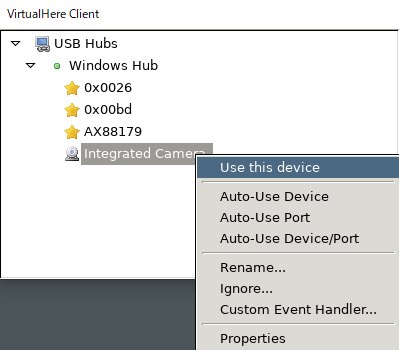
Right-click and select Use this device.
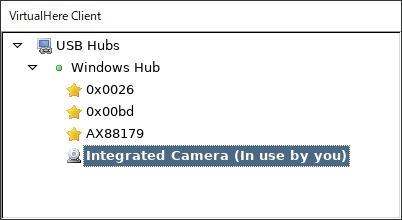
5-3. Check if the USB camera of the host PC is recognized from within WSL2
Right-click the Ubuntu icon on the taskbar and select Ubuntu 20.04 LTS to launch another WSL2 console.
Confirm that the USB camera is recognized by executing the following command. Run it in a terminal inside WSL2.
$ lsusb
Bus 002 Device 001: ID 1d6b:0003 Linux Foundation 3.0 root hub
Bus 001 Device 002: ID 5986:115f Acer, Inc Integrated Camera
Bus 001 Device 001: ID 1d6b:0002 Linux Foundation 2.0 root hub

$ ls -l /dev/video*
crw------- 1 root root 81, 0 Oct  1 17:44 /dev/video0
crw------- 1 root root 81, 1 Oct  1 17:44 /dev/video1
Install OpenCV.
$ pip3 install opencv-python opencv-contrib-python
Created a Python program to check the operation of the USB camera.
$ cat << 'EOT' > ${HOME}/usbcam_test.py
import cv2

cap = cv2.VideoCapture(0)

while True:
    ret, frame = cap.read()
    if not ret:
        continue
    frame = cv2.resize(frame, (640, 480))

    cv2.imshow('usb cam test', frame)
    if cv2.waitKey(1) & 0xFF == ord('q'):
        break

cap.release()
cv2.destroyAllWindows()
EOT
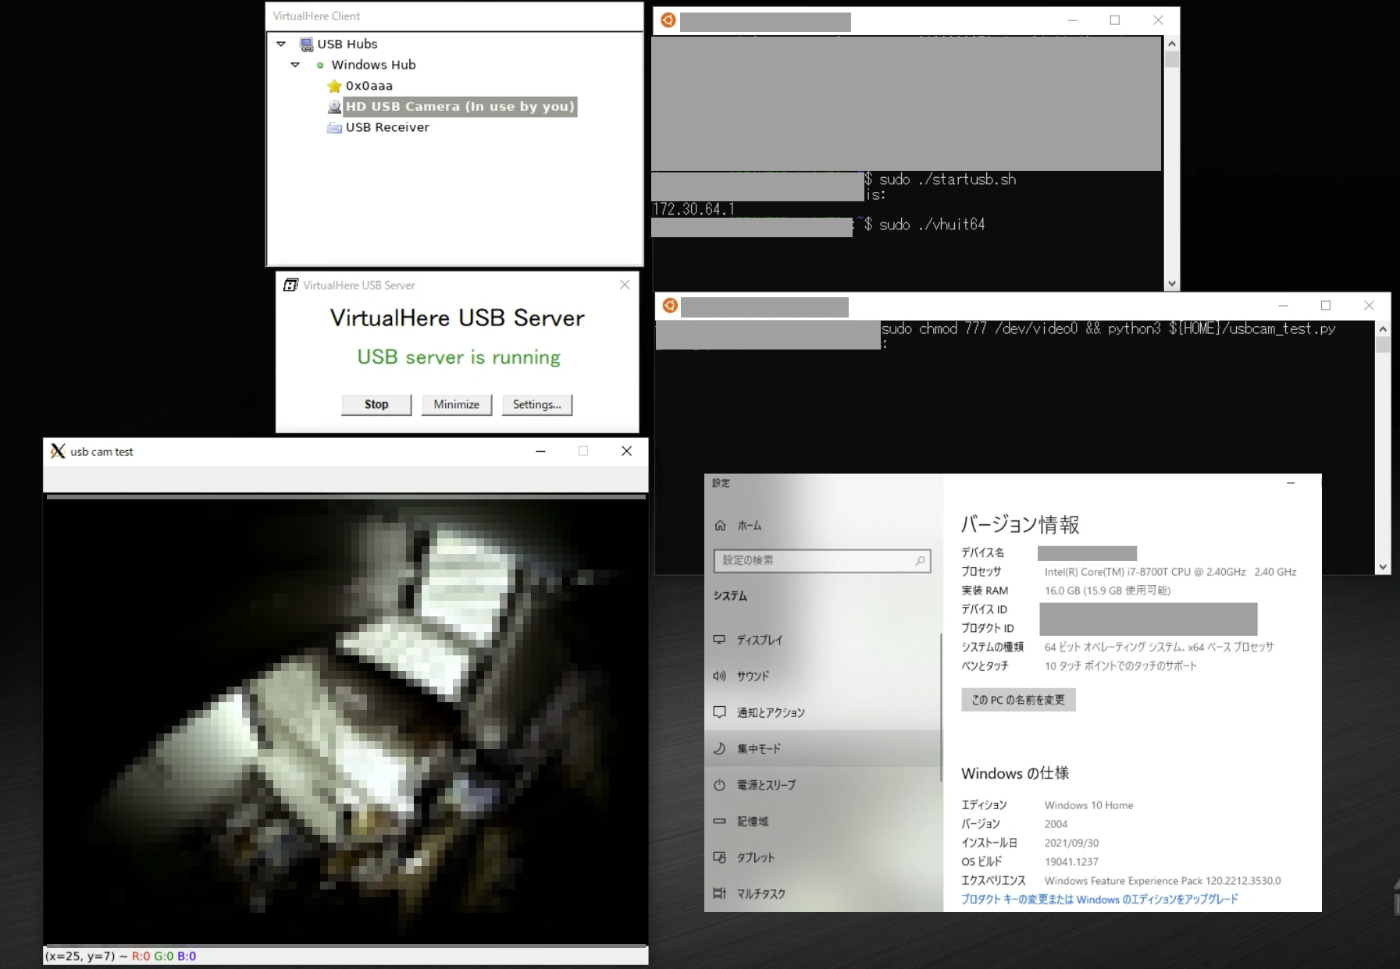
Run a Python program. If the image taken by the USB camera is displayed on the Windows host PC, you have succeeded.
$ sudo chmod 777 /dev/video0 && python3 ${HOME}/usbcam_test.py
The figure below shows the result of running on another terminal with Linux Kernel version linux-msft-wsl-5.10.16.3. It is displayed correctly.
If you receive the following error, please follow the additional steps: USB bandwidth issues may cause the information exchange with the camera to time out.
- Error Message
[ WARN:0] global /tmp/pip-req-build-xw6jtoah/opencv/modules/videoio/src/cap_v4l.cpp (1001) tryIoctl VIDEOIO(V4L2:/dev/video0): select() timeout.
- Additional command
$ sudo rmmod uvcvideo
$ sudo modprobe uvcvideo quirks=128 nodrop=1 timeout=6000
or
$ sudo modprobe uvcvideo quirks=0x80 nodrop=1 timeout=6000
or
$ sudo modprobe uvcvideo quirks=0x100 nodrop=1 timeout=6000
or
$ sudo modprobe uvcvideo quirks=0x200 nodrop=1 timeout=6000
 :
$ sudo chmod 777 /dev/video0 && python3 ${HOME}/usbcam_test.py
Discussion