[Deprecated] Windows 11/10 + WSL2 + USB Camera + Serial
-
ASUS PB60G-B7234ZD
-
Intel Core™ i7-8700T
-
RAM 16 GB
-
Windows 11 Home (21H2) OS build: 22000.194 (or Windows 10 21H1 OS build: 19043.1237+)
-
WSL2
- Kernel: 5.10.16.3-microsoft-standard-WSL2 #1 SMP Fri Apr 2 22:23:49 UTC 2021)
- Kernel: 5.10.60.1-microsoft-standard-WSL2 #1
- Kernel: 5.10.60.1-microsoft-standard-WSL2+ #n
Note:#nis the number of times to built the kernel
- Kernel: 5.10.60.1-microsoft-standard-WSL2+ #n
- Kernel: 5.10.60.1-microsoft-standard-WSL2 #1
- Kernel: 5.10.16.3-microsoft-standard-WSL2 #1 SMP Fri Apr 2 22:23:49 UTC 2021)
-
Ubuntu 20.04
-
NVIDIA GeForce GTX 1650
-
Reference articles
- Deprecated
On WSL2.
$ uname -r -v
5.10.16.3-microsoft-standard-WSL2 #1 SMP Fri Apr 2 22:23:49 UTC 2021
On Windows Terminal.
C:\> wsl --update
Checking for updates...
Downloading update...
Installing update...
This change will take effect the next time you reboot WSL. To force a reboot, run 'wsl --shutdown'.
Kernel version: 5.10.60.1

C:\> wsl --shutdown
On WSL2.
$ uname -r -v
5.10.60.1-microsoft-standard-WSL2 #1 SMP ...
On WSL2.
$ sudo apt update && sudo apt upgrade -y && \
sudo apt install -y build-essential flex bison \
libgtk2.0-dev libelf-dev libncurses-dev autoconf \
libudev-dev libtool zip unzip v4l-utils libssl-dev \
python3-pip cmake git iputils-ping net-tools
On WSL2.
$ cd /usr/src && \
TAGVERNUM=5.10.60.1 && \
TAGVER=linux-msft-wsl-${TAGVERNUM} && \
sudo git clone -b ${TAGVER} \
https://github.com/microsoft/WSL2-Linux-Kernel.git \
${TAGVERNUM}-microsoft-standard && \
cd ${TAGVERNUM}-microsoft-standard
$ sudo wget -O .config https://github.com/PINTO0309/wsl2_linux_kernel_usbcam_enable_conf/raw/main/${TAGVER}/config && \
sudo chmod 777 .config && \
sudo make clean && \
sudo make -j$(nproc) && \
sudo make modules_install -j$(nproc) && \
sudo make install -j$(nproc)
On WSL2. Replace the <windows username> part with the username you are logging on to the Windows host PC.
$ cd tools/usb/usbip/ && \
sudo ./autogen.sh && sudo ./configure && \
sudo sed 's/-Werror//g' -i Makefile && \
sudo sed 's/-Werror//g' -i src/Makefile && \
sudo sed 's/-Werror//g' -i libsrc/Makefile && \
sudo make install -j$(nproc) && \
sudo cp libsrc/.libs/libusbip.so.0 /lib/libusbip.so.0 && \
sudo rm /mnt/c/Users/<windows username>/vmlinux && \
sudo cp /usr/src/${TAGVERNUM}-microsoft-standard/vmlinux /mnt/c/Users/<windows username>/

$ cat << 'EOT' > /mnt/c/Users/<windows username>/.wslconfig
[wsl2]
kernel=C:\\Users\\<windows username>\\vmlinux
EOT
On Windows Terminal.
PS C:\> wsl --shutdown
On WSL2.
$ uname -r -v
5.10.60.1-microsoft-standard-WSL2+ #4 SMP Tue Oct 12 12:05:07 JST 2021
Download the VirtualHere USB Client from within WSL2.
$ sudo apt-get install -y libgtk2.0-0
$ wget https://www.virtualhere.com/sites/default/files/usbclient/vhuit64 && \
sudo chmod 777 vhuit64
Download the Windows USB Server on the Windows host PC.
Windows Defender Firewall settings
- Run
vhusbdwin64.exe - Yes
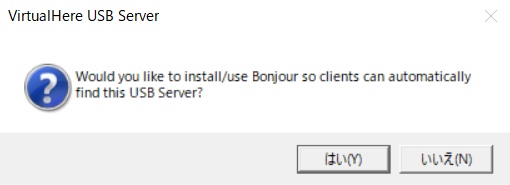
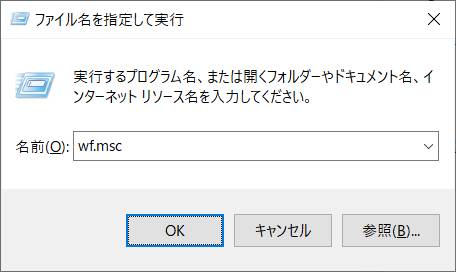
- Run
Windows Defender Firewall.Windows Key + R->wf.msc
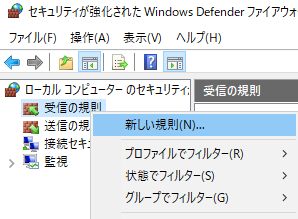
-
Reception Rules->New Rules
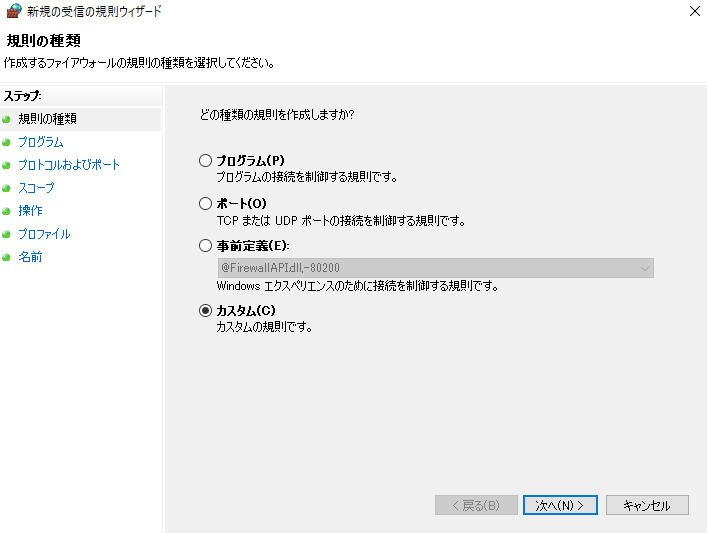
-
Custom
- Specify the path where
vhusbdwin64.exeis saved.
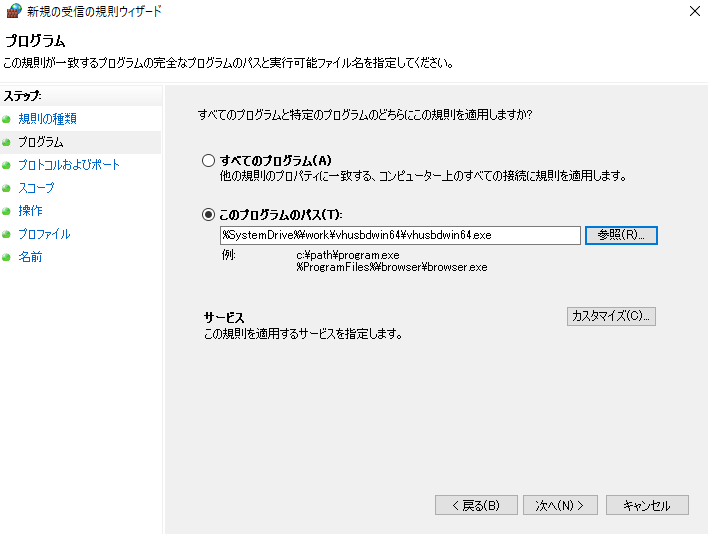
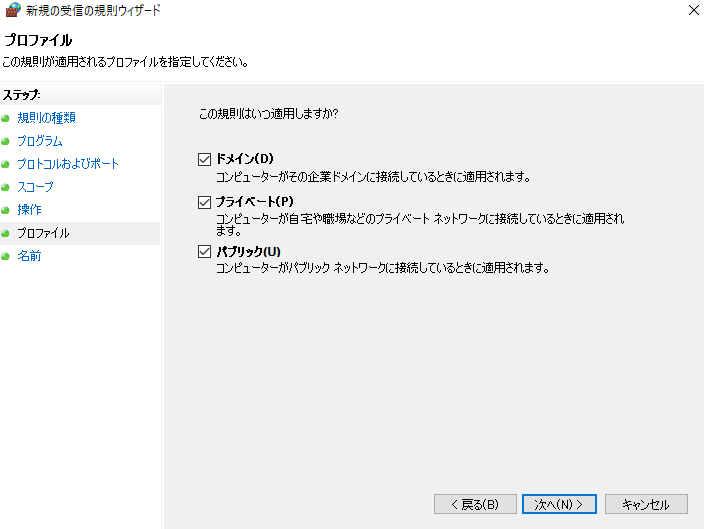
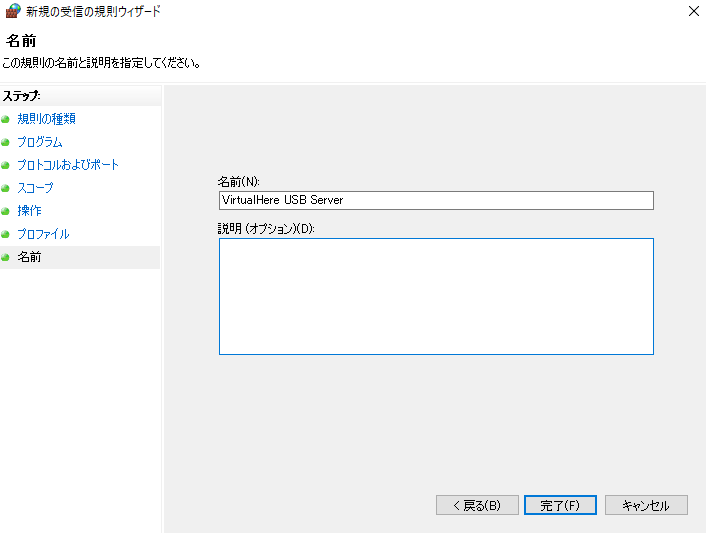
- Nmae:
VirtualHere USB Server

On WSL2.
$ sudo ${HOME}/vhuit64
Or run it in the background. You will need to authenticate the sudo command.
$ PASSWORD=your_sudo_password
$ echo $PASSWORD | sudo ${HOME}/vhuit64 &
It will be displayed on the Windows host PC side. OK

Select USB Camera.
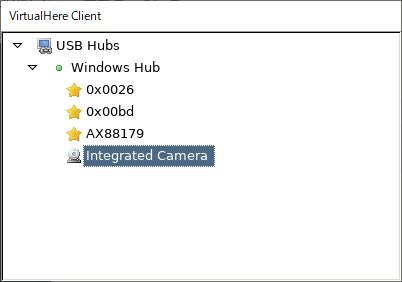
Right-click and select Use this device.
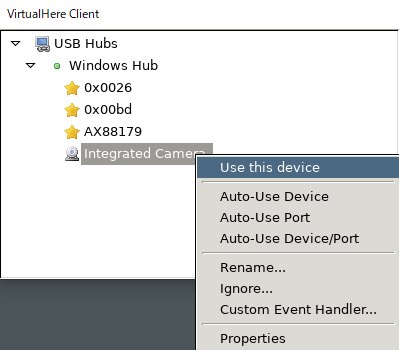
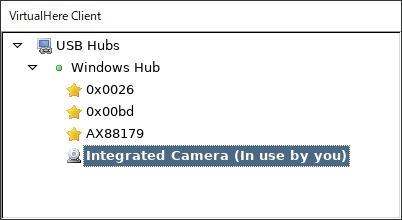
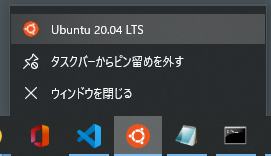
Right-click the Ubuntu icon on the taskbar and select Ubuntu 20.04 LTS to launch another WSL2 console. This step is not necessary if you are running vhuit64 in background mode.
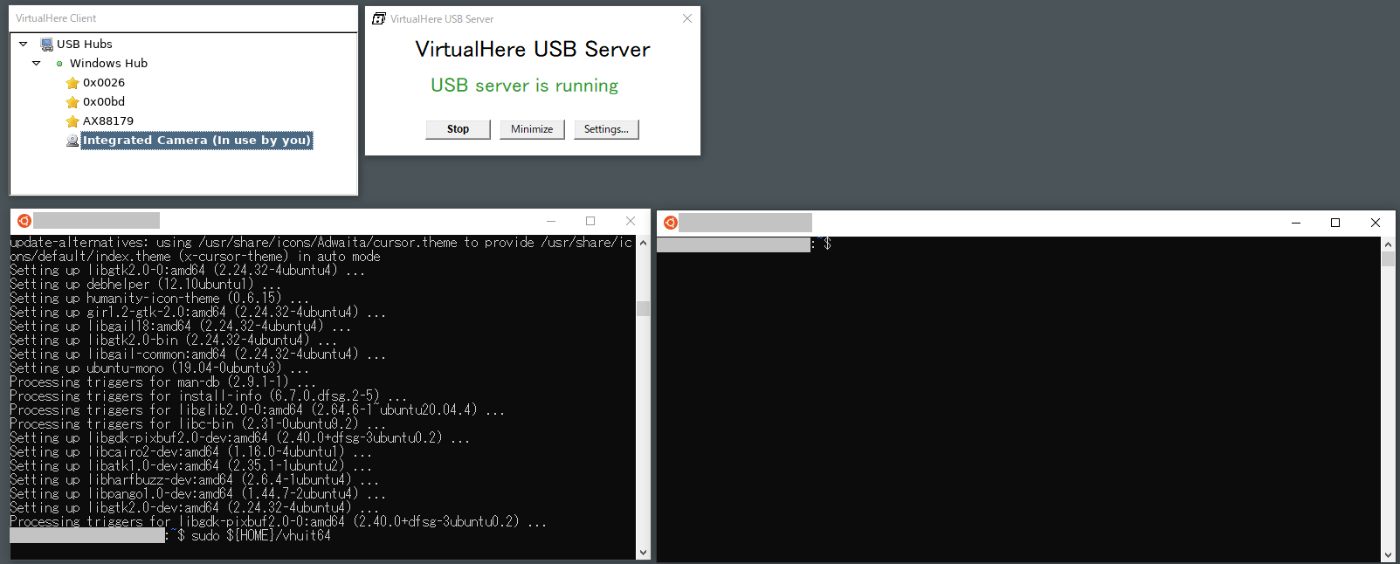
Confirm that the USB camera is recognized by executing the following command. Run it in a terminal inside WSL2.
$ lsusb
Bus 002 Device 001: ID 1d6b:0003 Linux Foundation 3.0 root hub
Bus 001 Device 003: ID 1bcf:2285 Sunplus Innovation Technology Inc. papalook FHD Camera
Bus 001 Device 001: ID 1d6b:0002 Linux Foundation 2.0 root hub
$ ls -l /dev/video*
crw------- 1 root root 81, 0 Oct  1 17:44 /dev/video0
crw------- 1 root root 81, 1 Oct  1 17:44 /dev/video1
$ pip3 install opencv-python opencv-contrib-python
$ cat << 'EOT' > ${HOME}/usbcam_test.py
import cv2

W=640
H=480
cap = cv2.VideoCapture(0)
cap.set(cv2.CAP_PROP_FRAME_WIDTH, W)
cap.set(cv2.CAP_PROP_FRAME_HEIGHT, H)

while True:
    ret, frame = cap.read()
    if not ret:
        continue
    cv2.imshow('usb cam test', frame)
    if cv2.waitKey(1) & 0xFF == ord('q'):
        break

cap.release()
cv2.destroyAllWindows()
EOT
Run a Python program. If the image taken by the USB camera is displayed on the Windows host PC, you have succeeded.
$ sudo chmod 777 /dev/video* && python3 ${HOME}/usbcam_test.py
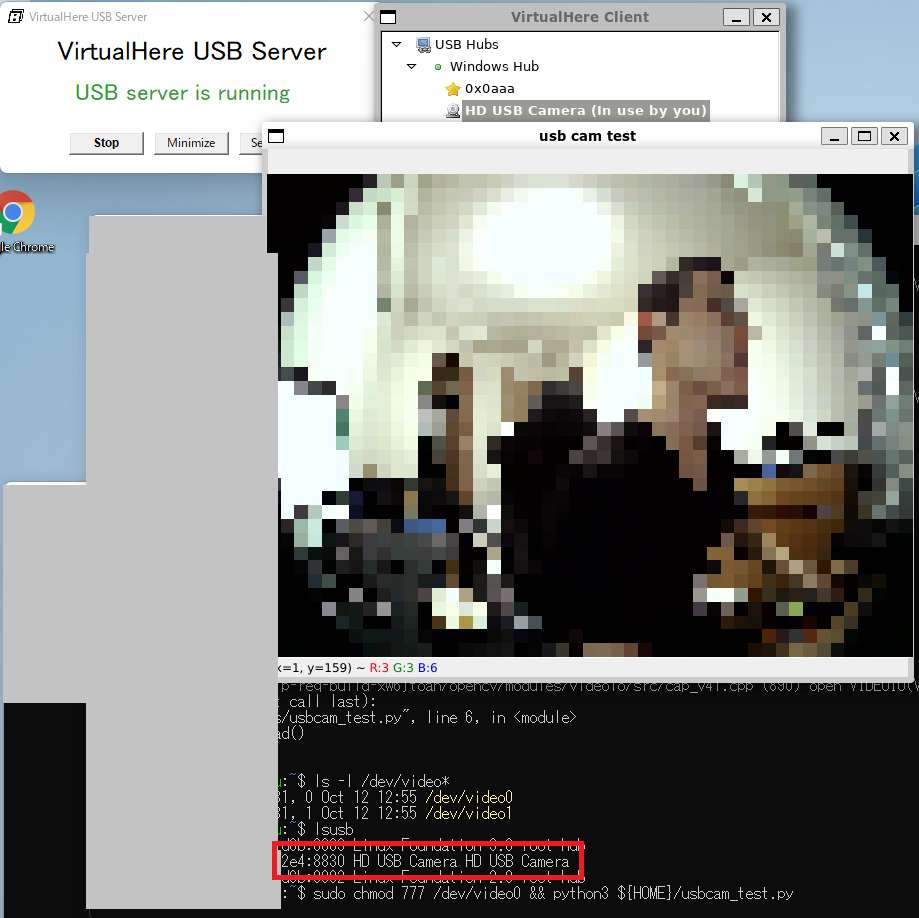
If you receive the following error, please follow the additional steps: USB bandwidth issues may cause the information exchange with the camera to time out.
- Error Message
[ WARN:0] global /tmp/pip-req-build-xw6jtoah/opencv/modules/videoio/src/cap_v4l.cpp (1001) tryIoctl VIDEOIO(V4L2:/dev/video0): select() timeout.
Try one or both of the following.
- Try1. Additional command
$ sudo apt install v4l-utils && \
sudo chmod 777 /dev/video0 && \
v4l2-ctl -d /dev/video0 --all

Driver Info:
	Driver name      : uvcvideo
	Card type        : papalook FHD Camera: papalook F
	Bus info         : usb-0000:00:14.0-11.1
	Driver version   : 5.11.22
	Capabilities     : 0x84a00001
		Video Capture
		Metadata Capture
		Streaming
		Extended Pix Format
		Device Capabilities
	Device Caps      : 0x04200001
		Video Capture
		Streaming
		Extended Pix Format
Media Driver Info:
	Driver name      : uvcvideo
	Model            : papalook FHD Camera: papalook F
	Serial           :
	Bus info         : usb-0000:00:14.0-11.1
	Media version    : 5.11.22
	Hardware revision: 0x00000100 (256)
	Driver version   : 5.11.22
Interface Info:
	ID               : 0x03000002
	Type             : V4L Video
Entity Info:
	ID               : 0x00000001 (1)
	Name             : papalook FHD Camera: papalook F
	Function         : V4L2 I/O
	Flags         : default
	Pad 0x01000007   : 0: Sink
	  Link 0x02000010: from remote pad 0x100000a of entity 'Extension 3': Data, Enabled, Immutable
Priority: 2
Video input : 0 (Camera 1: ok)
Format Video Capture:
	Width/Height      : 1280/720
	Pixel Format      : 'MJPG' (Motion-JPEG)
	Field             : None
	Bytes per Line    : 0
	Size Image        : 1843200
	Colorspace        : sRGB
	Transfer Function : Rec. 709
	YCbCr/HSV Encoding: ITU-R 601
	Quantization      : Default (maps to Full Range)
	Flags             :
Crop Capability Video Capture:
	Bounds      : Left 0, Top 0, Width 1280, Height 720
	Default     : Left 0, Top 0, Width 1280, Height 720
	Pixel Aspect: 1/1
Selection Video Capture: crop_default, Left 0, Top 0, Width 1280, Height 720, Flags:
Selection Video Capture: crop_bounds, Left 0, Top 0, Width 1280, Height 720, Flags:
Streaming Parameters Video Capture:
	Capabilities     : timeperframe
	Frames per second: 30.000 (30/1)
	Read buffers     : 0
                     brightness 0x00980900 (int)    : min=-64 max=64 step=1 default=0 value=0
                       contrast 0x00980901 (int)    : min=0 max=95 step=1 default=0 value=0
                     saturation 0x00980902 (int)    : min=0 max=100 step=1 default=30 value=30
                            hue 0x00980903 (int)    : min=-2000 max=2000 step=100 default=0 value=0
 white_balance_temperature_auto 0x0098090c (bool)   : default=1 value=1
                          gamma 0x00980910 (int)    : min=100 max=300 step=1 default=100 value=100
           power_line_frequency 0x00980918 (menu)   : min=0 max=2 default=1 value=1
				0: Disabled
				1: 50 Hz
				2: 60 Hz
      white_balance_temperature 0x0098091a (int)    : min=2800 max=6500 step=1 default=4600 value=4600 flags=inactive
                      sharpness 0x0098091b (int)    : min=1 max=7 step=1 default=1 value=1
         backlight_compensation 0x0098091c (int)    : min=0 max=3 step=1 default=2 value=2
Check the WIDTH and HEIGHT of the standard resolution displayed, and correct the input resolution listed in usbcam_test.py.
e.g.
From:
W=640
H=480
To:
W=1280
H=720
Another way to check with RealSenseD435.
$ sudo apt install v4l-utils && \
sudo chmod 777 /dev/video2 && \
v4l2-ctl -d /dev/video2 --list-formats-ext

ioctl: VIDIOC_ENUM_FMT
        Type: Video Capture

        [0]: 'GREY' (8-bit Greyscale)
                Size: Discrete 256x144
                        Interval: Discrete 0.003s (300.000 fps)
                        Interval: Discrete 0.011s (90.000 fps)
                Size: Discrete 424x240
                        Interval: Discrete 0.011s (90.000 fps)
                        Interval: Discrete 0.017s (60.000 fps)
                        Interval: Discrete 0.033s (30.000 fps)
                        Interval: Discrete 0.067s (15.000 fps)
                        Interval: Discrete 0.167s (6.000 fps)
    :
                Size: Discrete 1280x720
                        Interval: Discrete 0.033s (30.000 fps)
                        Interval: Discrete 0.067s (15.000 fps)
                        Interval: Discrete 0.167s (6.000 fps)
        [2]: 'GREY' (8-bit Greyscale)
                Size: Discrete 256x144
                        Interval: Discrete 0.003s (300.000 fps)
                        Interval: Discrete 0.011s (90.000 fps)
                Size: Discrete 424x240
                        Interval: Discrete 0.011s (90.000 fps)
                        Interval: Discrete 0.017s (60.000 fps)
                        Interval: Discrete 0.033s (30.000 fps)
                        Interval: Discrete 0.067s (15.000 fps)
                        Interval: Discrete 0.167s (6.000 fps)
                Size: Discrete 480x270
                        Interval: Discrete 0.011s (90.000 fps)
                        Interval: Discrete 0.017s (60.000 fps)
                        Interval: Discrete 0.033s (30.000 fps)
                        Interval: Discrete 0.067s (15.000 fps)
                        Interval: Discrete 0.167s (6.000 fps)
                Size: Discrete 640x360
                        Interval: Discrete 0.011s (90.000 fps)
                        Interval: Discrete 0.017s (60.000 fps)
                        Interval: Discrete 0.033s (30.000 fps)
                        Interval: Discrete 0.067s (15.000 fps)
                        Interval: Discrete 0.167s (6.000 fps)
                Size: Discrete 640x480
                        Interval: Discrete 0.011s (90.000 fps)
                        Interval: Discrete 0.017s (60.000 fps)
                        Interval: Discrete 0.033s (30.000 fps)
                        Interval: Discrete 0.067s (15.000 fps)
                        Interval: Discrete 0.167s (6.000 fps)
    :
Run it again.
$ sudo chmod 777 /dev/video* && python3 ${HOME}/usbcam_test.py
- Try2. It may not work well with UVC-compatible USB cameras depending on their compatibility. Try replacing several USB cameras. The following cameras were recognized successfully. I have tried four different USB cameras and only one was successful.
- OAK-D-Lite
- https://www.kickstarter.com/projects/opencv/opencv-ai-kit-oak-depth-camera-4k-cv-edge-object-detection?lang=en
-
https://github.com/luxonis/depthai
# Disable the Windows Defender Firewall
$ python3 install_requirements.py
$ python3 -m pip install blobconverter --upgrade
$ sudo echo 'SUBSYSTEM=="usb", ATTRS{idVendor}=="03e7", MODE="0666"' | \
sudo tee /etc/udev/rules.d/80-movidius.rules
$ service udev restart
$ sudo udevadm control --reload-rules && sudo udevadm trigger
$ python3 depthai_demo.py
- Built-in camera for Thinkpad laptops
Note
- Confirmed to work with Windows 11 Home (21H2) OS build: 22000.194
- Confirmed to work with Windows 10 Pro (21H1) OS build: 19043.1237
Discussion