はじめに
こんにちは〜!皆様いかがお過ごしでしょうか? no plan inc. CTOの @serinuntius です。
これはno plan inc.の Advent Calendar 2023の15日目の記事です。
ついにGemini ProのAPIが使えるようになりました。
GeminiとはGoogleが開発したマルチモーダル対応LLMです。
かなり無料枠がデカい && 超えてもかなり安いのでちょっとしたアプリケーションなら安心して動かせます。
GAまでは無料で使えるみたいなので、とりあえずは試してみましょう。
環境構築
pnpm create cloudflare@2

╭ Create an application with Cloudflare Step 1 of 3
│
├ In which directory do you want to create your application?
│ dir ./gemini-slack # ここで好きなアプリの名前を入力する
│
├ What type of application do you want to create?
│ type "Hello World" Worker
│
├ Do you want to use TypeScript?
│ yes typescript # TSで書きたい場合はここでyesを入力する
│
├ Copying files from "hello-world" template
│
├ Retrieving current workerd compatibility date
│ compatibility date 2023-12-06
│
├ Do you want to use git for version control?
│ yes git # git 使う
│
╰ Application created

╭ Installing dependencies Step 2 of 3
│
├ Installing dependencies
│ installed via `pnpm install`
│
├ Committing new files
│ git commit
│
╰ Dependencies Installed

╭ Deploy with Cloudflare Step 3 of 3
│
├ Do you want to deploy your application?
│ yes deploy via `pnpm run deploy` # 間違ってyesにしちゃった
...<中略>
#  deployされる
cd gemini-slack
pnpm add slack-cloudflare-workers@latest
TSをYesにしたつもりなのに、JSで作られてしまったので、TSに変更する
mv src/index.js src/index.ts
vi wrangler.toml
name = "gemini-slack"
- main = "src/index.js"
+ main = "src/index.ts"
compatibility_date = "2023-12-06"
src/index.ts を編集する
とりあえずBotが正しく動くのか確認するために、公式のexampleをそのまま動かしてみる。
微妙に型定義が足りてなかったりしたので、公式との差分も書いておきます。
slack-cloudflare-workers の作者様から以下のコメントをいただきました。
ちなみに ExecutionContext の型定義って wranlger のプロジェクトだと import なしで勝手に解決されるので、あえて slack-cloudflare-workers 側で便宜上定義しているものは import しないようにしてたりはします。まぁ、ただどっちでも問題はないと思いますが。https://zenn.dev/noplan_inc/articles/fc3ff947c3c1ee#comment-747ffffc99506f
環境によって型追加は不要かもしれません。
- import { SlackApp, SlackEdgeAppEnv, isPostedMessageEvent } from "slack-cloudflare-workers";
+ import { ExecutionContext, SlackApp, SlackEdgeAppEnv, isPostedMessageEvent } from "slack-cloudflare-workers";

export default {
  async fetch(
    request: Request,
    env: SlackEdgeAppEnv,
    ctx: ExecutionContext
  ): Promise<Response> {
    const app = new SlackApp({ env })
      // When the pattern matches, the framework automatically acknowledges the request
      .event("app_mention", async ({ context }) => {
        // You can do any time-consuming tasks here!
        await context.client.chat.postMessage({
          channel: context.channelId,
          text: `:wave: <@${context.userId}> what's up?`,
          blocks: [
            {
              type: "section",
              text: {
                type: "mrkdwn",
                text: `:wave: <@${context.userId}> what's up?`,
              },
              accessory: {
                type: "button",
                text: { type: "plain_text", text: "Click Me" },
                value: "click_me_123",
                action_id: "button-action",
              },
            },
            {
              type: "context",
              elements: [
                {
                  type: "plain_text",
                  text: "This message is posted by an app running on Cloudflare Workers",
                },
              ],
            },
          ],
        });
      })
      .message("Hello", async ({ context }) => {
        await context.say({ text: "Hey!" });
      })
      .event("message", async ({ payload }) => {
        if (isPostedMessageEvent(payload)) {
          console.log(`New message: ${payload.text}`);
        }
      })
      .action(
        "button-action",
        async () => {}, // Mus complete this within 3 seconds
        async ({ context }) => {
          // You can do any time-consuming tasks here!
          const { respond } = context;
          if (respond) {
            await respond({ text: "Now working on it ..." });
            await sleep(5);
            await respond({ text: "It's done :white_check_mark:" });
          }
        }
      )
      .command(
        "/hello-cf-workers",
        async () => "Thanks!", // Must complete this within 3 seconds
        async ({ context }) => {
          // You can do any time-consuming tasks here!
          await context.respond({ text: "What's up?" });
        }
      )
      .shortcut(
        "hey-cf-workers",
        async () => {}, // Must complete this within 3 seconds
        async ({ context, payload }) => {
          // You can do any time-consuming tasks here!
          await context.client.views.open({
            // The trigger_id needs to be used within 3 seconds
            trigger_id: payload.trigger_id,
            view: {
              type: "modal",
              callback_id: "modal",
              title: { type: "plain_text", text: "My App" },
              submit: { type: "plain_text", text: "Submit" },
              close: { type: "plain_text", text: "Cancel" },
              blocks: [],
            },
          });
        }
      )
      .viewSubmission(
        "modal",
        // Must respond within 3 seconds to update/close the opening modal
        async () => {
          return { response_action: "clear" };
        },
        async (req) => {
          // Except updating the modal view using response_action,
          // you can asynchronously do any tasks here!
        }
      );
    return await app.run(request, ctx);
  },
};

const sleep = (seconds: number) => {
  return new Promise((resolve) => setTimeout(resolve, seconds * 1000));
};
Slack Appの作成
https://api.slack.com/apps にアクセスして、Appを作成します。
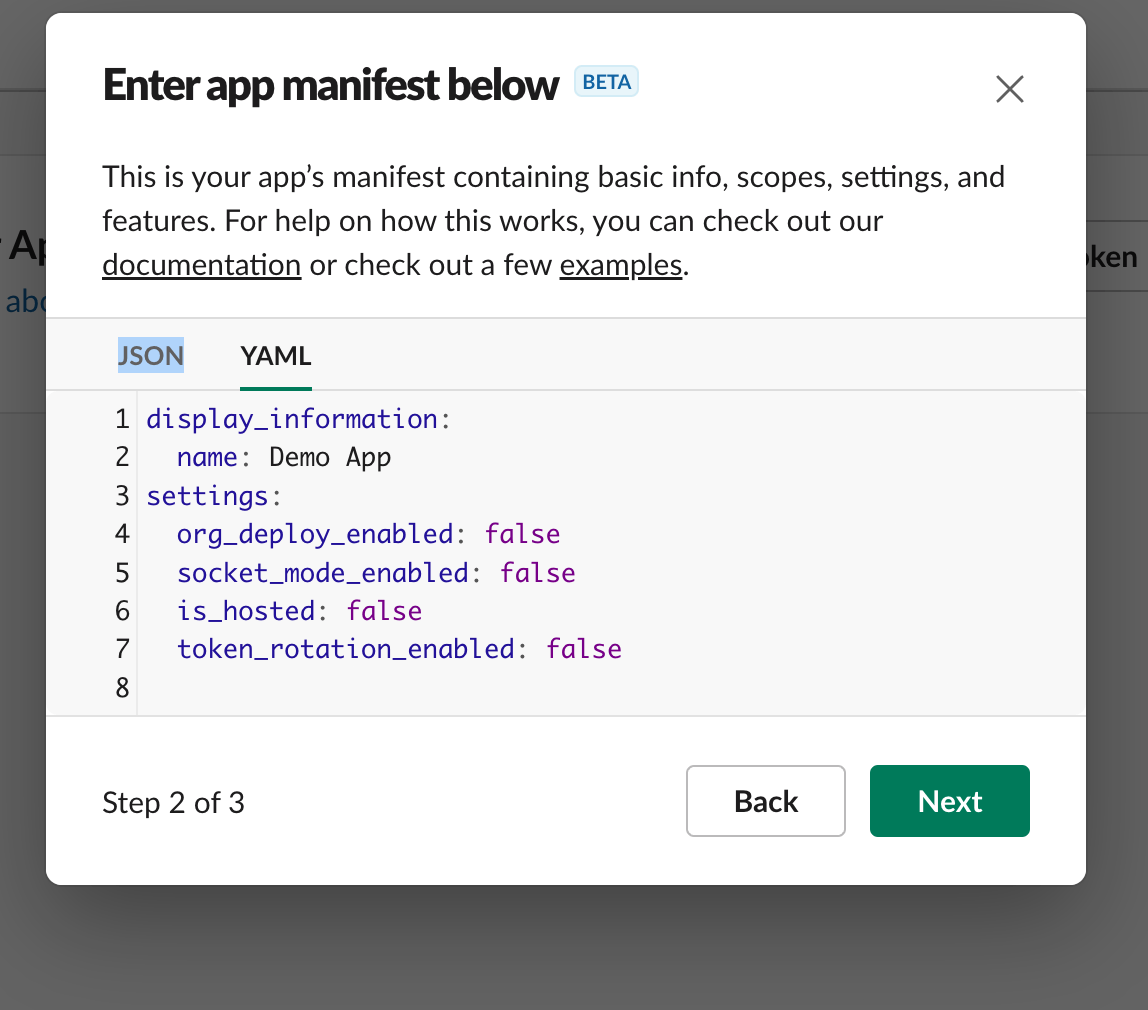
From an app manifest を選択して、
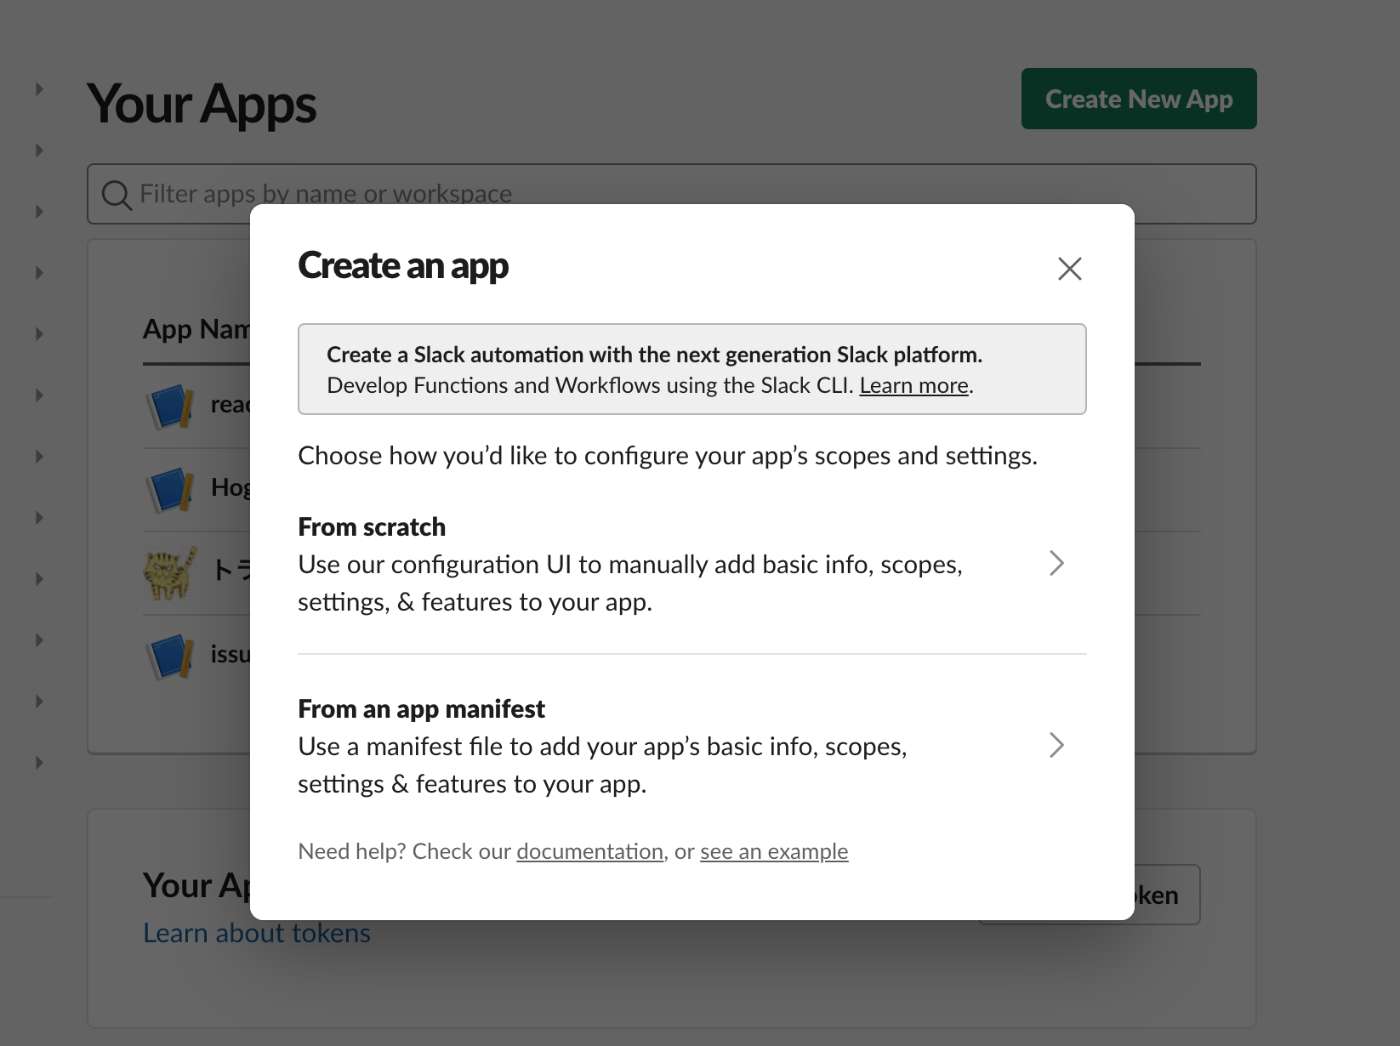
以下のような内容で作成します。
display_information:
  name: cf-worker-test-app
features:
  bot_user:
    display_name: cf-worker-test-app
    always_online: true
  shortcuts:
    - name: Hey Cloudflare Wokers!
      type: global
      callback_id: hey-cf-workers
      description: Say hi to CF Workers
  slash_commands:
    - command: /hey-cf-workers
      url: https://XXX.trycloudflare.com/ # とりあえず仮で入れておく
      description: Say hi to CF Workers
      usage_hint: Say hi to CF Workers
oauth_config:
  scopes:
    bot:
      - app_mentions:read
      - chat:write
      - chat:write.public
      - commands
settings:
  event_subscriptions:
    request_url: https://XXX.trycloudflare.com/ # とりあえず仮で入れておく
    bot_events:
      - app_mention
  interactivity:
    is_enabled: true
    request_url: https://XXX.trycloudflare.com/
    message_menu_options_url: https://XXX.trycloudflare.com/ # とりあえず仮で入れておく
ワークスペースにappをインストールする
install to workspace をクリックして、ワークスペースにインストールします。
環境変数を設定する
SLACK_SIGNING_SECRET は、アプリ管理画面の Settings > Basic Information > App Credentials > Signing Secret にあります
SLACK_BOT_TOKEN は、アプリ管理画面の Settings > Install App > Bot User OAuth Token にあります
$ pnpm wrangler secret put SLACK_SIGNING_SECRET

 ⛅️ wrangler 3.20.0
-------------------
✔ Enter a secret value: … ********************************
🌀 Creating the secret for the Worker "gemini-slack"
✨ Success! Uploaded secret SLACK_SIGNING_SECRET

$ pnpm wrangler secret put SLACK_BOT_TOKEN
 ⛅️ wrangler 3.20.0
-------------------
✔ Enter a secret value: … *************************************************************
🌀 Creating the secret for the Worker "gemini-slack"
✨ Success! Uploaded secret SLACK_BOT_TOKEN
デプロイする
workerのURLが欲しいので一旦デプロイしておきます。
pnpm run deploy
manifestを修正する
サイドバーの App Manifest をクリックして、以下のように修正します。


display_information:
  name: cf-worker-test-app
features:
  bot_user:
    display_name: cf-worker-test-app
    always_online: true
  shortcuts:
    - name: Hey Cloudflare Wokers!
      type: global
      callback_id: hey-cf-workers
      description: Say hi to CF Workers
  slash_commands:
    - command: /hey-cf-workers
-      url: https://XXX.trycloudflare.com/ # とりあえず仮で入れておく
+      url: https://XXX.trycloudflare.com/ # 正式なURLに修正する
      description: Say hi to CF Workers
      usage_hint: Say hi to CF Workers
oauth_config:
  scopes:
    bot:
      - app_mentions:read
      - chat:write
      - chat:write.public
      - commands
settings:
  event_subscriptions:
-    request_url: https://XXX.trycloudflare.com/ # とりあえず仮で入れておく
+    request_url: https://XXX.trycloudflare.com/ # 正式なURLに修正する
    bot_events:
      - app_mention
  interactivity:
    is_enabled: true
-    request_url: https://XXX.trycloudflare.com/
-    message_menu_options_url: https://XXX.trycloudflare.com/ # とりあえず仮で入れておく
+   request_url: https://XXX.trycloudflare.com/ # 正式なURLに修正する
+   message_menu_options_url: https://XXX.trycloudflare.com/ # 正式なURLに修正する
Gemini ProのAPIを使ってみる
パッケージをインストールする
pnpm add @google/generative-ai
どんな感じで使えるの確認してみる
結構使いやすいインターフェースになっているので、とりあえずはこれで十分かなと思います。
import { GoogleGenerativeAI, GenerateContentStreamResult } from "@google/generative-ai";

const ai = new GoogleGenerativeAI(GEMINI_API_KEY);
const model = ai.getGenerativeModel({model: "gemini-pro"});

const response = await model.generateContentStream(prompt);
let responseText = "";
for await (const chunk of response.stream) {
    responseText += chunk.text();
}

console.log(responseText);
Slack Botに組み込んでみる
今回初めてStreamでのアップデートを試してみました。
メッセージを投稿した後に、レスポンスが帰ってきたら、メッセージをアップデートするということができます。全部のレスポンスが返ってくるまで待つより、UXがめちゃくちゃ良くなります。
+ import { GoogleGenerativeAI, GenerateContentStreamResult } from "@google/generative-ai";

+ type Env = SlackEdgeAppEnv & {
+	GEMINI_API_KEY: string;
+ };

+ const invokeLLM = async (ai: GoogleGenerativeAI, prompt: string): Promise<GenerateContentStreamResult> => {
+	const model = ai.getGenerativeModel({model: "gemini-pro"});
+
+	const stream = await model.generateContentStream(prompt);
+
+	return stream;
+}

export default {
  async fetch(
    request: Request,
    env: Env,
    ctx: ExecutionContext
  ): Promise<Response> {

+	const GEMINI_API_KEY = env.GEMINI_API_KEY;
+	const ai = new GoogleGenerativeAI(GEMINI_API_KEY);

    const app = new SlackApp({ env })
      .event("app_mention", async ({ context, payload }) => {
+		let responseText = `:wave: <@${context.userId}> typing...\n\n`;
+       // streamでアップデートしたいので、一旦メッセージを投稿しておく
+		const messageResponse = await context.client.chat.postMessage({
+			channel: context.channelId,
+			text: responseText,
+		});
+
+		const stream = await invokeLLM(ai, payload.text);
+
+		for await (const chunk of stream.stream) {
+			responseText += chunk.text();
+       // レスポンスが帰ってきたら、メッセージをアップデートする
+			await context.client.chat.update({
+				channel: context.channelId,
+				ts: messageResponse.ts!,
+				text: responseText,
+			});
+		}
      })
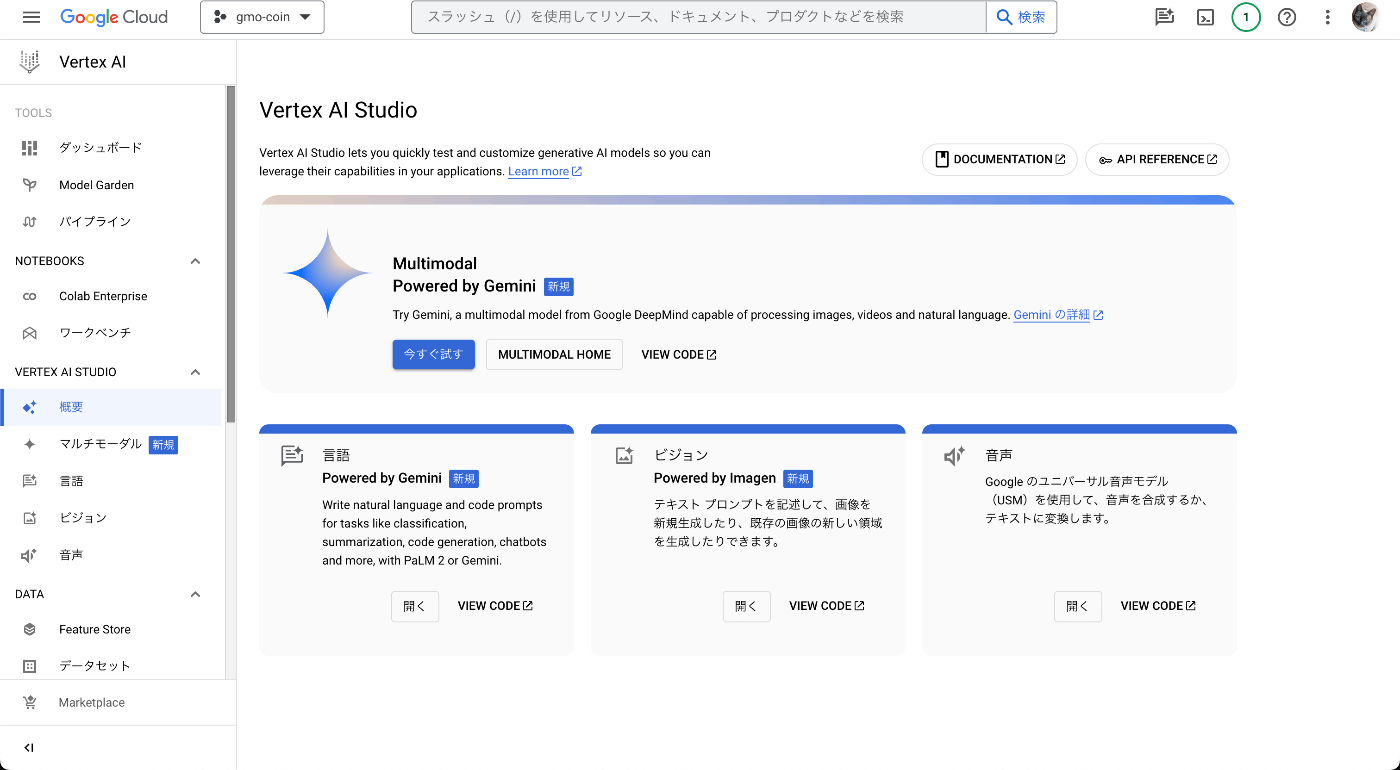
API keyを手に入れておく
https://makersuite.google.com/app/apikey にアクセスして、API keyを取得します。
api keyを設定する
$ pnpm wrangler secret put GEMINI_API_KEY
 ⛅️ wrangler 3.20.0
-------------------
✔ Enter a secret value: … ***************************************
🌀 Creating the secret for the Worker "gemini-slack"
✨ Success! Uploaded secret GEMINI_API_KEY
SlackでBotに話しかけてみる
こんな感じで話しかけると、返事をしてくれます。
レスポンスも結構速いです!
Gemini Proの注意点
- ハルシネーションが半端ない(めっちゃバカです。Googleはなぜこれをリリースしたのかわからないレベルw焦りすぎ)
- 翻訳タスクとかは嘘ついたりはしないので、そういうのは使えるかもしれない
- 安いし結構速いから相性はバッチリ
まとめ
- Gemini ProのAPIを使ってSlack Botを作ってみました。
- とりあえずは無料枠がデカいので、試してみるのはありかもしれません。
- ただ、ハルシネーションが半端ないので、使うときは注意が必要です。
- 今回はCloudflare Workersを使ってみましたが、他のサーバーレスでも同じように使えると思います。
- Cloudflare Workersはデプロイも早いし、最高すぎるので、ぜひ使ってみてください!
- slack-cloudflare-workersは結構使いやすかったです。簡単に実装できます。
no plan株式会社について
- no plan株式会社は 「テクノロジーの力でZEROから未来を創造する、精鋭クリエイター集団」 です。
- ブロックチェーン/AI技術をはじめとした、Webサイト開発、ネイティブアプリ開発、チーム育成、などWebサービス全般の開発から運用や教育、支援なども行っています。よくわからない、ふわふわしたノープラン状態でも大丈夫!ご一緒にプランを立てていきましょう!
- no plan株式会社について
- no plan株式会社 | web3実績
- no plan株式会社 | ブログ一覧
エンジニアの採用も積極的に行なっていますので、興味がある方は是非ご連絡ください!
参考文献

Discussion
早速!素晴らしいです!
ちなみに ExecutionContext の型定義って wranlger のプロジェクトだと import なしで勝手に解決されるので、あえて slack-cloudflare-workers 側で便宜上定義しているものは import しないようにしてたりはします。まぁ、ただどっちでも問題はないと思いますが。
作者様・・・!
素晴らしいライブラリの開発ありがとうございます!
自分の方法でセットアップするとVS Codeが型エラーで怒ってきたので、importしてしまいました。
記事修正させていただきます 🙏