Open3
Cloud Spannerを触ってみる
ローカルで確認する
ローカルで確認する方法を調べてみる。
この記事が参考になったので、手順通りにやってみる。
gcloudのコマンドでconfigurationのセットみたいなものを作れるのを初めて知ったのでここに少しメモしておく。
gcloudのconfiguration
config作成
gcloud config configurations create [CONFIGURATION NAME]
config切り替え
gcloud config configurations activate [CONFIGURATION NAME]
activeなconfigの確認
gcloud config configurations list --filter="IS_ACTIVE=true" --format="value(name)"
config全体を確認
gcloud config list
Docker
記事通りにやるとDockerのimageがpullされていく。
Docker Desktopで確認してみると、インストールされている。
記事だと、javaによるspanner clientでデータベースに対して操作をしているが、別のclientもしくはspanner-cliでやりたいと思うので、ここは行わない。
流れ
ローカルSpanner DBの確認までの手順は以下のようになる。
- Dockerのpull
- instanceの作成
- DBの作成
- テーブルの作成
- dbeverで接続し確認
Databaseを作る
こちらを参考。
コマンドでDB作成
gcloud spanner databases create <DB NAME> --instance=<INSTANCE NAME>
エミュレータのHOSTを環境変数に設定
自分の場合は、fishを使っているので、setで設定する。
SpannerのDBサーバのポートはデフォルトだと、9010となる。
set -x SPANNER_EMULATOR_HOST localhost:9010
spanner-cliを使う
以下リポジトリのspannerをcliツールで操作することを行う。
以下でインストール
go install github.com/cloudspannerecosystem/spanner-cli@latest
$ spanner-cli -h
Usage:
  spanner-cli [OPTIONS]

spanner:
  -p, --project=       (required) GCP Project ID. [$SPANNER_PROJECT_ID]
  -i, --instance=      (required) Cloud Spanner Instance ID [$SPANNER_INSTANCE_ID]
  -d, --database=      (required) Cloud Spanner Database ID. [$SPANNER_DATABASE_ID]
  -e, --execute=       Execute SQL statement and quit.
  -f, --file=          Execute SQL statement from file and quit.
  -t, --table          Display output in table format for batch mode.
  -v, --verbose        Display verbose output.
      --credential=    Use the specific credential file
      --prompt=        Set the prompt to the specified format
      --history=       Set the history file to the specified path
      --priority=      Set default request priority (HIGH|MEDIUM|LOW)
      --role=          Use the specific database role
      --endpoint=      Set the Spanner API endpoint (host:port)
      --directed-read= Directed read option (replica_location:replica_type). The replicat_type is optional and either READ_ONLY or READ_WRITE

Help Options:
  -h, --help           Show this help message
emulator として名前をつけたconfigから情報を確認し、spanner-cliのオプションに設定する。
 $ gcloud config list
[api_endpoint_overrides]
spanner = http://localhost:9020/
[auth]
disable_credentials = true
[core]
account = XXXX@gmail.com
disable_usage_reporting = True
project = test-project

Your active configuration is: [emulator]
db名は先ほど作成した名前を指定。
spanner-cli -p <PROJECT NAME> -i <INSTANCE NAME> -d <DB NAME>
接続が成功するとインタープリティングになる。
参考記事に沿って、CREATEを実行する。
create table members(
	id INT64 NOT NULL,
	name STRING(32),
	age INT64
) primary key (id);
DBeaverで接続する
新しい接続を選択すると、DBを選べるのでSpannerを選択する。

上記で、設定したemulatorのプロジェクト、インスタンス、DBを入力して接続確認。

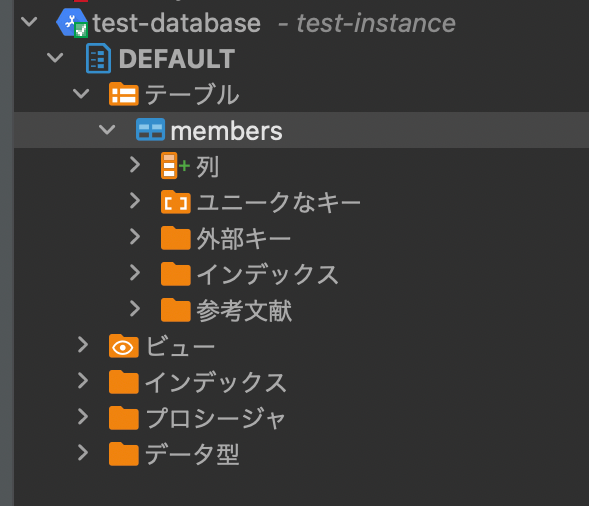
接続したら、先ほど作成したテーブルが見れるか確認。

Spannerの知識となりそうな資料一覧