🐙
Windows 11でNew Relic Infrastructureエージェントを設定する
はじめに
Windows 11環境でNew Relic Infrastructureエージェントを設定する手順をまとめました。
環境
Windows環境は以下の記事で作成した仮想環境を使用します。
手順
New Relicにサインインし、セットアップ
Integrations & Agents > Windows

Create a new keyを選択 > Continue

インストールコマンドが表示されるので、PowerShellを管理者権限で起動し実行します。
[Net.ServicePointManager]::SecurityProtocol = 'tls12, tls'; $WebClient = New-Object System.Net.WebClient;
$WebClient.DownloadFile("https://download.newrelic.com/install/newrelic-cli/scripts/install.ps1", "$env:TEMP\install.ps1"); &
PowerShell.exe -ExecutionPolicy Bypass -File $env:TEMP\install.ps1;
** 以下には実際のAPIキーとアカウントIDを入力してください。公開する際は必ず削除または秘匿してください **
$env:NEW_RELIC_API_KEY='YOUR_API_KEY';
$env:NEW_RELIC_ACCOUNT_ID='YOUR_ACCOUNT_ID'; &
'C:\Program Files\New Relic\New Relic CLI\newrelic.exe' install
Automatically answer 'yes'...とUse a proxy、Tags(optional)はオフのまま進めます。

Test the connectionがAgent installed successfully.になってるのを確認

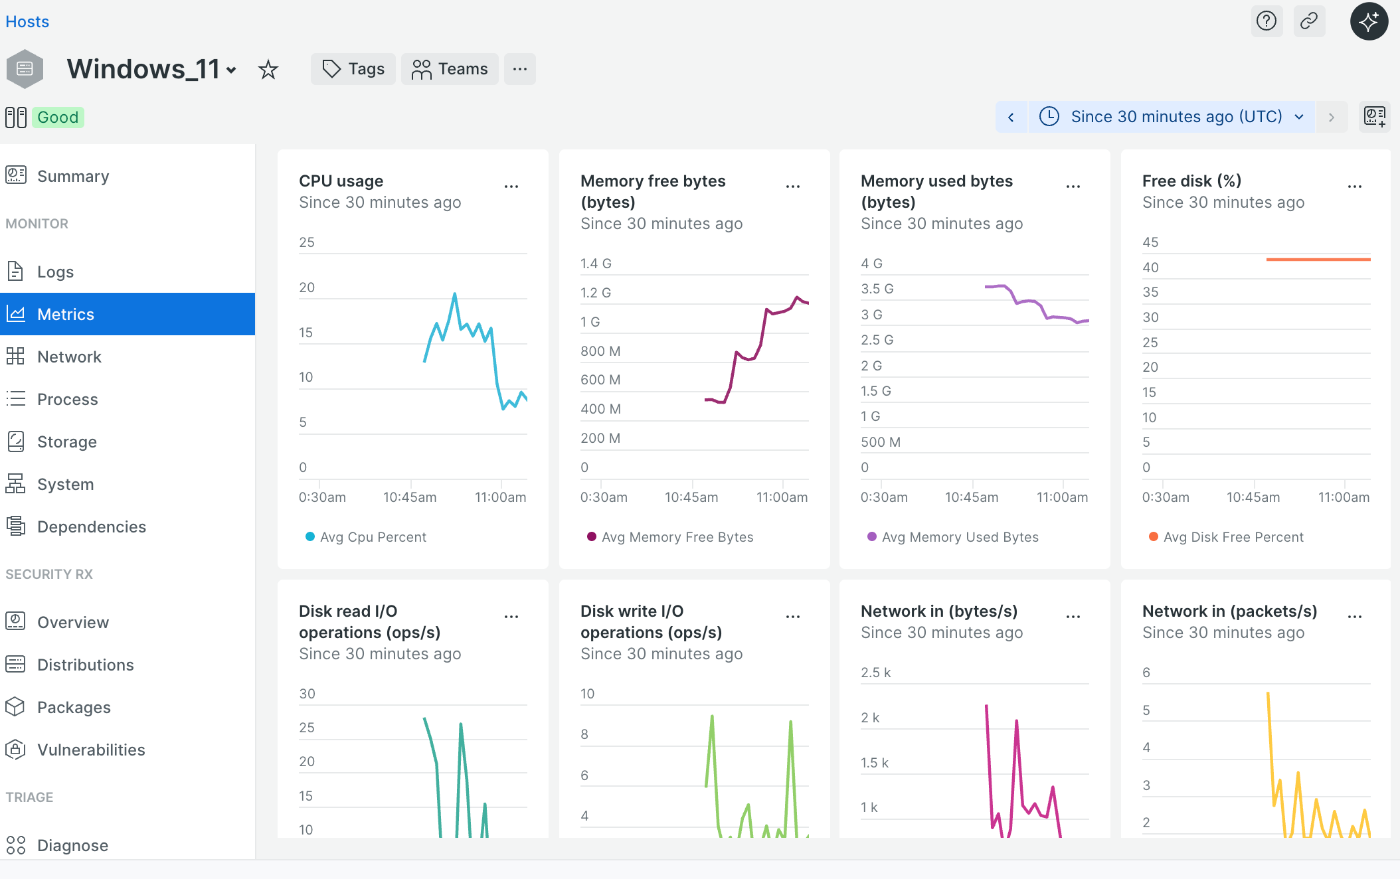
See Your data をクリック
ログやメトリクスが見れるようになっています🎉
タイムゾーンの確認・設定
ユーザー名 > User preferences > Japanを選択します。

New Relic CLIのインストール(管理者権限以外のユーザーで実行)
scopeを使用し、New Relic CLIをインストールします。
> Set-ExecutionPolicy RemoteSigned -Scope CurrentUser
Invoke-RestMethod -Uri https://get.scoop.sh | Invoke-Expression
> scoop --version
> scoop install git
> scoop bucket add newrelic-cli https://github.com/newrelic/newrelic-cli.git
> scoop install newrelic-cli

> newrelic
The New Relic CLI enables users to perform tasks against the New Relic APIs

Usage:
  newrelic [command]

Available Commands:
  agent          Utilities for New Relic Agents
  apiAccess      Manage New Relic API access keys
  apm            Interact with New Relic APM
  changeTracking Manage change tracking events for New Relic
  completion     Generate completion script
  config         Manage the configuration of the New Relic CLI
  decode         Decodes NR1 URL Strings
  diagnose       Troubleshoot your New Relic installation
  documentation  Generate CLI documentation
  edge           Interact with New Relic Edge
  entity         Interact with New Relic entities
  events         Send custom events to New Relic
  help           Help about any command
  install        Install New Relic.
  nerdgraph      Execute GraphQL requests to the NerdGraph API
  nerdstorage    Read, write, and delete NerdStorage documents and collections.
  nrql           Commands for interacting with the New Relic Database
  profile        Manage the authentication profiles for this tool
  reporting      Commands for reporting data into New Relic
  synthetics     Interact with New Relic Synthetics
  utils          Various utility methods
  version        Show the version of the New Relic CLI
  workload       Interact with New Relic One workloads
C:\Program Files\New Relic\newrelic-infra.ymlを確認してみる
こちらは最低限のものだけのようです。
newrelic-infra.yml
# THIS FILE IS MACHINE GENERATED
license_key:
enable_process_metrics: true
status_server_enabled: true
status_server_port: 18003
custom_attributes:
  nr_deployed_by: newrelic-cli
ちなみに、logs.ymlは以下のようになっていました。
logs.yml
logs:
  - name: windows-security
    winevtlog:
      channel: Security
      collect-eventids:
      - 4740
      - 4728
      - 4732
      - 4756
      - 4735
      - 4624
      - 4625
      - 4648
    attributes:
      logtype: windows_security

  - name: windows-application
    winevtlog:
      channel: Application
    attributes:
      logtype: windows_application

  - name: newrelic-cli.log
    file: C:\Users\<user_name>\.newrelic\newrelic-cli.log
    attributes:
      newrelic-cli: true
      logtype: newrelic-cli
Windowsのセキュリティログとアプリケーションログは以下で確認できます。
logs > logtype:"windows_application", "windows_security" で絞り込み > Query logs

メモ
PowerShellでNew Relicを再起動する(管理者権限で実行)
Restart-Service newrelic-infra
おわりに
設定自体は割とスムーズに行けて安心しました!今後はnewrelic-infra.ymlの詳しい設定方法なども掘り下げていけたらと思います。
Discussion