Xcode Cloud を使って Flutter で作成した iOS アプリを TestFlight にアップロードする
最終的な設定
以下、flutter_app_template における最終的な設定。
これを元に他のプロジェクトにも反映していく。
Post-clone script
ios/ci_scripts/ci_post_clone.sh
#!/bin/sh

# Fail this script if any subcommand fails.
set -e

# The default execution directory of this script is the ci_scripts directory.
cd $CI_PRIMARY_REPOSITORY_PATH # change working directory to the root of your cloned repo.

# Extract the Flutter version from .fvmrc file
FLUTTER_VERSION=$(cat .fvmrc | grep "flutter" | cut -d '"' -f 4)

# Clone the Flutter repository with the specified version
git clone https://github.com/flutter/flutter.git --depth 1 -b $FLUTTER_VERSION $HOME/flutter
export PATH="$PATH:$HOME/flutter/bin"

# Print the Flutter version
flutter --version

# change working directory to the Flutter app directory.
cd ./packages/flutter_app

# Install Flutter artifacts for iOS (--ios), or macOS (--macos) platforms.
flutter precache --ios

# Install Flutter dependencies.
flutter pub get

# Install CocoaPods using Homebrew.
HOMEBREW_NO_AUTO_UPDATE=1 # disable homebrew's automatic updates.
brew install cocoapods

# Install CocoaPods dependencies.
cd ios && pod install # run `pod install` in the `ios` directory.

# The flutterfire command is used in Xcode Build Phases and must be installed in advance.
dart pub global activate flutterfire_cli
export PATH="$PATH":"$HOME/.pub-cache/bin"

# Build the iOS app in release mode with no code signing.
flutter build ios --release --dart-define-from-file=dart_defines/${flavor}.env --no-codesign

exit 0
Xcode Cloud Workflow
各設定項目
General
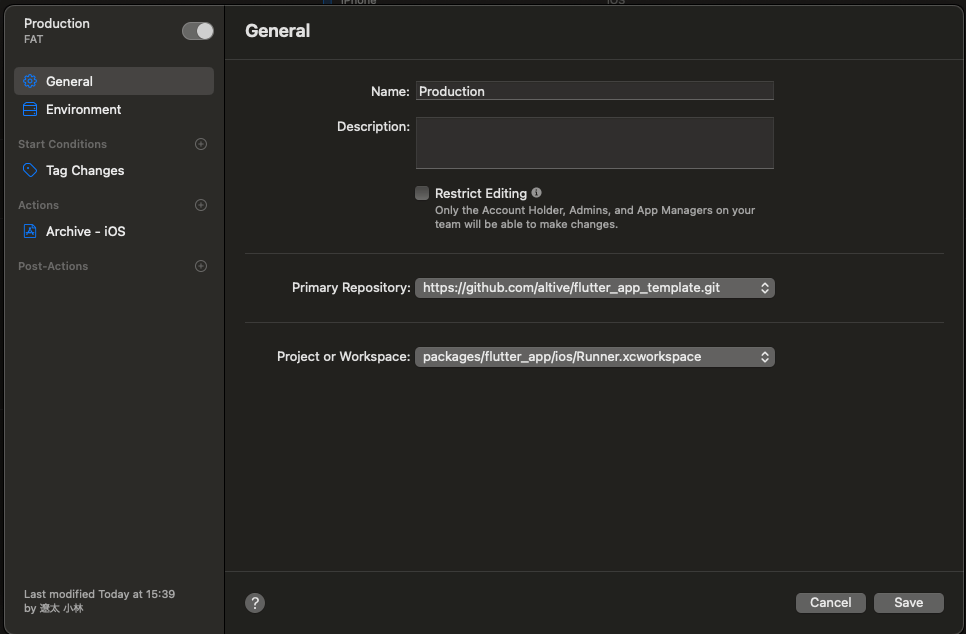
Environment
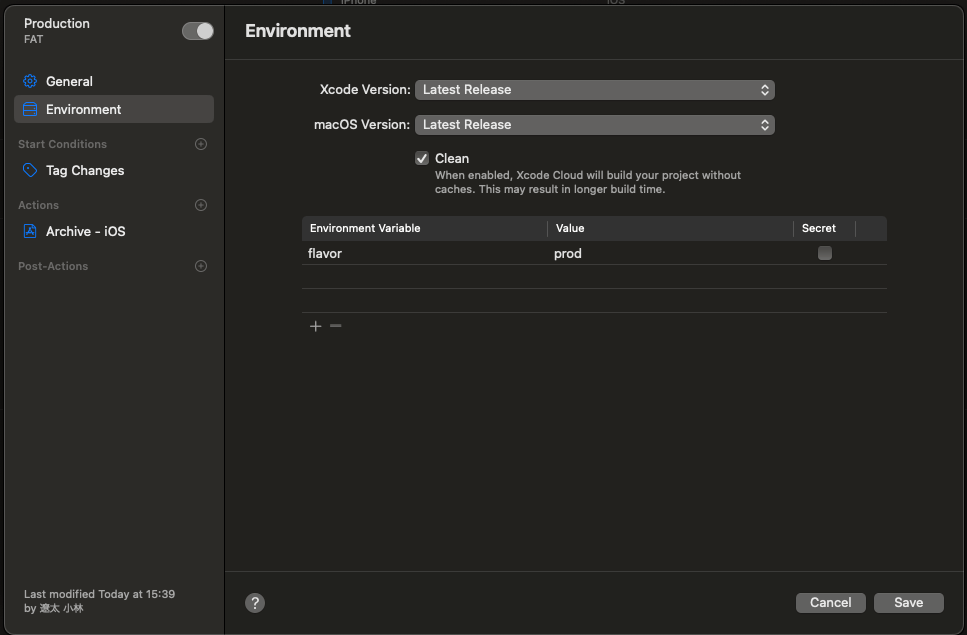
Start Conditions
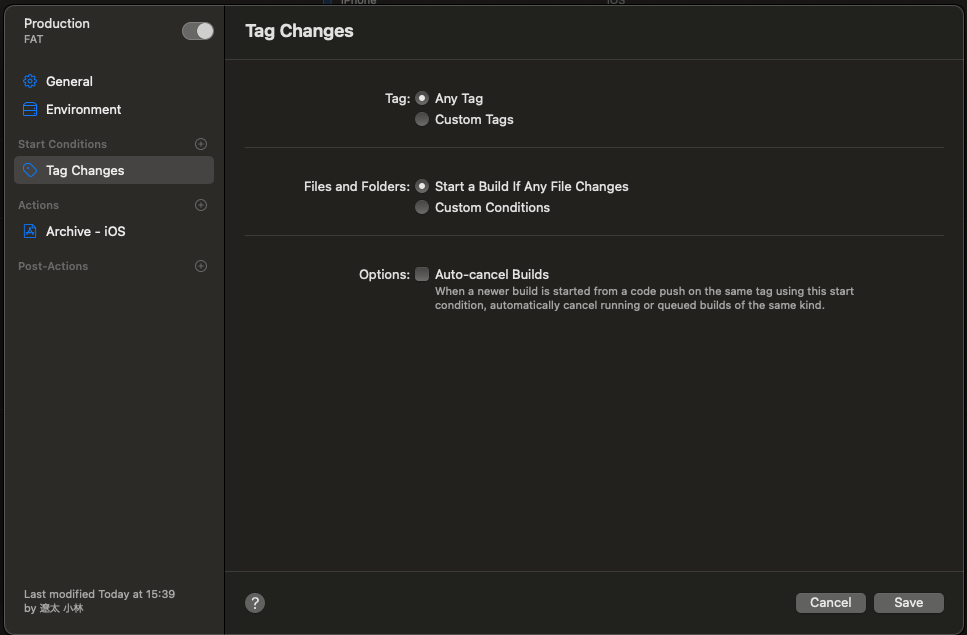
Archive
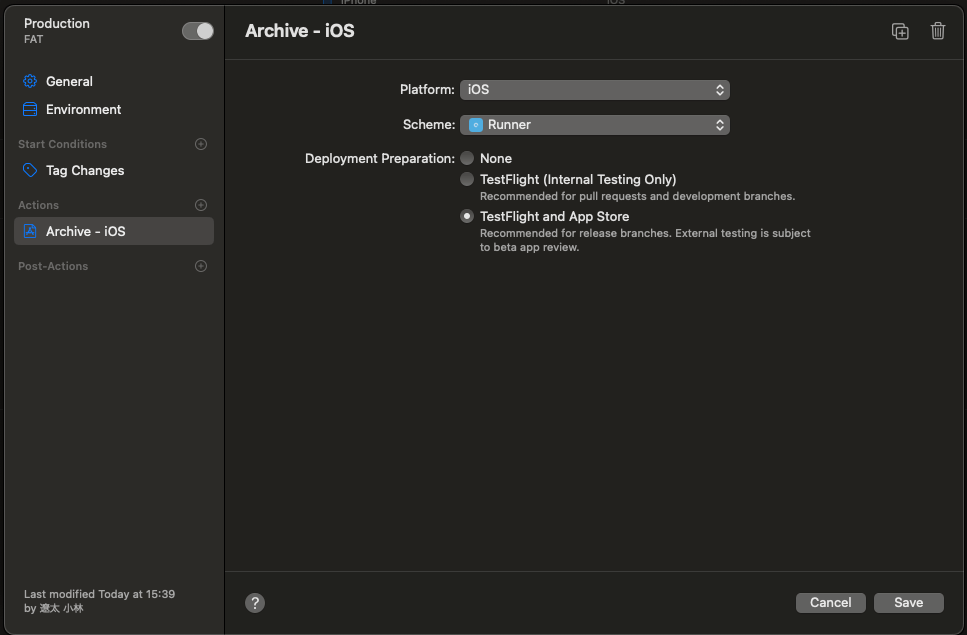
概要
Flutter で作成した iOS アプリを Xcode Cloud を使って TestFlight にデプロイするワークフロー作成過程の備忘録。
これを見ればできるようになる!
背景
これまで GitHub Actions でデプロイワークフローを作成し使用していたが、以下の課題が見えてきた。
-
Automatically manage signingを使用すると、ワークフロー内で開発者署名をインポートするワークアラウンドが必要 - 現状の
macos-latest(macos-14)でデバイス未登録エラーと Provisioning Profile 未設定エラーが発生する-
macos-13を指定することで回避可能
-
- コストが高い
上記の課題は、Xcode Cloud で解決できる可能性があるので、まずは flutter_app_template で試してみる。
もし問題なければ、他のプロジェクトにも適用していく。
参考
前提
- Flutter: 3.24.1
- Xcode: 15.4 (15F31d)
- 対象アプリの GitHub リポジトリで
Owner権限を持っている- 試せていないが、
Member権限だと連携ができないかも?
- 試せていないが、
-
Automatically manage signingがオンになっている - App Store Connect で以下の役割・権限を持っている

ワークフローの設定は、Account Holder、Admin、またはApp Managerが行えます。
https://developer.apple.com/jp/xcode-cloud/get-started/
Post-clone script
公式ドキュメントに沿って、まずは Post-clone script を作成していく。
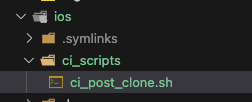
ios/ci_scripts/ci_post_clone.sh 作成
まずは、ios/ci_scripts/ci_post_clone.sh を作成。
次に公式ドキュメント記載の内容をコピペ。
ios/ci_scripts/ci_post_clone.sh
#!/bin/sh

# Fail this script if any subcommand fails.
set -e

# The default execution directory of this script is the ci_scripts directory.
cd $CI_PRIMARY_REPOSITORY_PATH # change working directory to the root of your cloned repo.

# Install Flutter using git.
git clone https://github.com/flutter/flutter.git --depth 1 -b stable $HOME/flutter
export PATH="$PATH:$HOME/flutter/bin"

# Install Flutter artifacts for iOS (--ios), or macOS (--macos) platforms.
flutter precache --ios

# Install Flutter dependencies.
flutter pub get

# Install CocoaPods using Homebrew.
HOMEBREW_NO_AUTO_UPDATE=1 # disable homebrew's automatic updates.
brew install cocoapods

# Install CocoaPods dependencies.
cd ios && pod install # run `pod install` in the `ios` directory.

exit 0
FVM で指定した Flutter バージョンを指定
このままだと、自動的に stable の Flutter を使用してしまうため、FVM で指定しているバージョンをインストールするように変更。
#!/bin/sh

# Fail this script if any subcommand fails.
set -e

# The default execution directory of this script is the ci_scripts directory.
cd $CI_PRIMARY_REPOSITORY_PATH # change working directory to the root of your cloned repo.

- # Install Flutter using git.
- git clone https://github.com/flutter/flutter.git --depth 1 -b stable $HOME/flutter
- export PATH="$PATH:$HOME/flutter/bin"
+ # Extract the Flutter version from .fvmrc file
+ FLUTTER_VERSION=$(cat .fvmrc | grep "flutter" | cut -d '"' -f 4)
+
+ # Clone the Flutter repository with the specified version
+ git clone https://github.com/flutter/flutter.git --depth 1 -b $FLUTTER_VERSION $HOME/flutter
+ export PATH="$PATH:$HOME/flutter/bin"
+
+ # Print the Flutter version
+ flutter --version

# Install Flutter artifacts for iOS (--ios), or macOS (--macos) platforms.
flutter precache --ios

# Install Flutter dependencies.
flutter pub get

# Install CocoaPods using Homebrew.
HOMEBREW_NO_AUTO_UPDATE=1 # disable homebrew's automatic updates.
brew install cocoapods

# Install CocoaPods dependencies.
cd ios && pod install # run `pod install` in the `ios` directory.

exit 0
flutterfire コマンド有効化
Build Phase で flutterfire コマンドを使用するため、GitHub Actions でやっていたように、念の為事前に flutterfire_cli もインストールしておく。
#!/bin/sh

# Fail this script if any subcommand fails.
set -e

# The default execution directory of this script is the ci_scripts directory.
cd $CI_PRIMARY_REPOSITORY_PATH # change working directory to the root of your cloned repo.

# Extract the Flutter version from .fvmrc file
FLUTTER_VERSION=$(cat .fvmrc | grep "flutter" | cut -d '"' -f 4)

# Clone the Flutter repository with the specified version
git clone https://github.com/flutter/flutter.git --depth 1 -b $FLUTTER_VERSION $HOME/flutter
export PATH="$PATH:$HOME/flutter/bin"

# Print the Flutter version
flutter --version

# Install Flutter artifacts for iOS (--ios), or macOS (--macos) platforms.
flutter precache --ios

# Install Flutter dependencies.
flutter pub get

# Install CocoaPods using Homebrew.
HOMEBREW_NO_AUTO_UPDATE=1 # disable homebrew's automatic updates.
brew install cocoapods

# Install CocoaPods dependencies.
cd ios && pod install # run `pod install` in the `ios` directory.

+ # The flutterfire command is used in Xcode Build Phases and must be installed in advance.
+ curl -sL https://firebase.tools | bash
+ dart pub global activate flutterfire_cli

exit 0
署名なしビルド
dart-define 等を適用するためにxcodebuildの前に署名なしビルドを行うコマンドを追加する。
どちらかというとxcodebuildを使ってビルドする直前に実行されるci_pre_xcodebuild.shに記載する方があっているかも?と思ったけど、一旦他に参考にさせていただいたものに合わせてci_post_clone.shに追記。
#!/bin/sh

# Fail this script if any subcommand fails.
set -e

# The default execution directory of this script is the ci_scripts directory.
cd $CI_PRIMARY_REPOSITORY_PATH # change working directory to the root of your cloned repo.

# Extract the Flutter version from .fvmrc file
FLUTTER_VERSION=$(cat .fvmrc | grep "flutter" | cut -d '"' -f 4)

# Clone the Flutter repository with the specified version
git clone https://github.com/flutter/flutter.git --depth 1 -b $FLUTTER_VERSION $HOME/flutter
export PATH="$PATH:$HOME/flutter/bin"

# Print the Flutter version
flutter --version

# Install Flutter artifacts for iOS (--ios), or macOS (--macos) platforms.
flutter precache --ios

# Install Flutter dependencies.
flutter pub get

# Install CocoaPods using Homebrew.
HOMEBREW_NO_AUTO_UPDATE=1 # disable homebrew's automatic updates.
brew install cocoapods

# Install CocoaPods dependencies.
cd ios && pod install # run `pod install` in the `ios` directory.

# The flutterfire command is used in Xcode Build Phases and must be installed in advance.
curl -sL https://firebase.tools | bash
dart pub global activate flutterfire_cli

+ # Build the iOS app in release mode with no code signing.
+ flutter build ios --release --dart-define-from-file=dart_defines/prod.env --no-codesign

exit 0
モノレポ対応
melos 等を使ってモノレポで管理している場合、該当アプリのディレクトリまで移動する必要がある。
#!/bin/sh

# Fail this script if any subcommand fails.
set -e

# The default execution directory of this script is the ci_scripts directory.
cd $CI_PRIMARY_REPOSITORY_PATH # change working directory to the root of your cloned repo.

# Extract the Flutter version from .fvmrc file
FLUTTER_VERSION=$(cat .fvmrc | grep "flutter" | cut -d '"' -f 4)

# Clone the Flutter repository with the specified version
git clone https://github.com/flutter/flutter.git --depth 1 -b $FLUTTER_VERSION $HOME/flutter
export PATH="$PATH:$HOME/flutter/bin"

# Print the Flutter version
flutter --version

+ # change working directory to the Flutter app directory.
+ cd ./packages/flutter_app

# Install Flutter artifacts for iOS (--ios), or macOS (--macos) platforms.
flutter precache --ios

# Install Flutter dependencies.
flutter pub get

# Install CocoaPods using Homebrew.
HOMEBREW_NO_AUTO_UPDATE=1 # disable homebrew's automatic updates.
brew install cocoapods

# Install CocoaPods dependencies.
cd ios && pod install # run `pod install` in the `ios` directory.

# The flutterfire command is used in Xcode Build Phases and must be installed in advance.
curl -sL https://firebase.tools | bash
dart pub global activate flutterfire_cli

# Build the iOS app in release mode with no code signing.
flutter build ios --release --dart-define-from-file=dart_defines/prod.env --no-codesign

exit 0
コミット&プッシュ
全ての追記が完了したら、コミット&プッシュする。
公式ドキュメント通りに、実行可能としてマークしておく。
git add --chmod=+x packages/flutter_app/ios/ci_scripts/ci_post_clone.sh
Workflow configuration
続いて、Xcode 上でワークフローの作成・設定を行っていく。
Create Workflow
0. 構築したいワークフローの対象アプリでビルドしておく(flavor使用時のみ)
flavorで環境分けしている場合、Xcode上でワークフローを設定するアプリを選択する際に表示されるのは最後にビルドされたアプリ。
よって、ワークフロー作成前に対象のアプリでビルドしておく。
# prodの場合
flutter build ios --release --dart-define-from-file=dart_defines/prod.env --no-codesign
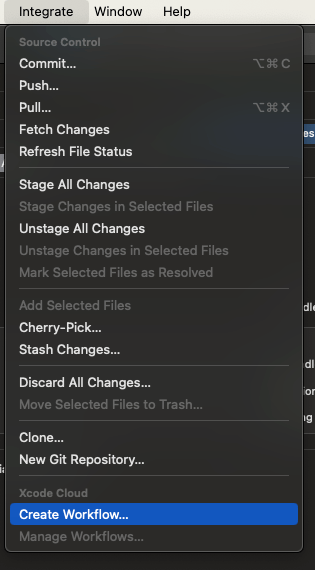
1. Integrate > Create Workflow で Create Workflow シートを開く
公式ドキュメントでは Product > Xcode Cloud > Create Workflow と記載されていたけど変わったぽい?
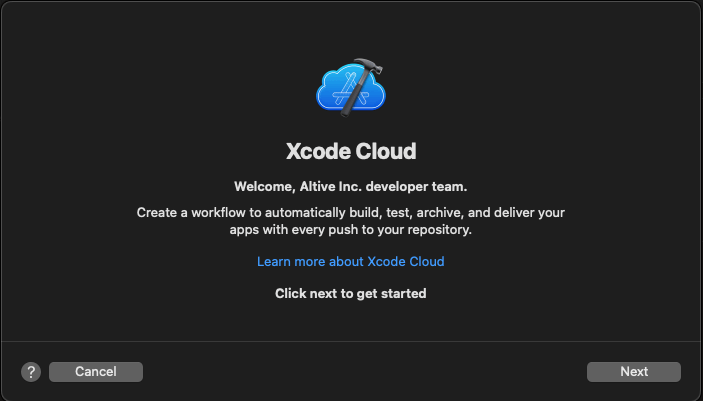
2. ワークフローを設定するアプリを選択する
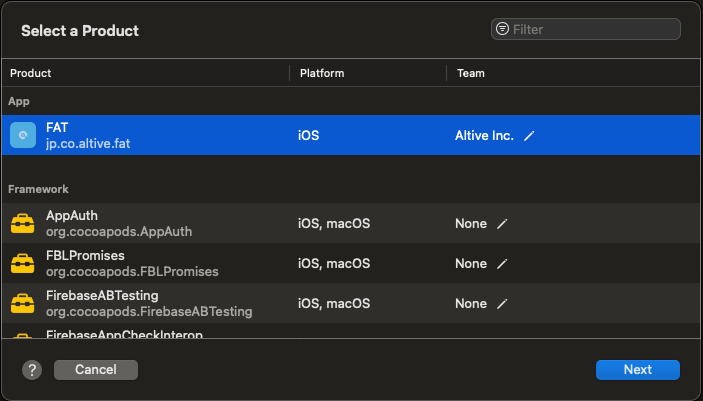
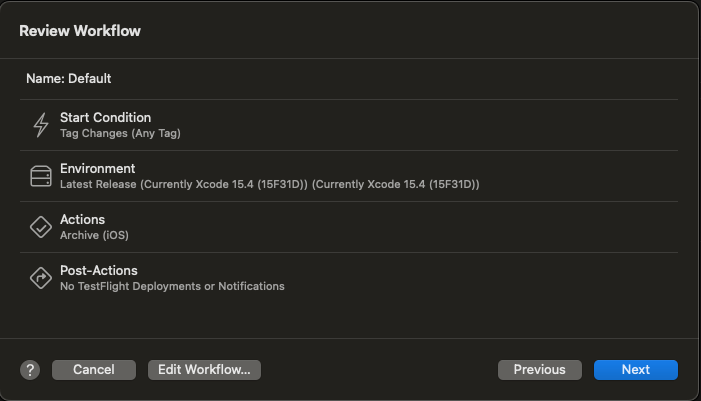
3. Xcode が提供するデフォルトワークフローの概要が表示されるので、[Edit Workflow] ボタンをクリックしてでカスタマイズする
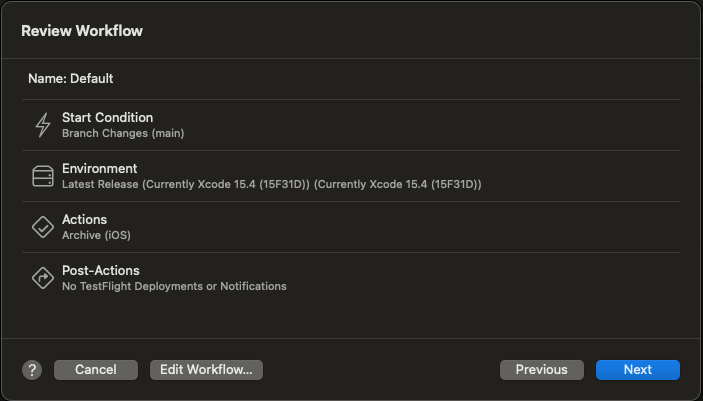
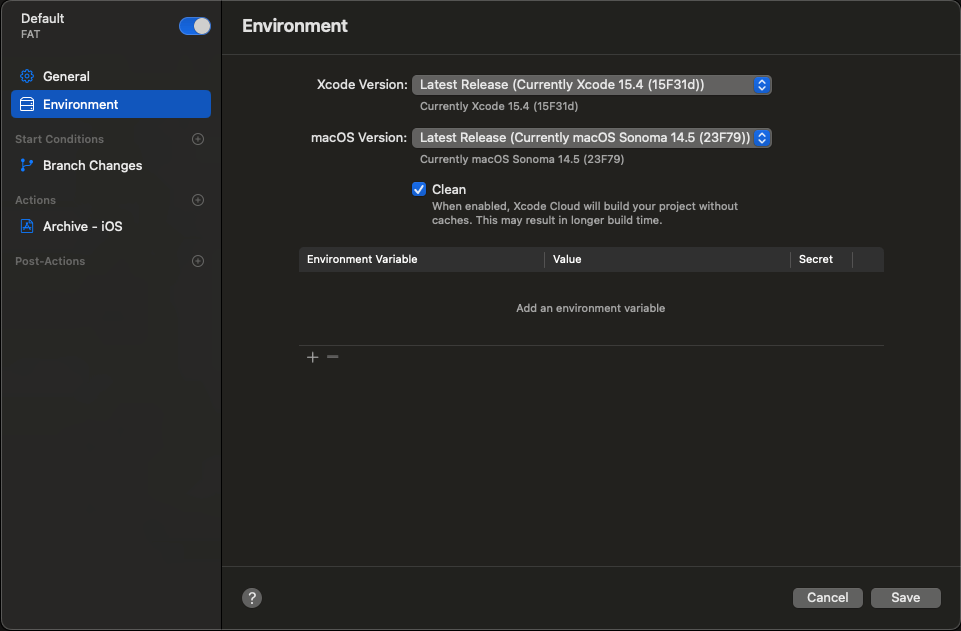
「General」、「Environment」 はそのまま変更せずで問題なさそう。

「Start Conditions」 は変更の必要がある。
デフォルトでは発火条件が Branch Changes になっている。
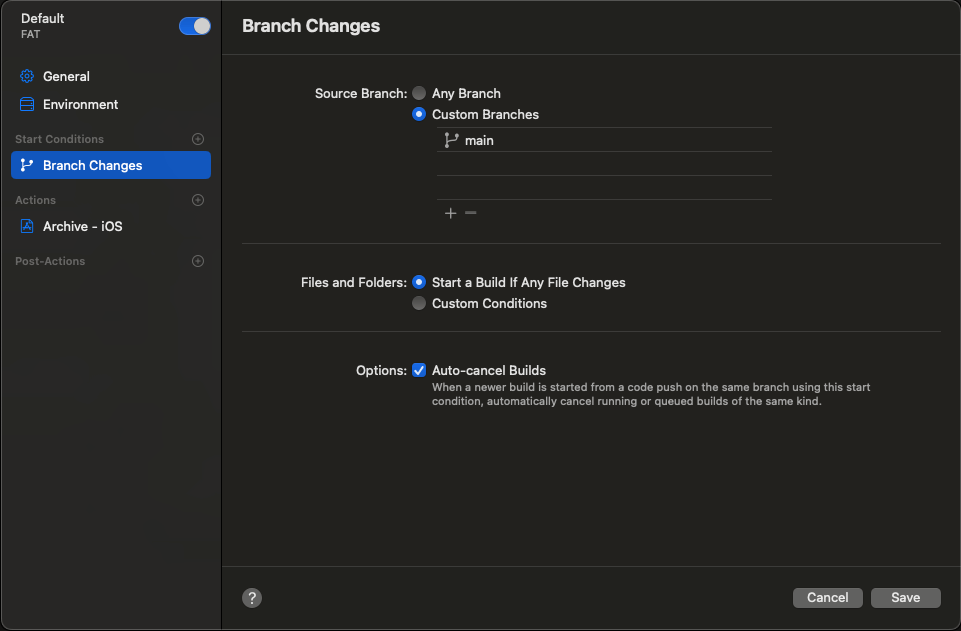
弊社のブランチ戦略では、mainブランチにreleaseブランチがマージされたときに発火されるのが好ましいが、現状そのような条件は作成できない。
よって Tag Changes で tag が push されたときに発火するように設定していく。
ちなみに、Pull Request Changesは以下の場合にしか発火しないので今回は使用できない。
- プルリクエストが新しく作成されたとき
- 既存のプルリクエストが更新されたとき(新しいコミットがプッシュされたとき)
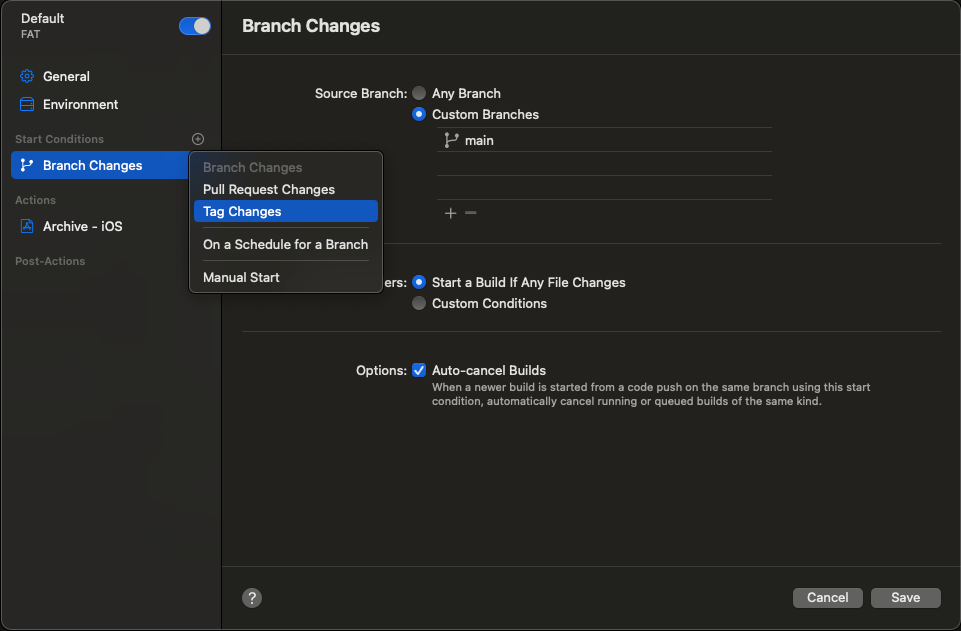
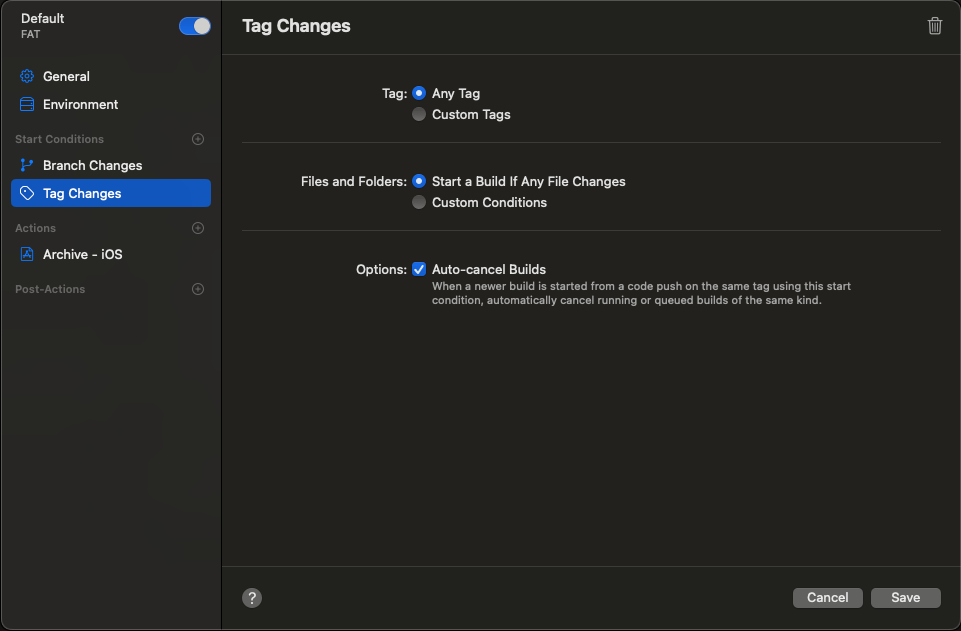
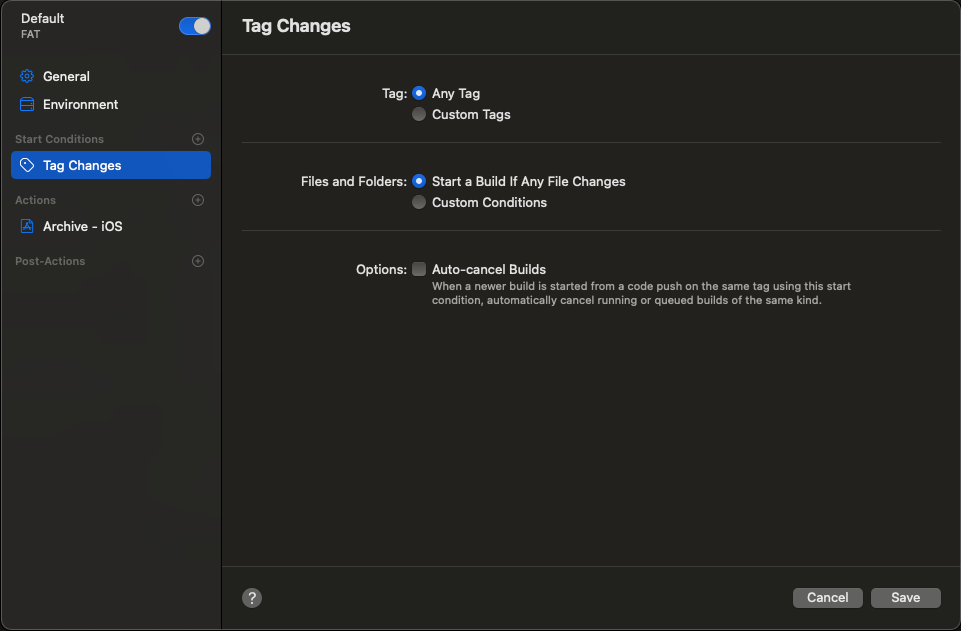
デプロイ中に tag を 追加で push する場合もあるし、「Auto-cancel Builds」はOffでいいかも。
「Branch Changes」は不要なので、右上のゴミ箱マークから削除する。
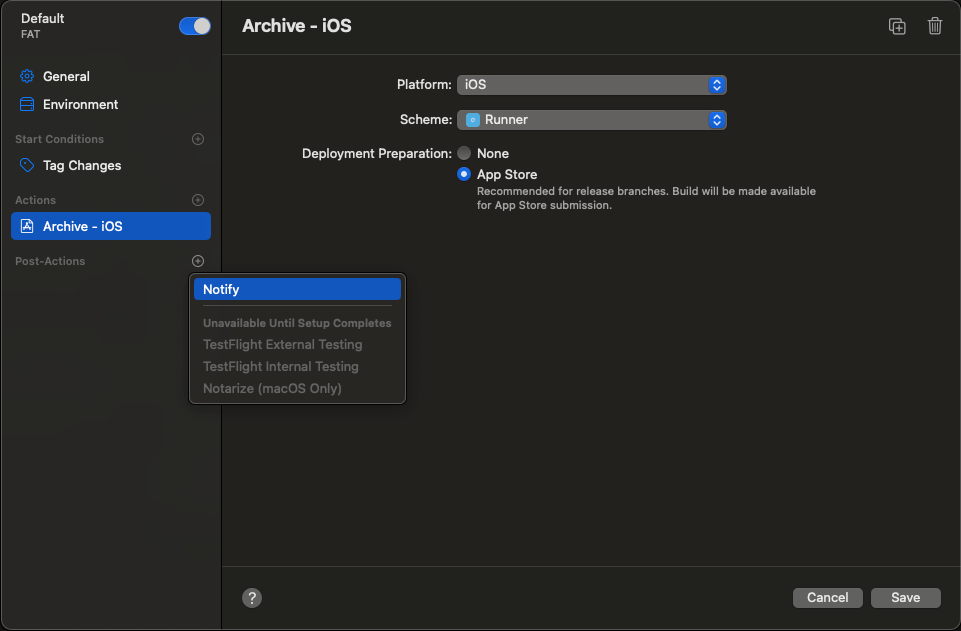
TestFlight アップロードまでして欲しいので、「Deployment Preparation」 を 「App Store」 に変更。
参考記事だと、「TestFlight (Internal Testing Only)」と「TestFlight and App Store」が選択できていたみたいだけど変わったのかな?

設定が完了したら「Save」ボタンをクリックして、「Next」ボタンをクリック。
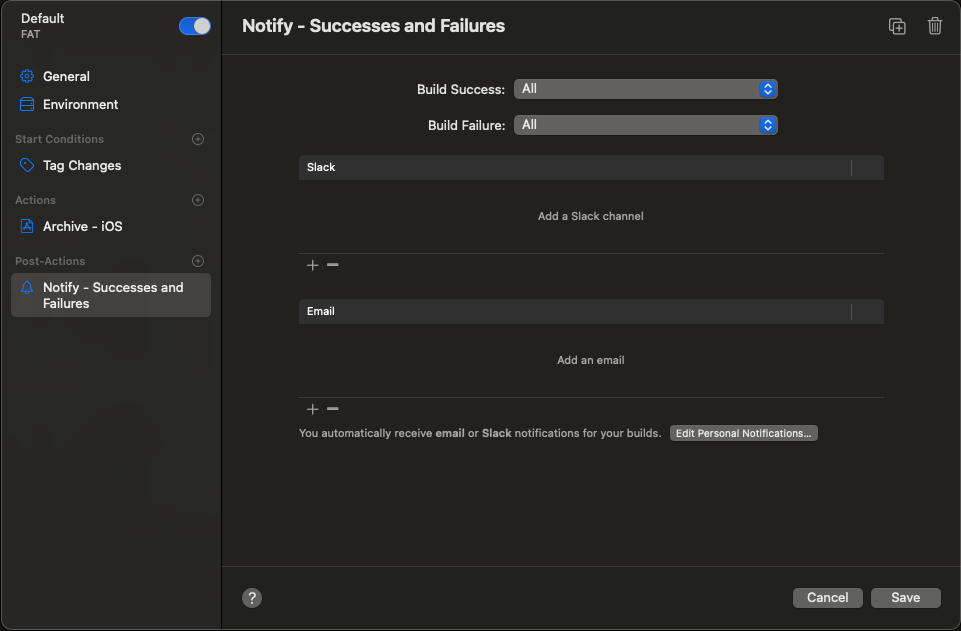
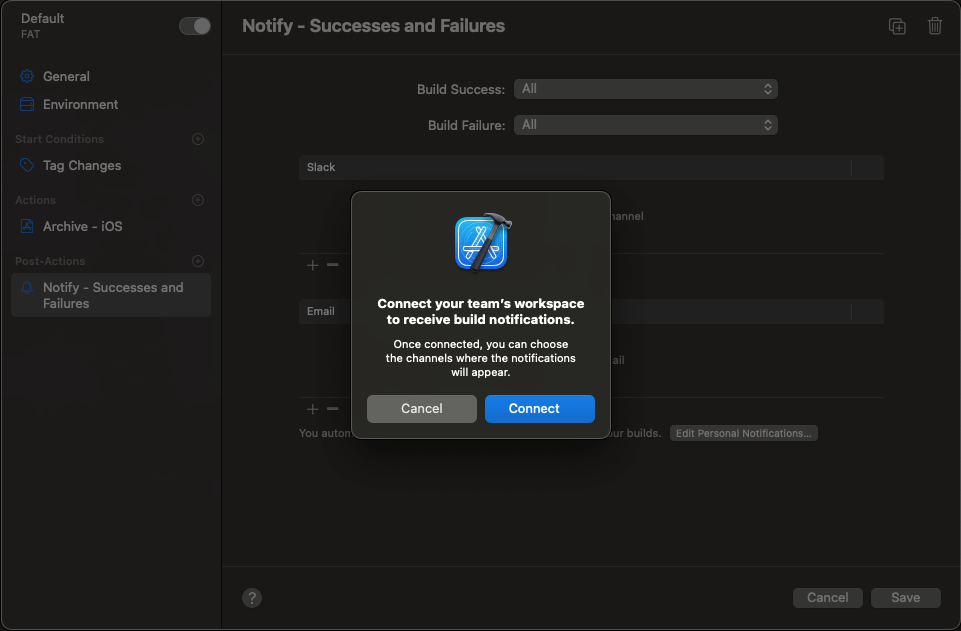
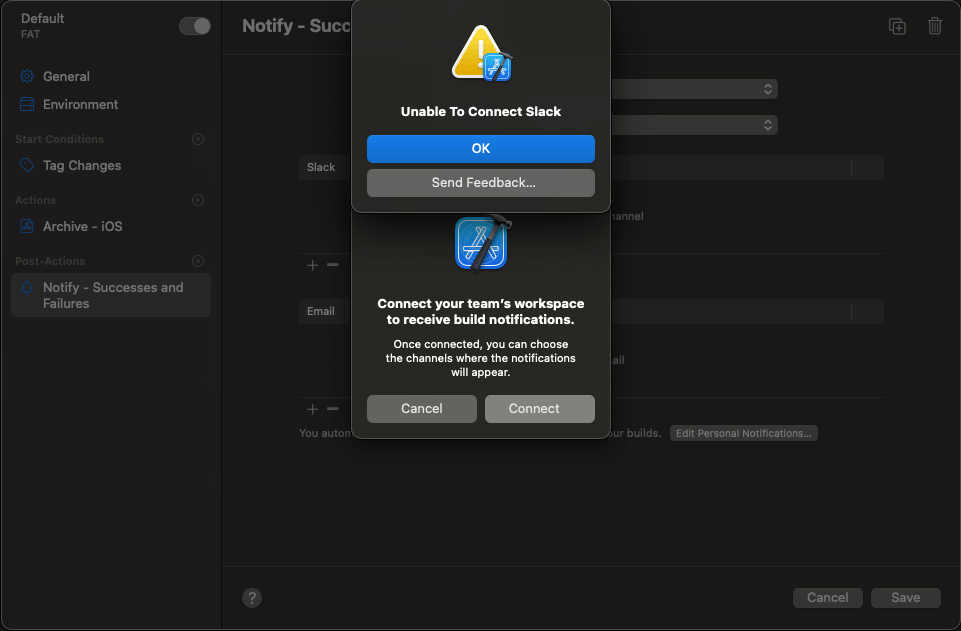
ちなみに、Slack 通知も設定してみたかったけどできなかったので一旦保留。
Slack 通知設定失敗
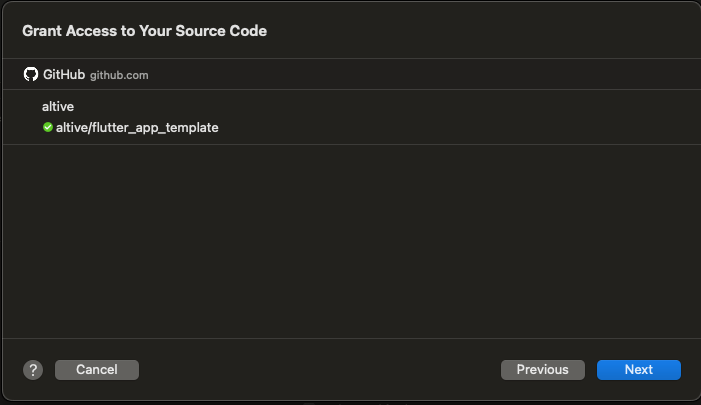
4. Grant Access to Your Source Code

上記のようなシートが出てきたので、GitHub の連携を進める。
「Grant Access」 をクリックすると下記 Web ページに飛ばされる。
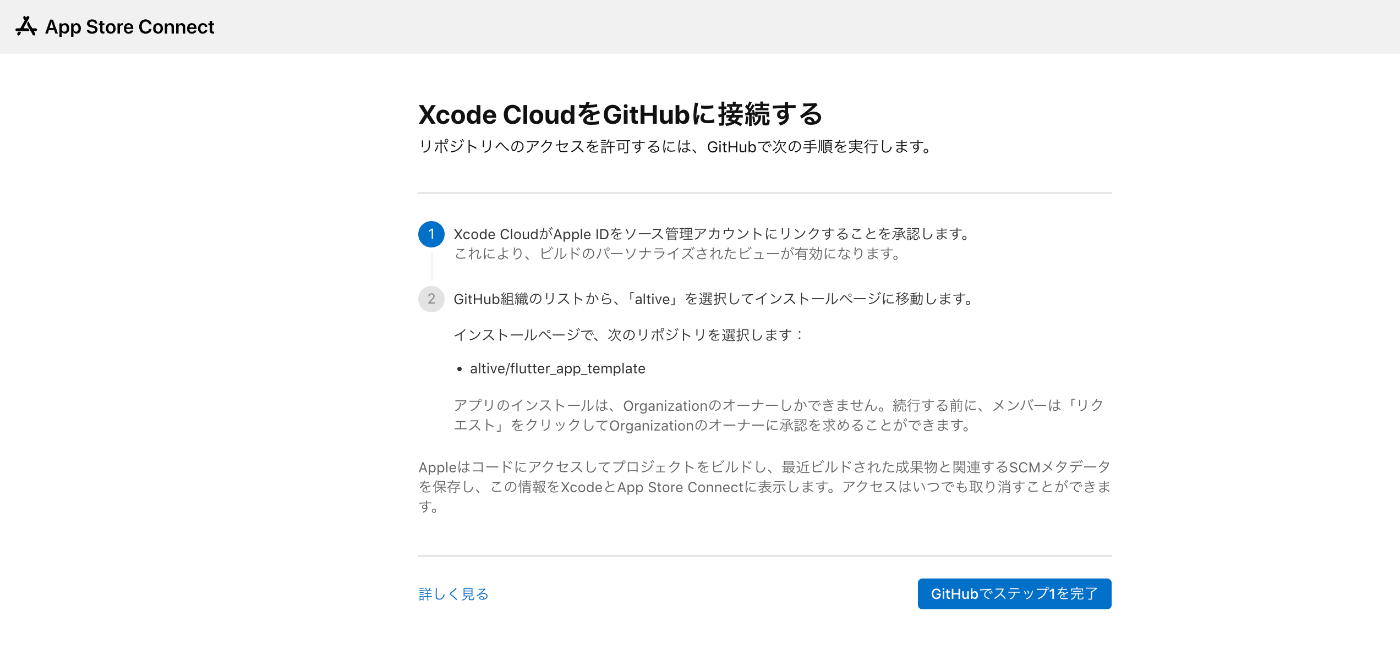
「GitHub でステップ1を完了」をクリックすると下記 Web ページに飛ぶのでインストール作業を進める。
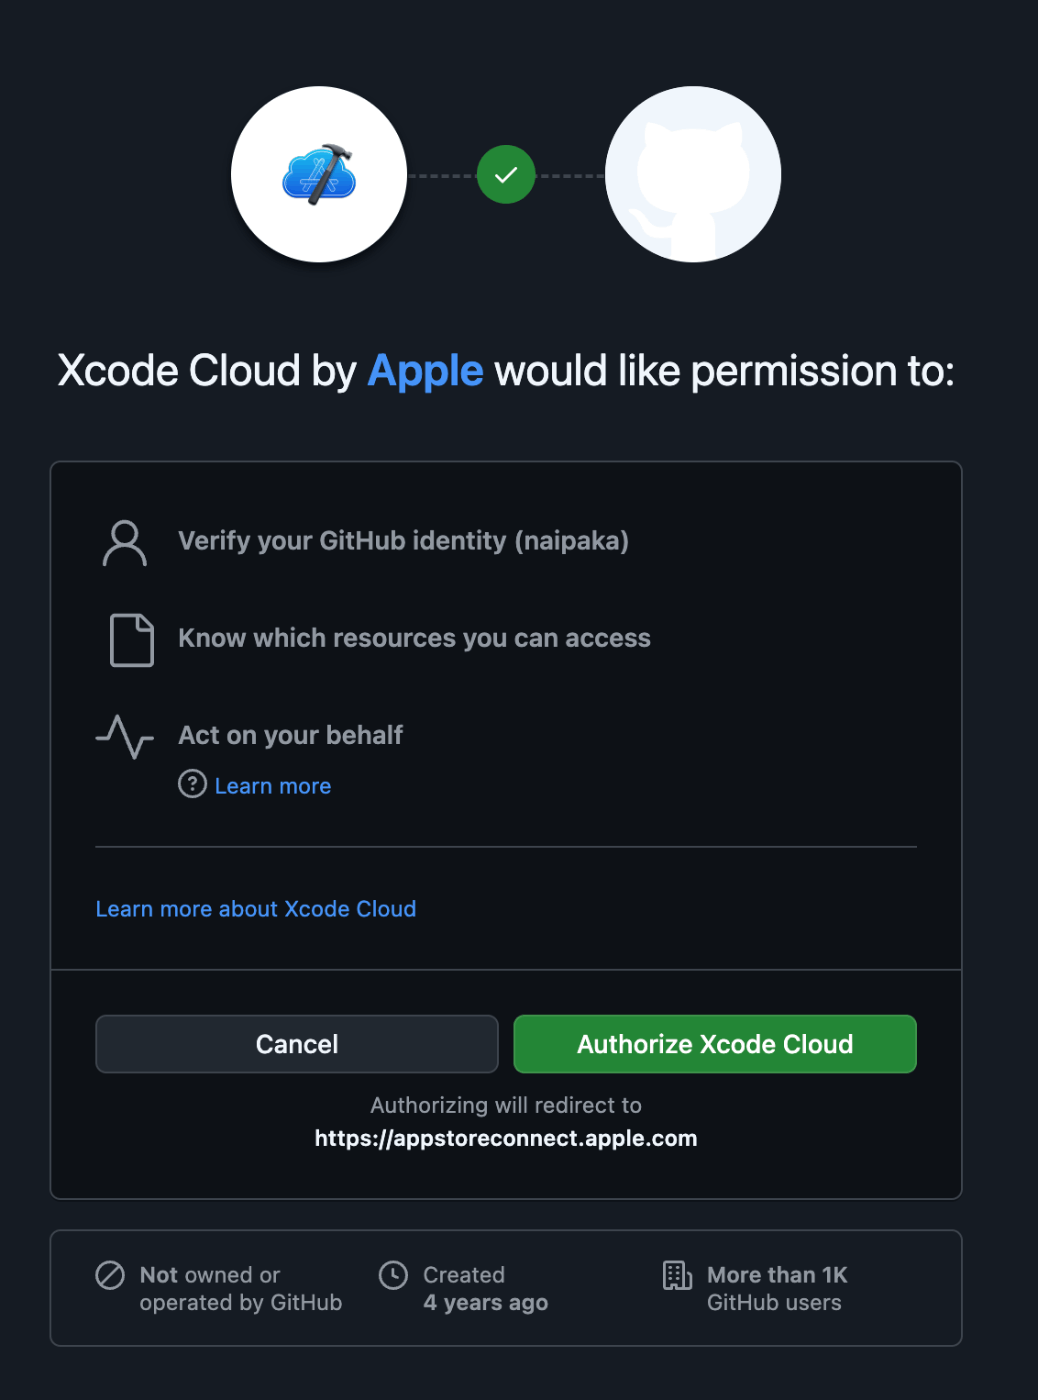
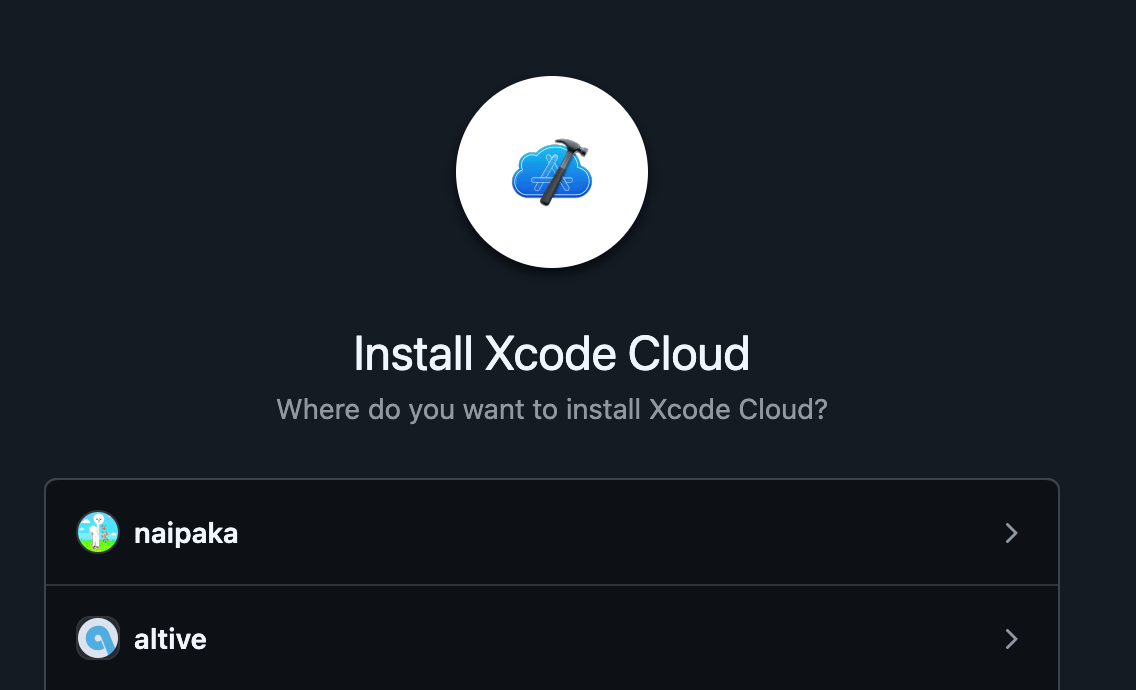
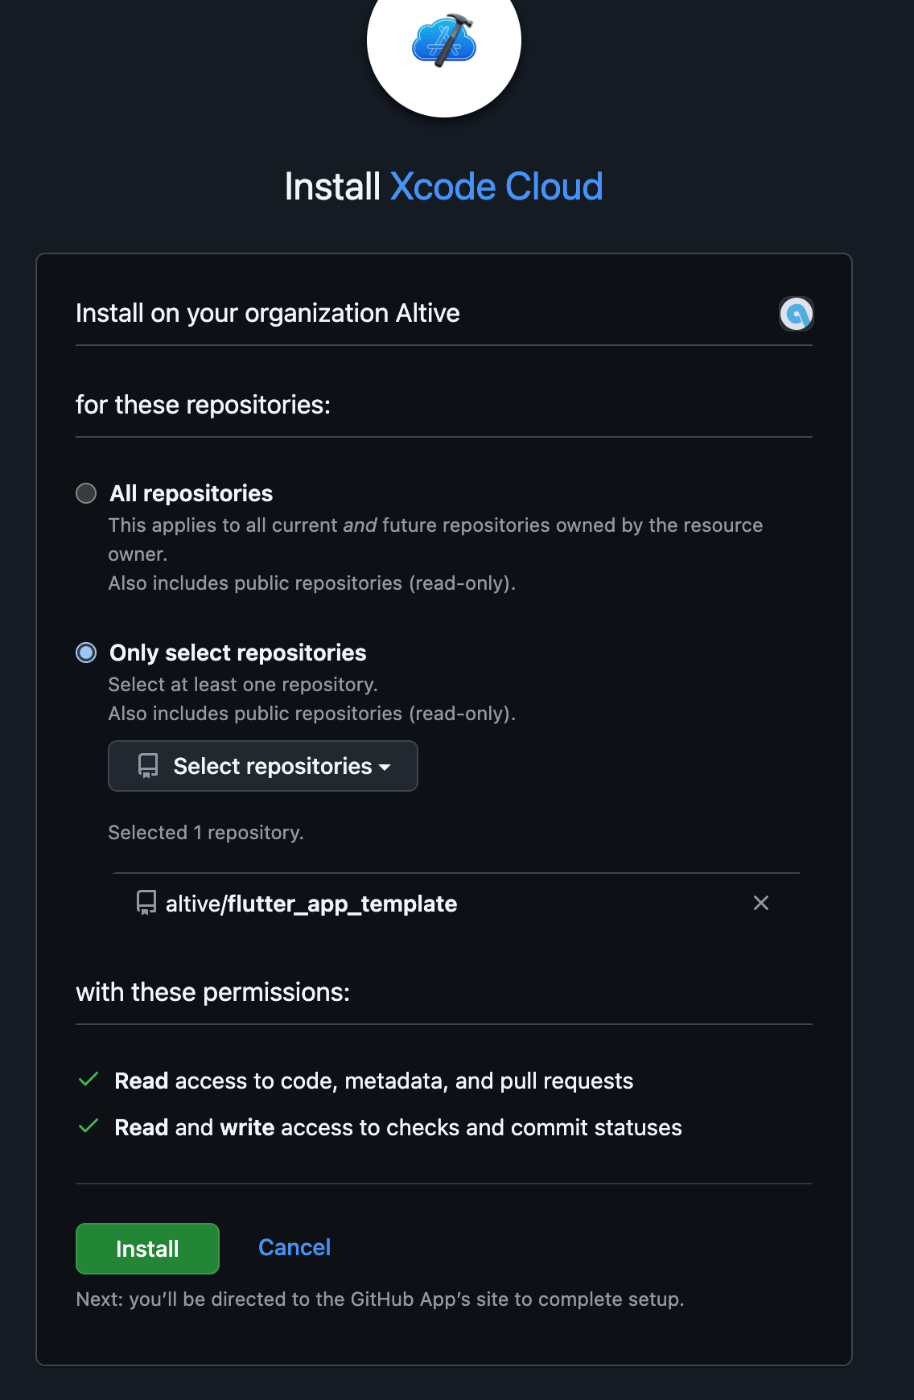
インストールが完了すると、下記のページに遷移し、Xcode 上でも接続が完了していることが確認できた。
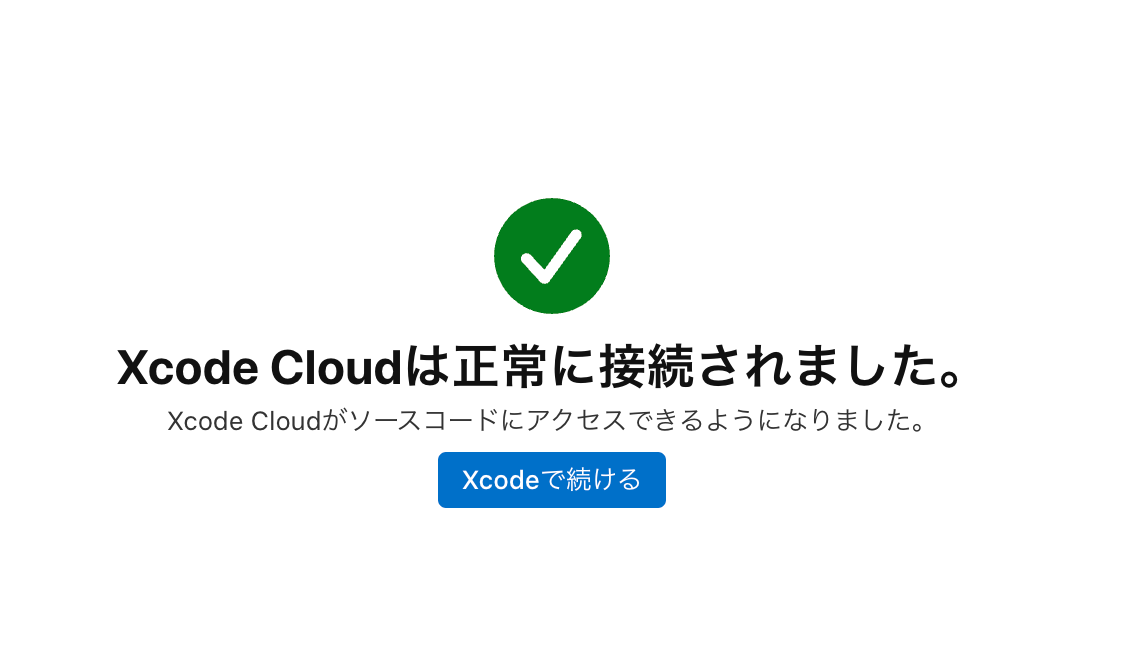
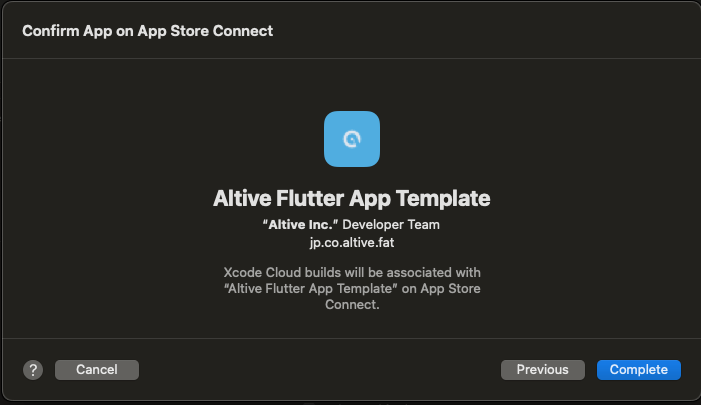
最後に確認シートが出てくるので、「Complete」ボタンを押して完了。
一回だけ Xcode Cloud が使えません的なエラーダイアログが表示されたけど、もう一回「Complete」ボタンを押したら大丈夫だった。
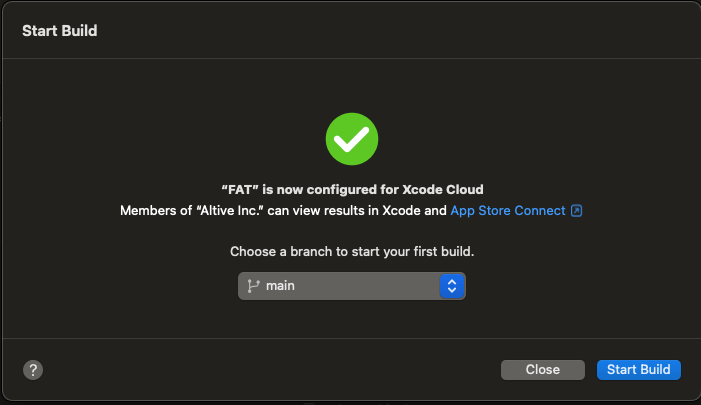
次のシートで最初のビルドをmainで試すこともできたけど、ビルド番号インクリメントしないとなので一旦ここでCloseした。
参考記事だと、「TestFlight (Internal Testing Only)」と「TestFlight and App Store」が選択できていたみたいだけど変わったのかな?
作成時はApp Storeしかありませんでしたが、作成後にEditしようとしたら「TestFlight (Internal Testing Only)」が増えていました👍
あ、今回はいいけど、環境ごとの別アプリを同時にTestFlightにアップロードしたい場合どうするんだ…?
あとで方法調べる。
-> ワークフローを2つ作成して、環境変数で flavor で渡してあげるようにすればできそう。
環境ごとにワークフローを分ける
まずは、先ほど作成したワークフローの編集シートを開く。
初めて作成した直後は「Manage Workflows」が表示されなかったが、Xcode 再起動で表示された。
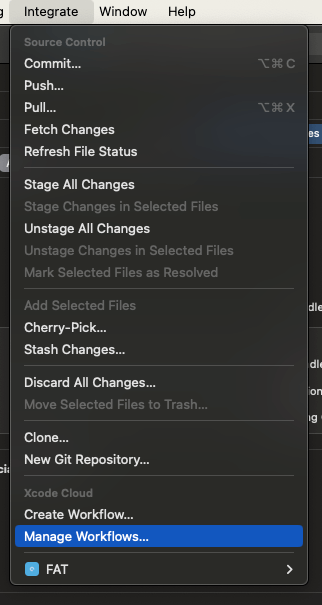
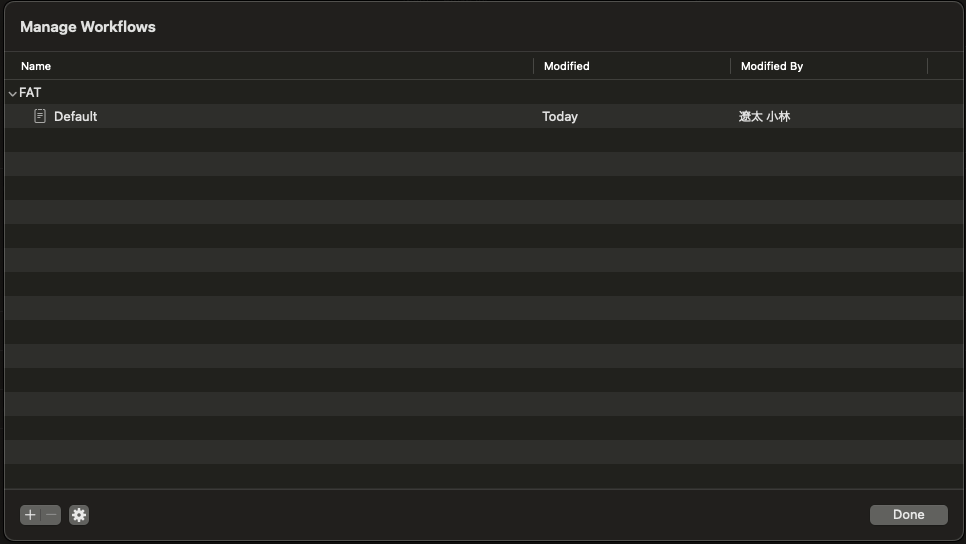
ワークフロー名を環境名に変更。
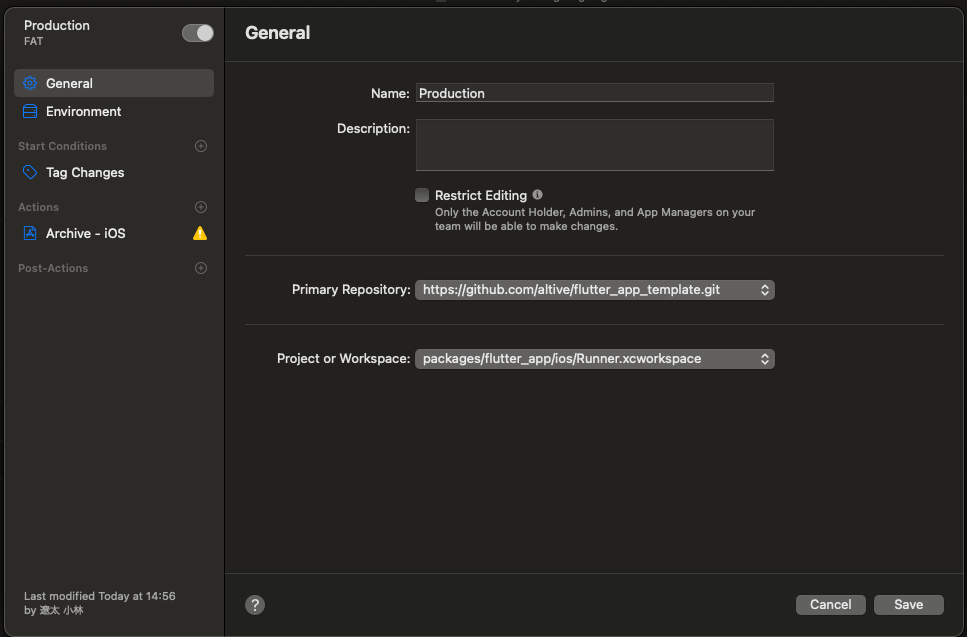
環境変数にflavorを追加。
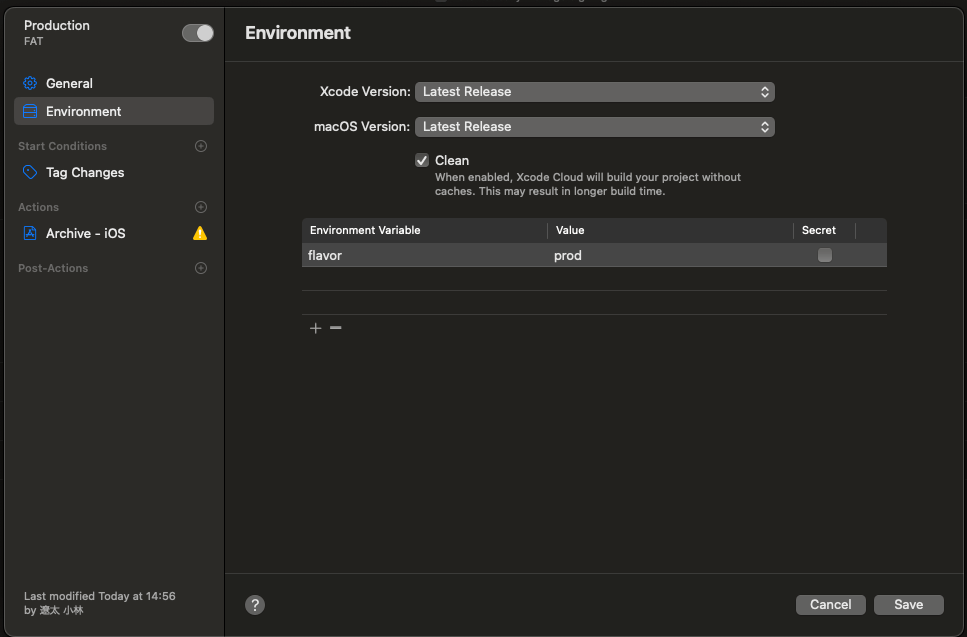
あとは、Post-clone script で環境変数を読み込むようにする。
#!/bin/sh

# Fail this script if any subcommand fails.
set -e

# The default execution directory of this script is the ci_scripts directory.
cd $CI_PRIMARY_REPOSITORY_PATH # change working directory to the root of your cloned repo.

# Extract the Flutter version from .fvmrc file
FLUTTER_VERSION=$(cat .fvmrc | grep "flutter" | cut -d '"' -f 4)

# Clone the Flutter repository with the specified version
git clone https://github.com/flutter/flutter.git --depth 1 -b $FLUTTER_VERSION $HOME/flutter
export PATH="$PATH:$HOME/flutter/bin"

# Print the Flutter version
flutter --version

# change working directory to the Flutter app directory.
cd ./packages/flutter_app

# Install Flutter artifacts for iOS (--ios), or macOS (--macos) platforms.
flutter precache --ios

# Install Flutter dependencies.
flutter pub get

# Install CocoaPods using Homebrew.
HOMEBREW_NO_AUTO_UPDATE=1 # disable homebrew's automatic updates.
brew install cocoapods

# Install CocoaPods dependencies.
cd ios && pod install # run `pod install` in the `ios` directory.

# The flutterfire command is used in Xcode Build Phases and must be installed in advance.
curl -sL https://firebase.tools | bash
dart pub global activate flutterfire_cli

# Build the iOS app in release mode with no code signing.
- flutter build ios --release --dart-define-from-file=dart_defines/prod.env --no-codesign
+ flutter build ios --release --dart-define-from-file=dart_defines/${flavor}.env --no-codesign

exit 0
備忘録書かせてください📝
FlavorごとにSchemeを分けている環境だと、ワークフローの複製は使えず、環境ごとにCreate workflowする必要がありました✍️
動作確認
最初にビルド番号をインクリメントしたPRを作成。
release ブランチがマージされた直後に自動で tag が push されるようにしているので、そのタイミングで Xcode Cloud のワークフローが動くはず…🙏
とりあえず動いた!あとは成功を待つのみ…

ですよね…😭
ログはどこから見れるんだろう。

ビルド番号の「1」をクリックしたら詳細・ログが見れた。
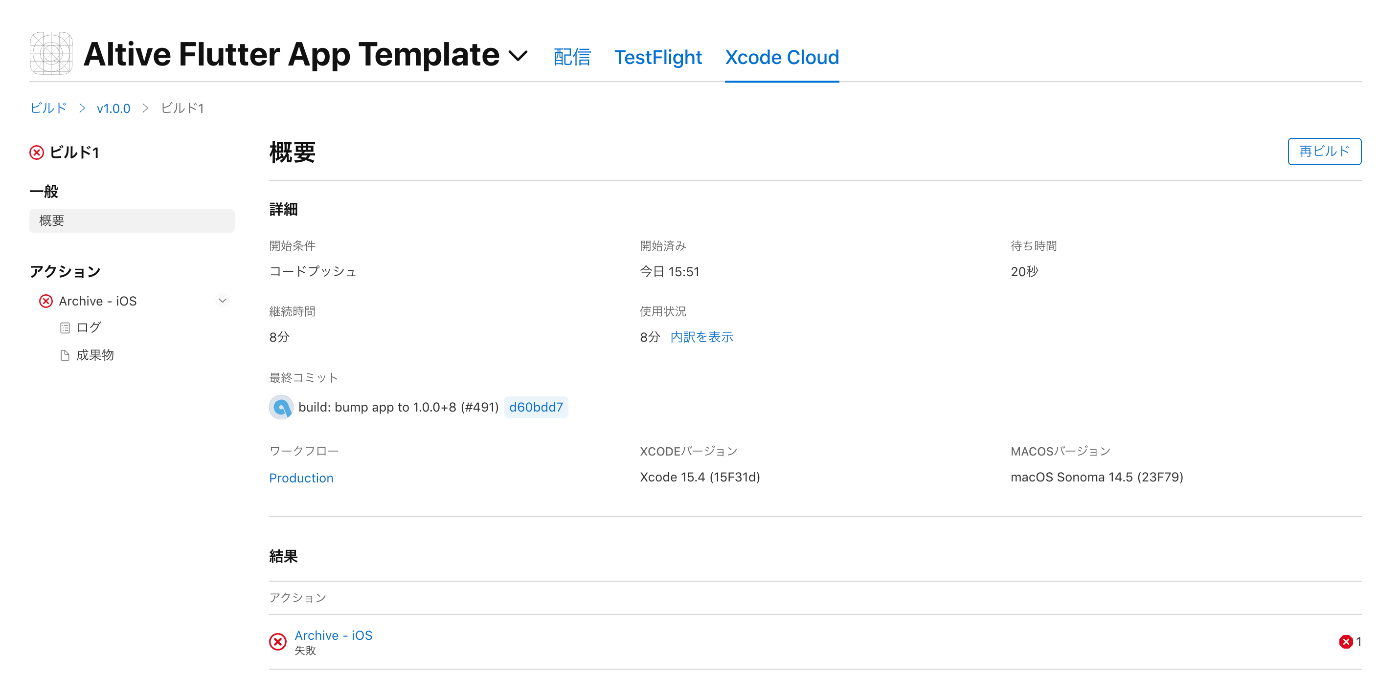
ci_post_clone.sh の flutterfire_cli のインストールで失敗してた。
2024-09-03T06:58:50.559504365Z	sudo: a terminal is required to read the password; either use the -S option to read from standard input or configure an askpass helper
2024-09-03T06:58:50.559740710Z	sudo: a password is required
2024-09-03T06:58:50.560082047Z	-- Checking for existing firebase-tools on PATH...
2024-09-03T06:58:50.577566204Z	-- Checking your machine type...
2024-09-03T06:58:50.586396708Z	-- Downloading binary from https://firebase.tools/bin/macos/latest
2024-09-03T06:58:50.656101791Z	sudo: a terminal is required to read the password; either use the -S option to read from standard input or configure an askpass helper
2024-09-03T06:58:50.656244737Z	sudo: a password is required
2024-09-03T06:58:50.656548921Z	-- Setting permissions on binary...
2024-09-03T06:58:50.672906855Z	sudo: a terminal is required to read the password; either use the -S option to read from standard input or configure an askpass helper
2024-09-03T06:58:50.673091331Z	sudo: a password is required
2024-09-03T06:58:50.673571006Z	bash: line 255: /usr/local/bin/firebase: No such file or directory
2024-09-03T06:58:50.674833644Z	Something went wrong, firebase has not been installed.
2024-09-03T06:58:50.674926633Z	Please file a bug with your system information on Github.
2024-09-03T06:58:50.675096774Z	https://github.com/firebase/firebase-tools/
curl -sL https://firebase.tools | bash は不要だったぽいので、削除してもう一度実行してみる。
#!/bin/sh

# Fail this script if any subcommand fails.
set -e

# The default execution directory of this script is the ci_scripts directory.
cd $CI_PRIMARY_REPOSITORY_PATH # change working directory to the root of your cloned repo.

# Extract the Flutter version from .fvmrc file
FLUTTER_VERSION=$(cat .fvmrc | grep "flutter" | cut -d '"' -f 4)

# Clone the Flutter repository with the specified version
git clone https://github.com/flutter/flutter.git --depth 1 -b $FLUTTER_VERSION $HOME/flutter
export PATH="$PATH:$HOME/flutter/bin"

# Print the Flutter version
flutter --version

# change working directory to the Flutter app directory.
cd ./packages/flutter_app

# Install Flutter artifacts for iOS (--ios), or macOS (--macos) platforms.
flutter precache --ios

# Install Flutter dependencies.
flutter pub get

# Install CocoaPods using Homebrew.
HOMEBREW_NO_AUTO_UPDATE=1 # disable homebrew's automatic updates.
brew install cocoapods

# Install CocoaPods dependencies.
cd ios && pod install # run `pod install` in the `ios` directory.

# The flutterfire command is used in Xcode Build Phases and must be installed in advance.
- curl -sL https://firebase.tools | bash
dart pub global activate flutterfire_cli
+ export PATH="$PATH":"$HOME/.pub-cache/bin"

# Build the iOS app in release mode with no code signing.
flutter build ios --release --dart-define-from-file=dart_defines/${flavor}.env --no-codesign

exit 0
今度はビルド番号の関係で失敗。
TestFlight の最新ビルド番号より上にインクリメントした上でビルドしたんだけどな…
もしできてなくても、自動インクリメントされるかと思ったのに謎。
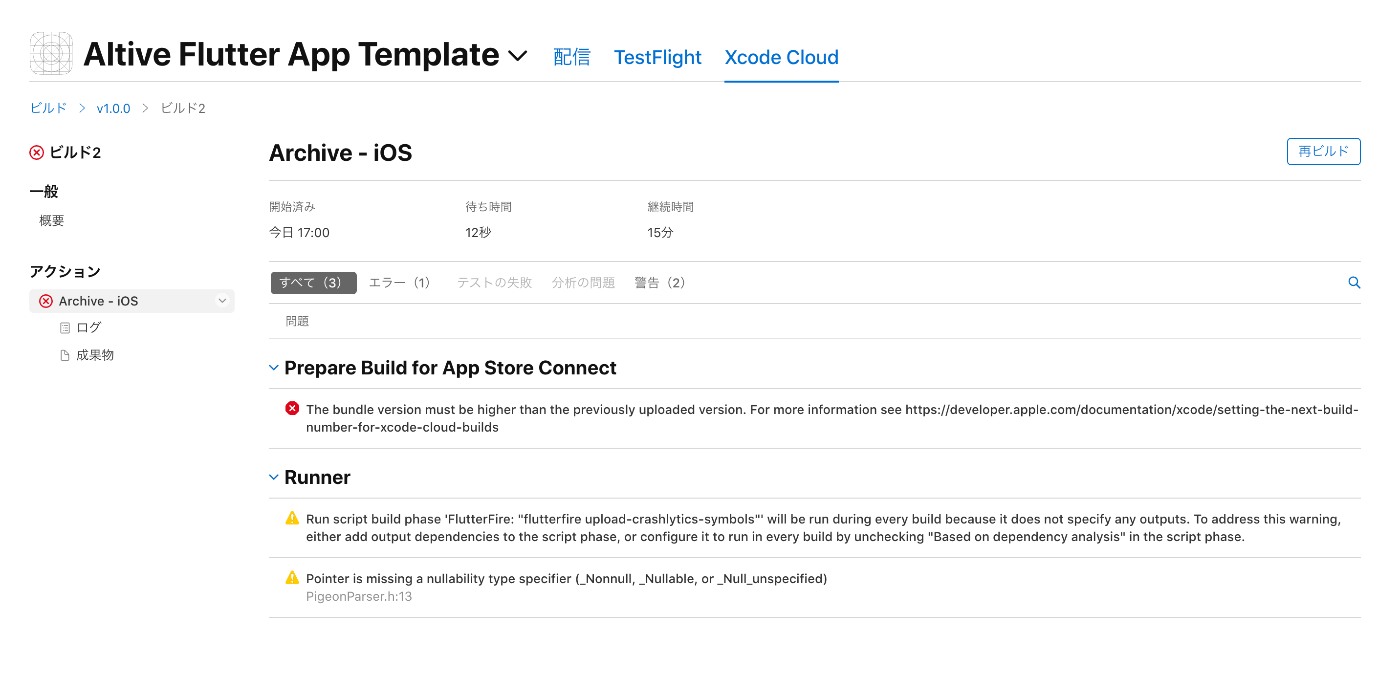
もしできてなくても、自動インクリメントされるかと思ったのに謎。
UploadOptions.plistの manageAppVersionAndBuildNumber を true にすれば自動インクリメントはされますかね?
でもできればここはfalseのままで、アプリのビルド番号使ってほしいですよね🤔
不具合かな😿
Xcode Cloud 上ではアプリのビルド番号とは別のビルド番号を参照しているようでした…!
もし1.0.1でビルドしていたら、1.0.1(1)になっていたみたいです✍️
別で管理せずアプリのビルド番号つかってほしいところですが、現状対処法見つかりませんでした…
これかも?🤔
最新のアプリビルド番号が28なので29にして再度手動実行してみる。
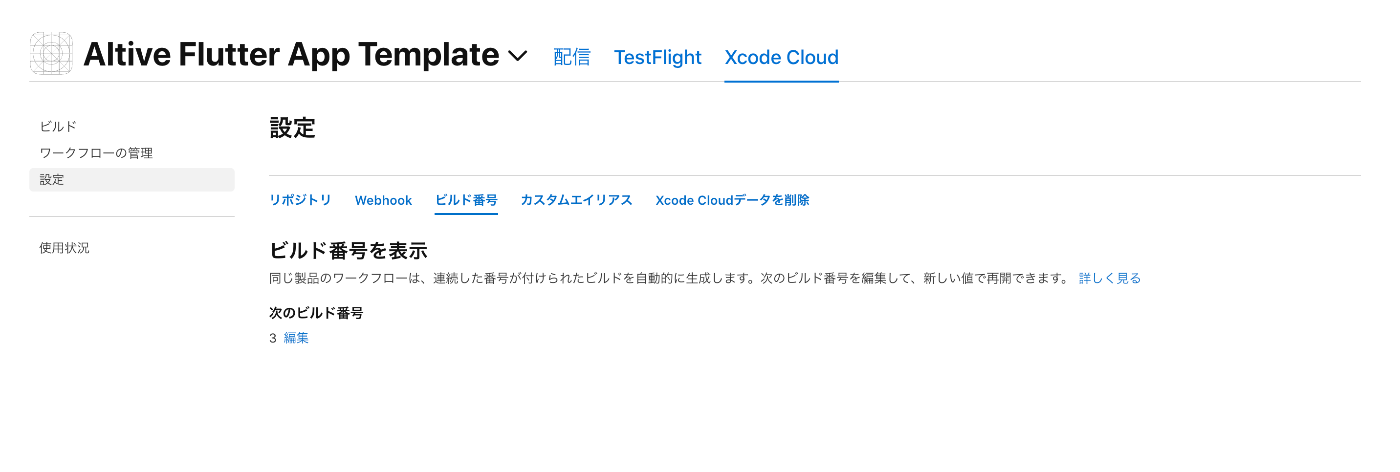
For example, your latest app version in the App Store could be 1.2.1 (42) before you start using Xcode Cloud. When you start using Xcode Cloud, your next app version would be 1.2.2 (1) because Xcode Cloud build numbers start at 1. It’s a unique combination of the version and the build number and, as a result, App Store Connect accepts it when you submit the new version for app review.
バージョンが違っていればビルドできていたぽい。
今回は1.0.0から変わらずだったのでXcode Cloud 上でもビルド番号を上げる必要があった。
Xcode Cloud 上でもビルド番号をアプリで設定しているビルド番号から参照して欲しいけどできないのかな。
成功!🎉
1ビルド 20分弱✍️
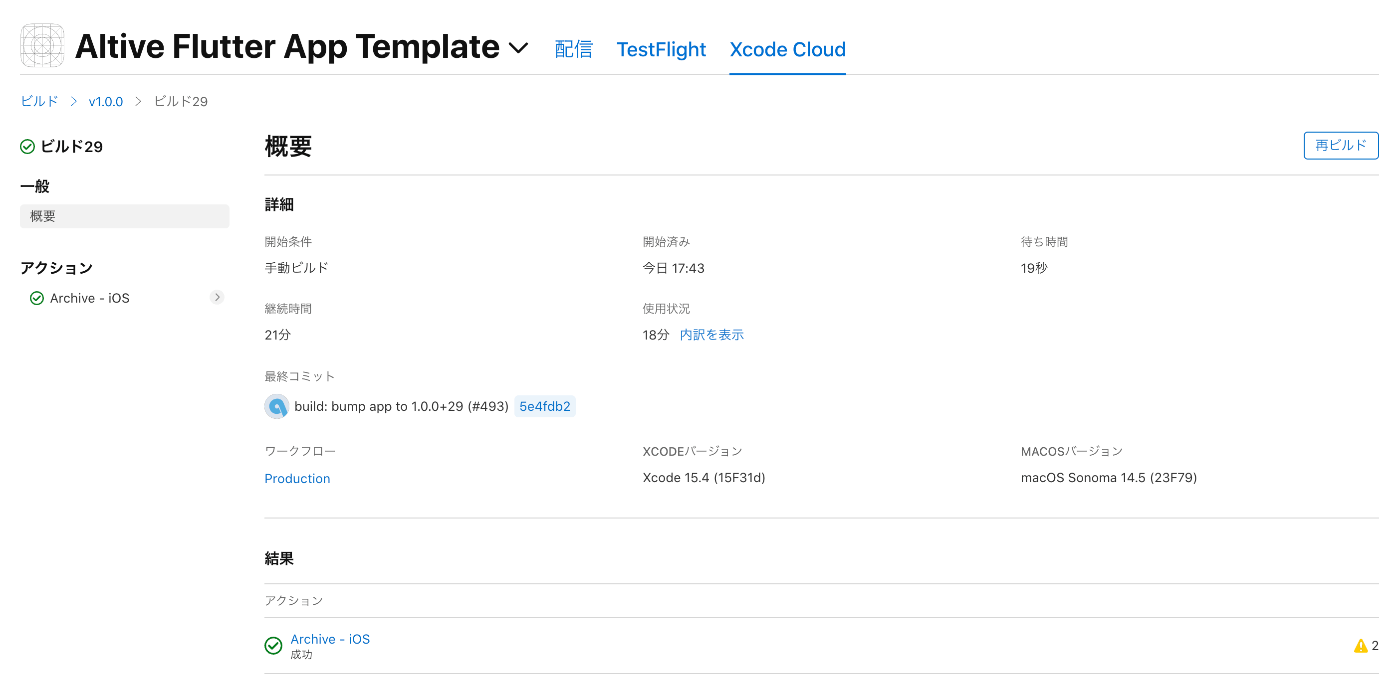
TestFlight 配信されたアプリの動作確認も問題なさそう!
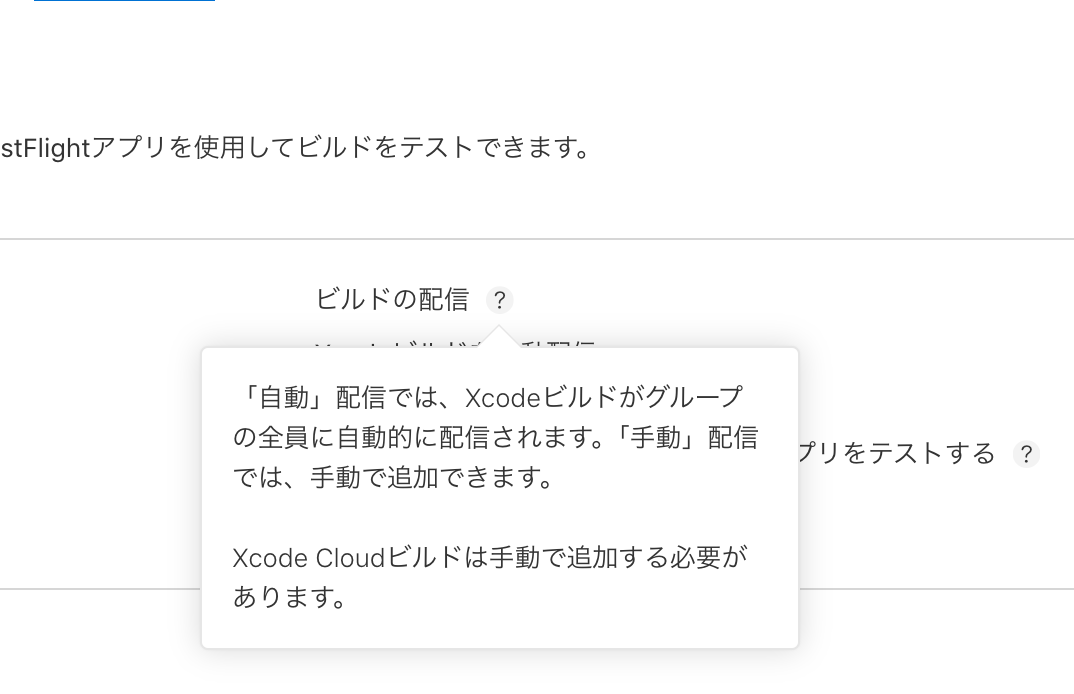
Xcode Cloudビルドは手動で追加する必要があります。
ビルド成功しても配信されなくてよく見てみたらそうなのか…面倒だ🤔
↑ の手順 Xcode 上でぽちぽちしたけど、App Store Connect 上でやった方がわかりやすいかも💭
結局ビルド番号とかの設定 ASC でやらないとだし、Slack連携もASCの方が安定していそう
と思ったけど、最初はXcode からじゃないとダメなのか
使用時間
25コンピューティング時間/月
無料
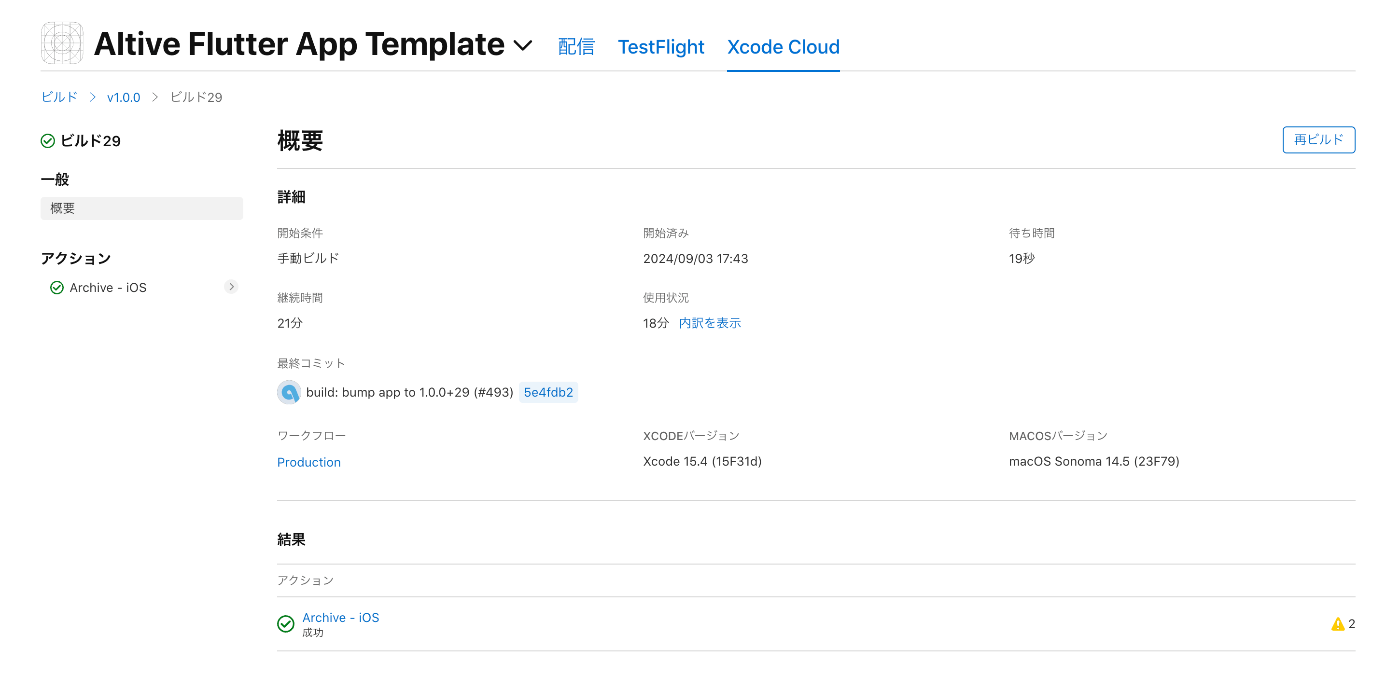
1回のビルドで20分くらい。
他のプロジェクトでは20分超えることもあったので、多く見積もって30分で計算しても1ヶ月50回はビルドできる。
リリースでのみ使うくらいであれば無料枠内で余裕そう!
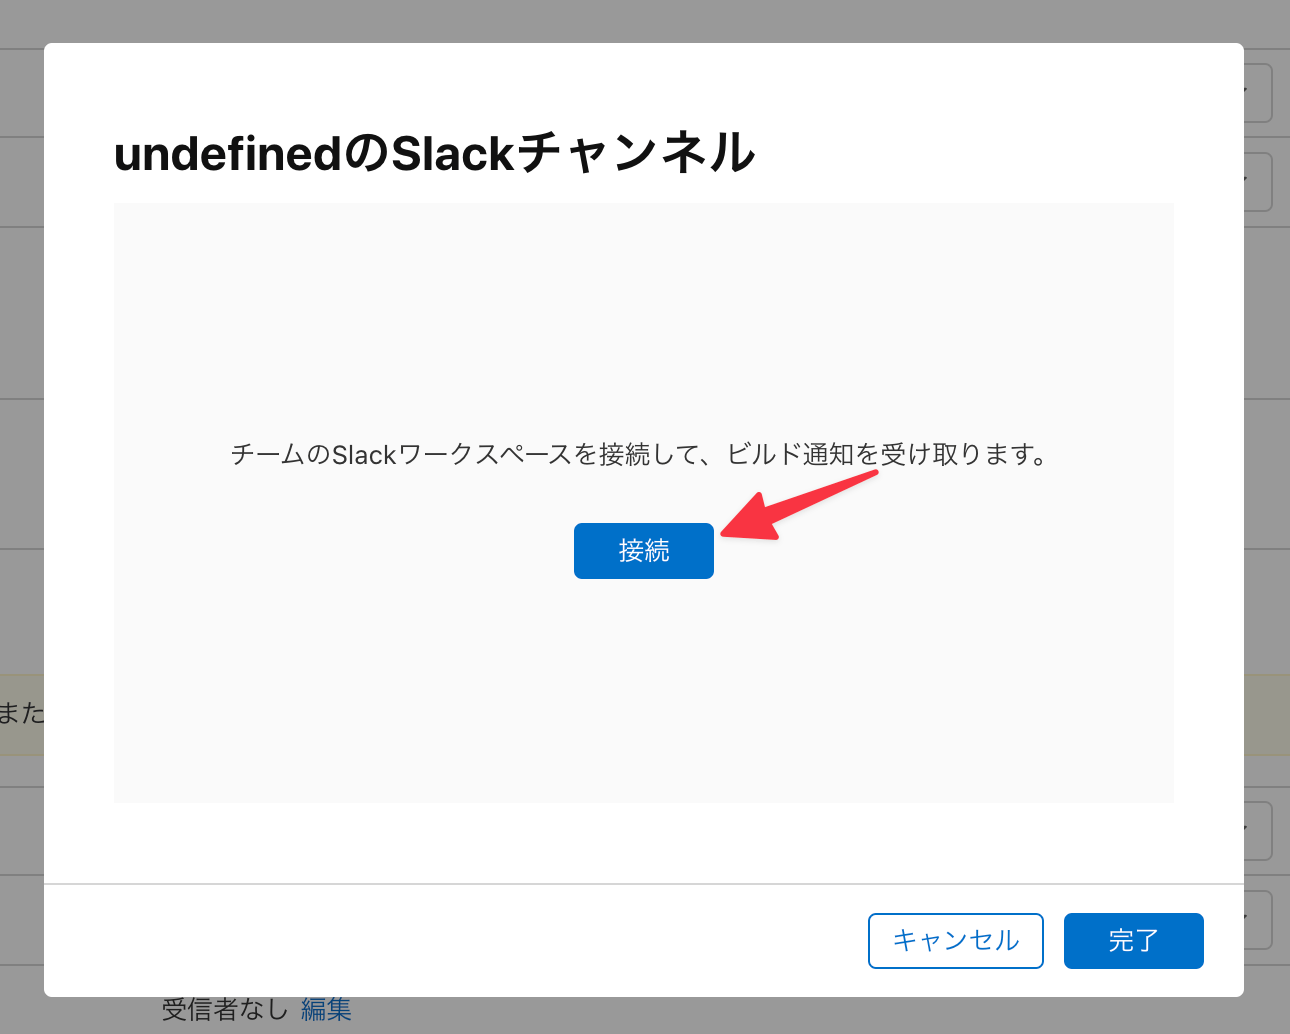
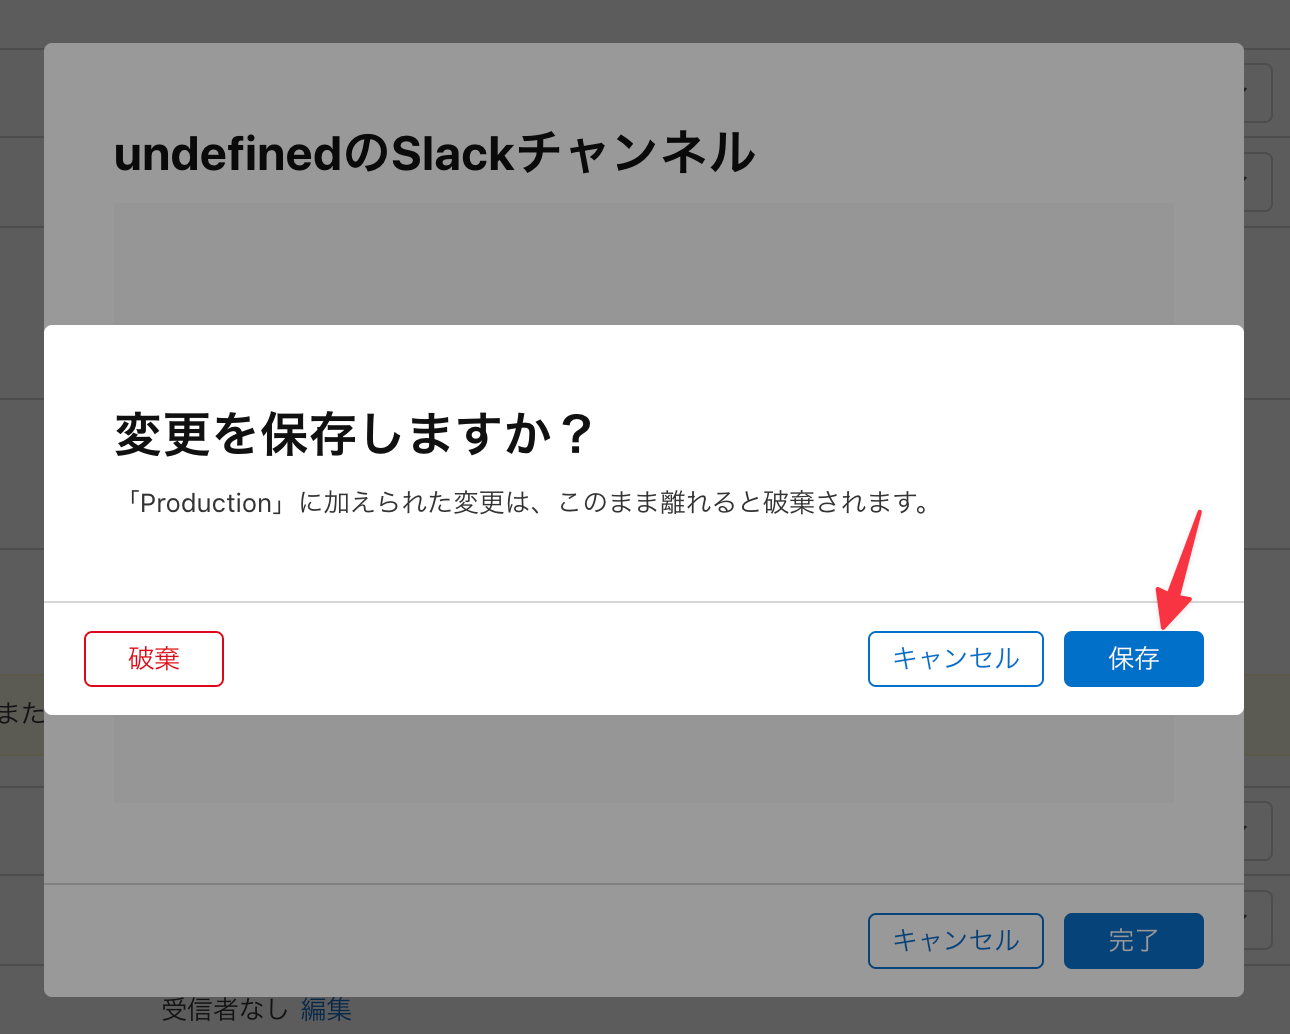
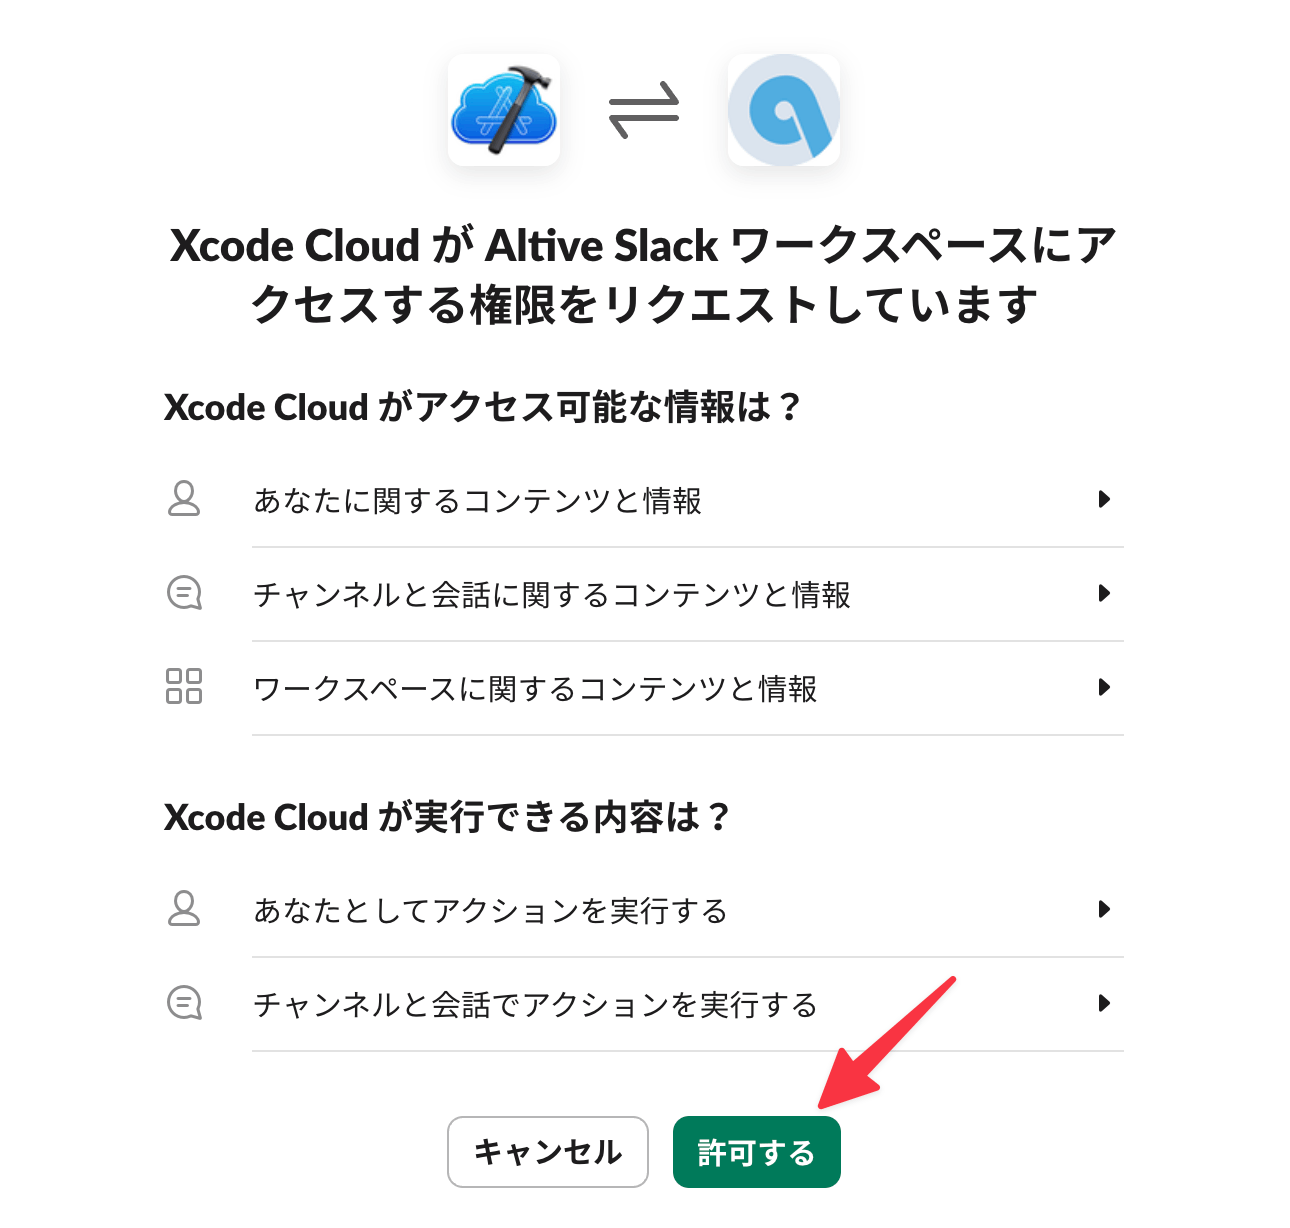
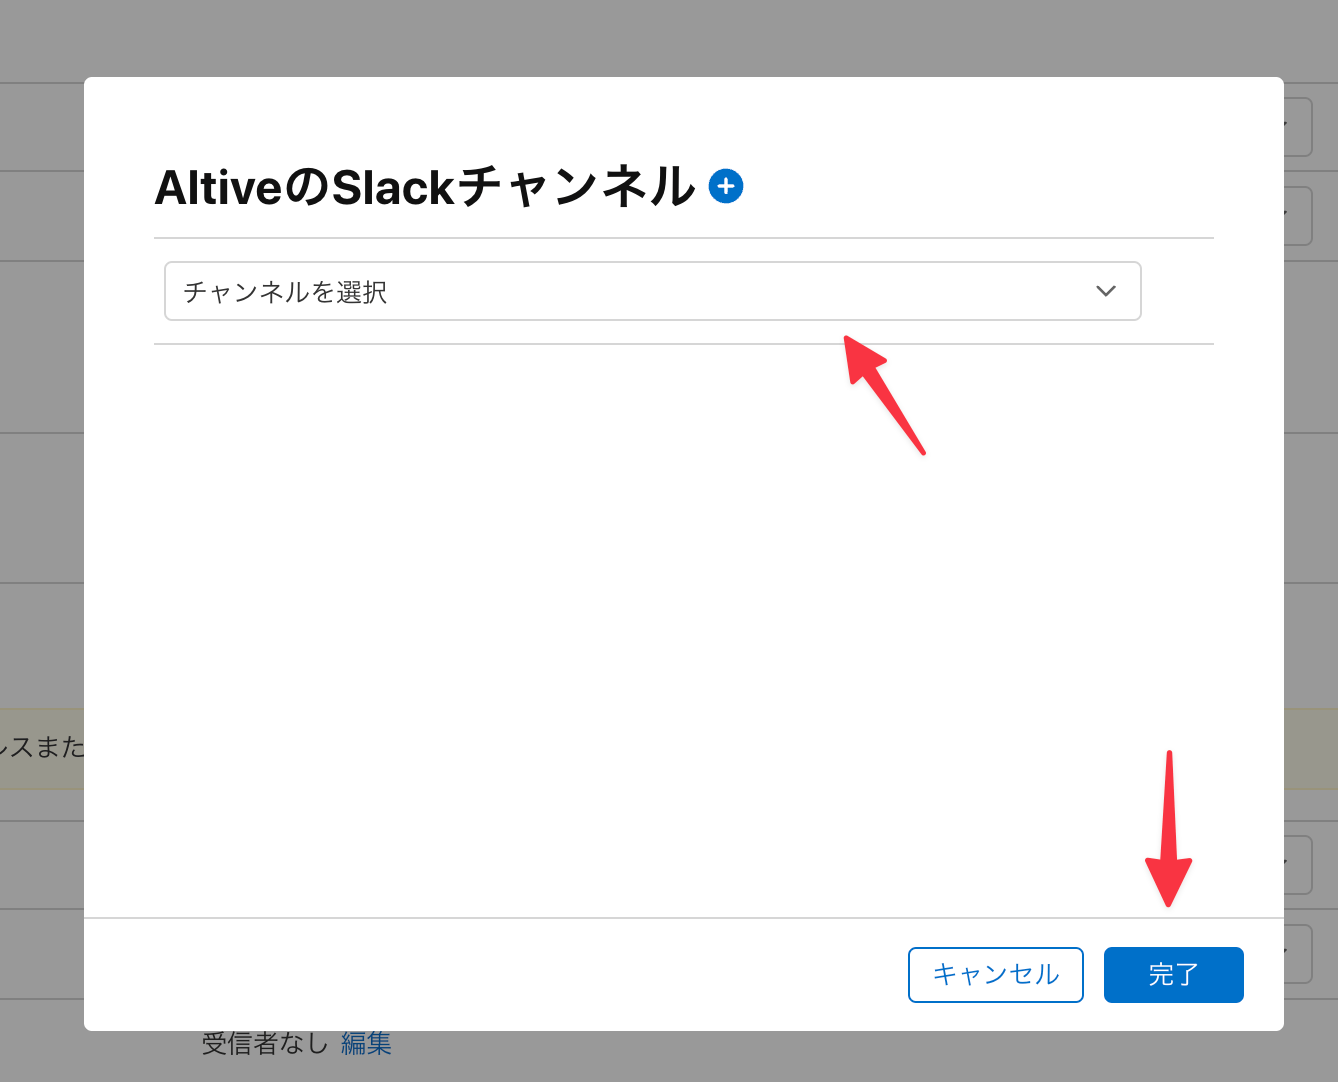
ポストアクション(Slack通知)
Xcode Cloudビルドは手動で追加する必要があるので、ビルド完了に気づけるようにSlack通知をポストアクションに追加した。
App Store Connect での設定


ポストアクション(TestFlight 配信)
こちらのポストを見て手動で配信する必要のないことがわかりました🙏
App Store Connect での設定


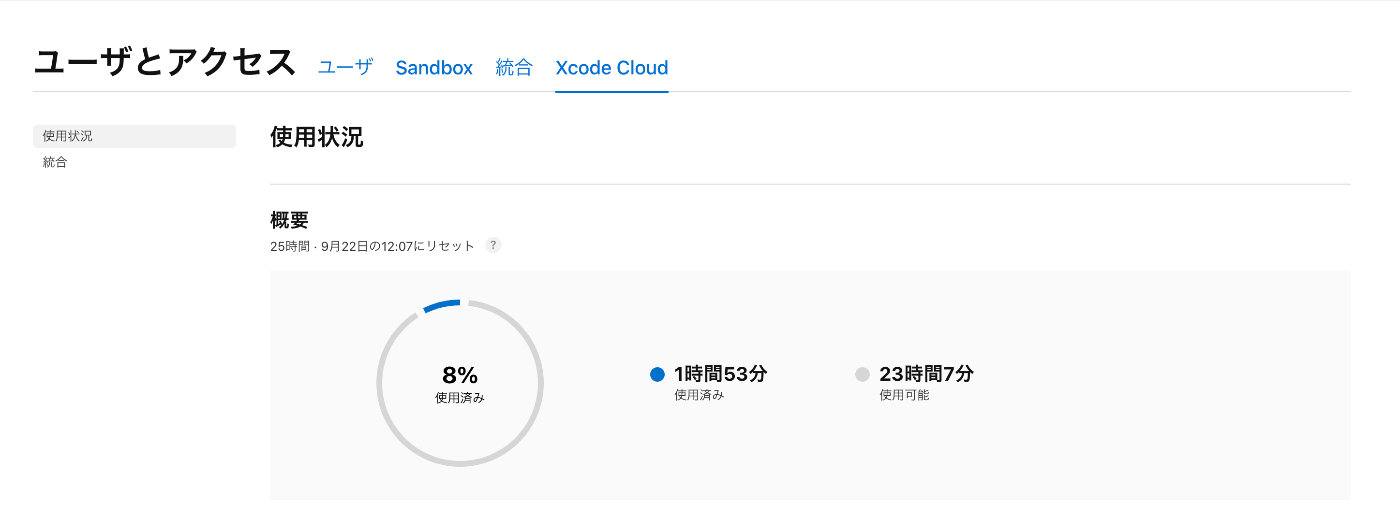
チーム全体の利用状況は ユーザーとアクセス > Xcode Cloud から確認できる