remix-authで認証を実装する
remixで認証を実装するにあたってremix-authを使ったらとても簡単でした。
remix-auth の実装方法を紹介したいと思います。
remix-auth とは?
Remix アプリケーション向けの認証ソリューションです。特徴については GitHub のページをご覧いただきたいと思いますが、remix のチュートリアルのJokes App Tutorialにあるようなセッションの設定を簡単に行なってくれます。
実装する
環境構築
こちらの手順を参考に環境構築しました。Prettier のインストールだけで OK です。
この記事を執筆時点での Remix のバージョンは1.15.0です。
remix アプリを作成したら、アプリの中に移動します。
cd 作成したremixアプリ
remix-auth と remix-auth-form のインストール
以下をターミナルに入力します。
npm install remix-auth
この記事を執筆時点での remix-auth のバージョンは3.4.0です。
また、今回の実装では remix-auth-form を使用するので、インストールします。
npm install remix-auth-form
この記事を執筆時点での remix-auth-form のバージョンは1.3.0です。
また、app フォルダと同じ階層に.envファイルを作り、SESSION_SECRETを定義しておきます。SESSION_SECRET は適当な文字列にします。
SESSION_SECRET="remix-auth-sample"
session.server.ts を作成
app 直下に services フォルダを作成し、その中に session.server.ts を作成します。
import { createCookieSessionStorage } from "@remix-run/node";

const sessionSecret: string | undefined = process.env.SESSION_SECRET;
if (sessionSecret === undefined)
  throw new Error("SESSION_SECRETを設定してください。");

export let sessionStorage = createCookieSessionStorage({
  cookie: {
    name: "auth_session",
    sameSite: "lax",
    path: "/",
    httpOnly: true,
    secrets: [sessionSecret],
    secure: process.env.NODE_ENV === "production",
    maxAge: 60 * 60 * 24,
  },
});

export const { getSession, commitSession, destroySession } = sessionStorage;
auth.server.ts と login.server.ts を作成
session.server.ts と同じ階層に auth.server.ts を作成します。user-loginの部分は任意で変更できます。認証処理を書く際にどの認証戦略を使うかを指定できますが、この部分で指定できます。
import { Authenticator } from "remix-auth";
import { sessionStorage } from "./session.server";
import { FormStrategy } from "remix-auth-form";
import { login } from "./login.server";

export let authenticator = new Authenticator<number>(sessionStorage);

authenticator.use(
  new FormStrategy(async ({ form }) => {
    let email = form.get("email");
    let password = form.get("password");
    let userId = await login(String(email), String(password));
    return userId;
  }),
  "user-login"
);
ここではログイン用関数である login()があります。この関数を準備するため、login.server.ts も作成しましょう。
login()ではデータベースなどから user を取得する処理が入りますが、ここでは簡略化のため 1 を固定で返すようにしています。
export async function login(email: string, password: string): Promise<User> {
  // DBからuserを取得する処理が入る
  const user = await login(email, password);
  return await user;
}
app/routes/_index.tsx を修正
app/routes/_index.tsx にログインフォームを作成するため、以下のように書き換えます。
import type { V2_MetaFunction } from "@remix-run/react";
import type { ActionArgs, LoaderArgs } from "@remix-run/node";
import { Form } from "@remix-run/react";
import { authenticator } from "~/services/auth.server";

export const meta: V2_MetaFunction = () => {
  return [{ title: "New Remix App" }];
};

export default function Index() {
  return (
    <>
      <Form method="post">
        <input type="email" name="email" required />
        <input
          type="password"
          name="password"
          autoComplete="current-password"
          required
        />
        <button>Sign In</button>
      </Form>
    </>
  );
}

export async function action({ request }: ActionArgs) {
  return await authenticator.authenticate("user-login", request, {
    successRedirect: "/success",
    failureRedirect: "/",
  });
}
認証が成功した場合の画面を用意
また、認証が成功した場合用に app/route/success.tsx と app/routes/success/index.tsx を作成します。
import { Outlet } from "@remix-run/react";

export default function SuccessRoute() {
  return (
    <>
      <main>
        <Outlet />
      </main>
    </>
  );
}
export default function SuccessIndex() {
  return (
    <>
      <div>ログイン成功しました。</div>
      <div>
        <form action="/logout" method="post">
          <button type="submit">サインアウト</button>
        </form>
      </div>
    </>
  );
}
ログアウトを用意
ログアウト用として app/routes/logout.tsx と app/routes/logout/index.tsx を用意します。
import { Outlet } from "@remix-run/react";

export default function LogoutRoute() {
  return (
    <>
      <main>
        <Outlet />
      </main>
    </>
  );
}
import type {
  ActionArgs,
  ActionFunction,
  LoaderFunction,
} from "@remix-run/node";
import { redirect } from "@remix-run/node";
import { authenticator } from "~/services/auth.server";

export const action: ActionFunction = async ({ request }: ActionArgs) => {
  return await authenticator.logout(request, { redirectTo: "/" });
};

export const loader: LoaderFunction = async () => {
  return redirect("/");
};
動かしてみる
サインイン成功
実際に動かしてセッションが作成されているか確認してみましょう。以下のコマンドをターミナルに入力してhttp://localhost:3000を開きます。
npm run dev
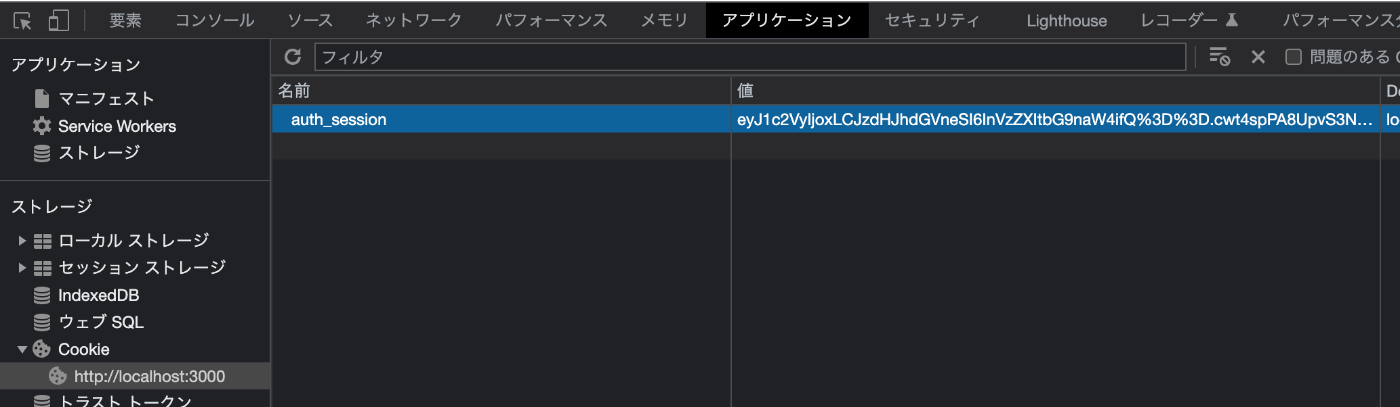
Google Chrome のその他ツール → デベロッパーツールをクリックし、アプリケーションタブをクリックします。左の項目の中から Cookie→http://localhost:3000 をクリックします。
画面上でメールアドレスとパスワードを入力し、Sign In をクリックします。すると/success 画面に遷移します。この時の Cookie を確認すると、名前が auth_session の項目が作成され、値が入ります。これは Sign In ボタンを押したら app/routes/_index.tsx の action を通って authenticator が動きます。getSession()や commitSession()をしなくても remix-auth がセッションのを取得して作成をよしなに行なってくれます。セッションの作成に成功すると success 画面に遷移します。
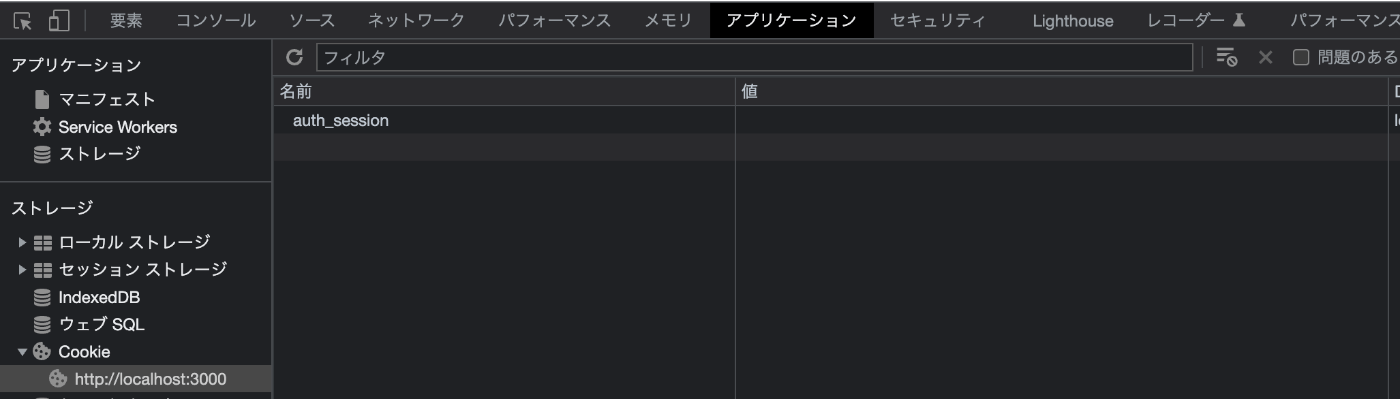
サインアウトボタンをクリックします。すると auth_session の値が削除されサインインの画面に戻ってきます。
サインイン失敗
次にサインインを失敗させてみます。app/services/auth.server.ts と app/routes/_index.tsx を修正します。
import { Authenticator } from "remix-auth";
import { sessionStorage } from "./session.server";
import { FormStrategy } from "remix-auth-form";
import { login } from "./login.server";

export let authenticator = new Authenticator<number>(sessionStorage);

authenticator.use(
  new FormStrategy(async ({ form }) => {
    let email = form.get("email");
    let password = form.get("password");
    let userId = await login(String(email), String(password));
+   throw new Error("ログインに失敗しました");
    return userId;
  }),
  "user-login"
);
import type { V2_MetaFunction } from "@remix-run/react";
import type { ActionArgs, LoaderArgs } from "@remix-run/node";
import { Form } from "@remix-run/react";
import { authenticator } from "~/services/auth.server";

export const meta: V2_MetaFunction = () => {
  return [{ title: "New Remix App" }];
};

export default function Index() {
  return (
    <>
      <Form method="post">
        <input type="email" name="email" required />
        <input
          type="password"
          name="password"
          autoComplete="current-password"
          required
        />
        <button>Sign In</button>
      </Form>
    </>
  );
}

export async function action({ request }: ActionArgs) {
  return await authenticator.authenticate("user-login", request, {
    successRedirect: "/success",
-   failureRedirect: "/",
  });
}
それではもう一度ログインしてみましょう。するとログインに失敗し401 Unauthorizedが表示されます。また、 Cookie の auth_session に値は入りません。
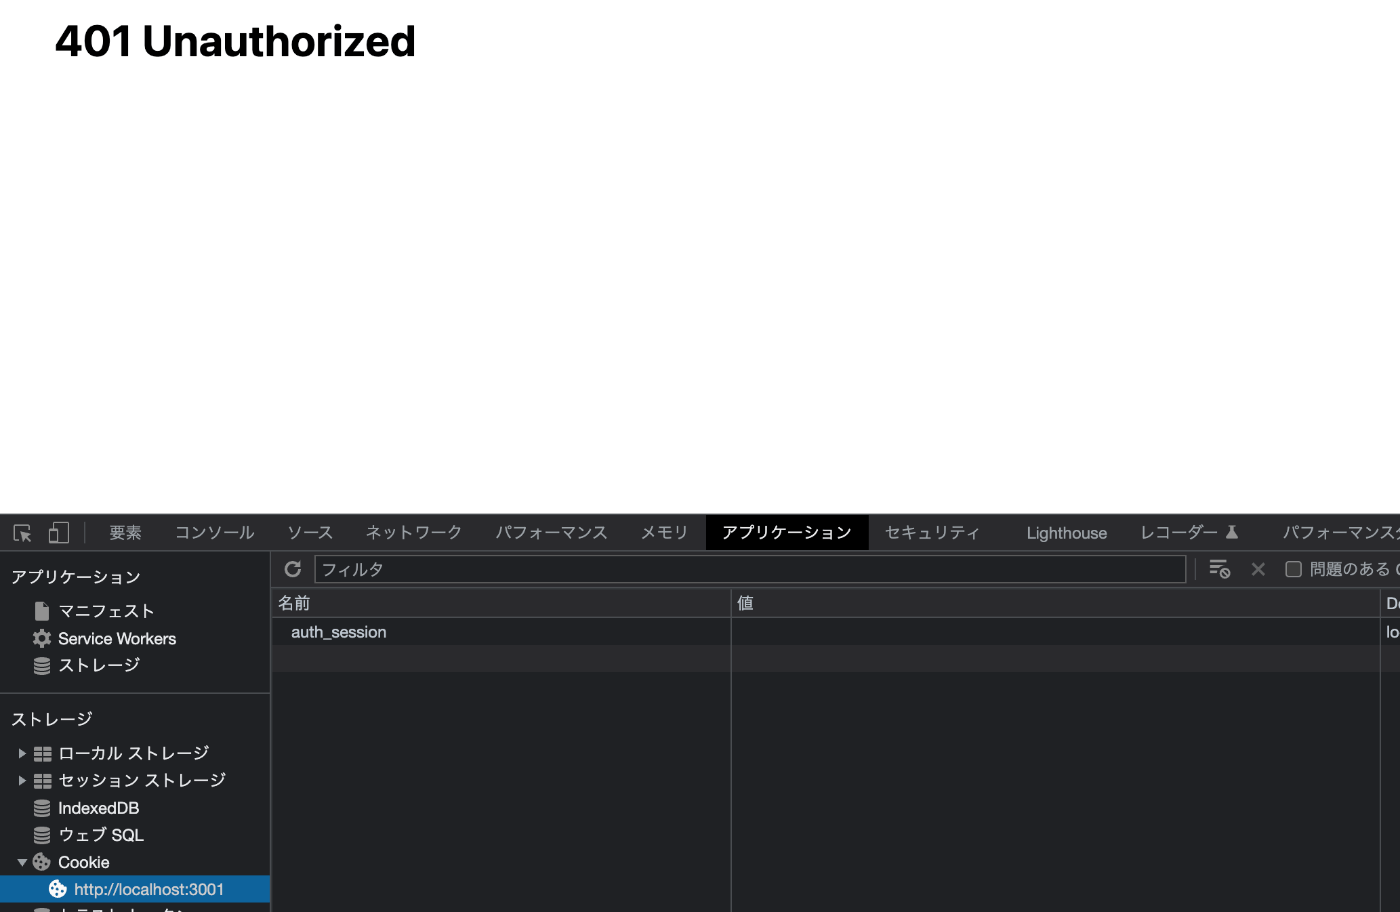
なぜ 401 が返ってくるのかというと、remix-auth で認証プロセスでエラーが発生すると、401 Unauthorizedがスローされる仕様になっているためです。今回は省いていますが、CatchBoundaryを使用すると任意のエラーメッセージを表示させることができます。
認証されているかを確認する
ログイン後に表示するダッシュボードのような画面は、認証されている場合のみ表示されるようにしたいかと思います。認証されていなければログイン画面に強制的に遷移させる場合もあるかと思います。
そのような場合は loader()でisAuthenticated()を呼び出し、認証されていればそのまま、認証されていなければログイン画面に遷移させることができます。
app/routes/_index.tsx を修正しましょう。
+ import type { LoaderArgs } from "@remix-run/node";
+ import { authenticator } from "~/services/auth.server";

+ export async function loader({ request }: LoaderArgs) {
+   return await authenticator.isAuthenticated(request, {
+     failureRedirect: "/",
+   });
+ }

export default function SuccessIndex() {
  return (
    <>
      <div>ログイン成功しました。</div>
      <div>
        <form action="/logout" method="post">
          <button type="submit">サインアウト</button>
        </form>
      </div>
    </>
  );
}
また、app/services/auth.server.ts のthrow new Error("ログインに失敗しました");は削除しておきます。
再度npm run devでサーバーを立ち上げてログインせずに/success に移動してみましょう。するとログイン画面にリダイレクトされます。
最後に
今回は remix-auth の実装を行いました。
remix-auth を使うとセッションの作成や破棄を気にせず認証を実装することができます。
GitHubには他の使い方として、認証成功・失敗時に特定のページに遷移させるのではなく、返ってきた値を使って action 内で処理を行ったり、セッションキーの変更を行ったりすることができます。
自分の用途に合わせてうまく使っていきましょう!
Discussion