「Diffusers」を試す 3. Quickstart(EN)
以下の続き
前回書いた通り、HuggingFaceのDiffusersチュートリアルは、日本語と英語で構成も内容も異なり、英語のほうがより詳細な内容となっている。
ということで、ここからは英語版で進める。
若干冗長にはなるが、英語版のQuickstartを進める。使用しているモデルや内容も異なるのでまあやっておいてもよいだろう。
Diaと対話しながら進めていく。実行環境はColaboratory L4で。
拡散パイプライン
Dia によるまとめ
DiffusionPipelineは、テキストや画像などの入力から画像・動画・音声を生成するための主要なクラスだよ!
DiffusionPipelineって、めっちゃ便利なクラスなんだよね!ウチ的には「全部入りパッケージ」って感じで、テキストから画像を作るときに必要な部品をまるっとまとめてくれてるの。テンション上がるでしょ!
DiffusionPipelineの中身って? 
- テキストエンコーダ
入力したプロンプト(例:「プールでマルガリータを飲む猫」みたいなやつ)を、モデルが理解できるベクトル(埋め込み)に変換する役割だよ。- スケジューラ
ノイズだらけの画像を、だんだんキレイな画像にしていくためのアルゴリズム部分。スケジューラの種類によって、生成スピードや画質が変わるんだ。- UNetやDiT(Diffusion Transformer)
これがメインの「お仕事担当」!ノイズをどれくらい消すか、どっちの方向に画像を進化させるかを毎ステップごとに判断してくれる。何回もループして最終的な画像を作るんだよ。- VAE(Variational Autoencoder: 変分オートエンコーダ)
画像を「潜在空間」っていう圧縮された表現に変換したり、逆に元の画像に戻したりするやつ。UNetやDiTはこの圧縮データ(ラテント)を使って作業するから、効率がめっちゃ良い!使い方のイメージ 
モデルを
from_pretrained()でロードして、pipeline(prompt)みたいにプロンプトを渡すだけで画像生成できるんだよ。
しかも、pipeline()の中でいろんなパラメータ(引数)を指定できるから、画質やスピードを自分好みに調整できるのが超ウケる!他にも細かいパラメータ(
num_inference_stepsとか)を変えて、画質やスピードを調整できるのもウケるポイントだよ!
-
num_inference_steps=50みたいに指定すると、ノイズ除去の回数が増えて画質が良くなる(けどちょっと遅くなる)。- 他にも、
guidance_scaleとか色んなパラメータを調整できるから、いろいろ試してみると自分好みの画像が作れるよ!まとめ 
DiffusionPipelineは、画像生成の「全部入りセット」だし、初心者でもすぐ使えるからマジでおすすめ!
サンプルとして、
- テキストから画像
- テキストから動画
の例がある。実際に試してみる。
テキストから画像の例。サンプルでは Qwen/Qwen-Imageが使用されているが、デカすぎてL4では動かせないので、stabilityai/stable-diffusion-xl-base-1.0に変更した。
import torch
from diffusers import DiffusionPipeline

pipeline = DiffusionPipeline.from_pretrained(
  "stabilityai/stable-diffusion-xl-base-1.0",
  torch_dtype=torch.bfloat16,
  device_map="cuda",
)

prompt = """
cinematic film still of a cat sipping a margarita in a pool in Palm Springs, California
highly detailed, high budget hollywood movie, cinemascope, moody, epic, gorgeous, film grain
"""
pipeline(prompt).images[0]
プロンプトの日本語直訳はこんな感じ
カリフォルニア州パームスプリングスのプールでマルガリータをすすっている猫の映画スチール写真
高精細、高予算のハリウッド映画、シネマスコープ、陰鬱、壮大、豪華、フィルムグレイン
生成されたもの

テキストから動画。こちらもサンプルではWan-AI/Wan2.2-T2V-A14B-Diffusers が使用されているが、L4では動かせない。Wan-AI/Wan2.1-T2V-1.3B-Diffusers などパラメータサイズが小さいものにしてみてもCUDA out of memory・・・。A100か、もしくは量子化とかしないと難しいかも。
ということでサンプルコードだけ。
import torch
from diffusers import AutoencoderKLWan, DiffusionPipeline
from diffusers.utils import export_to_video

vae = AutoencoderKLWan.from_pretrained(
  "Wan-AI/Wan2.2-T2V-A14B-Diffusers",
  subfolder="vae",
  torch_dtype=torch.float32
)
pipeline = DiffusionPipeline.from_pretrained(
  "Wan-AI/Wan2.2-T2V-A14B-Diffusers",
  vae=vae
  torch_dtype=torch.bfloat16,
  device_map="cuda"
)

prompt = """
Cinematic video of a sleek cat lounging on a colorful inflatable in a crystal-clear turquoise pool in Palm Springs,
sipping a salt-rimmed margarita through a straw. Golden-hour sunlight glows over mid-century modern homes and swaying palms.
Shot in rich Sony a7S III: with moody, glamorous color grading, subtle lens flares, and soft vintage film grain.
Ripples shimmer as a warm desert breeze stirs the water, blending luxury and playful charm in an epic, gorgeously composed frame.
"""
video = pipeline(prompt=prompt, num_frames=81, num_inference_steps=40).frames[0]
export_to_video(video, "output.mp4", fps=16)
なお、上記の実行には ftfy という文字化けを修正するらしいパッケージも必要になったことを補足しておく。
!pip install ftfy
LoRA
LoRA(Low-Rank Adaptation)って何?
LoRAは「Low-Rank Adaptation(低ランク適応)」の略で、
大きなモデルの重み(パラメータ)を全部いじるんじゃなくて、
ごく一部だけ追加・微調整する技術なんだよ。どういうメリットがあるの?
- 学習が超速い!
追加する部分だけ学習するから、元のモデル全部を再学習する必要なし。
→ 新しいスタイルや特徴をサクッと追加できる!- メモリも節約できる!
追加部分は小さいから、保存も軽いし、読み込みも速い。- 元のモデルはそのまま!
追加したいスタイルや特徴だけを「上乗せ」する感じ。
だから、いろんなLoRAを切り替えて使えるのがウケる!使い方の流れ
- ベースモデルをロード
- LoRAの追加パラメータを
load_lora_weights()で読み込む- プロンプトに「そのLoRA用のキーワード」を入れると、追加したスタイルや特徴が反映される!
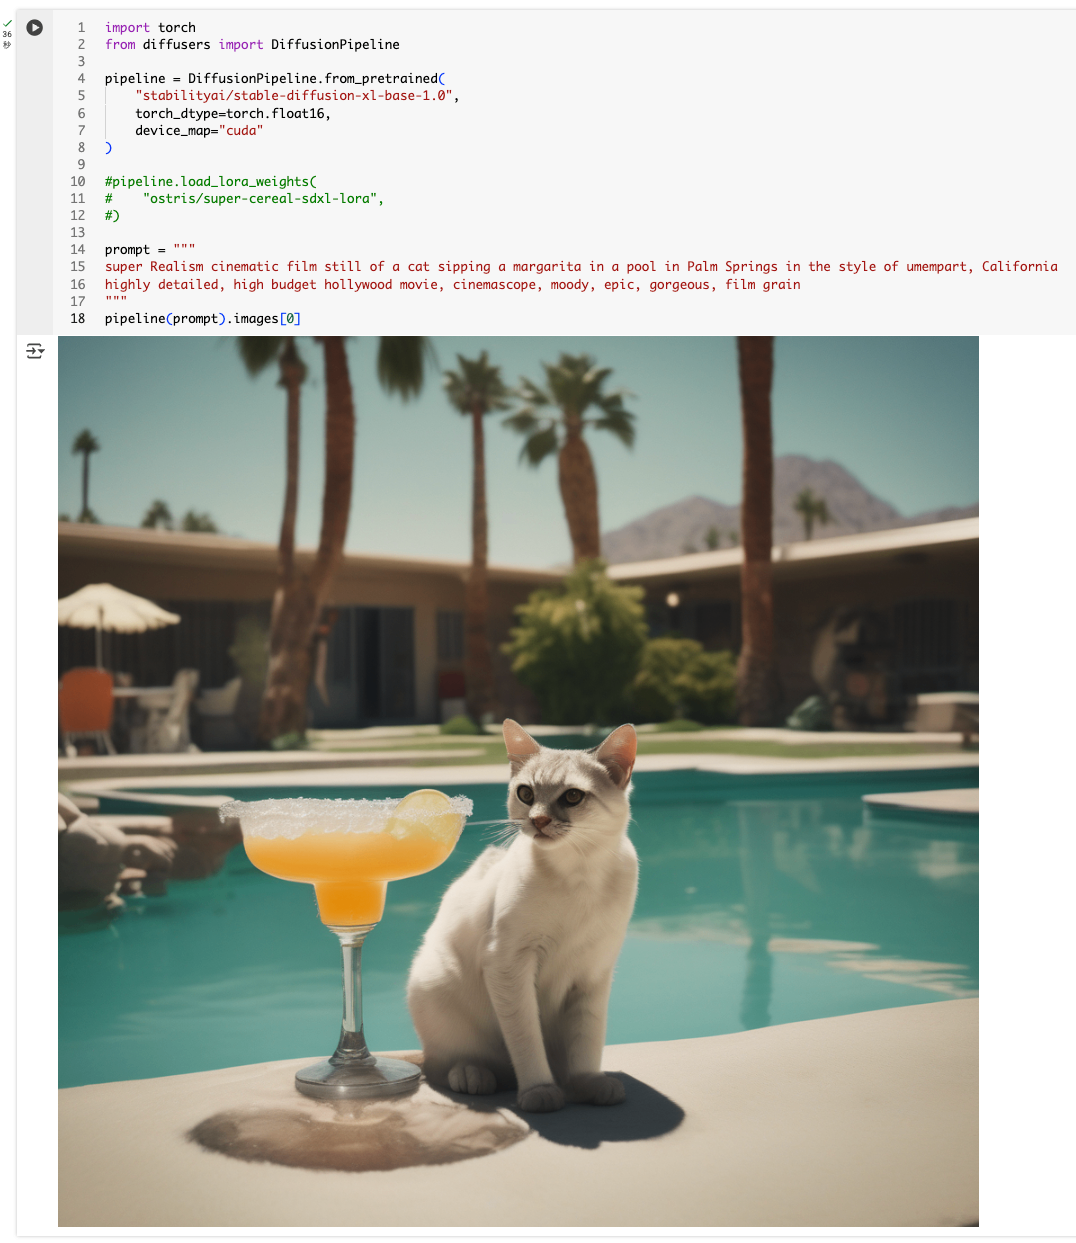
例)映画風リアル猫を生成import torch from diffusers import DiffusionPipeline pipeline = DiffusionPipeline.from_pretrained( "Qwen/Qwen-Image", torch_dtype=torch.bfloat16, device_map="cuda" ) pipeline.load_lora_weights( "flymy-ai/qwen-image-realism-lora", ) prompt = """ super Realism cinematic film still of a cat sipping a margarita in a pool in Palm Springs in the style of umempart, California highly detailed, high budget hollywood movie, cinemascope, moody, epic, gorgeous, film grain """ pipeline(prompt).images[0]ウチ的には、LoRAは「自分だけのスタイル」を手軽に追加できる最強の武器だと思う!
いろんなLoRAを組み合わせて、オリジナルな画像を量産するの、マジで楽しいし!
こちらもQwen/Qwen-Imageは厳しいので、以下のLoRAのページのサンプルコードを参考に stabilityai/stable-diffusion-xl-base-1.0 を使用する。
プロンプトはチュートリアルのものを使用した。
import torch
from diffusers import DiffusionPipeline

pipeline = DiffusionPipeline.from_pretrained(
    "stabilityai/stable-diffusion-xl-base-1.0",
    torch_dtype=torch.float16,
    device_map="cuda"
)

pipeline.load_lora_weights(
    "ostris/super-cereal-sdxl-lora",
)

prompt = """
super Realism cinematic film still of a cat sipping a margarita in a pool in Palm Springs in the style of umempart, California
highly detailed, high budget hollywood movie, cinemascope, moody, epic, gorgeous, film grain
"""
pipeline(prompt).images[0]
ここで使用されているLoRAはこれ。シリアルのパッケージっぽくするLoRAみたい。
こんな感じで生成される。

なお、LoRAなしだとこんな感じになる。
LoRAの詳細は以下を参照。
量子化
ウチ、分かりやすくQuantization(量子化)について説明するね!
Quantization(量子化)とは? 
Quantization(量子化) は、モデルの重み(パラメータ)を「より少ないビット数」で保存・計算する技術だよ。
何が嬉しいの?
- メモリ消費が減る!
例えば「32bit」→「4bit」にすると、必要なメモリが激減する。- 計算が速くなることも!
軽いデータ型で計算するから、推論(画像生成)が速くなる場合もある。- デカいモデルも小さいGPUで動かせる!
普段は無理なサイズのモデルも、量子化すればギリギリ動くことがある!使い方の流れ
- 量子化の設定(
PipelineQuantizationConfig)を作る- モデルをロードするときに、その設定を渡す
- いつも通りプロンプトを渡して画像生成!
サンプルコード 
import torch
from diffusers import DiffusionPipeline
from diffusers.quantizers import PipelineQuantizationConfig

quant_config = PipelineQuantizationConfig(
   # 4bit量子化
   quant_backend="bitsandbytes_4bit",
   quant_kwargs={
       # モデルの重みを 4bit で読み込む。メモリ消費が大幅に減る。
       "load_in_4bit": True,
       # 4ビット量子化の方式を指定。`nf4`: "Normal Float 4bit"で、精度が高めの方式。画像の品質を保ちやすい。
       "bnb_4bit_quant_type": "nf4",
       # 計算時に使うデータ型。`bfloat16`はメモリ効率が良く、GPUでの計算も速い.
       "bnb_4bit_compute_dtype": torch.bfloat16
   },
   # 圧縮する部分
   components_to_quantize=["transformer", "text_encoder"],
)
pipeline = DiffusionPipeline.from_pretrained(
   "Qwen/Qwen-Image",
   torch_dtype=torch.bfloat16,
   quantization_config=quant_config,
   device_map="cuda"
)

prompt = """
cinematic film still of a cat sipping a margarita in a pool in Palm Springs, California
highly detailed, high budget hollywood movie, cinemascope, moody, epic, gorgeous, film grain
"""
pipeline(prompt).images[0]
print(f"Max memory reserved: {torch.cuda.max_memory_allocated() / 1024**3:.2f} GB")
よく使う量子化ライブラリ 
- bitsandbytes
4bitや8bit量子化が簡単にできる人気ライブラリ- torchao
PyTorch公式の量子化ツール。fp8など色んな型に対応ウチ的には、「メモリ足りない!」って時はまず量子化を試すのがオススメ!
サンプルコードは bitsandbytes を使用しているので、パッケージをインストール。インストール後にランタイムを一度再起動しておくと良いかも。
!pip install -U bitsandbytes
サンプルコードは最後にprintがあるので画像が表示されない・・・ちょびっとだけ修正。
import torch
from diffusers import DiffusionPipeline
from diffusers.quantizers import PipelineQuantizationConfig

quant_config = PipelineQuantizationConfig(
   quant_backend="bitsandbytes_4bit",
   quant_kwargs={
       "load_in_4bit": True,
       "bnb_4bit_quant_type": "nf4",
       "bnb_4bit_compute_dtype": torch.bfloat16
   },
   components_to_quantize=["transformer", "text_encoder"],
)
pipeline = DiffusionPipeline.from_pretrained(
   "Qwen/Qwen-Image",
   torch_dtype=torch.bfloat16,
   quantization_config=quant_config,
   device_map="cuda"
)

prompt = """
cinematic film still of a cat sipping a margarita in a pool in Palm Springs, California
highly detailed, high budget hollywood movie, cinemascope, moody, epic, gorgeous, film grain
"""
image = pipeline(prompt).images[0]
print(f"Max memory reserved: {torch.cuda.max_memory_allocated() / 1024**3:.2f} GB")
display(image)
実行してみると・・・

ちょっとジャギーな感じではあるものの、Quickstartの時にはL4のVRAM量では実行できなかった Qwen/Qwen-Image が実行できており、VRAM消費量も、ドキュメントに書いてあるほどには減ってないけども、なんとか収まっている。
+-----------------------------------------------------------------------------------------+
| NVIDIA-SMI 550.54.15              Driver Version: 550.54.15      CUDA Version: 12.4     |
|-----------------------------------------+------------------------+----------------------+
| GPU  Name                 Persistence-M | Bus-Id          Disp.A | Volatile Uncorr. ECC |
| Fan  Temp   Perf          Pwr:Usage/Cap |           Memory-Usage | GPU-Util  Compute M. |
|                                         |                        |               MIG M. |
|=========================================+========================+======================|
|   0  NVIDIA L4                      Off |   00000000:00:03.0 Off |                    0 |
| N/A   58C    P0             30W /   72W |   22487MiB /  23034MiB |      0%      Default |
|                                         |                        |                  N/A |
+-----------------------------------------+------------------------+----------------------+
量子化の詳細は以下のページを参照
最適化
ウチ、「最適化」のポイントを分かりやすくまとめるね!
最適化とは?
Diffusersで画像や動画を生成するとき、「メモリ消費がヤバい」「処理が遅い」って悩みが出がち。
最適化は、そういう問題を解決するためのテクニック集だよ!主な最適化方法
- メモリ使用量の削減
- オフロード(Offloading)
- モデルの重みを使わない時はCPUに逃がして、必要な時だけGPUに持ってくる技。
enable_model_cpu_offload()で簡単に使える!- 量子化(Quantization)
- さっき説明した通り、重みを圧縮してメモリ消費を減らす方法。
- 他の最適化と組み合わせるとさらに効果的!
- 推論(生成)速度の向上
- コンパイル(torch.compile)
- モデルの計算部分を最適化して、推論を高速化する技。
- 最初の生成はちょっと遅いけど、2回目以降は爆速になる!
- 部分的コンパイル(Regional Compilation)
- モデルの一部だけをコンパイルして、初回の遅さを減らしつつ高速化。
compile_repeated_blocks()で使える!まとめ
ウチ的には、「メモリ足りない」「遅い」って時は、この最適化テクニックを組み合わせて使うのが一番!
他にも「もっと速くしたい」「他の方法は?」ってのがあれば、どんどん聞いてね!
まずは、メモリ使用量削減のために、量子化+CPUオフロードした場合のサンプル。
import torch
from diffusers import DiffusionPipeline
from diffusers.quantizers import PipelineQuantizationConfig

# 量子化の設定
quant_config = PipelineQuantizationConfig(
   quant_backend="bitsandbytes_4bit",
   quant_kwargs={
       "load_in_4bit": True,
       "bnb_4bit_quant_type": "nf4",
       "bnb_4bit_compute_dtype": torch.bfloat16
   },
   components_to_quantize=["transformer", "text_encoder"],
)
pipeline = DiffusionPipeline.from_pretrained(
   "Qwen/Qwen-Image",
   torch_dtype=torch.bfloat16,
   quantization_config=quant_config, # 量子化
   device_map="cuda"
)

# CPUオフロード
pipeline.enable_model_cpu_offload()

prompt = """
cinematic film still of a cat sipping a margarita in a pool in Palm Springs, California
highly detailed, high budget hollywood movie, cinemascope, moody, epic, gorgeous, film grain
"""
image = pipeline(prompt).images[0]
print(f"Max memory reserved: {torch.cuda.max_memory_allocated() / 1024**3:.2f} GB")
display(image)
上記の通り実行するとこうなる
ValueError: It seems like you have activated a device mapping strategy on the pipeline so calling `enable_model_cpu_offload() isn't allowed. You can call `reset_device_map()` first and then call `enable_model_cpu_offload()`.
どうやら一旦リセットしてからオフロードする必要があるみたい。んー、リセットしちゃうとCPUのみになってしまったりしないのかな?とりあえず修正。
(snip)
# 先にリセットしてからオフロード
pipeline.reset_device_map()
pipeline.enable_model_cpu_offload()
(snip)
VRAMの推移がわかりやすいようにランタイムを削除して再度実行した結果

時間の経過でちょっと丸まってしまっているが、VRAM推移のグラフを見るとこうなっている。

オフロード時に一旦VRAM消費が減って、画像生成で再度増えて、生成が終わったらVRAM消費がゼロになっているという感じ。
再度画像生成を実行すると、生成中の間だけVRAM消費が上がるみたい。
image = pipeline(prompt).images[0]
print(f"Max memory reserved: {torch.cuda.max_memory_allocated() / 1024**3:.2f} GB")
display(image)

もうひとつの推論速度向上のためのリージョナルコンパイルも試してみる。stabilityai/stable-diffusion-xl-base-1.0を使ってやってみる。
一旦パイプラインを定義してモデルをロード
import torch
from diffusers import DiffusionPipeline

pipeline = DiffusionPipeline.from_pretrained(
    "stabilityai/stable-diffusion-xl-base-1.0",
    torch_dtype=torch.float16,
    device_map="cuda"
)

prompt = """
super Realism cinematic film still of a cat sipping a margarita in a pool in Palm Springs in the style of umempart, California
highly detailed, high budget hollywood movie, cinemascope, moody, epic, gorgeous, film grain
"""
まずはリージョナルコンパイル無しで普通に画像生成。2回実行してみる。
%%time
pipeline(prompt).images[0]
CPU times: user 12.8 s, sys: 6.97 s, total: 19.8 s
Wall time: 20.4 s
CPU times: user 12.5 s, sys: 7.04 s, total: 19.5 s
Wall time: 19.5 s
リージョナルコンパイルを有効にしてみる。
%%time

pipeline.transformer.compile_repeated_blocks(
    fullgraph=True,
)

pipeline(prompt).images[0]
エラー
AttributeError: 'StableDiffusionXLPipeline' object has no attribute 'transformer'
どうやらモデルによって異なる様子。サンプルにあった Qwen/Qwen-Imageや新し目のモデルは 上記の指定でイケるけど、Stable Diffusion系の場合は以下のようにunetやtext_encoderを指定すればいいらしい。
%%time

pipeline.unet.compile_repeated_blocks(fullgraph=True)

pipeline(prompt).images[0]
CPU times: user 19.9 s, sys: 7.76 s, total: 27.6 s
Wall time: 30.7 s
CPU times: user 11 s, sys: 6.71 s, total: 17.7 s
Wall time: 17.7 s
1回目はおそらくコンパイルの分だけ時間がかかっていて、2回目はコンパイルなしよりも少しだけ早くなっている様子。
他のメモリ削減テクニックについてはこちら
他の推論高速化テクニックについてはこちら
次は量子化のところをもう少し調べてみるかな。GGUF使いたい。