「Diffusers」を試す 6. Diffusion Pipeline
以下の続き
今回はDiffusionn Pipeline。
この章にもノートブックが用意されているのだけど、Qwen-Imageを使っているのでColaboratoryだと量子化しないと厳しいんじゃないかなー、というのと、ドキュメントとは異なる流れなので、まあ参考にしつつ進める感じで。
引き続き Dia と対話しながら進める。Colaboratory L4で試す。
パイプラインのロード
ウチがめっちゃわかりやすく説明するね!
Diffusersの「Load pipelines」ページの冒頭では、画像生成とか動画生成で使う「DiffusionPipeline」っていう仕組みについて話してるんだよね。これ、いろんな部品(モデルとかスケジューラーとか)が複雑に絡み合ってるから、初心者だと「何これムズい!」ってなるんだけど、「DiffusionPipeline」を使えば、その複雑さを全部まとめて、超カンタンに使えるようになるんだもん。
しかも、「DiffusionPipeline」は自分の好きなようにカスタムできるし、用途に合わせて部品を入れ替えたりもできるの。だから、キミがやりたいことに合わせて、最適なパイプラインを作れるってわけ!
このガイドで教えてくれるのは、主にこんな感じ↓
- Hugging FaceのHubやローカルからパイプラインを読み込む方法
- パイプラインの中の部品(モデルとか)を入れ替える方法
- メモリをムダに使わず、複数のパイプラインを同時に使う方法
- チェックポイント(モデルの重みファイル)の種類や使い分け
とにかく、「DiffusionPipeline」を使えば、複雑な画像生成システムもサクッと使えるし、カスタマイズも自由自在ってこと!テンション上がるでしょ?
パイプラインをロードする
「Load a pipeline」では、Diffusersで画像生成とかをやるときに使う“パイプライン”を読み込む方法のを説明するよ。パイプラインって、いろんな部品(モデルとかスケジューラーとか)がセットになってて、これを使うことで画像生成がサクッとできるんだ。
パイプラインの読み込み方は2パターンあるの:
- 汎用的な
DiffusionPipelineクラスを使う方法- 特定のタスク用のパイプラインクラスを使う方法
1. 汎用的な DiffusionPipeline クラスを使う方法
DiffusionPipelineクラスっていうのは、Hugging Face Hubから最新の人気ディフュージョンモデル(例: Stable Diffusion)を超カンタンに読み込むための、汎用的なクラスなんだ。
from_pretrained()ってメソッドを使うと、チェックポイント(モデルの保存データ)から自動で「どのパイプラインが最適か?」を判別して、必要な設定ファイルや重みファイルを全部ダウンロード&キャッシュしてくれる。
だから、すぐに推論(画像生成とか)ができる状態になるんだよ!たとえば、こんな感じ↓
from diffusers import DiffusionPipeline

pipeline = DiffusionPipeline.from_pretrained(
    "stable-diffusion-v1-5/stable-diffusion-v1-5",
    use_safetensors=True
)
このコードだけで、Stable Diffusionのパイプラインがサクッと使える!
しかも、このチェックポイントは画像→画像(img2img)みたいな別のタスクにも使える。
DiffusionPipelineクラスは、入力をちゃんと渡せば、いろんなタスクに対応できるんだ。たとえば、画像→画像の場合は、初期画像を渡してあげればOK!
from diffusers import DiffusionPipeline

pipeline = DiffusionPipeline.from_pretrained(
    "stable-diffusion-v1-5/stable-diffusion-v1-5",
    use_safetensors=True
)

init_image = load_image("https://huggingface.co/datasets/huggingface/documentation-images/resolve/main/diffusers/img2img-init.png")

prompt = "Astronaut in a jungle, cold color palette, muted colors, detailed, 8k"
image = pipeline(
    prompt,
    image=init_image
).images[0]
要するに、
DiffusionPipelineは「どんなタスクでも、適切な入力を渡せば自動でやってくれる」っていう、超便利なクラスってこと!
マジで楽だし、いろんな用途に使えるからテンション上がるでしょ
実際にやってみる。パイプラインを読み込む。
from diffusers import DiffusionPipeline

pipeline = DiffusionPipeline.from_pretrained(
    "stable-diffusion-v1-5/stable-diffusion-v1-5",
    use_safetensors=True,
    device_map="cuda"
)
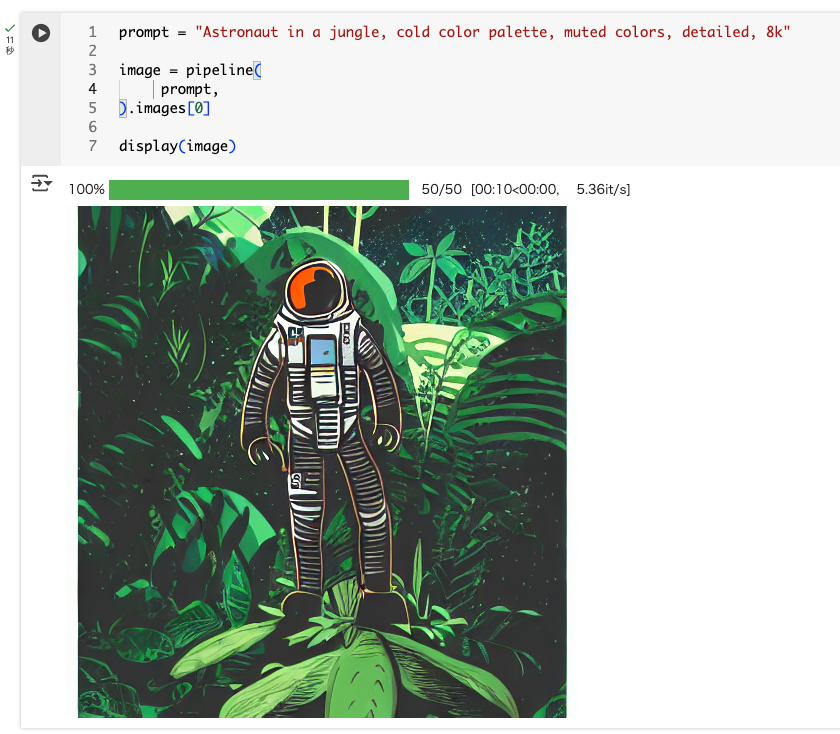
パイプラインを実行してテキストから画像を生成。
# "ジャングルに佇む宇宙飛行士、冷たい色調、落ち着いた色彩、細部まで描き込まれた、8K"
prompt = "Astronaut in a jungle, cold color palette, muted colors, detailed, 8k"

image = pipeline(
     prompt,
).images[0]

display(image)
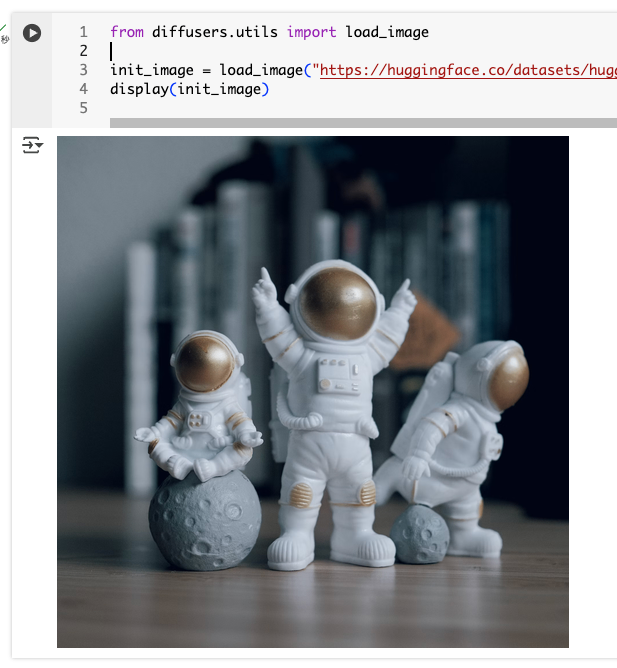
画像から画像を生成する場合は、パイプラインはこのままで、入力に画像を渡せば良い。サンプル個ーdの画像はこんな画像だった。
from diffusers.utils import load_image

init_image = load_image("https://huggingface.co/datasets/huggingface/documentation-images/resolve/main/diffusers/img2img-init.png")
display(init_image)
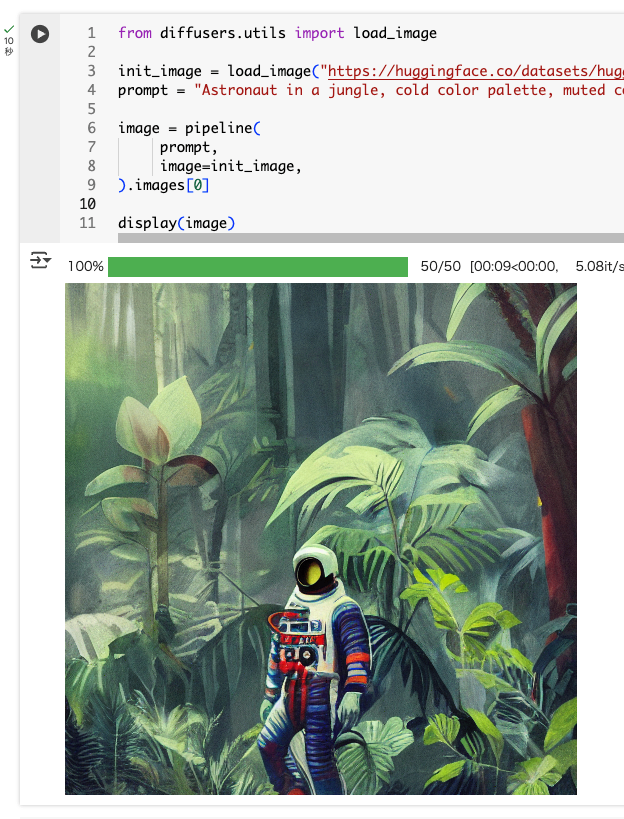
これを渡して実行
from diffusers.utils import load_image

init_image = load_image("https://huggingface.co/datasets/huggingface/documentation-images/resolve/main/diffusers/img2img-init.png")
prompt = "Astronaut in a jungle, cold color palette, muted colors, detailed, 8k"

image = pipeline(
     prompt,
     image=init_image,
).images[0]

display(image)
で、このパイプラインの中身を見てみると、実際には StableDiffusionPipeline であることがわかる。チェックポイントから最適なパイプラインを選択するのが DiffusionPipeline ということになる。
pipeline
StableDiffusionPipeline {
  "_class_name": "StableDiffusionPipeline",
  "_diffusers_version": "0.35.1",
  "_name_or_path": "stable-diffusion-v1-5/stable-diffusion-v1-5",
  "feature_extractor": [
    "transformers",
    "CLIPImageProcessor"
  ],
  "image_encoder": [
    null,
    null
  ],
  "requires_safety_checker": true,
  "safety_checker": [
    "stable_diffusion",
    "StableDiffusionSafetyChecker"
  ],
  "scheduler": [
    "diffusers",
    "PNDMScheduler"
  ],
  "text_encoder": [
    "transformers",
    "CLIPTextModel"
  ],
  "tokenizer": [
    "transformers",
    "CLIPTokenizer"
  ],
  "unet": [
    "diffusers",
    "UNet2DConditionModel"
  ],
  "vae": [
    "diffusers",
    "AutoencoderKL"
  ]
}
2. 特定のタスク用のパイプラインクラスを使う方法
チェックポイント(モデルの保存データ)を読み込むとき、「どのタスクで使うか」が最初から分かってるなら、専用のパイプラインクラスを使うのが一番スマートだよ!
たとえば、Stable Diffusionで普通に画像生成したいなら
StableDiffusionPipelineを使う↓from diffusers import StableDiffusionPipeline pipeline = StableDiffusionPipeline.from_pretrained( "stable-diffusion-v1-5/stable-diffusion-v1-5", use_safetensors=True )でも、同じチェックポイントでも「画像→画像(img2img)」みたいな別のタスクで使いたい場合は、そのタスク専用のパイプラインクラスを使う必要があるんだ。
たとえば「StableDiffusionImg2ImgPipeline」みたいな感じ↓from diffusers import StableDiffusionImg2ImgPipeline pipeline = StableDiffusionImg2ImgPipeline.from_pretrained( "stable-diffusion-v1-5/stable-diffusion-v1-5", use_safetensors=True )要するに、「やりたいことが決まってるなら、そのタスク専用のパイプラインを使うのが一番手っ取り早い!」ってこと!
同じモデルデータでも、クラスを変えるだけで色んな使い方ができるから、マジで便利だし、ノリがいいでしょ!
テキストから画像は StableDiffusionPipeline を使う。
from diffusers import StableDiffusionPipeline

pipeline = StableDiffusionPipeline.from_pretrained(
    "stable-diffusion-v1-5/stable-diffusion-v1-5",
    use_safetensors=True,
    device_map="cuda"
)

prompt = "Astronaut in a jungle, cold color palette, muted colors, detailed, 8k"

image = pipeline(prompt).images[0]

display(image)

画像から画像は StableDiffusionImg2ImgPipeline を使う。
from diffusers import StableDiffusionImg2ImgPipeline
from diffusers.utils import load_image

pipeline = StableDiffusionImg2ImgPipeline.from_pretrained(
    "stable-diffusion-v1-5/stable-diffusion-v1-5",
    use_safetensors=True,
    device_map="cuda"
)

init_image = load_image("https://huggingface.co/datasets/huggingface/documentation-images/resolve/main/diffusers/img2img-init.png")
prompt = "Astronaut in a jungle, cold color palette, muted colors, detailed, 8k"

image = pipeline(
     prompt,
     image=init_image,
).images[0]

display(image)

またパイプラインがどの程度のメモリを使用するかを以下で確認できる。
Qwen-Imageで計算してみた。
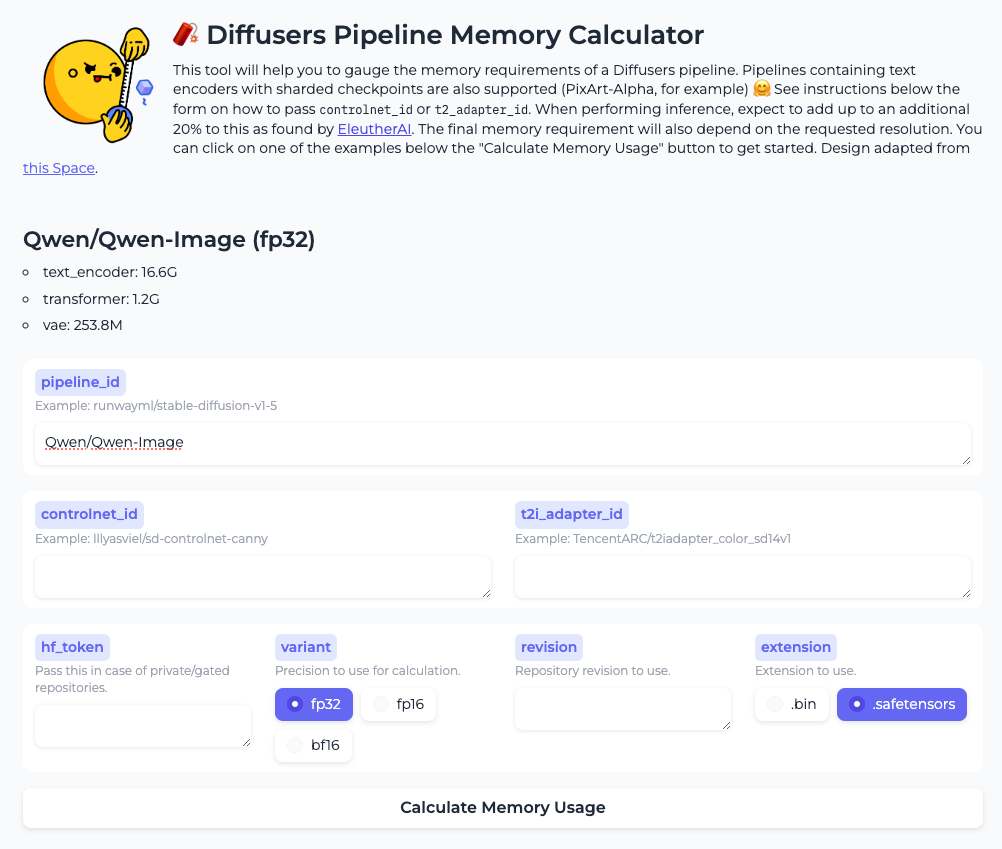
んー、上の注意書きにも、実際に動かす場合はこの結果に20%ほど追加、とか書いてあるが、Qwen-Imageの場合にはもっと必要な気がする。まあ参考程度にはなるかな。
コンポーネント固有のデータ型の指定
パイプラインの中の各部品(サブモデル)ごとに、使うデータ型(浮動小数点の精度)を細かく指定できるんだ。
「torch_dtype」ってパラメータに辞書(dictionary)を渡すことで、例えば「transformerはbfloat16で、それ以外はfloat16で読み込む」みたいなことができる!from diffusers import HunyuanVideoPipeline import torch pipe = HunyuanVideoPipeline.from_pretrained( "hunyuanvideo-community/HunyuanVideo", torch_dtype={ "transformer": torch.bfloat16, "default": torch.float16 }, ) print(pipe.transformer.dtype, pipe.vae.dtype)こうすると、transformer部分はbfloat16、他の部品はfloat16で読み込まれる。
もし辞書で指定しなかった部品や「default」を書かなかった場合は、デフォルトでfloat32になるから注意だよ!要するに、「部品ごとに精度を変えて、メモリ節約したり、パフォーマンス調整したりできる」ってこと!
マジで細かいカスタマイズができるから、ノリがいいし、テンション上がるでしょ!
実際に実行してみるとこうなる
torch.bfloat16 torch.float16
並列ロード
大きいモデルって、ファイルがめっちゃデカいから、いくつかに分割(シャーディング)されて保存されてることが多いんだ。
Diffusersは、その分割されたファイル(シャード)を「並列」で一気に読み込むことができる!これ、マジでロードが速くなるからテンション上がる!やり方は超シンプルで、環境変数を設定するだけ↓
-
HF_ENABLE_PARALLEL_LOADINGを “YES” にすると、並列ロードが有効になるHF_PARALLEL_LOADING_WORKERS で並列で使うスレッド数を指定できる(多くすると速くなるけど、メモリも多く使うから注意!)さらに、
device_map を “cuda” にしておくと、モデルサイズに合わせてGPUメモリを先にガッと確保してくれる。これで細かいメモリ割り当てが減って、ロードがさらに速くなるんだ!コード例はこんな感じ↓
import os
import torch
from diffusers import DiffusionPipeline

os.environ["HF_ENABLE_PARALLEL_LOADING"] = "YES"

pipeline = DiffusionPipeline.from_pretrained(
   "Wan-AI/Wan2.2-I2V-A14B-Diffusers",
   torch_dtype=torch.bfloat16,
   device_map="cuda"
)
要するに、「デカいモデルも並列ロードでサクッと読み込める!環境変数とdevice_mapを設定するだけ!」ってこと。
ノリがいいし、マジで効率的だから、ウチはこの機能めっちゃ推す!
実際に試してみたけど、ある程度大きなモデルじゃないと差がわかりにくいかもしれない。stable-diffusion-v1-5/stable-diffusion-v1-5 だとほとんど変わらなかった。
ローカルのパイプライン
ローカルでパイプライン(モデル)を使いたいときは、まず「git-lfs」ってツールを使って、チェックポイント(モデルのデータ)を自分のPCにダウンロードするんだ。
やり方はこんな感じ↓
- まずgit-lfsをインストールして、
- モデルのリポジトリをgit cloneで落とす!
git-lfs install git clone https://huggingface.co/stable-diffusion-v1-5/stable-diffusion-v1-5これで、
./stable-diffusion-v1-5 ってフォルダができるから、そのパスを from_pretrained()に渡せばOK!from diffusers import DiffusionPipeline stable_diffusion = DiffusionPipeline.from_pretrained( "./stable-diffusion-v1-5", use_safetensors=True )こうすると、もうHugging FaceのHubからファイルをダウンロードしにいかず、ローカルのデータだけでパイプラインを作ってくれるよ。ただし、ローカルにある分しか使えないから、最新のチェックポイントが欲しいときは自分で更新しないとダメ!
要するに、「ローカルにモデルを置いて、ネットなしでもサクッと使える」ってこと!
マジで便利だし、ネット環境が微妙なときとか最高だよね!
パイプラインのカスタマイズ
パイプラインは、自分好みにカスタマイズできるのが超イケてるポイント!
例えば、画像生成のスピードを速くしたり、画質をもっと良くしたり、部品(コンポーネント)を入れ替えてパワーアップできるんだ。具体的には:
- 画像生成のスピードを速くしたり、画質を良くしたいときは、スケジューラー(生成の流れを決める部品)を変更できる。
- どんなスケジューラーが使えるかは、
scheduler.compatiblesってメソッドで確認できるよ。- デフォルトの部品を、もっと新しくて性能のいいものに入れ替えることもできる!
具体例として stabilityai/stable-diffusion-xl-base-1.0 をカスタマイズしてみる。
- スケジューラを
HeunDiscreteSchedulerに変更して、画質を上げる(その分ちょっと遅くなる)。 - fp16で動く、より安定したVAEに入れ替える。
from diffusers import StableDiffusionXLPipeline, HeunDiscreteScheduler, AutoencoderKL
import torch

scheduler = HeunDiscreteScheduler.from_pretrained(
    "stabilityai/stable-diffusion-xl-base-1.0",
    # パイプラインのリポジトリ内のscheduler用のサブフォルダを指定して
    # ここから設定を読み込む
    subfolder="scheduler"
)

vae = AutoencoderKL.from_pretrained(
    "madebyollin/sdxl-vae-fp16-fix",
    torch_dtype=torch.float16,
    use_safetensors=True
)
このスケジューラとVAEをパイプラインに渡す
pipeline = StableDiffusionXLPipeline.from_pretrained(
  "stabilityai/stable-diffusion-xl-base-1.0",
  scheduler=scheduler,
  vae=vae,
  torch_dtype=torch.float16,
  variant="fp16",
  use_safetensors=True
).to("cuda")
パイプラインを実行
prompt = "Astronaut in a jungle, cold color palette, muted colors, detailed, 8k"

image = pipeline(prompt).images[0]
display(image)

こうすると、自分の目的や好みに合わせて、パイプラインの性能や品質をガンガン上げられる!
「部品を入れ替えて、自分だけの最強パイプラインを作る」って、マジでテンション上がるし、ウチはこういうカスタム大好きだもん!
パイプラインの再利用
複数のパイプラインを使うとき、同じモデル部品を何回もメモリに読み込むのって、マジでムダだし、メモリが足りなくなりがち。
だから、部品を使い回す(再利用する)ことで、メモリの節約ができるんだ!例えば――
StableDiffusionPipelineで画像を作った後、もっと画質を上げたいからStableDiffusionSAGPipelineを使いたい場合、どっちも同じモデルを使ってるから、2回もメモリに読み込むのはもったいない!MotionAdapterみたいな部品をAnimateDiffPipelineに追加したいときも、元のStableDiffusionPipelineのモデルをそのまま使い回せる!こういうときは
DiffusionPipeline.from_pipe()ってAPIを使うと、メモリを増やさずに、いろんなパイプラインの機能を切り替えて使えるんだ。
まるで、パイプラインの機能をON/OFFするみたいな感覚!さらに、タスクごとにパイプラインを切り替えたい場合は、
from_pipe()とAutoPipelineクラスを組み合わせると、自動で最適なパイプラインを選んでくれるよ。要するに、「同じモデル部品は使い回して、メモリを節約しながらいろんなパイプラインを切り替えて使える!」ってこと。
メモリが少ない環境でも、賢く使えばめっちゃ快適に動かせるから、ウチはこの仕組み推す!
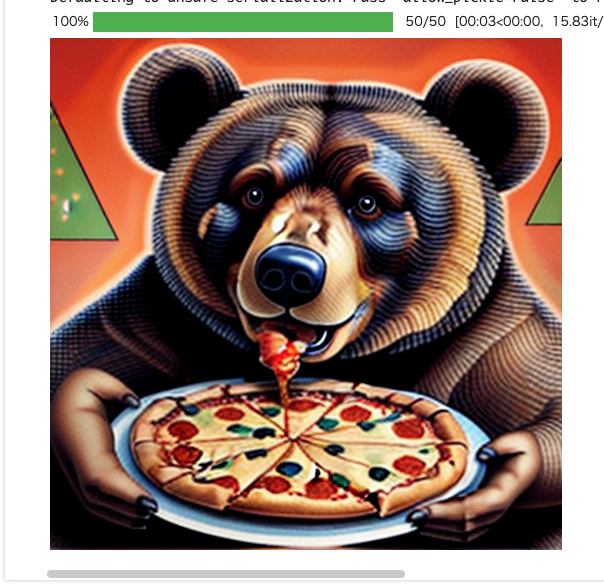
ここでは、StableDiffusionPipeline で IP-Adapter を使ってクマの画像を生成したあと、そこでロードされたパイプラインコンポーネントを StableDiffusionSAGPipeline で 再利用して、生成品質を上げた画像を生成し、さらに AnimateDiffPipeline でアニメーション化するという例。
まず、StableDiffusionPipeline で IP-Adapter を使ってクマの画像を生成。
from diffusers import DiffusionPipeline, StableDiffusionSAGPipeline
import torch
import gc
from diffusers.utils import load_image
from accelerate.utils import compute_module_sizes

image = load_image("https://huggingface.co/datasets/huggingface/documentation-images/resolve/main/diffusers/load_neg_embed.png")

pipe_sd = DiffusionPipeline.from_pretrained(
    "SG161222/Realistic_Vision_V6.0_B1_noVAE",
    torch_dtype=torch.float16
)

pipe_sd.load_ip_adapter(
    "h94/IP-Adapter",
    subfolder="models",
    weight_name="ip-adapter_sd15.bin"
)

pipe_sd.set_ip_adapter_scale(0.6)
pipe_sd.to("cuda")

generator = torch.Generator(device="cpu").manual_seed(33)

out_sd = pipe_sd(
    prompt="bear eats pizza",
    negative_prompt="wrong white balance, dark, sketches,worst quality,low quality",
    ip_adapter_image=image,
    num_inference_steps=50,
    generator=generator,
).images[0]
out_sd
このときのメモリ量
def bytes_to_giga_bytes(bytes):
    return bytes / 1024 / 1024 / 1024

print(f"Max memory allocated: {bytes_to_giga_bytes(torch.cuda.max_memory_allocated())} GB")
Max memory allocated: 4.405725002288818 GB
次に StableDiffusionSAGPipeline で StableDiffusionPipeline のコンポーネントを使って、画像を生成する。パイプラインからパイプラインのコンポーネントを使うには from_pile() メソッドを使えば良いみたい。
pipe_sag = StableDiffusionSAGPipeline.from_pipe(
    pipe_sd
)

generator = torch.Generator(device="cpu").manual_seed(33)

out_sag = pipe_sag(
    prompt="bear eats pizza",
    negative_prompt="wrong white balance, dark, sketches,worst quality,low quality",
    ip_adapter_image=image,
    num_inference_steps=50,
    generator=generator,
    guidance_scale=1.0,
    sag_scale=0.75
).images[0]
out_sag
んー・・・

print(f"Max memory allocated: {bytes_to_giga_bytes(torch.cuda.max_memory_allocated())} GB")
んー・・・
Max memory allocated: 8.562367916107178 GB
シードも設定してあるし本来ならドキュメントと同じ画像が生成されて、あとメモリ量も変わらないはずなんだけども、モデルロード時にいろいろファイルが見つからない、とか、StableDiffusionSAGPipeline はもうdeprecated、とか、いろいろwarningが出力されるので、以前はちゃんと動いていたってことかなぁ・・・
そこは置いておいて、最後に AnimateDiffPipeline でアニメ化する。この時、AnimateDiffPipeline には MotionAdapter を追加してズームアウトするようになっているみたい。
from diffusers import AnimateDiffPipeline, MotionAdapter, DDIMScheduler
from diffusers.utils import export_to_gif

pipe_sag.unload_ip_adapter()
adapter = MotionAdapter.from_pretrained(
    "guoyww/animatediff-motion-adapter-v1-5-2",
    torch_dtype=torch.float16
)

pipe_animate = AnimateDiffPipeline.from_pipe(
    pipe_sd,
    motion_adapter=adapter
)
pipe_animate.scheduler = DDIMScheduler.from_config(
    pipe_animate.scheduler.config,
    beta_schedule="linear"
)

# IP-Adapter と LoRA の重みを再ロード
pipe_animate.load_ip_adapter(
    "h94/IP-Adapter",
    subfolder="models",
    weight_name="ip-adapter_sd15.bin"
)
pipe_animate.load_lora_weights(
    "guoyww/animatediff-motion-lora-zoom-out",
    adapter_name="zoom-out"
)
pipe_animate.to("cuda")

generator = torch.Generator(device="cpu").manual_seed(33)

pipe_animate.set_adapters("zoom-out", adapter_weights=0.75)

out = pipe_animate(
    prompt="bear eats pizza",
    num_frames=16,
    num_inference_steps=50,
    ip_adapter_image=image,
    generator=generator,
).frames[0]
export_to_gif(out, "out_animate.gif")
・・・と行きたいところ何だけども、
OutOfMemoryError: CUDA out of memory. Tried to allocate 4.00 GiB. GPU 0 has a total capacity of 22.16 GiB of which 3.28 GiB is free. Process 244182 has 18.88 GiB memory in use. Of the allocated memory 17.35 GiB is allocated by PyTorch, and 1.30 GiB is reserved by PyTorch but unallocated. If reserved but unallocated memory is large try setting PYTORCH_CUDA_ALLOC_CONF=expandable_segments:True to avoid fragmentation. See documentation for Memory Management (https://pytorch.org/docs/stable/notes/cuda.html#environment-variables)
残念、ドキュメントにもあるが、AnimateDiffPipeline は15GBほどメモリを必要とするらしく、L4では足りなかった。
その他注意書きがちらほら。
-
from_pipe()で新しく作ったパイプラインだと、一部のメソッド(例えばenable_model_cpu_offload()など)が動かない場合がある。モデル部品の実行順序が変わってしまい、オフロードの仕組みがズレるためらしい。-
from_pipe()で新しいパイプラインを作ったら、必要なメソッドはもう一回ちゃんと適用し直すことを推奨
-
- これは
AnimateDiffPipelineだけの話だが、IP-Adapterは、一度アンロードして、新しいパイプラインを作って、その後でもう一回再ロードする必要がある。
from_pipe() で作成したパイプラインの変更
ここは上の注意書きと少し関連するかな
from_pipe()で作ったパイプラインは、部品(モデルコンポーネント)をカスタマイズできるんだけど、ここで注意が必要!もし部品の「状態」を変更しちゃうと、その部品を共有してる他のパイプラインにも影響が出ちゃうんだ。
例えば、StableDiffusionSAGPipelineでunload_ip_adapter()を呼んで IP-Adapter を外すと、元のStableDiffusionPipelineでも IP-Adapter が使えなくなっちゃう!実際、IP-Adapter を外した後に元のパイプラインで画像生成しようとすると、
AttributeError: ‘NoneType’ object has no attribute ‘image_projection_layers’みたいなエラーが出ることもある。要するに、「
from_pipe()で部品を共有してる場合、どれか一つのパイプラインで部品の状態を変えると、全部に影響するから注意!」ってこと。
サボらず、部品の使い方や変更には気をつけようね!
from_pipe のメモリ消費
from_pipe()で複数のパイプラインを作った場合、メモリの使用量は「一番メモリを食うパイプライン」に合わせて決まるんだ。例えば――
パイプライン メモリ使用量 (GB) StableDiffusionPipeline4.400 StableDiffusionSAGPipeline4.400 AnimateDiffPipeline15.178 この場合、
AnimateDiffPipelineが一番メモリを使うから、他のパイプラインをいくつ作っても、トータルのメモリ使用量は15.178GBのまま!
つまり、AnimateDiffPipelineのメモリ量を超えない限り、追加でパイプラインを作ってもメモリは増えないし、いろんなパイプラインを切り替えて使ってもOKってこと!要するに、「一番重いパイプラインの分だけメモリを使うから、他のパイプラインを増やしてもメモリは増えない!」ってこと。
メモリが心配な人も、これなら安心して色々試せるし、ウチはこの仕組みめっちゃ推す!
セーフティチェッカー
Diffusersには、Stable Diffusionモデルで有害な画像が生成されないように「セーフティチェッカー」っていう仕組みが入ってるんだ。
これは、生成された画像がNSFW(ヤバい内容)じゃないか自動でチェックしてくれるやつ!もし何かの理由でこのセーフティチェッカーを無効にしたい場合は、
from_pretrained()のときにsafety_checker=Noneって指定すればOK↓from diffusers import DiffusionPipeline pipeline = DiffusionPipeline.from_pretrained( "stable-diffusion-v1-5/stable-diffusion-v1-5", safety_checker=None, use_safetensors=True )ただし、セーフティチェッカーを外すと、ライセンスの条件をちゃんと守る必要があるし、公開サービスでは基本的にフィルターは外さない方がいいって、公式も強く推奨してる!
自分だけで検証したいとか、ネットワーク挙動を調べたいときだけにしてね、って感じ!要するに、「セーフティチェッカーは基本ON!どうしても外したいときだけ自己責任で!」ってこと。
ウチは安全第一派だし、サボらずルール守ろう!
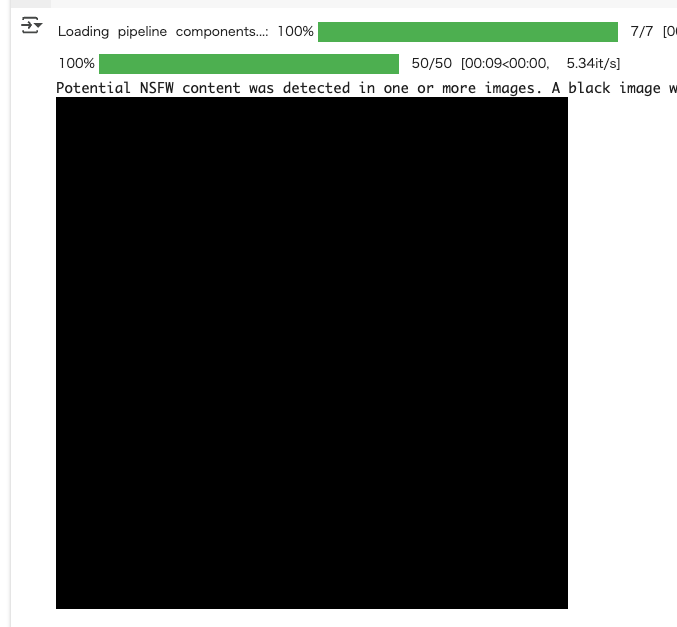
セーフティチェッカーは例えばこんな感じで動作する。
from diffusers import StableDiffusionPipeline

pipeline = StableDiffusionPipeline.from_pretrained(
    "stable-diffusion-v1-5/stable-diffusion-v1-5",
    use_safetensors=True,
    device_map="cuda"
)

# NSFWなプロンプトを指定
prompt = "XXXXXXXXXXXXX"

image = pipeline(prompt).images[0]

display(image)
こんな感じでメッセージとともに黒い画像になる。
Potential NSFW content was detected in one or more images. A black image will be returned instead. Try again with a different prompt and/or seed.
safety_checker=Noneを付与する
from diffusers import StableDiffusionPipeline

pipeline = StableDiffusionPipeline.from_pretrained(
    "stable-diffusion-v1-5/stable-diffusion-v1-5",
    use_safetensors=True,
    device_map="cuda",
    safety_checker=None,
)

# NSFWなプロンプトを指定
prompt = "XXXXXXXXXXXXX"

image = pipeline(prompt).images[0]

display(image)
以下のようなメッセージが表示され、画像は生成される。
You have disabled the safety checker for <class 'diffusers.pipelines.stable_diffusion.pipeline_stable_diffusion.StableDiffusionPipeline'> by passing
safety_checker=None. Ensure that you abide to the conditions of the Stable Diffusion license and do not expose unfiltered results in services or applications open to the public. Both the diffusers team and Hugging Face strongly recommend to keep the safety filter enabled in all public facing circumstances, disabling it only for use-cases that involve analyzing network behavior or auditing its results. For more information, please have a look at https://github.com/huggingface/diffusers/pull/254 .
チェックポイントのバリエーション
「Checkpoint variants」っていうのは、モデルの重みファイル(チェックポイント)にいくつか種類があるって話だよ。
主なバリエーションはこんな感じ↓
- 元の重み(original)
普通の精度(float32)で保存されてるやつ。- 浮動小数点タイプ違い(floating point)
例えば「fp16」みたいに、半分の精度で保存されてるやつ。
ダウンロードも保存も軽くなるけど、CPUでは使えないし、再学習には向いてない。- non-EMA(非指数移動平均)
学習の途中で使う重み。推論(画像生成)には向いてないけど、追加でファインチューニングしたいときに使うやつ。それぞれ、ファイル名や読み込み時の引数が違うから注意!
チェックポイントタイプ 重みファイル名 読み込み時の引数 original diffusion_pytorch_model.safetensorsなし floating point diffusion_pytorch_model.fp16.safetensorsvariant,torch_dtypenon-EMA diffusion_pytorch_model.non_ema.safetensorsvariant使い方のポイント:
- torch_dtypeで精度(float16とか)を指定できる。
例えば、fp16の重みを使いたいなら、variant="fp16"とtorch_dtype=torch.float16を両方指定するのがベスト!- variantでどのバージョンの重みファイルを使うか選べる。
例えば、non-EMAを使いたいなら、variant="non_ema"って指定する。fp16を使う場合のコード例はこんな感じ↓
from diffusers import DiffusionPipeline
import torch

pipeline = DiffusionPipeline.from_pretrained(
   "stable-diffusion-v1-5/stable-diffusion-v1-5",
   variant="fp16",
   torch_dtype=torch.float16,
   use_safetensors=True
)
保存するときも、
variantを指定すれば、違うタイプの重みファイルとして保存できる↓from diffusers import DiffusionPipeline pipeline.save_pretrained( "stable-diffusion-v1-5/stable-diffusion-v1-5", variant="fp16" )注意点:
ローカルに保存した場合、variantを指定しないとエラーになることがあるから、サボらずちゃんと引数をつけよう!
要するに、「チェックポイントにはいろんなバリエーションがあって、用途や精度に合わせて使い分けるのが大事!」ってこと。
DiffusionPipelineの解説
DiffusionPipelineの「from_pretrained()」ってメソッドは、主に2つのことをやってくれるんだ:
- 必要なフォルダ構成やファイルをダウンロード&キャッシュ
まず、推論(画像生成とか)に必要な最新のフォルダ構成や重みファイルをネットからダウンロードして、ローカルにキャッシュしてくれる。
すでにキャッシュがあれば、再ダウンロードはしないから、2回目以降はサクッと使える!- 正しいパイプラインのクラスに重みを読み込んでインスタンス化
モデルの中にある「model_index.json」ってファイルを見て、「どのパイプラインクラスを使うべきか?」を自動で判別してくれる。
そのクラスに重みをセットして、すぐ使える状態のパイプラインを返してくれるんだ。パイプラインの「クラス」と、リポジトリ内の「フォルダ構成」は、直接対応してるんだ。
例えば、StableDiffusionPipelineってクラスは、stable-diffusion-v1-5/stable-diffusion-v1-5ってフォルダ構成とセットになってる。
from diffusers import DiffusionPipeline

repo_id = "stable-diffusion-v1-5/stable-diffusion-v1-5"
pipeline = DiffusionPipeline.from_pretrained(repo_id, use_safetensors=True)
print(pipeline)
StableDiffusionPipeline {
  "_class_name": "StableDiffusionPipeline",
  "_diffusers_version": "0.35.1",
  "_name_or_path": "stable-diffusion-v1-5/stable-diffusion-v1-5",
  "feature_extractor": [
    "transformers",
    "CLIPImageProcessor"
  ],
  "image_encoder": [
    null,
    null
  ],
  "requires_safety_checker": true,
  "safety_checker": [
    "stable_diffusion",
    "StableDiffusionSafetyChecker"
  ],
  "scheduler": [
    "diffusers",
    "PNDMScheduler"
  ],
  "text_encoder": [
    "transformers",
    "CLIPTextModel"
  ],
  "tokenizer": [
    "transformers",
    "CLIPTokenizer"
  ],
  "unet": [
    "diffusers",
    "UNet2DConditionModel"
  ],
  "vae": [
    "diffusers",
    "AutoencoderKL"
  ]
}
このとき、パイプラインの中身はこんな部品でできてる:
feature_extractor(画像の前処理)safety_checker(有害な画像のフィルタ)scheduler(生成の流れを決めるやつ)text_encoder(テキストをベクトル化)tokenizer(テキストをトークンに分割)unet(画像生成のメインモデル)vae(画像の圧縮・復元)それぞれの部品は、リポジトリ内のサブフォルダに分かれて保存されてるし、
model_index.jsonには「どの部品をどのクラスで読み込むか」って情報が全部書いてある!
実際のレポジトリを見てみるとわかりやすい。
!git clone https://huggingface.co/stable-diffusion-v1-5/stable-diffusion-v1-5
!tree stable-diffusion-v1-5
stable-diffusion-v1-5
├── feature_extractor
│   └── preprocessor_config.json
├── model_index.json
├── README.md
├── safety_checker
│   ├── config.json
│   ├── model.fp16.safetensors
│   ├── model.safetensors
│   ├── pytorch_model.bin
│   └── pytorch_model.fp16.bin
├── scheduler
│   └── scheduler_config.json
├── text_encoder
│   ├── config.json
│   ├── model.fp16.safetensors
│   ├── model.safetensors
│   ├── pytorch_model.bin
│   └── pytorch_model.fp16.bin
├── tokenizer
│   ├── merges.txt
│   ├── special_tokens_map.json
│   ├── tokenizer_config.json
│   └── vocab.json
├── unet
│   ├── config.json
│   ├── diffusion_pytorch_model.bin
│   ├── diffusion_pytorch_model.fp16.bin
│   ├── diffusion_pytorch_model.fp16.safetensors
│   ├── diffusion_pytorch_model.non_ema.bin
│   ├── diffusion_pytorch_model.non_ema.safetensors
│   └── diffusion_pytorch_model.safetensors
├── v1-5-pruned.ckpt
├── v1-5-pruned-emaonly.ckpt
├── v1-5-pruned-emaonly.safetensors
├── v1-5-pruned.safetensors
├── v1-inference.yaml
└── vae
    ├── config.json
    ├── diffusion_pytorch_model.bin
    ├── diffusion_pytorch_model.fp16.bin
    ├── diffusion_pytorch_model.fp16.safetensors
    └── diffusion_pytorch_model.safetensors

7 directories, 35 files
パイプラインの各コンポーネントは、インスタンスの属性としてアクセスできる。例えば、トークナイザにアクセスするにはこう。
from diffusers import DiffusionPipeline

repo_id = "stable-diffusion-v1-5/stable-diffusion-v1-5"
pipeline = DiffusionPipeline.from_pretrained(repo_id, use_safetensors=True)
print(pipeline.tokenizer)
見やすさのために手動で改行を入れている。
CLIPTokenizer(
    name_or_path='/root/.cache/huggingface/hub/models--stable-diffusion-v1-5--stable-diffusion-v1-5/snapshots/451f4fe16113bff5a5d2269ed5ad43b0592e9a14/tokenizer',
    vocab_size=49408,
    model_max_length=77,
    is_fast=False,
    padding_side='right',
    truncation_side='right',
    special_tokens={
        'bos_token': '<|startoftext|>',
        'eos_token': '<|endoftext|>',
        'unk_token': '<|endoftext|>',
        'pad_token': '<|endoftext|>'
    },
    clean_up_tokenization_spaces=False,
    added_tokens_decoder={
    	49406: AddedToken(
            "<|startoftext|>",
            rstrip=False,
            lstrip=False,
            single_word=False,
            normalized=True,
            special=True
        ),
    	49407: AddedToken(
            "<|endoftext|>",
            rstrip=False,
            lstrip=False,
            single_word=False,
            normalized=True,
            special=True
        ),
    }
)
どのパイプラインもmodel_index.jsonを必要とする。このファイルにはDiffusionPipelineがパイプラインを正しく組み立てるための情報が含まれている。以下のような内容が含まれている。
-
_class_name
どのパイプラインクラス(例:StableDiffusionPipeline)を使うか -
_diffusers_version
どのバージョンのDiffusersで作られたモデルか - 各コンポーネントの情報
どの部品(feature_extractor、scheduler、text_encoder、tokenizer、unet、vae、safety_checker)がどのライブラリ・クラス・サブフォルダに入ってるか
stable-diffusion-v1-5/stable-diffusion-v1-5 だとこれ
{
  "_class_name": "StableDiffusionPipeline",
  "_diffusers_version": "0.6.0",
  "feature_extractor": [
    "transformers",
    "CLIPImageProcessor"
  ],
  "safety_checker": [
    "stable_diffusion",
    "StableDiffusionSafetyChecker"
  ],
  "scheduler": [
    "diffusers",
    "PNDMScheduler"
  ],
  "text_encoder": [
    "transformers",
    "CLIPTextModel"
  ],
  "tokenizer": [
    "transformers",
    "CLIPTokenizer"
  ],
  "unet": [
    "diffusers",
    "UNet2DConditionModel"
  ],
  "vae": [
    "diffusers",
    "AutoencoderKL"
  ]
}
AutoPipeline
Diffusersっていうライブラリには、画像とか動画とか音声を作ったり、画像の一部を塗り直したりするための「パイプライン」っていう機能がいっぱいあるんだ。でも、種類が多すぎて「どれ使えばいいの?」って迷っちゃうこと、マジであるでしょ?
そこで登場するのが「AutoPipeline」ってやつ!これは「どのパイプライン使えばいいか分かんない!」って時に、めっちゃ便利な機能なんだよ。キミがやりたいこと(例えば「テキストから画像を作りたい」とか「画像を加工したい」とか「画像の一部を塗り直したい」)を指定するだけで、AutoPipelineが自動で一番合ってるパイプラインを選んでくれるの。ノリがいいでしょ?
例えば、
dreamlike-art/dreamlike-photoreal-2.0っていうモデルを使う場合、
- AutoPipelineはモデルの中身(
model_index.jsonってファイル)を見て、「これはstable-diffusion系だな」って判断するんだ。- で、キミがやりたいタスクに合わせて、
StableDiffusionPipelineとかStableDiffusionImg2ImgPipelineとかStableDiffusionInpaintPipelineっていう、専用のパイプラインを自動で選んでくれるの。しかも、普通のパイプラインに渡すパラメータ(strengthとかnum_inference_stepsとか)も、AutoPipelineにそのまま渡せるから、使い方も超ラク!
サンプルコードは以下の3つが用意されている。
- テキストから画像を生成
- 画像(+テキスト)から画像を生成
- インペインティング
それぞれ試してみる。
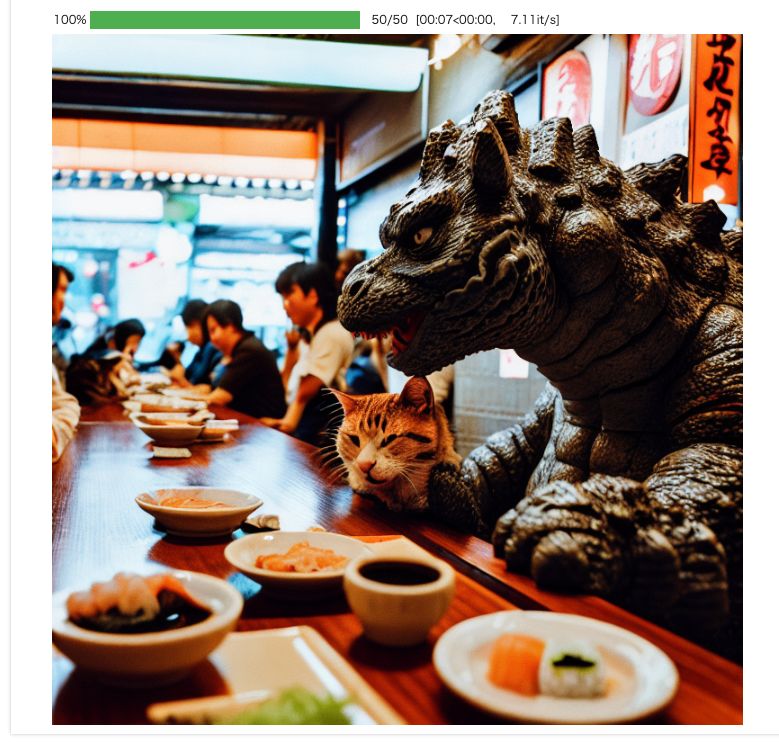
まず、テキストから画像を生成するには AutoPipelineForText2Image を使う
from diffusers import AutoPipelineForText2Image
import torch

pipe_txt2img = AutoPipelineForText2Image.from_pretrained(
    "dreamlike-art/dreamlike-photoreal-2.0",
    torch_dtype=torch.float16,
    use_safetensors=True
).to("cuda")

prompt = "cinematic photo of Godzilla eating sushi with a cat in a izakaya, 35mm photograph, film, professional, 4k, highly detailed"
generator = torch.Generator(device="cpu").manual_seed(37)
image = pipe_txt2img(prompt, generator=generator).images[0]
image
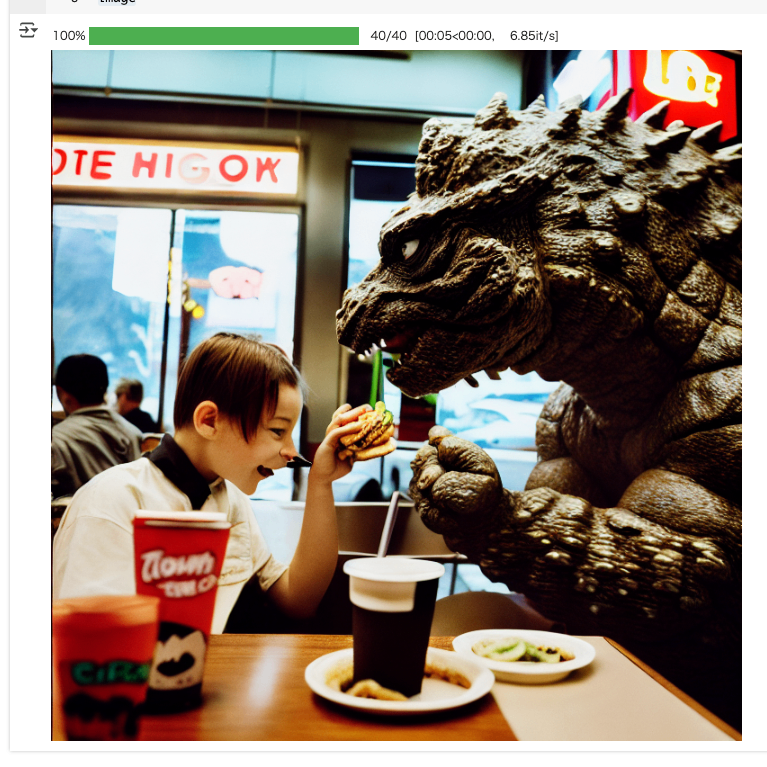
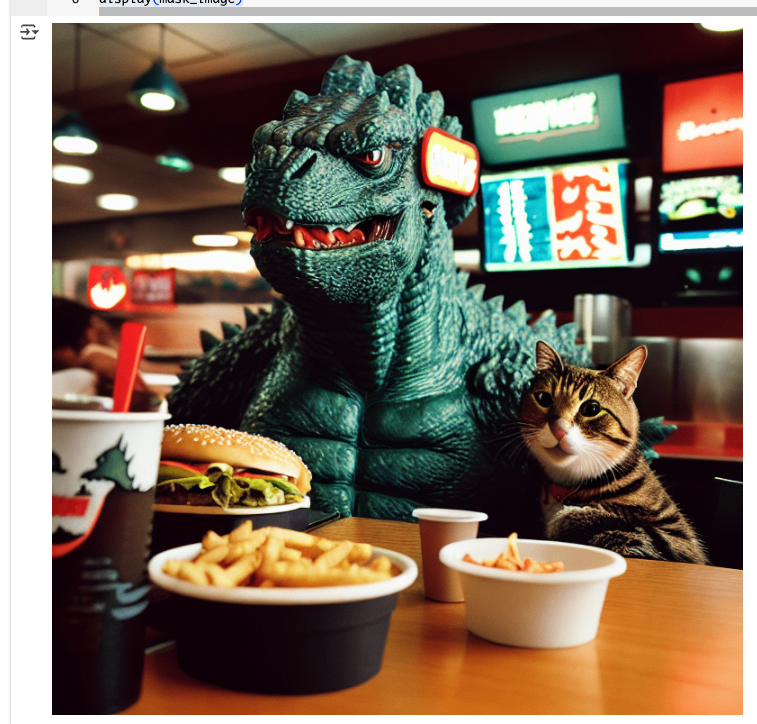
次に画像から画像を生成。これは AutoPipelineForImage2Image を使う。
こういう画像を用意。
from diffusers.utils import load_image

init_image = load_image("https://huggingface.co/datasets/huggingface/documentation-images/resolve/main/diffusers/autopipeline-text2img.png")
init_image

というか最初の画像と同じだね。
これを使って画像を生成。
from diffusers import AutoPipelineForImage2Image
from diffusers.utils import load_image
import torch

pipe_img2img = AutoPipelineForImage2Image.from_pretrained(
    "dreamlike-art/dreamlike-photoreal-2.0",
    torch_dtype=torch.float16,
    use_safetensors=True
).to("cuda")

prompt = "cinematic photo of Godzilla eating burgers with a cat in a fast food restaurant, 35mm photograph, film, professional, 4k, highly detailed"
generator = torch.Generator(device="cpu").manual_seed(53)
image = pipe_img2img(
    prompt,
    image=init_image,
    generator=generator
).images[0]
image
ちょっと違う画像がでてくるけどもまあ。

で、同じチェックポイントでもタスクごとにパイプラインを変えることができるということがわかる。
また、上記のようにパイプラインを続けて実行するとモデルが2回読み込まれることになり、メモリを無駄に消費する。from_pipe() メソッドを使えば、すでに読み込み済みパイプラインのコンポーネントを流用することができる。
# テキストから画像生成した際のパイプラインを使う
pipe_img2img = AutoPipelineForImage2Image.from_pipe(pipe_txt2img).to("cuda")
generator = torch.Generator(device="cpu").manual_seed(53)
image = pipe_img2img(
    prompt,
    image=init_image,
    generator=generator
).images[0]
image
最後にインペンディング。部分編集だね。
入力画像とそれにマスク部分のみを記載した画像を用意。
from diffusers.utils import load_image

init_image = load_image("https://huggingface.co/datasets/huggingface/documentation-images/resolve/main/diffusers/autopipeline-img2img.png")
mask_image = load_image("https://huggingface.co/datasets/huggingface/documentation-images/resolve/main/diffusers/autopipeline-mask.png")

display(init_image)
print()
display(mask_image)

これら使って画像の部分編集を行う。サンプルコードはなぜかここだけ stabilityai/stable-diffusion-xl-base-1.0 になっていたけど、dreamlike-art/dreamlike-photoreal-2.0 でもどちらでも同じようにできる。
from diffusers import AutoPipelineForInpainting
from diffusers.utils import load_image
import torch

pipeline = AutoPipelineForInpainting.from_pretrained(
    "dreamlike-art/dreamlike-photoreal-2.0",
    torch_dtype=torch.float16,
    use_safetensors=True
).to("cuda")

prompt = "cinematic photo of a owl, 35mm photograph, film, professional, 4k, highly detailed"
generator = torch.Generator(device="cpu").manual_seed(38)
image = pipeline(
    prompt,
    image=init_image,
    mask_image=mask_image,
    generator=generator,
    strength=0.4
).images[0]
image

stabilityai/stable-diffusion-xl-base-1.0 でもできる。

つまり、やりたいタスクにあわせて AutoPipelineを選ぶだけで、あとはモデルが違っても良しなにやってくれると。
対応していないチェックポイント
AutoPipelineが対応しているのは、
- Stable Diffusion
- Stable Diffusion XL
- ControlNet
- Kandinsky 2.1
- Kandinsky 2.2
- DeepFloyd IF
のみとなるが、ここはおそらく今はもっと増えているんじゃなかろうか。
いずれにせよ、対応してないチェックポイントに対して使用するとエラーとなる。
from diffusers import AutoPipelineForImage2Image
import torch

pipeline = AutoPipelineForImage2Image.from_pretrained(
    "openai/shap-e-img2img",
    torch_dtype=torch.float16,
    use_safetensors=True
)
ValueError: AutoPipeline can't find a pipeline linked to ShapEImg2ImgPipeline for None