「ソースコードと話す」未来の開発者体験
まずはこちらをご覧ください。
これはソースコードと話している様子です。 驚くほど正確に、ソースコードの内容を把握できていることがわかります。これをコードと話すので、Talk2Codeと命名しました。
本記事では、LangChainを使って、Talk2Codeを実装する方法をご紹介します。
また、Talk2Codeをはじめとした未来の開発者体験を実現するサービス、「Supernova」のLPを本日公開しました。よろしければこちらもご覧ください。
対象読者
- 未来の開発者体験を知りたい方
前提知識
LangChainとは?
LangChainとはLLMを用いたサービス開発のフレームワークです。
名前にも入っているChainは、LLM+定型プロンプトのようにLLMと何かを組み合わせた処理単位を指します。
より詳しくはこちらの記事がおすすめです。
Embeddingとは?
Embedding(エンベッディング)とは、データをベクトルデータに変換することを指します。
例えば、日本語の「こんにちは」をOpenAI APIでEmbeddingすると以下のようなデータになります。
[
  -0.012630949,
  -0.01614582,
  -0.015282053,
  # ...長ーいベクトルの数字がずらずら
  0.0030613937,
  0.00063869014
]
このベクトルデータは意味が近いほどベクトルの距離が近くなるように算出されます。
この性質を用いて、意味が近いものを取得する検索が可能になります。
例えば「挨拶」と検索したときに、文字のマッチはないが、意味的に近いので「こんにちは」と取得できるといった具合です。また、このEmbeddingしたベクトルデータを保存しておくDBをVectorStore(ベクトルストア)と呼びます。
より詳しくはドキュメントをご覧ください。
ざっくり把握
実装に入る前に、全体の流れをざっくり把握しておきましょう。
まず事前にVectorStoreと呼ばれるベクトルのDBに、ソースコードを全てEmbeddingして、保存しておきます。

実際にユーザーがコードに話しかけると、以下のような流れで処理されます。
- ユーザーが質問を投げる
- VectorStoreとの対話に特化したConventional Retriever Chain(以降CRChain)が質問を受け付ける
- VectorStoreからデータを取得するRetrieverが質問に関連するソースコードを取得する。
- Modelが取得した関連コードと合わせて質問をLLMに推論させ、結果を回答として返します。
- 回答をユーザーに返す

厳密には少し異なりますが、実装のためのざっくり把握という意味ではこれでOKです👌🏼
実装した後、より正確な内部実装をご説明します。
実装
ここからは、実際にTalk2Codeを実装する方法をご紹介します。
今回はLangChain自体のソースコードと対話できるようにしてみます。
手元で動かしてみたい方は、READMEを参考に環境をセットアップしてみてください。
データを準備する
まずは、ソースコードをEmbeddingして、VectorStoreに保存するprepare_data.py を実装します。
-
ソースコードをドキュメントとして読み込みます。読み込みにはLangChainの
TextLoaderが使用できます。from langchain.document_loaders import TextLoader # ... def load_docs(root_dir: str) -> list: """ Load documents from a dir. Parameters: root_dir: Root directory to load documents from. """ docs = [] for dirpath, dirnames, filenames in os.walk(root_dir): for file in filenames: try: loader = TextLoader(os.path.join(dirpath, file), encoding="utf-8") docs.extend(loader.load_and_split()) except Exception as e: pass return docs # 1. ソースコードををドキュメントとして読み込む docs = load_docs(os.getenv('SRC_DIR'))ドキュメントの中身は:
-
page_content: ファイルの全文 -
metadata.source: ファイルのパス
で構成されています。
Document( page_content='"""For backwards compatiblity."""\nfrom langchain.utilities.serpapi import SerpAPIWrapper\n\n__all__ = ["SerpAPIWrapper"]', metadata={ 'source': '/Users/kazuwombat/ghq/github.com/hwchase17/langchain/langchain/serpapi.py' } ) -
-
続いて、ドキュメントをチャンクと呼ばれるEmbedding可能なサイズに分割します。LangChainの
CharacterTextSplitterが便利です。from langchain.text_splitter import CharacterTextSplitter # ... def documents_to_chunks(documents: list) -> list: """ Split documents into chunks. """ text_splitter = CharacterTextSplitter(chunk_size=1000, chunk_overlap=0) chunks = text_splitter.split_documents(documents) return chunks # 1. ソースコードををドキュメントとして読み込む docs = load_docs(root_dir) # 2. ドキュメントをチャンクに分割 chunks = documents_to_chunks(docs)チャンクの中身はドキュメントと同じですが、1ファイルが長過ぎる場合に分割されたpage_contentが入っていることがわかります。
# page_contentがファイルの途中で切れている page_content='"""Transform documents"""\nfrom typing .... return cls(page_content=doc.page_content, metadata=doc.metadata)' metadata={'source': '/Users/kazuwombat/ghq/github.com/hwchase17/langchain/langchain/document_transformers.py'} -
最後にチャンクをEmbeddingして、DeepLakeに保存します。LangChainの
OpenAIEmbeddings、DeepLakeを活用することで、容易に実装できます。from langchain.embeddings.openai import OpenAIEmbeddings from langchain.vectorstores import DeepLake # ... def chunks_to_embeddings(chunks: list, data_set_name: str) -> list: """ Embed chunks and upload to Deeplake """ print("Embedding...") embeddings = OpenAIEmbeddings() DeepLake.from_documents( chunks, embeddings, dataset_path=f"hub://${os.getenv('ACTIVELOOP_ACCOUNT_NAME')}/{data_set_name}" ) print("Done!") # 1. ソースコードをドキュメントとして読み込む docs = load_docs(root_dir) # 2. ドキュメントをチャンクに分割 chunks = documents_to_chunks(docs) # 3. Embeddingして、DeepLakeにアップロード embeddings = chunks_to_embeddings(chunks, "nitte-backend")
準備ができたので、実行して、DeepLakeにデータをアップしてみましょう。
うまくいくと、以下のように出力されます。
(.venv) ~/talk2code (main ⚡☡=) python3 prepare_data.py
...
Created a chunk of size 1160, which is longer than the specified 1000
Created a chunk of size 1304, which is longer than the specified 1000
Embedding...
This dataset can be visualized in Jupyter Notebook by ds.visualize() or at https://app.activeloop.ai/kazuwombat/langchain-code-2

hub://kazuwombat/langchain-code-2 loaded successfully.

Deep Lake Dataset in hub://kazuwombat/langchain-code-2 already exists, loading from the storage
Dataset(path='hub://kazuwombat/langchain-code', tensors=['embedding', 'ids', 'metadata', 'text'])

  tensor     htype    shape    dtype  compression
  -------   -------  -------  -------  -------
 embedding  generic   (0,)    float32   None
    ids      text     (0,)      str     None
 metadata    json     (0,)      str     None
   text      text     (0,)      str     None
Evaluating ingest: 100%|███████████████████████████████████████████████████████████████████████████████████████████████████████████████████████████████████████████| 4/4 [01:22<00:00
Dataset(path='hub://kazuwombat/langchain-code', tensors=['embedding', 'ids', 'metadata', 'text'])

  tensor     htype      shape       dtype  compression
  -------   -------    -------     -------  -------
 embedding  generic  (3627, 1536)  float32   None
    ids      text     (3627, 1)      str     None
 metadata    json     (3627, 1)      str     None
   text      text     (3627, 1)      str     None
Done!
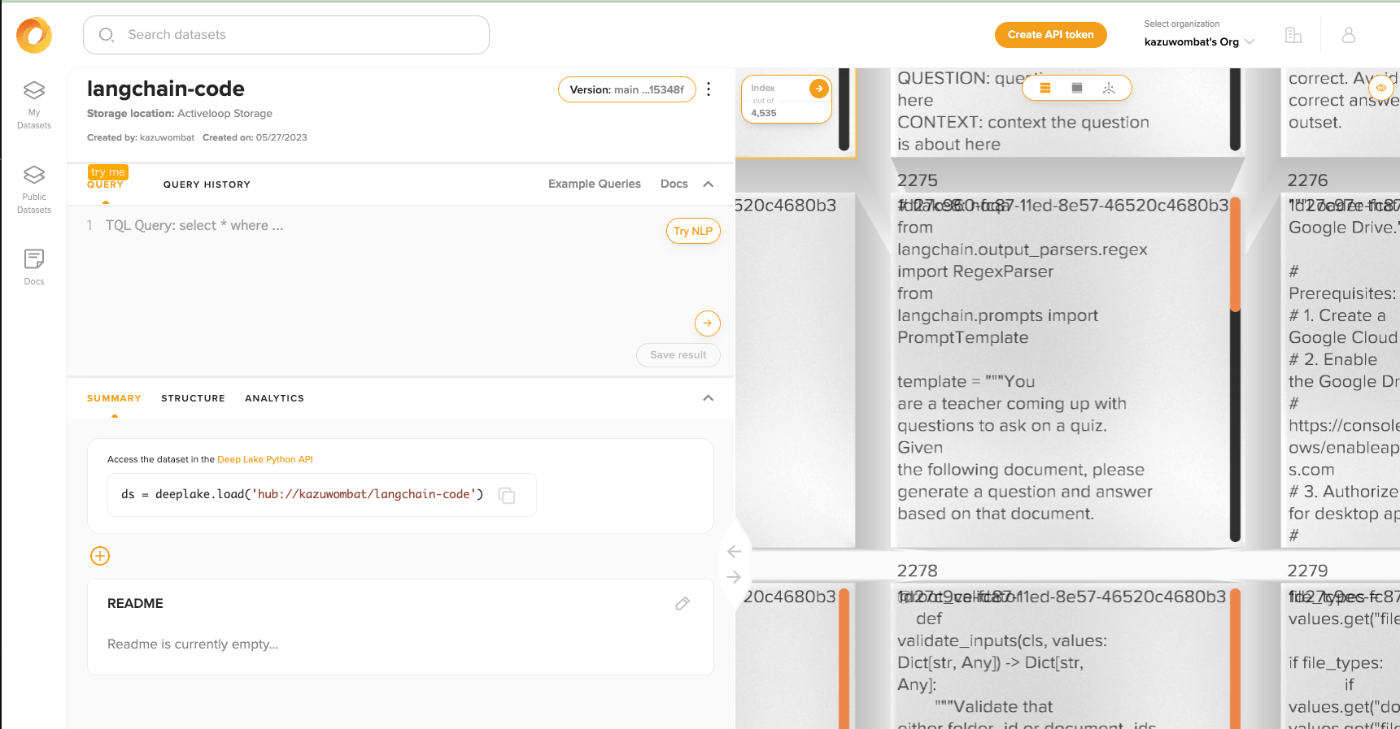
ActiveLoopを開くと、うまくVectorStoreが作成されていることがわかります。
質問する
VectorStoreが準備できたので、コードに話しかけるtalk2code.pyを実装します。
-
先ほど作成したDeepLakeを使って、retrieverを定義します。
embeddings = OpenAIEmbeddings() # DeepLakeからデータを読み込み vector_store = DeepLake( dataset_path=f"hub://{os.getenv('ACTIVELOOP_ACCOUNT_NAME')}/langchain-code", read_only=True, embedding_function=embeddings, ) # Retrieverを定義 retriever = vector_store.as_retriever() retriever.search_kwargs["distance_metric"] = "cos" retriever.search_kwargs["fetch_k"] = 20 retriever.search_kwargs["maximal_marginal_relevance"] = True retriever.search_kwargs["k"] = 20 -
Modelを定義します
model = ChatOpenAI(model_name="gpt-3.5-turbo") # 'ada' 'gpt-3.5-turbo' 'gpt-4', -
ModelとRetrieverを使って、ConversationalRetrievalChainを定義します
chain = ConversationalRetrievalChain.from_llm(model, retriever=retriever) -
質問と過去の会話履歴を入力として受け取り、返答を戻り値として返す
askメソッドを定義します。def ask(question: str, chat_history: list) -> str: "Ask a question and return an answer." result = chain({"question": question, "chat_history": chat_history}) return result["answer"] -
最後にユーザの入力を受け取って、askメソッドを呼び出します。返答をchat_historyにpushすることで、過去の会話の履歴を保持して渡します。
chat_history = []
while True:
    question = getpass("Please input:")

    print("You:", question)
    answer = ask(question, chat_history=chat_history)

    print("Code:", answer)
    chat_history.append((question, answer))
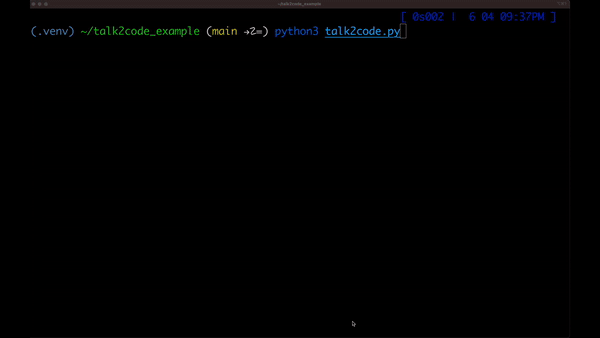
全ての準備が整ったので、コードに話しかけてみます。
$ python3 talk2code.py
You: StuffDocumentsChainクラスは何をしていますか?
Code: `StuffDocumentsChain` クラスは、複数のドキュメントを結合するためのチェーンです。このチェーンは、ドキュメントのコンテキストを含む入力として与えられた質問に対する回答を生成するために、言語モデルを使用します。このクラスは、`BaseCombineDocumentsChain` クラスを継承し、ドキュメントの組み合わせに関する基本的な機能を提供します。`StuffDocumentsChain` は、LLMChain オブジェクトと文書プロンプトを使用してドキュメントを処理し、文書変数名やその他のオプションを含む設定を管理します。
You: そのクラスはどのように文書を連結するのでしょうか?
Code: `StuffDocumentsChain` クラスは、複数の文書を連結するために、文書をコンテキストに"詰め込む"ことで動作します。具体的には、各文書の内容を取得し、`LLMChain` によって指定されたプロンプトに従って処理します。その後、結果を結合して、最終的な出力を生成します。
`StuffDocumentsChain` クラスは、`BaseCombineDocumentsChain` クラスを継承しており、複数の文書を連結するための基本的なフレームワークを提供します。 It uses the `llm_chain` and `document_prompt` to construct the initial inputs, and then stuffs each subsequent document into the context before running the `llm_chain` again. The `llm_chain` is used to generate a new output for each document that is added to the context. Finally, the outputs are combined using the `combine_document_func`.
見事に回答してくれました👏
特に2つ目の質問は、あえてStuffDocumentsChainを入れずに、”そのクラス”としていますが、1つ目の質問のコンテキストを考慮して、StuffDocumentChainについて説明してくれています。
Chain内部の仕組み
さて、LangChainを使うだけでは、まるで魔法のようでなぜこんなことができるのかよくわかりません。
ここからは内部で一体何が起こっているのか、内部実装を見てみましょう。
result = cr_chain({"question": question, "chat_history": chat_history})
エンドポイントとなるのは、 BaseConversationalRetrievalChain#_call です。
class BaseConversationalRetrievalChain(Chain):
	def _call(
		self,
		inputs: Dict[str, Any],
		run_manager: Optional[CallbackManagerForChainRun] = None,
	    ) -> Dict[str, Any]:
# ....
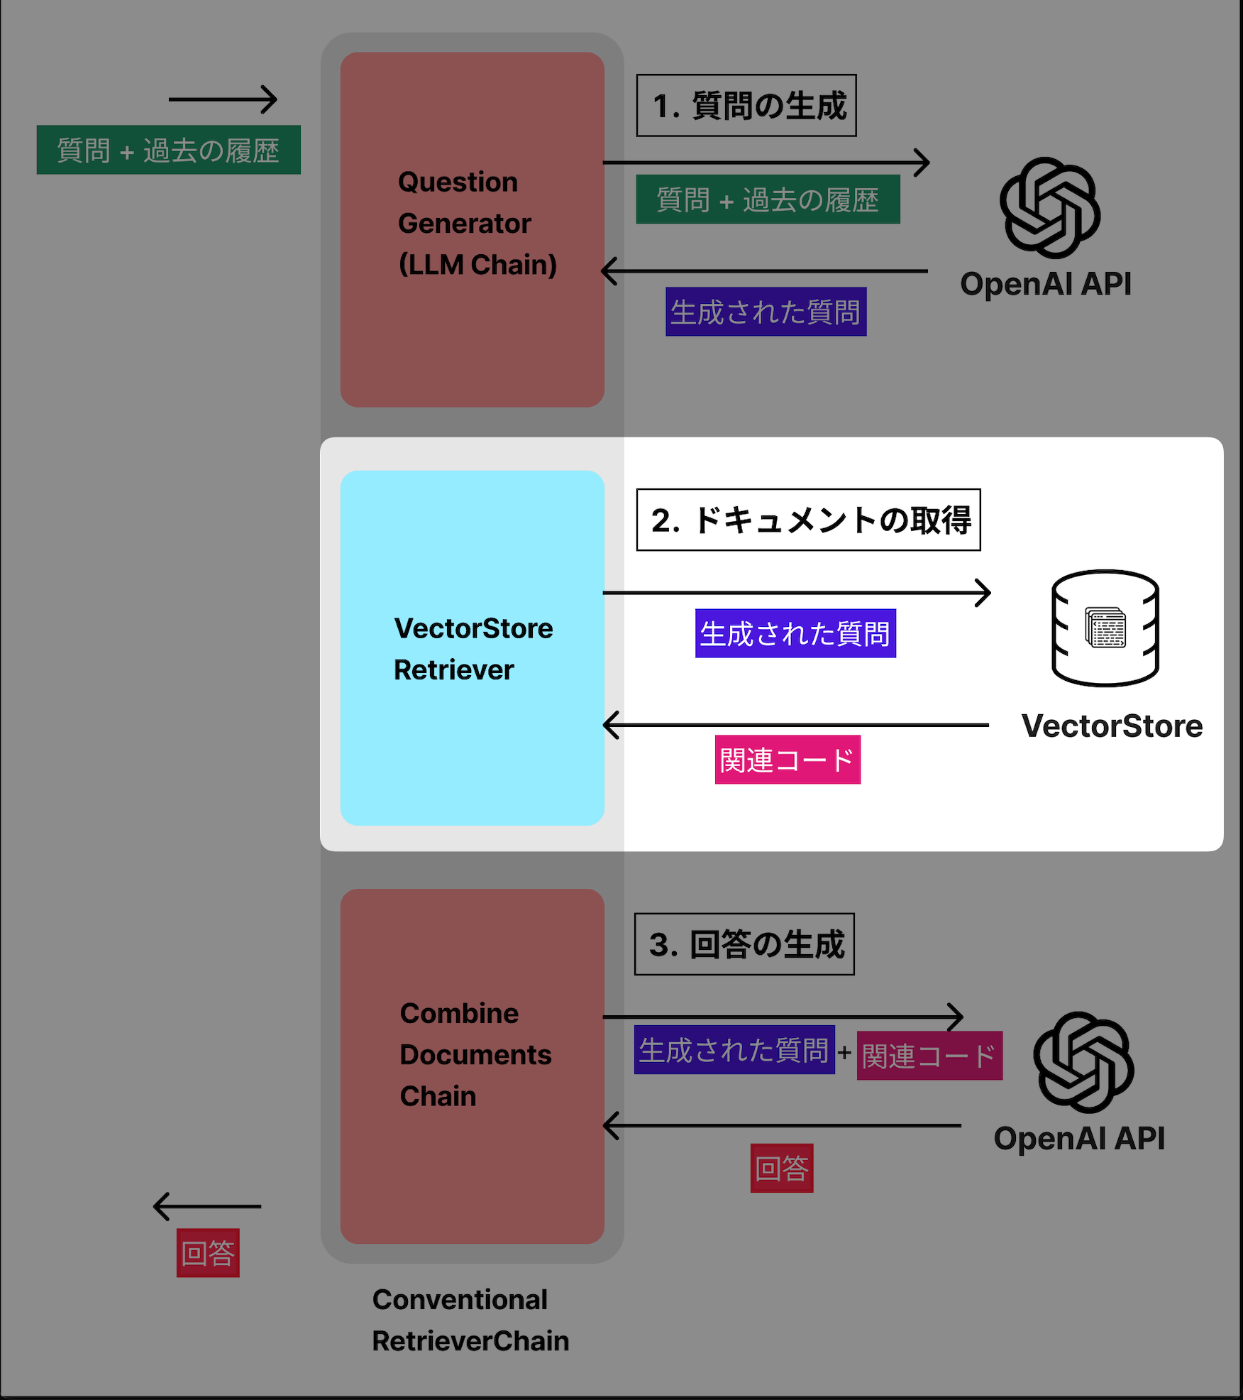
以下の3ステップで、処理されます。
- 質問の生成
- 関連ドキュメントの取得
- 回答の生成

1つずつ見ていきましょう。
1. 質問の生成
最初にコンテキストを考慮した質問の生成を行います。

過去の会話(chat_history)がある場合、qustion_generatorを使って、元の質問(question)を過去のコンテキストを考慮した質問(new_question)に書き換えます。
if chat_history_str:
    callbacks = _run_manager.get_child()
    # 元のquesionを過去のコンテキストを考慮したものに書き換える
    new_question = self.question_generator.run(
        question=question, chat_history=chat_history_str, callbacks=callbacks
    )
else:
    #
    new_question = question
このquestion_generatorも、Chainの一種です。
特に指定しなければCONDENSE_QUESTION_PROMPT という、質問を要約するプロンプトを使用して、過去の会話を考慮した単一の質問を生成します。
def from_llm(
    # ...
    condense_question_prompt: BasePromptTemplate = CONDENSE_QUESTION_PROMPT,
    # ...
) -> BaseConversationalRetrievalChain:
    """Load chain from LLM."""
    # ...
    condense_question_chain = LLMChain(llm=llm, prompt=condense_question_prompt)
    return cls(
        # ...
        question_generator=condense_question_chain,
    )
_template = """Given the following conversation and a follow up question, rephrase the follow up question to be a standalone question, in its original language.

Chat History:
{chat_history}
Follow Up Input: {question}
Standalone question:"""
CONDENSE_QUESTION_PROMPT = PromptTemplate.from_template(_template)
例えば、先ほどの「そのクラスはどのように文書を連結するのでしょうか?」の場合、以下のようなプロンプトになります。
prompts myao Given the following conversation and a follow up question, rephrase the follow up question to be a standalone question, in its original language.

Chat History:

Human: StuffDocumentsChainクラスは何をしていますか?
Assistant: StuffDocumentsChainクラスは、文書をコンテキストに詰め込んで結合するChainを表します。このChainは、LangchainのChainクラスを継承しており、BaseCombineDocumentsChainを継承しています。StuffDocumentsChainのインスタンスは、_load_stuff_documents_chain関数で作成されます。StuffDocumentsChainのコンストラクタは、llm_chainとdocument_variable_nameの2つの必須パラメータを受け取ります。_collapse_docsメソッドは、文書をコンテキストに詰め込んで結合するための具体的な実装を提供します。また、_construct_initial_inputsメソッドは、文書をコンテキストに詰め込む前に、コンテキストに追加する情報を構築するために使用されます。
Follow Up Input: そのクラスはどのように文書を連結するのでしょうか?
このプロンプトの出力が以下です。
StuffDocumentsChainクラスはどのように文書を連結するのですか?
見事に「そのクラス」がStuffDocumentsChainであることを認識して、質問にしてくれています。
2. 関連ドキュメントの取得
続いて、VectorStoreから関連するソースコードのドキュメントを取得します。
docs = self._get_docs(new_question, inputs)
内部では、VectorStoreRetriever#get_relevant_documentsが呼び出されます。
デフォルトではsimilarityを使って、距離の近いドキュメントが取得されます。
def get_relevant_documents(self, query: str) -> List[Document]:
	  if self.search_type == "similarity":
	      docs = self.vectorstore.similarity_search(query, **self.search_kwargs)
	  # ...
	  return docs
返却されるドキュメントは以下のようなものです。
質問に関連するドキュメントが返却されているのがわかります。
docs = [
    {
        "page_content": "@property\n    def _chain_type(self) -> str:\n        return \"stuff_documents_chain\"",
        "metadata": {
            "source": "/Users/kazuwombat/ghq/github.com/hwchase17/langchain/langchain/chains/combine_documents/stuff.py"
        }
    },
    {
        "page_content": "\"\"\"Different ways to combine documents.\"\"\"",
        "metadata": {
            "source": "/Users/kazuwombat/ghq/github.com/hwchase17/langchain/langchain/chains/combine_documents/__init__.py"
        }
    },
    {
        "page_content": "return StuffDocumentsChain(\n        llm_chain=llm_chain, document_prompt=document_prompt, **config\n    )",
        "metadata": {
            "source": "/Users/kazuwombat/ghq/github.com/hwchase17/langchain/langchain/chains/loading.py"
        }
    },
    # ...
]
3. 回答の生成
関連ドキュメントが取得できたので、回答を生成します。

回答の生成にはCombineDocumentsChain という、ドキュメントを組み合わせて実行できるChainを利用します。
answer = self.combine_docs_chain.run(
    input_documents=docs, callbacks=_run_manager.get_child(), **new_inputs
)
デフォルトではStuffDocumentsChain が使用され、愚直に取得したドキュメントの中身をつなぎ合わせてLLMにぶん投げています。
class StuffDocumentsChain(BaseCombineDocumentsChain):
    # ...
    def _get_inputs(self, docs: List[Document], **kwargs: Any) -> dict:
        # Format each document according to the prompt
        doc_strings = [format_document(doc, self.document_prompt) for doc in docs]
        # Join the documents together to put them in the prompt.
        inputs = {
            k: v
            for k, v in kwargs.items()
            if k in self.llm_chain.prompt.input_variables
        }
        inputs[self.document_variable_name] = self.document_separator.join(doc_strings)
        return inputs

    def combine_docs(
        self, docs: List[Document], callbacks: Callbacks = None, **kwargs: Any
    ) -> Tuple[str, dict]:
        """Stuff all documents into one prompt and pass to LLM."""
        # ドキュメントを全部くっつける
        inputs = self._get_inputs(docs, **kwargs)
        # LLMにぶん投げる
        return self.llm_chain.predict(callbacks=callbacks, **inputs), {}
	# ...
実際のinputsは以下のようになります。
inputs {
 'question': 'StuffDocumentsChainクラスはどのように文書を連結するのですか?',
 'context': '@property\n    def _chain_type(self) -> str:\n        return "stuff_documents_chain"
            """Different ways to combine documents."""
            return StuffDocumentsChain(\n        llm_chain=llm_chain, document_prompt=document_prompt, **config\n    )
            combine_documents_chain: BaseCombineDocumentsChain\n    """Chain to use to combine documents."""\n    question_key: str = "question"
            ....
勘の鋭い方はinputsに渡している関連コードが単純にdocsをくっつけているだけで、意味のないものであることにお気づきでしょう。それでも、GPTの力で、なかなかの精度で回答が返ります。
CombineDocumentsChain には、他にも種類があり、この関連コードの入力を正確な意味のあるものにできれば、さらに精度の高い回答を得られるようになりそうです。
未来の開発者体験
ChatGPTが登場して以降、ソフトウェアエンジニアの仕事は大きく変化しました。
わからないことについて教えてもらったり、コードを書いてもらったり、バグをみつけてもらったりと、今まで時間をかけてやっていたことが、一瞬でできるようになりました。
しかし、これはまだまだ序章です。
今後は、今回ご紹介したTalk2Codeのように、よりシームレスにソフトウェア開発とAIの連携が進むでしょう。
自分はこの未来の開発者体験を作る側に回ろうと思っています。
一緒に開発してみたい方、話してみたい方は、ぜひこちらから日程調整してください。
どんな未来が訪れるか楽しみでなりません🔮
Discussion