Avanade Beef で列を読み取り専用にする


はじめに
Avanade Beef (以下、Beef) は ASP.NET Core をベースとする Web API の自動生成ツールです。
概要については以下のスライドもご覧ください。
単純なエンティティの CRUD 操作ではエンティティのすべての列のデータが更新の対象になります。つまり更新する必要がない列においてもデータを送信する必要があるということです。しかし現実的にはデータの作成および操作は一部の列に対してのみ行うことが多いです。たとえば、あるデータのステータスを変更するのにそのほかのデータもいちいち送信しなければいけないというのはナンセンスです。そのような事態に対応するために Web API では PATCH 操作ができるようになっています。PATCH 操作では送信したデータのみを更新の対象とします。Beef でも既定で PATCH 操作をサポートしています。
ただし PATCH 操作にも限界があります。実際の業務では特定の列を更新させないようにする必要があります。これはクライアント側で PATCH 操作を行うことでも実現することができますが、悪意のあるユーザーが直接的に API を呼び出してデータを改竄する可能性を排除できません。これに対応するには 2 種類の方法があります。1 つ目はデータを検証 (Validation) しエラーを返す方法です。2 つ目はそもそも読み取り専用の列を受け付けないようにする方法です。今回はこの 2 つ目の方法を Beef で実装してみたいと思います。
サンプル コード
実行手順
プロジェクトの作成
今回はデータ ソースを EntityFramework としてプロジェクトを作成します。
dotnet new beef --company Karamem0 --appname SampleApplication --datasource EntityFramework
テーブル定義
Product テーブルを作成します。
CREATE TABLE [SampleApplication].[Product] (
  [ProductId] UNIQUEIDENTIFIER NOT NULL DEFAULT (NEWSEQUENTIALID()) PRIMARY KEY,
  [ProductName] NVARCHAR (255) NOT NULL,
  [Price] DECIMAL (15, 0) NOT NULL,
  [CreatedBy] NVARCHAR(250) NULL,
  [CreatedDate] DATETIME2 NULL,
  [UpdatedBy] NVARCHAR(250) NULL,
  [UpdatedDate] DATETIME2 NULL
);
コードの修正
database.beef.yaml
Entity Framework のモデルを定義します。
schema: SampleApplication
eventOutbox: false
entityScope: Autonomous
tables:
  - name: Product
    efModel: true
コードを自動生成します。
dotnet run all
entity.beef.yaml
エンティティを定義します。今回は ProductName を読み取り専用とし更新は Price のみできるようにします。ProductPrice という Price のみを定義するエンティティを作成し UpdatePrice では ProductPrice をパラメーターとして受け取るようにします。UpdatePrice は managerCustom: true とすることでドメイン ロジック層のカスタマイズを有効にします。ここでは ProductPrice を Price に変換した上でサービス インターフェイス層を呼び出すような変更を加えます。
entityScope: Autonomous
eventOutbox: None
eventPublish: None
appBasedAgentArgs: true
webApiAutoLocation: true
refDataText: true
databaseSchema: SampleApplication
entities:
  - name: Product
    webApiRoutePrefix: products
    get: true
    getAll: true
    create: true
    delete: true
    collection: true
    collectionResult: true
    validator: ProductValidator
    managerCtorParams:
      - AutoMapper.IMapper^mapper
    entityFrameworkModel: EfModel.Product
    autoImplement: EntityFramework
    properties:
      - name: ProductId
        type: Guid
        uniqueKey: true
        identifierGenerator: IGuidIdentifierGenerator
      - name: ProductName
        type: string
      - name: Price
        type: decimal
      - name: ChangeLog
        type: ChangeLog
    operations:
      - name: Update
        type: Update
        uniqueKey: true
        excludeWebApi: true
        excludeWebApiAgent: true
        excludeIManager: true
        excludeManager: true
      - name: UpdatePrice
        type: Update
        uniqueKey: true
        valueType: ProductPrice
        validator: ProductPriceValidator
        webApiRoute: '{productId}/price'
        managerCustom: true
        excludeIDataSvc: true
        excludeData: true
        excludeIData: true
        excludeDataSvc: true
  - name: ProductPrice
    properties:
      - name: ProductId
        type: Guid
        uniqueKey: true
      - name: Price
        type: decimal
コードを自動生成します。
dotnet run all
Business/ProductManager.cs
managerCustom: true としたので自動生成される ProductManager.cs の実装は以下のようになっています。
/// <summary>
/// Updates an existing <see cref="ProductPrice"/>.
/// </summary>
/// <param name="value">The <see cref="ProductPrice"/>.</param>
/// <param name="productId">The Product Id.</param>
/// <returns>The updated <see cref="Product"/>.</returns>
public Task<Product> UpdatePriceAsync(ProductPrice value, Guid productId) => ManagerInvoker.Current.InvokeAsync(this, async () =>
{
    await value.Validate().Mandatory().RunAsync(throwOnError: true).ConfigureAwait(false);

    value.ProductId = productId;
    return Cleaner.Clean(await UpdatePriceOnImplementationAsync(value, productId).ConfigureAwait(false));
}, BusinessInvokerArgs.Update);
ここで呼び出される UpdatePriceOnImplementationAsync メソッドを実装します。ProductManager.cs をパーシャル クラスとして追加します (Generated フォルダーにある ProductManager.cs は直接修正しないでください)。
/// <summary>
/// Updates an existing <see cref="ProductPrice"/>.
/// </summary>
/// <param name="value">The <see cref="ProductPrice"/>.</param>
/// <param name="productId">The Product Id.</param>
/// <returns>The updated <see cref="Product"/>.</returns>
public async Task<Product> UpdatePriceOnImplementationAsync(ProductPrice value, Guid productId)
{
    Cleaner.CleanUp(productId);
    await value.Validate().Mandatory().RunAsync(throwOnError: true).ConfigureAwait(false);
    var data = Cleaner.Clean(await _dataService.GetAsync(productId).ConfigureAwait(false));
    var result = Cleaner.Clean(await _dataService.UpdateAsync(_mapper.Map(value, data)).ConfigureAwait(false));
    return result;
}
ここでやっていることは以下の通りです。
- 現在のデータを
GetAsyncメソッドで取得する - AutoMapper で現在のデータにパラメーターの
ProductPriceを反映する - 反映したデータを
UpdateAsyncで更新する
Data/AutoMapperProfile.cs
AutoMapper の定義を追加します。AddAutoMapper でアセンブリを指定しているのでAutoMapper の定義は Profile クラスを継承していればどこに記述しても問題ありません。
public class AutoMapperProfile : Profile
{
    /// <summary>
    /// Gets the <i>Beef</i> <see cref="AutoMapperProfile"/> <see cref="System.Reflection.Assembly"/>.
    /// </summary>
    public static Assembly Assembly => typeof(AutoMapperProfile).Assembly;

    /// <summary>
    /// Initializes a new instance of the <see cref="AutoMapperProfile"/> class.
    /// </summary>
    public AutoMapperProfile()
    {
        CreateMap<ProductPrice, Product>();
    }
}
実行結果
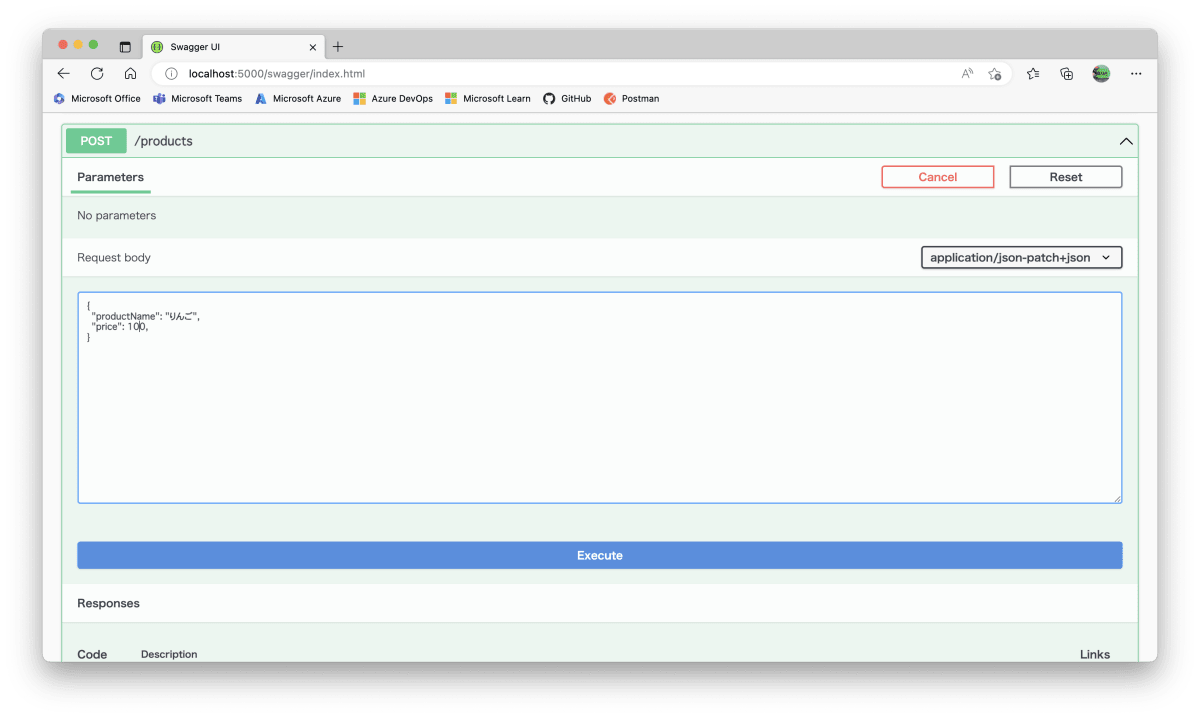
プロジェクトをデバッグ実行します。ブラウザーで http://localhost:5000/swagger を起動します。まずは /products に POST リクエストを実行してデータを作成します。
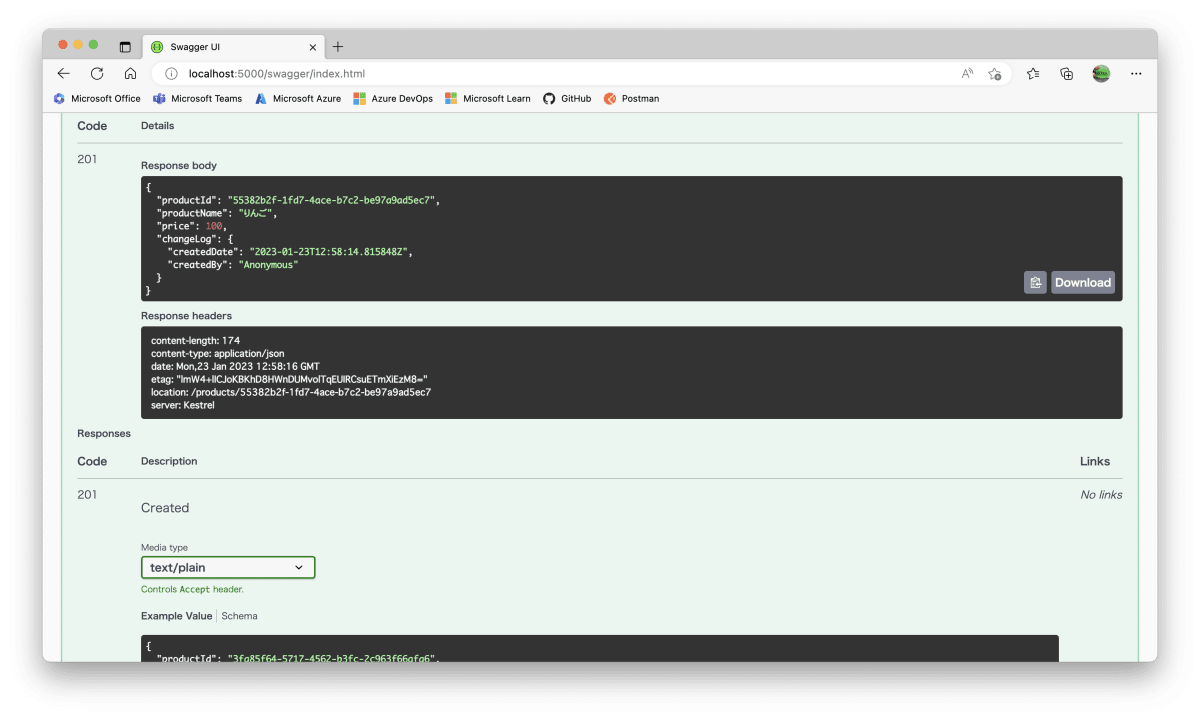
作成されたことを確認します。
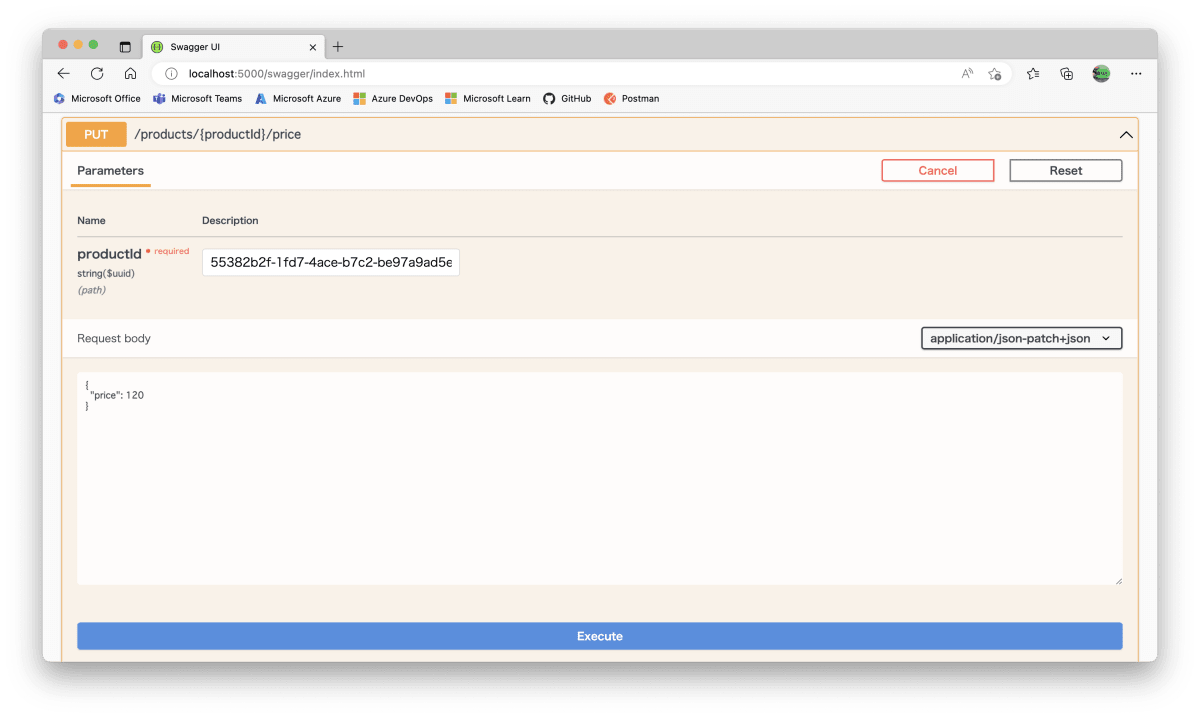
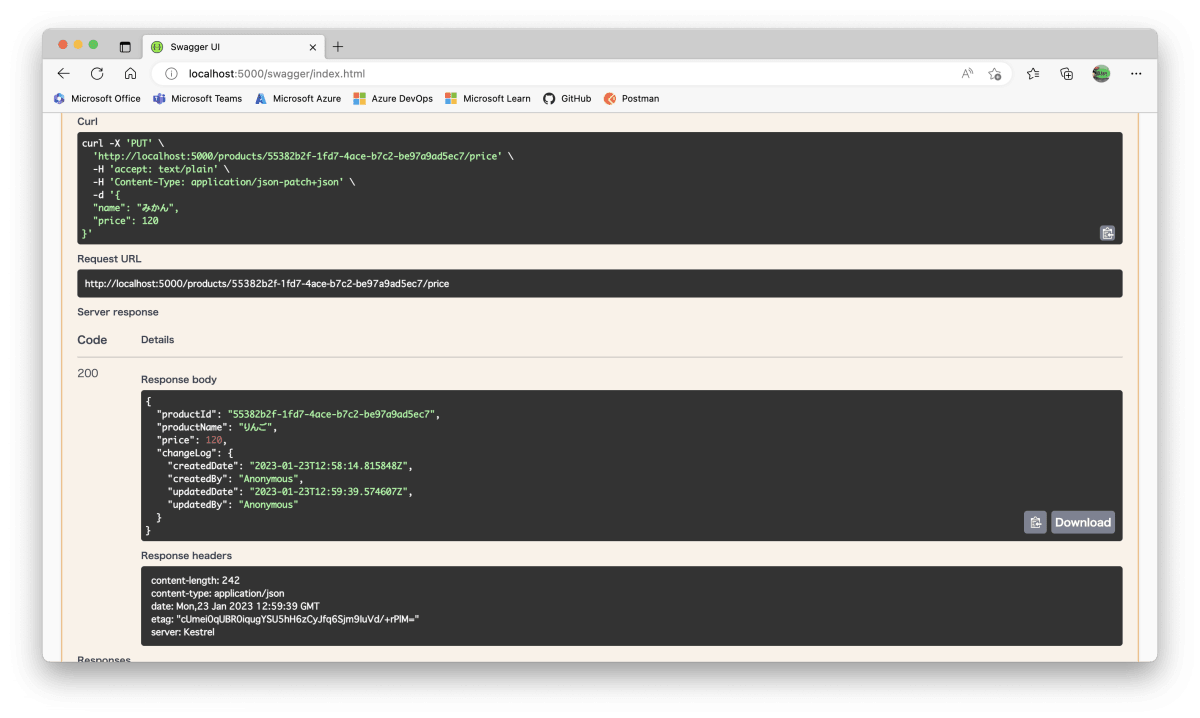
次に /products/price を実行します。
Price が更新されていることを確認します。
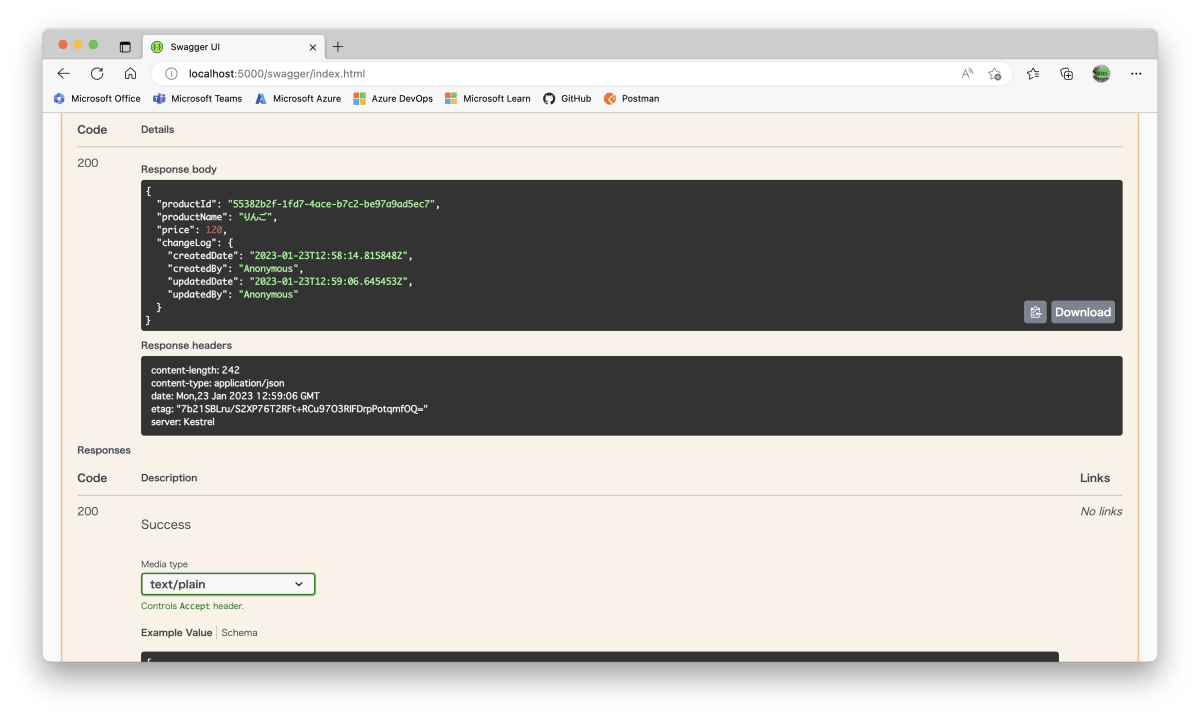
ちなみに Name を指定しても更新されません。
おわりに
エンドポイントがわかれていれば IAuthorizationFilter を追加して特定のユーザーのみ実行可能にするということもできるようになります。業務に合わせて柔軟に設計をすることが重要になります。
Discussion