Cloudflare AI Gateway for Amazon Bedrock
Clouflare AI Gateway は様々なLLMモデルに対するプロキシーとして、ログの保存や、回答結果のキャッシュを行うサービスです。
この記事では最近サポートされたAmazon Bedrockを試してみます。
さっそくやってみる
Amazon Bedrockの設定方法やその他AWSの環境設定はこの記事ではカバーしませんが、必要は物は以下です。
-
amazon.titan-text-express-v1が有効化されたリージョン - IAMユーザーのAccesskeyとSecretAccessKey
- IAM ユーザーは以下のポリシーを持っているとします。なぜか
ReadonlyではモデルをInvokeできませんでした。

Cloudflare AI Gateway 初期セットアップ
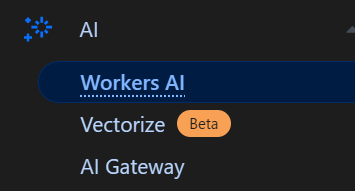
左ペインからAI Gatewayをクリックします。

画面右上のプラスボタンをクリックします。

適当な名前を付けてCreateをクリックします。

APIボタンをクリックします。

Bedrockを選択し以下の値をコピーしておきます。

必要なのは以下の部分です。
https://gateway.ai.cloudflare.com/v1/xxxxxxxx/yyyy/aws-bedrock
xxxxxxxxxとyyyyをコピーしておきます。
Cloudflare Workers 初期セットアップ
を参考に初期セットアップを行います。この際TypeScritpの利用を求められますのでYesと答えておきます。
WorkersからBedrockへのリクエストはSigv4で署名されている必要があるためまずは必要ライブラリをインストールします。
npm install aws4fetch
その後以下のソースをコピーします。
import { AwsClient } from 'aws4fetch'

interface Env {
  accessKey: string;
  secretAccessKey: string;
}

export default {
  async fetch(request: Request, env: Env, ctx: ExecutionContext): Promise<Response> {

    // replace with your configuration
    const cfAccountId = "xxxxxxxx";
    const gatewayName = "yyyyyy";
    const region = 'ap-northeast-1';

    // added as secrets (https://developers.cloudflare.com/workers/configuration/secrets/)
    const accessKey = "zzzzzz";
    const secretKey = "zzzzzz";

    const requestData = {
      inputText: "What does ethereal mean?"
    };

    const headers = {
      'Content-Type': 'application/json'
    };

    // sign the original request
    const stockUrl = new URL("https://bedrock-runtime.ap-northeast-1.amazonaws.com/model/amazon.titan-text-express-v1/invoke")

    const awsClient = new AwsClient({
      accessKeyId: accessKey,
      secretAccessKey: secretKey,
      region: region,
      service: "bedrock"
    });

    const presignedRequest = await awsClient.sign(stockUrl.toString(), {
      method: "POST",
      headers: headers,
      body: JSON.stringify(requestData)
    });

    // change the signed request's host to AI Gateway
    const stockUrlSigned = new URL(presignedRequest.url);
    stockUrlSigned.host = "gateway.ai.cloudflare.com"
    stockUrlSigned.pathname = `/v1/${cfAccountId}/${gatewayName}/aws-bedrock/bedrock-runtime/${region}/model/amazon.titan-text-express-v1/invoke`

    // make request
    const response = await fetch(stockUrlSigned, {
      method: 'POST',
      headers: presignedRequest.headers,
      body: JSON.stringify(requestData)
    })

    if (response.ok && response.headers.get('content-type')?.includes('application/json')) {
      const data = await response.json();

      return new Response(JSON.stringify(data));
    } else {
      return new Response("Invalid response", { status: 500 });
    }
  },
};
const cfAccountIdとconst gatewayNameは先ほどコピーした値に置き換えます。
accessKeyとsecretKeyはIAMユーザーの値をセットします。
なおドキュメントのこちらは問題があり動作しないため注意してください。その修正版が上記です。
ここまでできたらDeployを行います。
wrangler deploy
後はブラウザからアクセスすれば完成です。

SettingsからCacheをオンにすれば2回目以降は同じ質問の回答はキャッシュが用いられトークンを消費しません。


Discussion