ゼロからVivliostyleでレポートを書くまで ②カスタマイズ編
今回のリポジトリはこちら。
環境構築については次の記事を参照。
テーマフォルダのコピー
前回の記事で使用したテーマをカスタマイズしていく。
themes/packages/@vivliostyle/theme-academic
を
themes/theme-academic-custom へコピー。
また、vivliostyle.config.jsのテーマへのパスも書き換える。
theme: 'themes/theme-academic-custom', // .css or local dir or npm package. default to undefined.

npm run buildを実行し、前回と同様のpdfファイルが出力されるのを確認する。
manuscripts(原稿)の追加
mybook/manuscriptsフォルダを新規作成。 原稿(.mdファイル)は今後ここに追加していく。

cover.mdを新規作成し、次のように変更する。
# タイトル {.cover}

<div class="author">

- 2022/10/16
- 時価総額5000兆円株式会社
- kai ware
- Twitter: @kai_ware4job

</div>
toc.mdを新規作成し、次のように変更する。
# -{hidden}

<nav id="toc" role="doc-toc">

## 目次

- [目的](microcomputer.html#目的)
- [マイコンの基本構造](microcomputer.html#マイコンの基本構造)
- [実験手順](microcomputer.html#実験手順)
- [実験結果](microcomputer.html#実験結果)
- [追記](microcomputer.html#追記)

</nav>
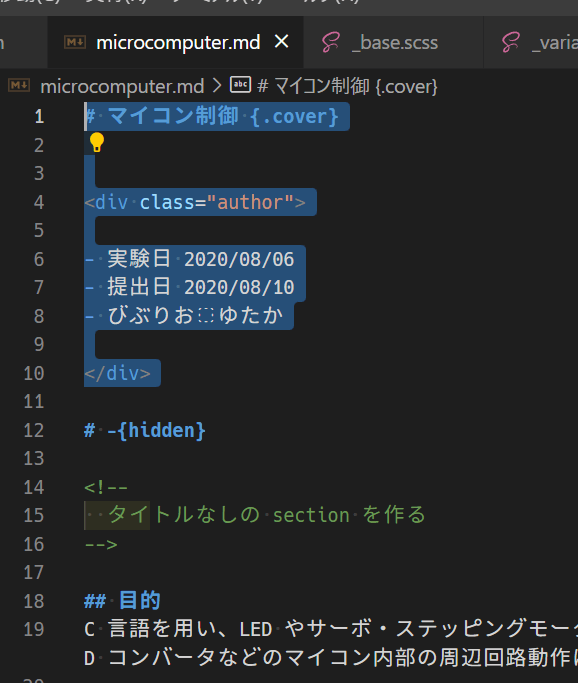
microcomputer.mdは以前のサンプルの中身から同じファイルをコピーし、先頭の部分を削除する。
vivliostyle.config.jsのentryとentryContextを修正し、mdファイルを登録する。

npm run buildを実行して、pdfに表紙と目次ができていることを確認する。

スタイルのカスタマイズ
Sassコマンドのインストール
Sassって?
CSSの拡張言語。 .sassファイルをコンパイルすることで.cssファイルを生成できる。
似たようなものに.scssもあり、こちらのほうが普及しているらしい。 今回はscssファイルを主に扱う。
また、sassコマンドをインストールするが、このコマンドでもscssファイルをコンパイルできる。
sassパッケージをインストールする。 同様のパッケージにnode-sassがあるが、こちらは非推奨らしい。
npm install sass
4つ脆弱性の警告が出るが、これを修正するとvivliostyleのbuildが通らなくなるので放置。
package.jsonを編集し、sassコマンドを登録する。 これにより、npm run sassコマンドを実行
できるようになる。
"sass": "sass themes/theme-academic-custom/scss:themes/theme-academic-custom --no-source-map --watch"

登録したコマンドの--watchオプションによってscssファイルの変更が監視され、逐一cssへコンパイルされる。
watchから抜けるには、Ctrl+C。
次から、コピーしたテーマフォルダ内のscssファイルを修正していく。
ヘッダ・フッタの変更
npm run sassコマンドを実行し、scssの監視をオンにしておく。
scss/_variables.scssファイルの以下の変数を変更する。

npm run buildを実行すると、ヘッダとフッタに文字が表示される。


目次のスタイルの変更
参考:Vivliostyle Viewer で CSS 組版ちょっと入門
npm run sassコマンドを実行し、scssの監視をオンにしておく。
theme-academic-custom/scssに、_toc.scssを新規作成。
また、theme_common.scssで_toc.scssファイルをimportする。

_toc.scssを次のように編集する。
/* ----------
 * TOC
 * ----------
*/
@page toc_page {
    counter-increment: none;

    @top-left {
        content: '';
    }

    @top-right {
        content: '';
    }

    @bottom-left {
        content: '';
    }

    @bottom-right {
        content: '';
    }

    @bottom-center {
        content: '';
    }
}

#toc {
    page: toc_page;

    li {
        list-style: none;

        ol {
            padding-left: 1em;
        }

        a {
            display: inline-flex;
            width: 100%;
            text-decoration: none;
            color: currentColor;
            align-items: baseline;

            ::before {
                margin-left: 0.5em;
                margin-right: 0.5em;
                border-bottom: 1px dotted;
                content: '';
                order: 1;
                flex: auto;
            }

            ::after {
                text-align: right;
                counter-increment: page -1;
                content: target-counter(attr(href), page);
                align-self: flex-end;
                flex: none;
                order: 2;
            }
        }
    }

    h2::before {
        content: '';
    }
}

@page :first {
    /* FIXME: タイトルと目次のページから逆算してページカウンタを調整 */
    counter-reset: page -2;
}
npm run buildを実行すると、目次に点線とページ番号がついているのがわかる。
また、各項目をクリックするとそのページに飛べる。

コードブロックのスタイルの変更
参考:https://vivliostyle.org/ja/tutorials/configure-basic-elements/
npm run sassコマンドを実行し、scssの監視をオンにしておく。
そのままの状態だとSyntax Highlightが無く、コードが見づらい。
scss/_code.scss を編集していく。
以下のように、addと書いてある部分を追加。
/* ----------
 * Code
 * ----------
*/

@import 'https://cdnjs.cloudflare.com/ajax/libs/prism/1.28.0/themes/prism.min.css'; // add

code,
kbd,
pre,
samp {
  font-family: $font-monospace;
}

pre {
  tab-size: 4;
  box-decoration-break: clone;
  text-align: left;
  white-space: pre-wrap;
  margin: 0pt; // add
}

*:not(pre)>code {
  color: $color-gray;
  font-weight: bold;
  padding: 0pt 2pt;
  border-radius: 1pt;
  background-color: $color-light-gray;
}

// add ->
code {
  background-color: #f6f6f6;
  padding: 0 3pt;
}

figure[class^='language-'] {
  margin: 0.5em 0;
}

figcaption {
  background-color: #e6e6e6;
}
// <- add
npm run buildを実行すると、ソースコードにハイライトがついて見やすくなったことがわかる。
また、コードブロックにファイル名を指定すると図番号を表示してくれる。
例:
```c:app.c
#include<stdio.h>
...

Headingのスタイルの変更
npm run sassコマンドを実行し、scssの監視をオンにしておく。
節番号部分に縦棒や下線を追加したい。
scss/_base.scssを編集していく。
以下のように、addと書いてある部分を追加。
/* ----------
 * Base - Headings
 * ----------
*/

h1 {
  margin: 8pt auto 4pt;
  font-size: 20pt;
  line-height: 1.5;
  text-align: center;
}

h2 {
  margin: 8pt auto 4pt;
  font-size: 14pt;
  border-bottom: solid 1px rgb(100, 100, 100); // add

  &:before {
    font-size: 14pt;
    border-left: solid 7px rgb(0, 51, 102); // add
  }
}

h3 {
  margin: 4pt auto 2pt;
  font-size: 12pt;
  border-bottom: solid 1px rgb(200, 200, 200); // add

  &:before {
    font-size: 12pt;
    border-left: solid 4px rgb(100, 100, 100); // add
  }
}

h4 {
  margin: 4pt auto 2pt;
  font-size: 10pt;
  border-bottom: solid 1px rgb(200, 200, 200); // add

  &:before {
    font-size: 10pt;
  }
}
scss/_counter.scss を編集していく。
以下のように、modifyと書いてある部分を修正。
/* ----------
 * Counter - Headings
 * ----------
 * h1: chapter
 * h2: section
 * h3: subsection
 * h4: subsubsection
*/

h1 {
  counter-reset: section table figure footnote ref;
  /* reset all counters */
}

h2 {
  counter-reset: subsection;
  /* reset counters of lower levels */
  counter-increment: section;
  /* increment counters of current level */

  &:before {
    content: ' ' counter(section); // modify
  }
}

h3 {
  counter-reset: subsubsection;
  /* reset counters of lower levels */
  counter-increment: subsection;
  /* increment counters of current level */

  &:before {
    content: ' ' counter(section) '.' counter(subsection); // modify
  }
}

h4 {
  counter-increment: subsubsection;
  /* increment counters of current level */

  &:before {
    content: counter(section) '.' counter(subsection) '.' counter(subsubsection);
  }
}
npm run buildを実行すると、節部分に縦棒や下線を追加できているのがわかる。

サブタイトルの追加
npm run sassコマンドを実行し、scssの監視をオンにしておく。
scss/_title.scss を編集していく。
以下のように、addと書いてある部分を追加。
/* ----------
 * Cover
 * ----------
*/

(途中略)

.cover {
  page: cover;
  break-after: page;
  height: 100vh;
  display: flex;
  flex-direction: column;
  justify-content: center;

  .author {
    ul {
      text-align: center;
    }
  }

  // add ->
  .subtitle {
    text-align: center;
    font-family: 'Hiragino Kaku Gothic ProN', sans-serif;
    font-size: large;
    font-weight: bold;
    margin-top: -300px;
    margin-bottom: 300px;
  }
  // <- add
}
また、manuscripts/cover.mdを次のように変更。
# ゼロからVivliostyleでレポートを書くまで {.cover}

<div class="subtitle">
    ②カスタマイズ編
</div>

<div class="author">

- 2022/10/16
- 時価総額5000兆円株式会社
- kai ware
- Twitter: @kai_ware4job

</div>
npm run buildを実行すると、サブタイトルを追加できたことがわかる。

まとめと今後の課題
cssをカスタマイズすることで見栄えの良いレポートを作成することができた。
ただ、目次が手動入力で節番号などが振れていないことがまだ物足りない。
Discussion