flutter_hooksのuseReducerを使った例
Overview
flutter_hooksにもReact.jsのようなuseStateより複雑な状態管理ができるuseReducerがあるようです。
Store<State, Action> useReducer<State, Action>(
Reducer<State, Action> reducer,
{required State initialState,
required Action initialAction}
)
An alternative to useState for more complex states.
useReducer manages a read only instance of state that can be updated by dispatching actions which are interpreted by a Reducer.
reducer is immediately called on first build with initialAction and initialState as parameter.
It is possible to change the reducer by calling useReducer with a new Reducer.
See also:
📕翻訳するとこんな感じ
Store<状態、アクション> useReducer<状態、アクション>(
Reducer<State, Action> レデューサー、
{必須の状態initialState、
必須アクションinitialAction}
)
より複雑な状態のための useState の代替手段。
useReducer は、Reducer によって解釈されるアクションをディスパッチすることで更新できる状態の読み取り専用インスタンスを管理します。
Reducer は、最初のビルド時に、initialAction とinitialState をパラメーターとして使用してすぐに呼び出されます。
新しい Reducer を指定して useReducer を呼び出すことで、Reducer を変更できます。
以下も参照してください。
減速機
店
アクションとステートを合成して新しいステートを作成します。 たとえ状態やアクションが null であっても、Reducer は決して null を返してはなりません。
データ型決まってるみたい?:
typedef Reducer<State, Action> = State Function(State state, Action action);
アクションをディスパッチすることで突然変異を可能にする、可変状態のストア。
ReactのReduxみたいなこと書いてありますね...
dispatchとは?
アクションをディスパッチします。 アクションは同期的にディスパッチされます。ビルド中にアクションをディスパッチしようとすることは不可能です。
void dispatch(Action action);

// 内部のコードはこれ
/// A store of mutable state that allows mutations by dispatching actions.
abstract class Store<State, Action> {
  /// The current state.
  ///
  /// This value may change after a call to [dispatch].
  State get state;

  /// Dispatches an action.
  ///
  /// Actions are dispatched synchronously.
  /// It is impossible to try to dispatch actions during `build`.
  void dispatch(Action action);
}
stateはゲッターのようですね。これは変数じゃなくてメソッドですよ。
summary
flutter_hooksのuseStateで状態管理を業務で使ったときの使用例を解説すると、setStateの代わりに画面を更新する処理が必要なWidgetで使っていましたね。例えばラジオボタンとドロップダウンボタンですね。
これから使用例をご紹介しようと思います。
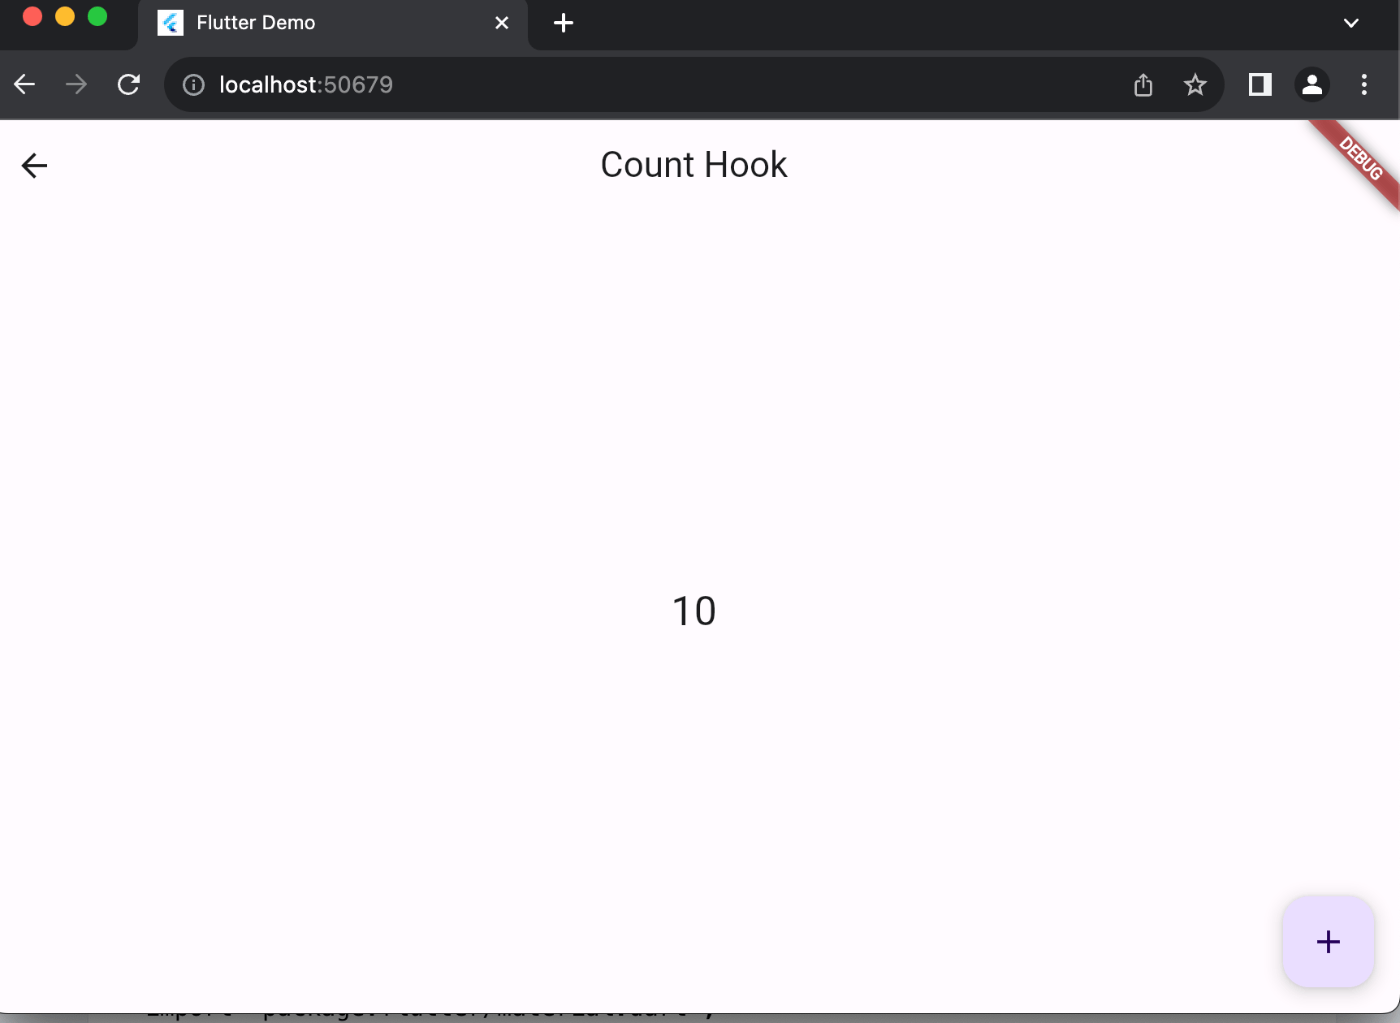
カウンターを使った例ですと、単純に初期値があって、ボタンを押すと数字が増えていくっていうものですね。dispatchがactionを更新することで、数字増えていく感じですね。ここはReact.jsと同じですね。
カウンター
import 'package:flutter/material.dart';
import 'package:flutter_hooks/flutter_hooks.dart';
class CountHook extends HookWidget {
const CountHook({super.key});
Widget build(BuildContext context) {
// カウンターの状態をuseReducerで管理する
final count = useReducer((state, action) => state + 1, initialState: 0, initialAction: 0);
return Scaffold(
appBar: AppBar(
title: const Text('Count Hook'),
),
floatingActionButton: FloatingActionButton(
onPressed: () => count.dispatch(0),// dispatchでactionを発行してstateを更新する
child: const Icon(Icons.add),
),
body: Center(
child: Text(
'${count.state}',
style: const TextStyle(fontSize: 25),
),
),
);
}
}
enumの書き方が古い気がしますが、これでないとうまくいかなかったので、許してください🙇
カウンターと同じで、違うボタンが選択されたら、dispatchでactionを発行してstateを更新します。画面を更新してるだけですね。値も変わっているんですけどね。
ラジオボタン
import 'package:flutter/material.dart';
import 'package:flutter_hooks/flutter_hooks.dart';
enum Action {
male,
female,
}
enum Gender {
male,
female,
}
extension on Gender {
String get displayName {
switch (this) {
case Gender.male:
return '男性';
case Gender.female:
return '女性';
}
}
}
class RadioHook extends HookWidget {
const RadioHook({Key? key}) : super(key: key);
Widget build(BuildContext context) {
// ラジオボタンの状態をuseReducerで管理
final selectedGender = useReducer<Gender?, Action>((state, action) {
// dispatchでactionを発行してstateを更新する
switch (action) {
case Action.male:
return Gender.male;
case Action.female:
return Gender.female;
}
}, initialState: Gender.male, initialAction: Action.male);
return Scaffold(
appBar: AppBar(
title: const Text('Radio Hook'),
),
body: Center(
child: Column(
mainAxisAlignment: MainAxisAlignment.center,
children: <Widget>[
Text(
'あなたの性別は${selectedGender.state?.displayName}です',
),
// onChangedで選択された値をdispatchで発行する
ListTile(
title: const Text('Male'),
leading: Radio<Gender>(
value: Gender.male,
groupValue: selectedGender.state,
onChanged: (Gender? value) {
selectedGender.dispatch(Action.male);
print('選択された性別は${selectedGender.state?.displayName}です');
},
),
),
ListTile(
title: const Text('Female'),
leading: Radio<Gender>(
value: Gender.female,
groupValue: selectedGender.state,
onChanged: (Gender? value) {
selectedGender.dispatch(Action.female);
},
),
),
],
),
),
);
}
}


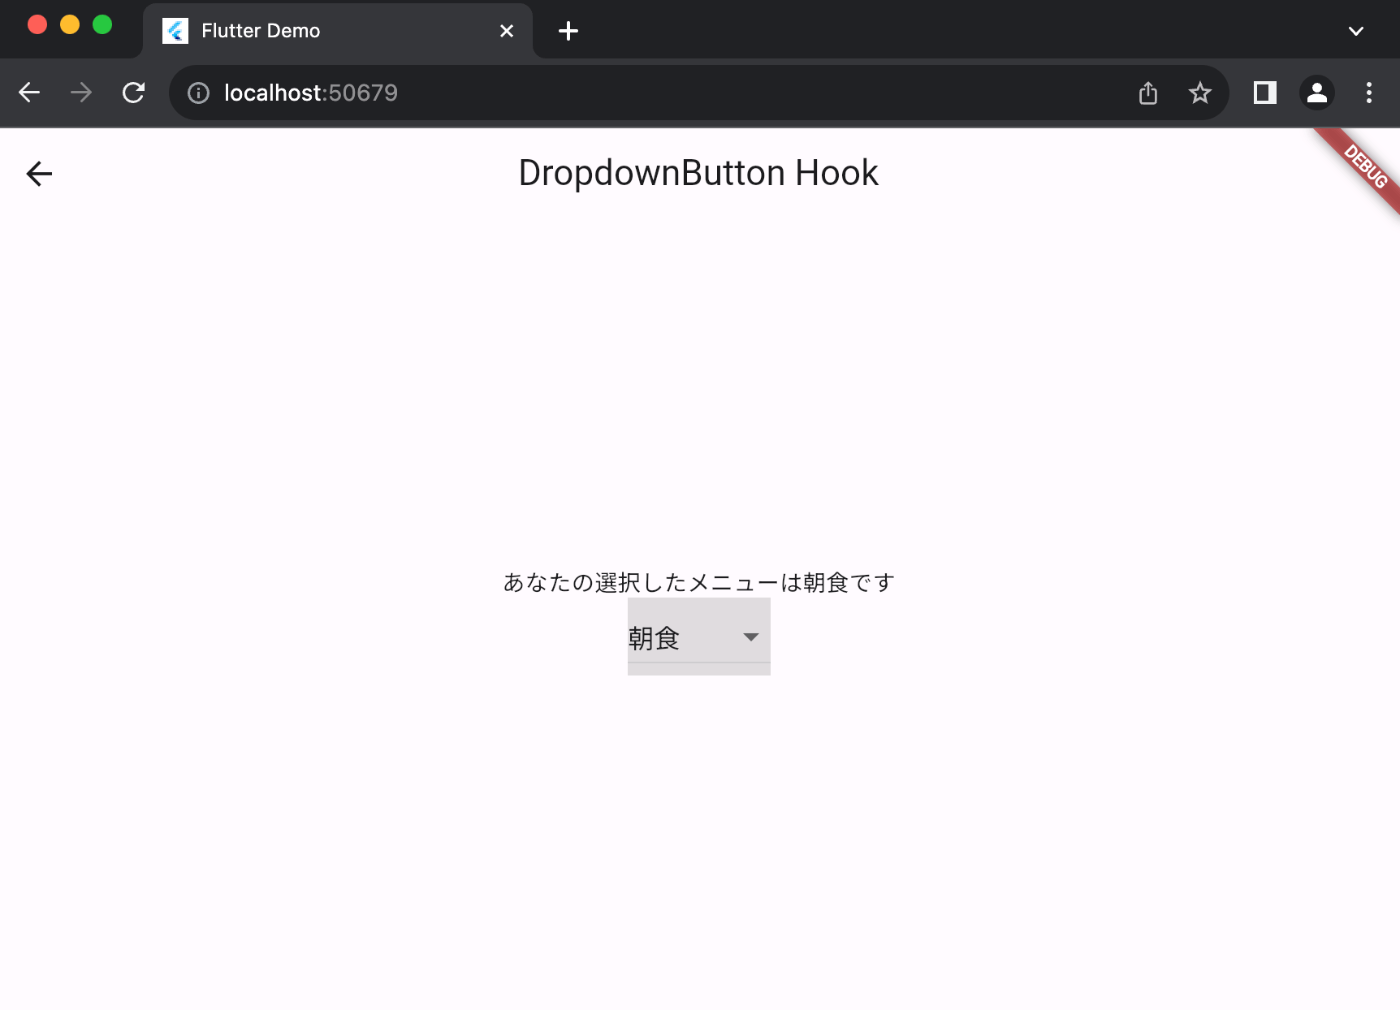
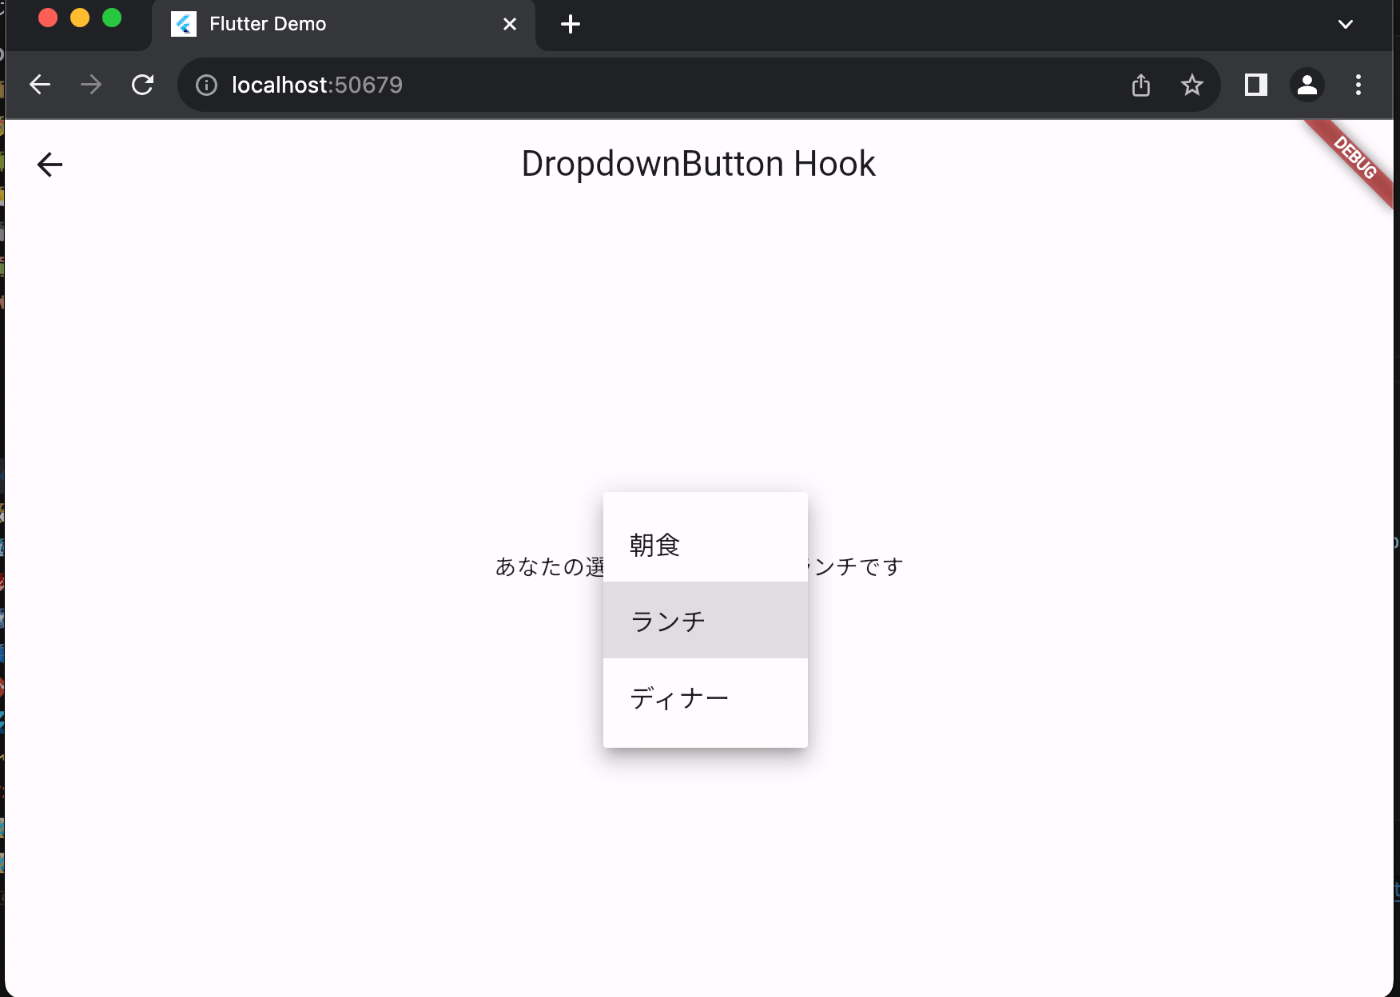
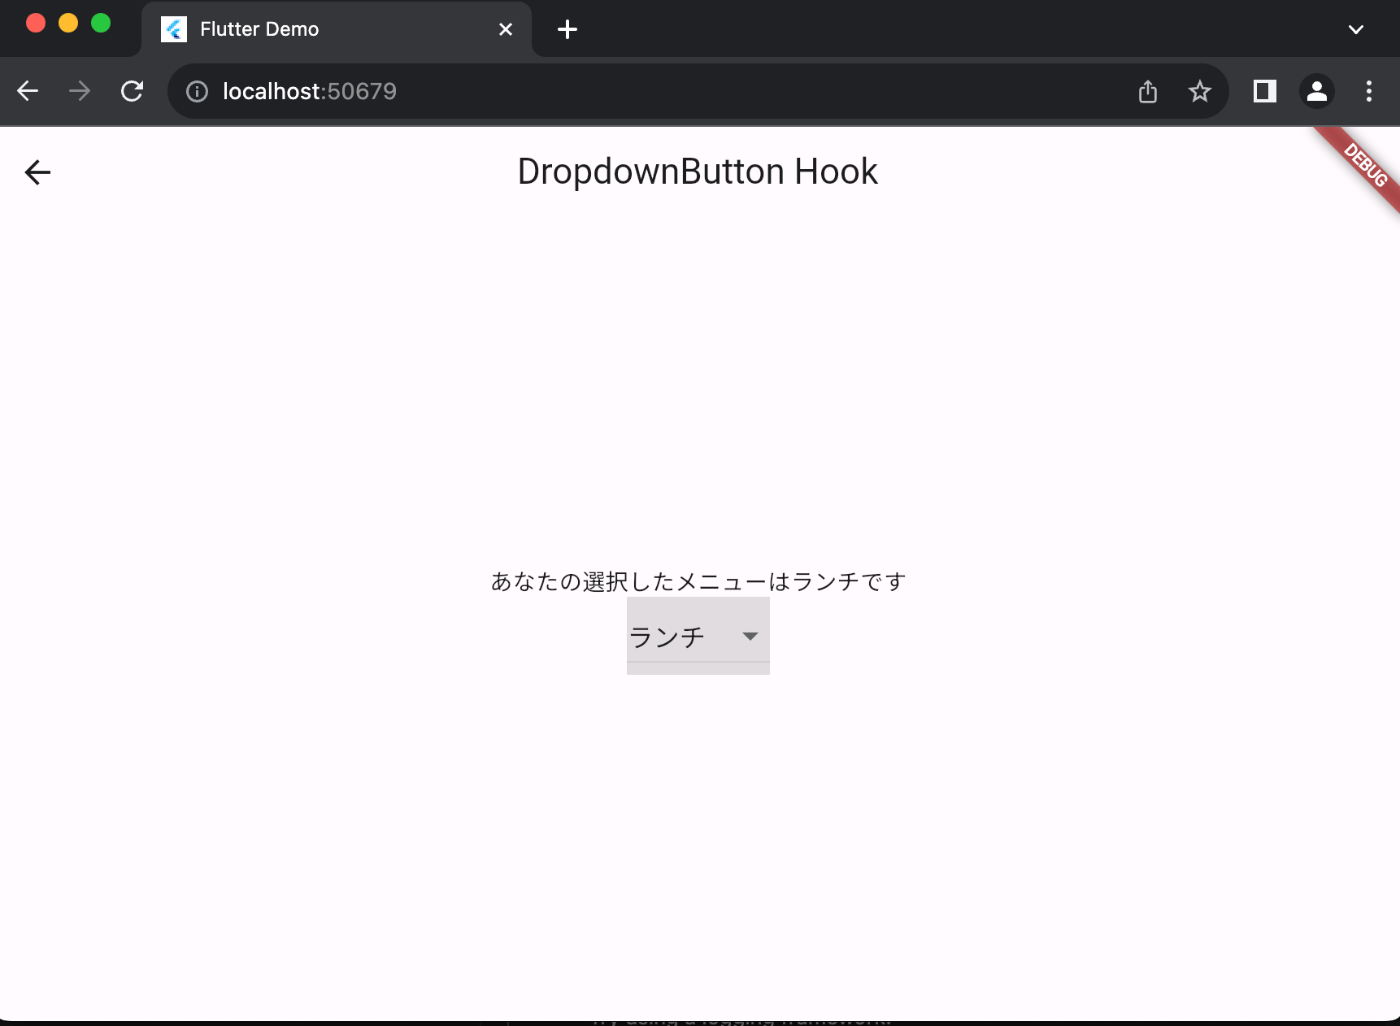
こちらもラジオボタンと同じで、dispatchでactionを発行してstateを更新して、選択されたメニューによって、Text Widgetの内容が変わります。画面が更新されているから内容が切り替わっているってことですね。
ドロップダウンボタン
import 'package:flutter/material.dart';
import 'package:flutter_hooks/flutter_hooks.dart';
enum MENU {
BRUNCH,
LUNCH,
DINNER,
}
extension on MENU {
String get displayName {
switch (this) {
case MENU.BRUNCH:
return '朝食';
case MENU.LUNCH:
return 'ランチ';
case MENU.DINNER:
return 'ディナー';
}
}
}
class DropButtonHook extends HookWidget {
const DropButtonHook({super.key});
Widget build(BuildContext context) {
// dropdownの状態をuseReducerで管理
final selectedMenu = useReducer<MENU?, MENU>((state, action) {
switch (action) {
case MENU.BRUNCH:
return MENU.BRUNCH;
case MENU.LUNCH:
return MENU.LUNCH;
case MENU.DINNER:
return MENU.DINNER;
}
}, initialState: MENU.BRUNCH, initialAction: MENU.BRUNCH);
return Scaffold(
appBar: AppBar(
title: const Text('DropdownButton Hook'),
),
body: Center(
child: Column(
mainAxisAlignment: MainAxisAlignment.center,
children: <Widget>[
Text(
'あなたの選択したメニューは${selectedMenu.state?.displayName}です',
),
// DropdownButtonで選択されたメニューをstateに反映する
DropdownButton<MENU>(
value: selectedMenu.state,
onChanged: (MENU? value) {
selectedMenu.dispatch(value!);
print('選択されたメニューは${selectedMenu.state?.displayName}です');
},
items: const [
DropdownMenuItem(
value: MENU.BRUNCH,
child: Text('朝食'),
),
DropdownMenuItem(
value: MENU.LUNCH,
child: Text('ランチ'),
),
DropdownMenuItem(
value: MENU.DINNER,
child: Text('ディナー'),
),
],
),
],
),
),
);
}
}
ページ3つ作ったので、画面遷移するページ作っておきました。go routerいらないかなと思って、標準の機能で画面遷移してます。
ページ移動すメニューページ
import 'package:flutter/material.dart';
import 'package:hooks_cookbook/view/count_hook.dart';
import 'package:hooks_cookbook/view/dropdown_hook.dart';
import 'package:hooks_cookbook/view/radio_hook.dart';
/// [extensionで画面遷移のWidgetを作成する関数を作成]
extension BuildContextE on BuildContext {
Future<void> to(Widget view) async {
await Navigator.of(this).push(
MaterialPageRoute(
builder: (context) {
return view;
},
),
);
}
}
class MenuHook extends StatelessWidget {
const MenuHook({super.key});
Widget build(BuildContext context) {
return Scaffold(
appBar: AppBar(
title: const Text('Menu Hook'),
),
body: Center(
child: Column(
mainAxisAlignment: MainAxisAlignment.center,
children: <Widget>[
ElevatedButton(
onPressed: () {
context.to(const DropButtonHook());
},
child: const Text('DropdownButton Hook'),
),
const SizedBox(height: 10),
ElevatedButton(onPressed: () {
context.to(const RadioHook());
}, child: const Text('Radio Hook')),
const SizedBox(height: 10),
ElevatedButton(onPressed: () {
context.to(const CountHook());
}, child: const Text('Count Hook'))
],
),
),);
}
}
メニューのページをimportしてビルドするとサンプルコードを実行することができます。
main.dart
import 'package:flutter/material.dart';
import 'package:hooks_cookbook/view/menu_hook.dart';
void main() {
runApp(const MyApp());
}
class MyApp extends StatelessWidget {
const MyApp({super.key});
Widget build(BuildContext context) {
return MaterialApp(
title: 'Flutter Demo',
theme: ThemeData(
colorScheme: ColorScheme.fromSeed(seedColor: Colors.deepPurple),
useMaterial3: true,
),
home: const MenuHook(),
);
}
}
thoughts
今回は、useStateではない方法でflutter_hooksの状態管理について学んでみました。これを使うとriverpodで1ページでしか使わないのに、グローバルに状態を管理するプロバイダーを定義する必要がなくなります。
カウンターページでしか使わないのに、わざわざどこでも使える方法を選択する必要はありませんからね。
この記事が誰かのお役に立つと良いですが...
こちらが完成品のソースコード:
参考になった海外サイト:
本家のReactだとこんな感じです:
Discussion