はじめに
前回、概要レベルで Voice Live API についてまとめました。
今回は、以下のブログにあるサンプルアプリをベースに、リアルタイムイベント処理について読み解き、理解を深めていきたいと思います
イベント処理の基本的な流れ自体は、従来の Realtime API とほとんど変わらないそうです
やること
- 全体処理の流れを把握する
- サーバ側からどのような順序でリアルタイムイベントが送られてくるか把握する
Voice Live API 固有のリアルタイムイベント
Realtime API にはないイベントが一部サポートされているようなので、差分を確認しました
サポートされているリアルタイム イベントは、ほとんどの場合 、Azure OpenAI Realtime API イベントと同等であり、一部の例外があります。
"一部の例外" についてですが、アバター出力に関連するイベントが、追加されているようです。
Real-time avatar uses WebRTC protocol to output the avatar video stream. You need to set up the connection with the avatar service through WebRTC peer connection.
アバター出力のビデオストリームの部分は、 WebRTC を使用する必要があるみたいです
| イベント名 | 概要 |
|---|---|
session.avatar.connect |
アバター用WebRTCチャネルを確立するためClient SDPを送信 |
session.avatar.connecting |
サーバーがServer SDPを返し、ネゴシエーションを継続 |
response.audio_timestamp.delta |
生成音声に対し、語単位のタイムスタンプをストリーミング |
response.audio_timestamp.done |
全タイムスタンプ送信完了を通知 |
response.animation_viseme.delta |
口形素(viseme ID)をリアルタイムでストリーミング |
response.animation_viseme.done |
Visemeストリーム完了を通知 |
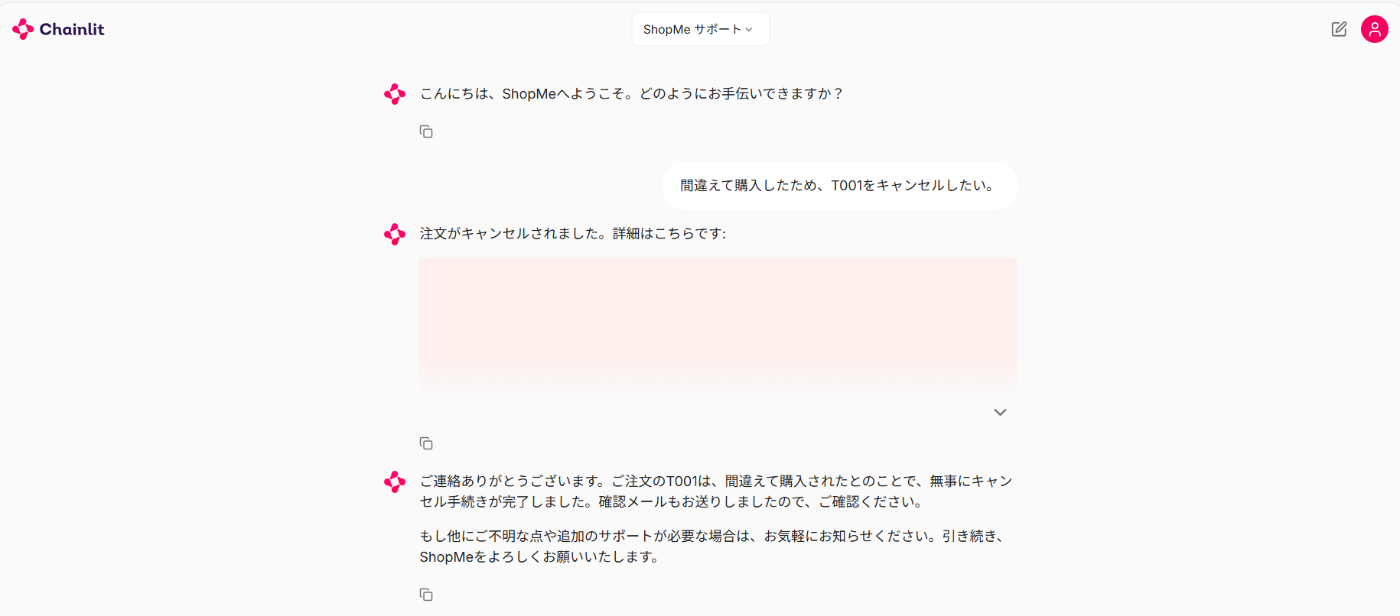
シナリオ
- ECサイトの問い合わせチャットボット
- 「間違えて購入した商品をキャンセルする」シナリオを想定
ユーザは音声入力を用いて、Voice Live APIにリクエストを送信し、
Function Calling で、キャンセル処理を呼び出し、音声+テキストで回答を受けることを想定します。
処理の流れ
全体の処理の流れです
- マイクから音声入力を取得する
- 取得した音声をサーバにリアルタイムで送信
- サーバ側で、文字起こしの生成 → LLMをコールし回答を生成 → コール結果を音声データに変換し応答音声を生成
- ストリームで生成された音声をユーザーに返却
Function Callingが発生する場合は、3の回答生成時に、下記の処理が追加で実行されます
- ツールに必要な引数を生成
- 生成した引数とcall_idを、ツールの実行が必要であるイベントとともにクライアント側返却
- クライアント側にて、ツールを実行し、サーバへ実行結果を返却する
セッションの開始~応答までのイベントの流れをまとめました(かなり小さいですが、、)
State
Voice Live API はセッションの中で以下の情報を保持しています。
session conversation input audio buffer responses function call
-
session
- モデル設定(プロンプト、音声合成、VAD)
- 入出力オーディオフォーマット設定
-
conversation
- 会話内でのメッセージやツール呼び出しを保持するセッション内で作られた item のリスト
conversation
"conversation": { "id": "conv_001", // conversation.created で通知 "items": [ /* message / function_call / function_call_output が時系列で並ぶ */ ] }- item
- typeは3種類あります
-
message: テキスト or 音声 -
function_call: モデルがツールを必要とすると判断したことを示す -
function_call_output: Funcitonの応答を示す
-
- typeは3種類あります
-
input_audio_buffer
- ユーザーの音声データ(PCM16/Base64)を一時的にチャンク単位で保持
- 発話完了時にサーバーに送信(commit)され会話に反映される
-
responses
- AIがリアルタイムに生成する応答(テキストや音声)の進行状況を管理
-
function_call
- モデルが外部ツールを使う際の指示やその結果を管理
リアルタイム処理
初期化
-
WebSocket接続・Connection確立
- model名, api-version, api-key をセット
await websockets.connect(f"{self.url}/voice-live/realtime?api-version={self.api_version}&model={self.model}&api-key={self.api_key}")
-
セッションの作成
session.updateでセッション構成をサーバへ送信- システムプロンプトや、 config 値を設定
- session config は、後からでも更新できます
session config
{
    "model": "cascaded",
    "modalities": ["text", "audio"],
    "instructions": "ShopMeというECサイトのお問い合わせに関して回答します",
    "voice": {
            "name": "en-US-Aria:DragonHDLatestNeural",
            "type": "azure-standard",
            "temperature": 0.8,
        },
    "input_audio_transcription": {
        "model": "azure-fast-transcription",
        "language": "ja-jp",
    },
    "input_audio_noise_reduction": {
            "type": "azure_deep_noise_suppression"
        },
    "input_audio_echo_cancellation": {
        "type": "server_echo_cancellation"
    },
    "input_audio_format": "pcm16",
    "output_audio_format": "pcm16",
    "turn_detection": {
            "type": "azure_semantic_vad",
            "threshold": 0.3,
            "prefix_padding_ms": 200,
            "silence_duration_ms": 200,
            "remove_filler_words": True,
            "end_of_utterance_detection": {
                "model": "semantic_detection_v1",
                "threshold": 0.1,
                "timeout": 1,
            },
        },
    "tools": [],
    "tool_choice": "auto",
    "temperature": 0.8,
    "max_response_output_tokens": 4096,
}
発話開始 ~ 入力の決定
-
ユーザーが発話開始
🎙「間違えて購入したのでorder_001をキャンセルしたい」 -
音声チャンクをバッファに書き込み
- マイク音声を一定時間ごとに、PCM16 に変換
- Base64エンコード
- 各チャンクごとに分割した単位でサーバ側のバッファに書き込み
input_audio_buffer.appendにチャンクを乗せてサーバに送信input_audio_buffer.append
{ "type":"input_audio_buffer.append", "audio":"<Base64-PCM16>" } -
ユーザーの音声入力完了を検出
- ユーザーの発話区切りを検知します
-
VAD (
turn_detected)が有効化-
サーバ側で発話開始/終了を自動検出する
VAD の種類
-
server_vad: 無音時間に基づいてオーディオを自動的にチャンク化 -
azure_semantic_vad: ユーザーが発した言葉に基づいて、モデルが発話完了と判断したときにオーディオをチャンク化
-
-
発話(音声)の開始が検出されたときに以下のイベントがサーバから返される
input_audio_buffer.speech_startedinput_audio_buffer.speech_started
{ "event_id": "event_1iWCMcdmYAduOX8HjdE4sy", "type": "input_audio_buffer.speech_started", "audio_start_ms": 864, "item_id": "item_DLbnJhPGgj7orR7Y8beWS" }- 発話(音声)の停止が検出されたときに以下のイベントがサーバから返される
input_audio_buffer.speech_stoppedinput_audio_buffer.speech_stopped
{ "event_id": "event_6sk736Wd7NGbCh7dDYZV0Q", "type": "input_audio_buffer.speech_stopped", "audio_end_ms": 4288, "item_id": "item_DLbnJhPGgj7orR7Y8beWS" } -
-
VAD が無効化
- 発話が完了したことを通知する以下のイベントをサーバに送信する必要がある
input_audio_buffer.commit- サーバ側でコミットが完了(音声終了を検出)したら、以下のイベントが返ってくる
input_audio_buffer.committed
-
- ユーザーの発話内容を会話履歴に追加
-
音声文字起こし(オプション)
- 発話終了をサーバ側で検知すると、発話内容が文字起こしされる
- オーディオバッファに書き込まれた音声の文字起こし結果が返される
conversation.item.input_audio_transcription.completedをサーバから受信するconversation.item.input_audio_transcription.completed
{ "event_id": "event_2OOrMPS6CBOzuRhm4ksF10", "type": "conversation.item.input_audio_transcription.completed", "item_id": "item_DLbnJhPGgj7orR7Y8beWS", "content_index": 0, "transcript": "間違えて購入したのでorder_001をキャンセルしたい" } -
会話アイテム生成
- サーバ側でセッション内の会話履歴に音声/テキストデータを追加してくれる
conversation.item.createdでサーバから生成されたユーザーの会話 item が返ってくるconversation.item.created
{
  "event_id": "event_2Yr6DP3TIJjanprPGRpsSx",
  "type": "conversation.item.created",
  "previous_item_id": null,
  "item": {
    "id": "item_DLbnJhPGgj7orR7Y8beWS",
    "type": "message",
    "status": "completed",
    "role": "user",
    "content": [
      {
        "type": "input_audio",
        "transcript": "間違えて購入したのでorder_001をキャンセルしたい"
      }
    ]
  }
}
回答生成(通常応答)
入力されたユーザーの質問をもとに、回答を生成します。
-
回答生成を開始
response.createdをサーバから受信
アイテムは、現在の生成状態を示す、ステータスを持っており、in_progressで生成されるresponse.created
{ "event_id": "event_3UGuvqKApAbZQaBiUyIzyr", "type": "response.created", "response": { "id": "resp_jJCbkHb0LtO58gCQibZA1", "status": "in_progress", "status_details": null, "output": [], "usage": null } } -
回答を作成
response.output_item.addedconversation.item.createdをサーバから受信
アシスタントの回答アイテムの生成開始をクライアントに通知(空文字で会話履歴に追加response.output_item.added
{
"event_id": "event_24HgEfmSBdFfkmpWVaDYGZ",
"type": "response.output_item.added",
"response_id": "resp_28Q5OdgE9HAvkQEyGpFrLy",
"output_index": 0,
    "item": {
    "id": "item_47S54thTtTkJtqVziPOo3B",
    "type": "message",
    "status": "incomplete",
    "role": "assistant",
    "content": []
    }
}
conversation.item.created
{ "event_id": "event_2jbwvLTe4f5rqytMlZYhyx", "type": "conversation.item.created", "previous_item_id": "item_7bRAq98xw5mxKwcrwhb3Qm", "item": { "id": "item_47S54thTtTkJtqVziPOo3B", "type": "message", "status": "incomplete", "role": "assistant", "content": [] } } -
回答をストリームで返却
response.text.deltaをサーバから受信
ストリームでテキストデータが返されていくresponse.text.delta
{ "type": "response.text.delta", "response_id": "<response_id>", "item_id": "<item_id>", "output_index": 0, "content_index": 0, "delta": "<delta>" }response.audio.deltaをサーバから受信
テキストと同様に、ストリームで音声データが返されていくresponse.audio.delta
{ "event_id": "event_7SzZg2cUheqgVN9r0bC4Xa", "type": "response.audio_transcript.delta", "response_id": "resp_28Q5OdgE9HAvkQEyGpFrLy", "item_id": "item_47S54thTtTkJtqVziPOo3B", "output_index": 0, "content_index": 0 }response.audio_transcript.delta(オプション)
サーバ側で回答を文字起こしして返すresponse.audio_transcript.delta
{ "event_id": "event_3e7oYxqbJoHC0O0j8NnC4S", "type": "response.transcript.delta", "response_id": "resp_28Q5OdgE9HAvkQEyGpFrLy", "item_id": "item_47S54thTtTkJtqVziPOo3B", "output_index": 0, "content_index": 0 } -
回答生成完了
response.output_item.doneを受信- item内のステータスが、
completedで返される - 応答が何かしらのエラーで中断された場合やキャンセルされた場合にも completed で発行される
response.output_item.done
{ "event_id": "event_2hdUdkCGMXHp80XaOgOfvV", "type": "response.output_item.done", "response_id": "resp_28Q5OdgE9HAvkQEyGpFrLy", "output_index": 0, "item": { "id": "item_47S54thTtTkJtqVziPOo3B", "type": "message", "status": "completed", "role": "assistant", "content": [ { "type": "audio", "transcript": "こんにちは!今日はどんなことをお話ししましょうか?何かお手伝いできることがあれば教えてくださいね。" } ] } } - item内のステータスが、
Function Calling
前提:session.update で tool の登録が完了している
-
ツール要否の判断
ツールを実行する必要がある場合、typeに function_call が指定された状態で返却されます。
また、ツールの実行結果をモデル側と紐づけするため、call_idが付与されます
response.output_item.addedをサーバから受信
response.output_item.added
{
  "event_id": "event_6LVM8WaVM8IYyxOwHAffDf",
  "type": "response.output_item.added",
  "response_id": "resp_jJCbkHb0LtO58gCQibZA1",
  "output_index": 0,
  "item": {
    "id": "item_dARTEnQhBIp4NACZduIHE",
    "type": "function_call", # ツール実行が必要である状態
    "status": "in_progress",
    "name": "cancel_order",
    "call_id": "call_n4EyEQasjveMAiI8TvaAl5XE",
    "arguments": ""
  }
}
-
ツール実行に必要な引数を生成
response.function_call_arguments.delta
関数を呼び出す際に渡す、arguments をサーバ側で生成している
response.function_call_arguments.delta
{
  "event_id": "event_77nmV9g4yAsFsbjKPc5ufJ",
  "type": "response.function_call_arguments.delta",
  "response_id": "resp_jJCbkHb0LtO58gCQibZA1",
  "item_id": "item_dARTEnQhBIp4NACZduIHE",
  "output_index": 0,
  "call_id": "call_n4EyEQasjveMAiI8TvaAl5XE"
}
-
ツール実行を要求する
引数の生成が完了すると、サーバから item 生成完了と返ってくる
response.output_item.done- type に "function_call" が含まれる item は、tool を呼び出そうとしている
response.output_item.done
{
  "event_id": "event_1hIgMGbqNTnovONOh8mSOC",
  "type": "response.output_item.done",
  "response_id": "resp_jJCbkHb0LtO58gCQibZA1",
  "output_index": 0,
  "item": {
    "id": "item_dARTEnQhBIp4NACZduIHE",
    "type": "function_call",
    "status": "completed",
    "name": "cancel_order",
    "call_id": "call_n4EyEQasjveMAiI8TvaAl5XE",
    "arguments": "{\"customer_id\":\"12121\",\"order_id\":\"T001\",\"reason\":\" 間違えて購入したため\"}"
  }
}
-
ツールの実行結果をサーバへ送信する
クライアント側でツールを実行し、結果を以下のイベントに乗せて送信します
conversation.item.create- item.type に
function_call_outputを指定 - call_id はモデルが発行したIDを使用する
- output は、関数の実行結果を渡す
conversation.item.create
{ "item": { "type": "function_call_output", "call_id": tool["call_id"], "output": json.dumps(result), } }) - item.type に
-
ツール実行結果をもとに回答を生成
ツールの実行結果をもとに、生成された item がサーバから返ってくる
conversation.item.createdconversation.item.created
{
"event_id": "event_6AkVm0T2pDwnCEiK1kWc7G",
"type": "conversation.item.created",
"previous_item_id": null,
    "item": {
    "id": null,
    "type": "function_call_output",
    "call_id": "call_n4EyEQasjveMAiI8TvaAl5XE",
    "output": "注文 order_001 は顧客 12121 によりキャンセルされました。理由: 間違えて購入したため。確認メールが送信されました。""
    }
}
会話履歴を含める
新しい item を生成する前に、過去のメッセージを渡します。
conversation.item.create で、サーバ側に item を追加することができます。
備忘録
Realtime API との大きな違いは、gpt-4o/Phiシリーズが使用できるといった点も挙げられますが、
使用する LLM によって、session config は調整する必要がありそうです。
というのも、文字起こしで、少しハマったのでメモ残しておきます
- ユーザーの音声を文字起こしするために使用するSTT (Speech To Text) モデルが、LLM によって対応するものが異なるため、適宜変更を加える必要がありそうです、
- ドキュメントは見当たりませんでしたが、以下が動くことを確認しています
STTモデルは、session config で input_audio_transcription プロパティで指定しています
| LLM | STTモデル |
|---|---|
gpt-4o-realtime-previewgpt-4o-mini-realtime-preview
|
whisper-1 |
gpt-4o, gpt-4o-mini
|
azure-fast-transcription |
まとめ
イベント処理の流れを中心に、 Voice Live API の理解を深めてみました。
簡単に実装するためには、各イベントに対する理解と大まかな処理の流れはつかむ必要がありそうです
難しい!
参考

Discussion