@commitlint/cz-commitlintを利用しCommitzenのプロンプトをカスタマイズ
概要
以下の記事では、cz-customizable を利用し、Commitzen のプロンプトをカスタマイズしました。この記事では、Commitlint の設定ファイル(commitlint.config.cjs)にてプロンプトの内容をカスタマイズします。
@commitlint/cz-commitlintについて
@commitlint/cz-commitlint は commitzen のアダプターです。このアダプターを利用すると、commitlint の設定ファイル commitlint.config.cjs に基づいて commitzen が動作します。commitzen でコミットメッセージを作成し、commitlint でコミットメッセージを lint をするだけで、1 つの設定ファイルで維持するだけで両方のタスクが完了します。
$ git commit

✔ Preparing lint-staged...
✔ Running tasks for staged files...
✔ Applying modifications from tasks...
✔ Cleaning up temporary files...
cz-cli@4.3.0, @commitlint/cz-commitlint@18.4.4

? コミットする変更の種類を選択してください: ci
? 変更範囲を記述する 'Enterでスキップ': 最大98文字
 (0)
? 変更内容を簡潔に記載する: 最大98文字
 (24) git commit時にcommitzenを実行
? 変更内容を詳述する(body:最大100文字) 'Enterでスキップ':

? 破壊的変更はあるか?: No
? 未解決のissuesに関する変更か: No
[main 08ea046] ci: git commit時にcommitzenを実行
 2 files changed, 5 insertions(+), 2 deletions(-)
 create mode 100755 .husky/prepare-commit-msg
結論
@commitlint/cz-commitlint は commitlint の設定ファイル commitlint.config.cjs を利用し、commitzen のプロンプトをカスタマイズできます。
$ git commit

✔ Preparing lint-staged...
✔ Running tasks for staged files...
✔ Applying modifications from tasks...
✔ Cleaning up temporary files...
cz-cli@4.3.0, @commitlint/cz-commitlint@18.4.4

? コミットする変更の種類を選択してください: ci
? 変更範囲を記述する 'Enterでスキップ': 最大98文字
 (0)
? 変更内容を簡潔に記載する: 最大98文字
 (24) git commit時にcommitzenを実行
? 変更内容を詳述する(body:最大100文字) 'Enterでスキップ':

? 破壊的変更はあるか?: No
? 未解決のissuesに関する変更か: No
[main 08ea046] ci: git commit時にcommitzenを実行
 2 files changed, 5 insertions(+), 2 deletions(-)
 create mode 100755 .husky/prepare-commit-msg
cz-customizable が良い点についてです。cz-customizable は Conventional Commits のフォーマットの scope を事前に定義できるので、scope に入力できる値を強制できます。一方で、@commitlint/cz-commitlint は、Conventional Commits のフォーマットの scope を事前に定義できないので、scope に入力できる値を強制できません。
<type>[scope]: <description>

[optional body]

[optional footer(s)]
@commitlint/cz-commitlint が良い点についてです。@commitlint/cz-commitlint は commitlint の設定ファイル commitlint.config.cjs を利用しますが、cz-customizable は、それに追加して .cz-config.cjs が必要となります。@commitlint/cz-commitlint を利用すると、commitzen でコミットメッセージを作成し、commitlint でコミットメッセージを lint をするだけで、1 つの設定ファイルで維持するだけで両方のタスクが完了します。
以下が作業リポジトリです。
作業環境の構築
以下の記事を参考に、作業環境を構築します。
具体的には以下を実施できる環境を構築します。
-
git commit時に、lint-staged でステージングエリアに追加されたファイルに対して、eslint と prettier を実行する -
git commit時に、コミットメッセージに対して commitlint を実行する
メイントピックではないので、折りたたんでおきます。
作業環境の構築
Next.jsプロジェクトを作成
create next-app@latestでプロジェクトを作成します。
$ pnpm create next-app@latest next-commitlint-sample --typescript --eslint --import-alias "@/*" --src-dir --use-pnpm --tailwind --app
$ cd next-commitlint-sample
Peer Dependenciesの警告を解消
Peer dependenciesの警告が出ている場合は、pnpm installを実行し、警告を解消します。
 WARN  Issues with peer dependencies found
.
├─┬ autoprefixer 10.0.1
│ └── ✕ unmet peer postcss@^8.1.0: found 8.0.0
├─┬ tailwindcss 3.3.0
│ ├── ✕ unmet peer postcss@^8.0.9: found 8.0.0
│ ├─┬ postcss-js 4.0.1
│ │ └── ✕ unmet peer postcss@^8.4.21: found 8.0.0
│ ├─┬ postcss-load-config 3.1.4
│ │ └── ✕ unmet peer postcss@>=8.0.9: found 8.0.0
│ └─┬ postcss-nested 6.0.0
│   └── ✕ unmet peer postcss@^8.2.14: found 8.0.0
└─┬ next 14.0.4
  ├── ✕ unmet peer react@^18.2.0: found 18.0.0
  └── ✕ unmet peer react-dom@^18.2.0: found 18.0.0
以下を実行することで警告が解消されます。
$ pnpm i postcss@latest react@^18.2.0 react-dom@^18.2.0
不要な設定を削除し、プロジェクトを初期化します。
styles
CSSなどを管理するstylesディレクトリを作成します。globals.cssを移動します。
$ mkdir src/styles
$ mv src/app/globals.css src/styles/globals.css
globals.cssの内容を以下のように上書きします。
@tailwind base;
@tailwind components;
@tailwind utilities;
初期ページ
app/page.tsxを上書きします。
import { FC } from "react";

const Home: FC = () => {
  return (
    <div className="">
      <div className="text-lg font-bold">Home</div>
      <div>
        <span className="text-blue-500">Hello</span>
        <span className="text-red-500">World</span>
      </div>
    </div>
  );
};

export default Home;
レイアウト
app/layout.tsxを上書きします。
import "@/styles/globals.css";
import { FC } from "react";
type RootLayoutProps = {
  children: React.ReactNode;
};

export const metadata = {
  title: "Sample",
  description: "Generated by create next app",
};

const RootLayout: FC<RootLayoutProps> = (props) => {
  return (
    <html lang="ja">
      <body className="">{props.children}</body>
    </html>
  );
};

export default RootLayout;
TailwindCSSの設定
TailwindCSSの設定を上書きします。
import type { Config } from 'tailwindcss'

const config: Config = {
  content: [
    './src/pages/**/*.{js,ts,jsx,tsx,mdx}',
    './src/components/**/*.{js,ts,jsx,tsx,mdx}',
    './src/app/**/*.{js,ts,jsx,tsx,mdx}',
  ],
  plugins: [],
}
export default config
TypeScriptの設定
baseUrlを追加します。
{
  "compilerOptions": {
    "target": "es5",
    "lib": ["dom", "dom.iterable", "esnext"],
    "allowJs": true,
    "skipLibCheck": true,
    "strict": true,
    "forceConsistentCasingInFileNames": true,
    "noEmit": true,
    "esModuleInterop": true,
    "module": "esnext",
    "moduleResolution": "node",
    "resolveJsonModule": true,
    "isolatedModules": true,
    "jsx": "preserve",
    "incremental": true,
    "plugins": [
      {
        "name": "next"
      }
    ],
+   "baseUrl": ".",
    "paths": {
      "@/*": ["./src/*"],
    }
  },
  "include": ["next-env.d.ts", "**/*.ts", "**/*.tsx", ".next/types/**/*.ts"],
  "exclude": ["node_modules"]
}
動作確認
ローカルで動作確認します。
$ pnpm dev
コミットして作業結果を保存しておきます。
$ pnpm build
$ git add .
$ git commit -m "feat:新規にプロジェクトを作成し, 作業環境を構築"
ESLint
ここでは、ESLint を設定します。
ESLintとは
ESLint は、JavaScript(および TypeScript)のソースコードを解析し、コーディングスタイルやパターンに関する問題を特定するための静的解析ツールです。
主な特徴
- コード品質とスタイルのチェック: ESLint はコードのバグやエラーを特定し、一貫したコーディングスタイルを促進します。
- カスタマイズ可能なルール: 既存のルールを使用するか、特定のプロジェクトのニーズに合わせて独自のルールを作成できます。
- プラグインシステム: React や Vue.js などの特定のライブラリやフレームワーク向けの追加ルールを提供するプラグインが多数あります。
- 自動修正機能: 一部のルール違反は ESLint によって自動的に修正されることがあります。
- IDE統合: 多くの統合開発環境(IDE)とエディタに統合でき、リアルタイムでのフィードバックが可能です。
動作のしくみ
ESLint はソースコードを解析し、設定されたルールに従ってコードを評価します。違反が検出されると、それに関する警告やエラーが表示されます。これにより、開発者はコードの品質を向上させ、バグを早期に発見できます。
ESLintをインストール
ESLint を導入するには以下を実行します。既に Next.js でインストールされているので、実行する必要はありません。一応実行しておきます。
$ pnpm add eslint -D
ESLintの設定ファイルを作成
ESLint の設定ファイルを作成します。既に Next.js でデフォルトで作成されているため、そちらの設定ファイルを削除します。
$ rm -f .eslintrc.json
ESLint の設定ファイルを作成するに当たり、Create T3 Appの設定ファイルを参考にします。Create T3 App とは、Youtube のインフルエンサーであるTheo氏が作成した、Next.js のテンプレートです。Theo 氏のモットーとして、レギュレーションを守りながらも、最速で開発することを掲げています。ESLint に必要な最低限の設定がされているため、参考にさせていただきます。
.eslintrc.cjs を作成します。
$ touch .eslintrc.cjs
/** @type {import("eslint").Linter.Config} */
const config = {
  parser: "@typescript-eslint/parser",
  parserOptions: {
    project: true,
  },
  plugins: ["@typescript-eslint"],
  extends: [
    "plugin:@next/next/recommended",
    "plugin:@typescript-eslint/recommended-type-checked",
    "plugin:@typescript-eslint/stylistic-type-checked",
  ],
  rules: {
    // These opinionated rules are enabled in stylistic-type-checked above.
    // Feel free to reconfigure them to your own preference.
    "@typescript-eslint/array-type": "off",
    "@typescript-eslint/consistent-type-definitions": "off",

    "@typescript-eslint/consistent-type-imports": [
      "warn",
      {
        prefer: "type-imports",
        fixStyle: "inline-type-imports",
      },
    ],
    "@typescript-eslint/no-unused-vars": ["warn", { argsIgnorePattern: "^_" }],
    "@typescript-eslint/require-await": "off",
    "@typescript-eslint/no-misused-promises": [
      "error",
      {
        checksVoidReturn: { attributes: false },
      },
    ],
  },
};

module.exports = config;
ESLint の設定ファイルに記述されているパッケージをインストールします。
$ pnpm add -D @next/eslint-plugin-next @types/eslint @typescript-eslint/eslint-plugin @typescript-eslint/parser
ESlintのスクリプトを作成
lint:fix の script を追加します。
{
  "scripts": {
+   "lint:fix": "eslint \"./src/**/*.{ts,tsx,js,jsx}\" --fix"
  },
}
ESLintを実行
lint:fix を実行します。
$ pnpm lint:fix
page.tsx と layout.tsx が修正されました。


コミット
コミットして作業結果を保存しておきます。
$ pnpm build
$ git add .
$ git commit -m "ESLintを設定"
Prettier
ここでは、Prettier を設定していきます。メイントピックではないので、折りたたんでおきます。
Prettierとは
Prettier は、コードのフォーマットを自動化するツールです。主な目的は、コードの読みやすさを向上させることで、プロジェクト全体での一貫したスタイルを保持することです。Prettier は多くの言語をサポートしており、コードを特定のスタイルガイドに従ってフォーマットします。このツールはコマンドラインから実行されるか、テキストエディタや IDE のプラグインとして統合されます。コーディングの際に手動でスタイルを整える手間を省き、開発者がより重要な問題に集中できるようにするのが目的です。
主な特徴
- 一貫性: コードのスタイルをプロジェクト全体で統一します。
- サポートされる言語: JavaScript, TypeScript, HTML, CSS, JSON など多くの言語に対応。
- カスタマイズ可能: フォーマットのルールをカスタマイズできます。
-
IDE統合: ほとんどの主要なテキストエディタや IDE と統合可能。
コマンドラインインターフェース: CLI を通じてスクリプトやビルドプロセスに組み込めます。 -
自動フォーマット: セーブ時やコミット時に自動的にコードをフォーマット。
Prettierをインストール
Prettier を導入するには以下を実行します。
$ pnpm add prettier -D
Prettierの設定ファイルを作成
Prettier の設定ファイルを作成します。
$ touch .prettierrc.mjs
/** @typedef  {import("prettier").Config} PrettierConfig */
/** @typedef  {import("@ianvs/prettier-plugin-sort-imports").PluginConfig} SortImportsConfig */

/** @type { PrettierConfig | SortImportsConfig } */
const config = {
  plugins: [
  // @ianvs/prettier-plugin-sort-imports options
  // importの順序を指定する
  // https://github.com/IanVS/prettier-plugin-sort-imports#importorder
      "@ianvs/prettier-plugin-sort-imports",
  // prettier-plugin-tailwindcss options
  // tailwindの設定ファイルを指定する。デフォルトでは既存プロジェクトのtailwind.config.jsを参照します。
  // https://github.com/tailwindlabs/prettier-plugin-tailwindcss#customizing-your-tailwind-config-path
    "prettier-plugin-tailwindcss",
  ],
    // @ianvs/prettier-plugin-sort-imports options
  // importの順序を指定する
  // https://github.com/IanVS/prettier-plugin-sort-imports#importorder
  importOrder: [
    "^(react/(.*)$)|^(react$)|^(react-native(.*)$)",
    "^(next/(.*)$)|^(next$)",
    "^(expo(.*)$)|^(expo$)",
    "<THIRD_PARTY_MODULES>",
    "",
    "^@acm/(.*)$",
    "^acm/(.*)$",
    "^@/",
    "^~/",
    "^[../]",
    "^[./]",
  ],
  importOrderParserPlugins: ["typescript", "jsx", "decorators-legacy"],
  // TypeScriptのバージョンを指定します。
  importOrderTypeScriptVersion: "5.0.0",
  // Prettierのフォーマットの設定
  // https://prettier.io/docs/en/options.html#arrow-function-parentheses
  arrowParens: "always",
  // https://prettier.io/docs/en/options.html#print-width
  printWidth: 80,
  // https://prettier.io/docs/en/options.html#quotes
  singleQuote: false,
  // https://prettier.io/docs/en/options.html#semicolons
  semi: true,
  // https://prettier.io/docs/en/options.html#trailing-commas
  trailingComma: "all",
  // https://prettier.io/docs/en/options.html#tab-width
  tabWidth: 2,
  // https://prettier.io/docs/en/options.html#prose-wrap
  proseWrap: "always", // printWidth line breaks in md/mdx
};

export default config;
Prettier の設定ファイルに記述されているパッケージをインストールします。
$ pnpm add -D @ianvs/prettier-plugin-sort-imports prettier-plugin-tailwindcss
package.json に以下を設定し、ES Module を有効にします。
{
+ "type": "module",
}
Prettier と関係ない部分ですが、ES Module を有効化したため、以下を実施します。
-
next.config.jsを ES Module に変更 -
postcss.config.jsをpostcss.config.cjsにリネーム
next.config.js を ES Module に変更します。
$ mv next.config.js next.config.mjs
以下の内容で上書きします。
/** @type {import("next").NextConfig} */
const config = {};

export default config;
postcss.config.js を postcss.config.cjs にリネームします。リネームする理由は、明確に ES Module ではなく、CommonJS であることを示すためです。
$ mv postcss.config.js postcss.config.cjs
Prettierのスクリプトを作成
format:fix で Prettier でフォーマットを修正する script を追加します。
{
  "scripts": {
+        "format:fix": "prettier --write \"**/*.{ts,tsx,js,jsx,cjs,mjs,md,json,lintstagedrc}\"",
  },
}
Prettierを実行
format:fix を実行します。
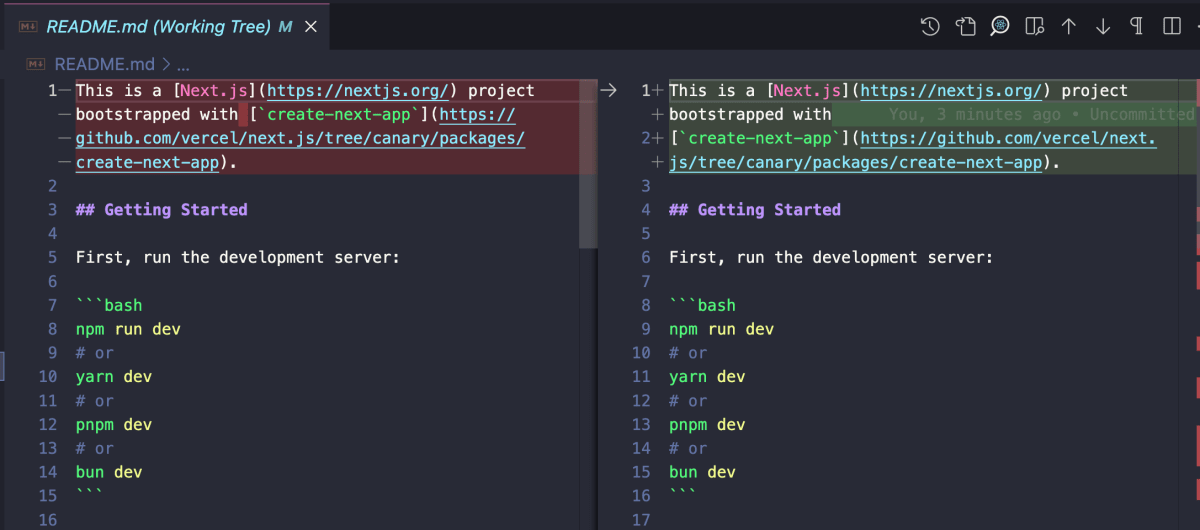
$ pnpm format:fix
README.md と layout.tsx が修正されました。README.md から proseWrap: "always" が適用されていることが確認できます。また、layout.tsx から importOrder が適用されていることが確認できます。

コミット
コミットして作業結果を保存しておきます。
$ pnpm build
$ git add .
$ git commit -m "Prettierを設定"
husky
ここでは、husky を設定していきます。
huskyとは
husky とは git のフックを利用して、コミットやプッシュなどの前に任意のコマンドを実行できるツールです。husky を利用することで、コミットやプッシュの前に lint やテストを実行できます。
主な特徴
以下はその主な特徴です。
- 自動化: コミットやプッシュ前に自動的にスクリプトを実行できます。
- カスタマイズ可能: さまざまな Git フック(pre-commit、pre-push など)にカスタムスクリプトを設定可能。
- プロジェクトの整合性保持: コード品質を一貫して保つためのチェックを自動化。
- 簡単な設定: package.json に設定を記述するだけで簡単に設定できます。
huskyをインストール
husky を導入するには以下を実行します。
$ pnpm dlx husky-init && pnpm install
上記コマンドを実行すると package.json に parepare スクリプトが追加されます。
{
  "scripts": {
    "prepare": "husky install"
  }
}
サンプルとして ./husky/pre-commit に pre-commit フックが作成されています。コミットすると pre-commit フックが反応し、npm test が実行されます。
#!/usr/bin/env sh
. "$(dirname -- "$0")/_/husky.sh"

npm test
コミットすると lint:fix が実行されるように pre-commit を修正します。
#!/usr/bin/env sh
. "$(dirname -- "$0")/_/husky.sh"

-npm test
+pnpm lint:fix
動作確認
lint:fix で修正されるように、page.tx を加工します。
-import { type FC } from "react";
+import { FC } from "react";

const Home: FC = () => {
  return (
    <div className="">
      <div className="text-lg font-bold">Home</div>
      <div>
        <span className="text-blue-500">Hello</span>
        <span className="text-red-500">World</span>
      </div>
    </div>
  );
};

export default Home;
コミットします。
$ git add .
$ git commit -m "huskyを設定"
コミットすると lint:fix が実行され、page.tsx が修正されます。

修正された page.tsx はコミットされていないので、ステージングエリアに追加し、コミットします。
$ git add .
$ git commit -m "importを修正"
現状の問題点
現状の問題点として、コミットされると、全体に対して lint:fix が実行されることが挙げられます。これは、コミットするファイルに対してのみ lint:fix を実行するように修正します。そこで登場するのが、lint-staged です。
lint-staged
ここでは、lint-staged を設定していきます。メイントピックではないので、折りたたんでおきます。
lint-stagedとは
lint-staged は、Git ステージングエリア(インデックス)に追加されたファイルに対してリントやその他のコマンドを実行するツールです。
主な特徴
以下は主な特徴です。
- 効率化: コミットされる変更のみに対してリントやテストを実行します。
- カスタマイズ可能: さまざまなコマンドやスクリプトを設定できます。
- 自動化: コミット前に自動的にタスクを実行し、エラーがあればコミットを阻止します。
これにより、リポジトリ全体ではなく、変更されたファイルのみに対して品質チェックを行うことができ、プロセスの効率化に寄与します。
lint-stagedをインストール
lint-staged を導入するには以下を実行します。
$ pnpm install -D lint-staged
lint-stageの設定ファイルを作成
Prettier の設定ファイルを作成します。
コミット時に、ステージングエリアに追加されたファイルに対して lint とするように、./husky/pre-commit を修正します。ポイントとして、複数スクリプトを実行する場合、並列実行をすると、スクリプトの実行順序が保証されないため、--concurrent false にて並列実行をしないように設定しています。
#!/usr/bin/env sh
. "$(dirname -- "$0")/_/husky.sh"

-pnpm lint:fix
+pnpm lint-staged --concurrent false
pnpm lint-stage で実行したい script を .lintstagedrc で定義します。
$ touch .lintstagedrc
{
  "./src/**/*.{ts,tsx,js,jsx}": ["prettier --write", "eslint --fix", "eslint"],
  "*.{cjs,mjs,md,json}": ["prettier --write"]
}
動作確認 & コミット
今回は動作確認のため、page.tx と layout.tsx を加工します。
-import { type FC } from "react";
+import { FC } from "react";

const Home: FC = () => {
  return (
    <div className="">
      <div className="text-lg font-bold">Home</div>
      <div>
        <span className="text-blue-500">Hello</span>
-       <span className="text-red-500">World</span>
+       <span className="text-red-500">Universe</span>
      </div>
    </div>
  );
};

export default Home;
import "@/styles/globals.css";

-import { type FC } from "react";
+import { FC } from "react";

type RootLayoutProps = {
  children: React.ReactNode;
};

export const metadata = {
  title: "Sample",
  description: "Generated by create next app!",
};

const RootLayout: FC<RootLayoutProps> = (props) => {
  return (
    <html lang="ja">
      <body className="">{props.children}</body>
    </html>
  );
};

export default RootLayout;
以下のように、page.tsx はステージングエリアに追加し、layout.tsx はステージングエリアに追加していない状態を作ります。

この状態でコミットします。
$ git commit -m "lint-stageを設定"
実行すると、ステージングエリアにない layout.tsx 以外はコミットされます。ここから分かる通り、lint-stage はステージングエリアに追加されたファイルに対してのみ実行されることが確認できます。layout.tsx の変更は破棄しておきます。

現状の問題点
現状の問題点として、コミットメッセージに規則性を強制できません。このまま運用すると雑なコミットメッセージが多発します。
Commitlintの導入
雑なコミットメッセージをしないためにも、一定の規約に沿ったコミットメッセージを強制できるようにすため、ここでは commitlint を設定していきます。
commitlintとは
commitlint は、Git コミットメッセージのフォーマットを標準化するためのツールです。コミットメッセージに対して一連のルールを適用し、プロジェクトに一貫性をもたらします。これにより、コミット履歴が読みやすくなり、自動化されたチェンジログ生成やバージョン管理が容易になります。commitlint は、コミット時に自動的にメッセージをチェックし、ルールに違反している場合はコミットを拒否します。
主な特徴
- 標準化: Git コミットメッセージのフォーマットを一貫させます。
- カスタマイズ可能: プロジェクトのニーズに応じてルールを設定できます。
- 自動チェック: コミット時にメッセージを自動的にチェックします。
- エラー防止: 不適切なフォーマットのメッセージをコミットから防ぎます。
- コミュニケーションの向上: クリアなコミットメッセージにより、プロジェクトのコミュニケーションが改善されます。
- ツールの統合: Husky のような他の開発ツールとの統合が可能です。
Conventional Commits
Conventional Commits は、Git コミットメッセージのためのフォーマット規約です。一方、commitlint はその規約に基づいてコミットメッセージを検証するツールです。Conventional Commits を採用することで、コミットメッセージに一貫性を持たせ、読みやすくできます。Commitlint はこのフォーマットを遵守しているかどうかを自動的にチェックし、規約に沿っていないメッセージがあればコミットを拒否します。つまり、Conventional Commits はルールセットであり、commitlint はそのルールを実施するツールという関係にあります。
commitlintをインストール
commitlint を導入するには以下を実行します。
$ pnpm install --save-dev @commitlint/{cli,config-conventional}
commitlintの設定ファイルを作成
commitlint の設定ファイルを作成します。
$ touch commitlint.config.cjs
module.exports = { extends: ['@commitlint/config-conventional'] };
huskyと連携
commit-msg フックを追加します。このフックで、コミット時にコミットメッセージをチェックします。
$ npx husky add .husky/commit-msg 'npx --no -- commitlint --edit ${1}'
動作確認 & コミット
page.tsx に 1 行追加します。
import { type FC } from "react";

const Home: FC = () => {
  return (
    <div className="">
      <div className="text-lg font-bold">Home</div>
      <div>
        <span className="text-blue-500">Hello</span>
        <span className="text-red-500">Universe</span>
+       <span className="text-green-500">Woohoo!</span>
      </div>
    </div>
  );
};

export default Home;
コミットします。
$ git add .
$ git commit -m "commitlintを設定しpage.tsxに1行追加"
すると以下の通り怒られました。
✔ Preparing lint-staged...
✔ Running tasks for staged files...
✔ Applying modifications from tasks...
✔ Cleaning up temporary files...
⧗   input: commitlintを設定しpage.tsxに1行追加
✖   subject may not be empty [subject-empty]
✖   type may not be empty [type-empty]

✖   found 2 problems, 0 warnings
ⓘ   Get help: https://github.com/conventional-changelog/commitlint/#what-is-commitlint
subject と type が空であるため怒られています。
✖   subject may not be empty [subject-empty]
✖   type may not be empty [type-empty]
Conventional Commits によると、commit のフォーマットは以下のような形に準拠する必要があります。
<型>[任意 スコープ]: <タイトル>

[任意 本文]

[任意 フッター]
type ですが、以下のいずれかを選択する必要があります。
[
  'build',
  'chore',
  'ci',
  'docs',
  'feat',
  'fix',
  'perf',
  'refactor',
  'revert',
  'style',
  'test'
];
では、あらためてコミットメッセージを記載します。
$ git commit -m "feat: commitlintを設定しpage.tsxに1行追加"
今度は無事コミットできました。
Commitlintの設定をカスタマイズ
ここでは、Commitlint の設定をカスタマイズしていきます。
commitlint.config.cjs
Commitlint の設定ファイルは commitlint.config.cjs です。
module.exports = { extends: ["@commitlint/config-conventional"] };
extends には @commitlint/config-conventional が設定されています。
@commitlint/config-conventional
@commitlint/config-conventional は、commitlint のルールがプリセットされた設定ファイルです。@commitlint/config-conventional で定義されているルールの詳細はこちらになります。
上記のルールはこちらをベースに解読できます。
いくつか例をあげています。
body-max-line-length は body の最大文字数を指定するルールです。値は 0,1,2 の 3 つの値を取ります。0 は無効、1 は警告、2 はエラーを意味します。今回は 2 を指定しているため、body の最大文字数が 100 文字を超えるとエラーが発生します。
'rules': {
  'body-max-line-length': [2, 'always', 100],
}
subject-empty は、subject が空であることを許可しないルールです。値は 2 を指定しているため、subject が空の場合はエラーが発生します。
'rules': {
  'subject-empty': [2, 'never'],
}
type-enum は、type が指定された値のいずれかであることを許可しないルールです。値は 2 を指定しているため、type が指定された値のいずれかでない場合はエラーが発生します。
'rules': {
  'type-enum': [
    2,
    'always',
    [
      'build',
      'chore',
      'ci',
      'docs',
      'feat',
      'fix',
      'perf',
      'refactor',
      'revert',
      'style',
      'test',
    ],
  ],
}
commitlint.config.cjs を以下のように日本語歌し修正します。
module.exports = {
  extends: ["@commitlint/config-conventional"],
  parserPreset: "conventional-changelog-conventionalcommits",
  prompt: {
    settings: {},
    messages: {
      skip: "'Enterでスキップ'",
      max: "最大%d文字",
      min: "最小%d文字",
      emptyWarning: "必須事項です",
      upperLimitWarning: "最大文字数を超えています",
      lowerLimitWarning: "最低文字数に足りていません",
    },
    questions: {
      type: {
        description: "コミットする変更の種類を選択してください",
        enum: {
          feat: {
            description: "新機能の追加",
            title: "Features",
          },
          fix: {
            description: "バグの修正",
            title: "Bug Fixes",
          },
          docs: {
            description: "ドキュメントのみの変更",
            title: "Documentation",
          },
          style: {
            description: "コードの意味に影響を与えない変更",
            title: "Styles",
          },
          refactor: {
            description: "新機能追加でもバグ修正でもないコードの変更",
            title: "Code Refactoring",
          },
          perf: {
            description: "パフォーマンス向上を目的としたコードの変更",
            title: "Performance Improvements",
          },
          test: {
            description: "テストの追加や変更",
            title: "Tests",
          },
          build: {
            description: "ビルドシステムや外部依存関係に影響を与える変更",
            title: "Builds",
          },
          ci: {
            description: "CIの設定ファイルやスクリプトの変更",
            title: "Continuous Integrations",
          },
          chore: {
            description:
              "ソースやテストの変更を含まない変更",
            title: "Chores",
          },
          revert: {
            description: "コミットの取り消し",
            title: "Reverts",
          },
        },
      },
      scope: {
        description: "変更範囲を記述する",
      },
      subject: {
        description: "変更内容を簡潔に記載する",
      },
      body: {
        description: "変更内容を詳述する(body:最大100文字)",
      },
      isBreaking: {
        description: "破壊的変更はあるか?",
      },
      breakingBody: {
        description: "破壊的変更がある場合は必ず変更内容を詳説する",
      },
      breaking: {
        description: "破壊的変更内容を詳述する(footer:最大100文字)",
      },
      isIssueAffected: {
        description: "未解決のissuesに関する変更か",
      },
      issuesBody: {
        description: "issuesをcloseする場合は必ず変更内容の詳説する",
      },
      issues: {
        description: "issue番号を記載する(footer:最大100文字)",
      },
    },
  },
};
コミットして作業結果を保存しておきます。
$ pnpm build
$ git add .
$ git commit -m "ci: commitlintの設定ファイルを修正"
Commitzen と @commitlint/cz-commitlint の導入
Commitzen を導入することで、コミットメッセージを対話的に入力できるようになります。
Commitzenのインストール
commitzen をグローバルにインストールする方法もありますが、ここではローカルにインストールします。
$ pnpm add -D @commitlint/cz-commitlint commitizen
Commitzenの設定
package.json に以下を追加します。
{
  "scripts": {
+    "commit": "git-cz",
  },
+  "config": {
+    "commitizen": {
+      "path": "@commitlint/cz-commitlint"
+    }
+  }
}
これで、pnpm run commit あるいは、pnpm commit を実行することで以下のような対話的なコミットメッセージを入力できるようになります。試してみます。
$ git add .
$ pnpm commit


> next-commitlint-sample@0.1.0 commit /Users/hayato94087/Private/next-commitlint-sample
> git-cz

cz-cli@4.3.0, @commitlint/cz-commitlint@18.4.4

? コミットする変更の種類を選択してください: (Use arrow keys)
❯ feat:       新機能の追加
  fix:        バグの修正
  docs:       ドキュメントのみの変更
  style:      コードの意味に影響を与えない変更
  refactor:   新機能追加でもバグ修正でもないコードの変更
  perf:       パフォーマンス向上を目的としたコードの変更
  test:       テストの追加や変更
(Move up and down to reveal more choices)
commitlint.config.cjs に記載したプロンプトのメッセージが表示されました。続けて、コミットします。
> next-commitlint-sample@0.1.0 commit /Users/hayato94087/Private/next-commitlint-sample
> git-cz

cz-cli@4.3.0, @commitlint/cz-commitlint@18.4.4

? コミットする変更の種類を選択してください: ci
? 変更範囲を記述する 'Enterでスキップ': 最大98文字
 (0)
? 変更内容を簡潔に記載する: 最大98文字
 (12) commitzenを導入
? 変更内容を詳述する(body:最大100文字) 'Enterでスキップ':

? 破壊的変更はあるか?: No
? 未解決のissuesに関する変更か: No
✔ Preparing lint-staged...
✔ Running tasks for staged files...
✔ Applying modifications from tasks...
✔ Cleaning up temporary files...
[main bb3175d] ci: commitzenを導入
 2 files changed, 456 insertions(+), 1 deletion(-)
git commit 時に自動でプロンプトを表示
pnpm commit でコミットメッセージを対話的に入力できるようになりました。しかし、pnpm commit というコマンドは違和感があります。そこで、git commit でコミットメッセージを対話的に入力できるようにします。
Git フックの prepare-commit-msg を使用して、git commit コマンドを実行したとき、 commitizen が実行されるようにします。
$ npx husky add .husky/prepare-commit-msg 'exec < /dev/tty && node_modules/.bin/cz --hook || true'
これで、git commit を実行時に、commizen が実行されます。が、以下のコマンドを実行していない場合、対話的な入力のあとに vi などのデフォルトエディターが起動してコミットメッセージの再確認を求められます。回避するために、以下のコマンドを実行します。
$ git config --global core.editor true
では、変更点をコミットします。
$ pnpm build
$ git add .
$ git commit

✔ Preparing lint-staged...
✔ Running tasks for staged files...
✔ Applying modifications from tasks...
✔ Cleaning up temporary files...
cz-cli@4.3.0, @commitlint/cz-commitlint@18.4.4

? コミットする変更の種類を選択してください: ci
? 変更範囲を記述する 'Enterでスキップ': 最大98文字
 (0)
? 変更内容を簡潔に記載する: 最大98文字
 (24) git commit時にcommitzenを実行
? 変更内容を詳述する(body:最大100文字) 'Enterでスキップ':

? 破壊的変更はあるか?: No
? 未解決のissuesに関する変更か: No
[main 08ea046] ci: git commit時にcommitzenを実行
 2 files changed, 5 insertions(+), 2 deletions(-)
 create mode 100755 .husky/prepare-commit-msg
cz-customizableとの比較
cz-customizable が良い点についてです。cz-customizable は Conventional Commits のフォーマットの scope を事前に定義できるので、scope に入力できる値を強制できます。一方で、@commitlint/cz-commitlint は、Conventional Commits のフォーマットの scope を事前に定義できないので、scope に入力できる値を強制できません。
<type>[scope]: <description>

[optional body]

[optional footer(s)]
@commitlint/cz-commitlint が良い点についてです。@commitlint/cz-commitlint は commitlint の設定ファイル commitlint.config.cjs を利用しますが、cz-customizable は、それに追加して .cz-config.cjs が必要となります。@commitlint/cz-commitlint を利用すると、commitzen でコミットメッセージを作成し、commitlint でコミットメッセージを lint をするだけで、1 つの設定ファイルで維持するだけで両方のタスクが完了します。
まとめ
ここまでで、以下のことができるようになりました。
- commit 時に、ステージングエリアに追加されたファイルに対して lint と format を実行
- commit 時に、コミットメッセージのフォーマットを強制
- commit 時に、対話的にコミットメッセージを入力
以下が作業リポジトリです。
Discussion