boidsをGoで実装してCLIツールとして公開してみた ~goids~
概要
タイトルの通りboidsをGolangで実装してみました.
せっかくなので, CLIツールとして公開するところまで挑戦してみました.
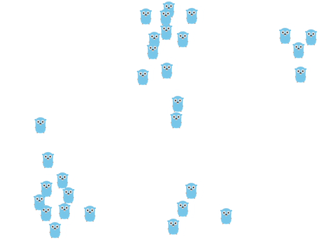
gopherくんがboidsアルゴリズムに従って動く様子を眺めるだけのアプリです.
作ったもの
たくさんのgopherくんが集団で動く様子を眺めるだけのアプリです.
仕事や勉強の合間に, gopherくんを見て癒されましょう.
インストール
Mac
Homebrewでインストールする
Homebrewでインストールできるようにしました.
brew tap hamao0820/goids
brew install goids
goids
実行ファイルを開く
リポジトリのbin/mac/goidsをダブルクリックするかターミナルから呼び出して実行してください.
Windows
実行ファイルを開く
リポジトリのbin/win/goids.exeをダブルクリックして呼び出して実行してください.
おそらく動くと思いますが, もし動かなければコメントでお知らせください.
使い方
Homebrewでinstallした場合はターミナルでgoidsコマンドを打ち込めば使えます.
goidsコマンドにはいくつかのフラグがあります.
色々条件を変えて, どんなふうに動きが変わるかを試してみてください.
Flags:
  -f, --force float   max force of the gopher (default 2)
      --full          full screen mode
      --height int    height of the window (default 480)
  -h, --help          help for goids
  -n, --number int    number of gopher (default 30)
      --sight float   sight of the gopher (default 100)
  -s, --speed float   max speed of the gopher (default 3)
  -v, --version       version for goids
  -w, --width int     width of the window (default 640)
gopherくん
gopherくんは言わずと知れたGo言語のマスコットキャラクターです.

今回の画像は, 上田拓也(tenntenn)さんのイラストを利用させていただいています.
この記事の目的
初めてCLIツールを作って公開しました.
途中で困ったこともいくつかあったので, 自分のメモ用もかねて, 同様の悩みを持っている人の助けになればと思い書いています.
いくつかのパッケージを利用したので, それらのよかった点や難しかった点, 困った点などもご紹介しようと思います.
対象読者としては,
- Goで何か簡単なものを作ってみたい方
- CLIツールを作って公開してみたい方
- GoでGUIを扱ってみたい方
などです.
初めて記事を書くので読みづらいかもしれませんが, ご容赦ください.
指摘や質問があればぜひコメントでいただけるとありがたいです. また, コードも全て我流のため, こうした方が良いなどがあれば教えていただきたいです.
参考にした記事やドキュメントを貼りつつ, その上で少し躓いた点とその解決方法を加えていくという形を取ろうと思います.
参照が多くて読みづらかったらすみません.
boidsとは
boidsとは, 鳥や魚などの群れが集団で行動する際の動きをシミュレーションするためのアルゴリズムであるFlocking algorithmの一種です.
boidsは, 各々が
- 分離(Separation): 個体同士が近づきすぎると離れる
- 整列(Alignment): 周りの個体と同じ方向に進む
- 結合(Cohesion): 群れの中心に移動する
のたった3つの基本ルールに基づいて行動します. 名称は, 鳥もどき(bird-oid)から取られています.
参考
実装
具体的なコードの実装をそれぞれ見ていきます.
プロジェクトのコード全体は以下の通りです.
利用したパッケージ
boidsの実装
まずboidアルゴリズムを実装しました. ここでは, mikuさんの のコードを参考にさせていただきました.
アルゴリズムのコード全体は以下の通りです.
boidsアルゴリズム
boidsアルゴリズムのメインの実装は以下の通りです. Goidを構造体として実装しました.
package goids

import "math"

const GopherSize = 32

type Goid struct {
	position     Vector
	velocity     Vector
	acceleration Vector
	maxSpeed     float64
	maxForce     float64
	sight        float64
}

func (g *Goid) Seek(t Vector) {
	tv := Sub(t, g.position)
	tv.Limit(g.maxSpeed)
	force := Sub(tv, g.velocity)
	g.acceleration.Add(force)
}

func (g *Goid) Flee(t Vector) {
	tv := Sub(t, g.position)
	tv.Limit(g.maxSpeed)
	force := Sub(tv, g.velocity)
	g.acceleration.Sub(force)
}

func (g Goid) IsInsight(g2 Goid) bool {
	d := Sub(g.position, g2.position).Len()
	return d < g.sight
}

func (g *Goid) Align(goids []Goid) {
	var avgVel Vector
	n := 0
	for _, other := range goids {
		if g == &other || !g.IsInsight(other) {
			continue
		}
		avgVel.Add(other.velocity)
		n++
	}
	if n > 0 {
		avgVel.ScalarMul(1 / float64(n))
		avgVel.Limit(g.maxSpeed)
		g.acceleration.Add(Sub(avgVel, g.velocity))
	}
}

func (g *Goid) Separate(goids []Goid) {
	for _, other := range goids {
		if g == &other || !g.IsInsight(other) {
			continue
		}
		d := Sub(g.position, other.position).Len()
		if d < 50 {
			g.Flee(other.position)
		}
	}
}

func (g *Goid) Cohesive(goids []Goid) {
	var avgPos Vector
	n := 0
	for _, other := range goids {
		if g == &other || !g.IsInsight(other) {
			continue
		}
		avgPos.Add(other.position)
		n++
	}
	if n > 0 {
		avgPos.ScalarMul(1 / float64(n))
		g.Seek(avgPos)
	}
}

func (g *Goid) Flock(goids []Goid) {
	g.Align(goids)
	g.Separate(goids)
	g.Cohesive(goids)
}

func (g *Goid) AdjustEdge(width, height float64) {
	if g.position.X < float64(GopherSize)/2 {
		g.position.X = float64(GopherSize) / 2
		g.velocity.X = math.Abs(g.velocity.X)
	} else if g.position.X >= width-float64(GopherSize)/2 {
		g.position.X = width - float64(GopherSize)/2 - 1
		g.velocity.X = -math.Abs(g.velocity.X)
	}

	if g.position.Y < float64(GopherSize)/2 {
		g.position.Y = float64(GopherSize) / 2
		g.velocity.Y = math.Abs(g.velocity.Y)
	} else if g.position.Y >= height-float64(GopherSize)/2 {
		g.position.Y = height - float64(GopherSize)/2 - 1
		g.velocity.Y = -math.Abs(g.velocity.Y)
	}
}

func (g *Goid) Update(width, height float64) {
	g.acceleration.Limit(g.maxForce)
	g.velocity.Add(g.acceleration)
	g.velocity.Limit(g.maxSpeed)
	g.position.Add(g.velocity)
	g.acceleration.ScalarMul(0)

	g.AdjustEdge(width, height)
}
Vectorの実装
参考記事がp5.jsを使用していたため, Vector構造体をp5.jsのドキュメントを見ながら, 使われている関数を自分なりに移植しました.
boidsアルゴリズムの実行
boidsアルゴリズムの進行やgoidsの管理などはEnvironment構造体に任せました.
type Environment struct {
	width    float64
	height   float64
	goidsNum int
	goids    []Goid
	maxSpeed float64
	maxForce float64
}

func CreateEnv(width, height float64, n int, maxSpeed, maxForce float64, sight float64) Environment {
	goids := make([]Goid, n)
	for i := range goids {
		position := CreateVector(rand.Float64()*width, rand.Float64()*height)
		velocity := CreateVector(rand.Float64()*2-1, rand.Float64()*2-1)
		velocity.Scale(rand.Float64()*4 - rand.Float64()*2)

		goids[i] = Goid{position: position, velocity: velocity, maxSpeed: float64(maxSpeed), maxForce: float64(maxForce), sight: sight}
	}

	return Environment{width: width, height: height, goidsNum: n, goids: goids, maxSpeed: maxSpeed, maxForce: maxForce}
}

func (e *Environment) Update() {
	for i := 0; i < len(e.goids); i++ {
		goid := &e.goids[i]
		goid.Flock(e.goids)
		goid.Update(e.width, e.height)
	}
}
コード全体は次です.
テスト
今回, 人生で初めてテストコードを書いてみました. 簡単なUnitテストのみですが, 良い経験になりました(ほぼ全てcopilotが書いてくれましたが...).
以下の記事を参考にしました.
// ...
func TestLen(t *testing.T) {
	type args struct {
		v Vector
	}

	tests := []struct {
		name string
		args args
		want float64
	}{
		{"Test 1", args{Vector{3, 4}}, 5},
		{"Test 2", args{Vector{0, 0}}, 0},
		{"Test 3", args{Vector{3, -1}}, math.Sqrt(10)},
		{"Test 4", args{Vector{-1, 2}}, math.Sqrt(5)},
		{"Test 5", args{Vector{2, 2}}, math.Sqrt(8)},
	}

	for _, tt := range tests {
		t.Run(tt.name, func(t *testing.T) {
			if got := tt.args.v.Len(); got != tt.want {
				t.Errorf("Vector.Len() = %v, want %v", got, tt.want)
			}
		})
	}
}
// ...
少し躓いた点として, プロジェクトルートディレクトリでgo testを実行すると
? github.com/hamao0820/goids [no test files]
と表示されてテストができませんでした. 解決方法としては, go test ./...とすることで全てのパッケージのテストコードを走らせることができました. 詳しくは以下の記事をご覧ください.
画像の読み込み
gopherくんを画面に表示するために, 画像を読み込む必要があります. 画像を読み込むだけなら, 以下のようにすれば問題ありません.
f, err := os.ReadFile("image.png")
if err != nil {
	return err
}
img, _, err := image.Decode(bytes.NewReader(f))
if err != nil {
	return err
}
しかし, go buildは.goファイルのみしかバイナリに含めないため, このままでは配布できません. そこで使うのが, go:embedパッケージです. このパッケージを使うことで, ビルド時に静的ファイルもまとめてビルドをしてくれるようになります.
標準パッケージなので追加のインストールの必要もありません.
使用方法は, 上のコードを以下のように書き換えるだけです.
import _ "embed"

//go:embed image.png
var b []byte

func main() {
	img, _, err:= image.Decode(bytes.NewReader(b))
	if err != nil {
		return err
	}
}
また, //go:embedを用いたvar宣言は, 関数の外でしか行うことができません. より詳しい使い方やその他の注意は以下の記事を参考にしてみてください.
GUIの実装 (Fyne)
GUIはFyneを使って実装しました.
導入は以下の通りです.
go get fyne.io/fyne/v2 &&\
go get fyne.io/fyne/v2/app &&\
go get fyne.io/fyne/v2/canvas &&\
go get fyne.io/fyne/v2/widget &&\
go get fyne.io/fyne/v2/container &&\
go get fyne.io/fyne/v2/layout &&\
以下の記事を参考に, 利用するGUIのパッケージを決めました. Macで開発が可能で, 更新が活発なものはWailsとFyneのようです.
所感としては, fyneはTkinterに似ていて, WailsはElectornに似ているなと思いました.
Wailsは独自のビルドツールが必要なようで, CLIツールとして内包するのは難しそうかなと思い, Fyneを選びました. また, WailsはHTMLベースであり, Goで書いたコードをHTMLに表示するのは難しそうというのも, Fyneを選んだ理由の一つです.
Fyneを使ってみた全体的な感想は以下です
- よかった点
- 短いコードでしたいことができた
- 難しかった点・困った点
- 画面サイズを取得することができない
- ウィンドウサイズを変更したときのイベントハンドラーがない
- そのままではCross Compileが出来なかった
よかった点
短いコードでしたいことができた
以下がコードの全文です. 今回したいことがこれだけでできるのは, とてもよかったです.
公式ドキュメントのサンプルを少し変更するだけでできました.
package gui

import (
	"image"
	"time"

	"github.com/kbinani/screenshot"
	"github.com/hamao0820/goids/goids"

	"fyne.io/fyne/v2"
	"fyne.io/fyne/v2/app"
	"fyne.io/fyne/v2/canvas"
)

func Run(width, height int, n int, speed float64, force float64, sight float64, fullScreen bool) {
	a := app.New()
	w := a.NewWindow("Goids")
	if fullScreen {
		width, height = windowSize()
	}

	w.Resize(fyne.NewSize(float32(width), float32(height)))
	w.CenterOnScreen()

	w.SetFullScreen(fullScreen)

	e := goids.CreateEnv(float64(width), float64(height), n, speed, force, sight)

	go func() {
		img := e.RenderImage()
		imageWidget := canvas.NewImageFromImage(img)
		w.SetContent(imageWidget)
		for range time.Tick(time.Second / 60) {
			tick(&e, imageWidget)
		}
	}()

	w.ShowAndRun()
}

func tick(e *goids.Environment, imageWidget *canvas.Image) {
	e.Update()
	updateImage(imageWidget, e.RenderImage())
}

func updateImage(imageWidget *canvas.Image, img image.Image) {
	imageWidget.Image = img
	imageWidget.Refresh()
}

func windowSize() (int, int) {
	if screenshot.NumActiveDisplays() > 0 {
		bounds := screenshot.GetDisplayBounds(0)
		return bounds.Dx(), bounds.Dy()
	}
	return 800, 800
}
難しかった点・困った点
画面サイズを取得できない
Fyneだけでは画面(ディスプレイ)の大きさを取得することができませんでした. あとで紹介するのですが, --fullフラグをつけると最大画面で表示されます. その際に, w.SetFullScreen(true)とすれば最大画面にはできるのですが, 指定されたwidthとheightと異なると, 画面が引き伸ばされます. なので, あらかじめ画面サイズを取得して, 画像を画面サイズに合わせる必要がありました.
ここでは, screenshotパッケージを使用して画面サイズを取得するようにしました.
ウィンドウサイズを変更したときのイベントハンドラーがない
上の問題にも通ずるのですが, ウィンドウサイズが変化した時のイベントハンドラーのようなものが用意されていないことです. 画面のサイズが変更された時に動的にEnvironmentのwidthフィールドとheightフィールドを変更したかったのですが, 調べた感じ出来なさそうでした.
どちらの情報も, 何か知っている方はコメントで教えていただけるとありがたいです.
そのままではCross Compileが出来なかった
FyneのコンパイルにはGCCが必要です.
自分の環境には, GCCが入っていたので, Macでのコンパイルは問題なくできました. しかし, Windows向けにコンパイルしようとすると,
GOOS=windows GOARCH=amd64 go build -o ./sample.exe .
を実行すると
package github.com/hamao0820/goids
        imports github.com/hamao0820/goids/cmd
        imports github.com/hamao0820/goids/gui
        imports fyne.io/fyne/v2/app
        imports fyne.io/fyne/v2/internal/driver/glfw
        imports fyne.io/fyne/v2/internal/driver/common
        imports fyne.io/fyne/v2/internal/painter/gl
        imports github.com/go-gl/gl/v3.2-core/gl: build constraints exclude all Go files in /Users/username/go/pkg/mod/github.com/go-gl/gl@v0.0.0-20211210172815-726fda9656d6/v3.2-core/gl
というエラーが出てコンパイルできません.
解決方法としては, x86_64-w64-mingw64-gccを導入することです. MacOSだと, HomebrewでMinGW-w64をinstallして, 以下のようにコマンドを変更することでCross Compileができました.
brew install mingw-w64
CC=x86_64-w64-mingw32-gcc CGO_ENABLED=1 GOOS=windows GOARCH=amd64 go build -o bin/win/goids.exe .
CC=x86_64-w64-mingw32-gccとCGO_ENABLED=1を追加する必要があります. また, go buildを行う際に, -oフラグをつけることで, 出力先を指定できます.
詳しくは, 公式ドキュメントを参考にしてください.
CLIツールの実装 (Cobra)
CLIツールはCobraパッケージを利用して作りました.
導入法は以下の通りです. また, 専用のCLIツールがあるので, それを使うと便利です.
go get -u github.com/spf13/cobra@latest
go install github.com/spf13/cobra-cli@latest
詳しくは, 以下の記事をご参照ください.
注意点というほどでもないですが, すでにmain.goがある状態でcobra-cli initを実行すると, main.goが上書きされることに注意してください.
今回, 開発の途中で, CLIツールにしようと思いCobraを導入しました. 最初はmain.goにもコードを記述していたのですが, cobra-cli initによって上書きされてしまいました. あまりない状況かと思いますが, 途中からCobraを導入する際はお気をつけください.
Cobraを使ってみた感想
Cobraを使ってみた全体的な感想は以下です.
- よかった点
- CLIツールが便利
- フラグの設置が簡単
- 難しかった点・困った点
- 特になし
よかった点
CLIが便利
上でも書いた通り, cobra-cliコマンドを使うことで, ディレクトリ構成などを勝手に構築してくれるので, 始めやすかったです.
cobra-cli init
を実行すると,
.
├── LICENSE
├── cmd
│   └── root.go
├── go.mod
├── go.sum
└── main.go
というディレクトリとファイルが生成されます. 今回は使っていませんが, cobra-cli addコマンドをつかうことで, サブコマンドを簡単に追加することもできます.
cobra-cli add hello
./cmd
├── hello.go
└── root.go
cmd/にサブコマンド用の.goファイルが追加されます.
フラグの設置が簡単
次のコードのように, roomCmd.Flags().IntVarP()ようなメソッドを使うことで, 簡単にフラグを設置することができます. 他にも, StringVarP()など型によっていくつかの同様のメソッドが用意されています. このメソッドを使うと--Widthに-wという省略したフラグ名を付けることができたり, --helpを実行した際の説明文を加えたりできます.
var widht int

func init() {
	rootCmd.Flags().IntVarP(&width, "width", "w", 640, "width of the window")
}
実際に-hをつけてみると, 次のようになります.
デフォルト値を自動で出してくれるのは, 地味ですが便利です.
$ goids -h
Run a Boids Flocking animation with a Gopher in a GUI.

This CLI application allows you to run a captivating Boids Flocking animation featuring our beloved Gopher in a graphical user interface (GUI).
The animation simulates the collective behavior of Gopher-like creatures, following the Boids Flocking algorithm.
You can experience the mesmerizing movement patterns of Gophers as they interact with one another, all while being displayed in a visually appealing graphical interface.

Usage:
  goids [flags]

Flags:
  -f, --force float   max force of the gopher (default 2)
      --full          full screen mode
      --height int    height of the window (default 480)
  -h, --help          help for goids
  -n, --number int    number of gopher (default 30)
      --sight float   sight of the gopher (default 100)
  -s, --speed float   max speed of the gopher (default 3)
  -v, --version       version for goids
  -w, --width int     width of the window (default 640)
その他, フラグについては次の記事をご覧ください.
全文のコードは次のとおりです.
ビルド
ビルドは次のMakefileを実行しました.
build: test build-intel build-m1 lipo clean
.PHONY: build

clean:
	rm bin/mac/goids-intel bin/mac/goids-m1
.PHONY: clean

lipo:
	lipo -create -output bin/mac/goids bin/mac/goids-intel bin/mac/goids-m1
.PHONY: lipo

build-intel:
	CGO_ENABLED=1 GOOS=darwin GOARCH=amd64 go build -o bin/mac/goids-intel .
.PHONY: build-intel

build-m1:
	CGO_ENABLED=1 GOOS=darwin GOARCH=arm64 go build -o bin/mac/goids-m1 .
.PHONY: build-m1

build-win: test ## Make a Windows executable binary
	CC=x86_64-w64-mingw32-gcc CGO_ENABLED=1 GOOS=windows GOARCH=amd64 go build -o bin/win/goids.exe .
.PHONY: build-win

test: deps ## go test
	go test ./...
.PHONY: test

deps: fmt ## go mod tidy
	go mod tidy
.PHONY: deps

fmt: ## go fmt
	go fmt
.PHONY: fmt
Homebrewで公開するために, M1 Mac用のバイナリファイルとIntel Mac用のバイナリファイルを生成して, lipoコマンドで結合しました.
Homebewに公開する
Mac限定ですが, Homebrewで公開してみました.
ほとんど次の記事の通りで大丈夫でした.
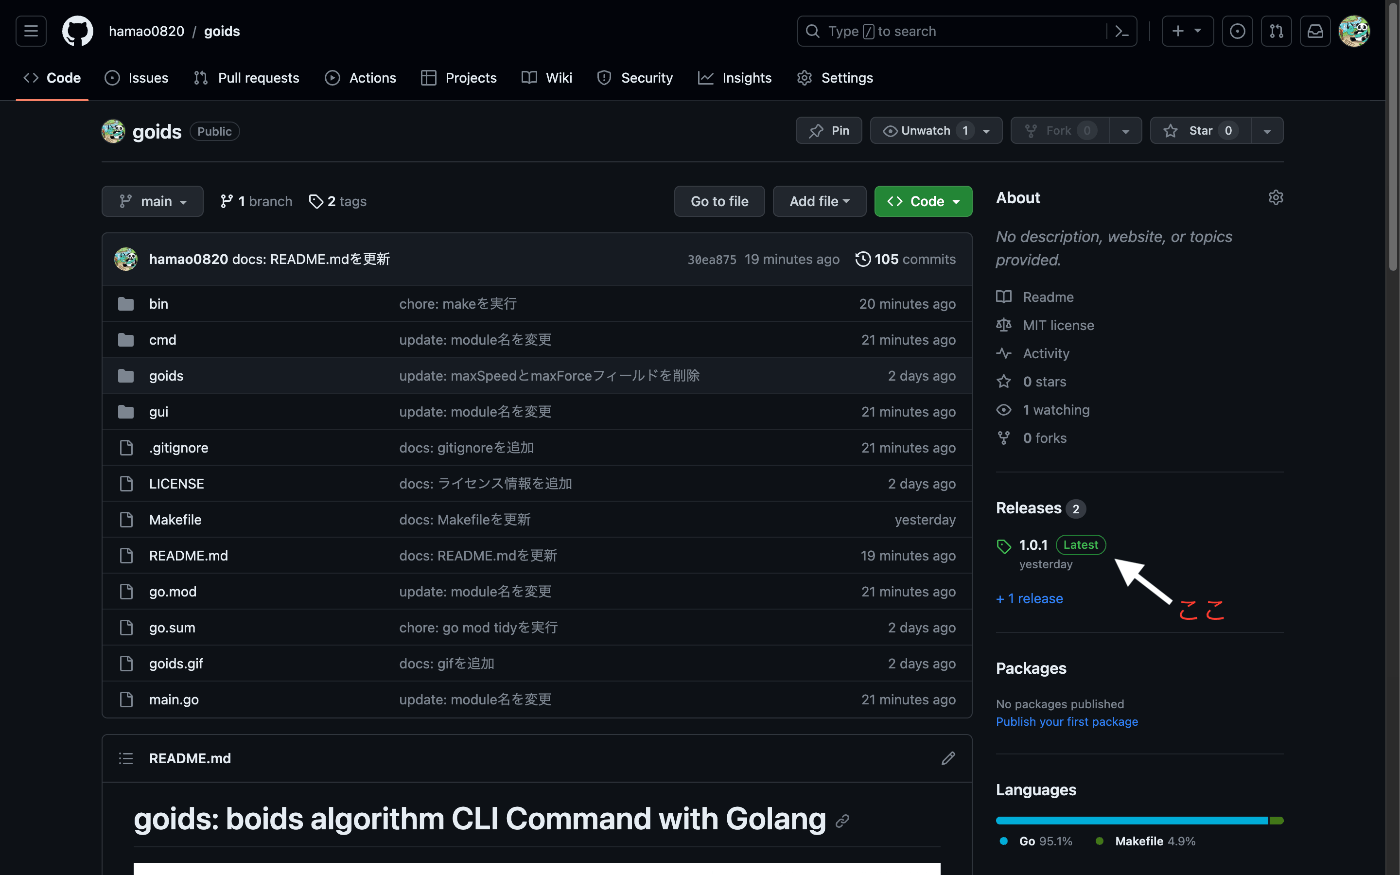
リリースタグはリポジトリのCodeページの右側のAboutの下にあります. そこをクリックして, ローカルでビルドしたバイナリファイルをアップロードしてください. バイナリファイルをアップロードすると, リポジトリから自動でコードが圧縮されます.
あとは, 記事の通りにしていくだけです.
自分の環境では, brew createをした際に, 次のようなエラーが出たので, 指示に従ってbrew tap --force homebrew/coreを実行するとうまくいきました.
$ brew create --set-name=goids https://github.com/hamao0820/goids/releases/download/1.0.0/goids
Warning: create is a developer command, so Homebrew's
developer mode has been automatically turned on.
To turn developer mode off, run:
  brew developer off

Error: No available tap homebrew/core.
Run brew tap --force homebrew/core to tap homebrew/core!
$  brew tap --force homebrew/core
==> Tapping homebrew/core
Cloning into '/opt/homebrew/Library/Taps/homebrew/homebrew-core'...
remote: Enumerating objects: 1738899, done.
remote: Counting objects: 100% (38320/38320), done.
remote: Compressing objects: 100% (7973/7973), done.
remote: Total 1738899 (delta 31100), reused 34920 (delta 30347), pack-reused 1700579
Receiving objects: 100% (1738899/1738899), 455.22 MiB | 4.91 MiB/s, done.
Resolving deltas: 100% (1231315/1231315), done.
Tapped 3 commands and 6855 formulae (7,224 files, 526.8MB).
もう一度brew createを実行すると, 次のようなファイルが生成されます.
# Documentation: https://docs.brew.sh/Formula-Cookbook
#                https://rubydoc.brew.sh/Formula
# PLEASE REMOVE ALL GENERATED COMMENTS BEFORE SUBMITTING YOUR PULL REQUEST!
class Goids < Formula
  desc ""
  homepage ""
  url "https://github.com/hamao0820/goids/releases/download/1.0.0/goids"
  sha256 "000000000000000000000000000000000000000000000000000000000"
  license ""

  # depends_on "cmake" => :build

  def install
    # ENV.deparallelize  # if your formula fails when building in parallel
    # Remove unrecognized options if warned by configure
    # https://rubydoc.brew.sh/Formula.html#std_configure_args-instance_method
    system "./configure", *std_configure_args, "--disable-silent-rules"
    # system "cmake", "-S", ".", "-B", "build", *std_cmake_args
  end

  test do
    # `test do` will create, run in and delete a temporary directory.
    #
    # This test will fail and we won't accept that! For Homebrew/homebrew-core
    # this will need to be a test that verifies the functionality of the
    # software. Run the test with `brew test goids`. Options passed
    # to `brew install` such as `--HEAD` also need to be provided to `brew test`.
    #
    # The installed folder is not in the path, so use the entire path to any
    # executables being tested: `system "#{bin}/program", "do", "something"`.
    system "false"
  end
end
test doの部分を削除し, installの部分を変更すると次のようになります.
# Documentation: https://docs.brew.sh/Formula-Cookbook
#                https://rubydoc.brew.sh/Formula
# PLEASE REMOVE ALL GENERATED COMMENTS BEFORE SUBMITTING YOUR PULL REQUEST!
class Goids < Formula
  desc ""
  homepage ""
  url "https://github.com/hamao0820/goids/releases/download/1.0.0/goids"
  sha256 "000000000000000000000000000000000000000000000000000000000"
  license ""

  # depends_on "cmake" => :build

  def install
    bin.install "goids"
  end
end
その後, 新しくhomebrew-goidsというレポジトリを作成しました.
ディレクトリ構成は以下の通りです.
.
└── Formula
    └── goids.rb
これでアップロードは完了です. あとは通常通りbrew installをすることができます.
参考記事では, brew install時もレポジトリ名を指定していましたが, brew tapで指定しているので, レポジトリ名はなくても大丈夫です.
brew tap hamao0820/goids
brew install goids
CLIツールを削除したい場合は, 以下のコマンドでできます.
brew uninstall goids
brew untap hamao0820/goids
今後の展望
次のようなことをしてみたいです.
- 3つのルールにそれぞれ重みをつけて, 変更できるようにする
- boidsアルゴリズムを計算する際に, 一匹ずつfor文で回しているので, goroutineなどを使った高速化
- 障害物を避けるルールを追加してクリックで障害物を設置したりマウスをよけるような動作を追加
- GoReleaserなどを用いてリリースを自動化
- wasmなどを使ってWailsで表示する
全体的な感想
特段詰まることもなく実装できたのでよかったです. 分からないところも, ソースコードを読めば理解できるところが多かったです.
初めて記事を書くという良い経験もできてよかったです. これからも何か記事を書いていきたいと思います.
Fyneは初めて使いましたが, 少し難しく感じました. 今回のレベルのアプリならほとんどサンプル通りでよかったですが, もう少し難しいことをしようとすると大変そうな気がします. 細いかいレイアウトやイベントに対応しようと思うと, HTMLベースが必須になるのかなという気がしました. 次はWailsを触ってみたいです.
Fyneは現在はv2なのですが, 検索したときにv1の情報が出てくることもあり, すこし困りました.
Cobraは少しだけ触れたことがあり, 初めてではなかったです. やはり簡単で便利でした. 基本的にテンプレート通りに作っていけば作れたので特に困ることもなかったです. 次はもう少し複雑で実用性のあるCLIツールを作ってみたいです.
Homebrewでの公開は, 案外簡単にできることに驚きました. 何か作った時は公開までしていきたいです. その時は, リリースの自動化などにも挑戦してみたいです.
ʕ◔ϖ◔ʔgopherくんが可愛かったですʕ◔ϖ◔ʔ
Discussion