Shopifyでメタフィールドを設定して表示を切り替える方法【liquid】
この記事でやろうとしていること。
日付メタフィールドを設定
日付によって表示させるテキストを変更させる

メタフィールドが設定してある商品には「〇〇日後から購入ができます」

メタフィールドが設定されていない商品はもちろん通常ってな感じです。
手順としては下記
1.メタフィールドを設定
2.main-prodact.liquidファイルでコードを書く
方法としてはこれだけですが、条件分岐を使うので初心者の自分としてはかなり悩んだ様子。
ということで忘れてしまわないうちにアウトプットです。
これからShopifyを独自にカスタマイズしていきたい人の参考になれば嬉しいです。
メタフィールドを設定する

オンラインテーマの「設定」からメタフィールドを選択します。


5個のメタフィールドがあるので設定したい項目にそったものを定義しましょう。
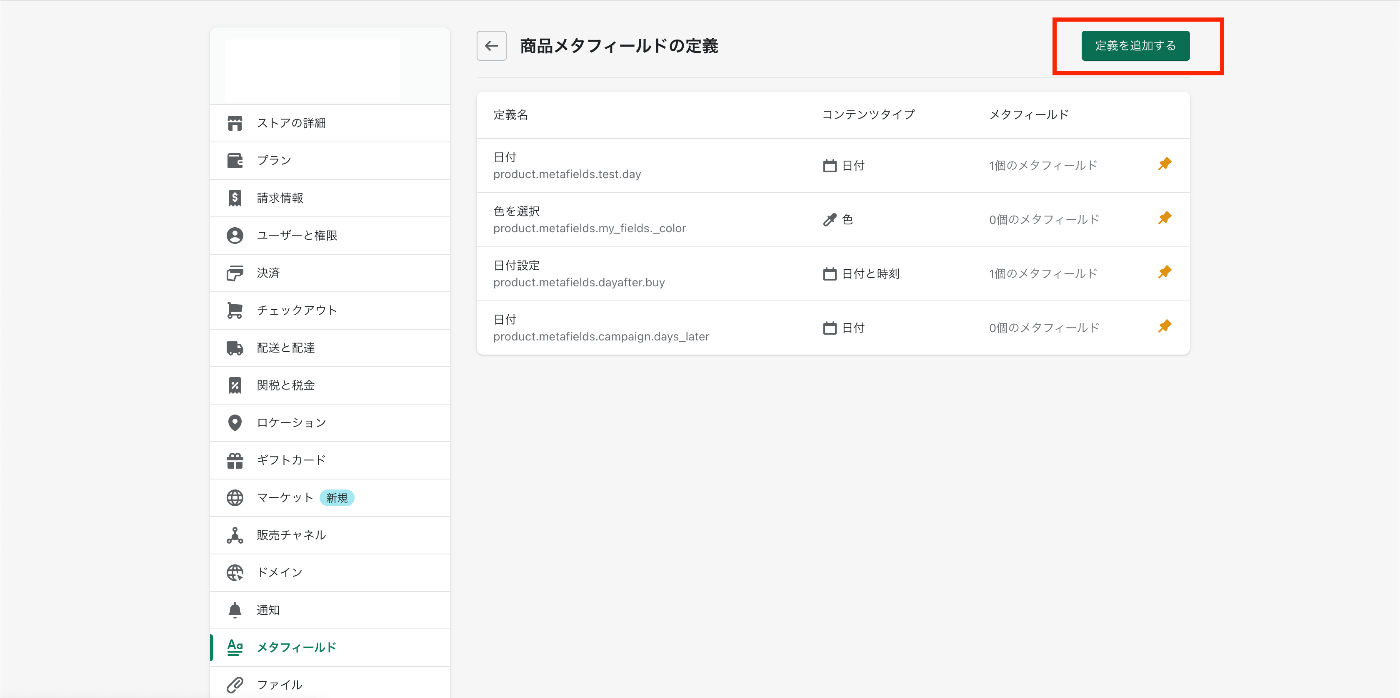
今回は商品に対してなので、商品のメタフィールドを定義します。

定義を追加するからメタフィールを設定していきます。

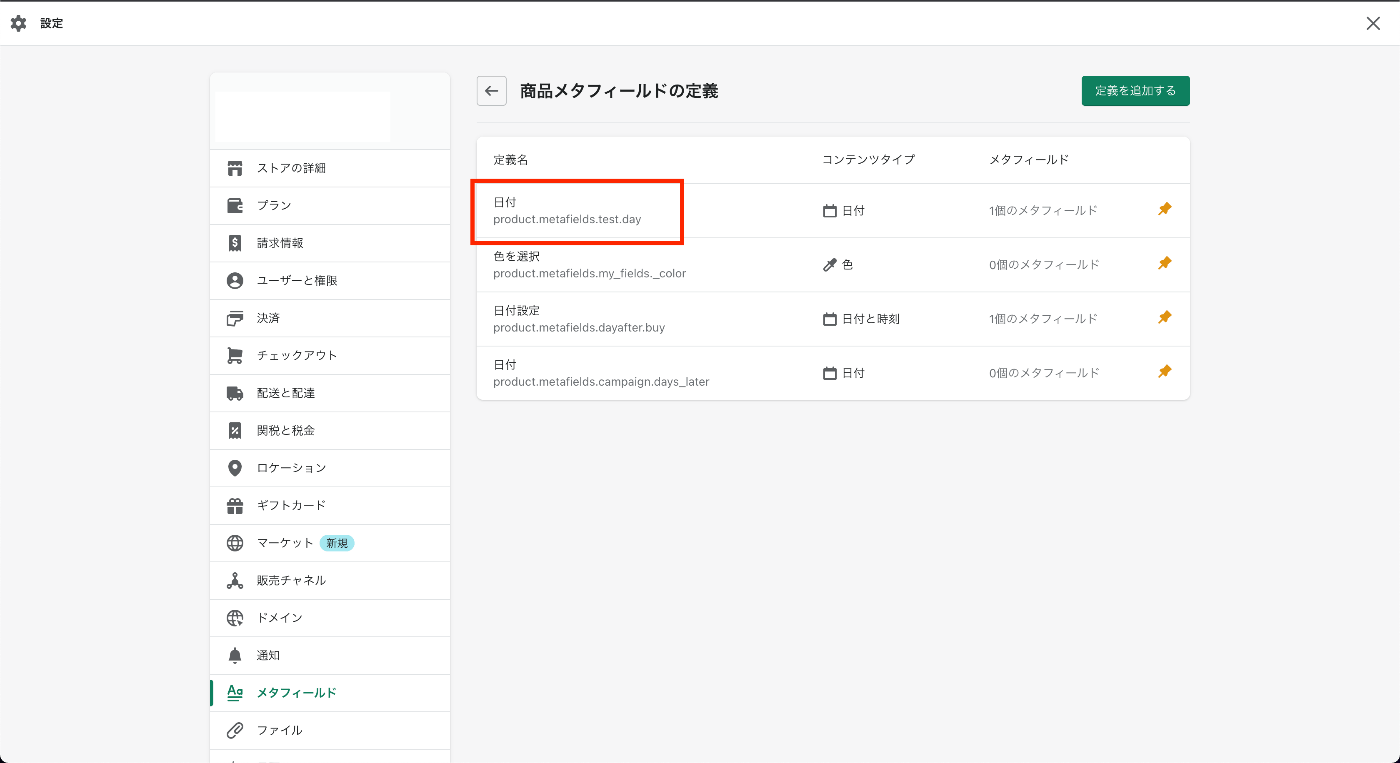
今回はこんな感じで日にちに関するメタフィールドを設定しました。

追加したメタフィールドのコードが下記のように設定されたらOKです。

sectionファイルのmain-product.liquidをカスタマイズする
$ shopify theme serve
で開発環境を立ち上げて
2つ目のURLをクリックし、デベロッパーモードを確認しながら作業を進める。
手前味噌で恐縮ですが、開発環境の立ち上げ方法は下記でも解説しています。
メタフィールドを設定した商品と比較する
main-product.liquidファイルの中の
{%- when 'buy_buttons' -%}
を見つける。
このliquidコードから下がカートに入れるなどのボタンを作っているコードになります。
方法
今日の時間を変数にする
{% assign today = 'now'| date: '%d' %}
これで今日の時間を変数にできました。
ちなみに
- %d:日
- %s:秒
- %Y:年
を表すことができます。
{% assign purchase_able_to_day = product.metafield.test.day | date: '%d' %}
メタフィールドで設定した情報を purchase_able_to_day という変数に格納できました。
if文を使ってテキストの表示を変える
変数同士を比較してif文を使って表示を切り替えていきます。
メタフィールドで設定した商品だった場合
{% if product.metafields.test.day != null %}
{% if purchase_able_to_day > today %}
  〇〇日から購入できます

{% else %}
<div class="product-form__bottons">
 <button
  type="submit"
  name="add"
  class="product-form__submit button button--full-width {% if block.settings.show_dynamic_checkout and product.selling_plan_groups == empty %}button--secondary{% else %}button--primary{% endif %}"
{% if product.selected_or_first_available_varilable == false %}disabled{% endif %}
>

<span>
add to cart
</span>
<div class="loading-overlay__spinner hidden">
  <svg aria-hidden="true" focusable="false" role="presentation" class="spinner" viewBox="0 0 66 66" xmlns="http://www.w3.org/2000/svg">
     <circle class="path" fill="none" stroke-width="6" cx="33" cy="33" r="30"></circle>
  </svg>
 </div>
</button>
  {%- if block.settings.show_dynamic_checkout -%}
     {{ form | payment_button }}
  {%- endif -%}
 </div>
{% endif %}
{% else %}
メタフィールドで設定した商品ではない場合
 {% else %}
<div class="product-form__buttons">
  <button
   type="submit"
   name="add"
   class="product-form__submit button button--full-width {% if block.settings.show_dynamic_checkout and product.selling_plan_groups == empty %}button--secondary{% else %}button--primary{% endif %}"
  {% if product.selected_or_first_available_variant.available == false %}disabled{% endif %}
   >
 <span>
   add to cart
 </span>
<div class="loading-overlay__spinner hidden">
 <svg aria-hidden="true" focusable="false" role="presentation" class="spinner" viewBox="0 0 66 66" xmlns="http://www.w3.org/2000/svg">
 <circle class="path" fill="none" stroke-width="6" cx="33" cy="33" r="30"></circle>
 </svg>
  </div>
</button>
{%- if block.settings.show_dynamic_checkout -%}
   {{ form | payment_button }}
 {%- endif -%}
</div>
{% endif %}
〇〇日後を遡って表示を変える
メタフィールドが設定してある日付と今日の日付を比較して、あと〇〇日後に購入できますの、〇〇をliquidを使って表示させます。
{{ purchase_able_to_day | minus:today }}日後から購入できます
これで今の日にちと、メタフィールドで設定された日にちを比較して自動でテキストが表示されるようになりました。
カスタマイズの幅が広がり少しレベルもあがりました(そのような気がする)
もっとアウトプットしていこうと思います。
Discussion