🙋♂️
Spring SecurityでログインページにGoogle認証を追加する方法
今回はSpringSecurityのログインページにGoogle認証を追加する方法について説明します。
Spring Securityを使用したアプリにGoogle認証を導入する方法に関しては以下を参照してください。
上の記事の設定を行うと、localhost:8080/にアクセスした際に自動でGoogleの認証にリダイレクトされるように設定されています。
今回は、ログイン画面を表示して、通常のログインとGoogleの認証のどちらでも行える形に変更していこうと思います。
注意:Spring Security5.3.5で実装しているため、それ以上のバージョンの場合は適宜読み替えてください・・・
Security Configクラス
@EnableWebSecurity
@Configuration
public class WebSecurityConfig extends WebSecurityConfigurerAdapter {
     @Override
     protected void configure(HttpSecurity http) throws Exception {
	     http.authorizeRequests()
	     .mvcMatchers("/login").permitAll()
	     .anyRequest().authenticated() //上記以外のファイルへのアクセスは認証が必要
	     .and()
	     .oauth2Login() //OpenID Connect認証(Oauth)を有効にする
	     .loginPage("/login").permitAll()
	     .and()
	     .formLogin()
	     .loginPage("/login").permitAll()  // 自作ログインページのリクエストURL
	     .defaultSuccessUrl("/blog", true)
	     .and()
	}
}
上記の設定を行うことで、Oauth認証とフォーム認証のどちらも有効になった状態になります。
.loginPage("/login").permitAll()についてはOauth2Login,formLoginのどちらにも付与することに注意してください。
Thymeleaf
<!DOCTYPE html>
<html xmlns:th="
http://www.thymeleaf.org">

<head>
	<meta charset="UTF-8">
	<title>ログインページ</title>
	<link rel="stylesheet" href="css/starter-template.css" type="text/css">
	<link rel="stylesheet" href="css/bootstrap.min.css" type="text/css">

</head>

<body class="mx-4">
	<h1 class="mt-3">ログイン画面</h1>
	<form action="#" th:action="@{/login}" method="post">
		<div th:if="${param.error}" class="alert alert-danger" role="alert">
			ユーザー名もしくはパスワードが間違っています
		</div>
		<div class="mt-3">
			<label for="usernameInput" class="form-label">ユーザー名</label>
			<input type="text" id="usernameInput" name="username" required class="form-control">
		</div>
		<div class="mt-3">
			<label for="passwordInput" class="form-label">パスワード</label>
			<input type="password" id="passwordInput" name="password" required class="form-control">
		</div>
		<div class="mt-3">
			<button type="submit" class="btn btn-primary">ログイン</button>
		</div>
	</form>
	<table>
		<tr th:each="clientRegistration : ${@clientRegistrationRepository}">
			<td><a class="btn btn-primary btn-block"
					th:href="@{/oauth2/authorization/{id}(id=${clientRegistration.registrationId})}"
					th:text="|Sign in with ${clientRegistration.clientName}|">Sign in with GitHub</a></td>
		</tr>
	</table>

	<div class="mt-3">
		<a href="../creationForm.html" class="mt-3" th:href="@{/signup}">新規登録はこちら</a>
	</div>
</body>
</html>
ここでは、自作のログインページを作成しています。
ログインボタンの下のテーブル属性でGoogle認証へのボダンを作成しています。
前の記事でapplication.ymlに記載した情報からボタンを作成しています。
Google認証の他の認証方法を導入した場合も自動でボタンが増える実装にしています。
動作確認
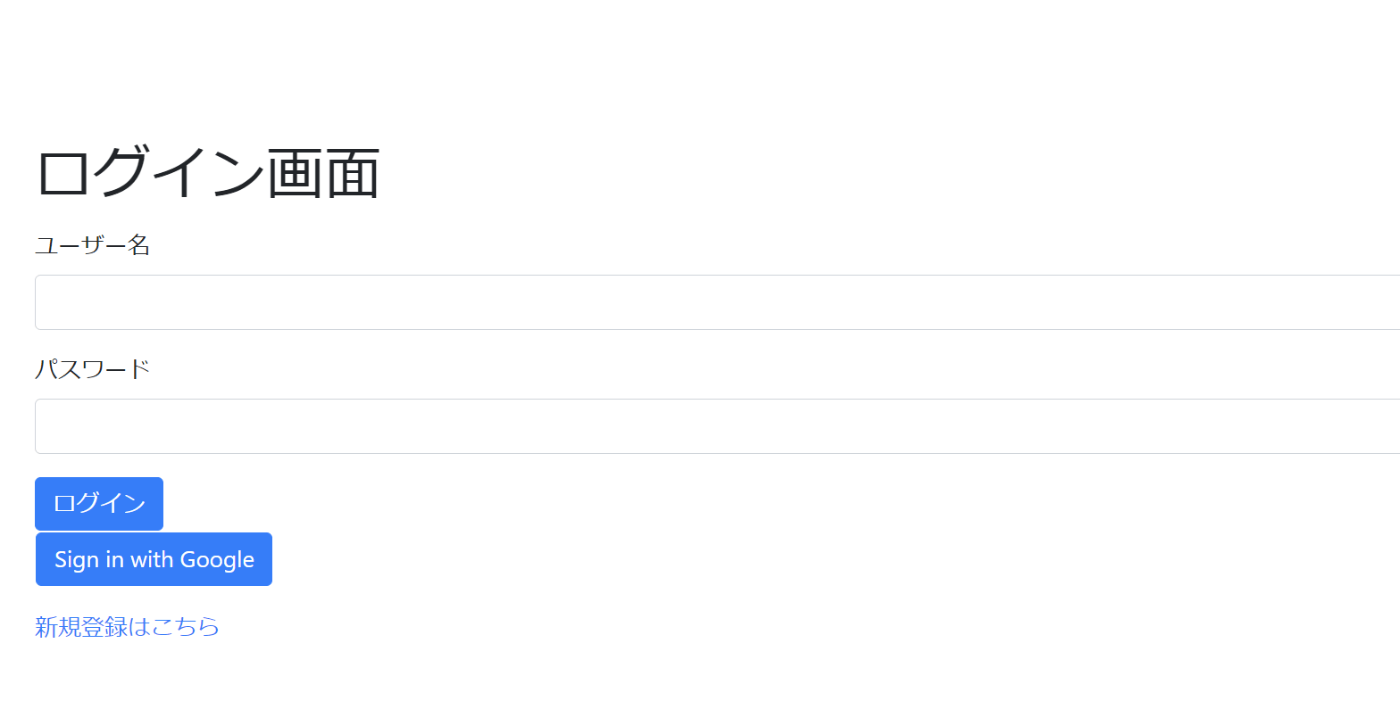
このようなログインページを表示することができました。
「Sign In With Google」ボタンを押すことでGoogle認証につなげることができます。
まとめ
以上の流れで自作のログインページを作成して、Google認証に遷移させる実装が完了です。
読んでいただきありがとうございます。
Discussion