MinIO + keycloak の SSO設定


ストレージをかっこよく使いたい
の続きです。
こんどは、MinIOでシングルサインオンによる認証がしたくなりましたのでそれを実施します。
オレオレ証明書でも使える
まずはオレオレ証明書から作成します。
そのためにEasy RSAを入れます。
$ sudo apt update
$ sudo apt install easy-rsa
そして、Easy RSAを使用して証明書を作成します。
$ mkdir easyrsa
$ cd easyrsa
$ ln -s /usr/share/easy-rsa/* ./

$ ./easyrsa init-pki
* Notice:

  init-pki complete; you may now create a CA or requests.

  Your newly created PKI dir is:
  * /home/evakichi/easyrsa/pki

* Notice:
  IMPORTANT: Easy-RSA 'vars' file has now been moved to your PKI above.

$ ./easyrsa build-ca nopass
* Notice:
Using Easy-RSA configuration from: /home/evakichi/easyrsa/pki/vars

* Notice:
Using SSL: openssl OpenSSL 3.0.11 19 Sep 2023 (Library: OpenSSL 3.0.11 19 Sep 2023)

Using configuration from /home/evakichi/easyrsa/pki/e24f6740/temp.e68d1a85
................+..+++++++++++++++++++++++++++++++++++++++++++++++++++++++++++++++++*.+...+.+...+...+...+.....+....+...+............+..+.........+.+........+.+............+..+............+++++++++++++++++++++++++++++++++++++++++++++++++++++++++++++++++*.......................+...+.+......+..+......+.+.........+.....+....+.....+...+......................+......+..+............+.+..+.......+.....+.+.........+.....+.......+......+...+.........+...+..+...+....+...........+...+..........+......+...+..+......+...+++++++++++++++++++++++++++++++++++++++++++++++++++++++++++++++++
..+...+.........+.........+..+....+++++++++++++++++++++++++++++++++++++++++++++++++++++++++++++++++*..+........+.+...+...+...+.....+......+...+.......+...+..+++++++++++++++++++++++++++++++++++++++++++++++++++++++++++++++++*.+...+........+...+....+...........+..........+..+.......+...............+.....+............+.........+.+......+.....+...+....+...+.....+.............+.........+...+...+...........+...+...+..........+.....+..................+.........+...+..................+.+.........+.........+...+.........+.....+.............+...............+..+....+...............+..+...+.+...........+.......+..+.............+.....+...+.......+.....+.+.................+....+........+.+......+.....+...+............+......+...+.......+............+..+.............+..+......+....+...............+......+........+......+......+...+....+............+.....+.+........+.......+...+..+.......+......+.........+......+..+...+.+.....+.........+......+.+..+......+....+..+......+..........+...+.................+...............+....+...+...+..+.+..............+......+.........+............+...+.............+++++++++++++++++++++++++++++++++++++++++++++++++++++++++++++++++
-----
You are about to be asked to enter information that will be incorporated
into your certificate request.
What you are about to enter is what is called a Distinguished Name or a DN.
There are quite a few fields but you can leave some blank
For some fields there will be a default value,
If you enter '.', the field will be left blank.
-----
Common Name (eg: your user, host, or server name) [Easy-RSA CA]:evakichi.example.com

* Notice:

CA creation complete and you may now import and sign cert requests.
Your new CA certificate file for publishing is at:
/home/evakichi/easyrsa/pki/ca.crt

$ ./easyrsa build-server-full evakichi.example.com nopass
* Notice:
Using Easy-RSA configuration from: /home/evakichi/easyrsa/pki/vars

* Notice:
Using SSL: openssl OpenSSL 3.0.11 19 Sep 2023 (Library: OpenSSL 3.0.11 19 Sep 2023)

....+..............+...+.......+...+.........+...+...+...+..+...+....+..+++++++++++++++++++++++++++++++++++++++++++++++++++++++++++++++++*..+..+...+...+...+.+...+...+.....+...+....+.....+++++++++++++++++++++++++++++++++++++++++++++++++++++++++++++++++*........+...+......+..............+.+..+....+++++++++++++++++++++++++++++++++++++++++++++++++++++++++++++++++
...+..+++++++++++++++++++++++++++++++++++++++++++++++++++++++++++++++++*.....+......+..............+.+......+........+.+..............+++++++++++++++++++++++++++++++++++++++++++++++++++++++++++++++++*....................+......+....+........+.........+...+.+...........+....+.....+....+.....+......+.+......+...+.........+...+...+..+....+.....+......+....+........+.+...........+..........+......+...+.....+....+..+...............+......+.......+.....+............+................+...+..+.........+.+..+.............+..+...+...+....+...........+....+........+.........+.+.........+...+.....+++++++++++++++++++++++++++++++++++++++++++++++++++++++++++++++++
-----
* Notice:

Keypair and certificate request completed. Your files are:
req: /home/evakichi/easyrsa/pki/reqs/evakichi.example.com.req
key: /home/evakichi/easyrsa/pki/private/evakichi.example.com.key


You are about to sign the following certificate.
Please check over the details shown below for accuracy. Note that this request
has not been cryptographically verified. Please be sure it came from a trusted
source or that you have verified the request checksum with the sender.

Request subject, to be signed as a server certificate for 825 days:

subject=
    commonName                = evakichi.example.com


Type the word 'yes' to continue, or any other input to abort.
  Confirm request details: yes

Using configuration from /home/evakichi/easyrsa/pki/25f55d14/temp.50c1f200
Check that the request matches the signature
Signature ok
The Subject's Distinguished Name is as follows
commonName            :ASN.1 12:'evakichi.example.com'
Certificate is to be certified until Sep 18 08:13:40 2026 GMT (825 days)

Write out database with 1 new entries
Database updated

* Notice:
Certificate created at: /home/evakichi/easyrsa/pki/issued/evakichi.example.com.crt
この証明書(/home/evakichi/easyrsa/pki/issued/evakichi.example.com.crt)と鍵(/home/evakichi/easyrsa/pki/private/evakichi.example.com.key)を使用してKeyCloakとMinIOを立てます。
Keycloakの立ち上げ
まずはKeyCloakから、docker compose で立てます。
services:
  keycloak:
    container_name: keycloak
    hostname: keycloak
    image: quay.io/keycloak/keycloak:latest
    environment:
      - TZ=Asia/Tokyo
      - KC_DB=postgres
      - KC_DB_URL_HOST=postgres
      - KC_DB_URL_PORT=5432
      - KC_DB_USERNAME=keycloak
      - KC_DB_PASSWORD=testpassword
      - KC_HOSTNAME=evakichi.example.com
      - KEYCLOAK_ADMIN=admin
      - KEYCLOAK_ADMIN_PASSWORD=admin
      - KC_HTTPS_CERTIFICATE_FILE=/opt/certs/evakichi.example.com.crt
      - KC_HTTPS_CERTIFICATE_KEY_FILE=/opt/certs/evakichi.example.com.key
    command:
      start
    restart: always
    ports:
      - 8443:8443
      - 8080:8080
    volumes:
      - keycloak-volume:/opt/keycloak/data
      - ./certs/evakichi.example.com.key:/opt/certs/evakichi.example.com.key:ro
      - ./certs/evakichi.example.com.crt:/opt/certs/evakichi.example.com.crt:ro
      - ./certs/evakichi.example.com.ca.crt:/opt/certs/evakichi.example.com.ca.crt:ro
    tty: true
    depends_on:
      - postgres

  postgres:
    container_name: postgres
    image: postgres:latest
    volumes:
      - db-store:/var/lib/postgresql/data
    environment:
      - TZ=Asia/Tokyo
      - POSTGRES_USER=keycloak
      - POSTGRES_PASSWORD=testpassword
    restart: always

volumes:
  keycloak-volume:
  db-store:
networks:
  keycloak-network:
立ち上げます。
$ docker compose up -d
目的のURIにつなげます。

左上のKeycloakのプルダウンメニューからCreate Realmをおしてレルムを作ります。
今回はMinIOrealmにします。
そしたらそのレルムを選択しておきます。
MinIOの立ち上げ(1回目)
次に、MinIOを立ち上げます。今回はNginxのリバプロで通信路をHTTPS化しておきます。
services:
  nginx:
    container_name: nginx
    hostname: nginx
    image: nginx:stable-alpine3.19-perl
    volumes:
      - ./conf/nginx.conf:/etc/nginx/nginx.conf
      - ./certs/evakichi.example.com.crt:/opt/certs/evakichi.example.com.crt:ro
      - ./certs/evakichi.example.com.key:/opt/certs/evakichi.example.com.key:ro
    ports:
      - 80:80
      - 443:443
      - 9000:9000
    networks:
      - minio-network
  s3:
    container_name: s3
    hostname: s3
    image: minio/minio:RELEASE.2024-05-10T01-41-38Z
    environment:
      - MINIO_ROOT_USER=${MINIO_ROOT_USER}
      - MINIO_ROOT_PASSWORD=${MINIO_ROOT_PASSWORD}
      - TZ=Asia/Tokyo
    volumes:
      - minio-volume:/data/
      - ./certs/evakichi.example.com.ca.crt:/root/.minio/certs/CAs/evakichi.example.com.ca.crt
      - ./docker-entrypoint.sh:/usr/bin/docker-entrypoint.sh
    tty: true
    networks:
      - minio-network
    command: ["server", "/data", "--console-address", ":9001","--certs-dir","/root/.minio/certs/"]
    restart: always

volumes:
  minio-volume:
networks:
  minio-network:
entrypointの改造
entry-pointの改造をします。しなくていいかもしれませんが念の為。
#!/bin/sh
#
cat  /root/.minio/certs/CAs/* >>/etc/ssl/certs/ca-certificates.crt
# If command starts with an option, prepend minio.
if [ "${1}" != "minio" ]; then
        if [ -n "${1}" ]; then
                set -- minio "$@"
        fi
fi

docker_switch_user() {
        if [ -n "${MINIO_USERNAME}" ] && [ -n "${MINIO_GROUPNAME}" ]; then
                if [ -n "${MINIO_UID}" ] && [ -n "${MINIO_GID}" ]; then
                        chroot --userspec=${MINIO_UID}:${MINIO_GID} / "$@"
                else
                        echo "${MINIO_USERNAME}:x:1000:1000:${MINIO_USERNAME}:/:/sbin/nologin" >>/etc/passwd
                        echo "${MINIO_GROUPNAME}:x:1000" >>/etc/group
                        chroot --userspec=${MINIO_USERNAME}:${MINIO_GROUPNAME} / "$@"
                fi
        else
                exec "$@"
        fi
}

## DEPRECATED and unsupported - switch to user if applicable.
docker_switch_user "$@"
Nginxの設定例
user  nginx;
worker_processes  auto;

error_log  /var/log/nginx/error.log notice;
pid        /var/run/nginx.pid;


events {
    worker_connections  1024;
}


http {
	server {
		listen 9000 ssl;
		ssl_protocols TLSv1.3;
		ssl_certificate /opt/certs/evakichi.example.com.crt;
		ssl_certificate_key /opt/certs/evakichi.example.com.key;
		server_name evakichi.example.com.jp.;

		location /{
			proxy_pass http://s3:9000;
			proxy_set_header Host $http_host;
			proxy_set_header X-Real-IP $remote_addr;
			proxy_set_header X-Forwarded-For $proxy_add_x_forwarded_for;
			proxy_set_header X-Forwarded-Proto $scheme;
		}

	}

	server {
		listen       443 ssl;
		listen  [::]:443 ssl;
		server_name  evakichi.example.com;
		ssl_protocols TLSv1.3;

		ssl_certificate /opt/certs/evakichi.example.com.crt;
		ssl_certificate_key /opt/certs/evakichi.example.com.key;

		# Allow special characters in headers
		ignore_invalid_headers off;
		# Allow any size file to be uploaded.
		# Set to a value such as 1000m; to restrict file size to a specific value
		client_max_body_size 0;
		# Disable buffering
		proxy_buffering off;
		proxy_request_buffering off;
		location / {
			proxy_set_header Host $http_host;
		  	proxy_set_header X-Real-IP $remote_addr;
		  	proxy_set_header X-Forwarded-For $proxy_add_x_forwarded_for;
		  	proxy_set_header X-Forwarded-Proto $scheme;
		  	proxy_connect_timeout 300;
			# Default is HTTP/1, keepalive is only enabled in HTTP/1.1
			proxy_http_version 1.1;
			proxy_set_header Upgrade $http_upgrade;
			proxy_set_header Connection "upgrade";
			chunked_transfer_encoding off;
			proxy_pass http://s3:9001; # This uses the upstream directive definition to load balance
		}

		location /minio/ui/ {
			rewrite ^/minio/ui/(.*) /$1 break;
			proxy_set_header Host $http_host;
			proxy_set_header X-Real-IP $remote_addr;
			proxy_set_header X-Forwarded-For $proxy_add_x_forwarded_for;
			proxy_set_header X-Forwarded-Proto $scheme;
			proxy_set_header X-NginX-Proxy true;
			# This is necessary to pass the correct IP to be hashed
			real_ip_header X-Real-IP;
			proxy_connect_timeout 300;

			# To support websockets in MinIO versions released after January 2023
			proxy_http_version 1.1;
			proxy_set_header Upgrade $http_upgrade;
			proxy_set_header Connection "upgrade";
			# Some environments may encounter CORS errors (Kubernetes + Nginx Ingress)
			# Uncomment the following line to set the Origin request to an empty string
			# proxy_set_header Origin '';

			chunked_transfer_encoding off;
			proxy_pass http://s3:9001; # This uses the upstream directive definition to load balance
		}
	}
    include       /etc/nginx/mime.types;
    default_type  application/octet-stream;

    log_format  main  '$remote_addr - $remote_user [$time_local] "$request" '
                      '$status $body_bytes_sent "$http_referer" '
                      '"$http_user_agent" "$http_x_forwarded_for"';

    access_log  /var/log/nginx/access.log  main;

    sendfile        on;
    #tcp_nopush     on;

    keepalive_timeout  65;

    #gzip  on;

    include /etc/nginx/conf.d/*.conf;
}
ミソは、MinIOのドキュメント
にあるように、
			proxy_http_version 1.1;
			proxy_set_header Upgrade $http_upgrade;
			proxy_set_header Connection "upgrade";
			chunked_transfer_encoding off;
をいれたところです。これがないとWebインターフェースでファイル一覧が取ってこられません。
まずは一回立ち上げます。
$ dokcer compose up -d
そしたらkeycloakに戻ります。
Keycloakの設定
クライアントの設定
ここからは、MiNIOのドキュメントを忠実に実施していきます。
まずは、クライアントの作成から。
[Create Client]を押して実施します。
- Client ID:minio
- Client type:OpenID Connect
- Always display in UI:On

[Next]を押します。
- Client authentication:On
- Authentication flow:Standard flowとDirect access grantsをOnにします。
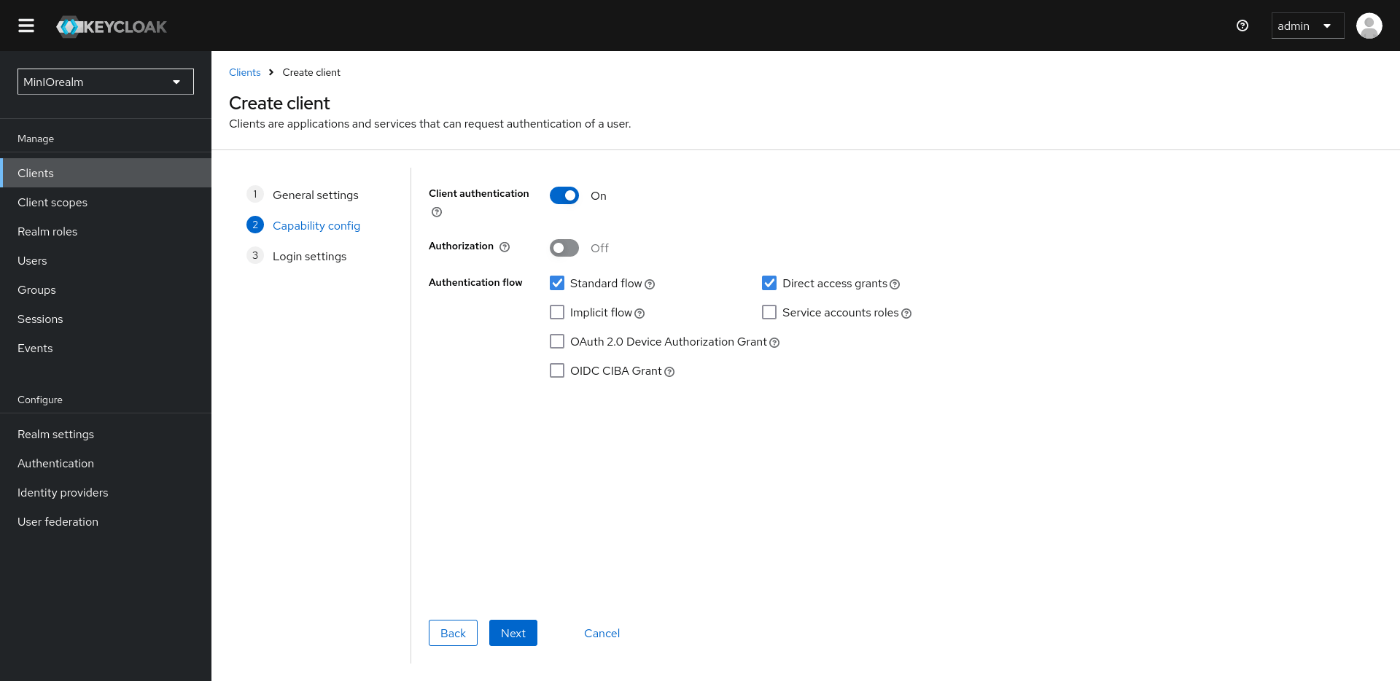
[Next]を押します。
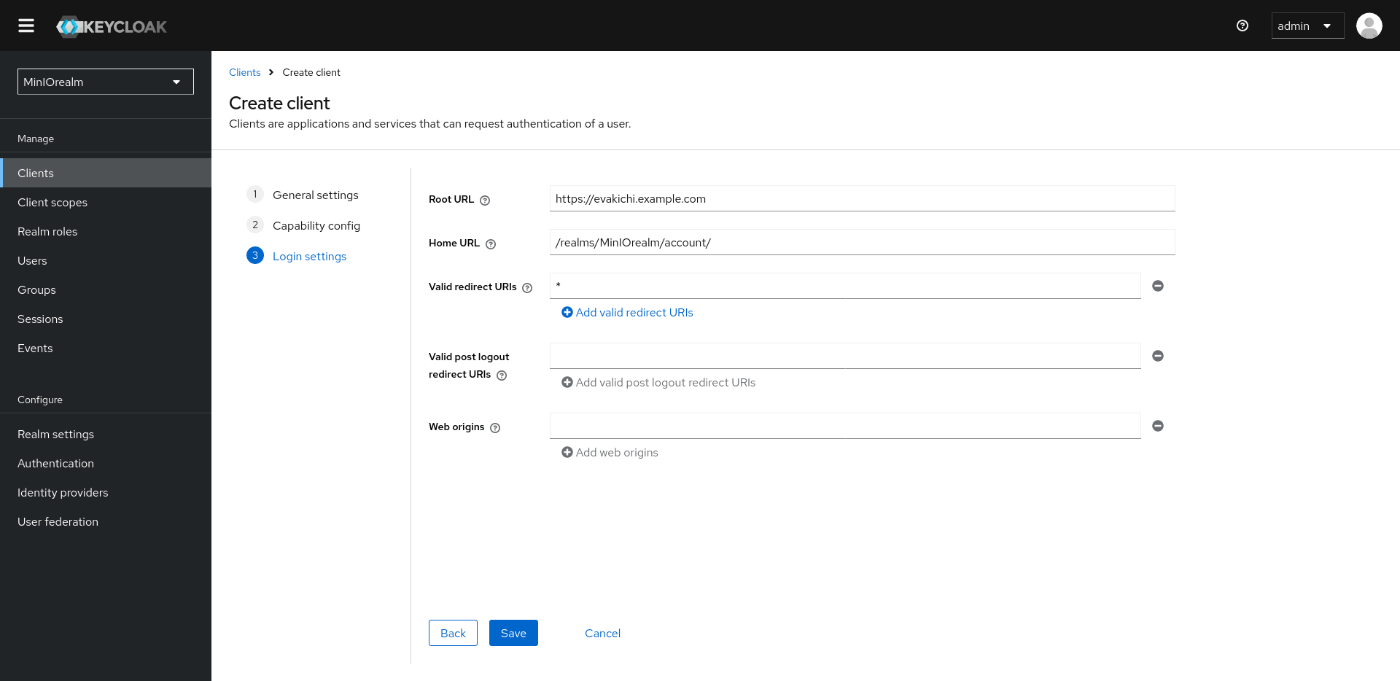
- Root URL:https://evakichi.example.com:8443
- Home URL:/realms/MinIOrealm/account/
- Valid Redirect URI:*
で一度保存します。
そのあともう一度そのクライアント設定を開き
- Keysタブ -> Use JWKS URL:On
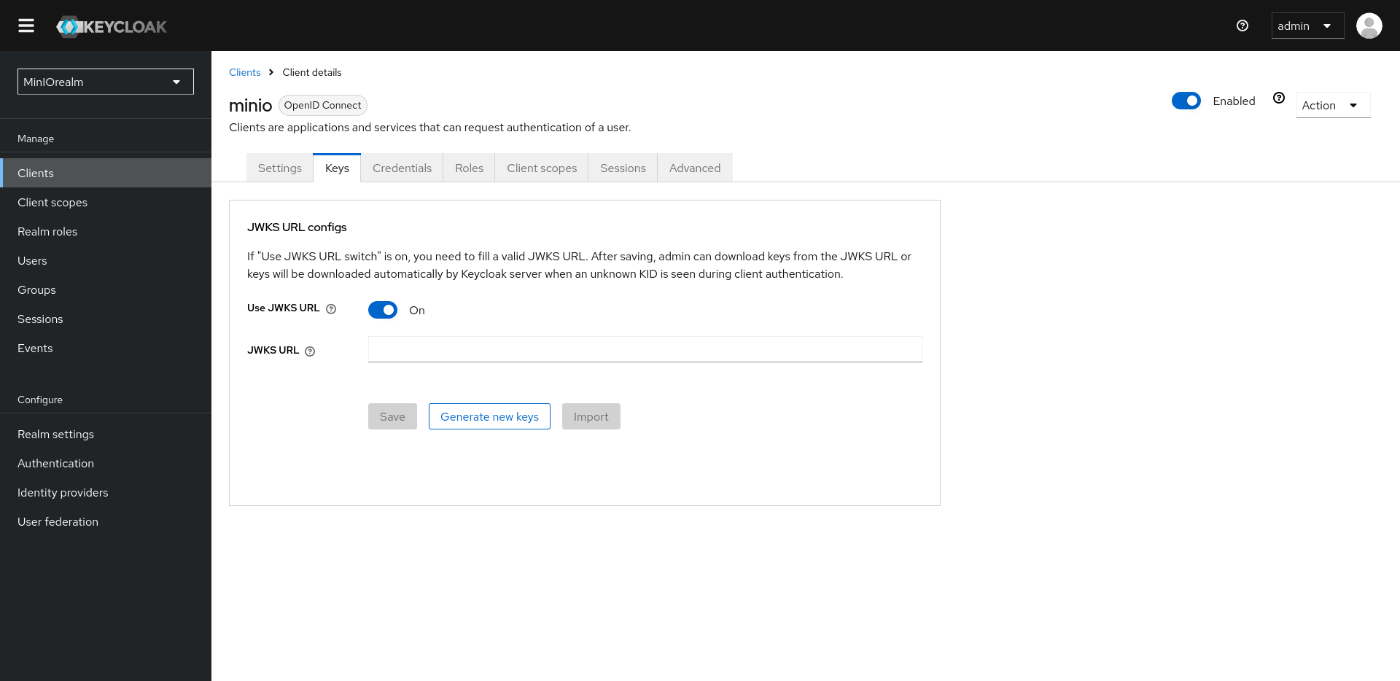
- Advancedタブ -> Advanced Settings -> Access Token Lifespan:1 Hour

にしておきます。
クライアントスコープの設定
次にクライアントスコープの設定をします。
左ペインから「Client Scope」を選択し、[Create client scope]を押します。
- Name:minio-authorization
- Include in token scope:On

Saveします。
詳細設定
一度保存した「minio-suthorization」をクリックして、[Meppers]タブを選択します。[Configure a new mapper]を押して新しいマッパーを作成します。
- Choose any of the mappings from this tableからUser Attributeを選択します。

- Select the Mapper Type:minio-policy-mapper
- User Attribute:policy
- Token Claim Name:policy
- Add to ID token:On
- Claim JSON Type:String
- Multivalued:On
- Aggregate attribute values:On
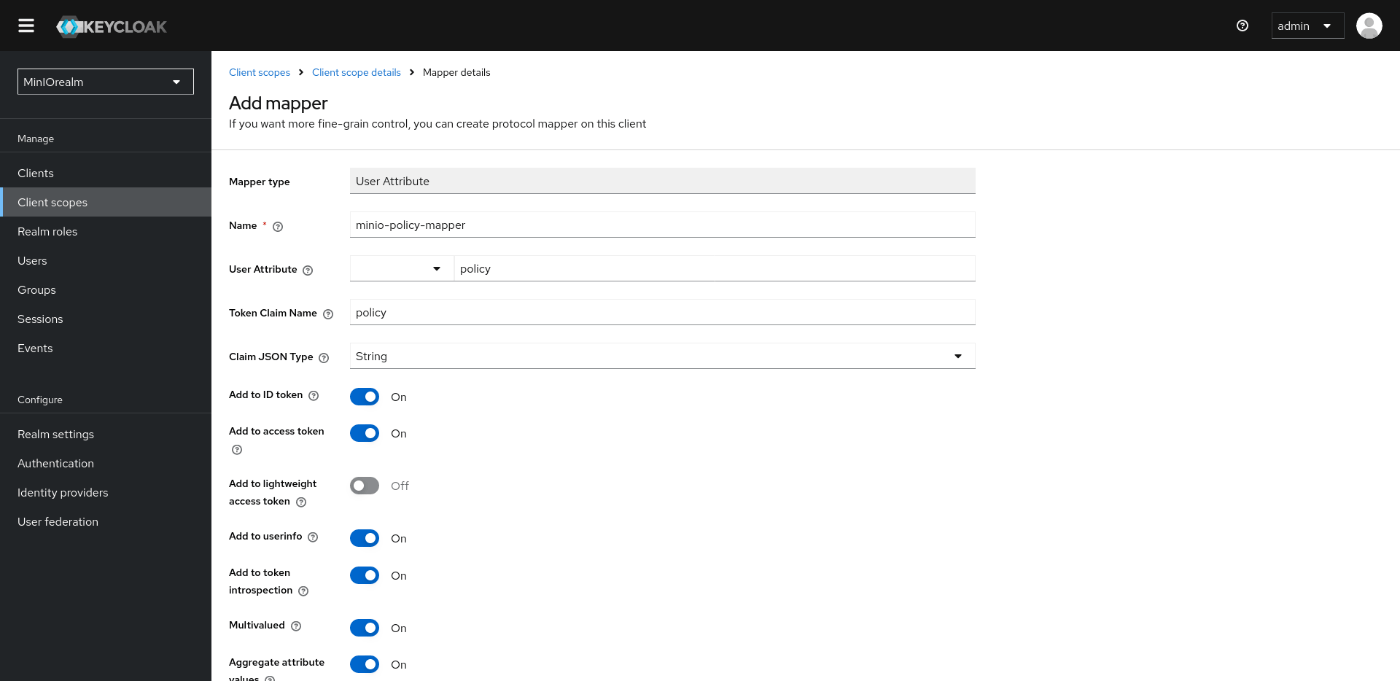
Saveします。
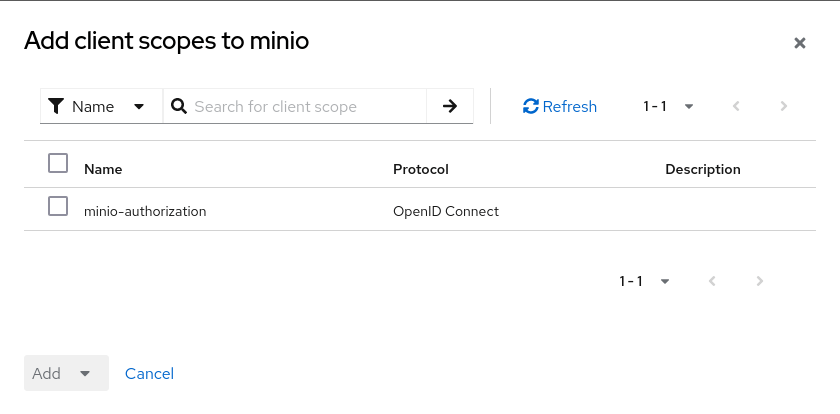
もう一度Clientの設定に戻って、minioのクライアントを選択し[Client Scopes]タブを押して[Add client scope]を押します。
そしてminio-authorizationのスコープを選択し、Addを押すときにDefaultを選択して押します。
これでクライアントとクライアントスコープの作成は修了です。
ユーザとグループの作成
ユーザは通常のユーザを作ってください。
そして、グループを作成します。

つくったらそのグループにポリシーを与えます。
ポリシーはMinIOにあるポリシー名なので今回はデフォルトである[consoleAdmin][readwrite]を与えることとします。
グループを選択してAttributesタブを押します。
そのあとKeyにpolicy、ValueにconsoleAdminを入れ「+」ボタンを押して更にreadwriteのpolicyを与えます。

そしたら、ユーザをそのグループに所属させます。
Mambersタブを押してAdd menberを押し、自分のユーザを追加します。
MinIOの立ち上げ(2回目)
次に、このKeycloakの設定をMinIOから読めるようにします。
Docker ComposeのMinIOの記述の環境変数に次のようなものを与えます。
      - MINIO_IDENTITY_OPENID_CONFIG_URL_PRIMARY_IAM=https://evakichi.example.com:8443/realms/MinIOrealm/.well-known/openid-configuration
      - MINIO_IDENTITY_OPENID_CLIENT_ID_PRIMARY_IAM=minio
      - MINIO_IDENTITY_OPENID_CLIENT_SECRET_PRIMARY_IAM=J5fAMEQURILhHJ5wcNW7AP9fIQJCB0Vw
      - MINIO_IDENTITY_OPENID_DISPLAY_NAME_PRIMARY_IAM=SSO_IDENTIFIER
      - MINIO_IDENTITY_OPENID_SCOPES_PRIMARY_IAM=email
      - MINIO_IDENTITY_OPENID_REDIRECT_URI_DYNAMIC_PRIMARY_IAM=on
MINIO_IDENTITY_OPENID_CONFIG_URL_PRIMARY_IAMの末尾PRIMARY_IAMは任意の文字列で良いそうです、変えたら他の環境変数も変えておいてください。
ここで重要なのはMINIO_IDENTITY_OPENID_CLIENT_SECRETです。これは、Keycloakのminioクライアントのなかで[Credentials]タブがありますのでそこの「Client Secret」をコピーして書き込みます。
これでMinIOをもう一度立ち上げましょう。
$ docker compose down
$ docker compose up -d
で、MinIOに接続すると認証画面が変わっているはずです。

[SSO_IDENTIFIER]を押すと、Keycloakに遷移します。

ここでKeycloakで登録したユーザを入力すると・・・、
MinIOのコンソール画面に移動します。

これで、シングルサインオンができました。
終わりに
この方法を流用すればかんたんにデータを取るときにシングルサインオンで取ってこられるようになると思います。是非活用してみてください。
Discussion