【環境構築】Vite + Vue + UnoCSS で簡単なグリッドレイアウトを作ってみる
Vue Advent Calendar 2024 4 日目の記事です。
はじめに
ナイトウ(@naitokosuke)と申します。
Vite、Vue、UnoCSS を組み合わせて開発環境を構築する手順を詳しく解説します。
構築した環境で簡単なレスポンシブなグリッドレイアウトの画面を作成します。
この記事を参考にしていただき、ぜひ UnoCSS を試してみてください。
UnoCSS とは
Instant On-demand Atomic CSS Engine
コアユーティリティは存在しないためフレームワークではなく CSS エンジンです。
高速性と軽量さを兼ね備え、Vite や VSCode との統合も簡単に行えます。
コアユーティリティはありませんが、魅力的な機能が「プリセット」として提供されています。
公式プリセットの中にはコアユーティリティ相当のもの(Uno Preset)があります。
Tailwind CSS や Bootstrap のようなユーティリティファーストのフレームワークのように利用することもできます。
今回は公式プリセットである Uno Preset を利用してグリッドレイアウトを実現します。
環境準備
- Node.js
- npm / yarn / pnpm などのパッケージマネージャー
がインストールされていることを確認してください。
Vue プロジェクトの作成
Vite で Vue プロジェクトを作成します。
pnpm create vue@latest
ウィザードには以下のように回答しました。
Project name: try-vite-vue-unocss
Add TypeScript? > Yes
Add JSX Support? > No
Add Vue Router for Single Page Application development? > No
Add Pinia for state management? > No
Add Vitest for Unit Testing? > No
Add an End-to-End Testing Solution? > No
Add ESLint for code quality? > Yes
Add Prettier for code formatting? > Yes
Add Vue DevTools 7 extension for debugging? (experimental) > No
Prettier を導入したので好みの設定に変更しておきます。
{
  "$schema": "https://json.schemastore.org/prettierrc",
  "semi": true,
  "tabWidth": 2,
  "singleQuote": false,
  "printWidth": 80,
  "trailingComma": "es5"
}
開発サーバを立ち上げて、ブラウザでプロジェクト作成の成功を確認します。
cd try-vite-vue-unocss
pnpm install
pnpm format
pnpm devs
UnoCSS の導入
VSCode 拡張機能
VSCode には公式の拡張機能があります。
インストールします。
UnoCSS インストール
pnpm add -D unocss
Vite の設定
次に vite.config.ts のプラグインの部分に UnoCSS を追加します。
import { fileURLToPath, URL } from "node:url";

import { defineConfig } from "vite";
import vue from "@vitejs/plugin-vue";
import UnoCSS from "unocss/vite";

// https://vitejs.dev/config/
export default defineConfig({
  plugins: [vue(), UnoCSS()],
  resolve: {
    alias: {
      "@": fileURLToPath(new URL("./src", import.meta.url)),
    },
  },
});
UnoCSS の設定
We highly recommend to use a dedicated
uno.config.tsfile to configure your UnoCSS, in order to get the best experience with IDEs and other integrations.
ということで公式激推しの UnoCSS 専用の設定ファイル uno.config.ts を追加します。
import { defineConfig } from "unocss";

export default defineConfig({
  rules: [
    ["m-100px", { margin: "100px" }],
    ["text-green", { color: "green" }],
  ],
});
rules にはカスタムのユーティリティクラスを定義できます。
これはお試しのための静的なルールですが、正規表現を利用して動的なルールも定義できます。
いらないものを消す
rm -rf src/assets/ && rm -rf src/components/
エントリーポイント uno.css を src/main.ts にインポートする
import { createApp } from "vue";
import App from "./App.vue";

import "uno.css";

createApp(App).mount("#app");
ここまでで設定下準備はできました。
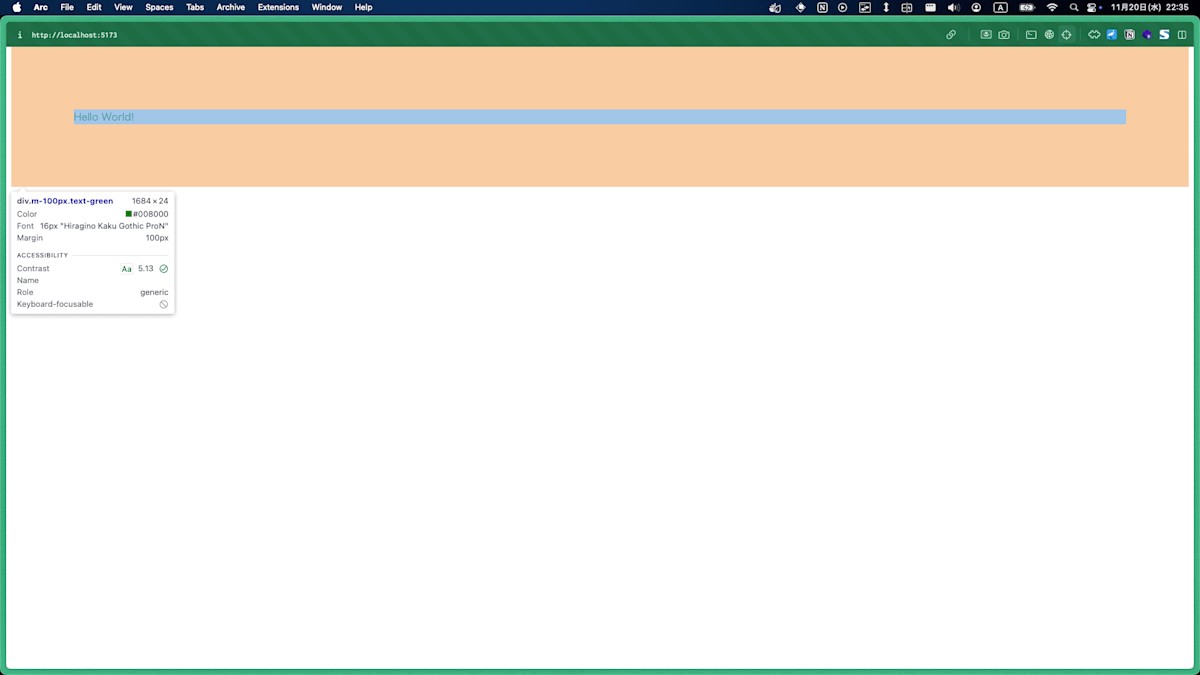
先ほど定義したルール(カスタムユーティリティ)を試してみましょう。
<template>
  <div class="m-100px text-green">Hello World!</div>
</template>
$ pnpm dev して表示を見てみましょう。


Attributify を試す
What is Attributify?
UnoCSS の魅力的な機能のひとつに Attributify モードがあります。
これはユーティリティを属性として用いることができる機能です。
例えば、
<button
  class="bg-blue-400 hover:bg-blue-500 text-sm text-white font-mono font-light py-2 px-4 rounded border-2 border-blue-200 dark:bg-blue-500 dark:hover:bg-blue-600"
>
  Button
</button>
は Attributify モードで以下のように記述できます。
<button
  bg="blue-400 hover:blue-500 dark:blue-500 dark:hover:blue-600"
  text="sm white"
  font="mono light"
  p="y-2 x-4"
  border="2 rounded blue-200"
>
  Button
</button>
これを試してみましょう。
Attributify を利用する設定
すでにインストールした unocss モジュールに Attributify プリセットは含まれています。
uno.config.ts に追加すると、
import { defineConfig, presetAttributify } from "unocss";

export default defineConfig({
  presets: [presetAttributify()],
  rules: [
    ["m-100px", { margin: "100px" }],
    ["text-green", { color: "green" }],
    ["text-bold", { "font-weight": "700" }],
  ],
});
<template>
  <div m-100px text="green bold">Hello World!</div>
</template>
グリッドレイアウトを実装してみる
こんな感じの見た目のページを作成してみます

リセット CSS
リセット CSS をインストールします。
pnpm add @unocss/reset
import { createApp } from "vue";
import App from "./App.vue";

import "@unocss/reset/tailwind.css";
import "uno.css";

createApp(App).mount("#app");
UnoCSS の特徴機能を他にも使ってみる
presetTagify, presetIcons も使ってみます。
import {
  defineConfig,
  presetAttributify,
  presetTagify,
  presetIcons,
  presetUno,
} from "unocss";

export default defineConfig({
  presets: [
    presetAttributify(),
    presetTagify(),
    presetIcons({
      scale: 2.0,
      autoInstall: true,
    }),
    presetUno(),
  ],
});
<!doctype html>
<html lang="en">
  <head>
    <meta charset="UTF-8" />
    <link rel="icon" href="/favicon.ico" />
    <meta name="viewport" content="width=device-width, initial-scale=1.0" />
    <title>Vite App</title>
  </head>
  <body>
    <div id="app" h-100vh></div>
    <script type="module" src="/src/main.ts"></script>
  </body>
</html>
<template>
  <div
    p-5
    grid
    gap="x-8 y-8"
    grid-cols="sm:2 md:3 lg:4"
    h-full
    border="[&>div]:~ [&>div]:solid"
    class="[&>div]:rounded-lg [&>div]:grid [&>div]:justify-center [&>div]:items-center [&>div>*]:text-4xl"
  >
    <div border-red><i-carbon-logo-github text-green /></div>
    <div border-orange><i-carbon-logo-vue text-green /></div>
    <div border-yellow><i-twemoji-frog /></div>
    <div border-green><i-twemoji-green-heart /></div>
    <div border-gray><i-logos-unocss /></div>
    <div border-blue><i-devicon-nuxtjs /></div>
    <div border="#000080"><i-devicon-homebrew /></div>
    <div border-purple><i-logos-vitejs /></div>
    <div border-pink><i-logos-visual-studio-code /></div>
  </div>
</template>
Vue らしく、コンポーネントに分割して、ナビゲーションバーにダークモード切り替えボタンも配置します。
<script setup lang="ts">
import { ref } from "vue";

import GridLayout from "./components/GridLayout.vue";
import GridIcon from "./components/GridIcon.vue";
import NavBar from "./components/NavBar.vue";

const isDark = ref(false);

const toggleDarkMode = () => (isDark.value = !isDark.value);

type Item = {
  borderColor: string;
  icon: string;
};

const items: Item[] = [
  { borderColor: "border-red", icon: "i-carbon-logo-github" },
  { borderColor: "border-orange", icon: "i-carbon-logo-vue" },
  { borderColor: "border-yellow", icon: "i-twemoji-frog" },
  { borderColor: "border-green", icon: "i-twemoji-avocado" },
  { borderColor: "border-gray", icon: "i-logos-unocss" },
  { borderColor: "border-blue", icon: "i-devicon-nuxtjs" },
  { borderColor: "border-#000080", icon: "i-devicon-homebrew" },
  { borderColor: "border-purple", icon: "i-logos-vitejs" },
  { borderColor: "border-pink", icon: "i-logos-visual-studio-code" },
];
</script>

<template>
  <div :class="{ 'bg-black': isDark }">
    <NavBar :isDark @toggleDarkMode="toggleDarkMode"> </NavBar>
    <GridLayout
      :gap="'x-8 y-8'"
      :columnsLg="'lg:grid-cols-4'"
      :columnsMd="'md:grid-cols-3'"
      :columnsSm="'sm:grid-cols-2'"
      h-90vh
    >
      <GridIcon
        v-for="(item, index) in items"
        :key="`icon-${index}`"
        :borderColor="item.borderColor"
        :icon="item.icon"
        :isDark
      />
    </GridLayout>
  </div>
</template>
components/NavBar.vue
<script setup lang="ts">
import { computed } from "vue";

const props = defineProps<{
  isDark: boolean;
}>();

const emit = defineEmits<{
  toggleDarkMode: [];
}>();

const emitToggleDarkMode = () => {
  emit("toggleDarkMode");
};

const iconClass = computed(() => {
  return props.isDark ? "i-mi-moon text-white" : "i-mi-sun";
});
</script>

<template>
  <nav h-10vh w-full px-10 flex justify-end items-center>
    <button @click="emitToggleDarkMode">
      <span text-2xl flex content-center :class="iconClass"></span>
    </button>
  </nav>
</template>
components/GridIcon.vue
<script setup lang="ts">
import { computed } from "vue";

const props = defineProps<{
  borderColor?: string;
  icon?: string;
  isDark: boolean;
}>();

const borderClass = computed(() => {
  return props.borderColor || "border-gray";
});

const iconClass = computed(() => {
  return props.icon || "i-logos-vue";
});
</script>

<template>
  <div
    grid
    items-center
    justify-center
    border
    rounded-lg
    border-solid
    :class="borderClass"
    hover="bg-gray"
  >
    <span text-4xl :class="[iconClass, { 'text-white': isDark }]"> </span>
  </div>
</template>
components/GridLayout.vue
<script setup lang="ts">
const props = defineProps<{
  gap: string;
  columnsLg: string;
  columnsMd: string;
  columnsSm: string;
}>();
</script>

<template>
  <div
    grid
    px-5
    pb-5
    :gap="props.gap"
    :class="[columnsLg, columnsMd, columnsSm]"
  >
    <slot />
  </div>
</template>
最後に
UnoCSS を使った開発環境構築から、簡単なグリッドレイアウトの実装までをご紹介しました。
UnoCSS はまだまだ勉強中ですが、Attributify モードやアイコンのプリセットが便利でとても気に入っています。
作者の antfu さんが実際に UnoCSS を用いて開発をしている様子(ライブコーディング)が YouTube で見れます!
より詳しい、より実践的な使い方を知ることができるのでぜひチェックしてみてください!
Let's build Nuxt playground! リスト
最後まで読んでいただきありがとうございました!
Discussion