こんにちは!sugitaniと申します。ブラックキャット・カーニバル(略称ブラキャニ)というCompose Multiplatformで作られたSNSアプリを開発しています。
本稿はブラキャニの開発で得られた"あれどうやるんだっけ" を備忘録も兼ねて共有していくシリーズの5作目です。
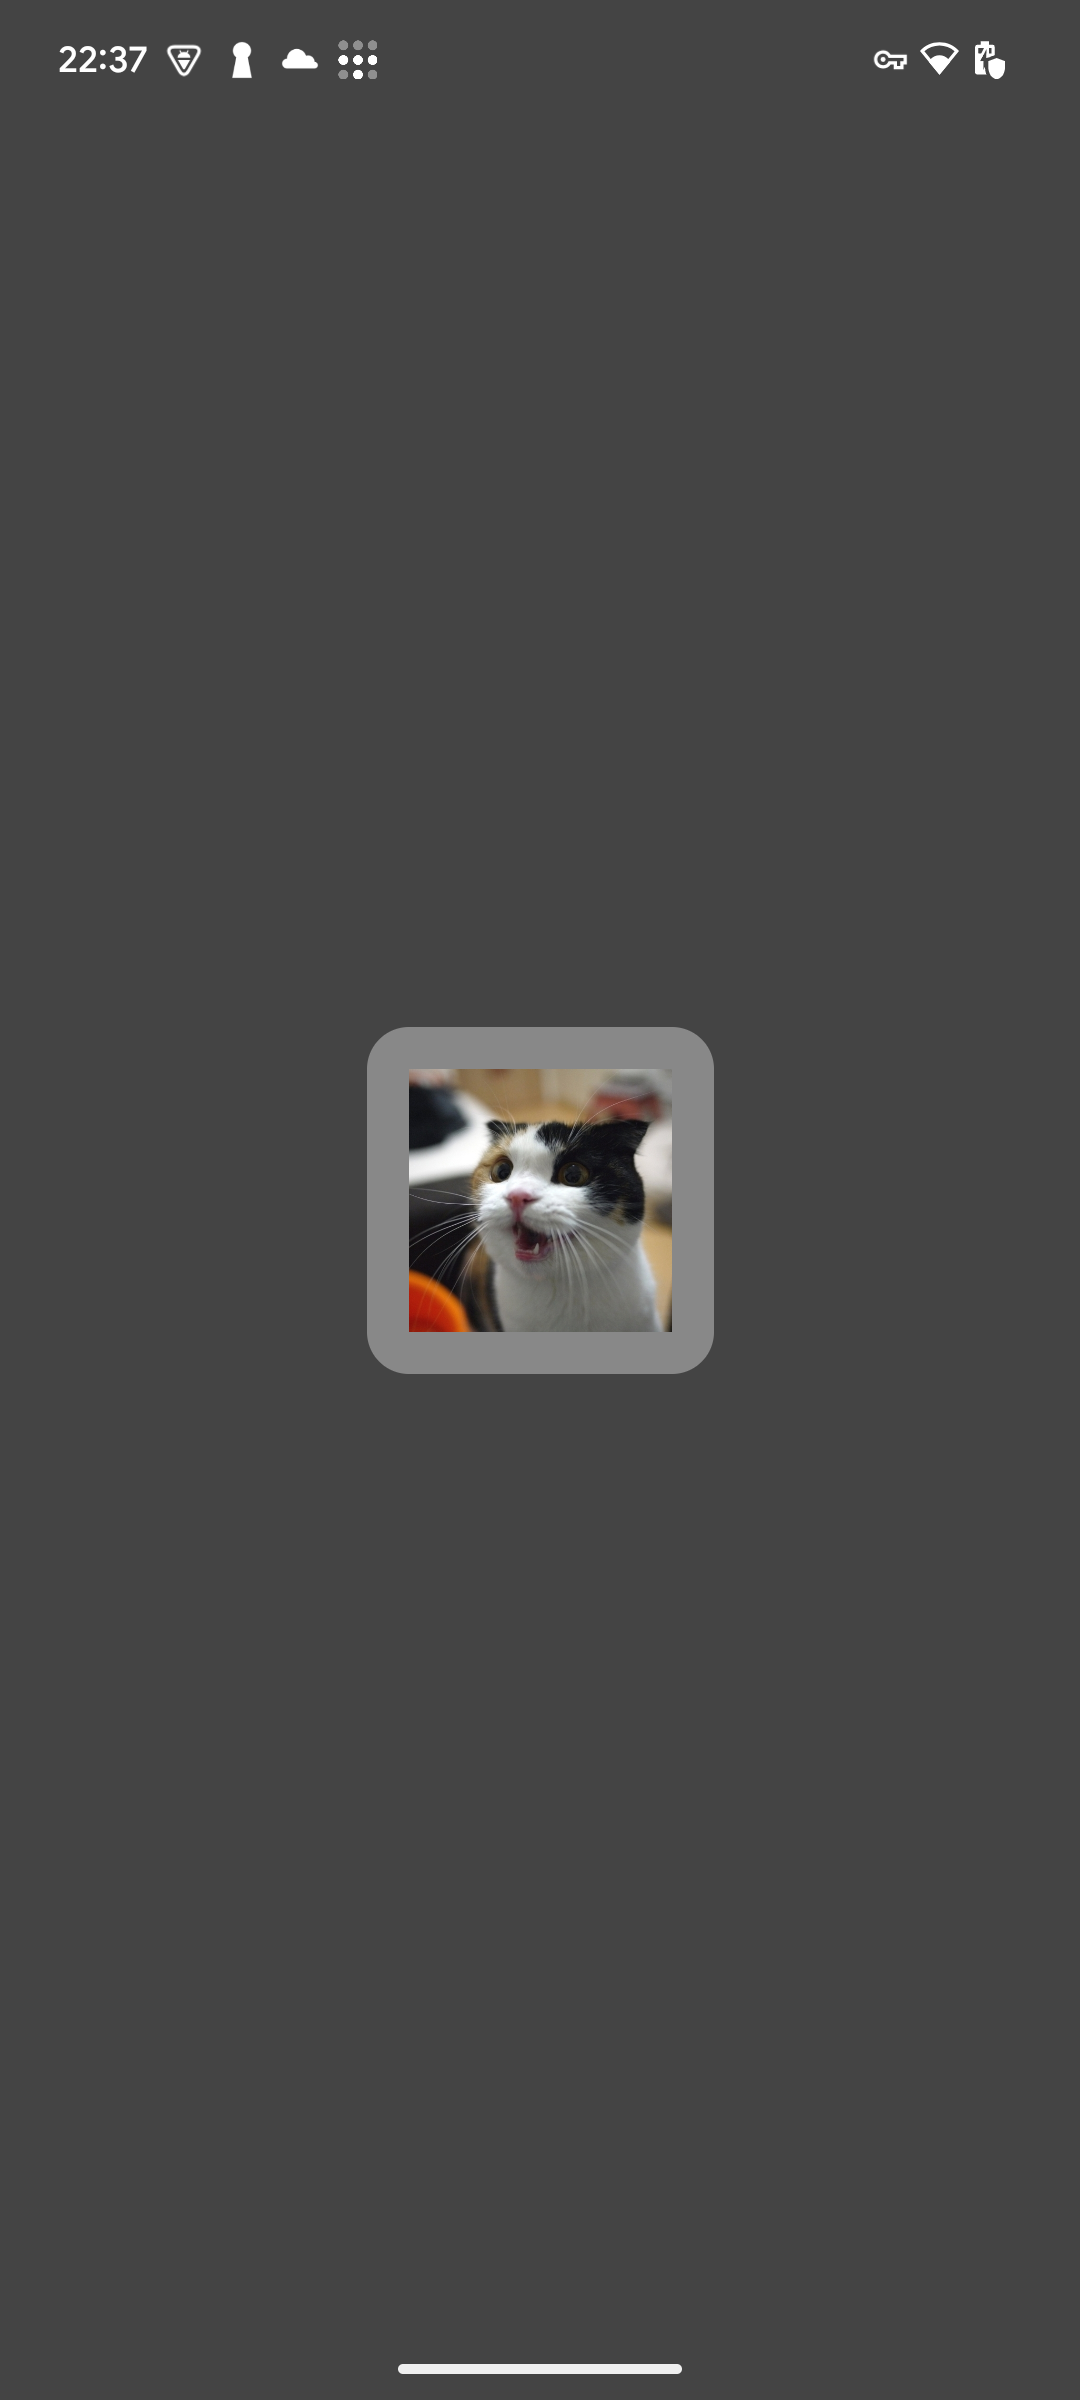
スポットライトのような描画を行うには
具体的には以下のような描画です

このような描画は公式ドキュメントにあるようにModifier.drawWithContent を使うとで実現できます。
var pointerOffset by remember {
    mutableStateOf(Offset(0f, 0f))
}
Column(
    modifier = Modifier
        .fillMaxSize()
        .pointerInput("dragging") {
            detectDragGestures { change, dragAmount ->
                pointerOffset += dragAmount
            }
        }
        .onSizeChanged {
            pointerOffset = Offset(it.width / 2f, it.height / 2f)
        }
        .drawWithContent {
            drawContent()
            // draws a fully black area with a small keyhole at pointerOffset that’ll show part of the UI.
            drawRect(
                Brush.radialGradient(
                    listOf(Color.Transparent, Color.Black),
                    center = pointerOffset,
                    radius = 100.dp.toPx(),
                )
            )
        }
) {
    // Your composables here
}
この処理は
- コンテンツを描画する
- 後から指定箇所以外を黒く塗りつぶす
というアプローチになります
重ねられるスポットライトのような一部をくり抜いた描画を行うには
別のアプローチとして、覆い隠すエフェクトを別コンポーネントにできる方法を開拓します。
例示コードの最終形態はもっと複雑になりますが、具体的には以下のようにしたいとします。
Box{
    MainContent()
    Spotlight()
}
この場合は描画に関する以下の機能を利用します
-
Modifier.graphicsLayerで明示的にオフスクリーン描画(CompositingStrategy.Offscreen)を指定する - ブレンドモードで
BlendMode.DstOut(あるいはSrcOut)を利用する
graphicsLayerとCompositingStrategyとは
Modifier.graphicsLayerはお絵かきソフトにあるレイヤーのように被せられる層を作ります。
実際にメモリ的なレイヤーを作るかはCompositingStrategyで制御されます。
- 透過等がない場合は実際にレイヤーは作らずそのまま上塗り描画を行う(Auto)
- 透過だけ効かせながら上塗り描画を行う(ModulateAlpha)
- 常にレイヤーを作る(Offscreen)
BlendModeとは
こちらを見ていただくのが手っ取り早いです
重ねられるくり抜いた描画のサンプルコード
package cc.bcc.cmpexamples.example005

import androidx.compose.foundation.layout.Box
import androidx.compose.foundation.layout.fillMaxSize
import androidx.compose.runtime.Composable
import androidx.compose.runtime.remember
import androidx.compose.ui.Modifier
import androidx.compose.ui.draw.drawBehind
import androidx.compose.ui.geometry.Rect
import androidx.compose.ui.geometry.Size
import androidx.compose.ui.graphics.BlendMode
import androidx.compose.ui.graphics.Color
import androidx.compose.ui.graphics.CompositingStrategy
import androidx.compose.ui.graphics.Shape
import androidx.compose.ui.graphics.drawOutline
import androidx.compose.ui.graphics.drawscope.translate
import androidx.compose.ui.graphics.graphicsLayer
import androidx.compose.ui.platform.LocalDensity

@Composable
fun Spotlight(
    spots: List<Pair<Rect, Shape>>,
    backgroundColor: Color = remember { Color.Black.copy(0.5f) },
) {
    val density = LocalDensity.current
    Box(
        modifier =
            Modifier
                .fillMaxSize()
                .graphicsLayer { compositingStrategy = CompositingStrategy.Offscreen }
                .drawBehind {
                    drawRect(backgroundColor, size = size)

                    spots.forEach { (rect, shape) ->
                        translate(rect.left, rect.top) {
                            drawOutline(
                                outline =
                                    shape.createOutline(
                                        Size(rect.width, rect.height),
                                        layoutDirection,
                                        density,
                                    ),
                                color = Color.White,
                                blendMode = BlendMode.DstOut,
                            )
                        }
                    }
                },
    )
}
このコードは以下のアプローチになります
- CompositingStrategy.Offscreenを指定し、常にオフスクリーン描画(実際にメモリにレイヤーを作る)ようにします
- 指定背景色で全てを塗りつぶします
- 与えられた範囲&形毎に
BlendMode.DstOutで描画して②で描画した背景色を消していきます
利用例
package cc.bcc.cmpexamples.example005

import androidx.compose.foundation.Image
import androidx.compose.foundation.background
import androidx.compose.foundation.layout.Box
import androidx.compose.foundation.layout.fillMaxSize
import androidx.compose.foundation.layout.size
import androidx.compose.foundation.shape.RoundedCornerShape
import androidx.compose.material3.ExperimentalMaterial3Api
import androidx.compose.runtime.Composable
import androidx.compose.runtime.getValue
import androidx.compose.runtime.mutableStateOf
import androidx.compose.runtime.remember
import androidx.compose.runtime.setValue
import androidx.compose.ui.Alignment
import androidx.compose.ui.Modifier
import androidx.compose.ui.geometry.Rect
import androidx.compose.ui.graphics.Color
import androidx.compose.ui.graphics.Shape
import androidx.compose.ui.layout.boundsInParent
import androidx.compose.ui.layout.onGloballyPositioned
import androidx.compose.ui.platform.LocalDensity
import androidx.compose.ui.unit.dp
import bccexamples005.composeapp.generated.resources.Res
import bccexamples005.composeapp.generated.resources.mikan
import org.jetbrains.compose.resources.painterResource
import org.jetbrains.compose.ui.tooling.preview.Preview

@OptIn(ExperimentalMaterial3Api::class)
@Preview
@Composable
internal fun App() {
    var mask by remember { mutableStateOf<Pair<Rect, Shape>?>(null) }
    val density = LocalDensity.current

    Box(modifier = Modifier.fillMaxSize().background(Color.Gray)) {
        Image(
            painter = painterResource(Res.drawable.mikan),
            contentDescription = null,
            modifier =
                Modifier
                    .size(100.dp)
                    .align(Alignment.Center)
                    .onGloballyPositioned { layoutCoordinates ->
                        val imageRect = layoutCoordinates.boundsInParent()
                        with(density) {
                            mask =
                                if (imageRect != Rect.Zero) {
                                    val fixed = imageRect.padding(16.dp.toPx())
                                    Pair(fixed, RoundedCornerShape(16.dp.toPx()))
                                } else {
                                    null
                                }
                        }
                    },
        )

        mask?.let {
            Spotlight(listOf(it))
        }
    }
}

fun Rect.padding(padding: Float): Rect =
    copy(
        left = this.left - padding,
        top = this.top - padding,
        bottom = this.bottom + padding,
        right = this.right + padding,
    )
このコードは以下の構造になっています
- mikan(猫の画像)を描画します
- onGloballyPositionedを見張って配置先を検出します
- 配置先の情報を元にSpotlightコンポーネントを描画します
サンプルプロジェクト
本稿のソースコード、および動作するコードは にあります。
免責事項
このコードはあくまで"自分はこう実装した"という例ですので、よりよい方法がある可能性があります。見つけたら教えてください!
以下宣伝
- コメントのしやすさともらいやすさに全力を注いだショートSNS ブラキャニ をお試しください
- ブラックキャット・カーニバル株式会社のPublicationではCompose Multiplatformに関する記事を沢山投稿しています
- Compose Multiplatformでアプリのバックグラウンド切り替えを検知するには
- Compose MultiplatformでコンポーネントをImageBitmapにするには
- Compose MultiplatformでKoinを使って環境別のDIを行う方法
- Compose Multiplatformでexpect/actialでContextをうまく扱う方法
- Compose Multiplatformで後から重ねられる&一部をくり抜いたコンポーネントを作るには
- Compose MultiplatformでImageBitmapとBitmap/UIImageを相互変換するには
- Compose MultiplatformでLiquid glass対応のタブ表示を行うには

Discussion