✨
MacでESP-IDF環境構築
Appleシリコン搭載のMacでESP32のESP-IDF環境を構築します。ESP-IDFは「Espressif IoT Development Framework」の略でESP32シリーズの公式開発フレームワークです。
- OS: Ventura 13.4 (Apple M2)
- Device: ESP32-DevKitC-VE ESP32-WROVER-E開発ボード 4MB
ESP-IDFインストール
brewでesp32コンパイル環境とcmakeをインストールします。
brew tap tasanakorn/homebrew-esp32
brew install xtensa-esp32-elf
brew install cmake
esp-idf
cd ~
git clone --recursive https://github.com/espressif/esp-idf.git
cd esp-idf
./install.sh
環境パスにPathを通します。
cd ~/esp-idf
. export.sh
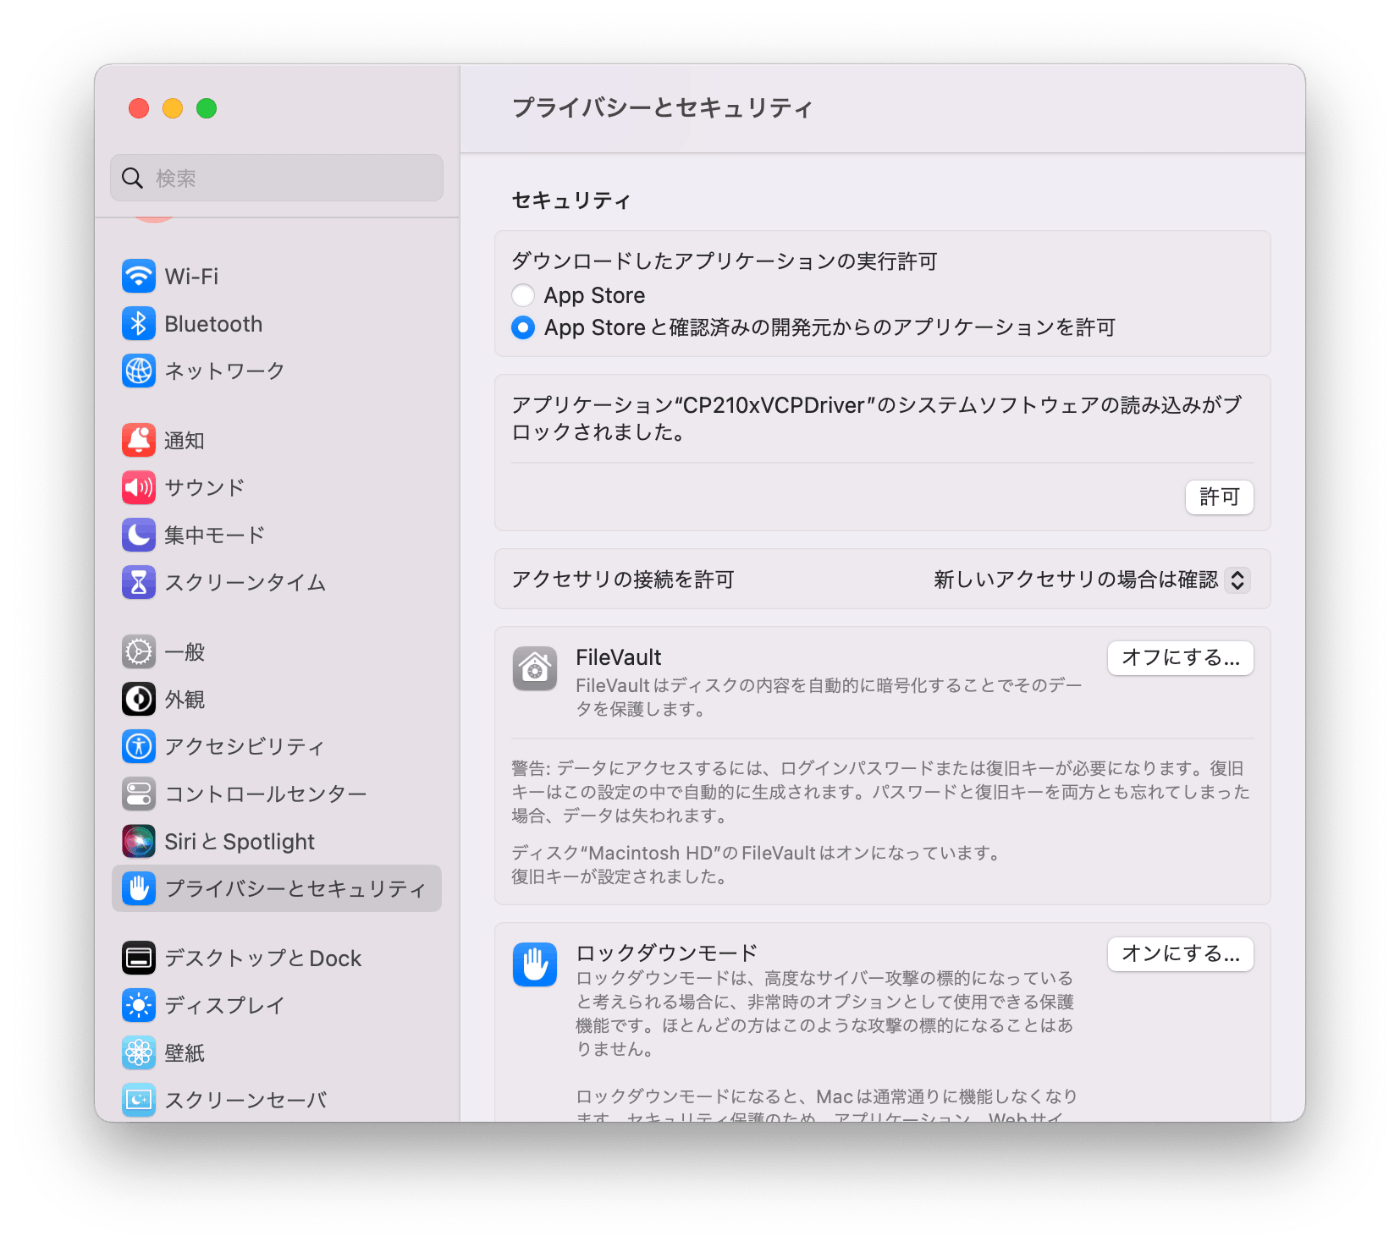
USBドライバインストール
ESP32とUSB接続する際に必要となるドライバをインストールします。
CP210x USB Driver: macOS VPC Driver
ドライバのインストール中に拡張機能の許可を求められるので、「CP210xVPCDriver」を許可します。
/devにcu.SLAB_USBtoUARTが表示されれば認識されています。
% ls -la /dev |grep USB
crw-rw-rw-   1 root   wheel      0x9000005  8 14 12:00 cu.SLAB_USBtoUART
crw-rw-rw-   1 root   wheel      0x9000004  8 14 12:00 tty.SLAB_USBtoUART
Hello world 実行
サンプルのHello worldを実行します。ホームディレクトリにespフォルダを作成し、hello_worldフォルダをコピーします。
mkdir ~/eps/
cd ~/esp
cp -r $IDF_PATH/examples/get-started/hello_world .
ターゲットにesp32を設定し、ビルドします。
cd hello_world
idf.py set-target esp32
idf.py build
下記でESP32に書き込みます。
idf.py -p /dev/cu.SLAB_USBtoUART flash
ESP32の標準出力を確認するため、次のモニターコマンドを実行します。下記のような出力が表示されます。モニターを終了するためにはCtrl+]を押してください。
% idf.py -p /dev/cu.SLAB_USBtoUART monitor
Hello world!
This is esp32 chip with 2 CPU core(s), WiFi/BTBLE, silicon revision v3.0, 2MB external flash
Minimum free heap size: 301244 bytes
Restarting in 10 seconds...
Restarting in 9 seconds...
Restarting in 8 seconds...
Restarting in 7 seconds...
Restarting in 6 seconds...
Restarting in 5 seconds...
Restarting in 4 seconds...
Restarting in 3 seconds...
Restarting in 2 seconds...
Restarting in 1 seconds...
Restarting in 0 seconds...
Restarting now.
Discussion
公式ページのまま進めても、 pyenv と相性悪いのか上手くいかなくて困っていたところ、救われました・・!
ありがとうございます!!