はじめに
ASP.NET MVCやASP.NET Coreでは、C#のモデルに付与したデータ注釈属性(Validation Attributes) を使って、サーバー側の検証を簡単に行えます。
しかし、従来はクライアント側のリアルタイム検証を行うために、jquery.validateなどのjQueryベースの仕組みに依存していました。
そこで登場するのが、aspnet-client-validation です。
このライブラリを使うと、jQueryを一切使わずに、ASP.NET MVCの標準検証属性をクライアント側でも利用できます。
aspnet-client-validationとは
aspnet-client-validation は、ASP.NETの検証仕組みをそのままクライアント(ブラウザ)で動かすための軽量ライブラリです。
C#側の属性定義をそのまま活かせるため、サーバー・クライアント両方で同じルールが適用されます。
✅ 主な特徴
- jQuery不要(純粋なTypeScript/JavaScriptで動作)
- 既存の
[Required]や[StringLength]などの属性がそのまま有効 - カスタム属性にも対応(TypeScriptで検証関数を追加)
ただし、カスタム属性の場合は、対応するクライアント検証コードをTypeScript/JavaScriptで自作する必要があります。
導入手順
1. ライブラリの取得
-
公式GitHubページを開き、
「Releases」タブから最新リリースを開きます。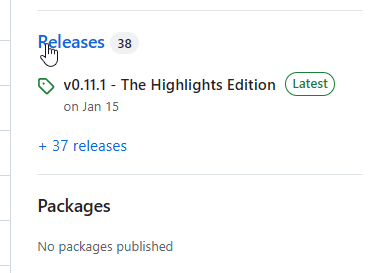
-
ソースコードをZIPでダウンロードします。

-
ZIPを展開し、
distフォルダ内の4つのファイルを
ASP.NET Core プロジェクトの
wwwroot/lib/aspnet-validation/フォルダにコピーします。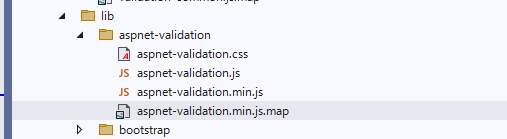
npm installしても良いのですが、ここではソースを取得してそれをプロジェクトに組み込みました。
2. TypeScriptの準備
このサンプルでは、TypeScriptを使って検証コードを拡張します。
NuGetパッケージ追加
Visual Studioのパッケージマネージャから以下を追加します。
Microsoft.TypeScript.MSBuild
tsconfig.jsonの作成
プロジェクト直下に以下の tsconfig.json を配置します。
{
  "compileOnSave": true,
  "compilerOptions": {
    "noImplicitAny": false,
    "noEmitOnError": true,
    "removeComments": false,
    "module": "esnext",
    "moduleResolution": "node",
    "sourceMap": true,
    "target": "ES6",
    "outDir": "wwwroot/js"
  },
  "include": [
    "scripts/**/*.ts",
    "scripts/**/*.d.ts"
  ],
  "exclude": [
    "node_modules",
    "wwwroot"
  ]
}
3. 型定義ファイル(global.d.ts)の追加
/scripts/global.d.ts に以下の内容を追加します。
これにより TypeScript 上で aspnetValidation オブジェクトが補完されるようになります。
// global.d.ts
declare global {
    interface ValidationField {
        element: HTMLInputElement | HTMLSelectElement | HTMLTextAreaElement;
        name: string;
        value: string;
    }
    interface ValidationService {
        bootstrap(): void;
        addProvider(
            name: string,
            provider: (
                value: any,
                element: HTMLElement,
                params: any,
                allFields: Record<string, ValidationField>
            ) => boolean
        ): void;
    }

    interface Window {
        aspnetValidation: {
            ValidationService: new () => ValidationService;
        };
    }
}
export { };
モデル属性によるクライアント検証を実装する
1. validation-common.ts の作成
まずは、検証サービスを初期化する共通スクリプトを用意します。
scripts/validation-common.ts:
export const initializeValidation = () => {
    console.log('initializeValidation');
    if (window.aspnetValidation) {
        const v = new window.aspnetValidation.ValidationService();
        v.bootstrap();
        (window as any).aspnetValidationService = v;
        console.log("ValidationService initialized");
    } else {
        console.error("aspnetValidation is not loaded!");
    }
};
(window as any).initializeValidation = initializeValidation;

// 読み込み時に自動実行
initializeValidation();
このコードにより、ASP.NETのデータ注釈属性がそのままブラウザでも有効になります。
2. _Layout.cshtml の編集
以下のようにスクリプトを読み込みます。
<script src="~/lib/bootstrap/dist/js/bootstrap.bundle.min.js"></script>
<script src="~/lib/aspnet-validation/aspnet-validation.min.js"></script>
<script type="module" src="~/js/validation-common.js"></script>
💡 jQueryは不要なので、次の行は削除してOKです:
<script src="~/lib/jquery/dist/jquery.min.js"></script>
3. ViewModel の定義
namespace ClientValidationSample.Models;
using System.ComponentModel.DataAnnotations;

public class SampleModel {
    [Required, StringLength(50, MinimumLength = 3)]
    [Display(Name = "ユーザー名")]
    public string UserName { get; set; } = string.Empty;

    [Range(0, 120)]
    [Display(Name = "年齢")]
    public int Age { get; set; }

    [EmailAddress]
    [Display(Name = "メールアドレス")]
    public string? Email { get; set; }

    [Phone]
    [Display(Name = "電話番号")]
    public string? PhoneNumber { get; set; }

    [Url]
    [Display(Name = "WebサイトURL")]
    public string? Website { get; set; }

    [StringLength(200)]
    [Display(Name = "備考")]
    public string? Remarks { get; set; }
}
4. コントローラーの定義
using ClientValidationSample.Models;
using Microsoft.AspNetCore.Mvc;

namespace ClientValidationSample.Controllers;
public class SampleController : Controller {
    [HttpGet]
    public IActionResult Index() => View(new SampleModel());

    [HttpPost]
    public IActionResult Index(SampleModel model) {
        ViewBag.Message = ModelState.IsValid
            ? "入力内容はすべて正しいです。"
            : "入力に誤りがあります。";
        return View(model);
    }
}
5.ビュー(Index.cshtml)の定義
@model ClientValidationSample.Models.SampleModel
@{
    ViewData["Title"] = "サンプルバリデーションフォーム";
}

<h2>@ViewData["Title"]</h2>

<form asp-action="Index" method="post" enctype="multipart/form-data">
    <div asp-validation-summary="All" class="text-danger"></div>

    <div class="mb-3">
        <label asp-for="UserName"></label>
        <input asp-for="UserName" class="form-control" />
        <span asp-validation-for="UserName" class="text-danger"></span>
    </div>

    <div class="mb-3">
        <label asp-for="Age"></label>
        <input asp-for="Age" class="form-control" />
        <span asp-validation-for="Age" class="text-danger"></span>
    </div>

    <div class="mb-3">
        <label asp-for="Email"></label>
        <input asp-for="Email" class="form-control" />
        <span asp-validation-for="Email" class="text-danger"></span>
    </div>

    <div class="mb-3">
        <label asp-for="PhoneNumber"></label>
        <input asp-for="PhoneNumber" class="form-control" />
        <span asp-validation-for="PhoneNumber" class="text-danger"></span>
    </div>

    <div class="mb-3">
        <label asp-for="Website"></label>
        <input asp-for="Website" class="form-control" data-val="true" data-val-wensite="aaaaaaaaa" />
        <span asp-validation-for="Website" class="text-danger"></span>
    </div>
    <div class="mb-3">
        <label asp-for="Remarks"></label>
        <textarea asp-for="Remarks" class="form-control"></textarea>
        <span asp-validation-for="Remarks" class="text-danger"></span>
    </div>

    <button type="submit" class="btn btn-primary">送信</button>
</form>

@if (ViewBag.Message != null)
{
    <div class="alert alert-info mt-3">@ViewBag.Message</div>
}
実行結果
標準の [Required] や [EmailAddress] などがそのままブラウザで動作します。
送信ボタンを押すと、次のようにリアルタイムでエラーメッセージが表示されます。

カスタム検証属性を作る
標準の属性では対応できないルール(たとえば「終了値は開始値以上」など)は、
C#でカスタム属性を作成し、TypeScriptでその検証処理を追加します。
1. カスタム属性クラスの定義
Validation/GreaterThanOrEqualToAttribute.cs
using System.ComponentModel.DataAnnotations;
using Microsoft.AspNetCore.Mvc.ModelBinding.Validation;

public class GreaterThanOrEqualToAttribute : ValidationAttribute, IClientModelValidator {
    public string OtherProperty { get; }

    public GreaterThanOrEqualToAttribute(string otherProperty) {
        OtherProperty = otherProperty;
        ErrorMessage = "{0} は {1} 以上である必要があります。";
    }

    protected override ValidationResult? IsValid(object? value, ValidationContext validationContext) {
        var otherProp = validationContext.ObjectType.GetProperty(OtherProperty);
        if (otherProp == null) return new($"Unknown property: {OtherProperty}");

        var otherValue = otherProp.GetValue(validationContext.ObjectInstance, null);
        if (value == null || otherValue == null) return ValidationResult.Success;

        if (Convert.ToDouble(value) >= Convert.ToDouble(otherValue))
            return ValidationResult.Success;

        return new(string.Format(ErrorMessage ?? "", validationContext.DisplayName, OtherProperty));
    }

    public void AddValidation(ClientModelValidationContext context) {
        context.Attributes["data-val"] = "true";
        context.Attributes["data-val-greaterthanequal"] = FormatErrorMessage(context.ModelMetadata.GetDisplayName());
        context.Attributes["data-val-greaterthanequal-other"] = OtherProperty;
    }
}
2. ViewModelに属性を追加
2つのプロパティを追加し、GreaterThanOrEqualTo属性を付加します。
[Display(Name = "開始値")]
public int FromVal { get; set; }

[Display(Name = "終了値")]
[GreaterThanOrEqualTo("FromVal", ErrorMessage = "「終了値」は「開始値」以上である必要があります。")]
public int ToVal { get; set; }
3. クライアント側検証を追加
scripts/Sample/index.ts:
document.addEventListener("DOMContentLoaded", () => {
    const globalAny = window as any;
    let v = globalAny.aspnetValidationService;
    if (!v) {
        v = new window.aspnetValidation.ValidationService();
    }

    v.addProvider("greaterthanequal", (value, element, params) => {
        const otherName = params["other"];
        const form = element.closest("form");
        const other = form?.querySelector<HTMLInputElement>(`[name='${otherName}']`);
        if (!value || !other?.value) return true;

        const a = parseFloat(value), b = parseFloat(other.value);
        return !isNaN(a) && !isNaN(b) && a >= b;
    });

    v.bootstrap();
});
4. ビューでスクリプトを読み込む
Index.cshtmlに以下の行を追加します。
@section Scripts {
    <script type="module" src="~/js/Sample/index.js"></script>
}
実行結果

「終了値」が「開始値」より小さい場合、クライアント側でも即座にエラーが表示されます。
まとめ
aspnet-client-validation を使うことで、次のような利点があります。
- jQuery不要で軽量なクライアント検証が実現できる
- C#のデータ注釈属性をそのまま活かせる
- カスタム属性にも柔軟に対応可能
ASP.NET Coreでクライアント検証を実装する場合、このライブラリは有力な選択肢となります。

Discussion