[Angular][状態管理]NgRxチュートリアル+α
はじめに
今回はNgRxの学習を兼ねて、公式チュートリアルをまとめました。
また、作成したチュートリアルに@ngrx/effectやSelectorやActionReducerMapを取り入れてみました。
なお、NgRxの基本は別記事にまとめましたので興味のある方は見ていただけたらと思います。
今回の開発環境
Angular CLI: 13.3.8
Node: 16.10.0
Package Manager: npm 7.5.6
OS: win32 x64
Angular: 13.3.11
rxjs: 7.5.5
typescrip: 4.6.4
@ngrx/store@13.2.0
@ngrx/storeを使ったTutorial
まずは公式チュートリアルに沿って開発を進めて行きます。
このアプリケーションはカウンターの状態を管理する方法と、Angularコンポーネント内でカウンターを選択し表示する方法を学習します。
その後に、管理する状態が増えることを見越してリファクタリングしていきます。
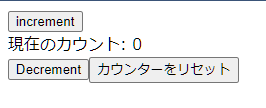
完成形↓

プロジェクト作成
ローカルもしくはStackBlitzでアプリケーションを立ち上げます。
ngrx/storeのインストール
npm install @ngrx/store@自分のAngularのバージョン --save
アクションを定義
StackBlitzのapp フォルダを右クリックし、counter.actions.ts という名前の新規ファイルを作成します。作成したファイルに値の増加、減少、およびリセットするカウンターのアクションを記述します。
src/app/counter.actions.ts
import { createAction } from '@ngrx/store';

// createActionはActionCreator型を返します。
export const increment = createAction('[Counter Component] Increment');
export const decrement = createAction('[Counter Component] Decrement');
export const reset = createAction('[Counter Component] Reset');
-
createActionはActionCreator型を返します。第一引数がtypeになります。 -
createAction([])の[]はアクションのカテゴリ記述します。その後ろにはこのアクションのイベント名を記述するとわかりやすいです。 - 作成した各アクションを
exportで公開しておきます。
また、createAction()の第二引数にはprops関数を使ってメタデータとして値を持たせることもできます。
export const loginSuccess = createAction(
  '[Auth/API] Login Success',
  props<{ user: User}>()
)
---------------------------------------------------
// dispatchするときは
store.dispatch(loginSuccess({ user: newUser }));
Reducer関数を定義
先程作成したアクションに基づく、カウンタ値の変化を処理するためのReducer関数を定義します。
各処理のreturnで返る値が新たにStoreの新しいStateとして更新されます。
ReducerによってStoreの状態を操作します。
src/app/counter.reducer.ts
import { createReducer, on } from '@ngrx/store';
import { increment, decrement, reset } from './counter.actions';
// アクションを下記のように記述するとアクションをまとめてインポートできる
// import * as CounterActions from './counter.actions';
// この場合はCounterActions.アクションメソッド名でアクセス可能

// 初期状態
export const initialState = 0;

// Reducer関数を定義
export const counterReducer = createReducer(
  initialState,
  on(increment, (state) => state + 1),
  on(decrement, (state) => state - 1),
  on(reset, (state) => 0)
);
-
createReducerはReducerを定義する関数です。第一引数引数は初期値を指定。 - 第二引数の
onメソッドでActinoメソッドと処理を記述します。
💡 注意: Reducerはswitch文を使って記述することもできますが、これはNgRxにcreateReducer()が導入される前に定義されていた方法です。
switch文を使った方法はバージョン7.x以下で用いられていました。
Note:
You can also write reducers using switch statements, which was the previously defined way before reducer creators were introduced in NgRx. If you are looking for examples of reducers using switch statements, visit the documentation for versions 7.x and prior
.
Storeモジュールと作成したReducerをインポート
StoreModule を @ngrx/store からインポートし、counter.reducer ファイルをインポートします。
src/app/app.module.ts (imports)
import { StoreModule } from '@ngrx/store';
import { counterReducer } from './counter.reducer';
AppModule の imports 配列に StoreModule.forRoot関数を追加し、プロパティ名countとカウンターの状態を管理する counterReducer のオブジェクトを指定します。
StoreModule.forRoot() メソッドは、アプリケーション全体でStoreにアクセスするために必要なグローバルプロバイダを登録します。
src/app/app.module.ts (StoreModule)
import { BrowserModule } from '@angular/platform-browser';
import { NgModule } from '@angular/core';

import { AppComponent } from './app.component';

import { StoreModule } from '@ngrx/store';
import { counterReducer } from './counter.reducer';

@NgModule({
  declarations: [AppComponent],
  imports: [BrowserModule, StoreModule.forRoot({ count: counterReducer })],
  providers: [],
  bootstrap: [AppComponent],
})
export class AppModule {}
MyCounterコンポーネントの作成
ng g component my-counter
src/app/my-counter/my-counter.component.tsという新しいファイルを作成し、MyCounterComponent という新しいコンポーネントを定義します。
このコンポーネントは、ユーザーがカウントの状態を変更できるようにするためのボタンを定義します。
src/app/my-counter/my-counter.component.ts
import { Component } from '@angular/core';
import { Observable } from 'rxjs';

@Component({
  selector: 'app-my-counter',
  templateUrl: './my-counter.component.html',
})
export class MyCounterComponent {
  count$: Observable<number>

  constructor() {
    // TODO: Connect `this.count$` stream to the current store `count` state
  }

  increment() {
    // TODO: Dispatch an increment action
  }

  decrement() {
    // TODO: Dispatch a decrement action
  }

  reset() {
    // TODO: Dispatch a reset action
  }
}
src/app/my-counter/my-counter.component.html
<button (click)="increment()">Increment</button>

<div>Current Count: {{ count$ | async }}</div>

<button (click)="decrement()">Decrement</button>

<button (click)="reset()">Reset Counter</button>
MyCounterテンプレートをAppComponentで宣言
新しいコンポーネントをAppModuleの宣言に追加し、テンプレートで宣言します。
src/app/app.component.html
<app-my-counter></app-my-counter>
AppModuleにインポートしていない場合はしておく。
src/app/app.module.ts
import { NgModule } from '@angular/core';
import { BrowserModule } from '@angular/platform-browser';

import { AppComponent } from './app.component';

import { StoreModule } from '@ngrx/store';
import { counterReducer } from './counter.reducer';
import { MyCounterComponent } from './my-counter/my-counter.component';

@NgModule({
  declarations: [
    AppComponent,
    MyCounterComponent
  ],
  imports: [
    BrowserModule,
    // StoreModuleにcounterReducerを登録
    // forRoot()でアプリケーション全体でアクセスできるようになる
    StoreModule.forRoot({ count: counterReducer})
  ],
  providers: [],
  bootstrap: [AppComponent]
})
export class AppModule { }
MyCounterコンポーネントでアクションをStoreにdispatchする
StoreをMyCounterComponentに注入し、count$ストリームをStoreのカウント状態に接続します。
StoreにActionをdispatchすることで、インクリメント、デクリメント、リセットの各Actoinメソッドを実行できます。
src/app/my-counter/my-counter.component.ts
import { Component } from '@angular/core';
import { Store } from '@ngrx/store';
import { Observable } from 'rxjs';
import { increment, decrement, reset } from '../counter.actions'

@Component({
  selector: 'app-my-counter',
  templateUrl: './my-counter.component.html',
  styleUrls: ['./my-counter.component.css']
})
export class MyCounterComponent {

  count$: Observable<number>

  constructor(private store: Store<{ count: number }>) {
    // this.store.select()で取得したいstateを指定します。
    this.count$ = store.select('count');
  }

  increment() {
    this.store.dispatch(increment());
  }

  decrement() {
    this.store.dispatch(decrement());
  }

  reset() {
    this.store.dispatch(reset());
  }

}
💡 Store<{ count: number }>とstore.select('count');のcountは、appModuleで登録したプロパティ名と合わせる必要があります。
完了です。インクリメント、デクリメント、リセットの各ボタンをクリックすると、カウンターの状態を変更できます。
ここまでのまとめ
- イベントを表現するためのActionを定義した。
- カウンターの状態を管理するための Reducer関数を定義した。
- アプリケーション全体で利用可能なグローバルステートコンテナを登録した。
- Actionをdispatchし、カウンターの現在のStateを選択するために、Store サービスを注入した。
リファクタリング
通常NgRxで状態を管理する場合は、中~大規模なアプリケーションになると思います。
次第に扱うファイルが増えてきたり、Reducerが複雑になってくる可能性があります。
それらに対応するためにリファクタリングしていきます。
あくまで一例です。
モデルを作成してフィーチャーごとにプロパティを定義
まずはsrc/app/shared/modelsディレクトリを作成し、その中にフィーチャーごとにmodel.tsを作成していきます。
このmodel.tsの中には、そのフィーチャーで管理したいStateをインターフェースとして定義していきます。
また、必要であれば初期値のクラスを定義します。
src/app/shared/models/counter.model.ts
// Counterのプロパティを定義
export interface Count {
  countNum: number;
}

// CounterのStateの初期値
export class initalCount implements Count {
  countNum = 0;
}
このように初期状態の値やStateのインターフェースをReducerから分離することができました。
Stateディレクトリを作成してStateをまとめる
次に、src/app/shared/statesディレクトリを作成し、その中にフィーチャーごとにstate.tsを作成していきます。
この中ではEntityの状態や初期値の状態を管理するために使います。
今回はCountの初期値とCountStateの識別キーを定義しておきます。
Countの初期値はcount.model.tsで定義してあるので、インポートします。
initialCountクラスをインスタンス化して初期値の定数としてinitialStateを作成します。
src/app/shared/states/counter.state.ts
import { initialCount } from '../models/counter.model';

export const countKey = 'count';
export const initialState = new initialCount();
よって、count.reducer.tsで定義していた、initialStateは削除し、上記のcounter.state.tsからインポートします。
src/app/counter.reducer.ts
// 初期値をインポート
import { initialState } from './shared/states/counter.state';
Reducerを編集
CountStateの型はcountNumプロパティを持つオブジェクト型になりました。
そのためon関数の式を書き直す必要があります。
src/app/counter.reducer.ts
import { createReducer, on } from '@ngrx/store';
import * as CounterActions from './counter.actions';

import { initialState } from './shared/states/counter.state';

export const counterReducer = createReducer(
  initialState,
  on(CounterActions.increment, (state) => ({...state, countNum: state.countNum + 1})),
  on(CounterActions.decrement, (state) => ({...state, countNum: state.countNum - 1})),
  on(CounterActions.reset, (state) => ({...state, countNum: 0}))
  );
  // 引数stateの型はinitialStateと同じ型を型注釈する。今回は{ countNum: number }型
- 引数
stateはinitialStateと同じ型になります。つまり、initialCount型です。initialCount型はCount型と同じなので、状態は{ countNum: number }で返す必要があります。 - ただ、stateを直接変更しません。状態遷移は元の状態を変更するのではなく、スプレッド構文でプロパティを現在のstateから別のオブジェクトとしてコピーしてから変更を加えて返します。
これにより、変更の純度を維持しながら、変更ごとに新しい状態が生成されることが保証されます。また、状態が変化したときに古い状態が破棄されるのも保証されます。 - よって、stateのcountNumの値を+1するには{(...state, countNum: state.countNum + 1)}となります。
Selectorを使う
💡 Selectorで取り出したStateはObservableです
Selectorはstoreの一部を取得したいときなどに使われます。
createSelector関数を使ってセレクト関数を作成し、それを使ってSelector経由でStoreから任意のStateを取り出します。
つまり、StoreとComponentの間に位置します。
counterSelectorsファイルの作成
src/app/shared/selectors/counter.selector.ts
// createFeatureSelectorはフィーチャStateを指定する関数
// createSelectorはセレクト関数を作成する関数
import { createFeatureSelector, createSelector } from "@ngrx/store";
// countStateの識別キー
import { countKey } from '../states/counter.state';
// Countインターフェース
import { Count } from "../models/counter.model";

export const selectCounterState = createFeatureSelector<Count>(countKey);

export const selectCount = createSelector(selectCounterState, state => state.countNum)
-
createFeatureSelectorとcreateSelector関数をインポート-
createFeatureSelectorはフィーチャーStateを指定する関数 -
createSelectorはセレクト関数を作成する関数
-
-
countStateの識別キーをインポート - Countインターフェースをインポート
-
createFeatureSelector関数で対象としたいフィーチャーStateを定数に取り出す -
createSelector関数の第一引数に取りだしたい任意のフィーチャーStateを指定、第二引数にどう取り出すかを関数で定義
💡 注意 : SelectorはStoreから任意のStateの情報を取得するので、すでに格納されているState情報(Reducerで処理された後のState情報)が引数stateに渡されます。
Selector経由でStateを取得
Selectorの処理内容を定義できたら、コンポーネントでSelector経由でStateを取り出すようにします。
src/app/my-counter/my-counter.component.ts
import { Component } from '@angular/core';
import { Store } from '@ngrx/store';

import { Observable } from 'rxjs';
import * as CounterActions from '../counter.actions';
import { selectCount } from '../shared/selectors/counter.selector';

@Component({
  selector: 'app-my-counter',
  templateUrl: './my-counter.component.html',
  styleUrls: ['./my-counter.component.css']
})
export class MyCounterComponent {

  // 常に最新の値が入る
  countNum$: Observable<number>

  constructor(private store: Store<{ count: number }>) {

    // Select経由でStateを取得
    this.countNum$ = store.select(selectCount)
  }

  increment() {
    this.store.dispatch(CounterActions.increment());
  }

  decrement() {
    this.store.dispatch(CounterActions.decrement());
  }

  reset() {
    this.store.dispatch(CounterActions.reset());
  }

}
- 先程作成したセレクト関数をインポート
-
store.select(セレクト関数)でSelector経由でStateを取得できる
ActionReducerMapでReducerをまとめる
ActionReducerMapを使うと将来Reducerが増えてもいいようにまとめることができます。
型定義は下記のようになっています。
type ActionReducerMap<T, V extends Action = Action> = {
    [p in keyof T]: ActionReducer<T[p], V>;
};
- オブジェクト型でプロパティを持っています。
-
[p in keyof T]はMapped typeです。pがオブジェクトTのキーの1つであることを意味します。そして、T[p]はそのキーの値の型を表しています。
まずはReducerをまとめるファイルを作成します。
今回は例としてsrc/app/shared/reducers/index.tsとします。
src/app/shared/reducers/index.ts
import { ActionReducerMap } from "@ngrx/store";
import { counterReducer } from '../../counter.reducer';
import { countKey } from "../states/counter.state";
import { initialCount } from '../models/counter.model';

export interface AppState {
  [countKey]: initialCount;
};

export const reducers: ActionReducerMap<AppState> = {
  [countKey]: counterReducer
};
- もし他のフィーチャーReducerが増えたら
reducersの中に追記していくとこで、複数のReducerを管理できます。 -
AppStateというインターフェースでStateの識別キーをインデックスシグネチャで定義 -
ActionReducerMapの型引数で先ほどのAppStateインターフェースを指定
次にAppModueでStoreに登録するReducer名を変更します。
src/app/app.module.ts
import { reducers } from './shared/reducers';
-----------------------------------------------------
@NgModule({
  declarations: [
    AppComponent,
    MyCounterComponent
  ],
  imports: [
    BrowserModule,
    StoreModule.forRoot(reducers),
先程作成したreducersを引数にStoreに登録します。
これで複数Reducerが増えても一括管理できます。
💡 **ここのStoreModule.forRoot()で指定したすべてのReducerは、アプリケーションが起動・リロードされるたびに読み込まれます。
Effectを使う
本来は別にDBやサービスクラスを用意し、副作用を与える場合にEffectを使用しますが、今回は無理矢理導入します。
@ngrx/effectsのインストール
npm install @ngrx/effects@angularのバージョン
インポートも忘れずに
src\app\app.module.ts
import { EffectsModule } from '@ngrx/effects';
ちなみに@ngrx/effects/srcではなく@ngrx/effectsなので注意
actionsとreducersディレクトリを作成
フィーチャーごとに管理しやすいようにactionsとreducersファイルをsharedディレクトリにまとめます。
src/app/shared/actions/counter.actions.ts
src/app/shared/reducers/counter.reducer.ts
CounterEffectsの作成
今回はカウントの増加とリセットのActionがdispatchされたときに、コンソール上にログを出力する副作用を定義します。
@ngrx/effectsからActions, createEffect, ofTypeをimportします。
src/app/shared/effects/counter.effect.ts
// 副作用を伴うStateの変更はReducerではなくEffectに集約する
import { Injectable } from "@angular/core";
import { Actions, createEffect, ofType  } from "@ngrx/effects";
import { tap } from "rxjs";

import * as CounterActions from '../actions/counter.actions';

@Injectable()
export class CounterEffects {

  constructor(private actions$: Actions) {}

  logger$ = createEffect(() =>
    this.actions$.pipe(
      ofType(CounterActions.increment, CounterActions.reset),
      tap(action => {
        console.log(action)
      })
      ),
    { dispatch: false }
  )
}
-
ActionsをDIすることで、Reducerで処理されるActionを捕捉してsubscribeできます。 -
actions$は流れてくるActionのストリームです。つまりObservableです。 -
createEffect関数でエフェクトの処理を記述します。 -
ofType関数でどのActionを捕捉するか指定する。
これで、incrementアクションがdispatchされたタイミングで、コンソールログ上に表示される処理を定義できました。
💡 なお、今回作成したlogger$エフェクトは、最後にどのActionもdispatchしないので、最後に{ dispatch: false }で、捕捉したActionをdispatchしないようにします。
これを記述しないと、この処理が無限ループされます。
アプリケーションにEffectsを登録
作成したEffectを実際に使うにはNgModuleにimportします。
StoreModuleと同じように、forRoot, forFeatureがあります。
src/app/app.module.ts
@NgModule({
  declarations: [
    AppComponent,
    MyCounterComponent
  ],
  imports: [
    // Effectsを登録
    EffectsModule.forRoot([CounterEffects])
  ],
forRootの引数には作成したEffectのクラス名を指定します。
これで一通り完成です。
いずれはEntityも記事にしたいと思います。
参考
Discussion