😸
PlayCanvas Stencil覚え書き


実行可能なデモプロジェクト
PlayCanvasでステンシルについて
APIリファレンス
3Dモデル(ヒエラルキー)
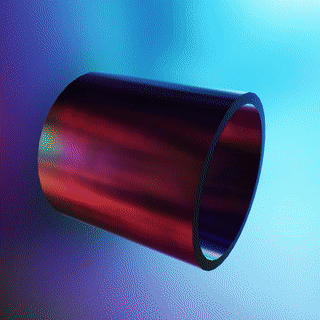
今回利用する3Dモデルはこのようなモデルを用意しました。

Blenderのビュー
- Cylinder(シリンダー)
- Left (シリンダーから分離されたオブジェクト)
- Right (シリンダーから分離されたオブジェクト)
また、今回はそれぞれのオブジェクトにマテリアルを設定します。
3DモデルをPlayCanvasにインポート
PlayCanvasにオブジェクトをインポートをすると、元のヒエラルキーをもとにマテリアルの設定がされているオブジェクトがインポートされます。

インポートされたオブジェクト
ステンシルで片側から見えるオブジェクトを追加
今回は、「The Base Mesh」で公開されているモデルを2つインポートしてヒエラルキーに配置をしました。

先程のBlenderで作成した、Left / Rightのモデルは非表示にされておりますが表示をするとこのようになります。

Rightのモデルを表示した状態
この左右のモデルを通してCylinderの内側を見たときに、ハンマーのモデルが表示されるようにしたいと思います。
ポータル側の設定
ポータル用のスクリプトstencil-portal.jsを作成します。
var StencilPortal = pc.createScript('StencilPortal');

StencilPortal.attributes.add('depthFunc', {
    type: 'number',
    enum: [
        { 'FUNC_NEVER': 0 },
        { 'FUNC_LESS': 1 },
        { 'FUNC_EQUAL': 2 },
        { 'FUNC_LESSEQUAL': 3 },
        { 'FUNC_GREATER': 4 },
        { 'FUNC_NOTEQUAL': 5 },
        { 'FUNC_GREATEREQUAL': 6 },
        { 'FUNC_ALWAYS': 7 }
    ],
    default: 3,
    title: 'Depth Func'
});

StencilPortal.attributes.add('zpass', {
    type: 'number',
    enum: [
        { 'STENCILOP_KEEP': 0 },
        { 'STENCILOP_ZERO': 1 },
        { 'STENCILOP_REPLACE': 2 },
        { 'STENCILOP_INCREMENT': 3 },
        { 'STENCILOP_INCREMENTWRAP': 4 },
        { 'STENCILOP_DECREMENT': 5 },
        { 'STENCILOP_DECREMENTWRAP': 6 },
        { 'STENCILOP_INVERT': 7 }
    ],
    default: 2,
    title: 'zpass'
});

StencilPortal.attributes.add('ref', {
    type: "number",
    default: 0
})


StencilPortal.prototype.initialize = function () {
    this.entity.render.enabled = true;
    this.updateMaterial();
    this.on("attr", this.updateMaterial,this);
};

StencilPortal.prototype.updateMaterial = function () {
    const material = new pc.StandardMaterial();
    this.entity.render.meshInstances[0].material = material;
    const stencil = new pc.StencilParameters({ func: this.depthFunc, zpass: this.zpass, ref: this.ref  });
    material.stencilBack = material.stencilFront = stencil;
    material.depthWrite = false;
    material.redWrite = material.greenWrite = material.blueWrite = material.alphaWrite = false;
    material.update();
};
スクリプトを作成したらポータル用のエンティティにスクリプトを追加します。

スクリプトの追加
シリンダーの内側に配置する3Dモデルの設定
次にハンマーのモデルに対して、ステンシルを設定するためのスクリプトstencil-geometry.jsを作成します。
var StencilGeometry = pc.createScript('stencilGeometry');

StencilGeometry.attributes.add('depthFunc', {
    type: 'number',
    enum: [
        { 'FUNC_NEVER': 0 },
        { 'FUNC_LESS': 1 },
        { 'FUNC_EQUAL': 2 },
        { 'FUNC_LESSEQUAL': 3 },
        { 'FUNC_GREATER': 4 },
        { 'FUNC_NOTEQUAL': 5 },
        { 'FUNC_GREATEREQUAL': 6 },
        { 'FUNC_ALWAYS': 7 }
    ],
    default: 3,
    title: 'Depth Func'
});

StencilGeometry.attributes.add('ref', {
    type: "number",
    default: 0
})


StencilGeometry.prototype.initialize = function () {
    this.updateMaterial();

    this.on("attr", this.updateMaterial,this);
}

StencilGeometry.prototype.updateMaterial = function () {

    const stencil = new pc.StencilParameters({
        func: this.depthFunc,
        ref: this.ref,
    });

    const renders = this.entity.findComponents("render");
    renders.forEach((render) => {
        for (const meshInstance of render.meshInstances) {
            meshInstance.material.stencilBack = meshInstance.material.stencilFront = stencil;
            meshInstance.material.update();
        }
    });

}
モデルに対してスクリプトを追加します。
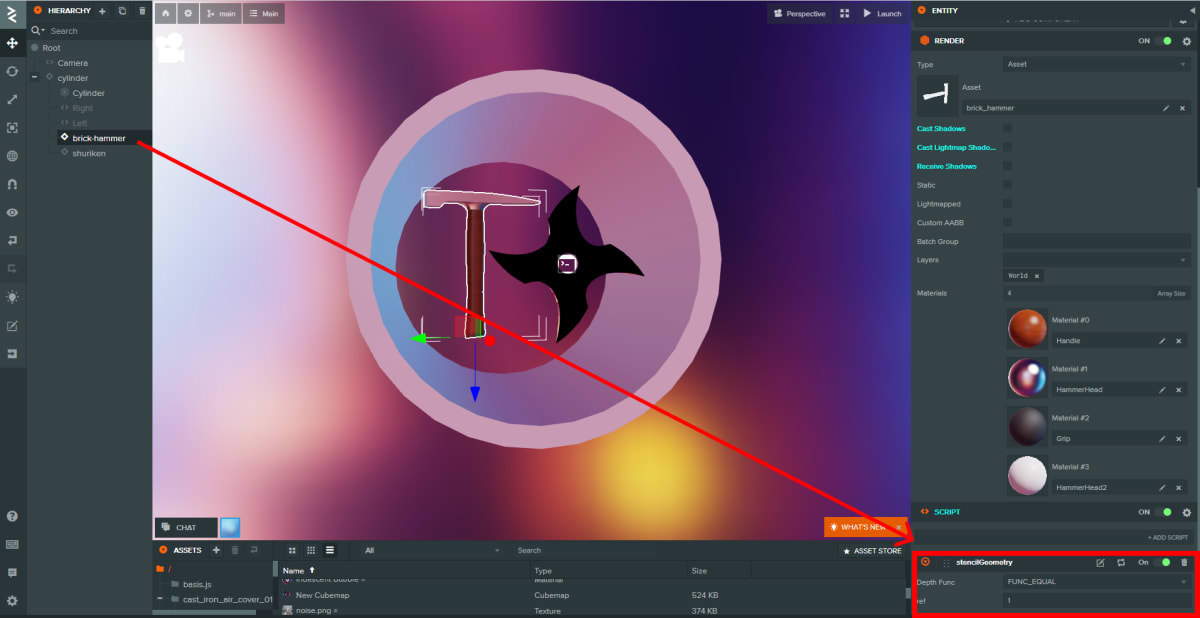
スクリプト属性の設定
それぞれのスクリプト属性を設定します。
- stencil-portal.js
- zpass:
STENCILOP_REPLACEref:1
- zpass:
- stencil-geometry.js
- Depth Func:
FUNC_EQUALref:1
- Depth Func:
この2つのスクリプト属性にある、refの値を同じ値にします。
今回の例では、Rightとハンマーのrefの値を1にします。
起動をして確認をしてみる。
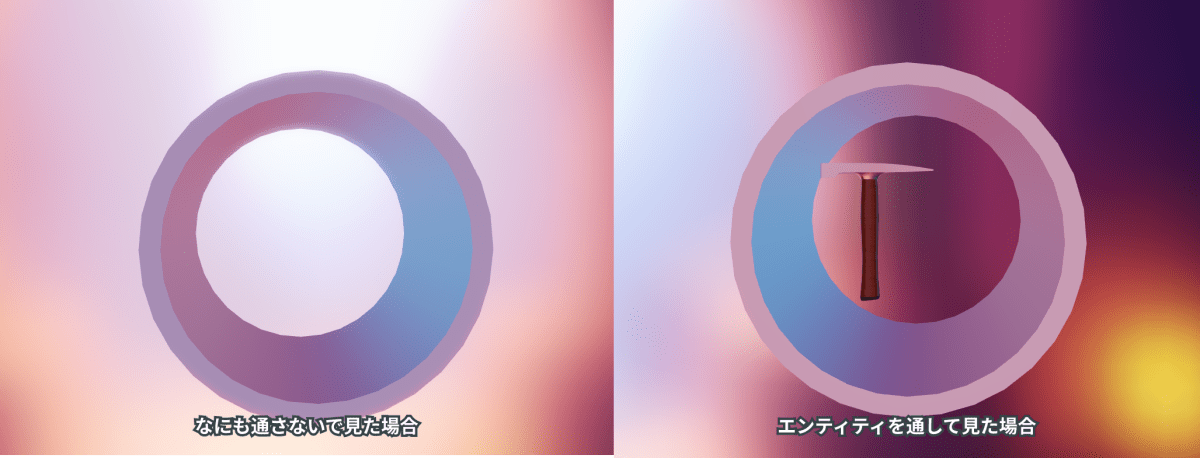
このように、ハンマーのモデルがCylinderの内側から見えるようになりました。
デモURL: https://playcanv.as/b/876d14bf
Discussion