Dapr Tutorials - Hello World をやってみた
Dapr入門 です。まずは Hello World から。
ローカル環境でDaprを動かすチュートリアルです。
環境
WSL2 Ubuntu 22.04
Dapr 1.12.0
構成
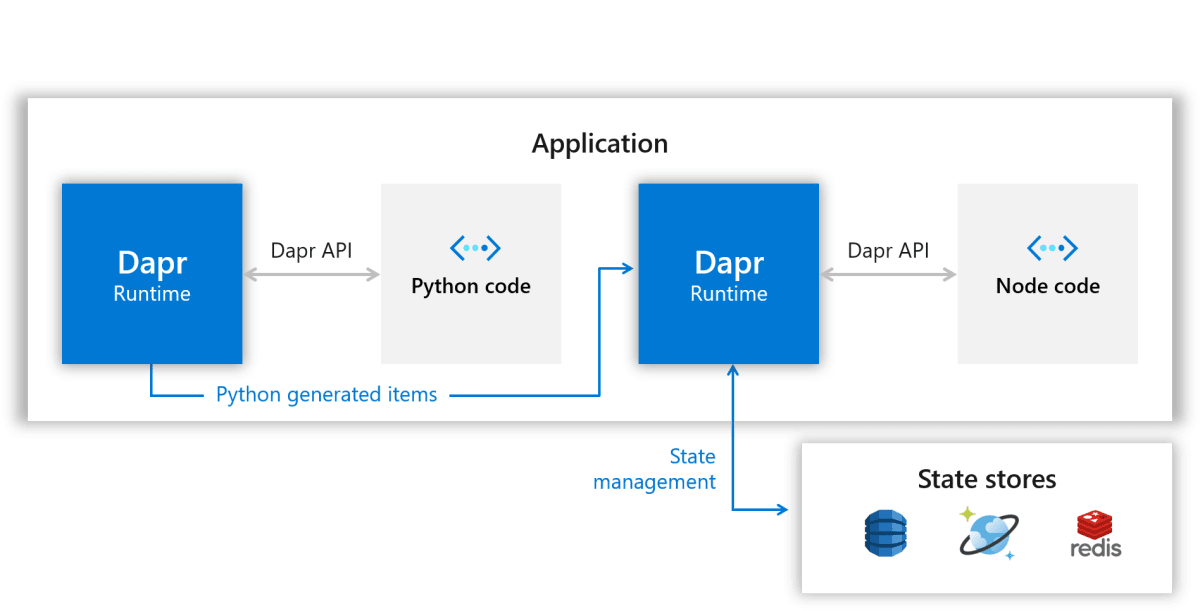
ご本家から画像を拝借いたします。
まず最初に、Node.jsのアプリをデプロイ。

その次にPublisherとして機能するPythonアプリをデプロイするそうです。出たPublisher。
Step 1 - Setup Dapr
Dapr のインストールと初期化は もう済んでるので割愛
Step 2 - Understand the code
チュートリアルのコードをクローンしてきます。
$ git clone https://github.com/dapr/quickstarts.git
$ cd quickstarts/tutorials/hello-world/node
app.js に、/neworder、/order というエンドポイントが用意されています。
Step 3 - Run the Node.js app with Dapr
- 依存関係をインストールします。
$ npm install
- Dapr を使用して Node.js アプリを起動させます。
$ dapr run --app-id nodeapp --app-port 3000 --dapr-http-port 3500 node app.js
ℹ️  Starting Dapr with id nodeapp. HTTP Port: 3500. gRPC Port: 37915
---
ℹ️  Updating metadata for appPID: 751468
ℹ️  Updating metadata for app command: node app.js
✅  You're up and running! Both Dapr and your app logs will appear here.
Note: the --app-port (the port the app runs on) is configurable. The Node app happens to run on port 3000, but you could configure it to run on any other port. Also note that the Dapr --app-port parameter is optional, and if not supplied, a random available port is used.
ここで dapr-hhtp-port を3500 で指定してますが、省略可能で、省略した場合はランダムなポートが割り当てられるそうです。
The dapr run command looks for the default components directory which for Linux/MacOS is $HOME/.dapr/components and for Windows is %USERPROFILE%.dapr\components which holds yaml definition files for components Dapr will be using at runtime. When running locally, the yaml files which provide default definitions for a local development environment are placed in this default components directory. Review the statestore.yaml file in the components directory:
ローカルでDaprを起動した際は、初期化の際に生成された $HOME/.dapr/components ディレクトリにデフォルト定義のyamlが配置されるそうです。
statestore.yaml を見てます。
apiVersion: dapr.io/v1alpha1
kind: Component
metadata:
  name: statestore
spec:
  type: state.redis
  version: v1
  metadata:
  - name: redisHost
    value: localhost:6379
  - name: redisPassword
    value: ""
  - name: actorStateStore
    value: "true"
状態管理がRedisを使用することになっていて、名前は statestore となっています。
これは、app.jsの状態ストアの定義は、この名前のストアを使用するようになっているみたいです。なるほど。
const stateStoreName = `statestore`;
const stateUrl = `http://localhost:${daprPort}/v1.0/state/${stateStoreName}`;
Optional: Now it would be a good time to get acquainted with the Dapr dashboard. Which is a convenient interface to check status and information of applications running on Dapr. The following command will make it available on http://localhost:9999/.
ということなので、ダッシュボードも表示してみます。
$ dapr dashboard -p 9999
ブラウザから http://localhost:9999/ にアクセス
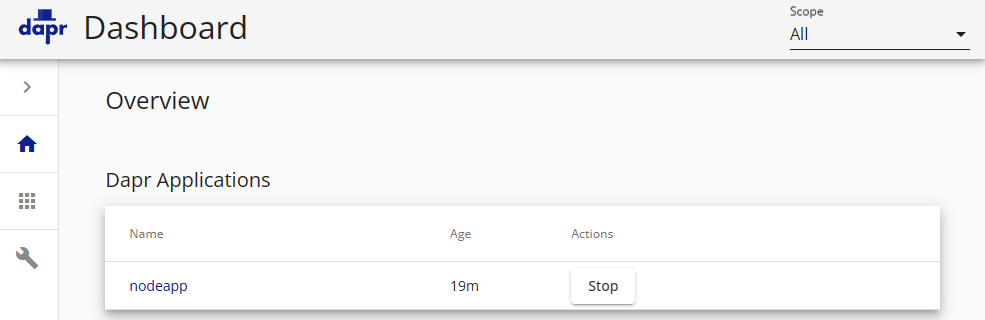
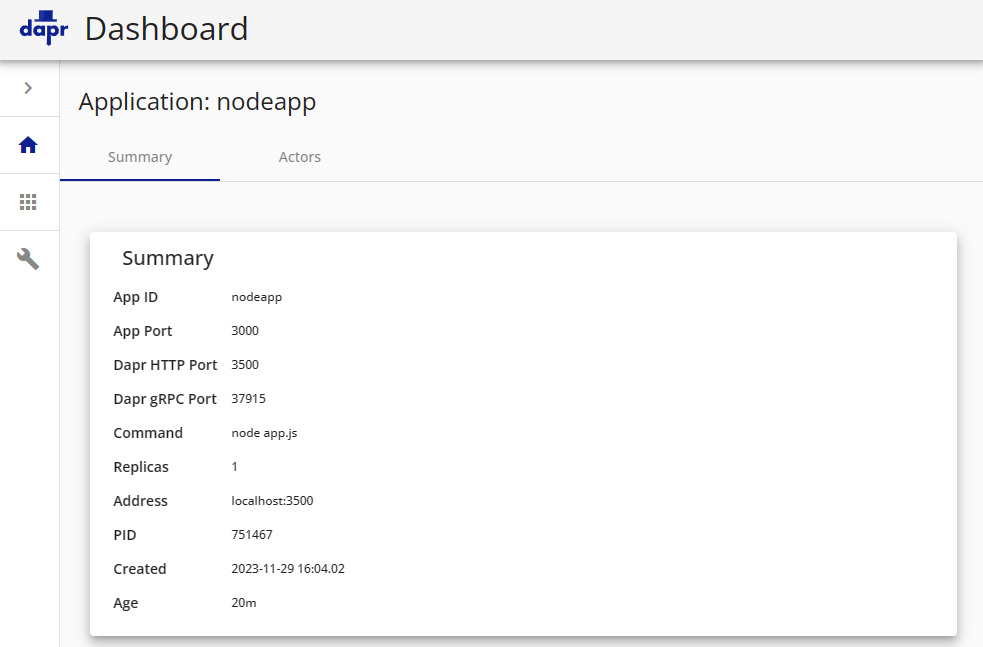
なにやらいろいろ見れるみたいです。
ちょっとずつ慣れていきましょう。
Step 4 - Post messages to the service
アプリが実行中なので、いろいろなツールを使って POST メッセージを送信できるとのこと。
まずはdapr cliで。
node の作業ディレクトリから実行します。
$ dapr invoke --app-id nodeapp --method neworder --data-file sample.json
✅  App invoked successfully
上記はcurlだとこうなるみたいです。
curl -XPOST -d @sample.json -H Content-Type:application/json http://localhost:3500/v1.0/invoke/nodeapp/method/neworder
node アプリを起動しているコンソールには、以下のようなログが出ます。
== APP == Got a new order! Order ID: 42
== APP == Successfully persisted state.
Step 5 - Confirm successful persistence
リクエストした内容が保存されているか、確認します。
$ curl http://localhost:3500/v1.0/invoke/nodeapp/method/order
{"orderId":"42"}

$ dapr invoke --app-id nodeapp --method order --verdapr invoke --app-id nodeapp --method order --verb GET
{"orderId":"42"}
✅  App invoked successfully
うまくいってますね。
Step 6 - Run the Python app with Dapr
python のコードは ./hello-world/python にあります。
仕様が変わったのか、説明とコードが違いますね。。
nodeappにリダイレクトではなく、ヘッダを使うようになってます。
{"dapr-app-id": "nodeapp"} これがnodeアプリの名前と一緒になっているのが重要なんでしょうね。
import os
import requests
import time

dapr_port = os.getenv("DAPR_HTTP_PORT", 3500)
dapr_url = "http://localhost:{}/neworder".format(dapr_port)

n = 0
while True:
    n += 1
    message = {"data": {"orderId": n}}

    try:
        response = requests.post(dapr_url, json=message, timeout=5, headers = {"dapr-app-id": "nodeapp"})
        if not response.ok:
            print("HTTP %d => %s" % (response.status_code,
                                     response.content.decode("utf-8")), flush=True)
    except Exception as e:
        print(e, flush=True)

    time.sleep(1)
さて、動かします。
- 依存関係をインストールします。
$ pip3 install requests
- Dapr を使用してPythonアプリを起動させます。
$ dapr run --app-id pythonapp python3 app.py
ℹ️  Starting Dapr with id pythonapp. HTTP Port: 32841. gRPC Port: 35753
ℹ️  Checking if Dapr sidecar is listening on HTTP port 32841
---
ℹ️  Checking if Dapr sidecar is listening on GRPC port 35753
ℹ️  Dapr sidecar is up and running.
ℹ️  Updating metadata for appPID: 780253
ℹ️  Updating metadata for app command: python3 app.py
✅  You're up and running! Both Dapr and your app logs will appear here.
うまくいくと、node側のターミナルにエントリログが流れます。
== APP == Got a new order! Order ID: 1
== APP == Successfully persisted state.
== APP == Got a new order! Order ID: 2
== APP == Successfully persisted state.
== APP == Got a new order! Order ID: 3
== APP == Successfully persisted state.
- GET のリクエストを何回か実行して、orderId が毎秒変化するかを確認します。
python アプリが毎秒 node アプリの neworder エンドポイントにリクエストしてるので、orderIdは増えていきますね。
$ curl http://localhost:3500/v1.0/invoke/nodeapp/method/order
{"orderId":210}
$ curl http://localhost:3500/v1.0/invoke/nodeapp/method/order
{"orderId":214}
$ curl http://localhost:3500/v1.0/invoke/nodeapp/method/order
{"orderId":215}
Step 7 - Cleanup
クリーンアップの仕方は、シンプルに Ctl+C で終わらせるか、dapr stop で終わらせるようです。
$ dapr stop --app-id nodeapp
$ dapr stop --app-id pythonapp
アプリが起動しているかは dapr list で確認できます。
$ dapr list
No Dapr instances found.
おわりに
Dapr につま先が触れたぐらいでしょうか。ふーんという感覚です。笑
今のところ、コネクション周りを良しなにやってくれる、という感じですかね?
次は、Hello Kubernetes のクイックスタートをやります。
Discussion